Exercise 6: Creating Kits and Storage Locations
Reference Material
Modeling Containers (Kits)
Exercise Objectives
Part 1: Create two (2) new Container Types in L7|Master
Part 2: Create two (2) new Containers in the Location app
Part 3: Fill the Sepax Kit
Scenario
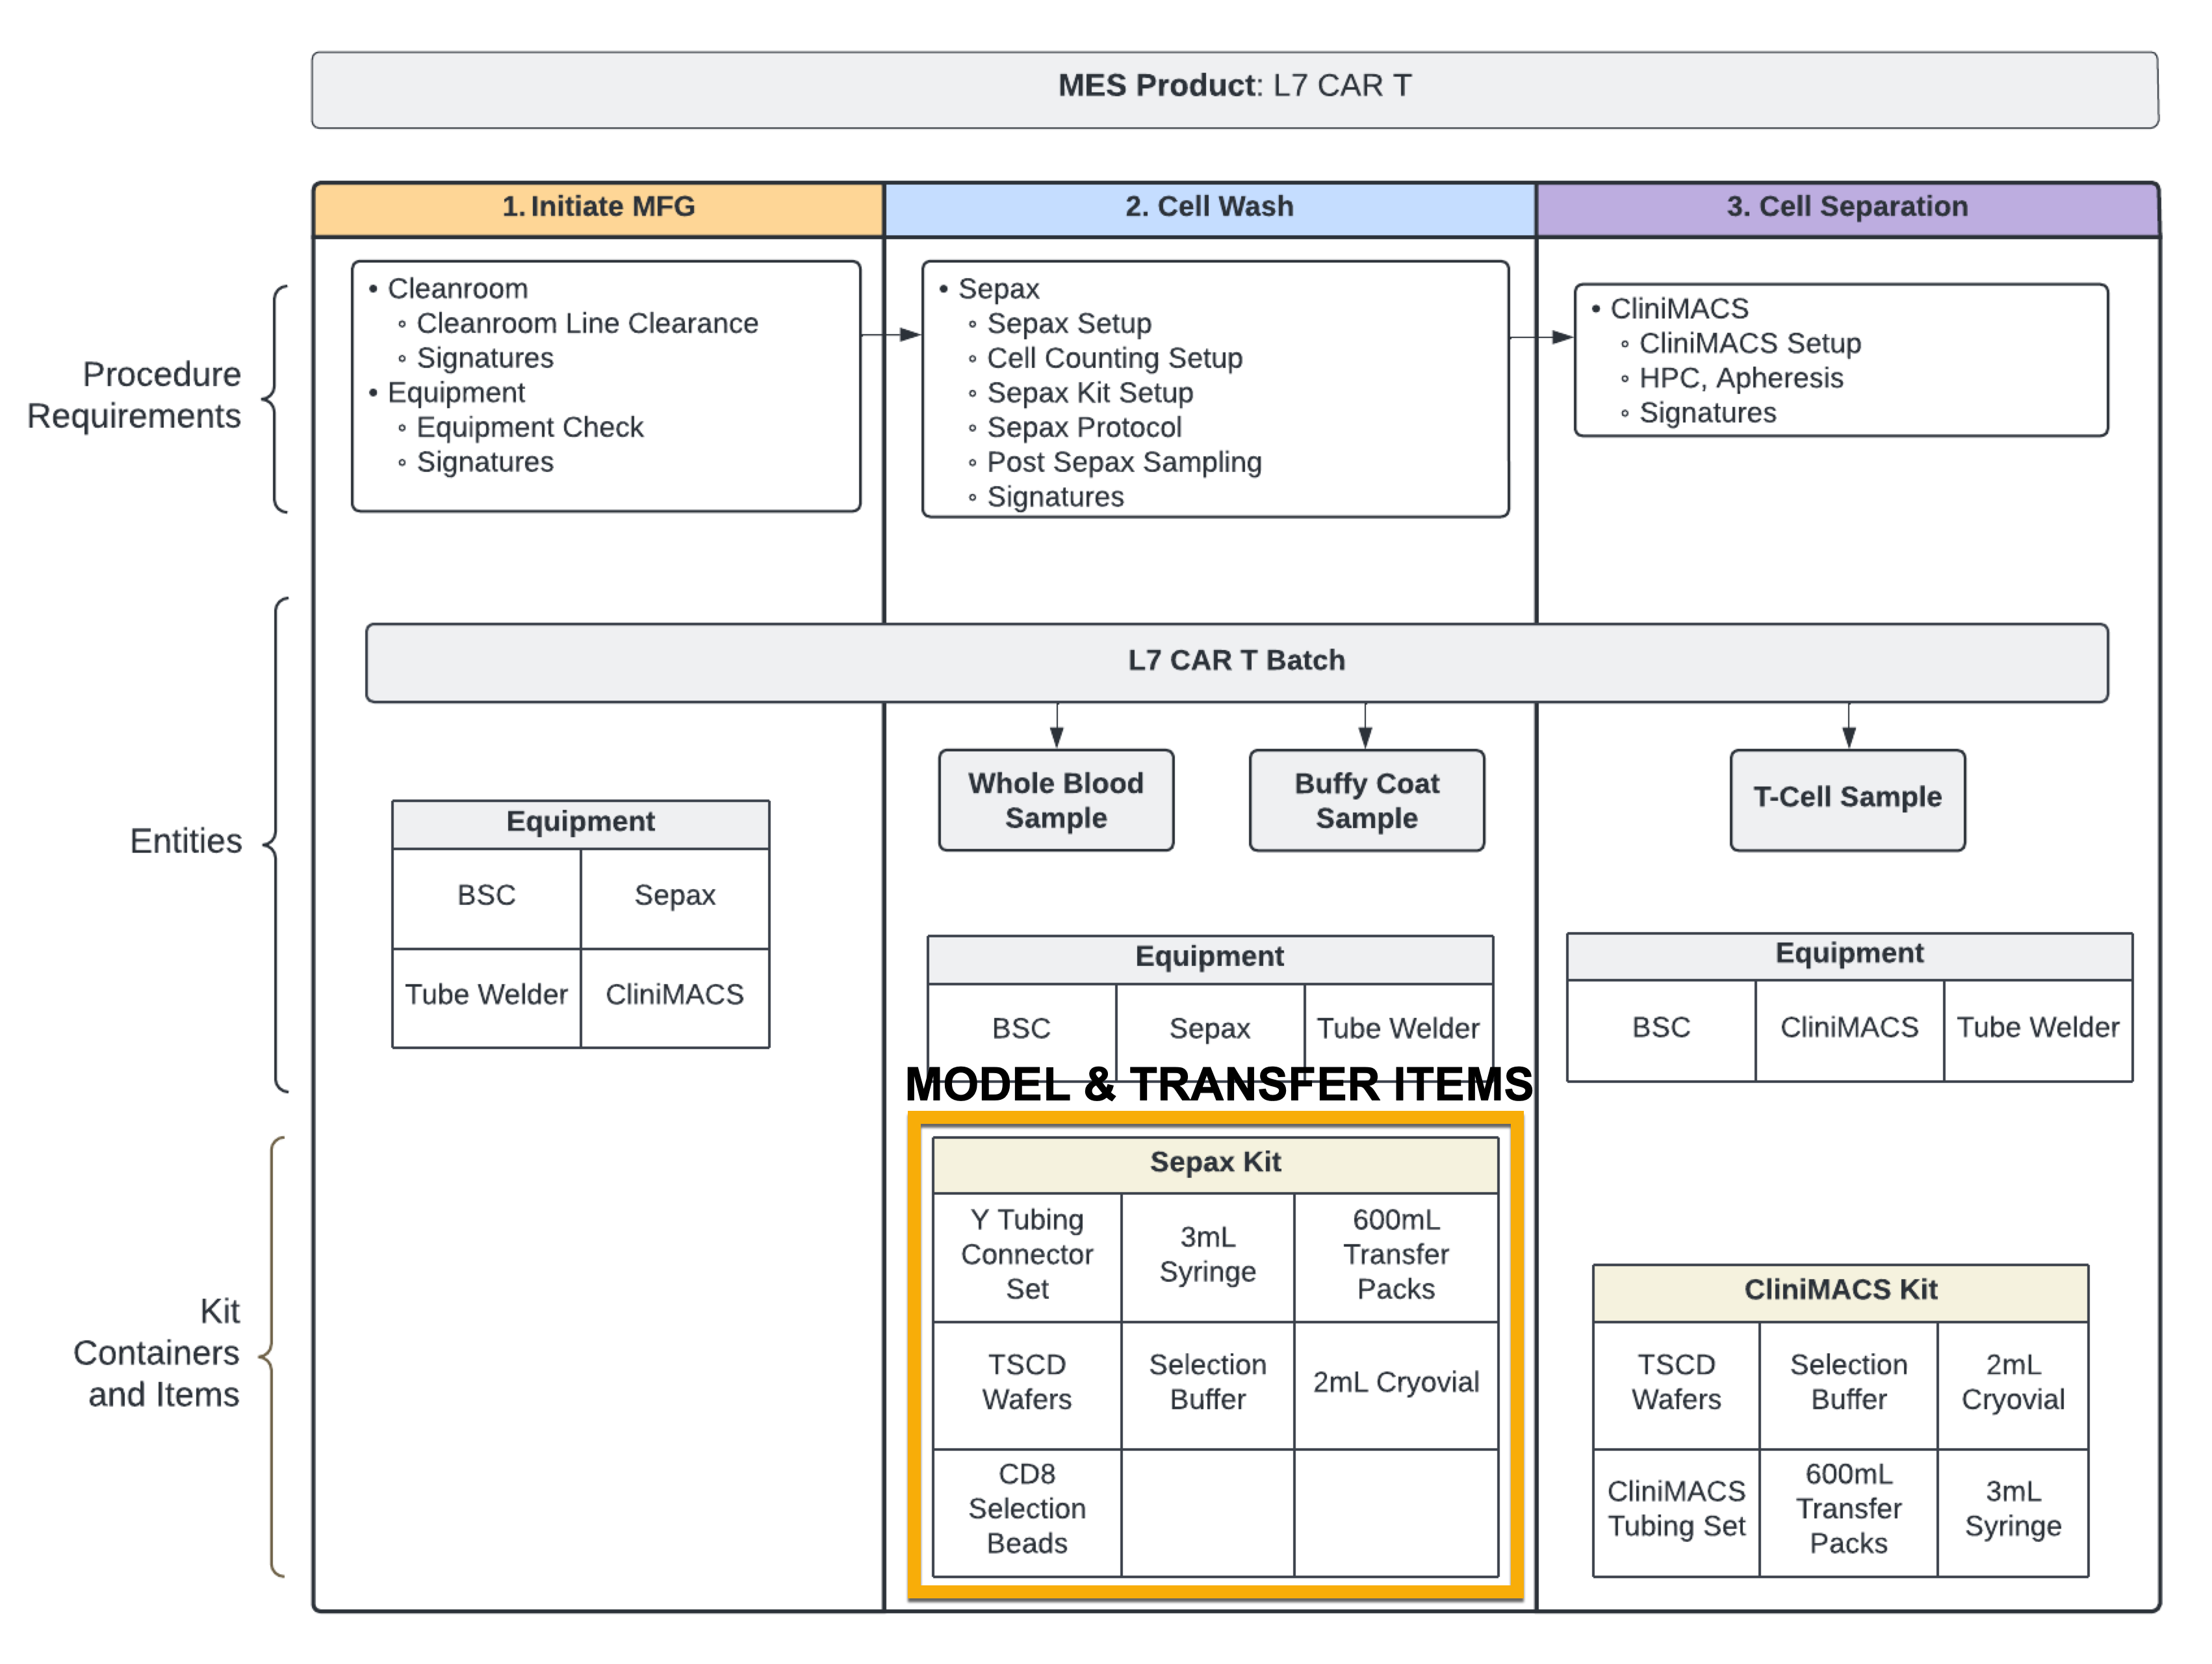
In manufacturing, inventory items are packaged into kits. These kits can correspond to the process, or a component of the process. In CAR T Processing, each kit corresponds to a component of the process:
Sepax Kit - cell washing
CliniMACS Kit - cell separation
In this exercise, you will be modeling the Sepax Kit and a Liquid Nitrogen Tank for long-term storage.

Your Task
Part 1: As a Super User, you have been asked to create two (2) new Container Types.
Manufacturing Operations has provided the following requirements:
Sepax Kit
The Kit has a single dimension labeled numerically
The Kit can store multiple Items at specified quantities:
3 mL Syringe
min: 1
max: 2
600 mL Transfer Packs
min: 1
max: 2
CD8 Selection Beads
min: 2
max: 4
2 mL Cryovial
min: 1
max: 2
Selection Buffer
min: 2
max: 4
TSCD Wafers
min: 5
max: 10
Y Tubing Connector Set
min: 1
max: 2
Liquid Nitrogen (LN2) Tank used to store Racks
Four (4) Quadrants
Each Quadrant can store multiple LN2 Racks
The labels should read Quadrant 1, Quadrant 2, etc.
Part 2: Navigate to the Location app and create one (1) new Sepax Kit and one (1) new LN2 Tank. Do not assign a status to the Sepax Kit.
Tip
When testing your Container configurations, pay attention to:
Are your Containers configured correctly?
Do they have the right number of dimensions?
Are the dimensions labeled correctly?
What can be stored in the LN2 Tank?
Does the Sepax Kit have Item Type and quantity restrictions? How do you know?
Part 3: Transfer the max quantity of each Item Type in Part 2 to the Sepax Kit in the Location app.
Note
Additional work will be done with the LN2 Tank in the Capstone Project on Day 4.