Plasmid Editor Bundle
Summary
The Plasmid Editor bundle contains plasmid editing functionality in 3 forms: Custom Entity View, Applet, and L7 Notebooks widget. An open source library called the Open Vector Editor (OVE) is used. L7 built some things on top of/around it, but most of the functionality inside the editor itself is from the library, not built by L7.
Usage and Features
The Plasmid Editor can be used to edit a plasmid sequence and then save it to the current Entity, or create a new Entity with the updated plasmid. This functionality is the same across all the places where the plasmid editor can be found (Entity View, Applet, Widget) with 2 minor exceptions which will be covered at the end. In the following explanation/use case we will see a bit of each of the entity view, applet, and widget just for demo purposes, but keep in mind that for the most part the same thing can be done from any of these 3 places.
Key Features
Plasmid file compatibility
The Plasmid Editor supports genbank (
.gb,.gbk) and fasta (.fasta,.gb) and text (.txt) files. Note that if using a text file, its contents must be in the same format as a GenBank or Fasta file.
Plasmid Search
In the applet and widget, you are able to search for a plasmid Entity (can be different Entity types as long as they are the same Plasmid Class) by name.
Plasmid View featues (from the OVE library)
Circular vs linear view of the plasmid
Base pair/reverse sequences
Cut Sites
Features
Plasmid Editing
You can edit the plasmid by inserting/deleting/modifying the sequence and the above mentioned features
Save and Save As
You can save the changes to the plasmid to the existing Entity or create a new Entity
Drag and Drop
In the applet and widget, the user is able to drag an drop a supported file in and have it loaded and save it to a new entity
Differences between the Entity View and Applet/Widget
In the applet and L7 Notebooks widget, you need to search for a specific plasmid Entity. In the Entity View, the system already knows what file to load in because it is attached to the Entity.
In the applet and L7 Notebooks widget, you are allowed to drag and drop a file directly in the applet/widget.
Bundle Contents
Plasmid Editor Applet
Plasmid Editor configuration file
Plasmid Entity Class
Files (2): Plasmid Editor Frontend and Plasmid Editor Pipeline Script
Plasmid Editor Extensions Invokable
Plasmid Editor Widget for L7 Notebooks App
Plasmid Editor Query
Plasmid Configuration Object
The Plasmid Editor bundle comes with a configuration object called Plasmid Editor which contains the following:
{
 "widgets": {...},
 "plasmid_entity_class_name": "Plasmid",
 "plasmid_file_entity_field_name": "Plasmid File"
}
Key Descriptions:
widgets - this is where the Plasmid Editor widget is defined. The only thing a you might want to change is the tab name that shows up in the L7 Notebook app (widgets → tabs → label)
plasmid_entity_class_name - this is the Entity Class name that contains the custom view code for the Plasmid Editor. Any Entity Types that need to have the Plasmid Editor view must be of this Class.
plasmid_file_entity_field_name - this is the custom field name that must exist on the Entity Type that you are using with the Plasmid Editor. It must be an attachment custom field type.
User Guide
Getting Started/Initial Setup
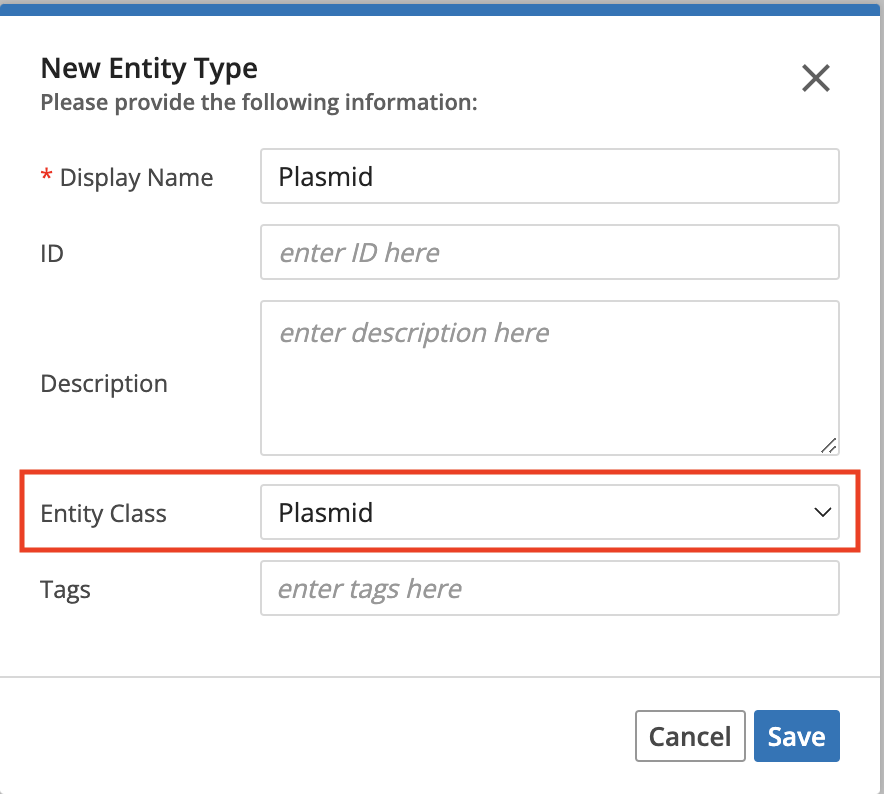
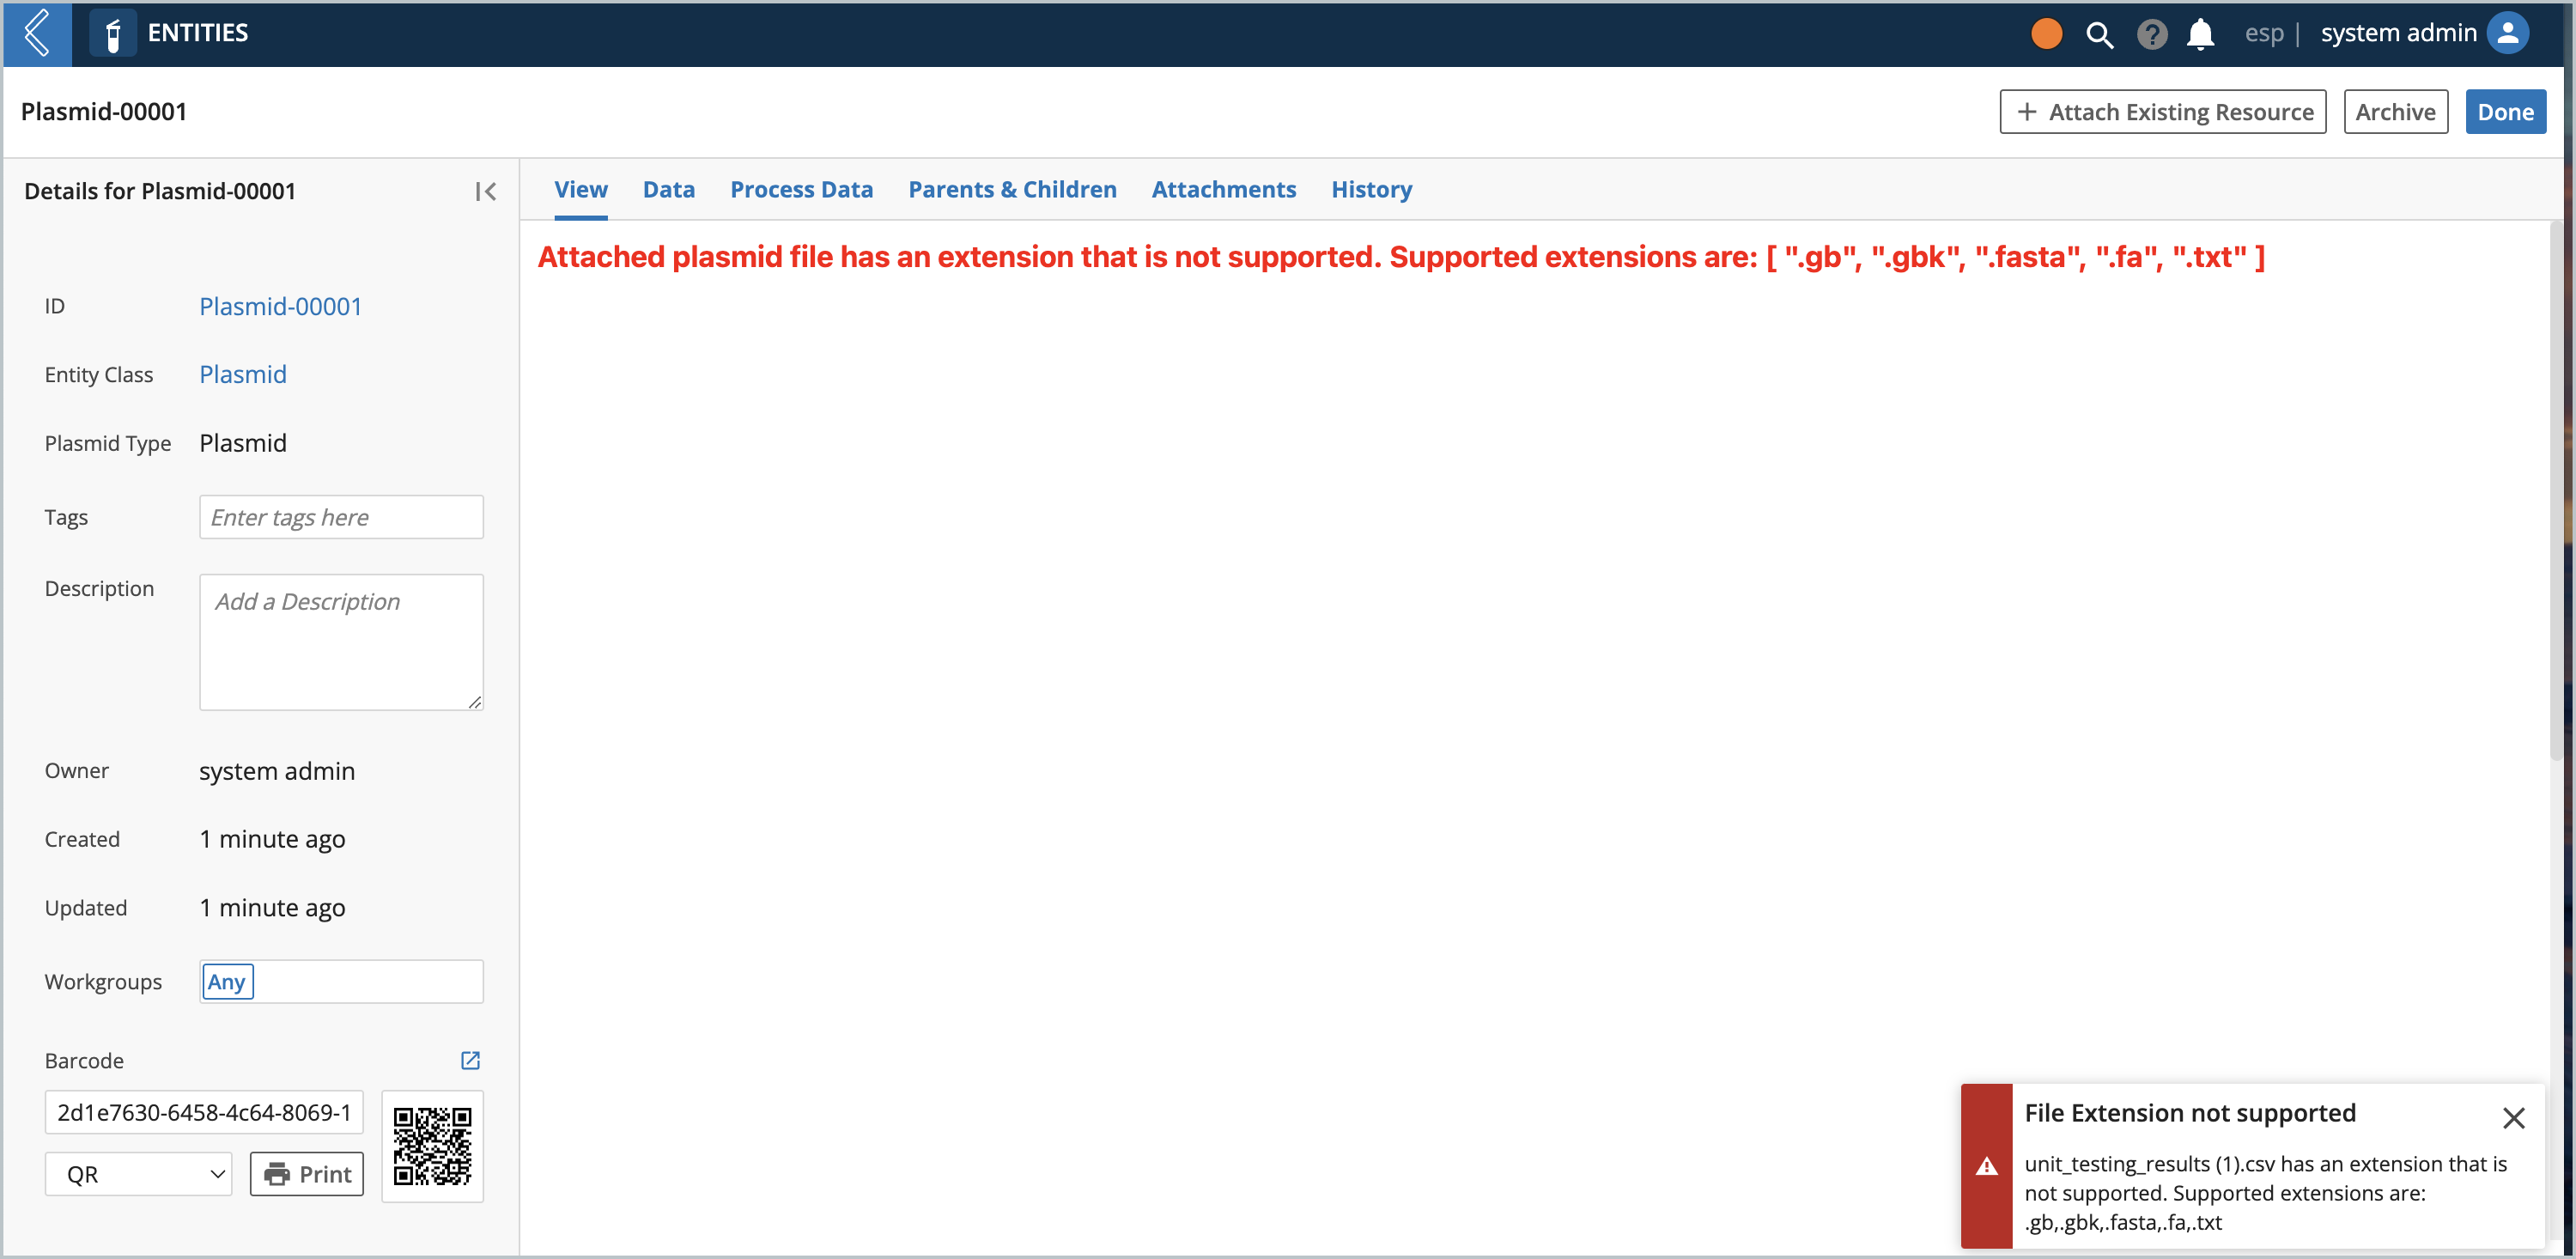
The bundle comes with a “Plasmid” Entity Class but not any Entity Types. To begin using this bundle, you first need to create an entity type. When you create the Entity Type, the name doesn’t matter, but the Entity Class must be set to “Plasmid” or whatever is in the plasmid_entity_class_name config key. Then you must add an attachment custom field called “Plasmid File” or whatever is in the plasmid_file_entity_field_name config key. The next step is to create one or more Entities of this Type and attach a .gb , .gbk , .fasta, .fa, or .txt) file.
Creating the Entity Type
Adding the field of type “attachment” as shown in the screenshot below. The ID of this custom field must match with the value in the
plasmid_file_entity_field_nameconfig key in the configuration.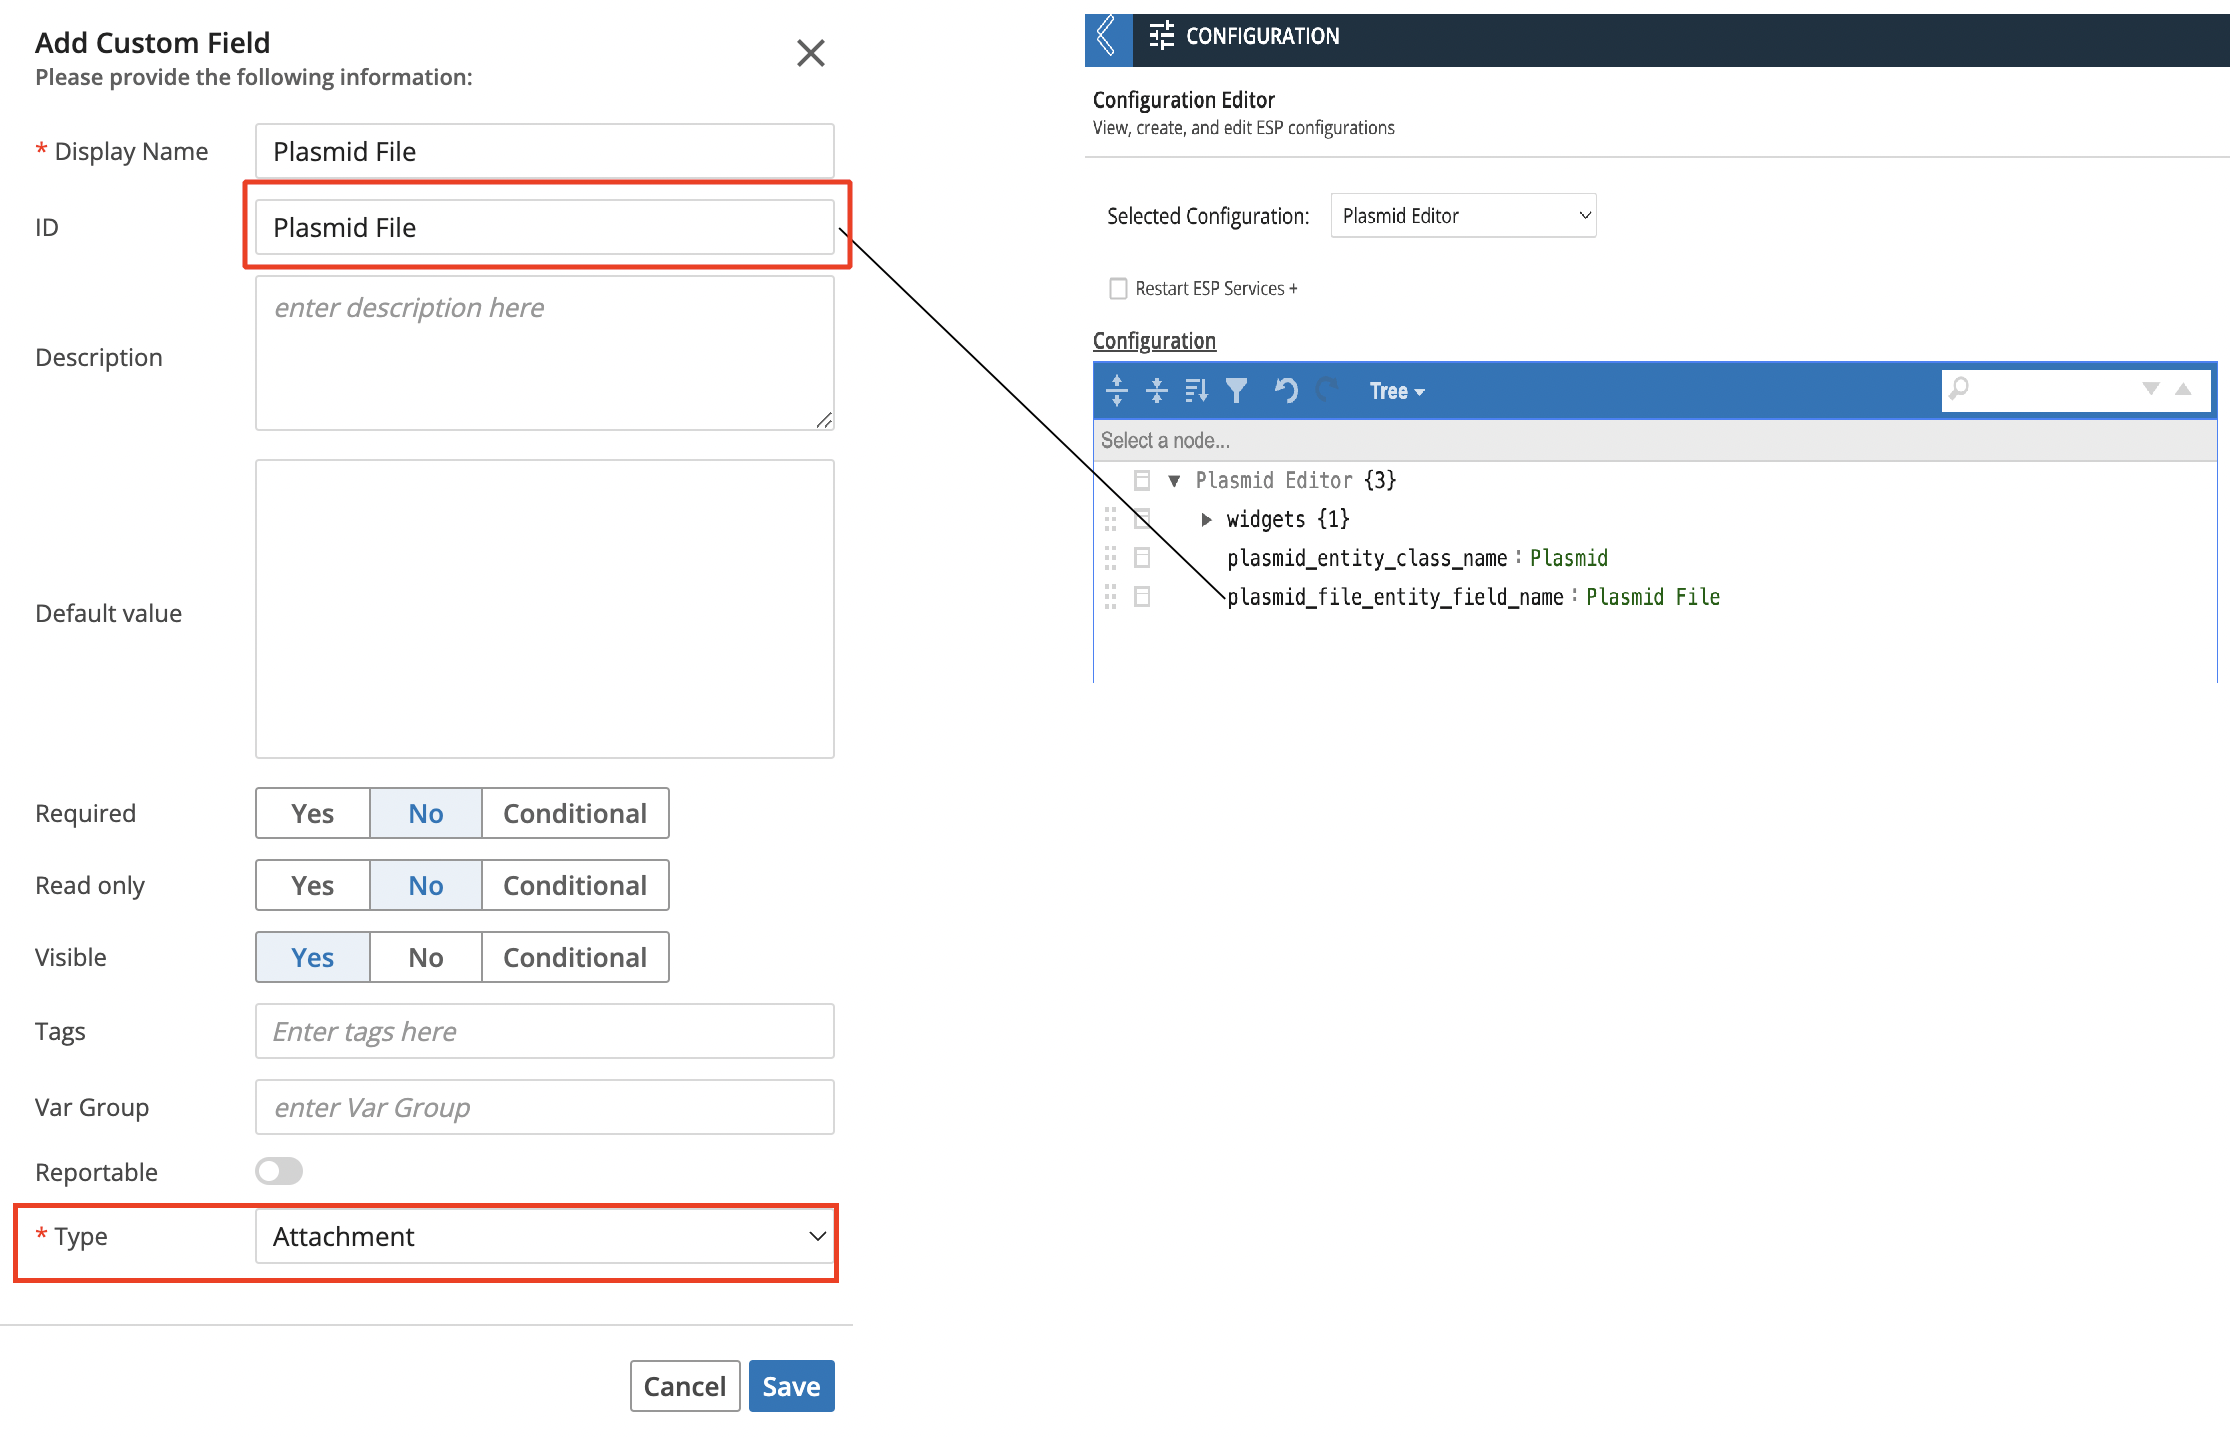
Create an Entity(s) and attach the sequence file (
.gb,.gbk,.fasta,.fa, or.txt) and save.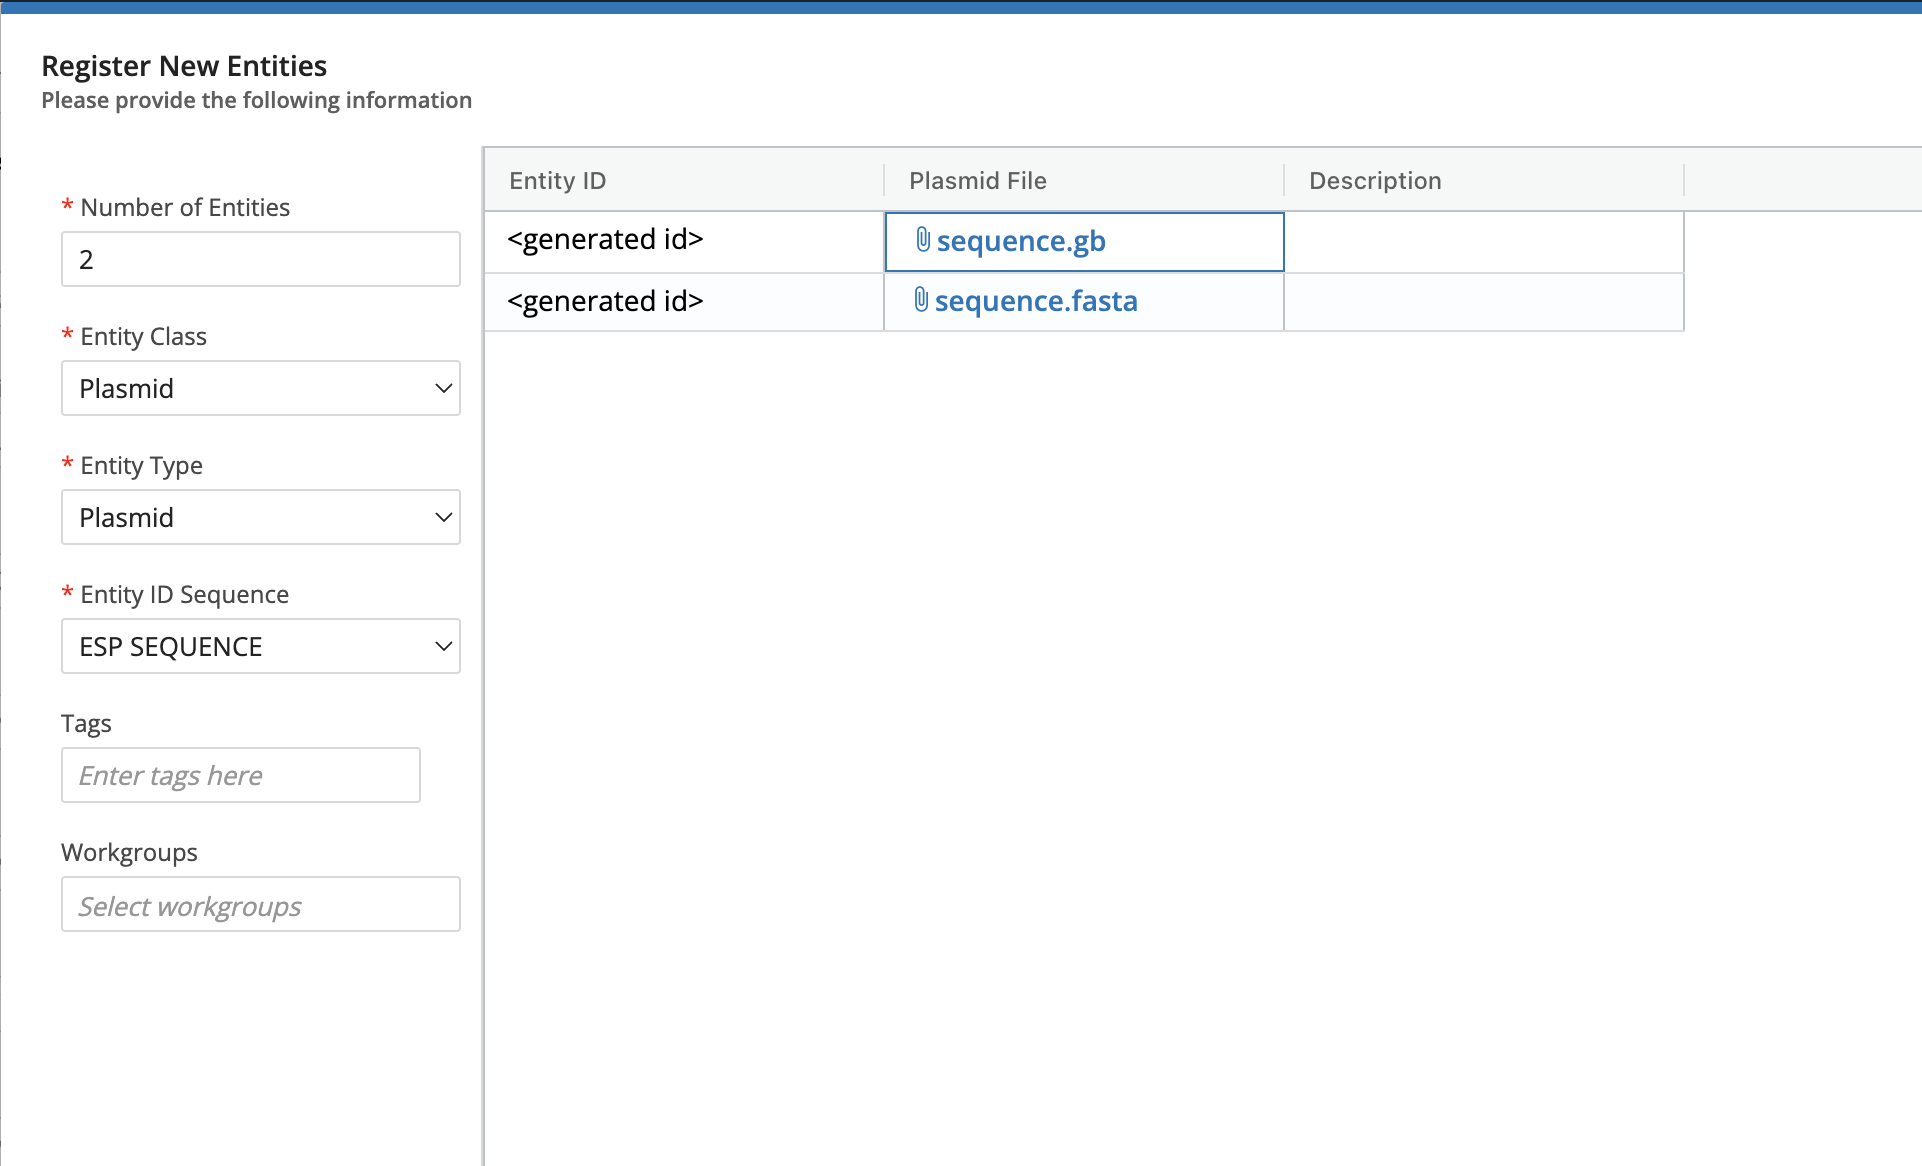
Entity View at a Glance
If you click on one of the Entities you created, and navigate to its View tab you should see this:
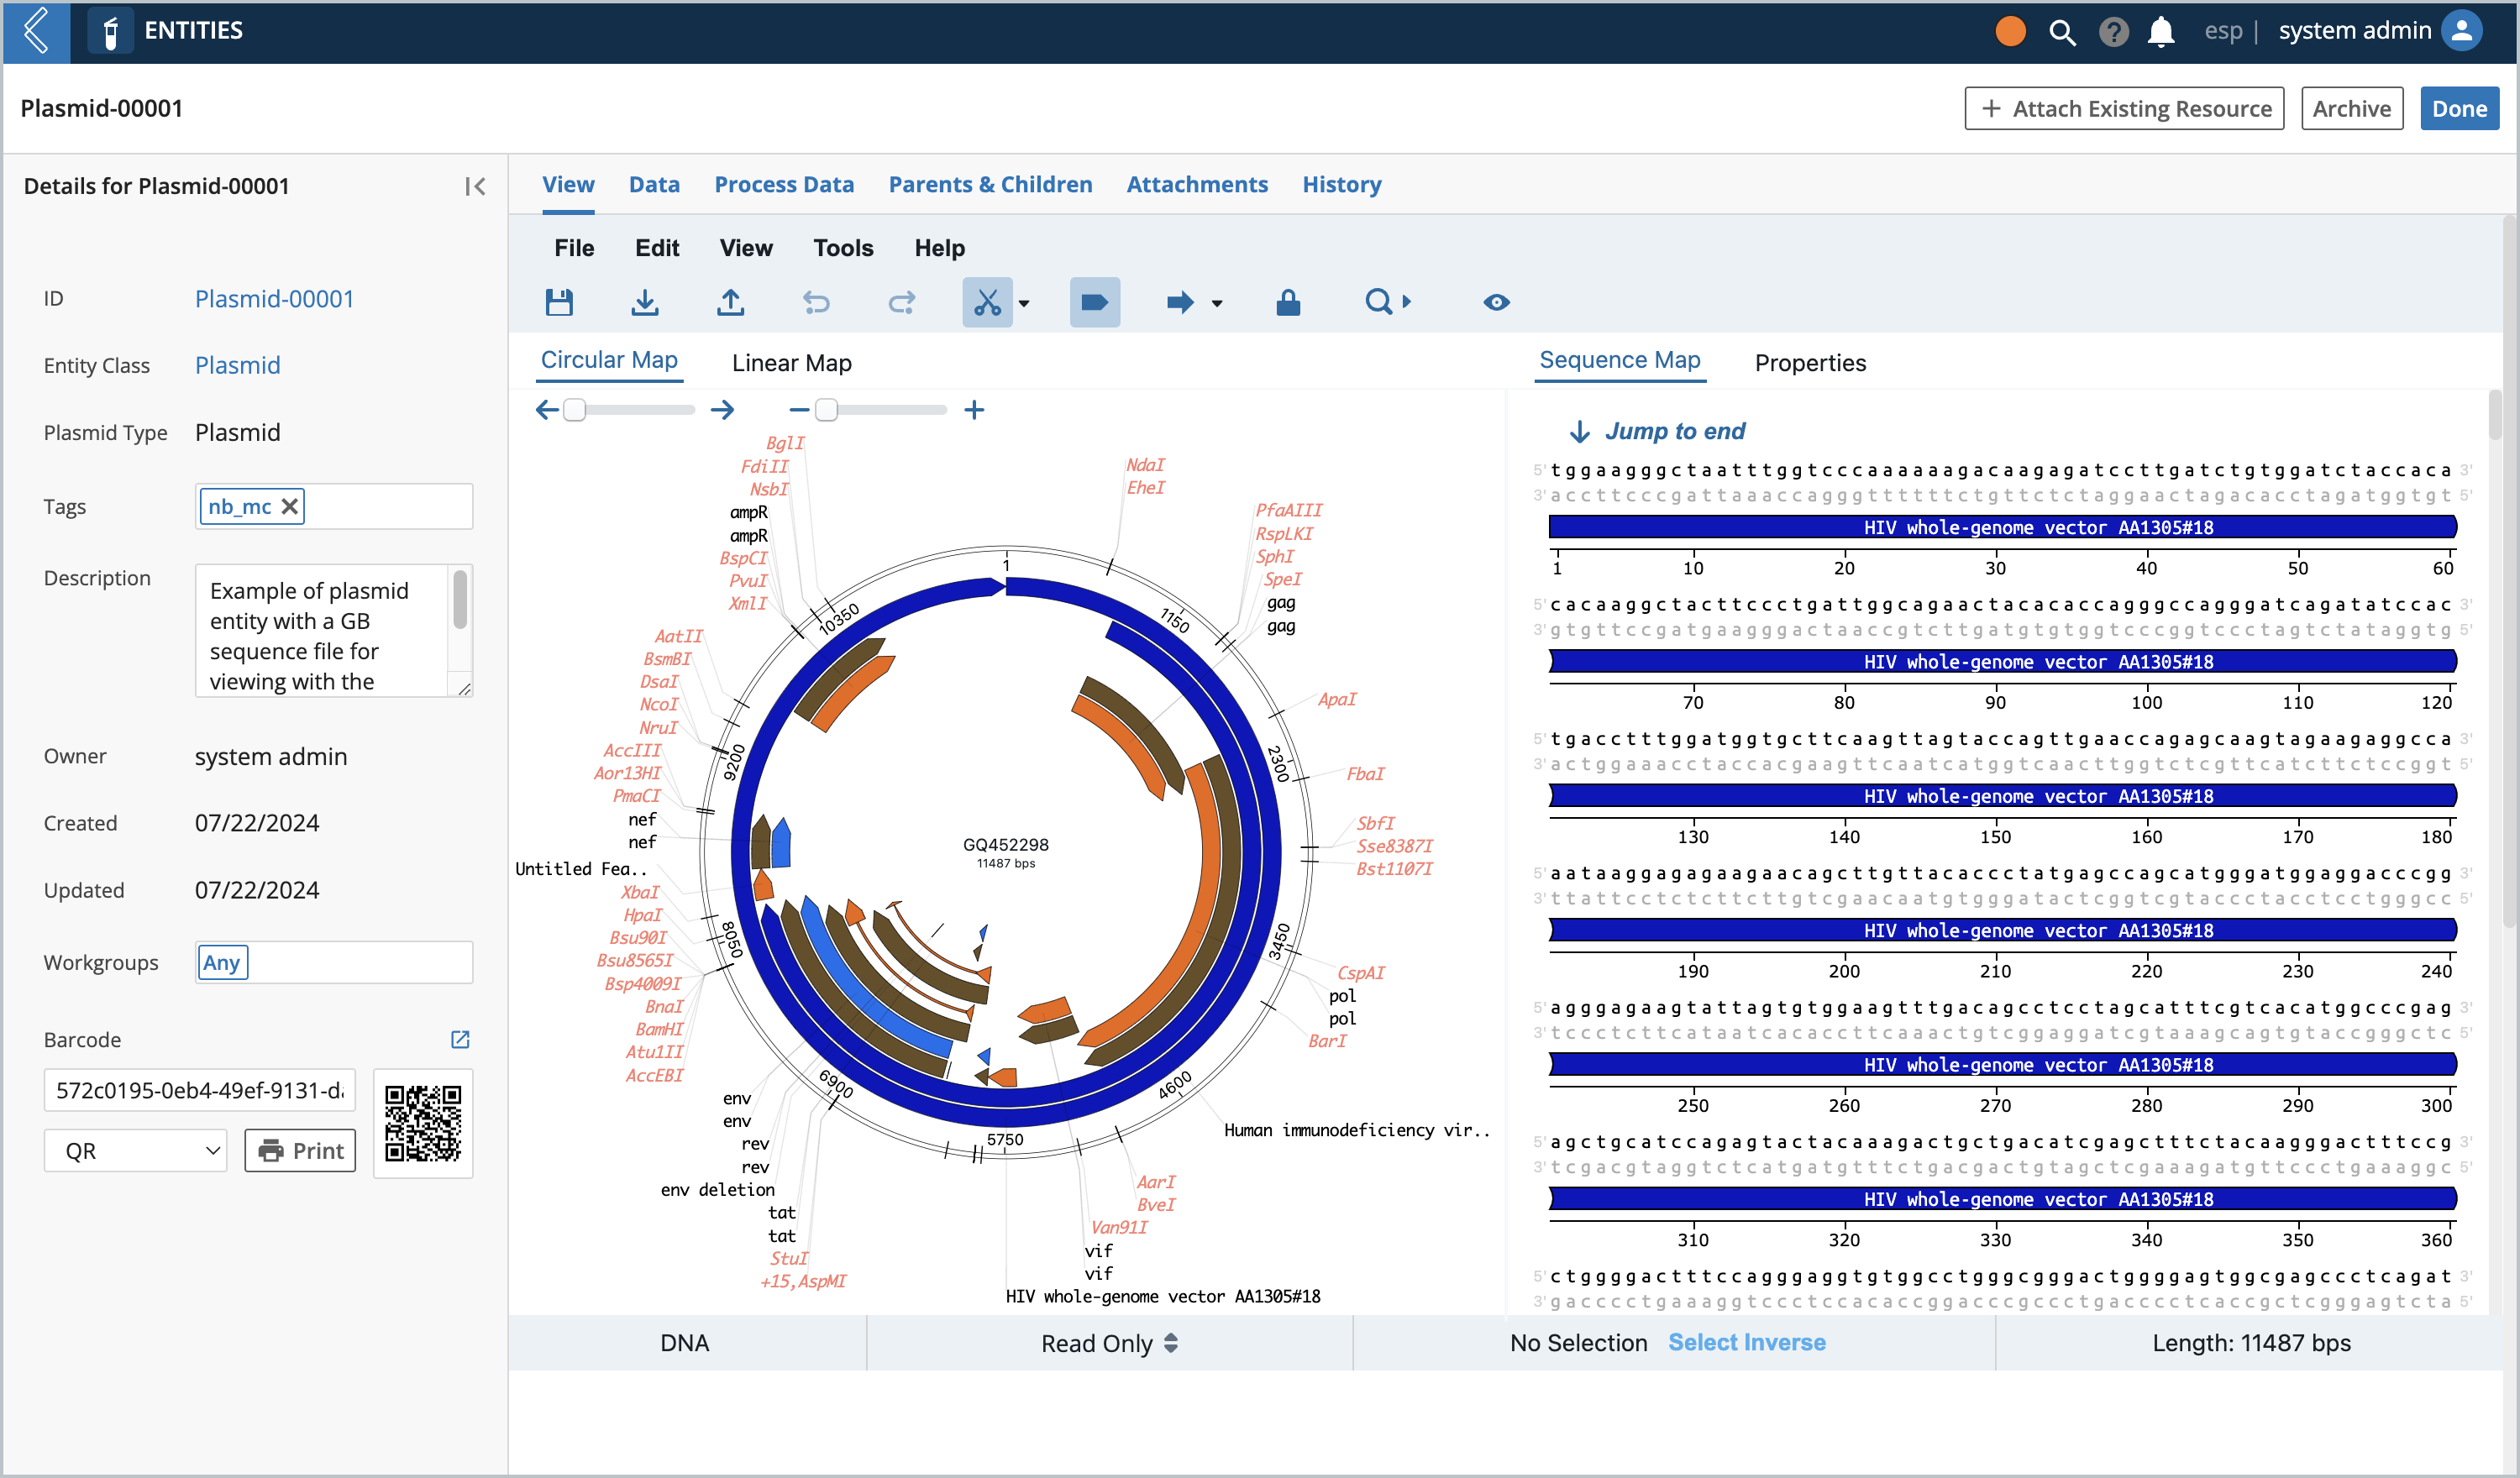
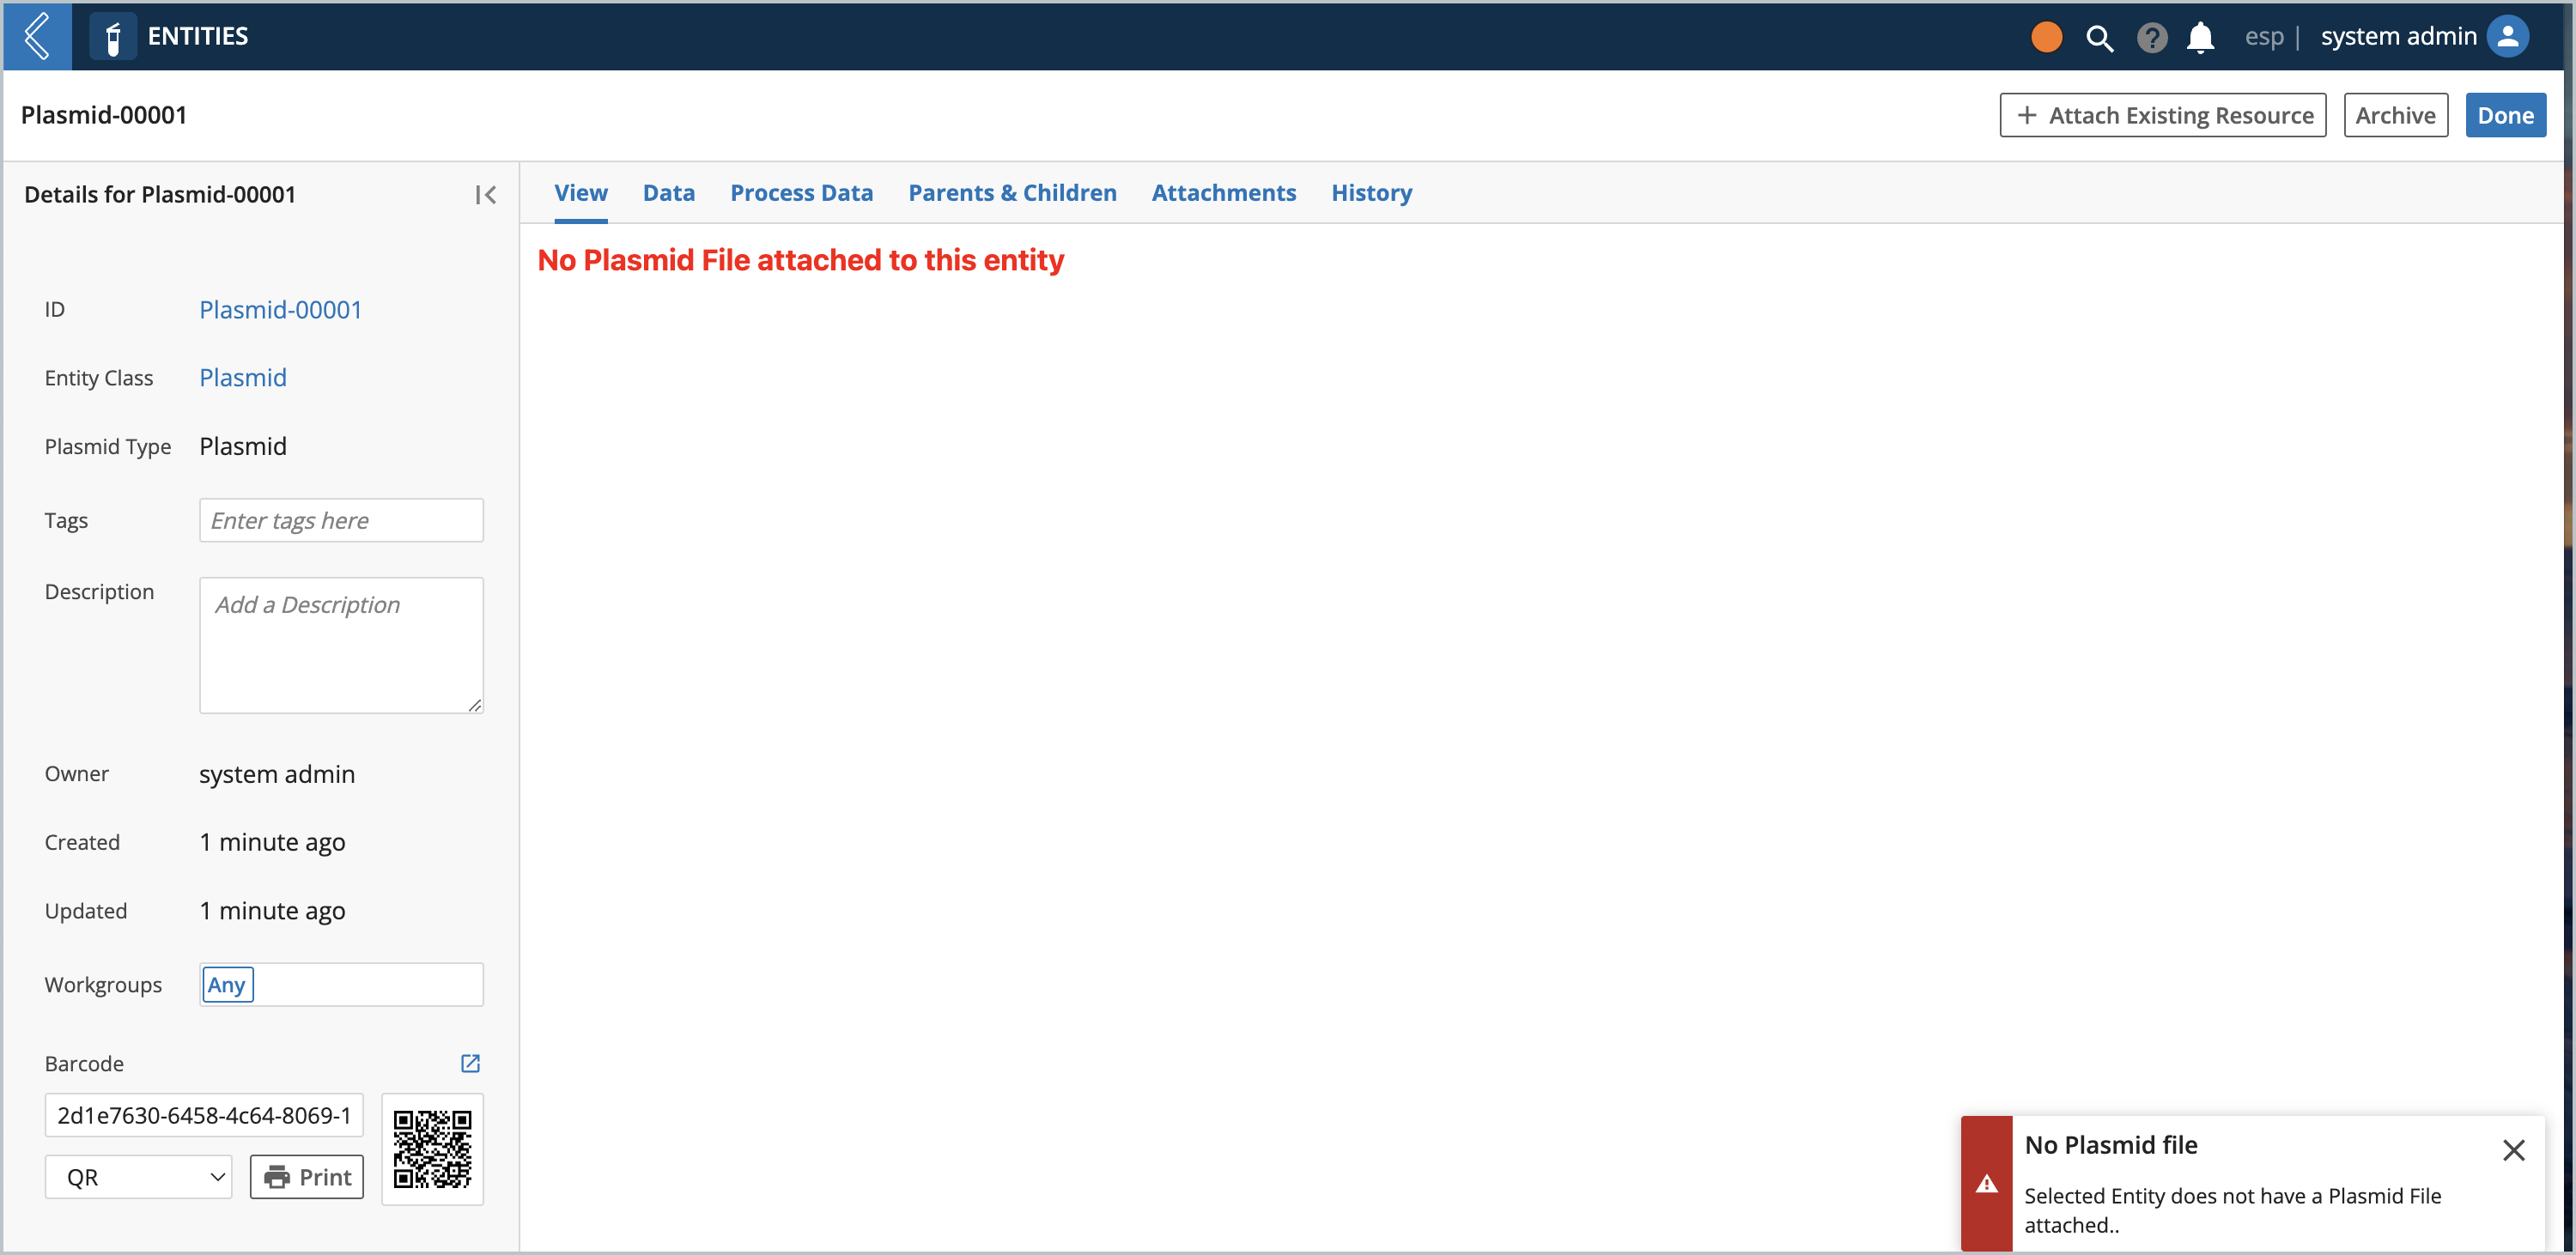
The Entity view automatically loads the file that is attached to the Entity into the Plasmid Editor. If there is no file attached you would see this view:
If the Entity has a file attached with an extension that is not supported, this view would show instead:
Applet at a Glance
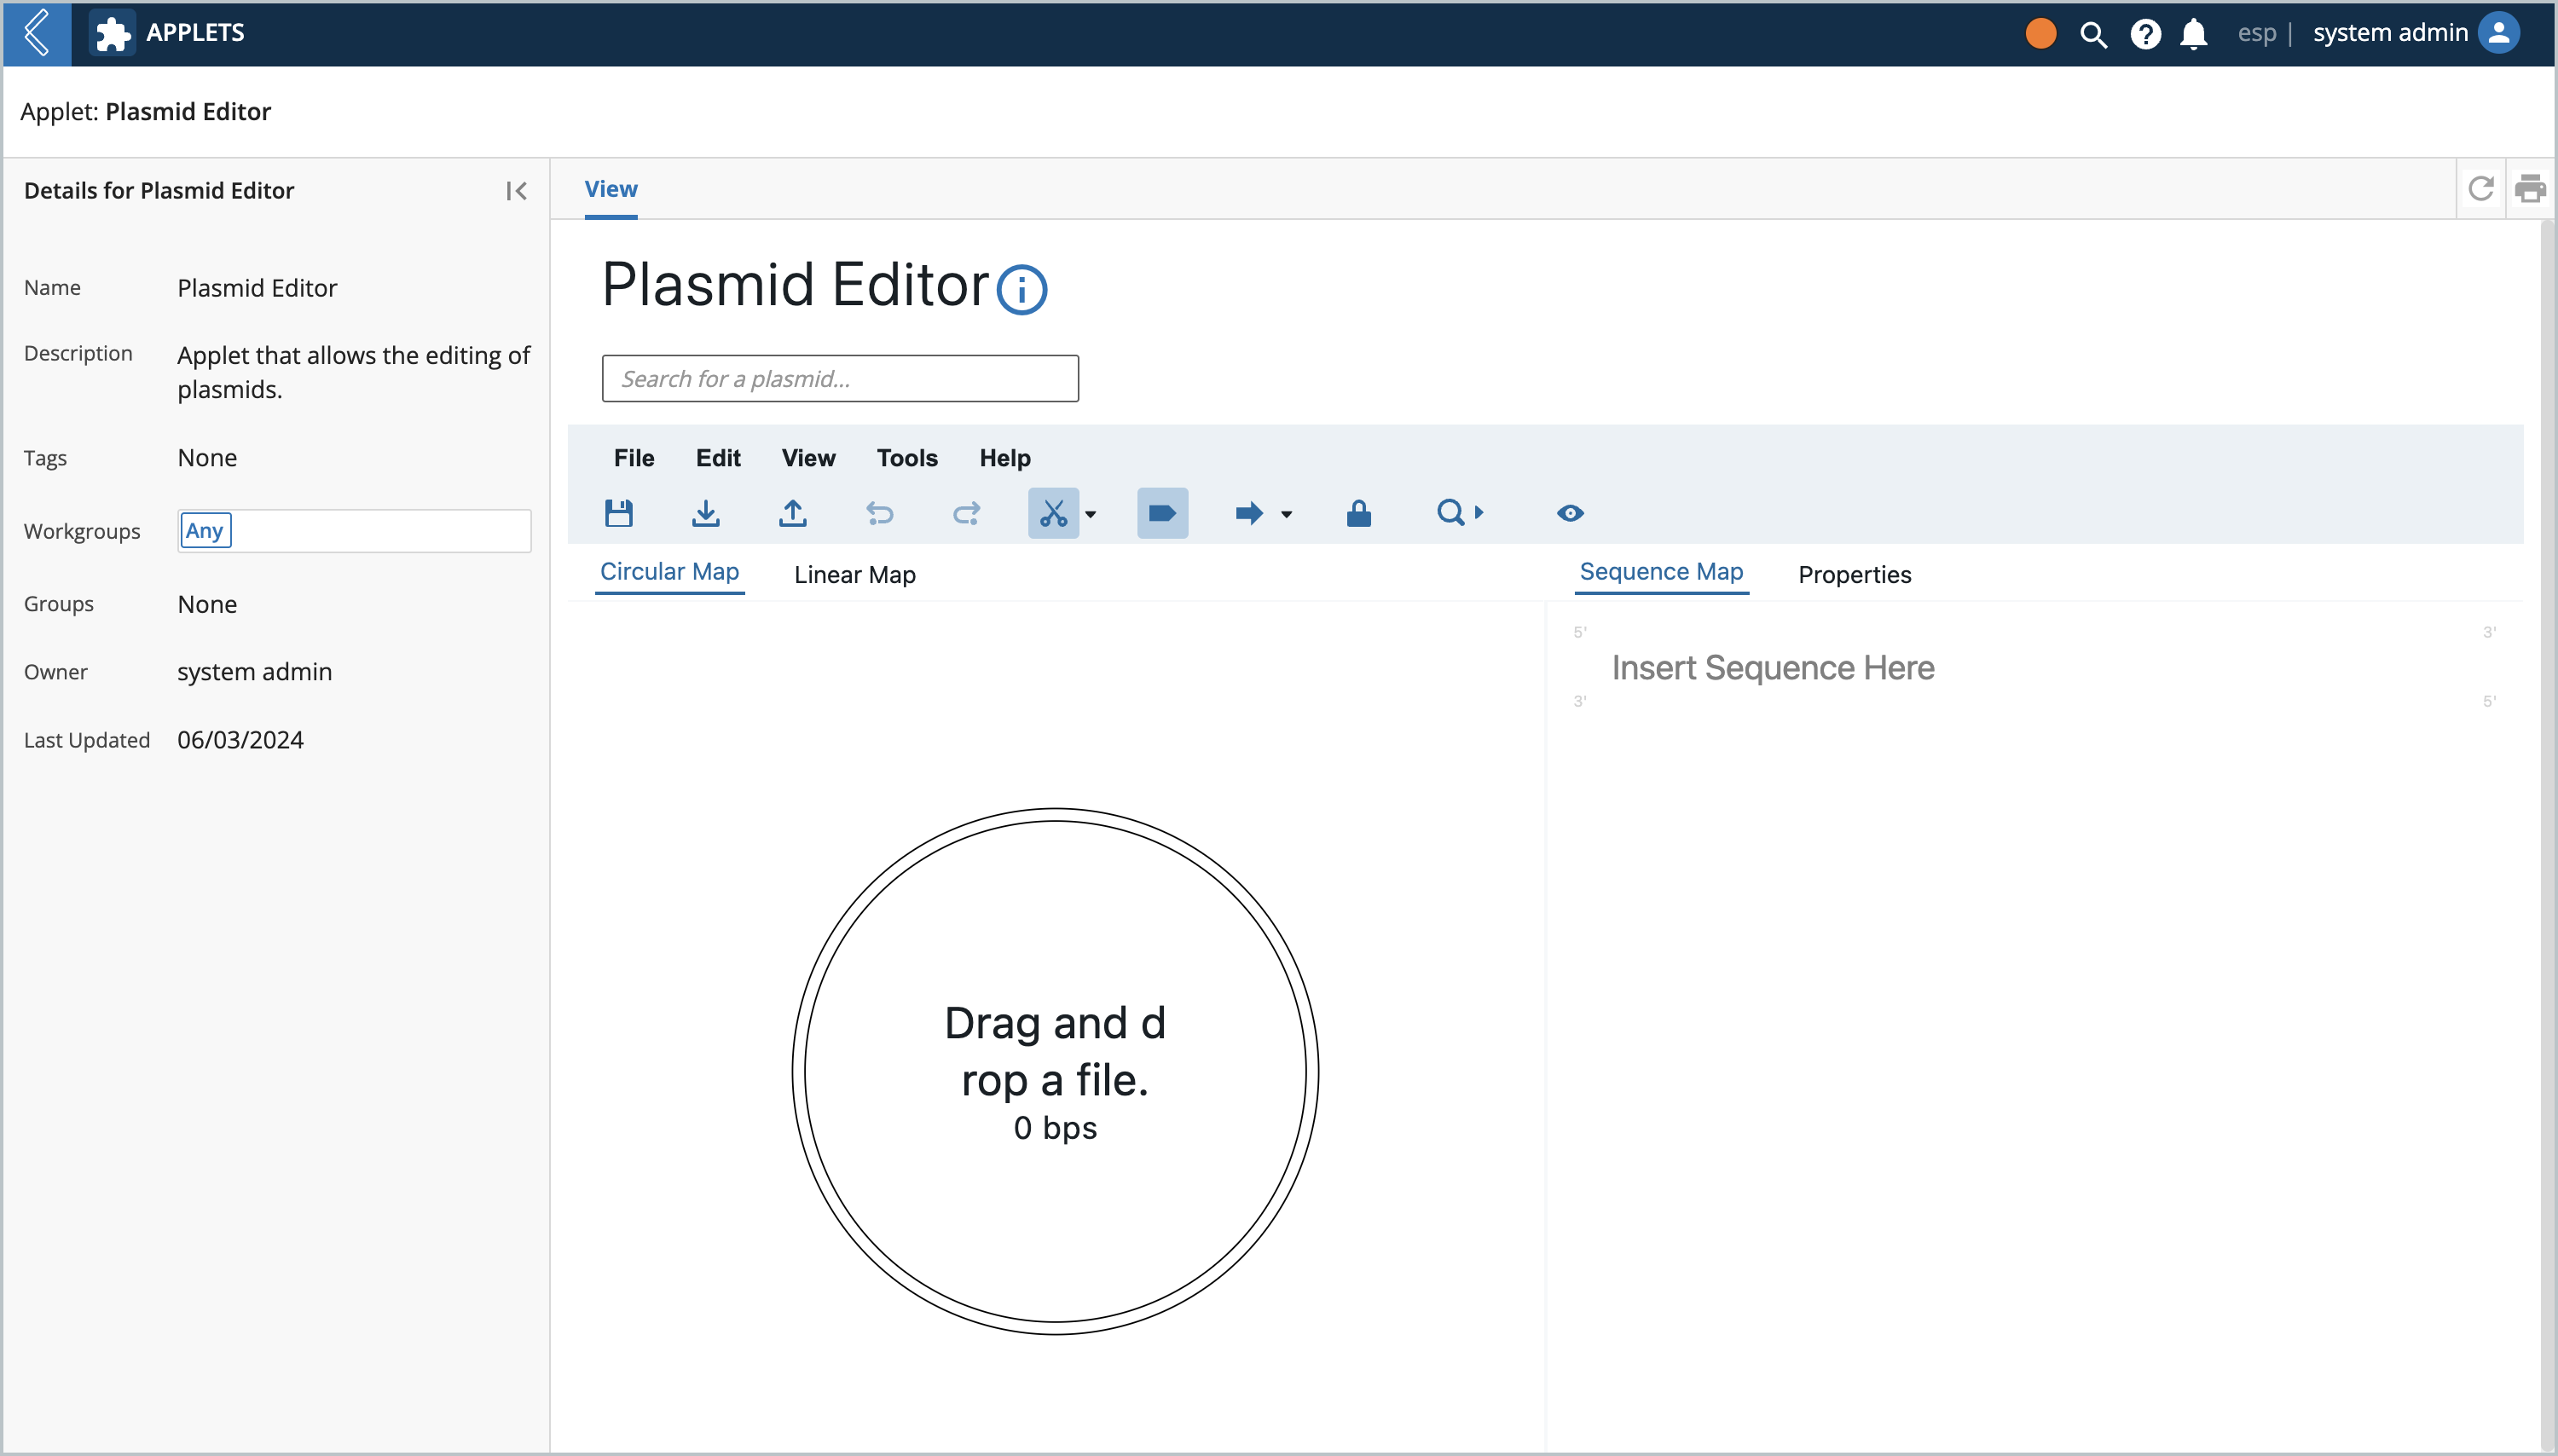
Under the applets page there should be a Plasmid Editor applet. Open it up and you should see this view:
L7 Notebooks Widget at a Glance
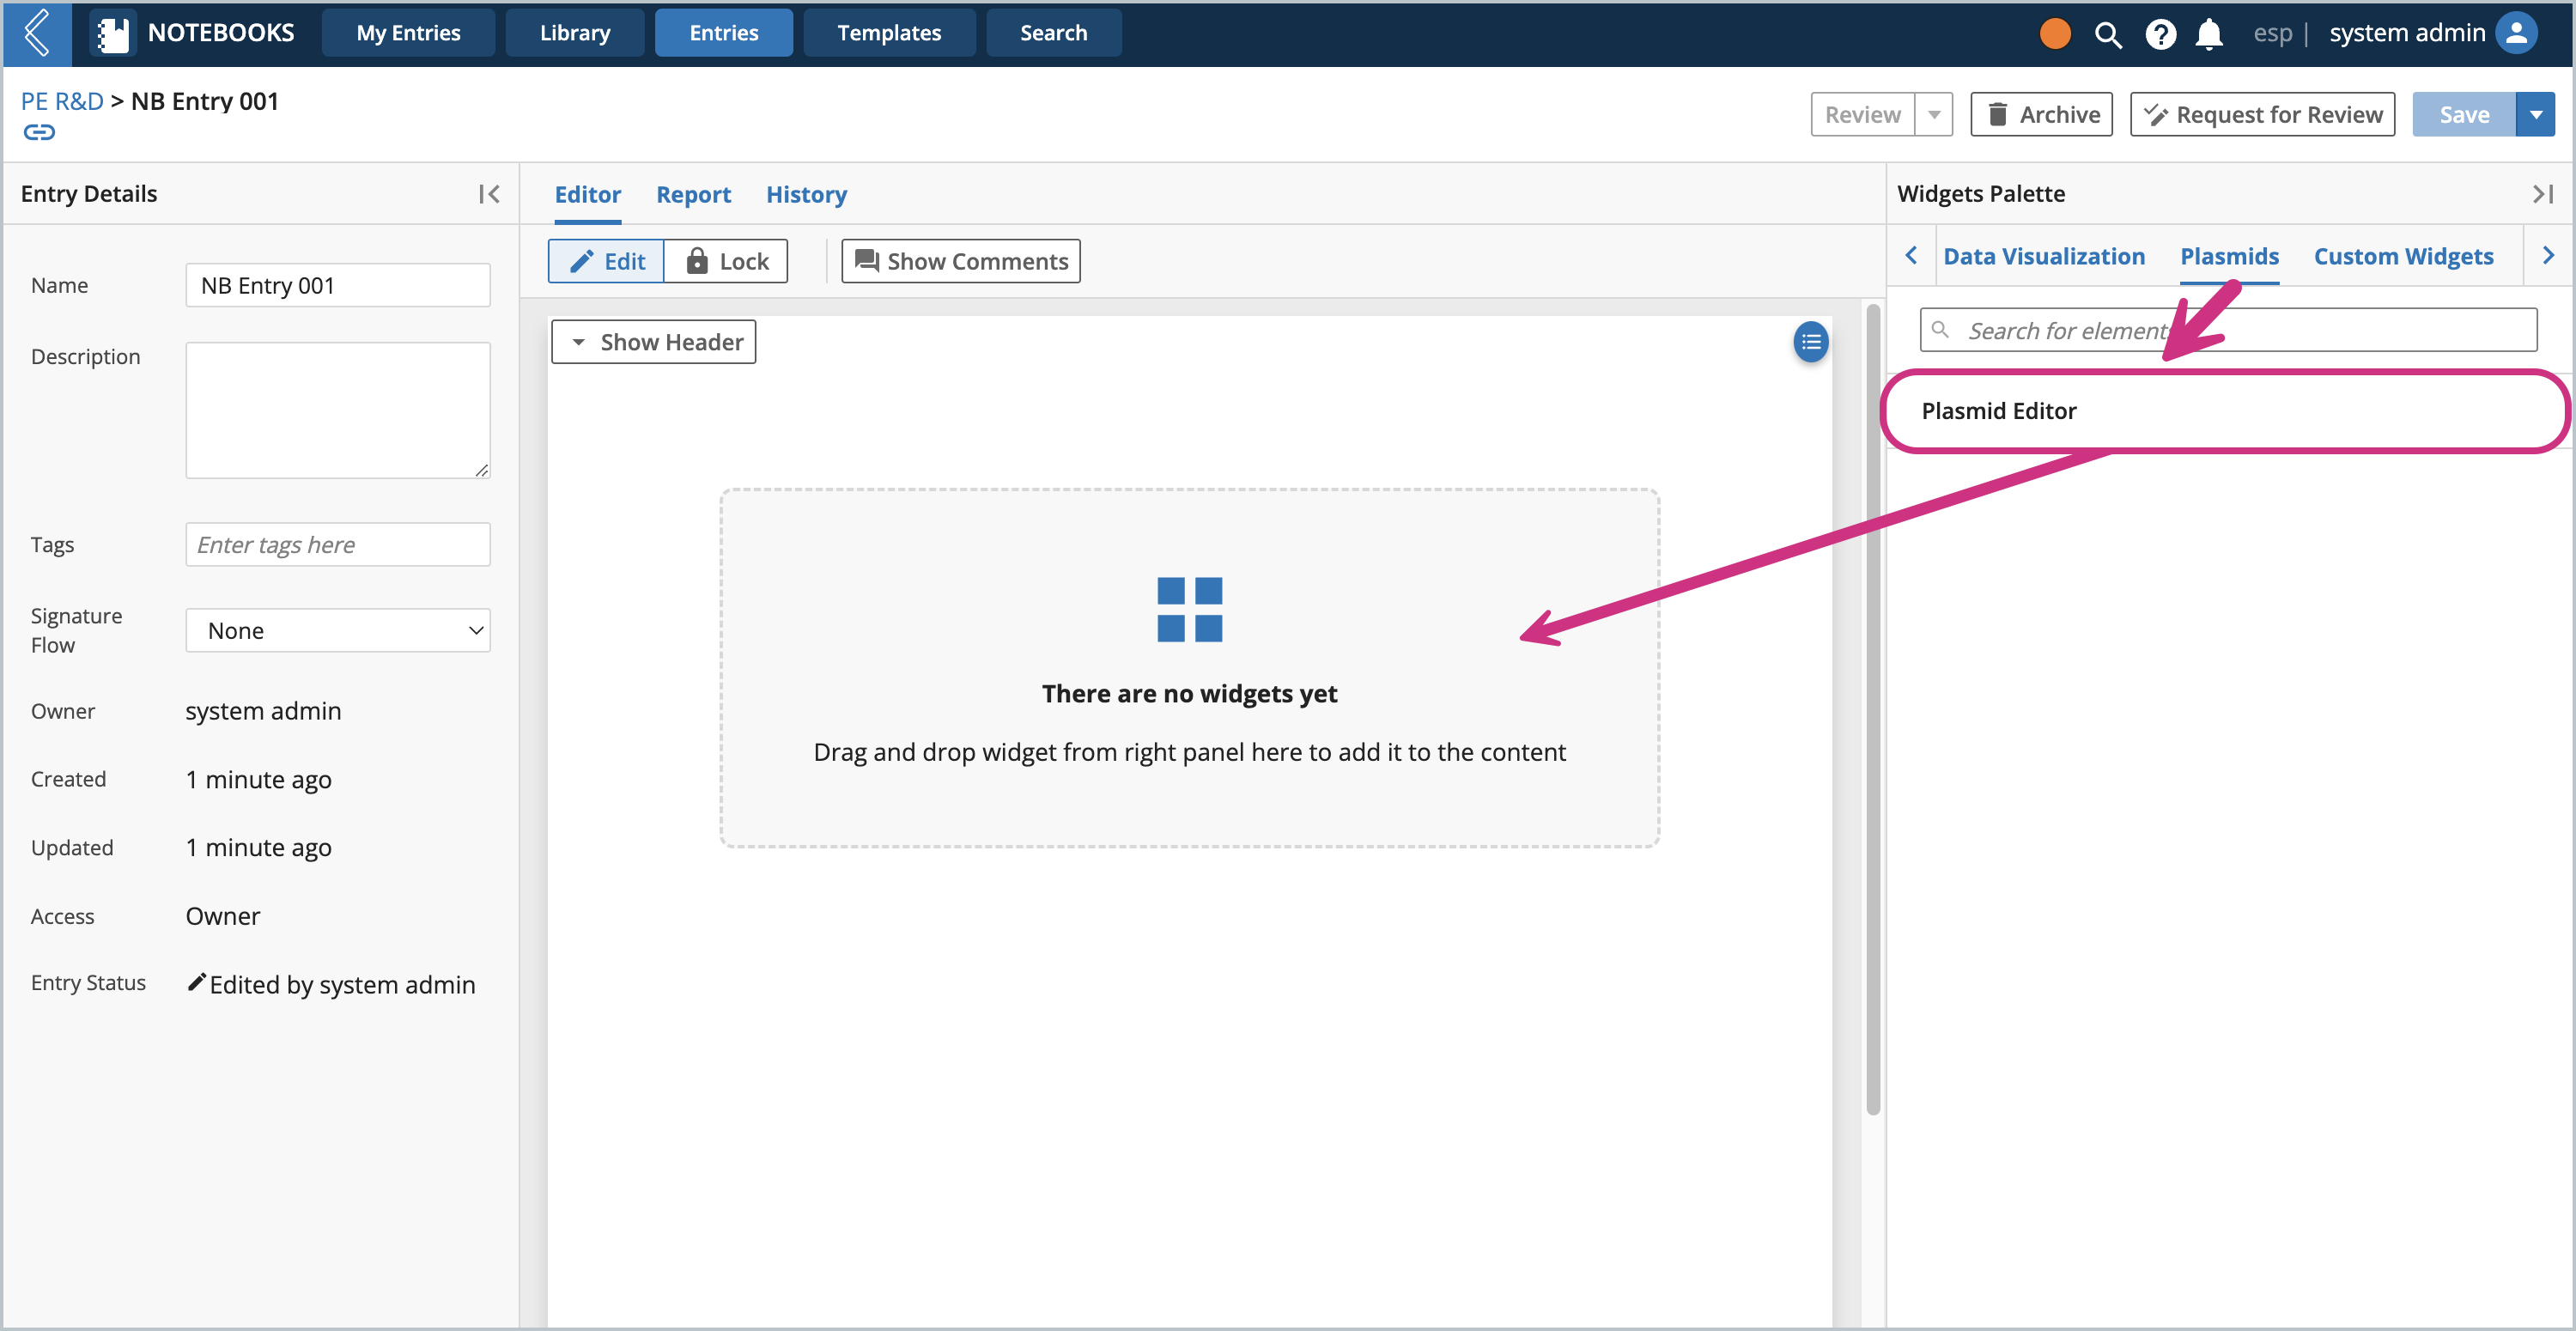
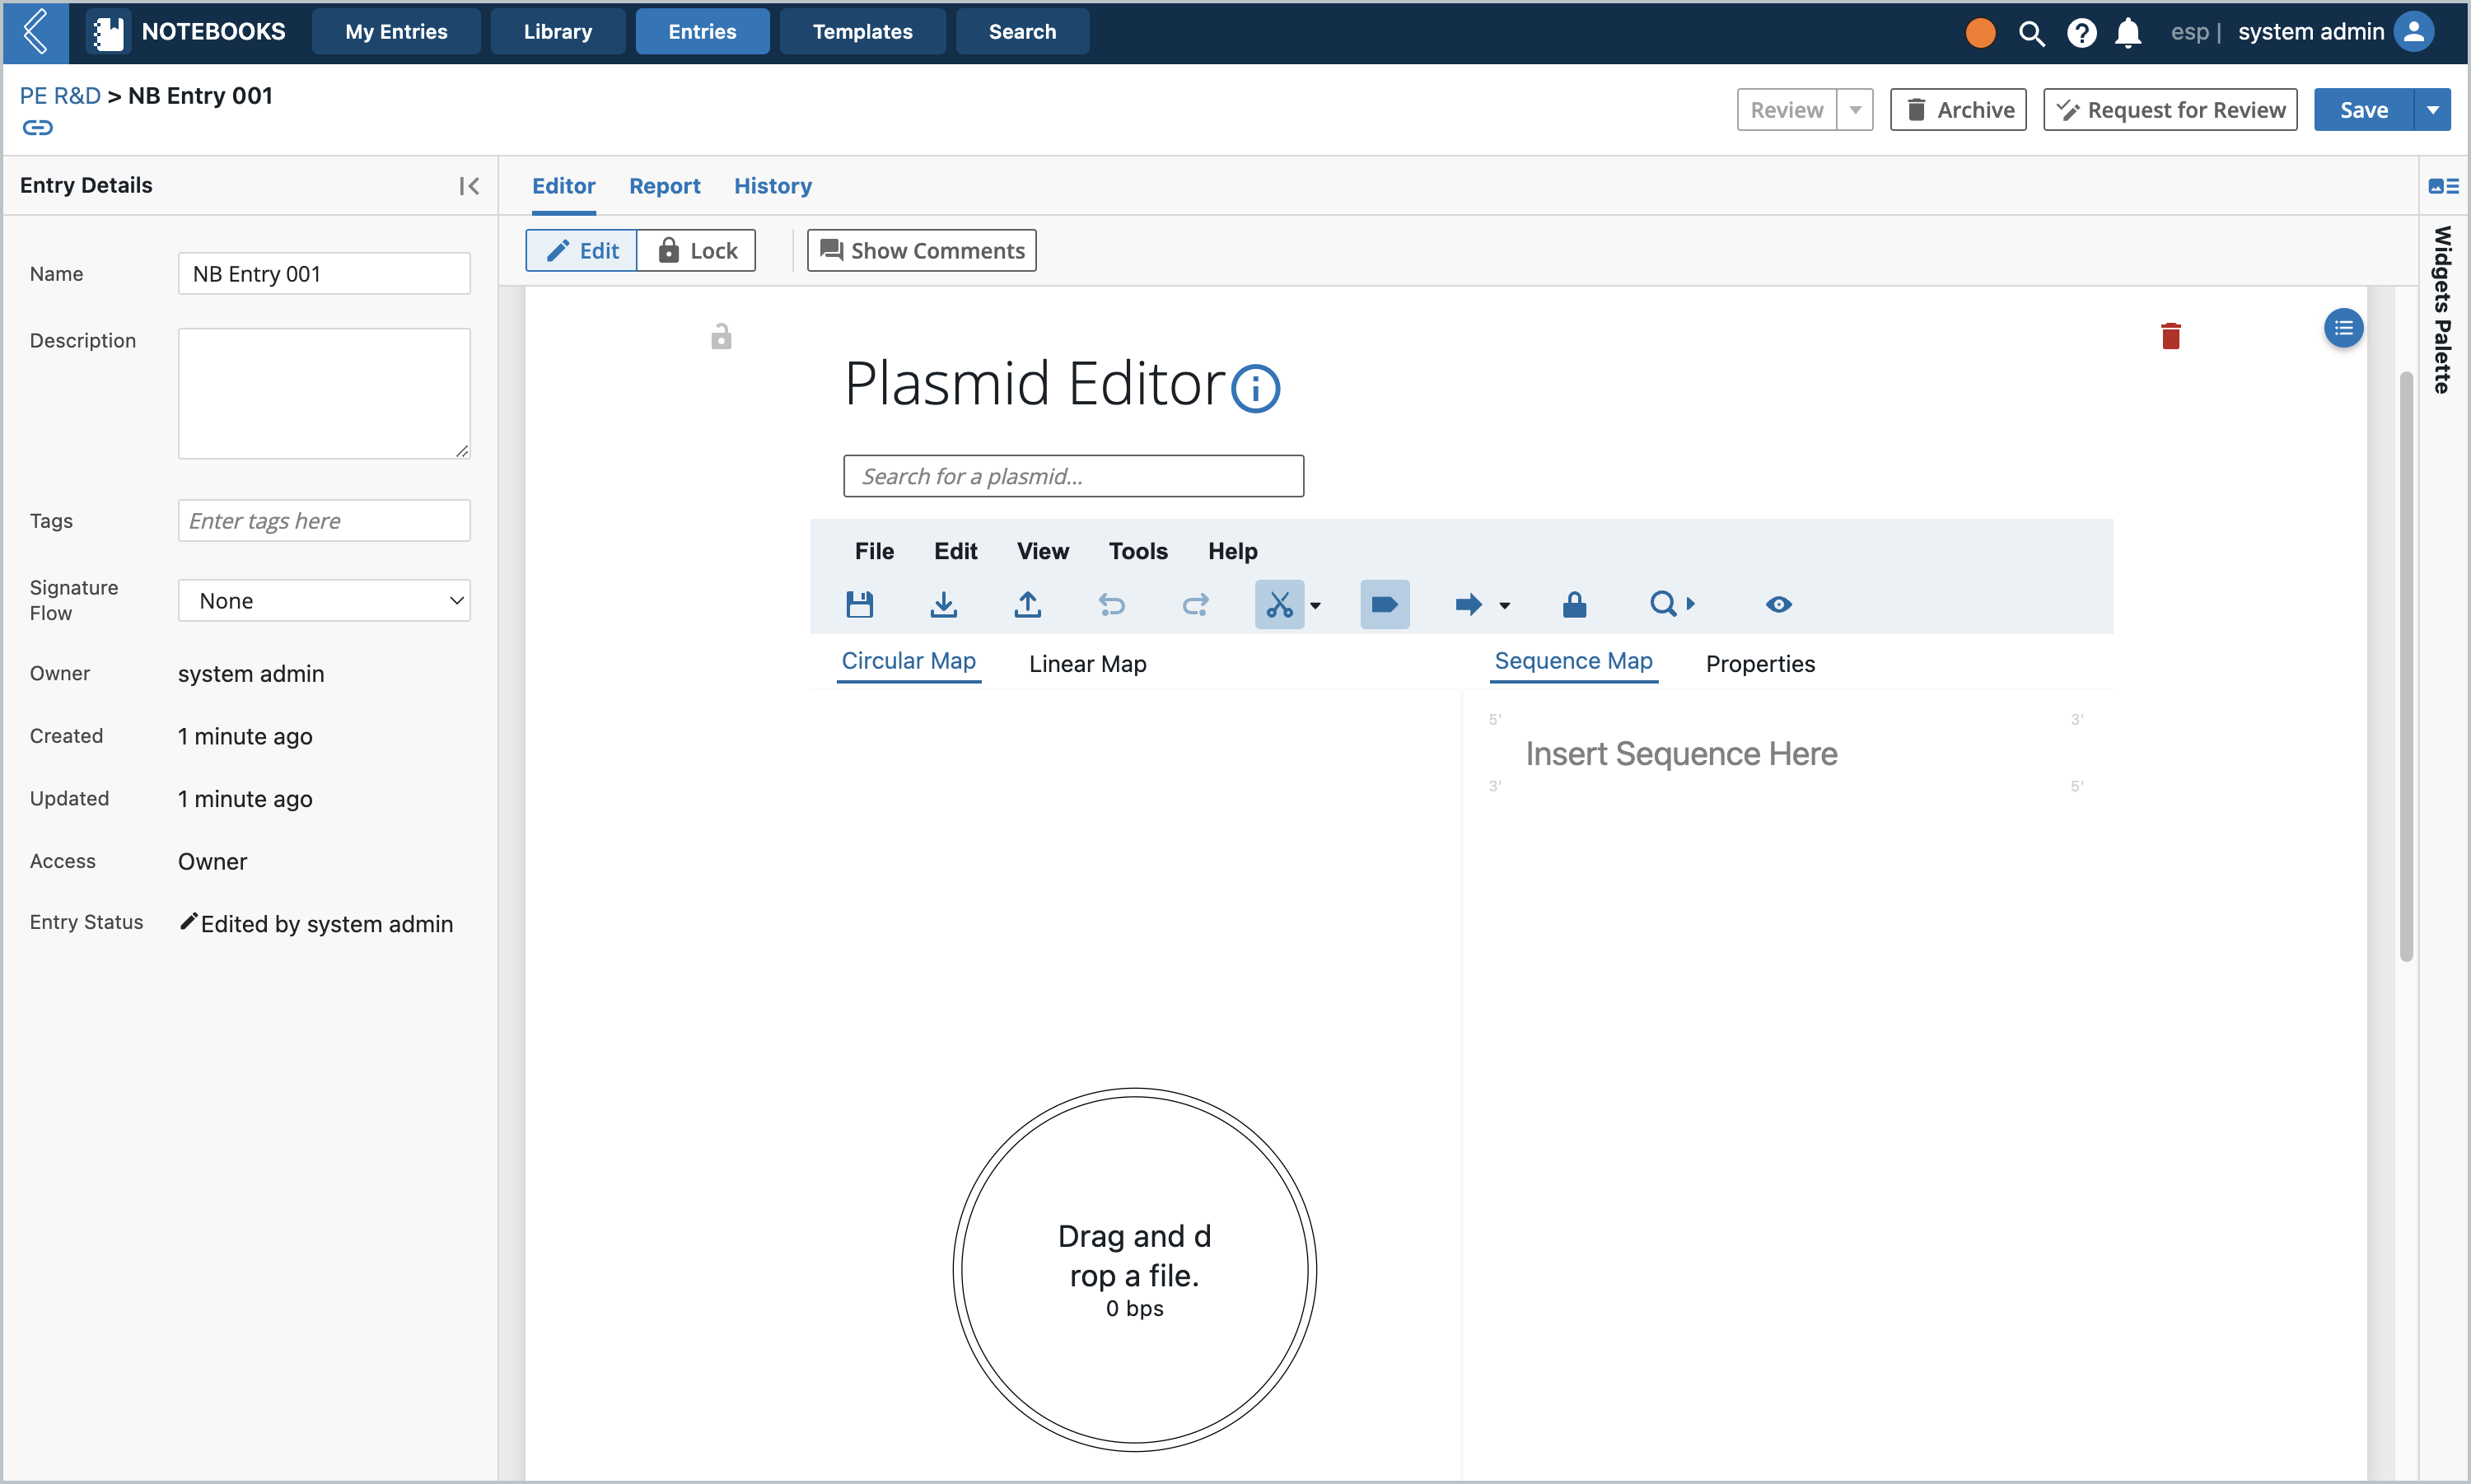
The L7 Notebooks widget is very similar to the applet, except that it is a widget. It should be loaded in its own Plasmids tab in the Notebook Entry as well as a template. Make a Notebook and an Entry, then you can drag in the widget.
Example Usage
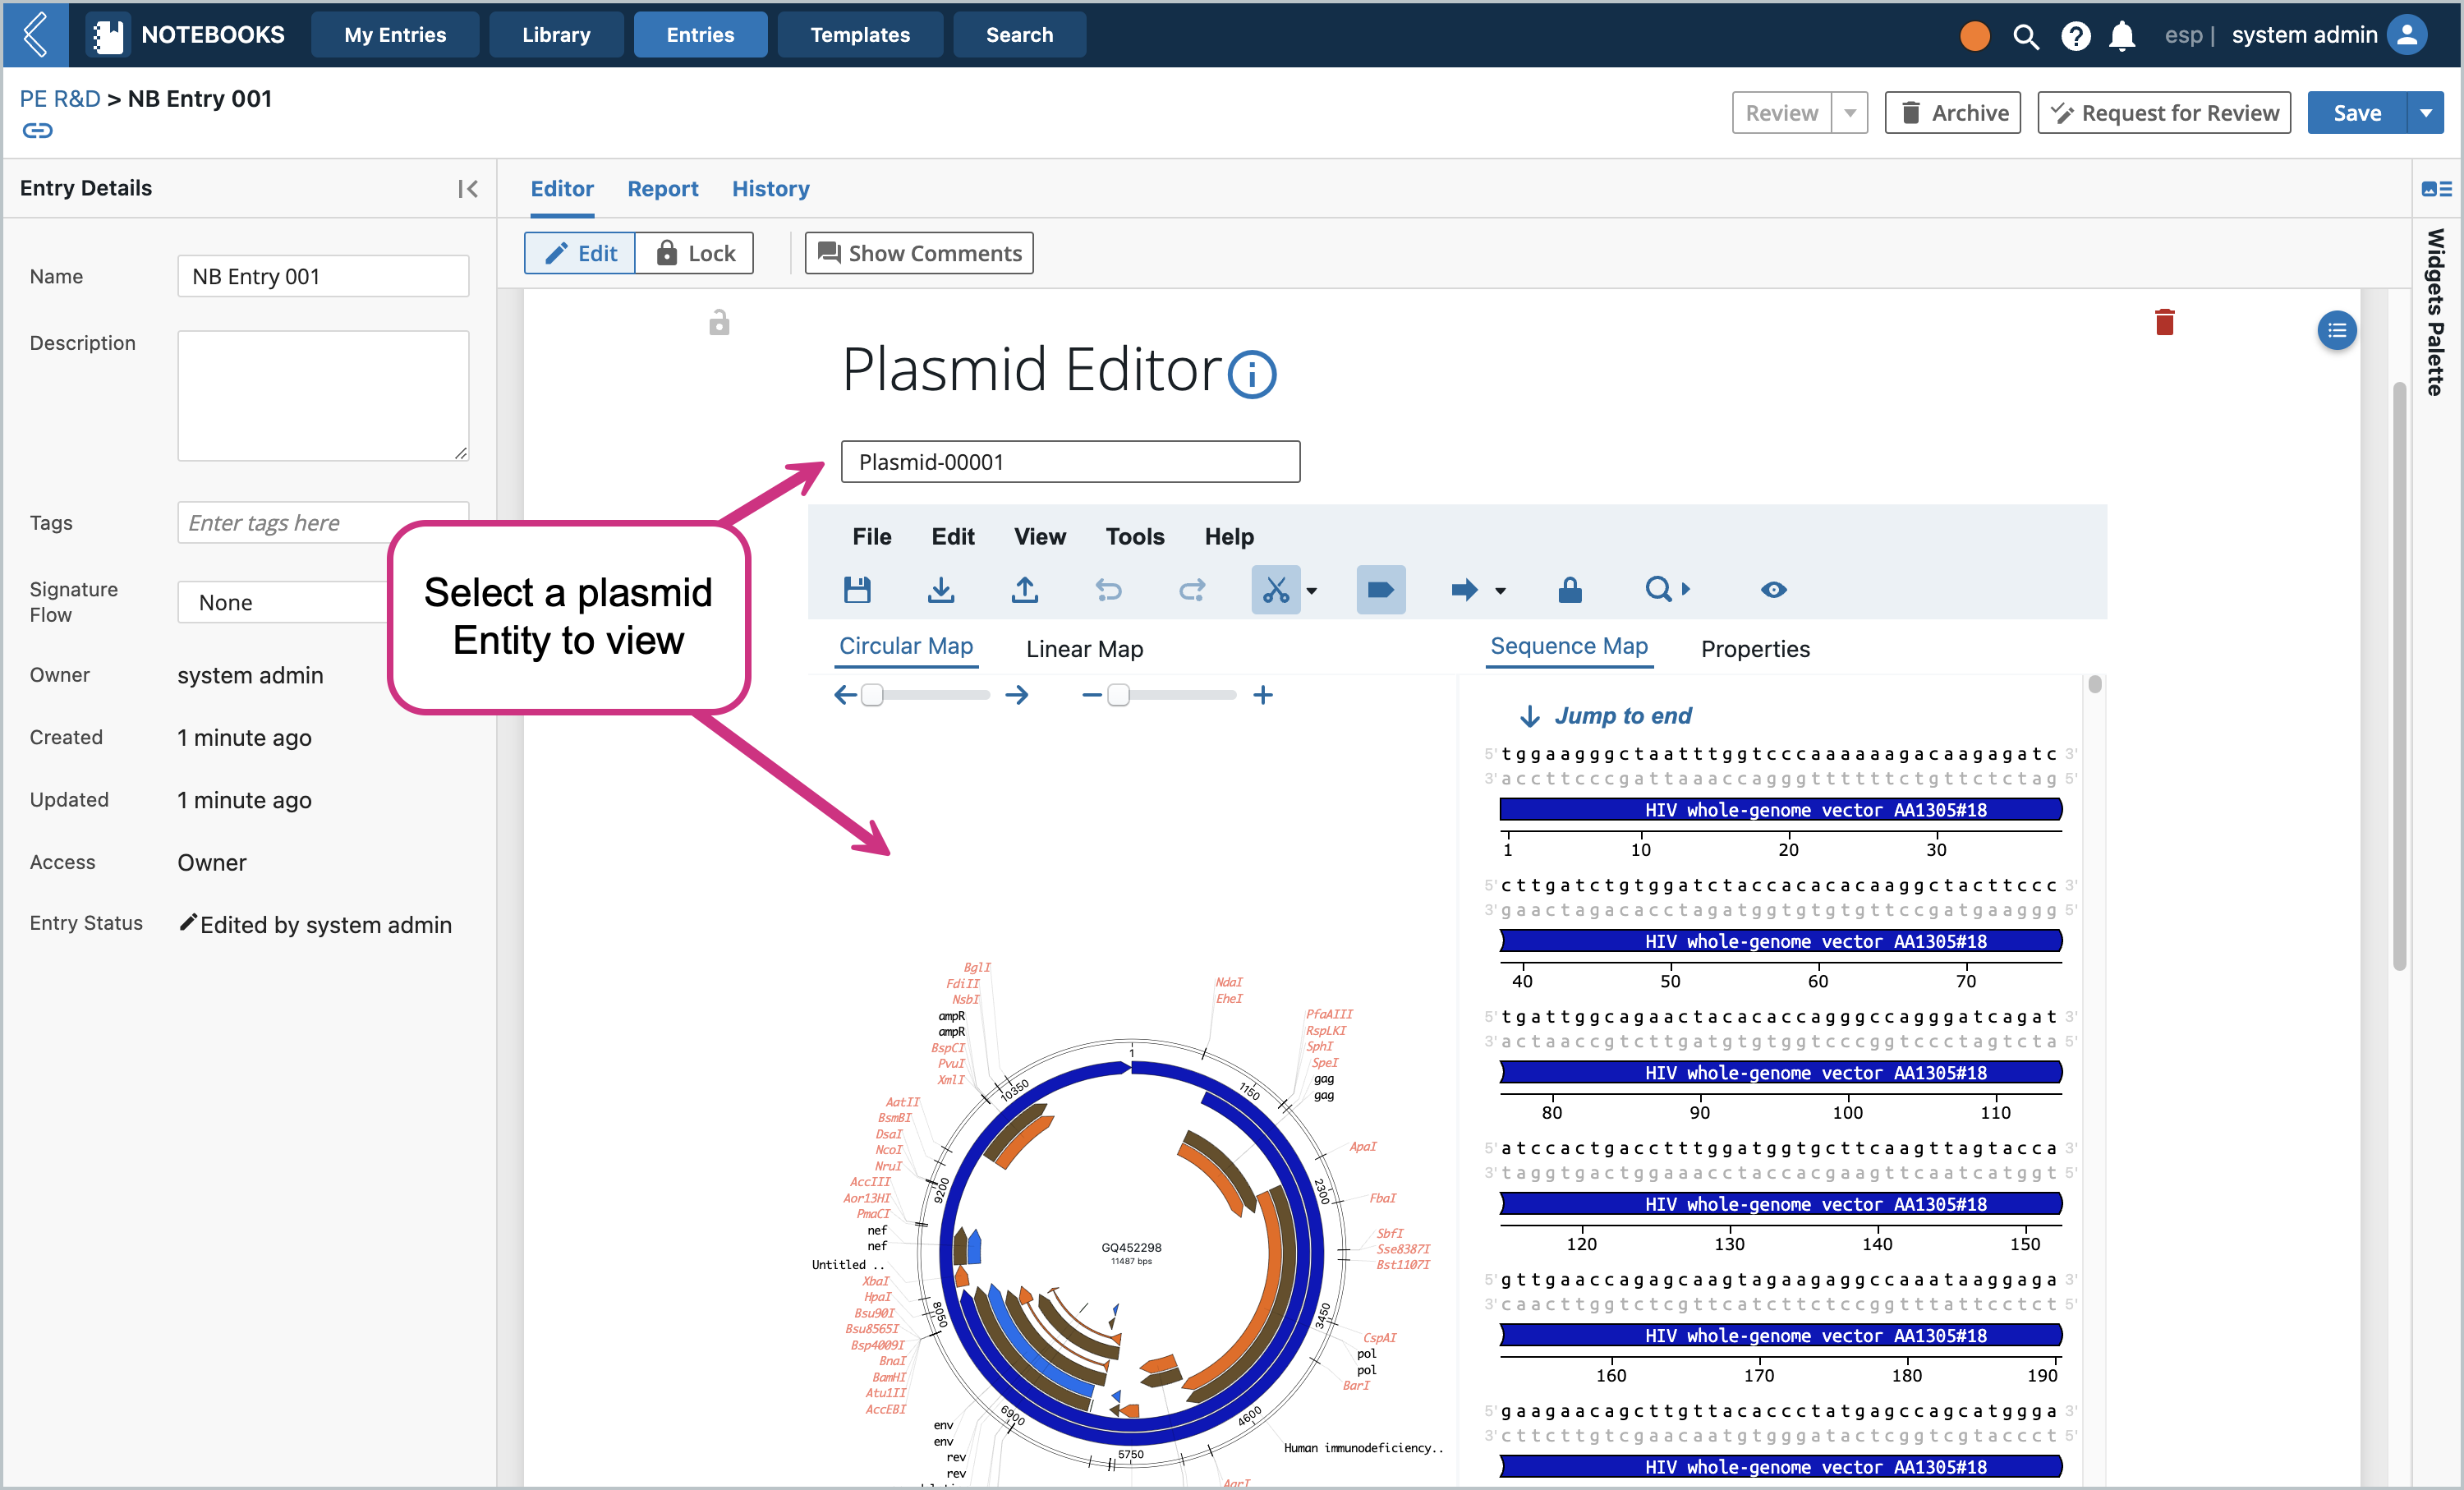
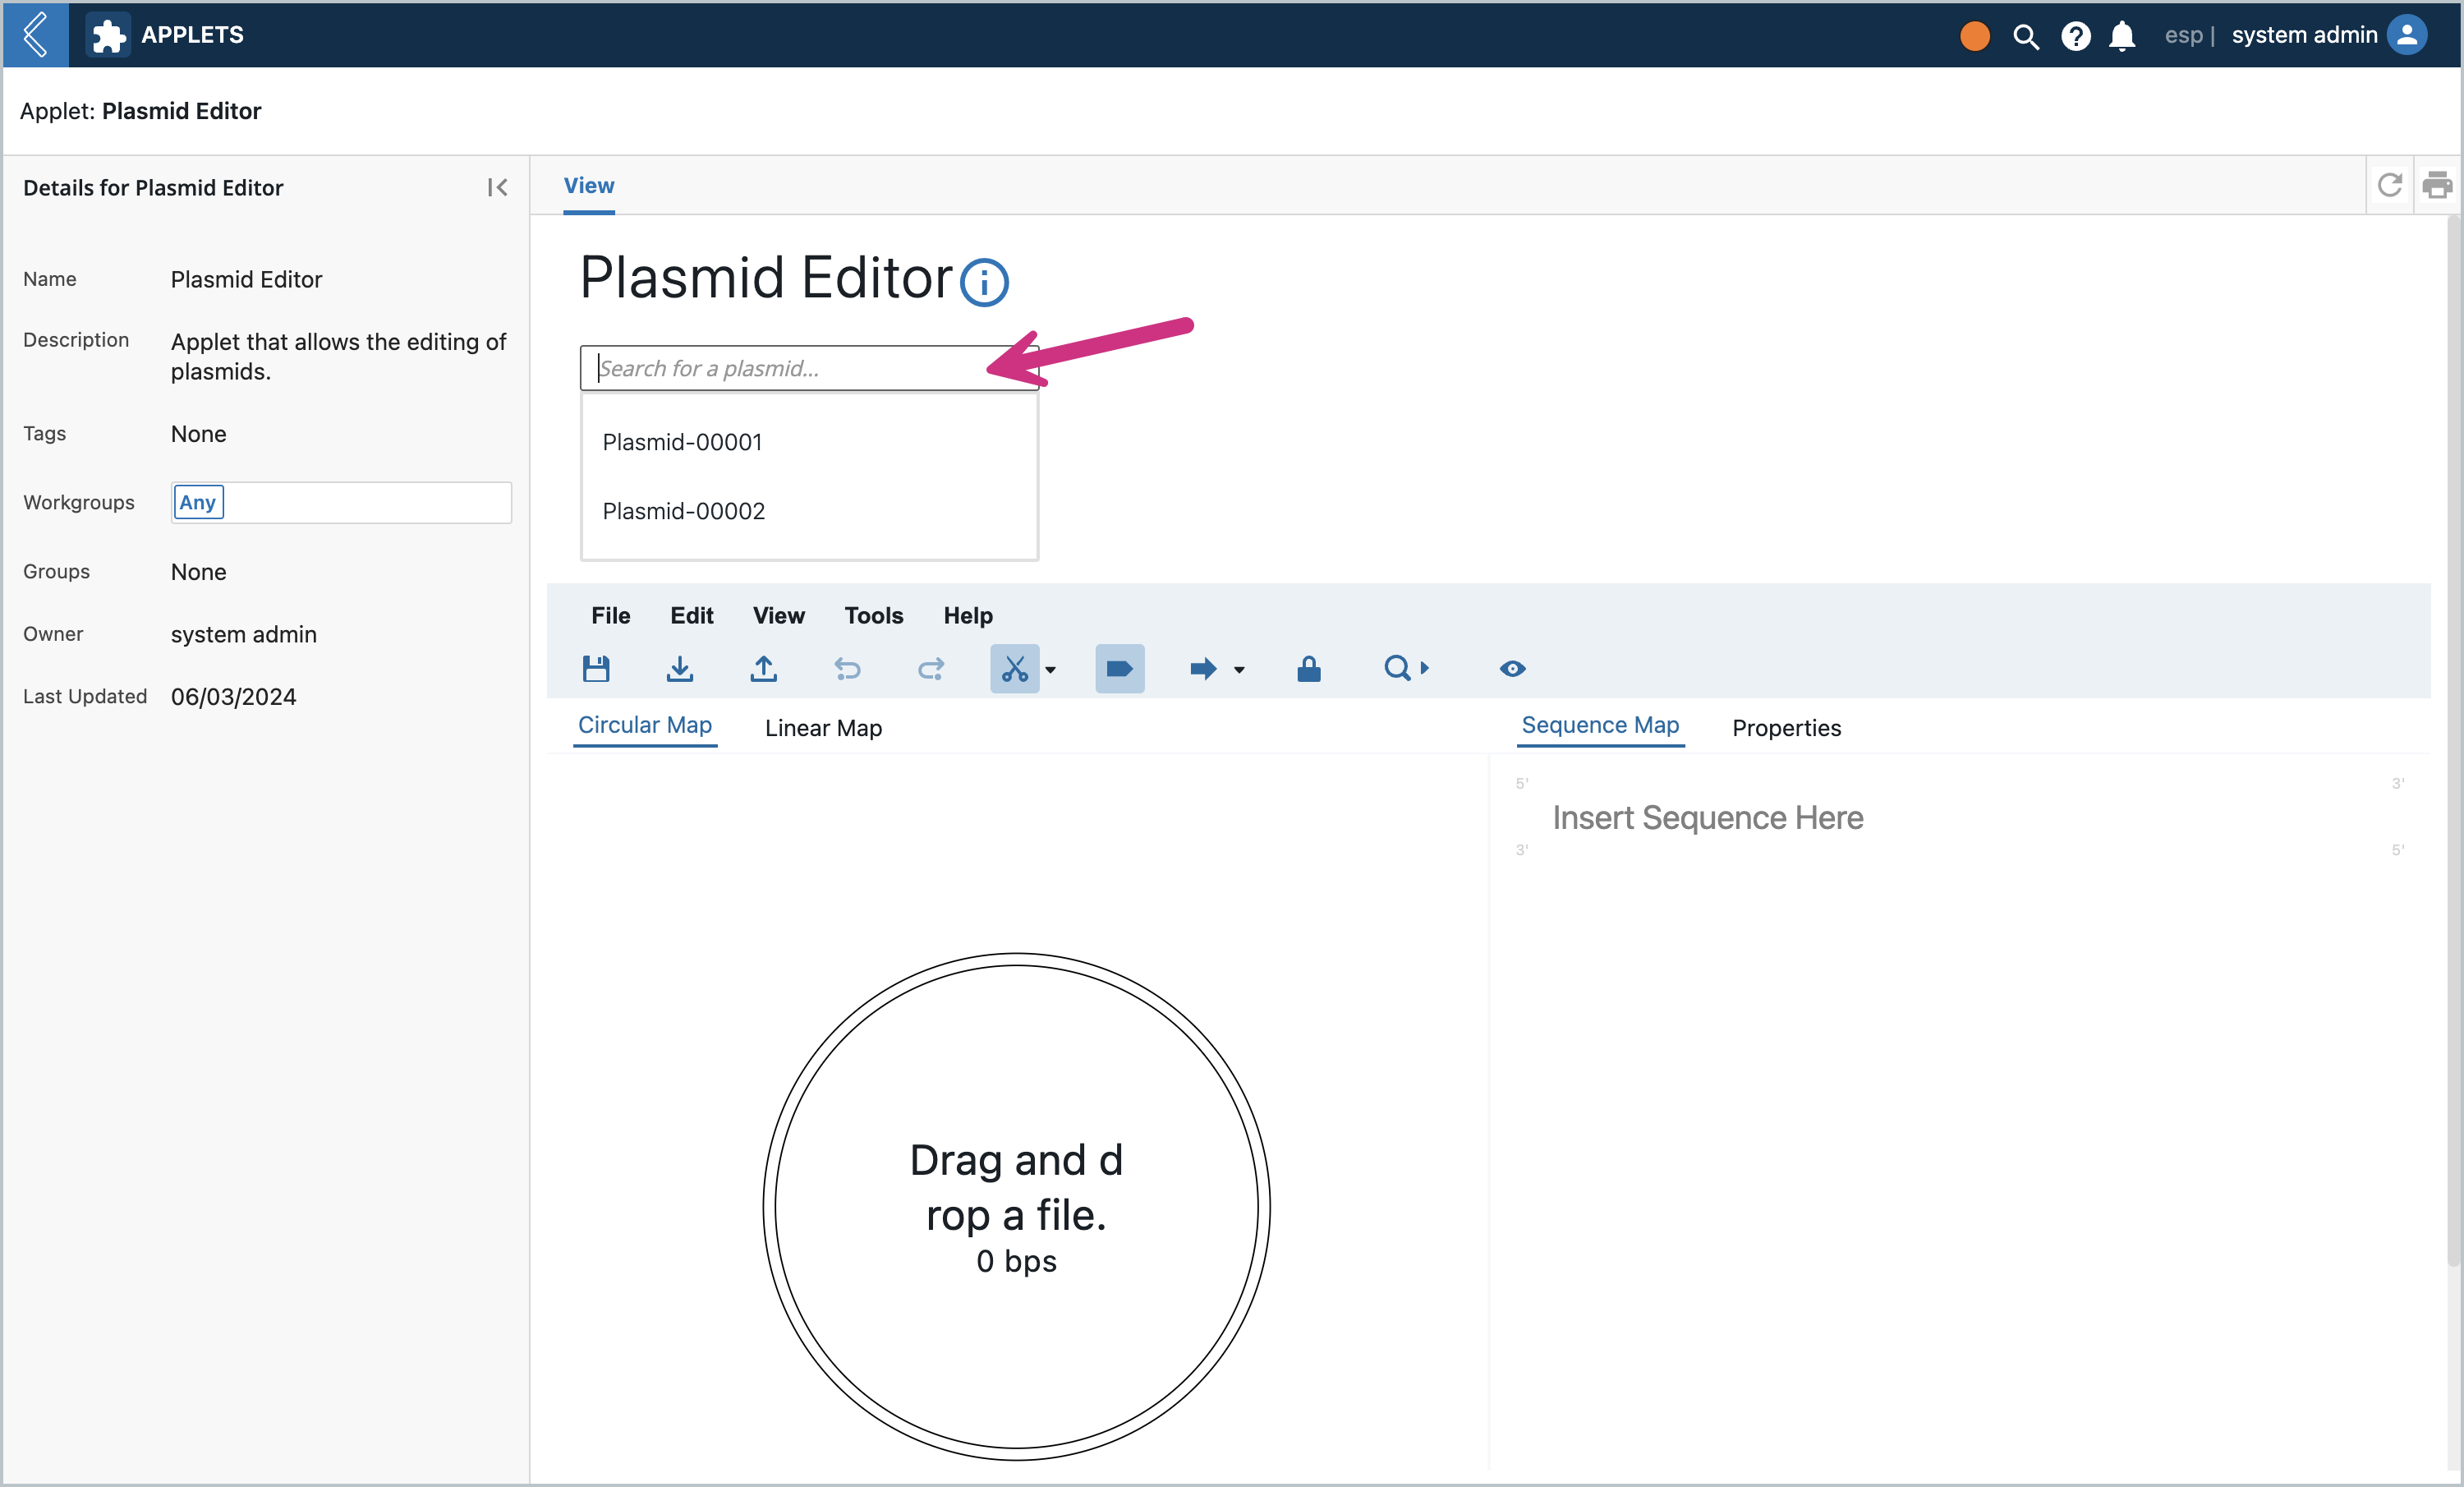
Load the applet and search for a Plasmid Entity created earlier. (Note: the dropdown can contain Entities of multiple Entity Types - anything that is a Plasmid Class). The dropdown will have a maximum of 5 entities for performance reasons.
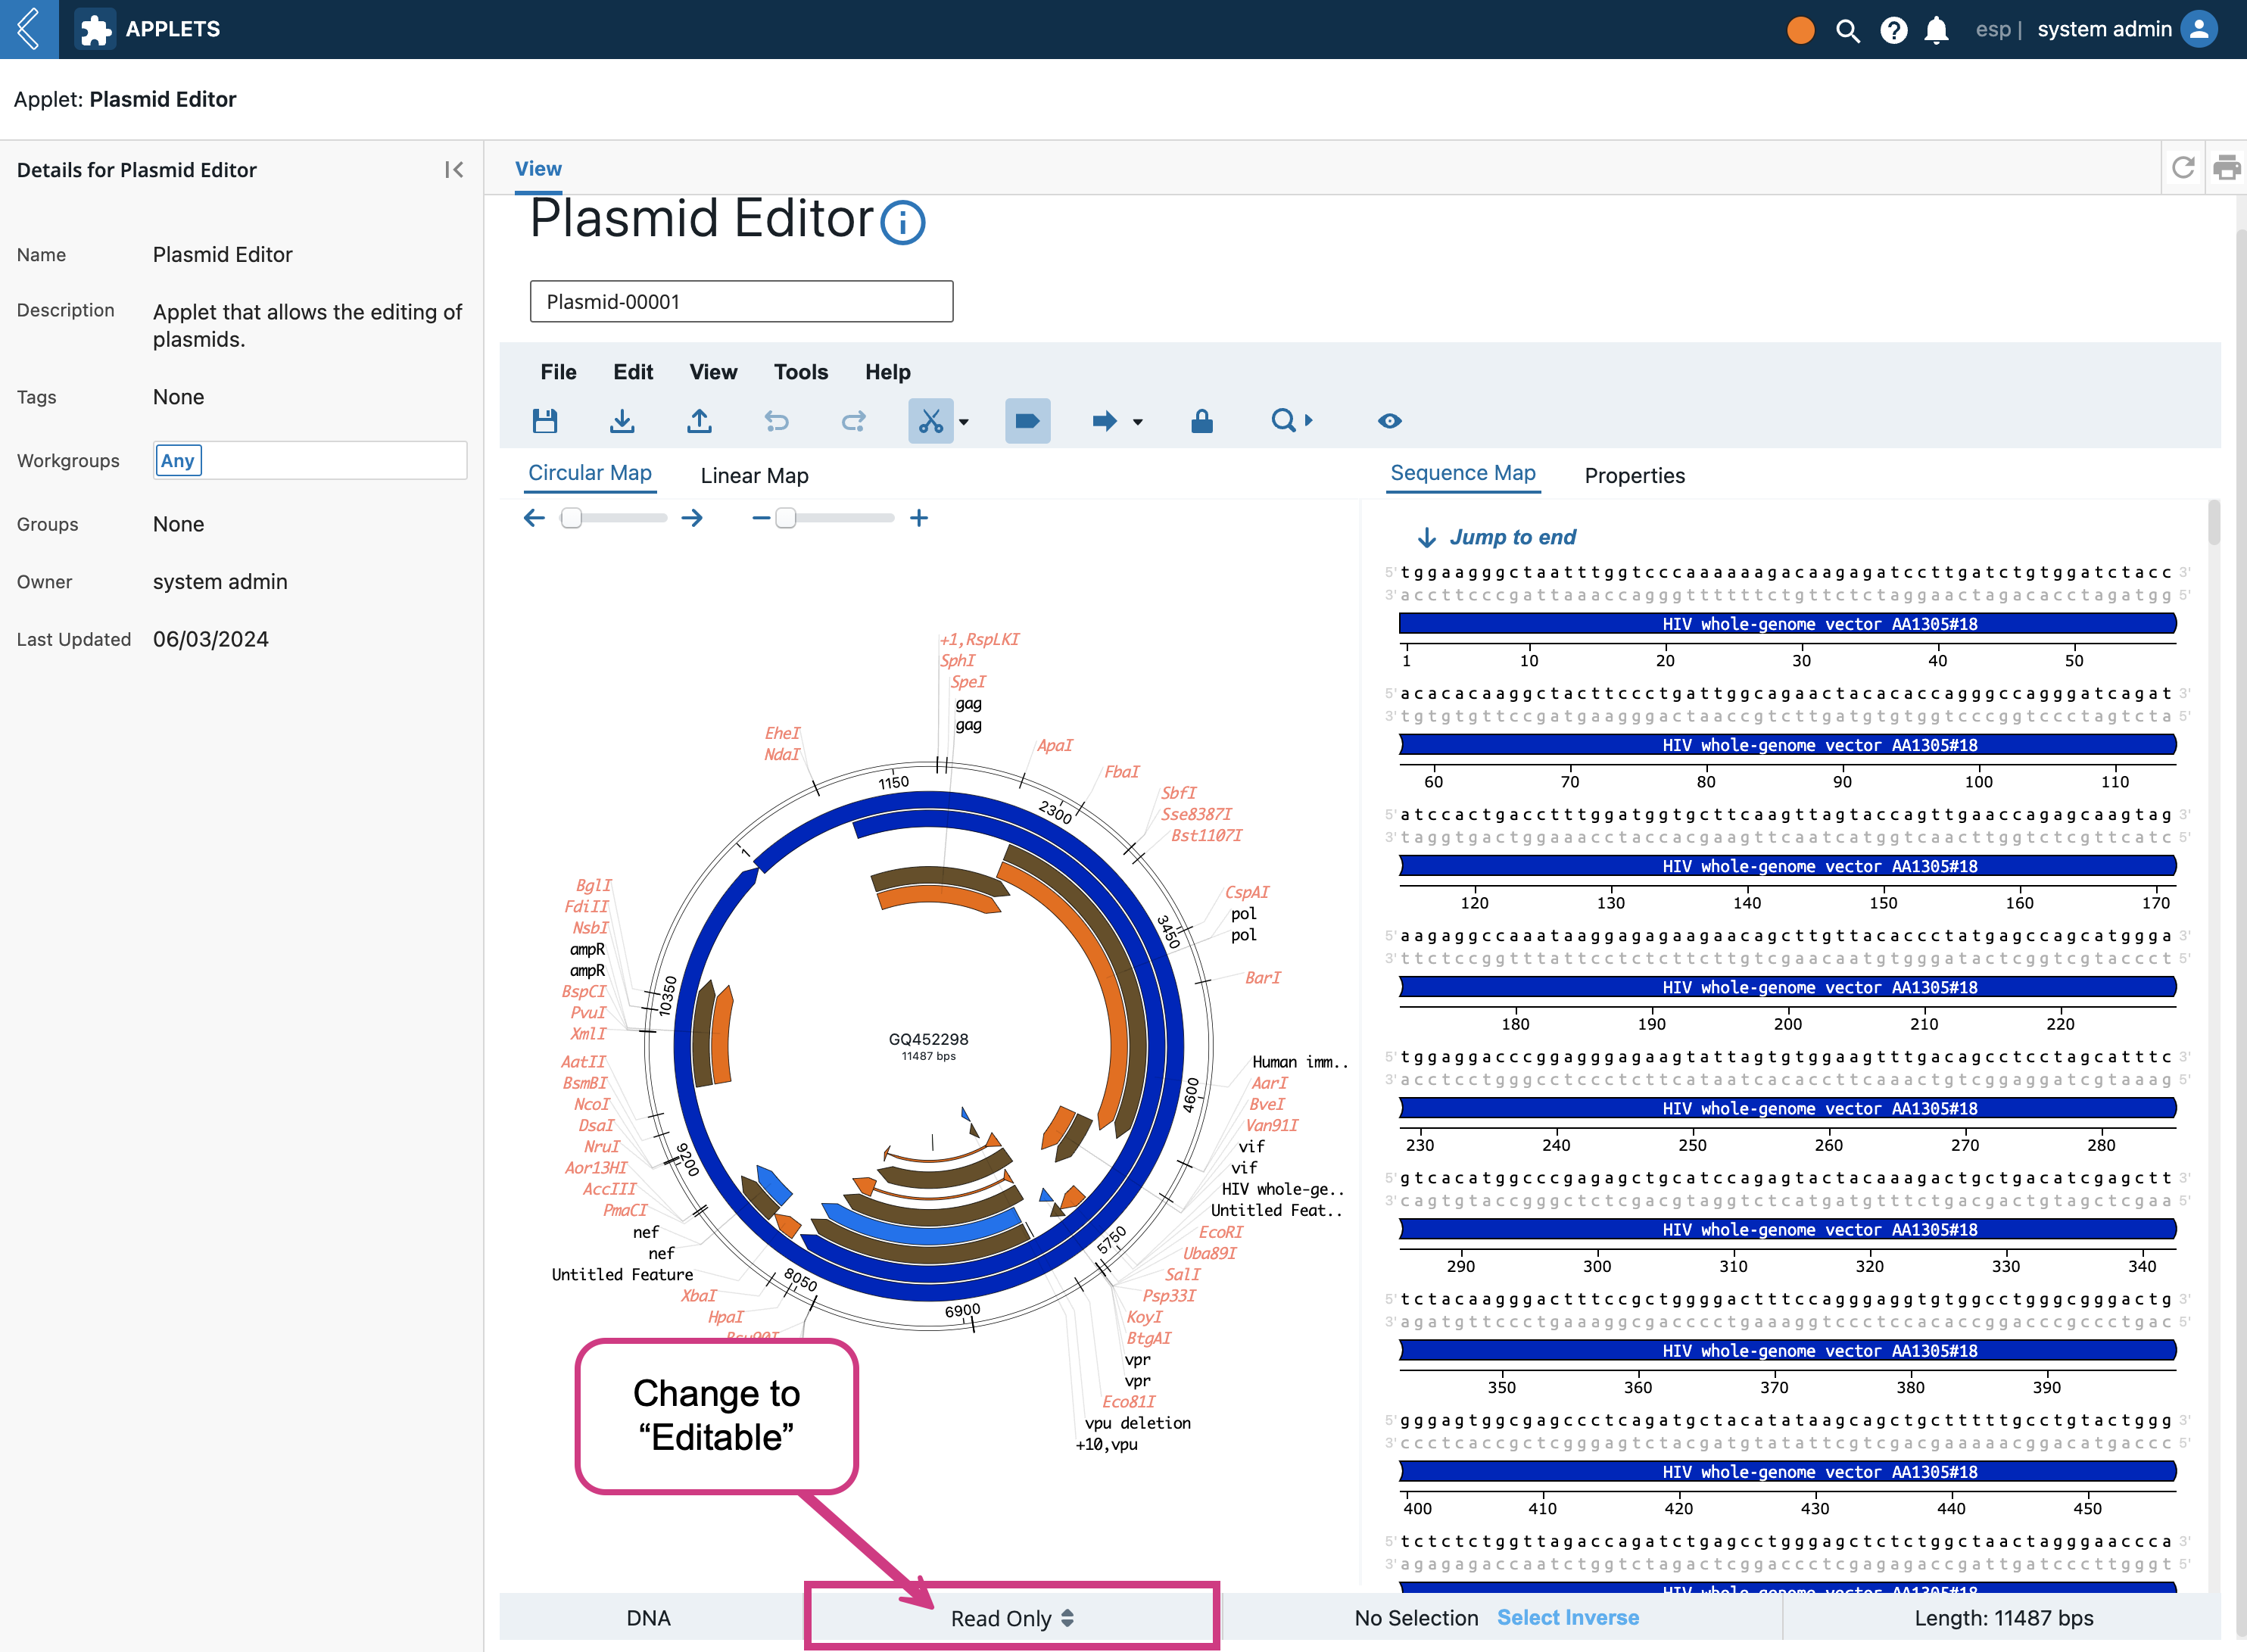
Once you click on the Entity name, the Plasmid Editor will load the Entity’s plasmid file in the editor. Then notice the “Read Only” toggle at the bottom..click it and change the state to “Editable”.
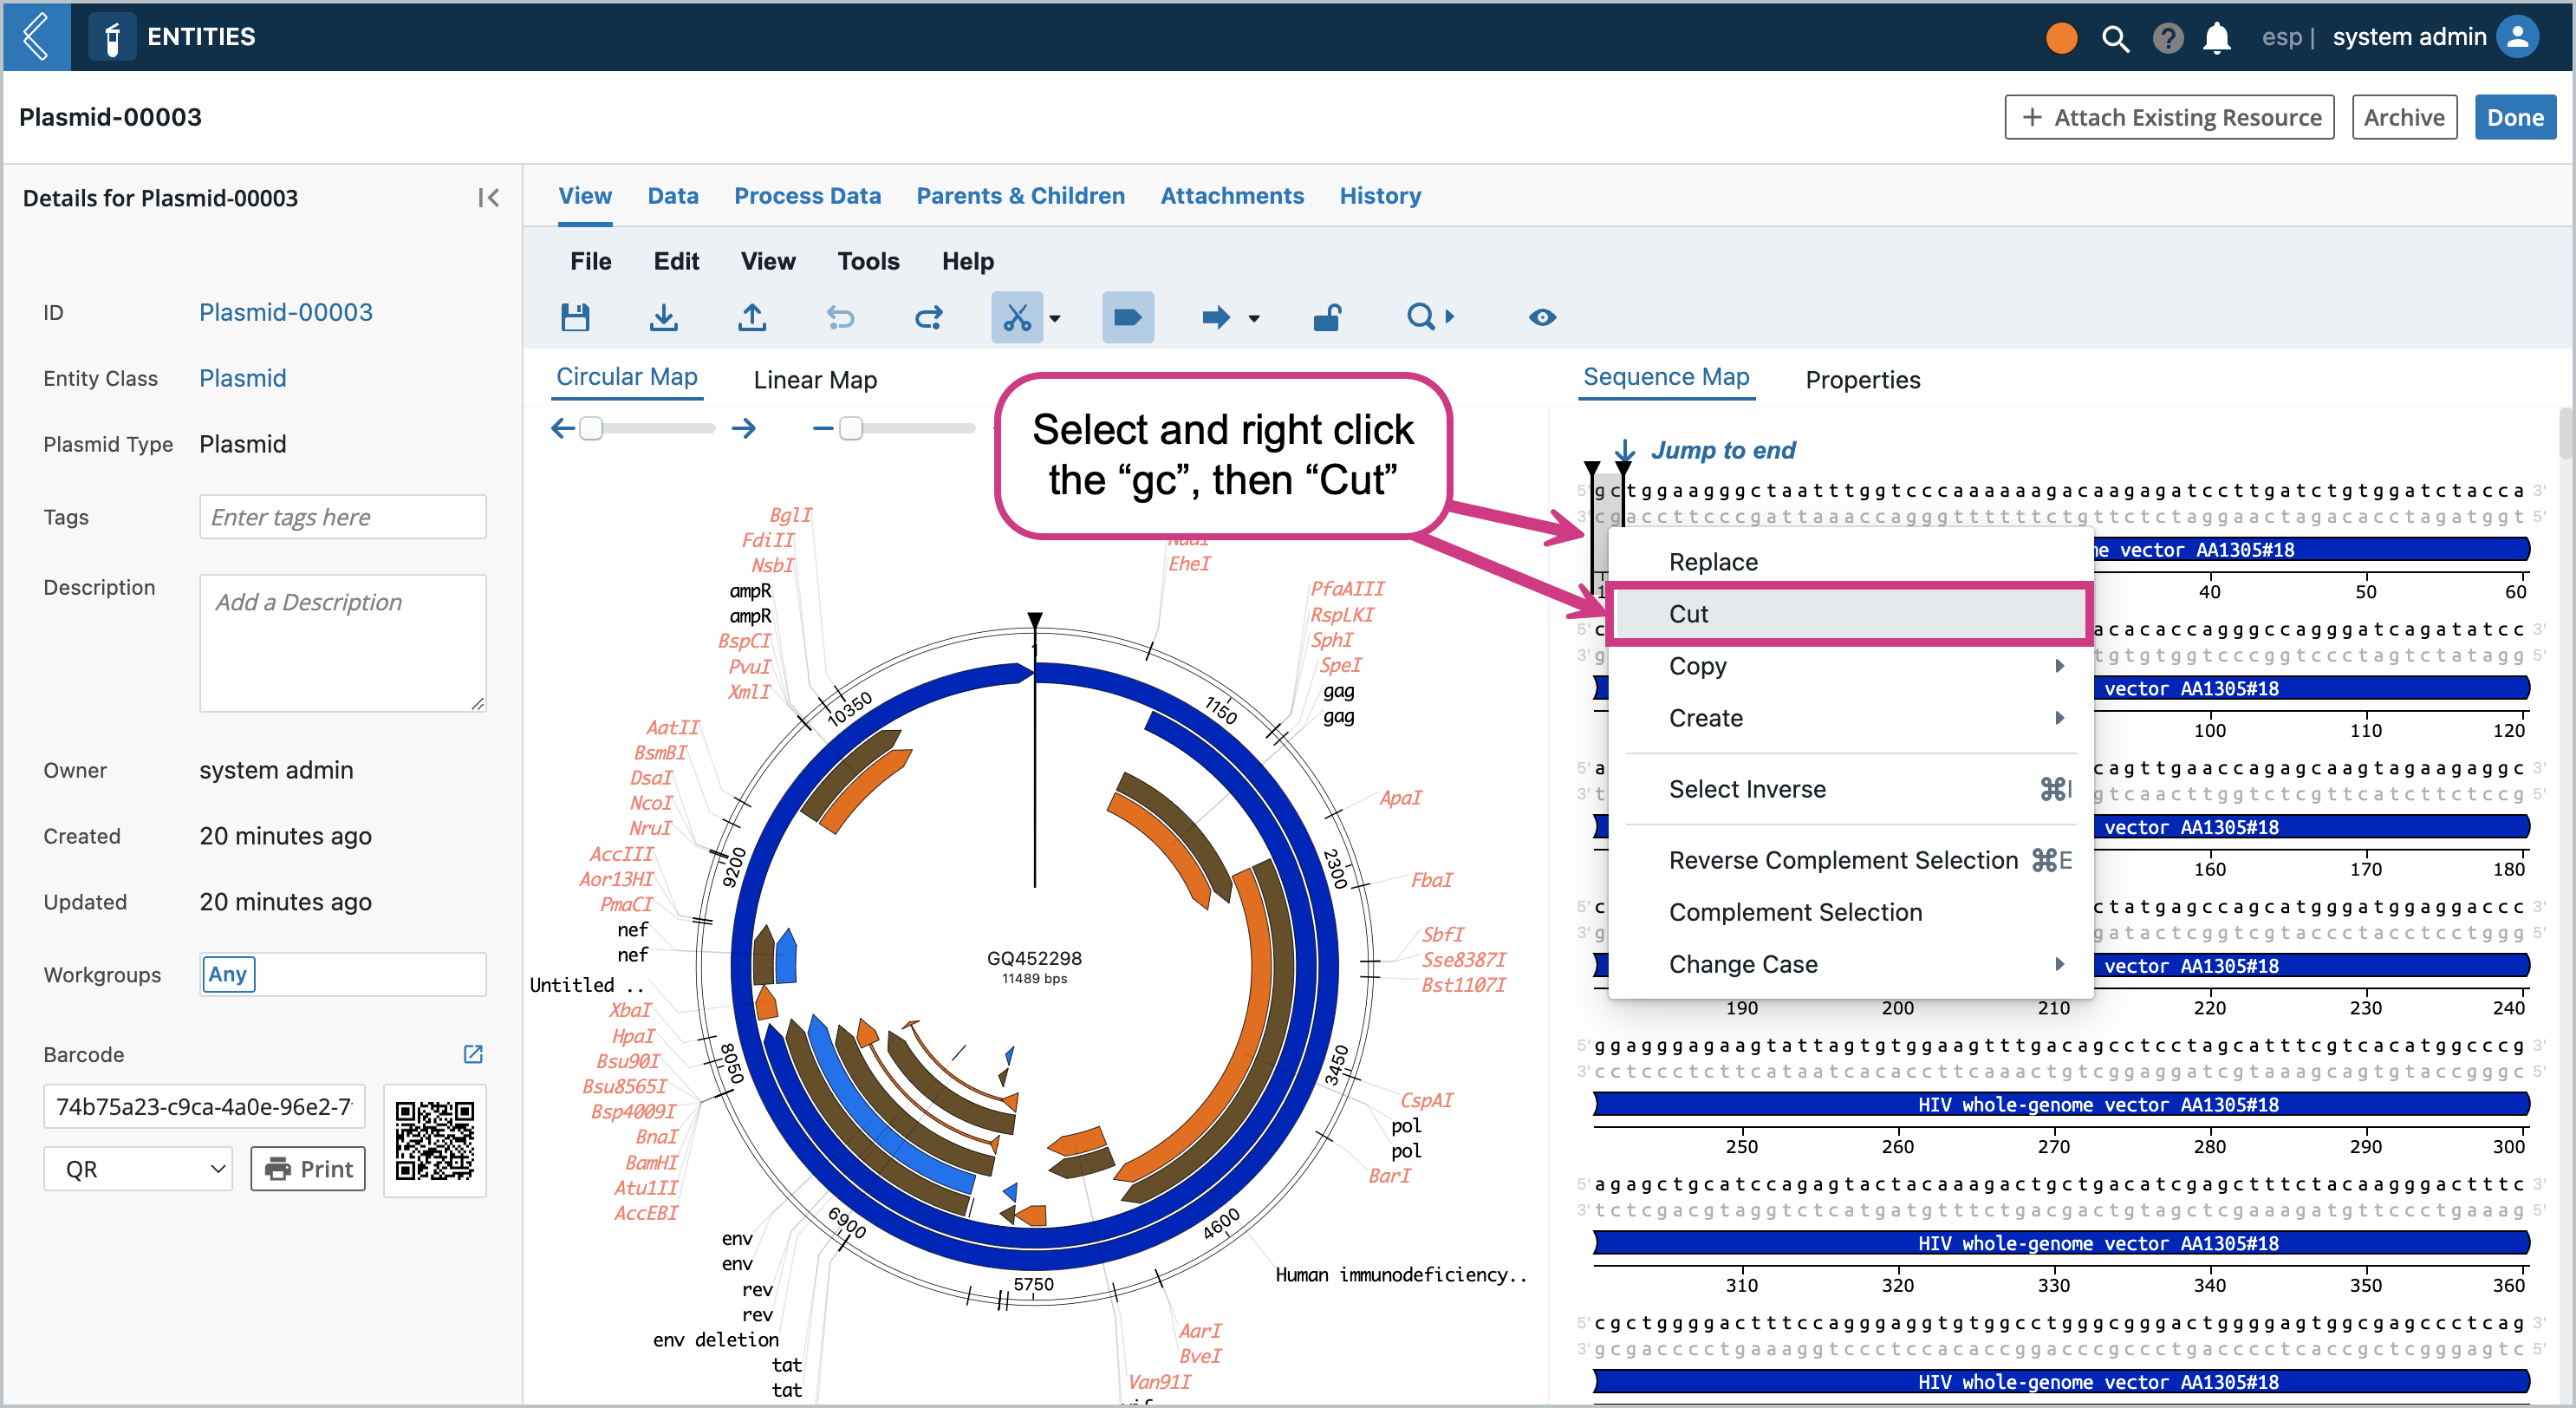
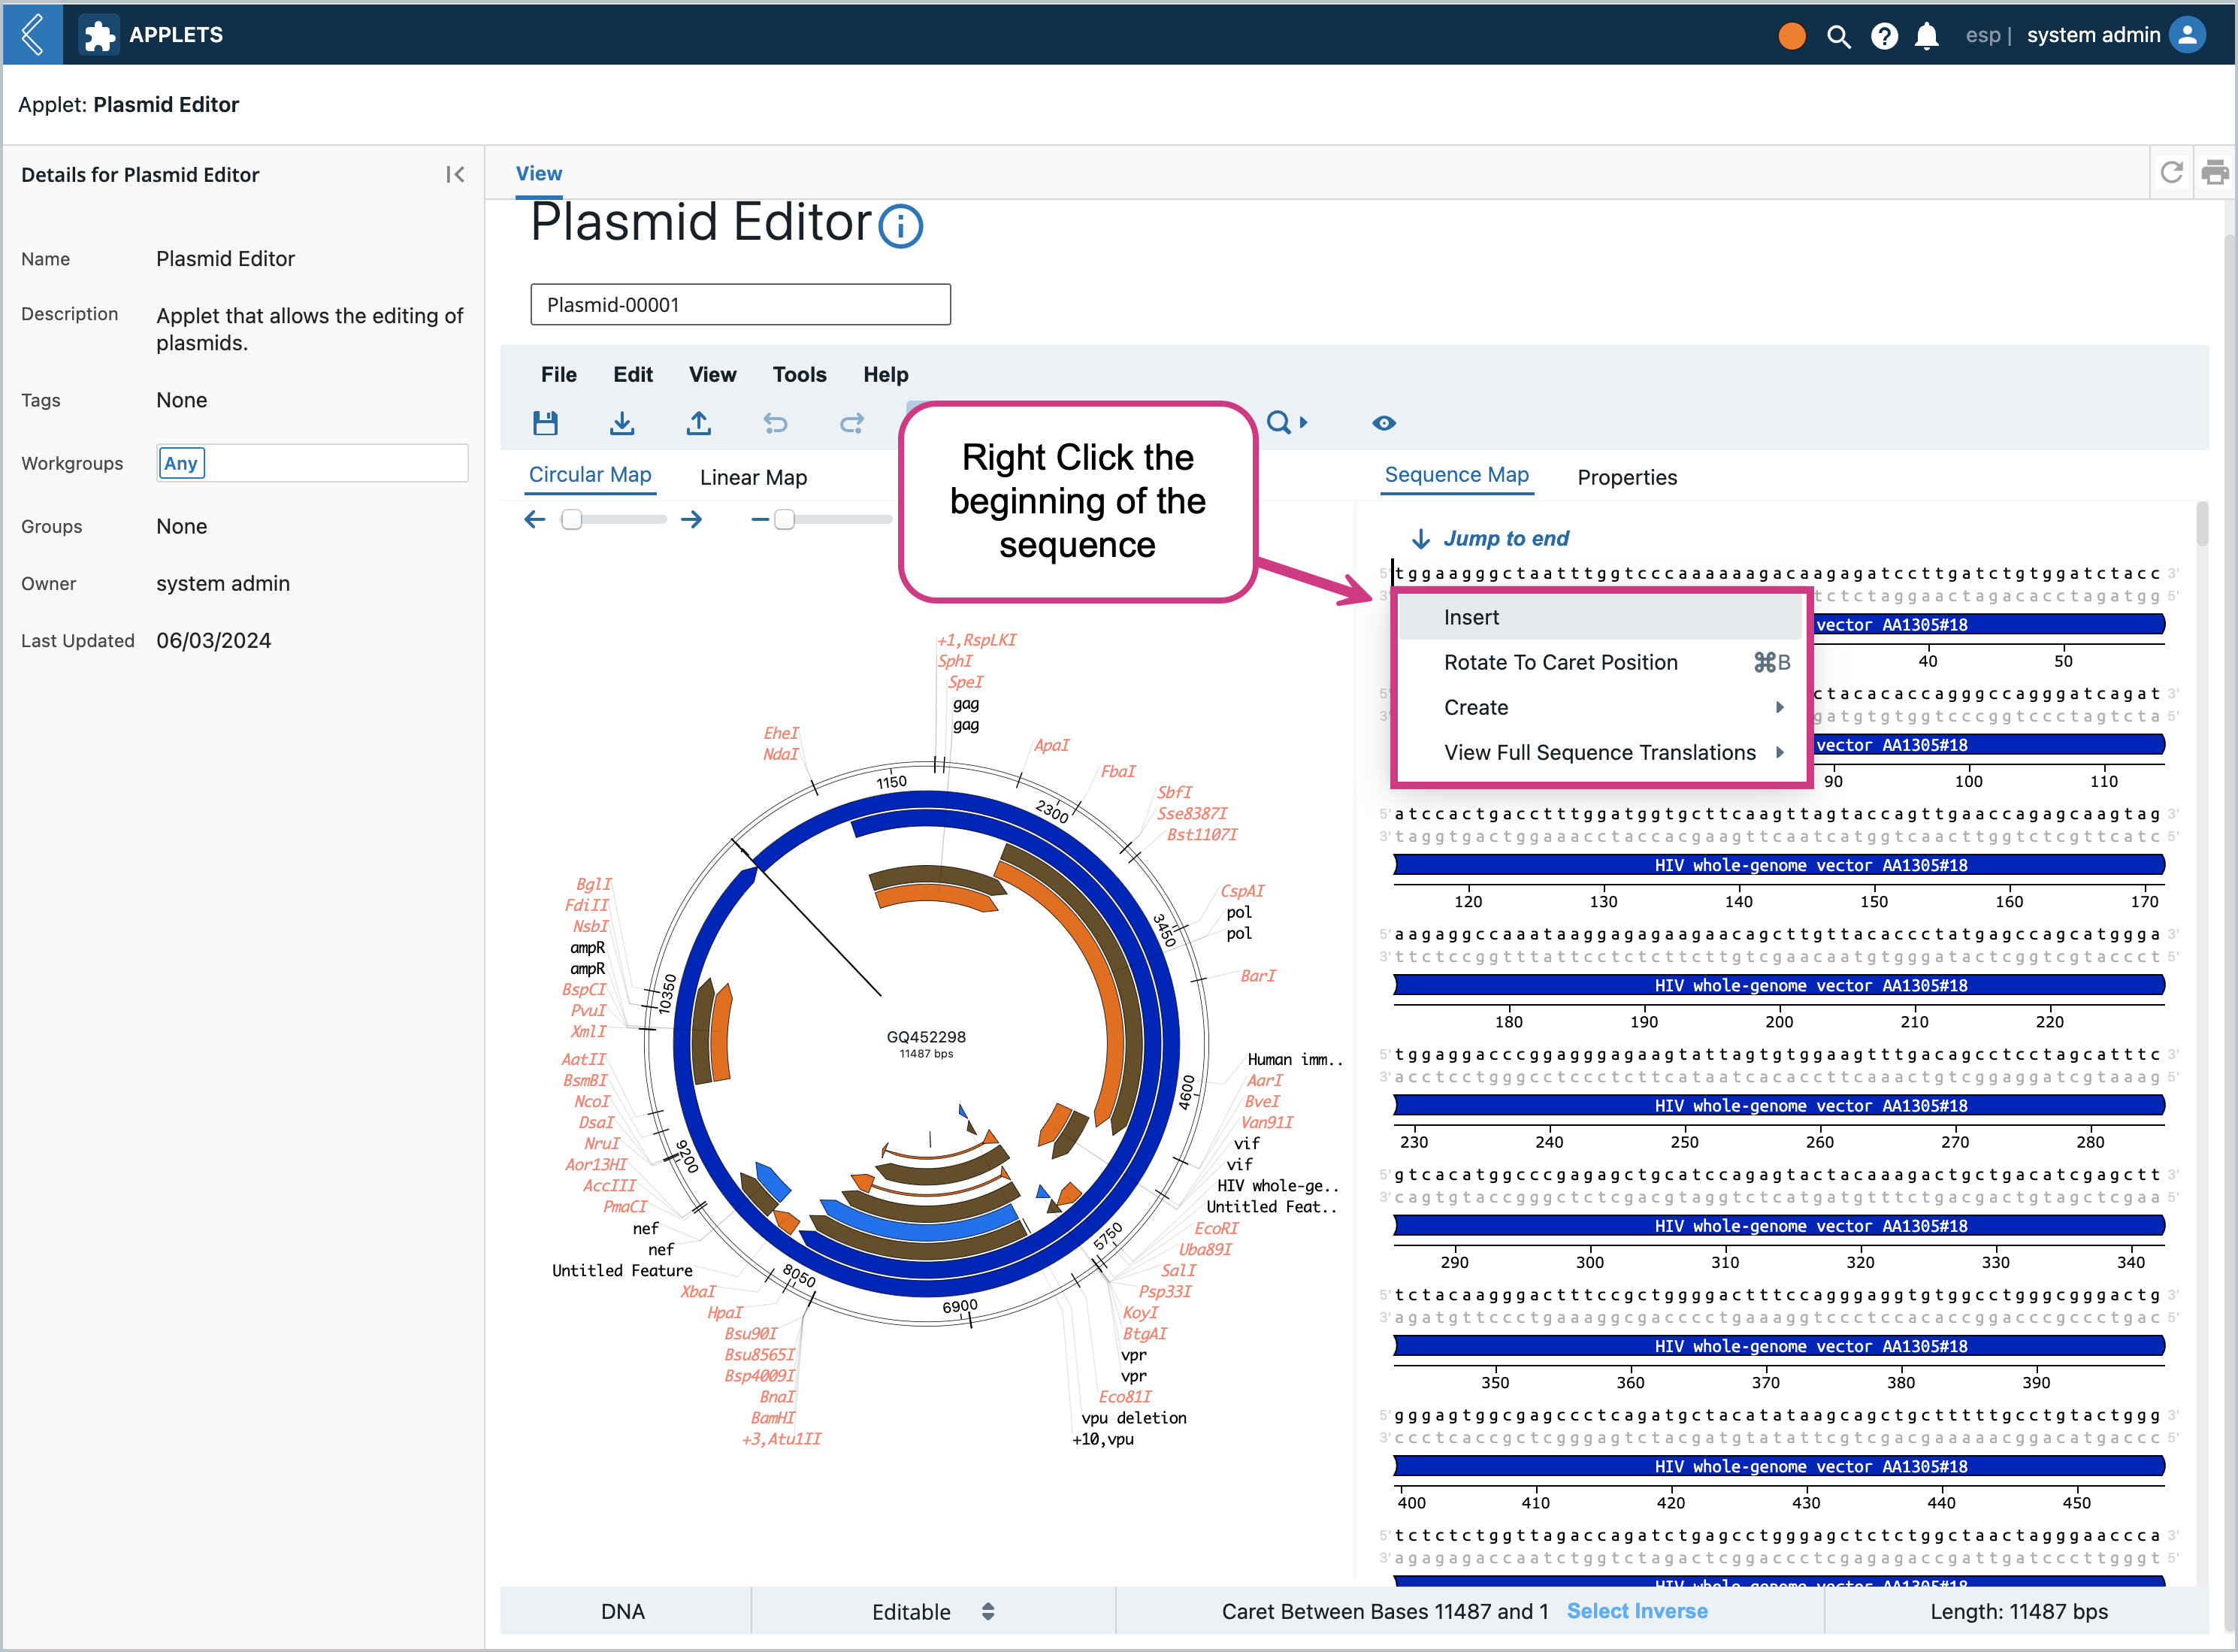
Once the editor is in editable mode, there are many features you can modify/add/delete that the OVE library enables. For example, we can right click the the beginning of the sequence and click “Insert”
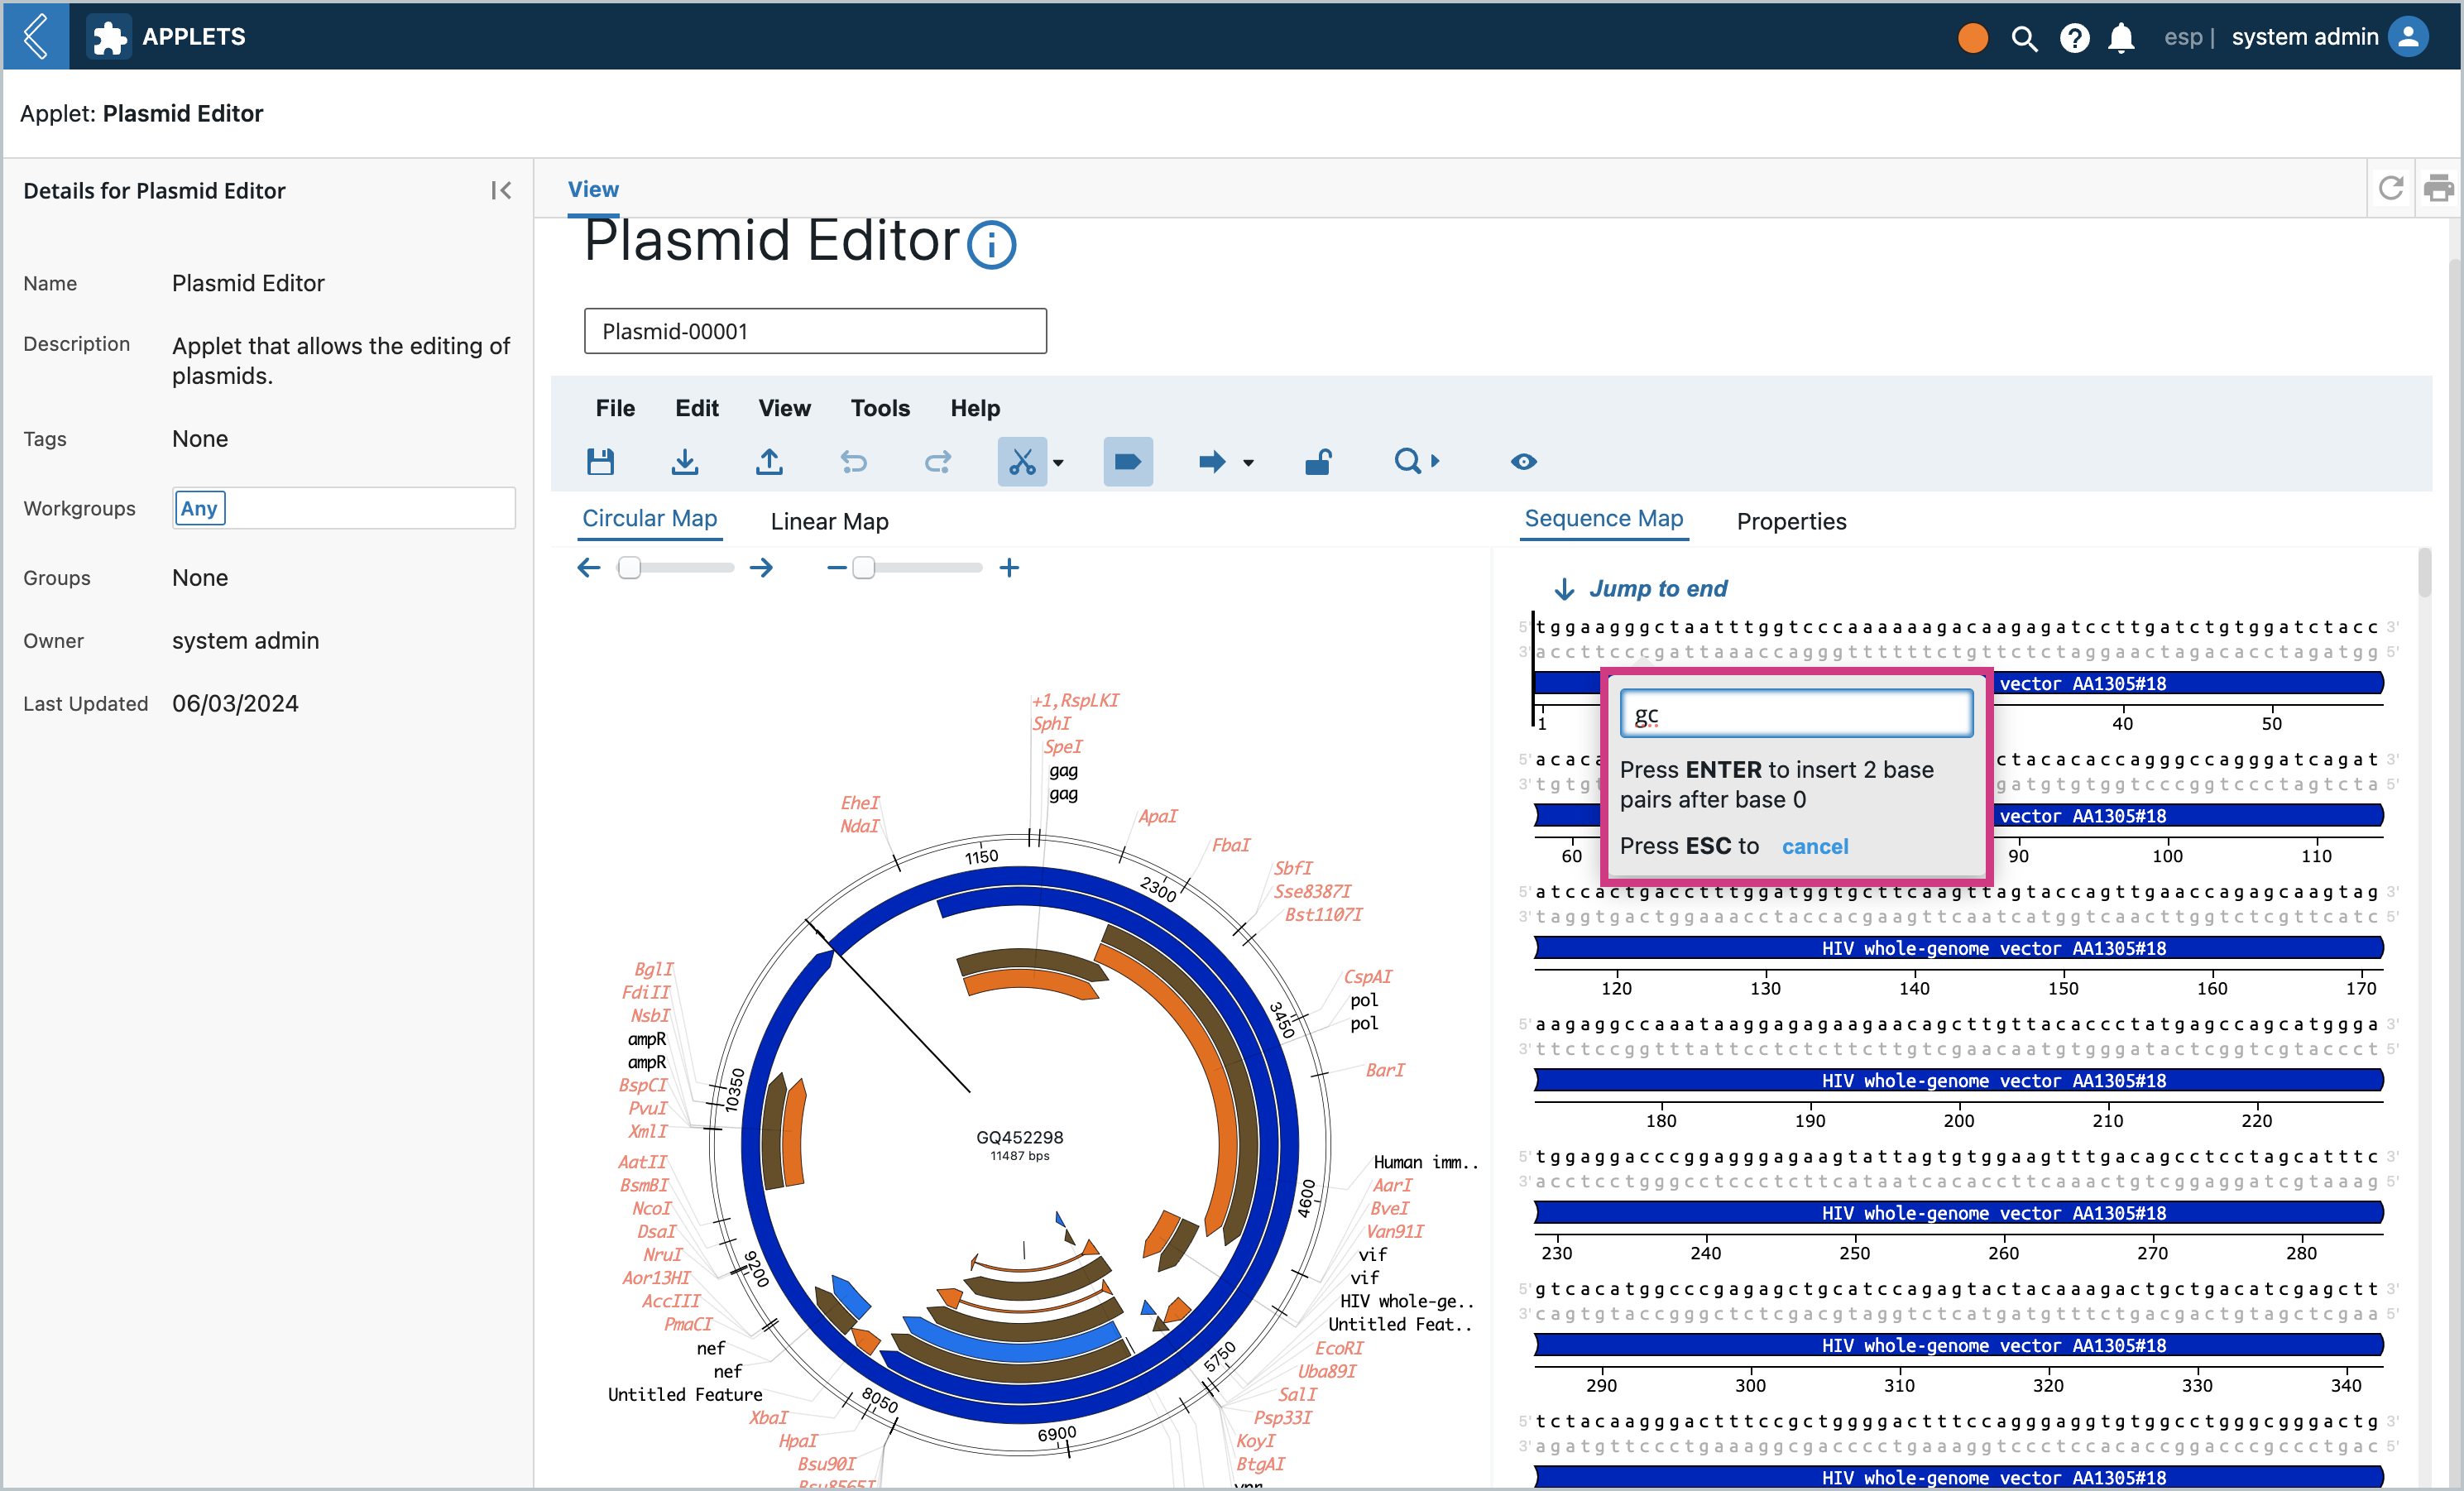
This will pop up a modal where we can insert into the sequence. Let’s add “gc” to the beginning of the sequence so that it’s easy to spot later on. Type in “gc” and press enter
You will notice the “gc” base pairs were inserted at the beginning of the sequence
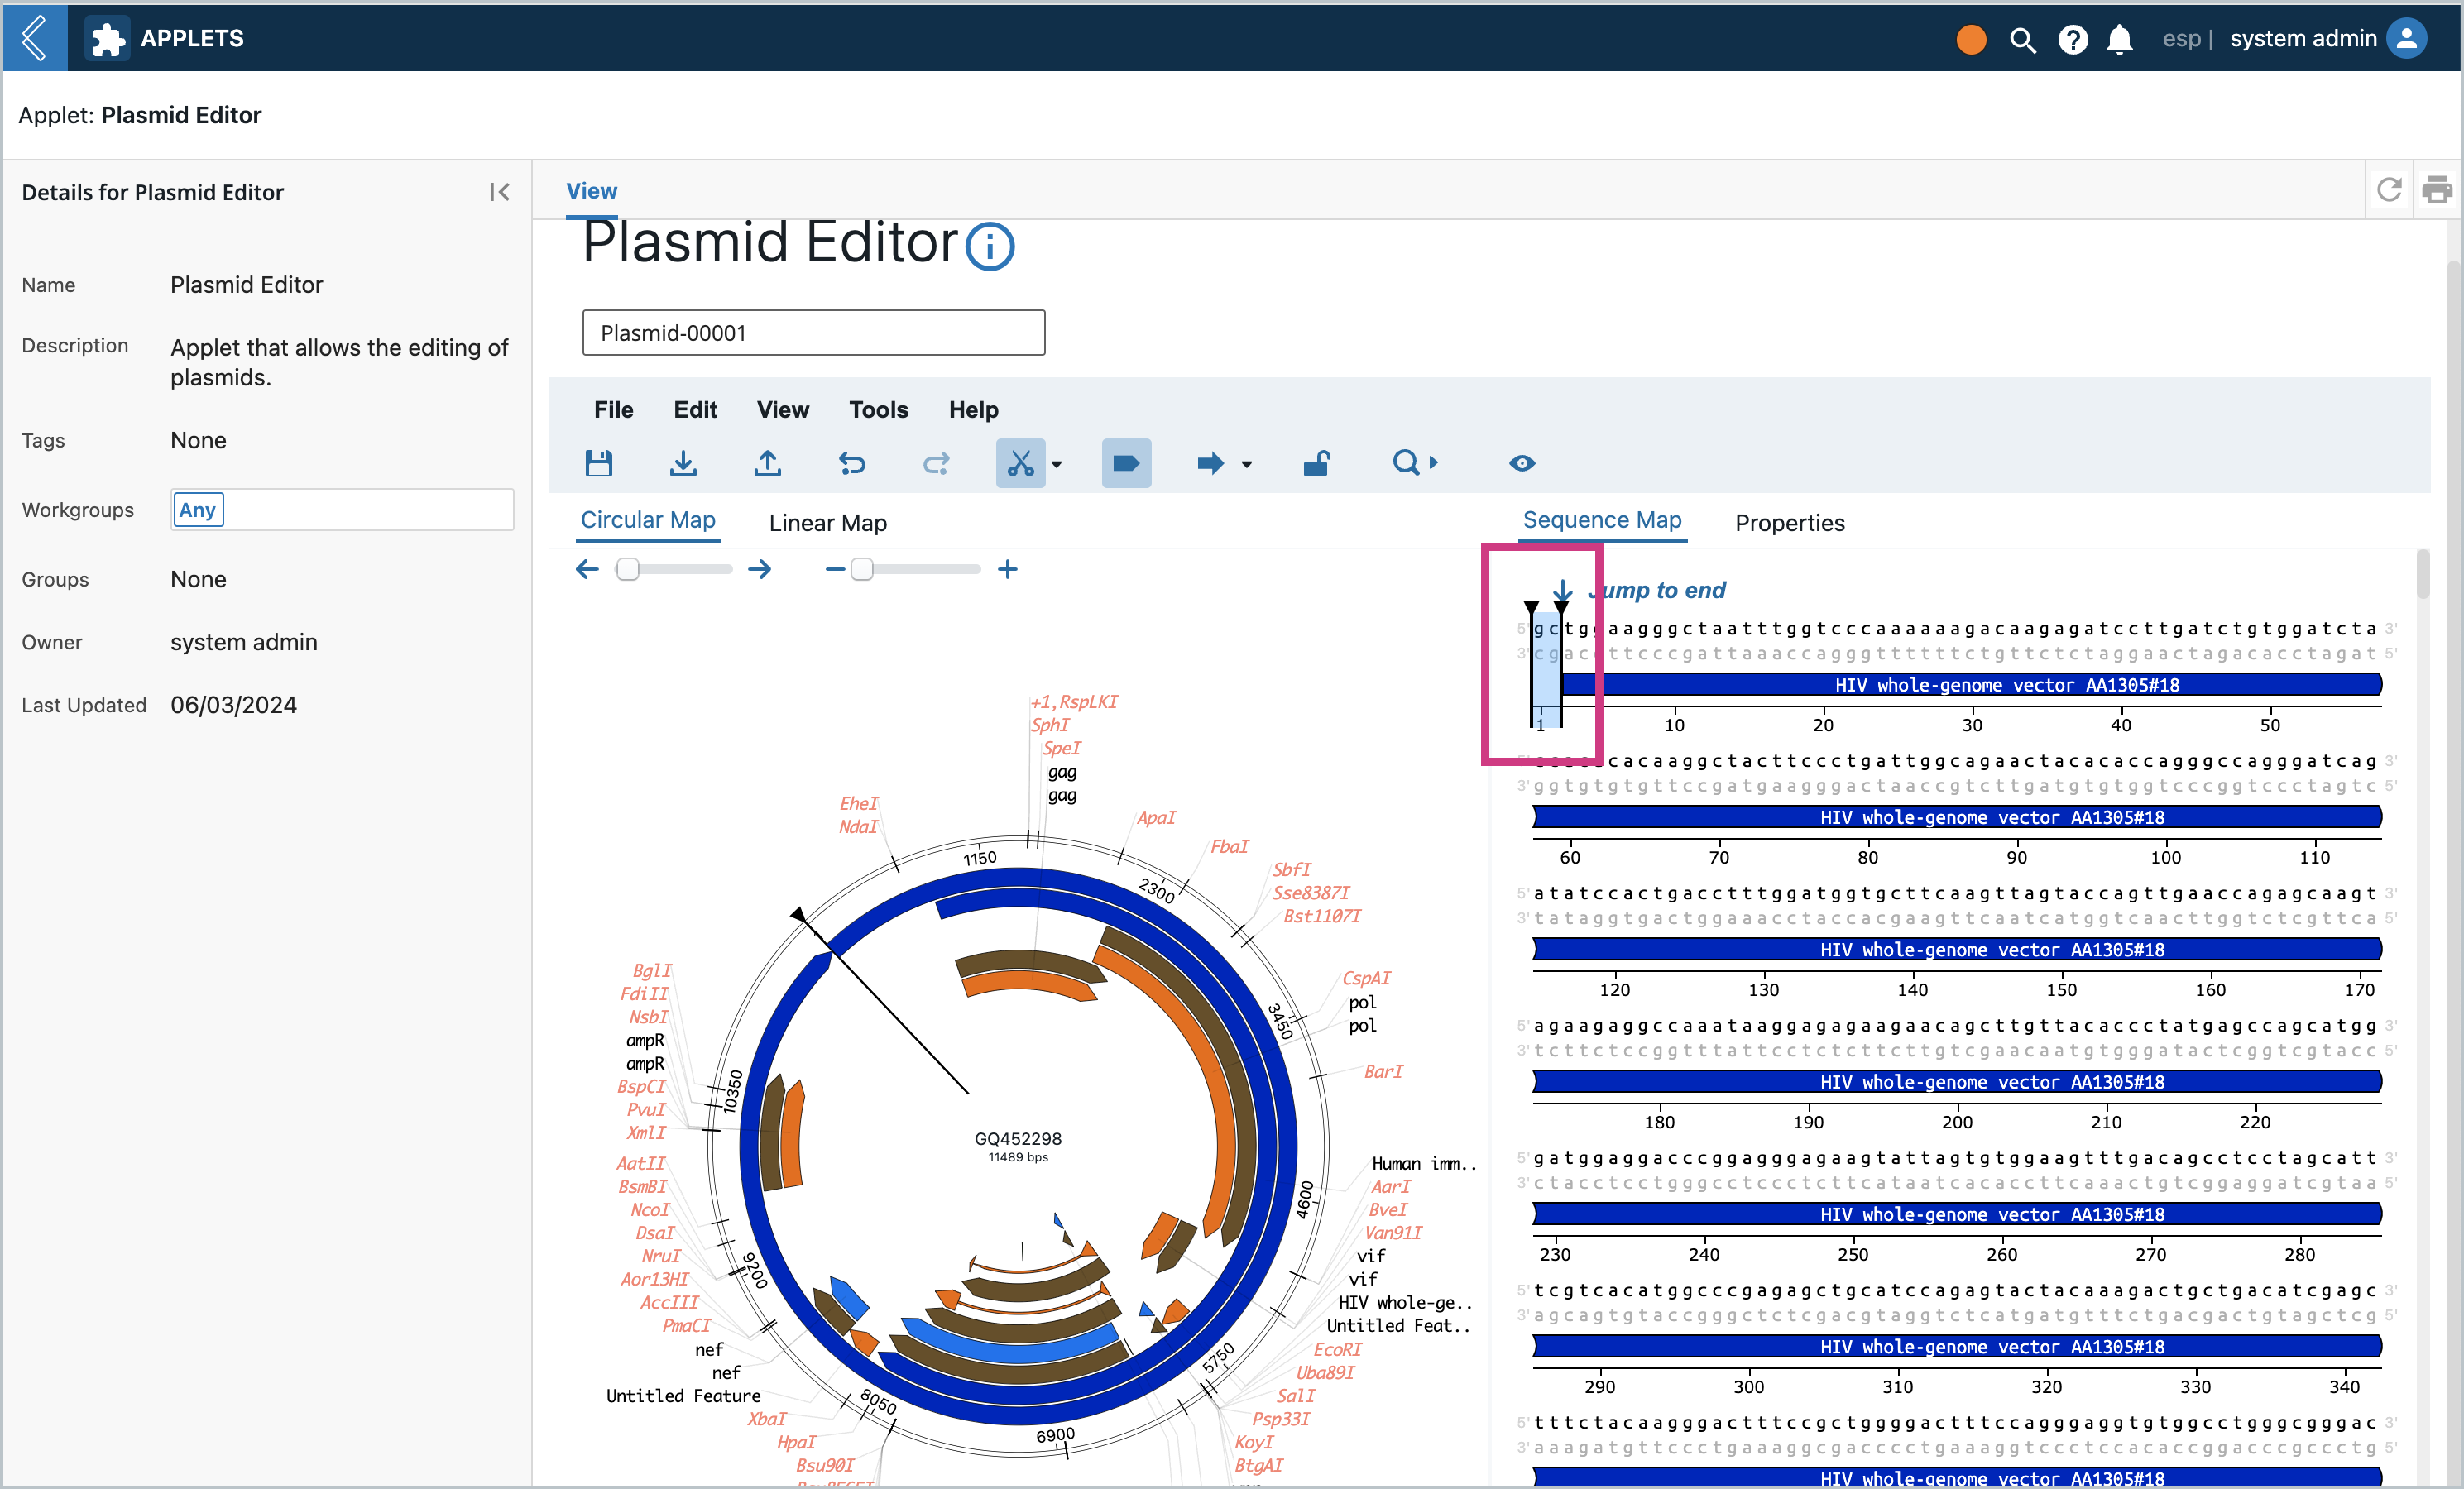
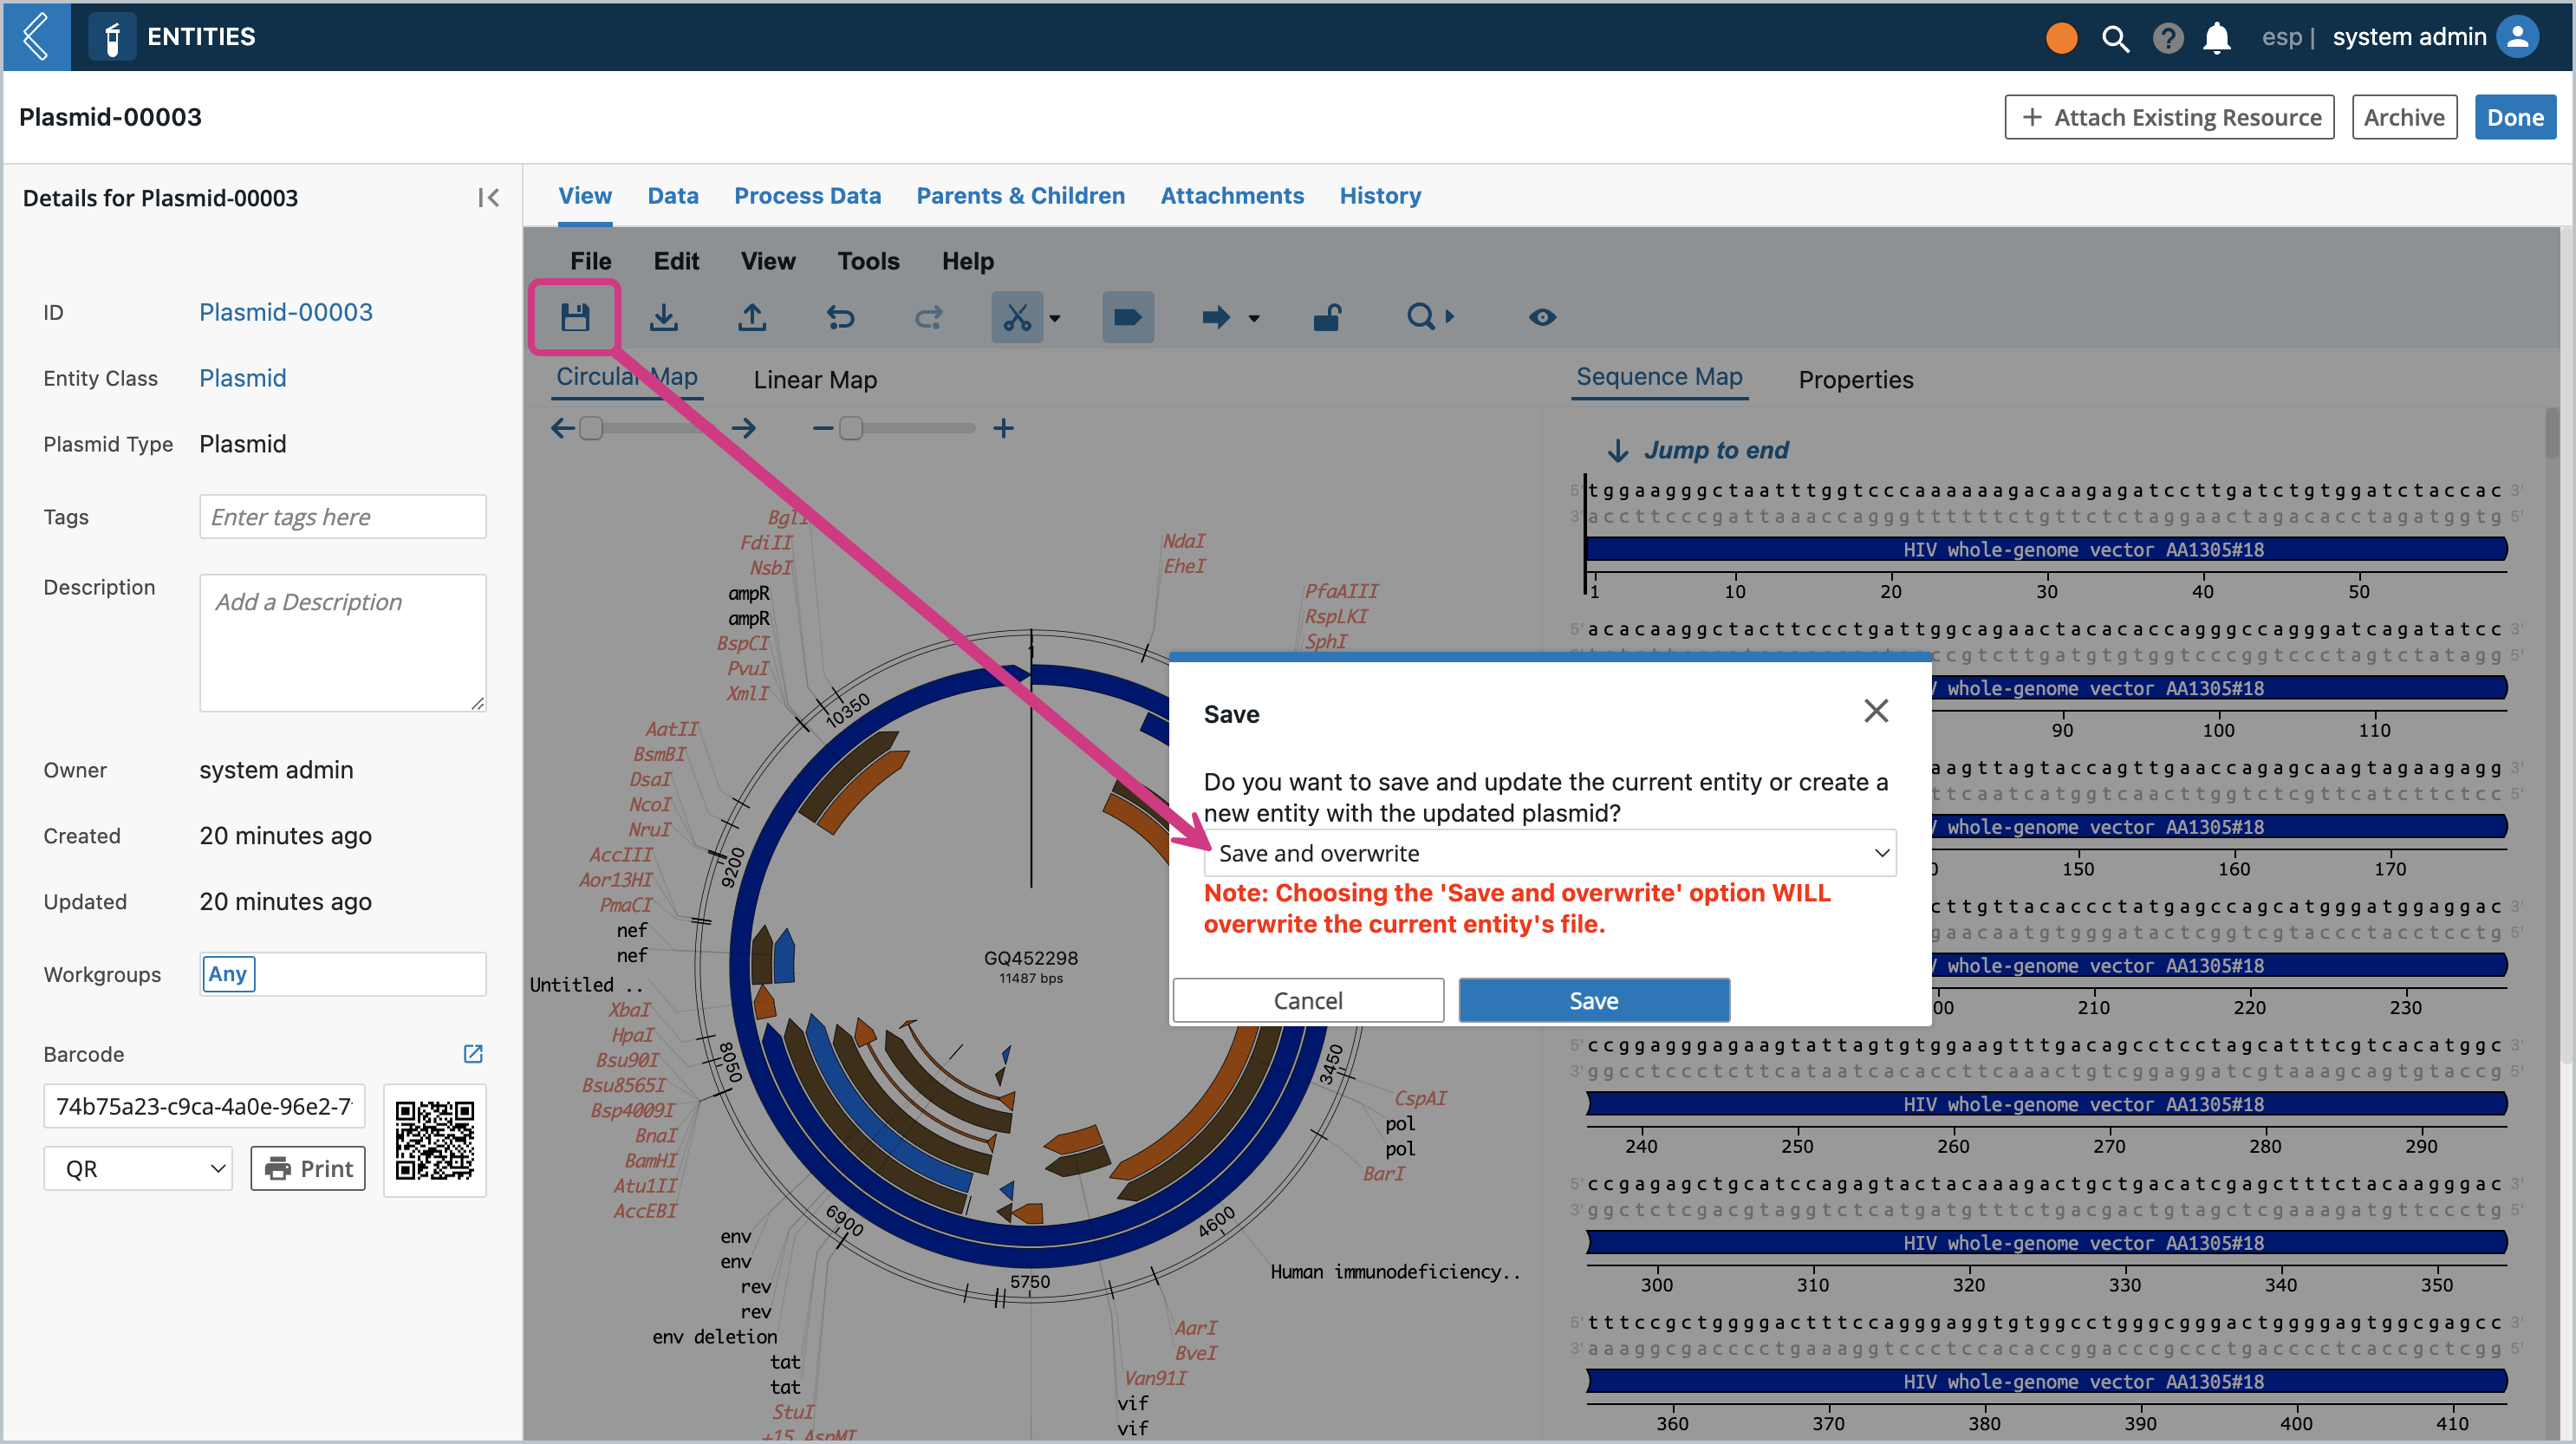
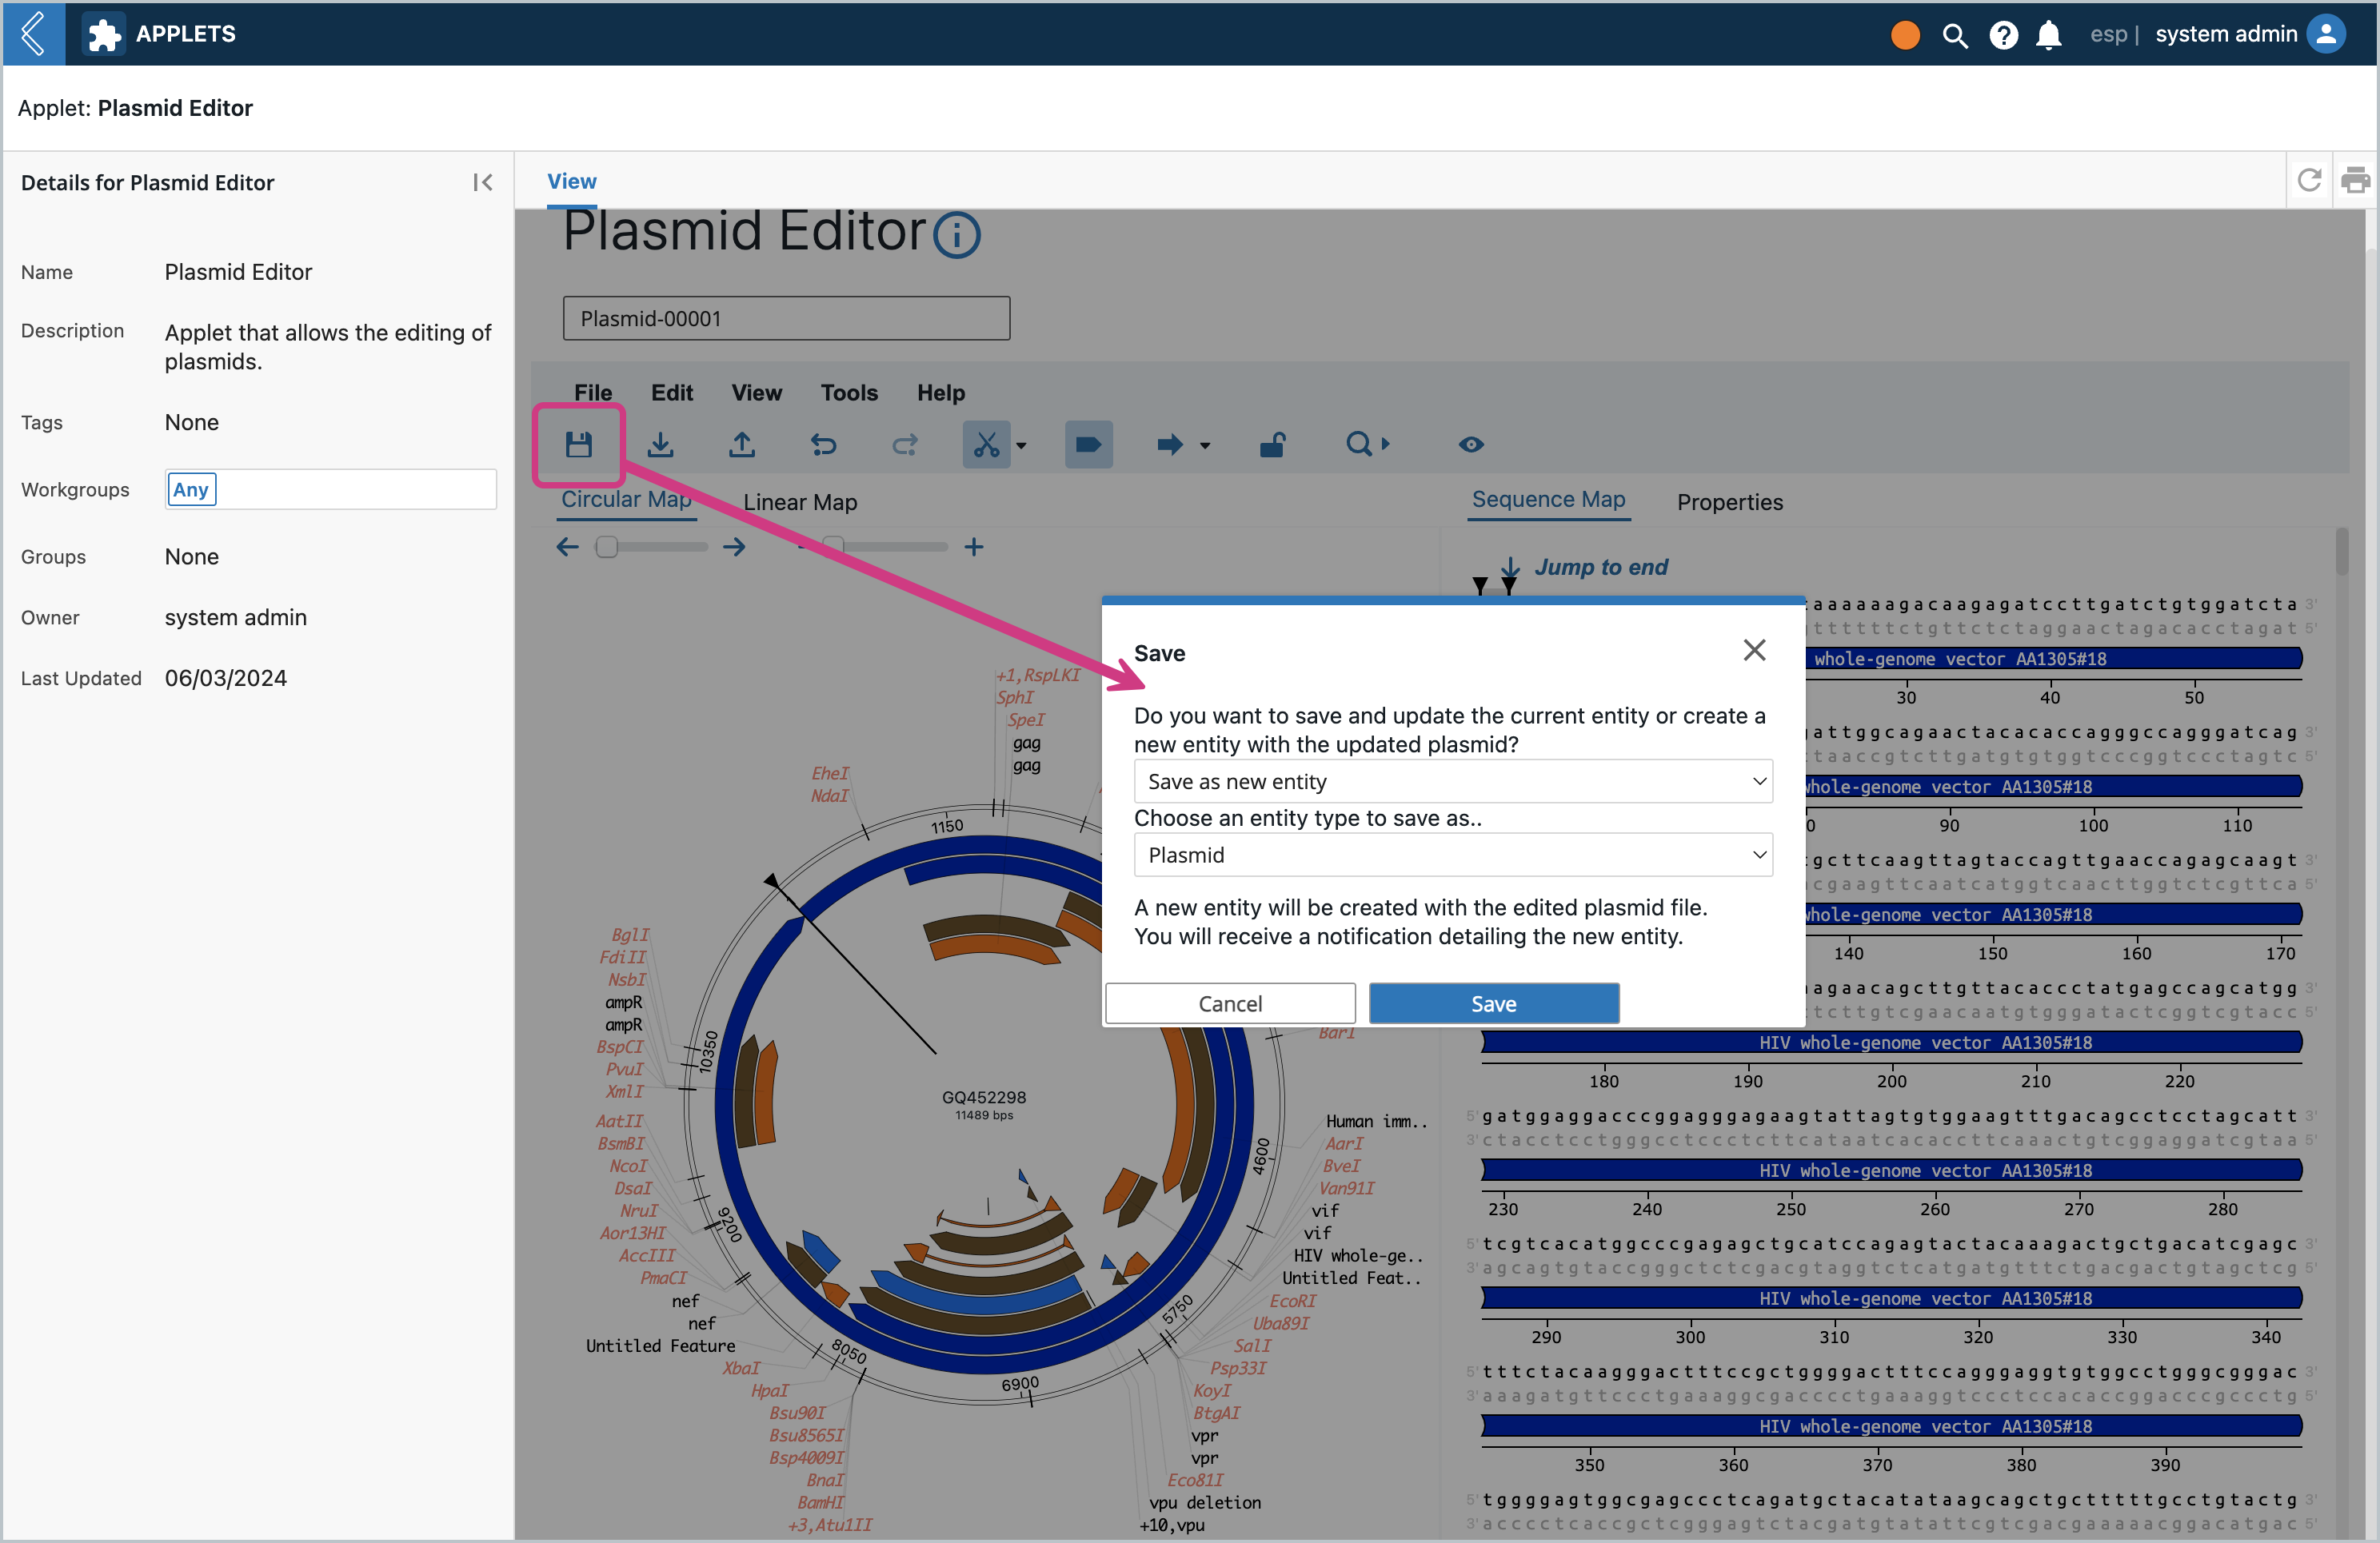
Click the Save icon. A modal will pop up asking if you want to save as a new Entity or save and overwrite. Let’s first Save as a new Entity. The dropdown will contain all the Entity Types that are set up with the Entity Class that set up at the beginning. The same modal will pop up from the File Menu → Save and File Menu → Save As
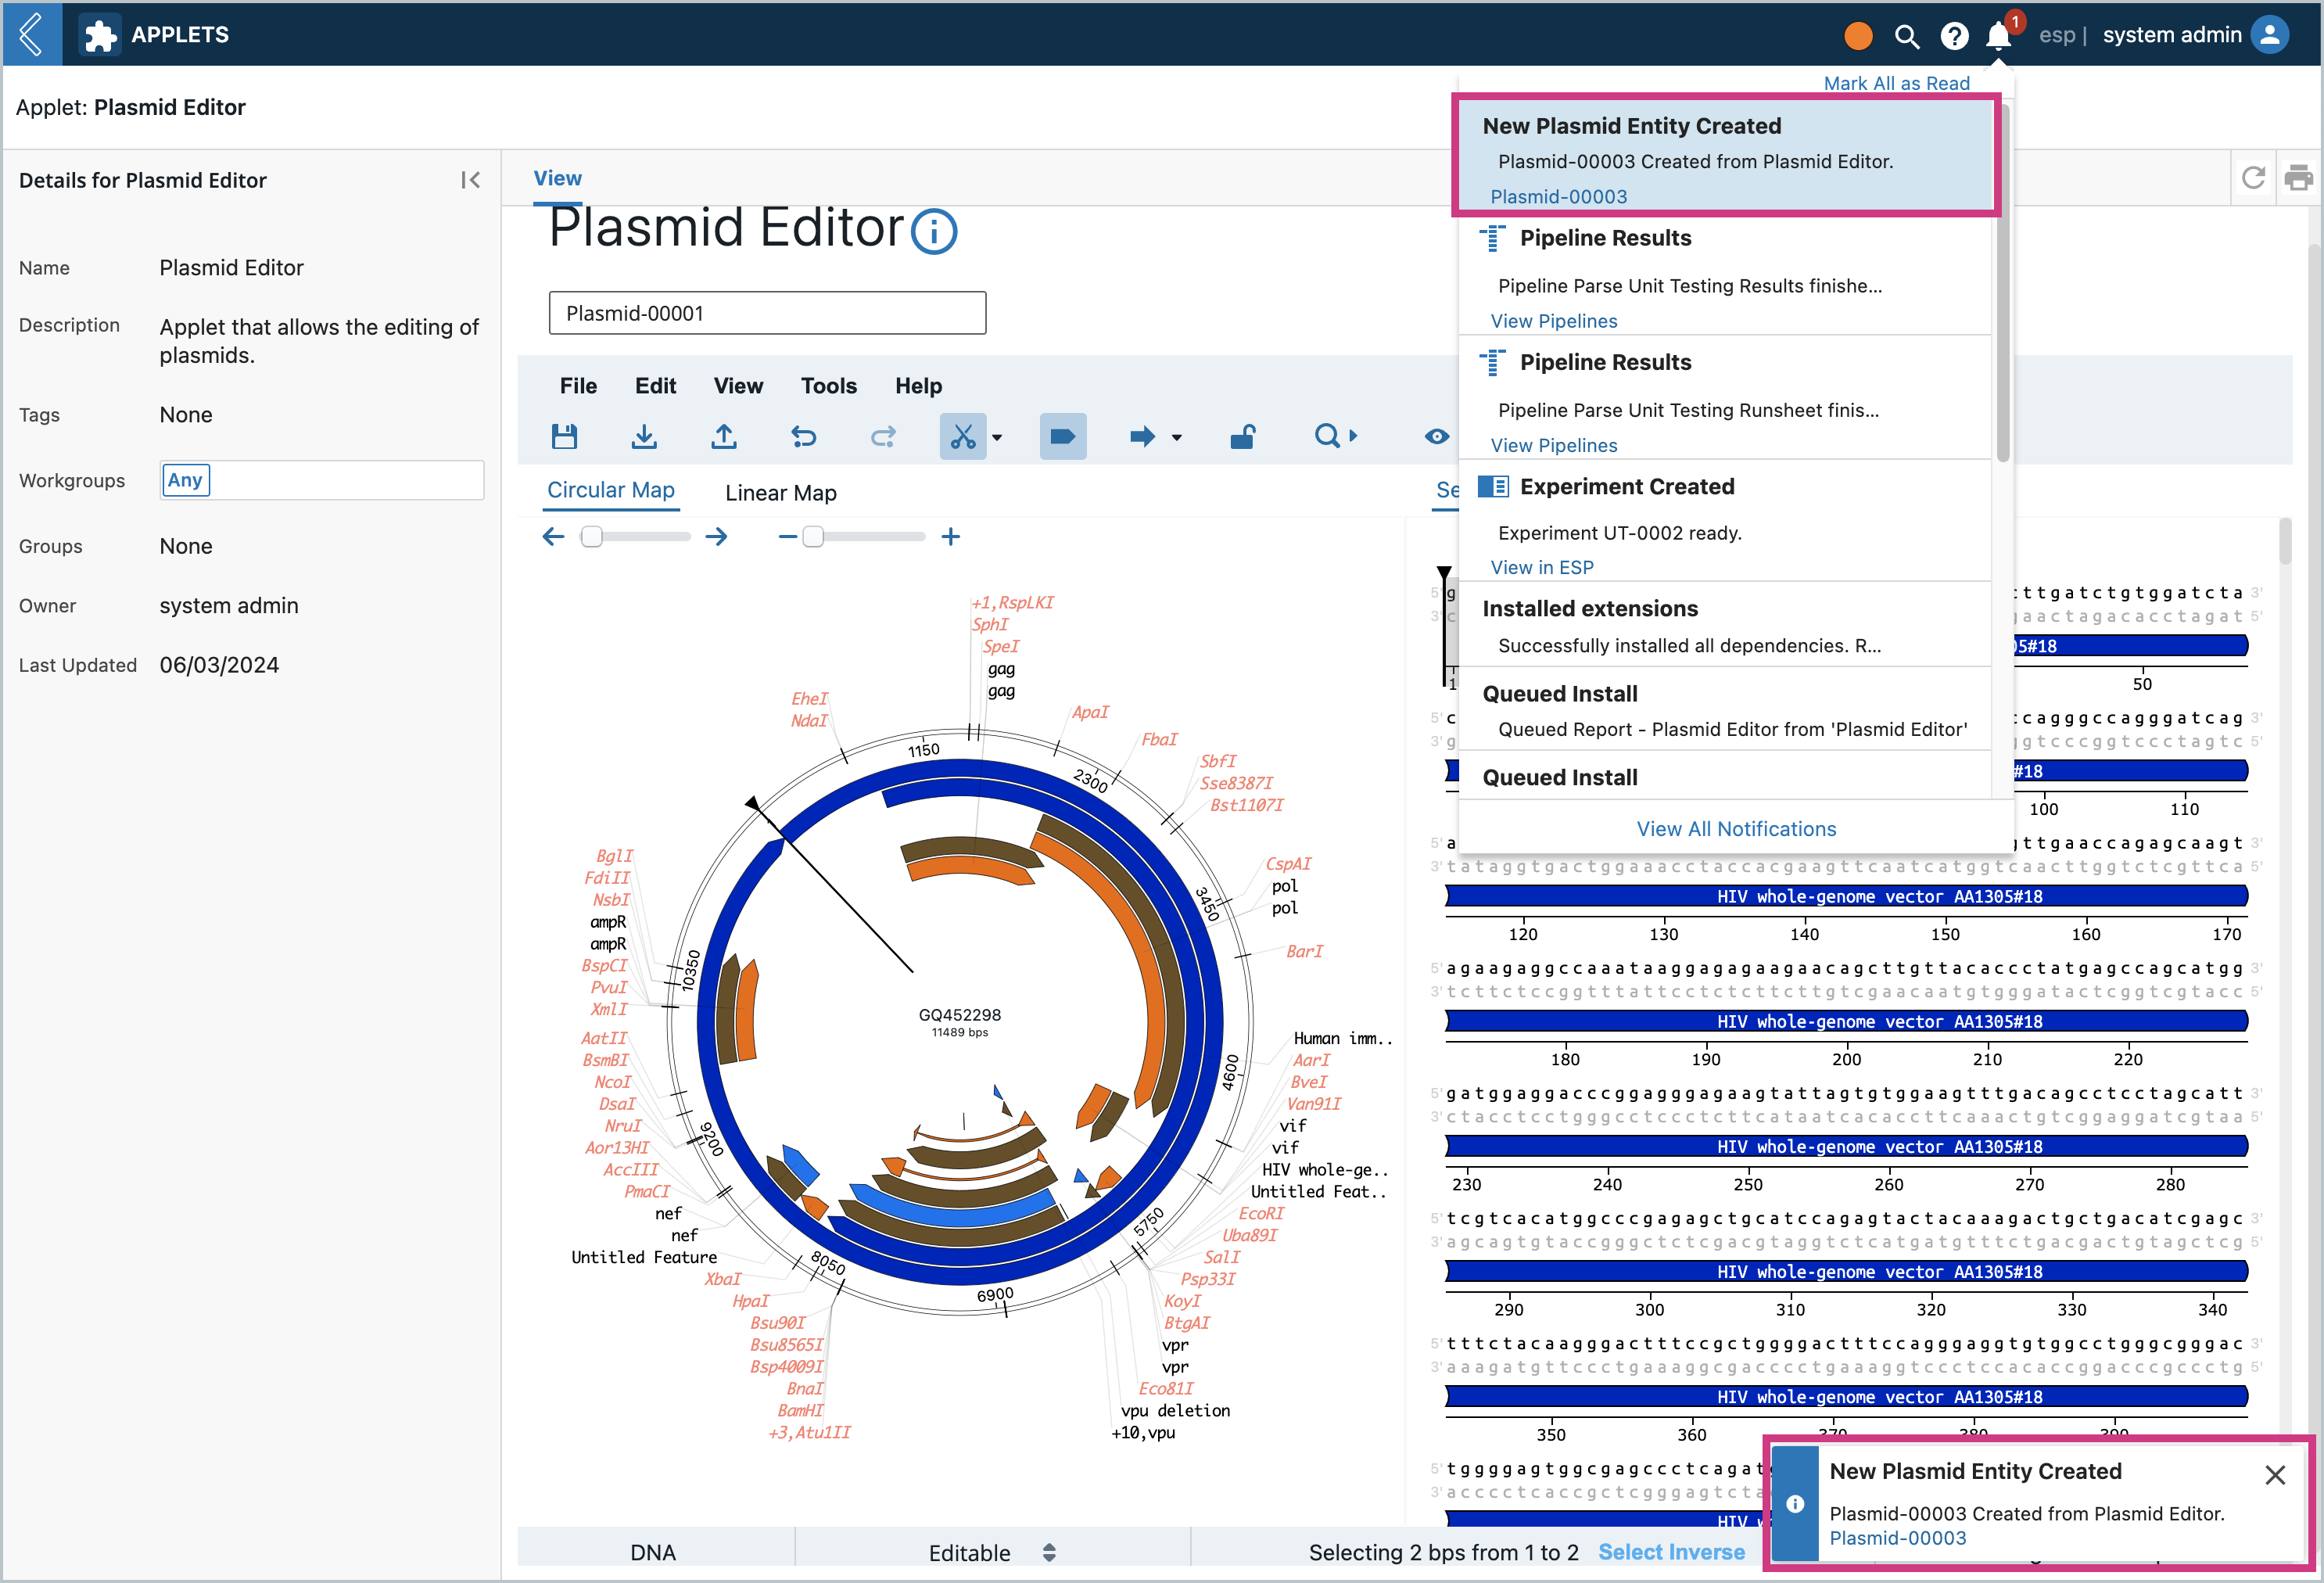
Clicking save will create a new Entity as a child of the current Entity. It will have a file attachment with the same extension and the file will have the new Entity’s name. You will first get a notification of the new Entity’s creation. In the icon notification area you can click on it to navigate directly to the created Entity.
Note
There are a few special cases we guard against such as:
Trying to save with an Entity that has no file attached is not allowed and will result in an error indicating that there is no file detected
If the Entity Type that you are using doesn’t have an attachment field for the plasmid file, or if it does not match what is specified in the configuration key
plasmid_file_entity_field_namean error will indicate this.
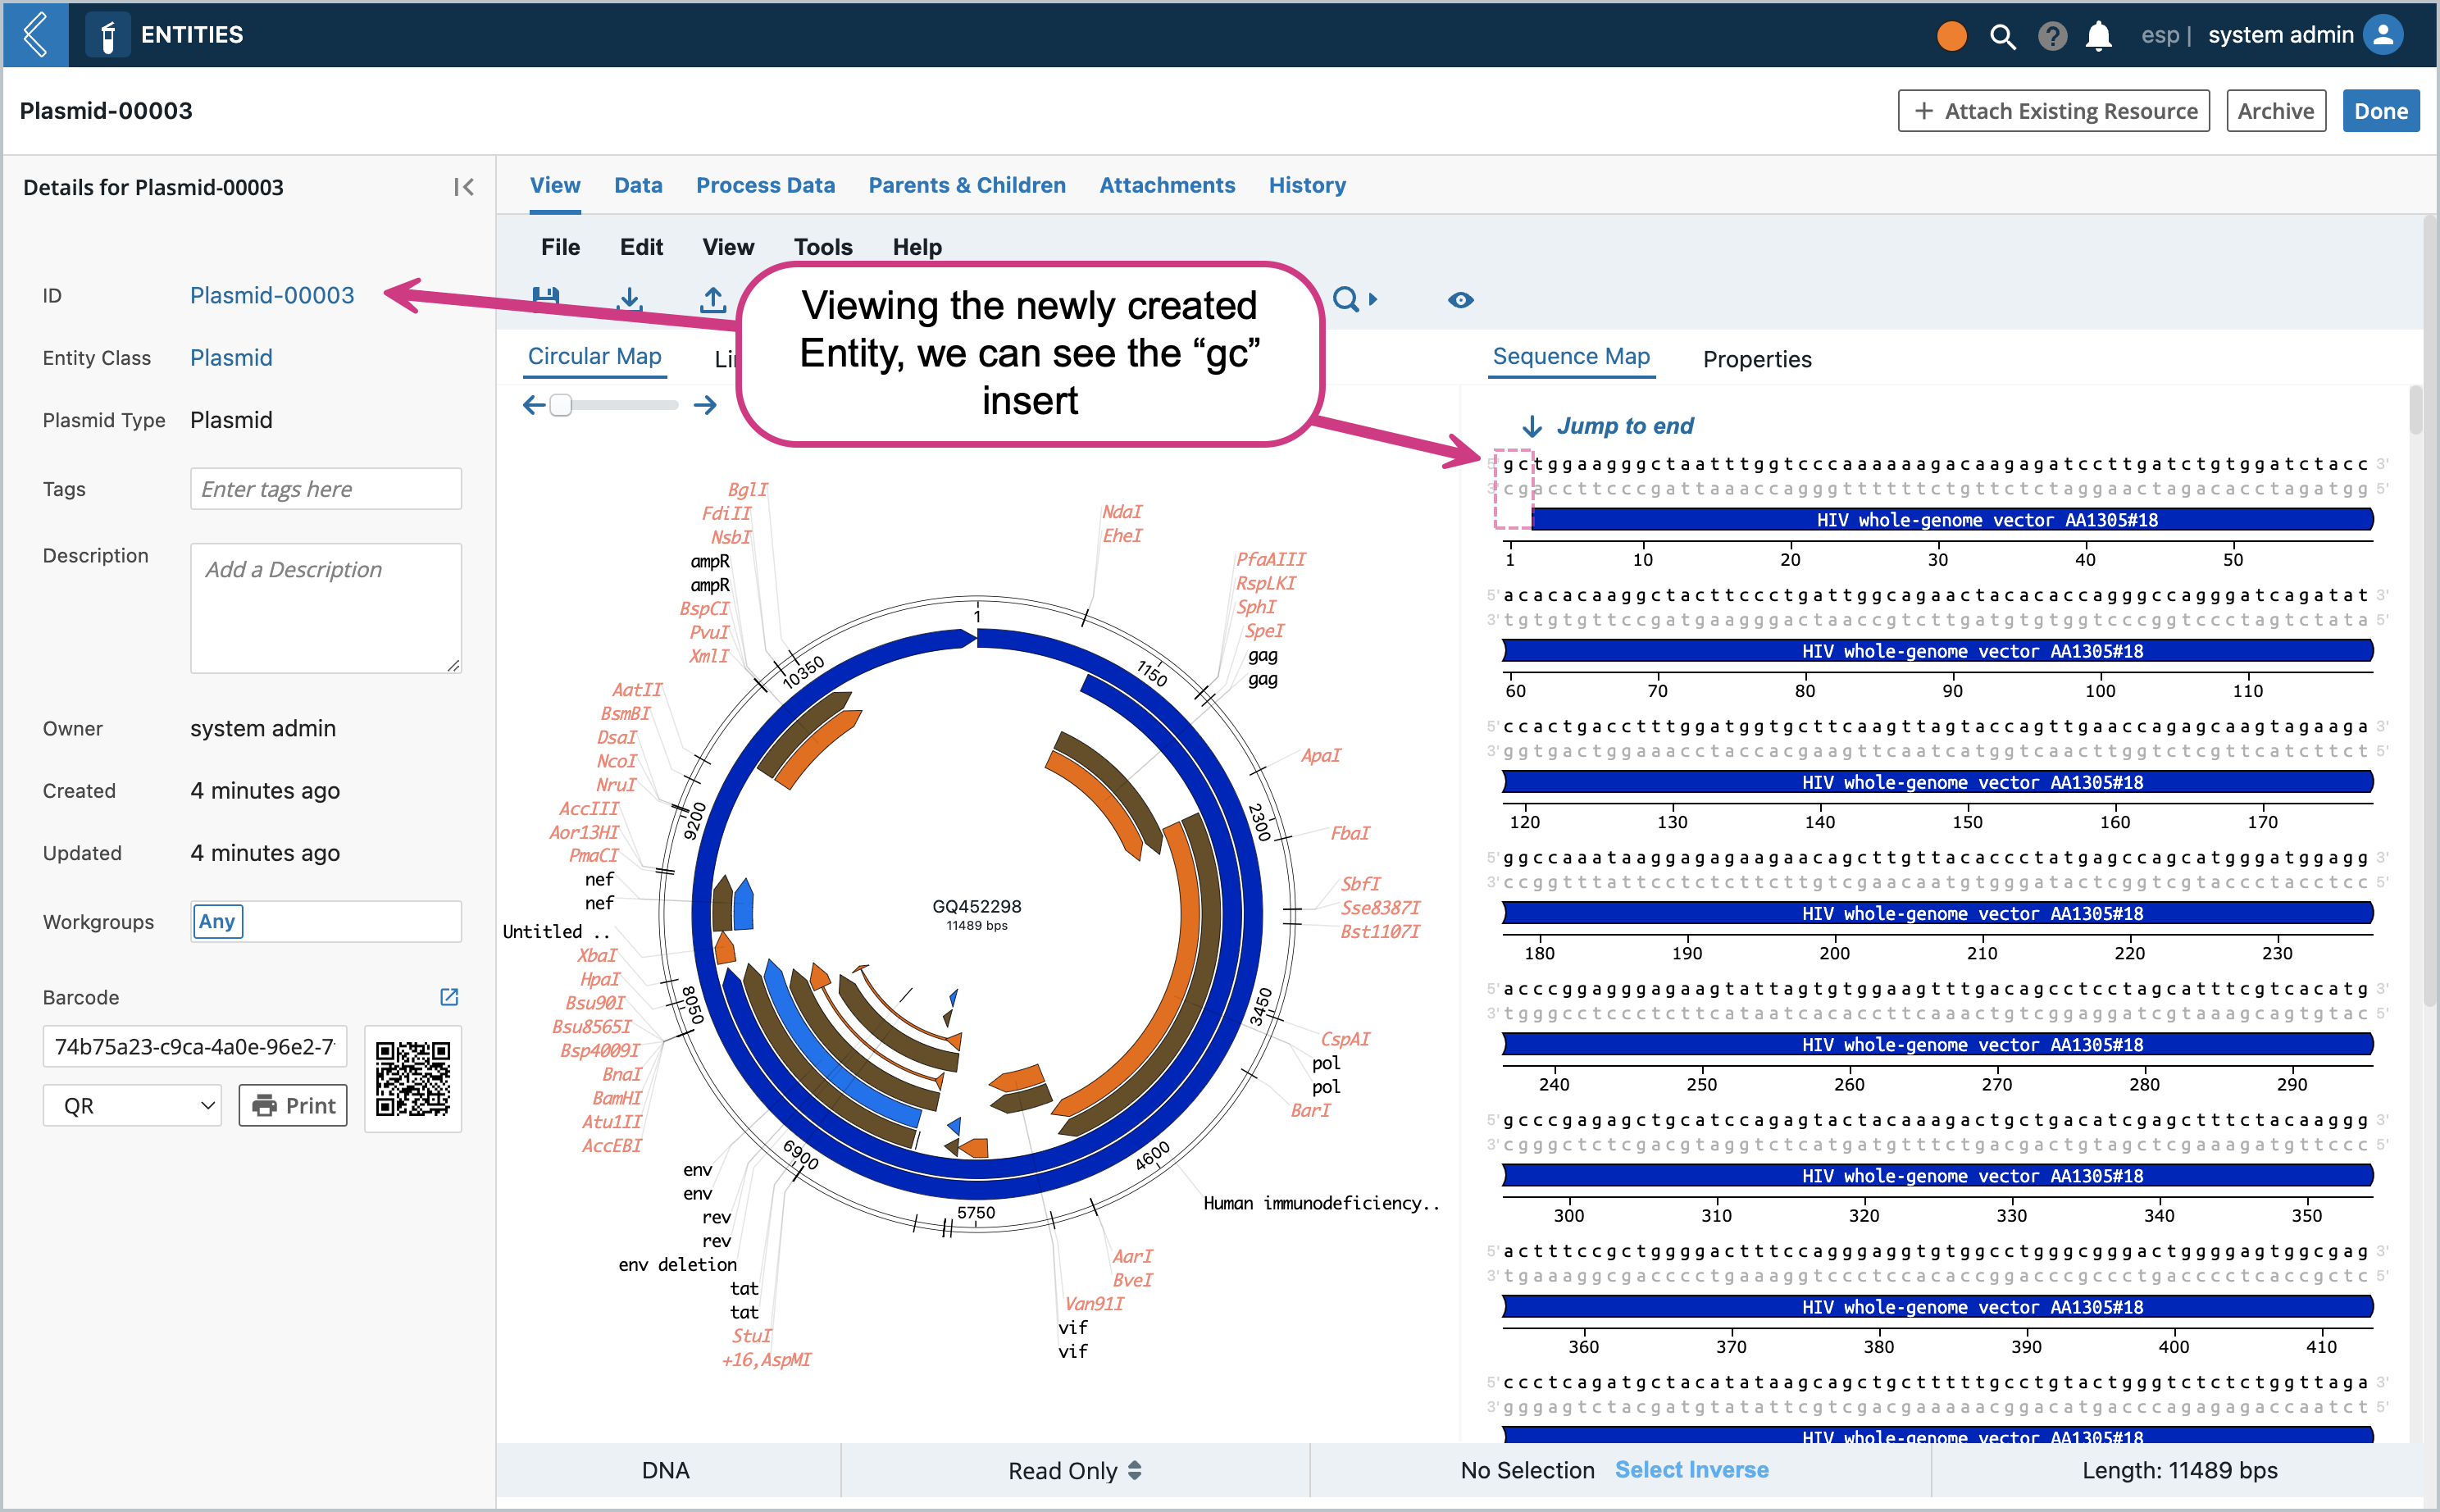
If the save was successful, in the Entity View you should be able to see the plasmid with the change we made earlier (the “gc” at the beginning of the sequence)
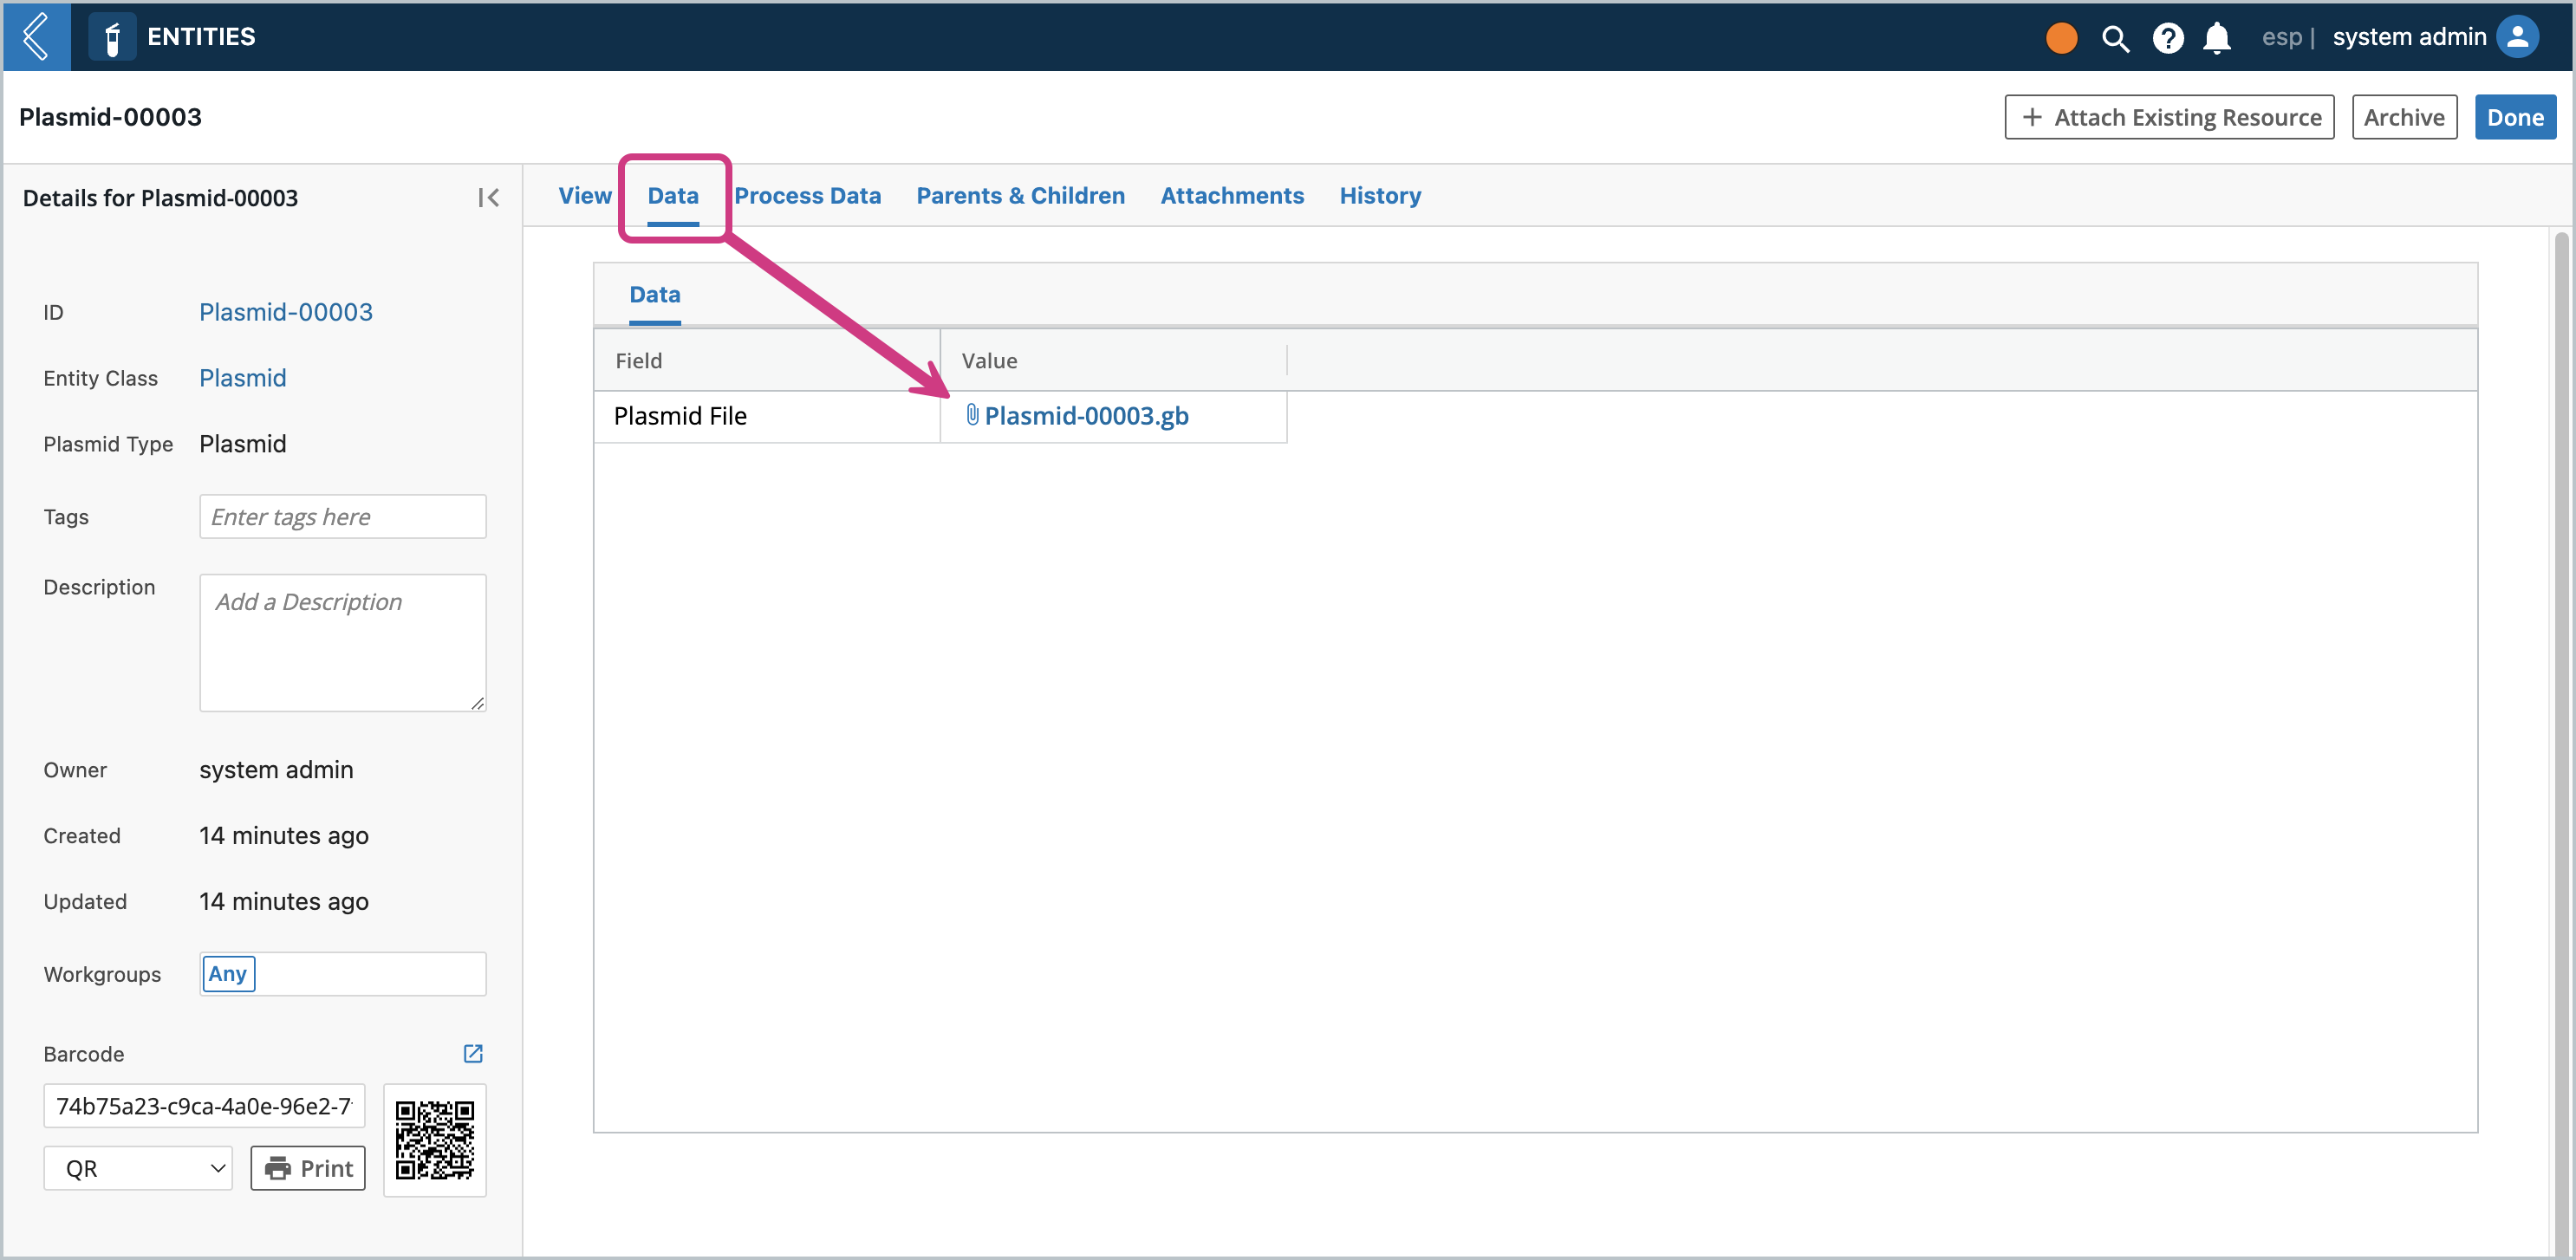
Clicking on the Data tab, you should see the attachment field contain a file with the same name as the Entity, but keeping the original extension name.
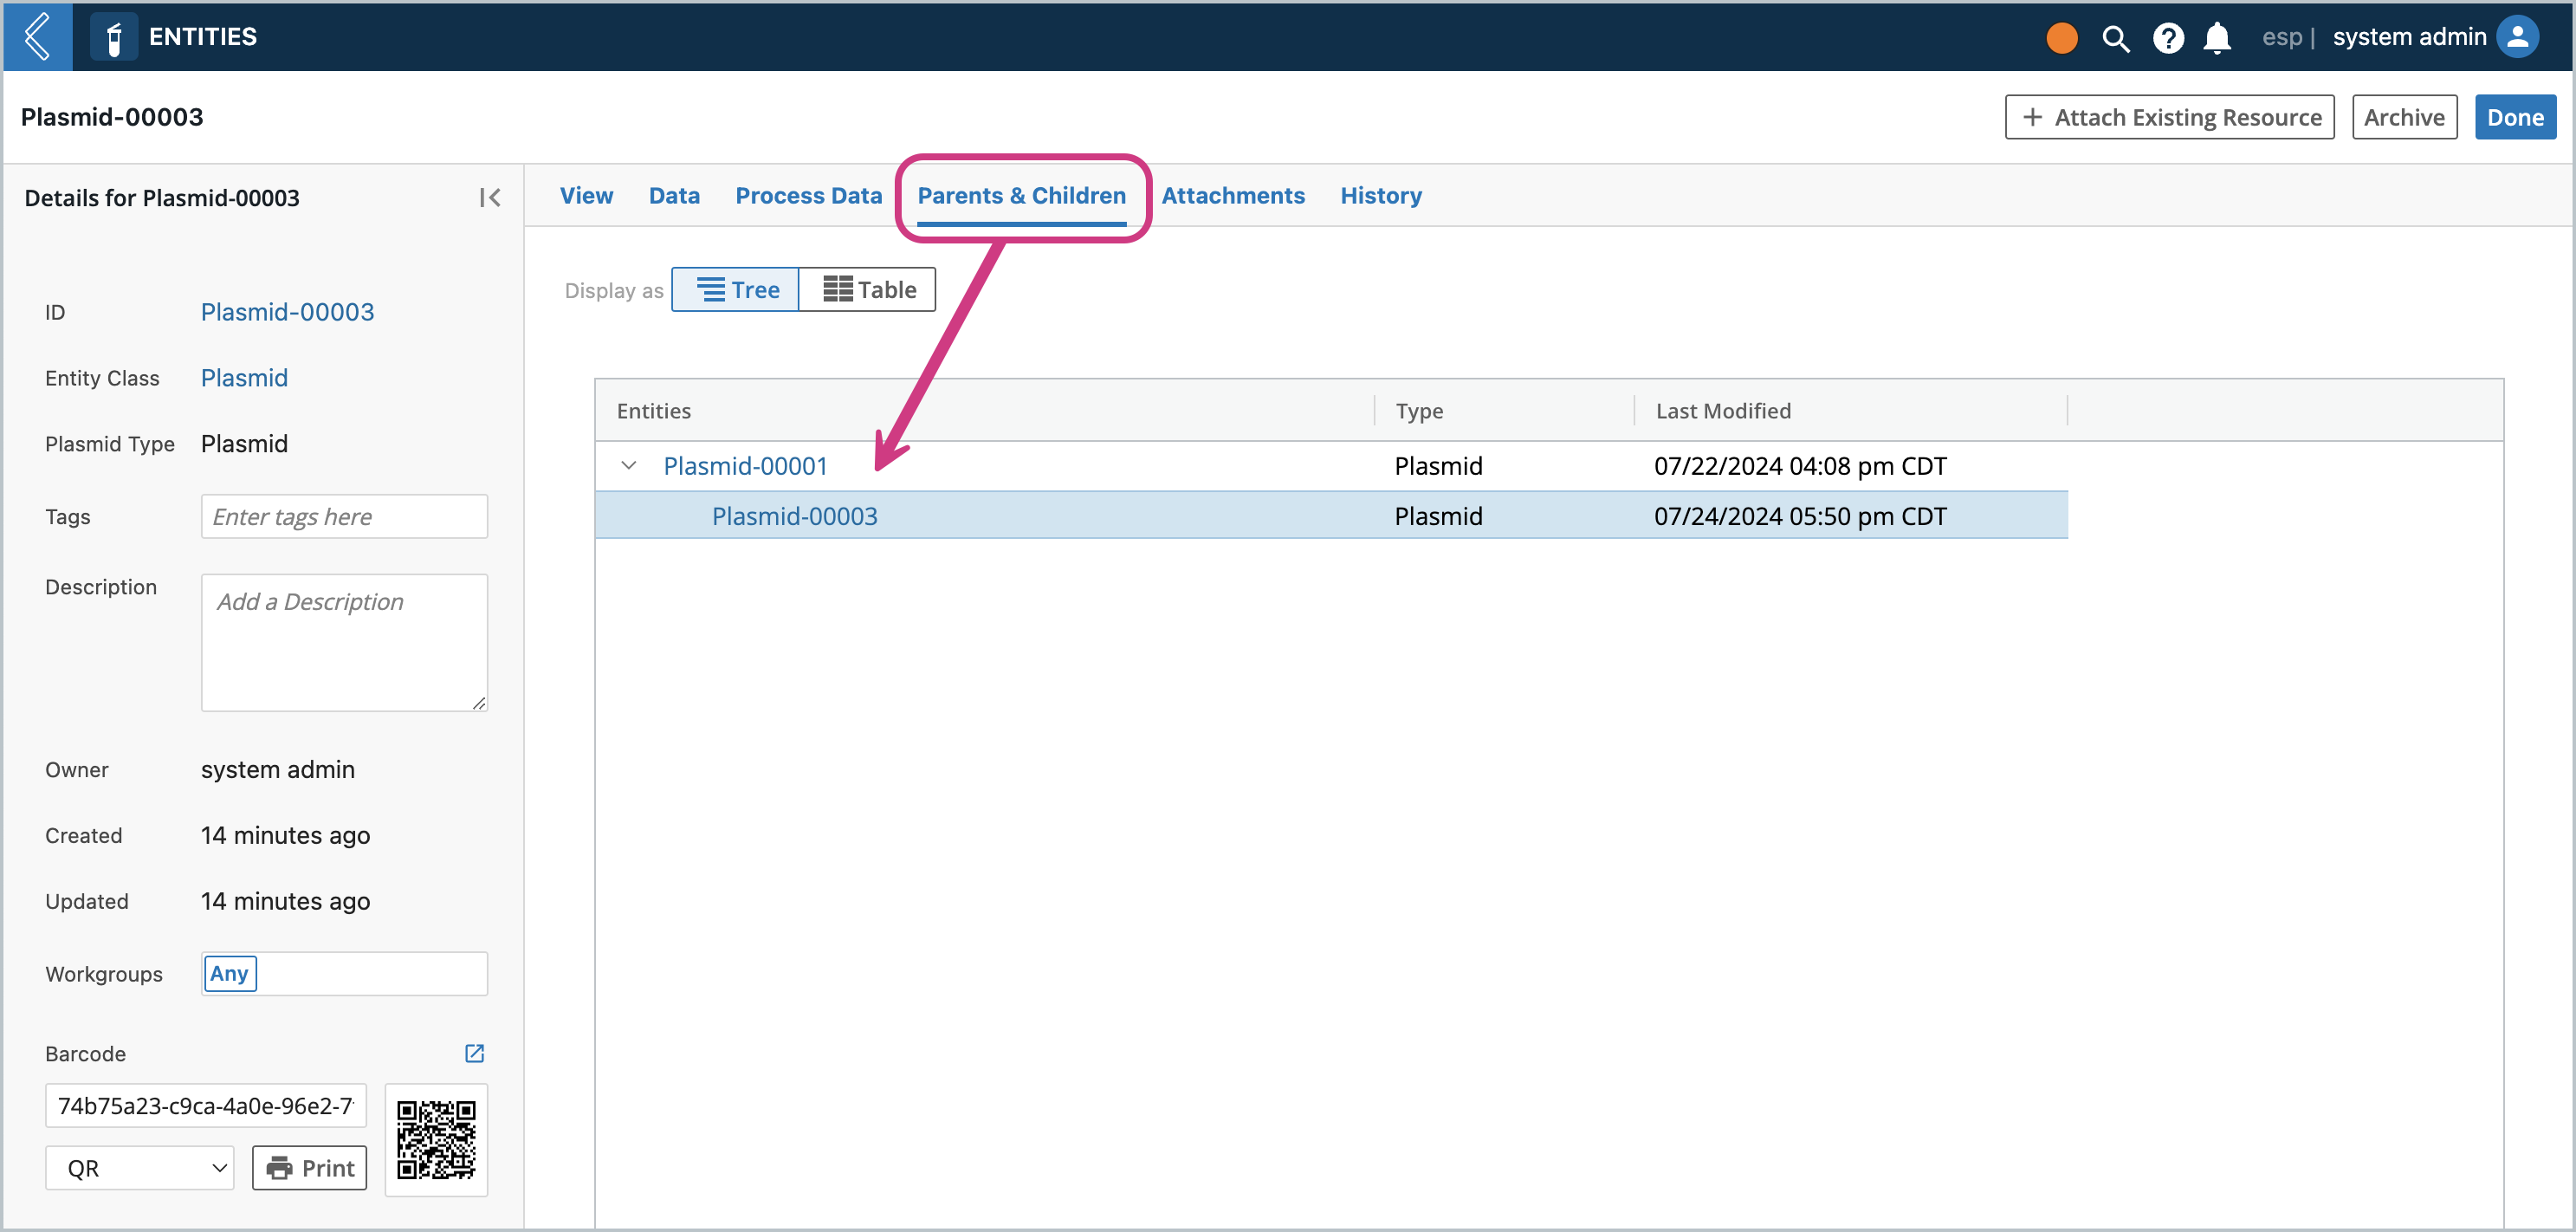
Clicking on the Parents & Children tab, you should see this Entity be the child of the Entity that was used to create it. This is how you can track provenance and if you ever need to refer to the original file, you have it on the oldest ancestor.
To check the Save and overwrite functionality, let’s go back to the View tab of the Entity, and delete the “gc” at the beginning of the sequence. You can do this by going to editable mode, selecting the first 2 letters with the mouse or with the keyboard (shift + arrow keys) and pressing the delete key. Then click the save icon and you should see the modal pop up again and choose “Save and overwrite”.
