Creating Entries and Using Widgets
Overview
An Entry is an electronic notebook page that gives you the flexibility to record information similar to a paper notebook, but with the digital connectivity that lets you reference and use other resources registered in L7|ESP. Each Entry belongs to a Notebook library, and can be shared with collaborators and allow multiple users to work on the same Entry.
Creating Entries
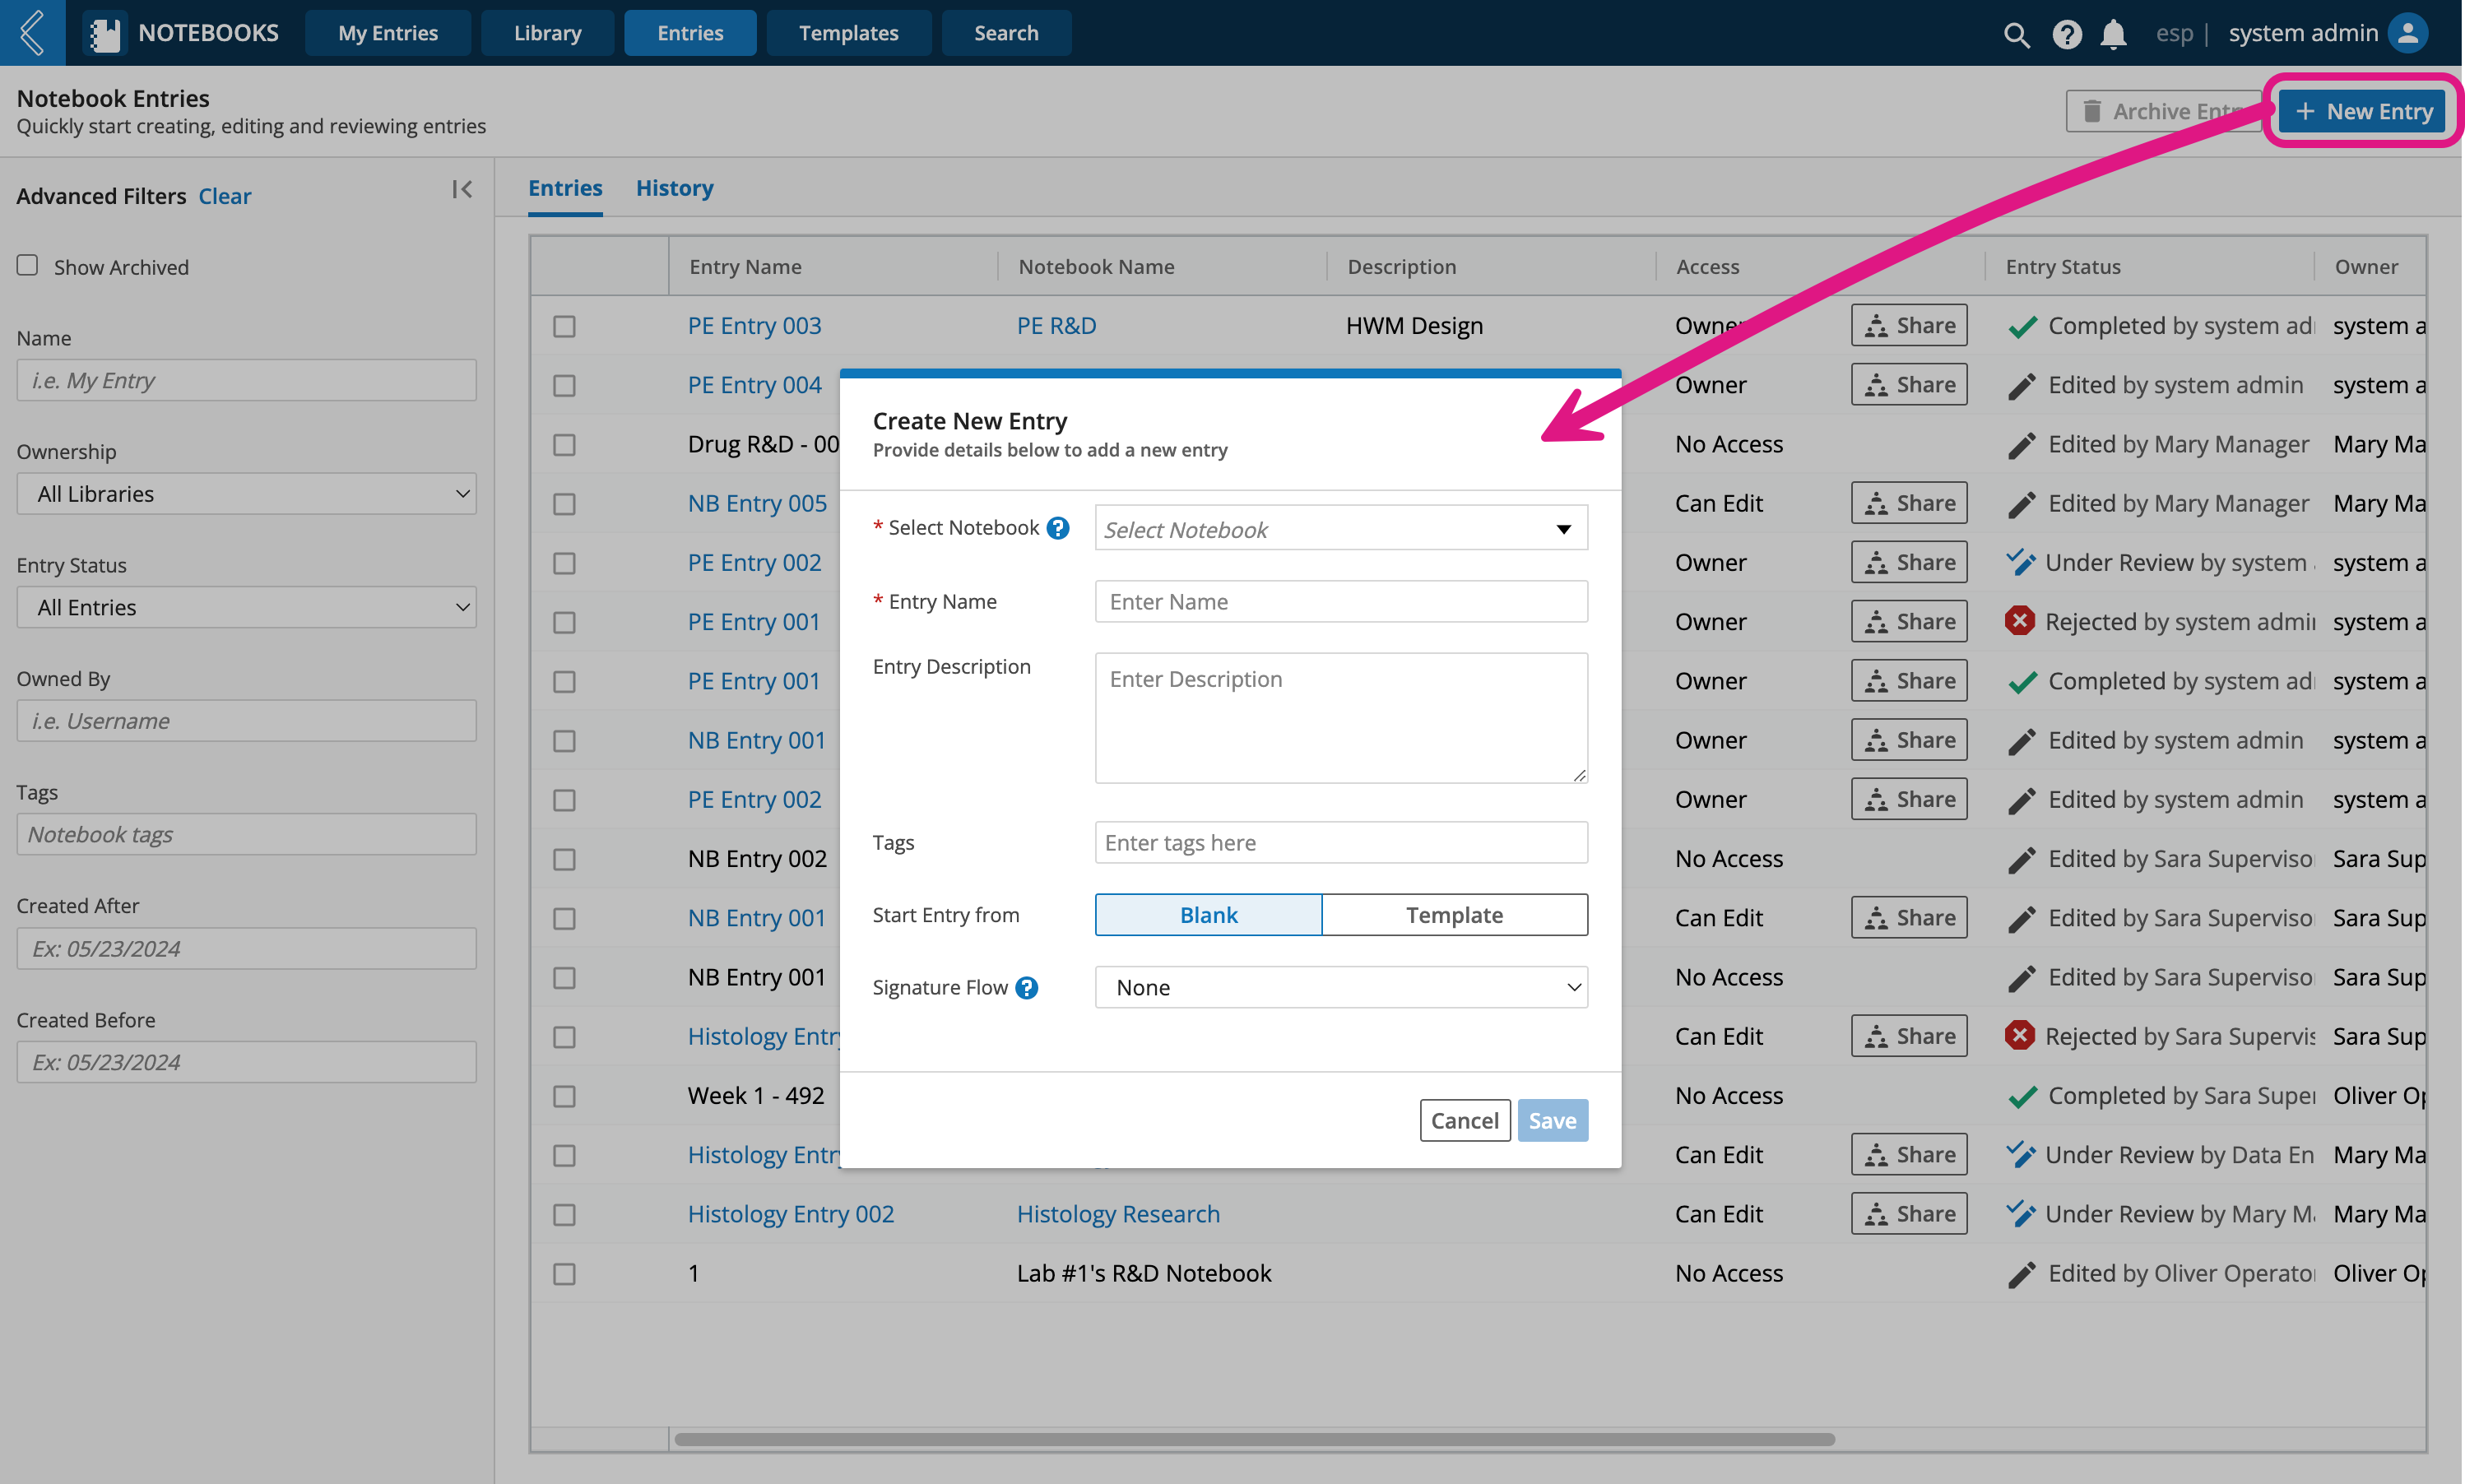
Entries can be created from the My Entries and Entries pages, and when looking at the details of a Notebook from the Library page.
Procedure
Click + New Entry
Select Notebook to assign the Entry to a specific notebook
Enter an Entry Name. Note: If the associated Notebook has an Entry Naming Template assigned, then this field will be auto-populated with a name that can still be edited)
Enter an Entry Description (optional)
Enter Tag(s) (optional)
Select Start Entry from either Blank (new blank page) or Template (a preconfigured formatted Template)
Note
Entry Templates provide a structured outline as a starting point for you. You can always edit the template to add, remove, or move any of the widgets in the template.
Select a Signature Flow (optional) (signature flows represent the electronic signatures collected when reviewing an Entry)
Save
You are now ready to start using your Entry. Simply drag and drop widgets onto the page to get started.
Note
Changes made to Notebook Entries are autosaved to avoid data loss.
 |
Using Widgets
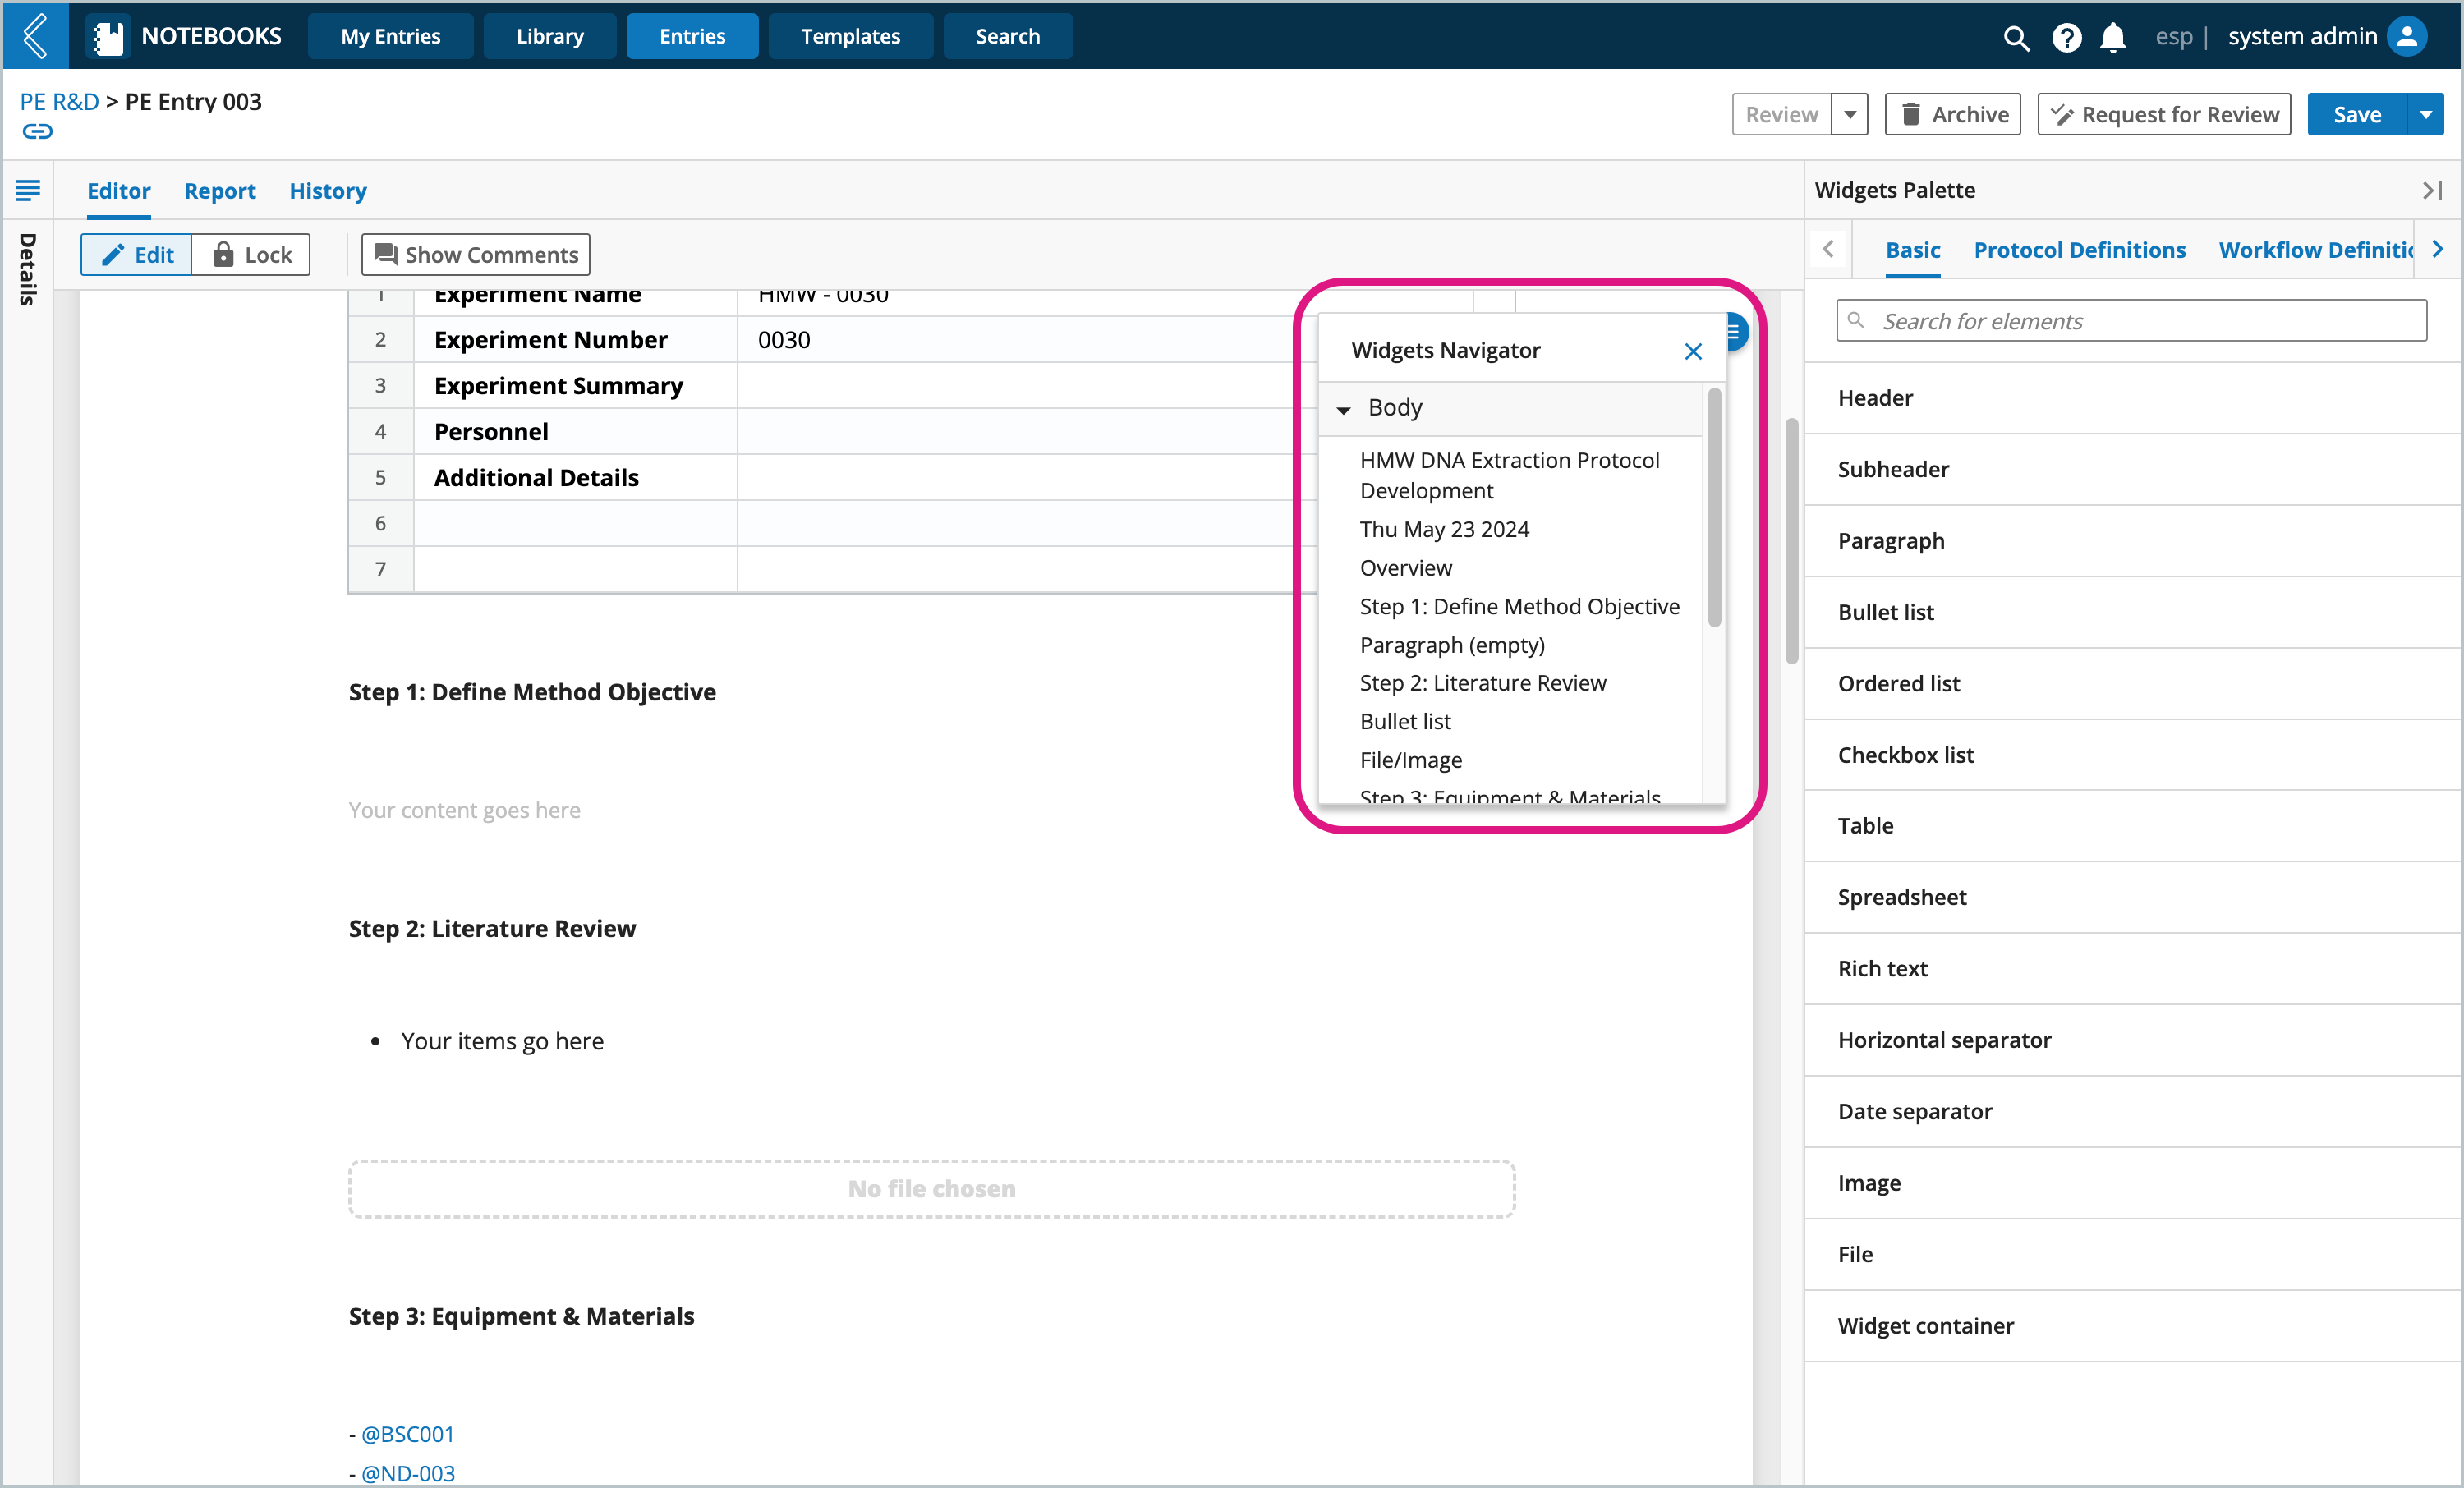
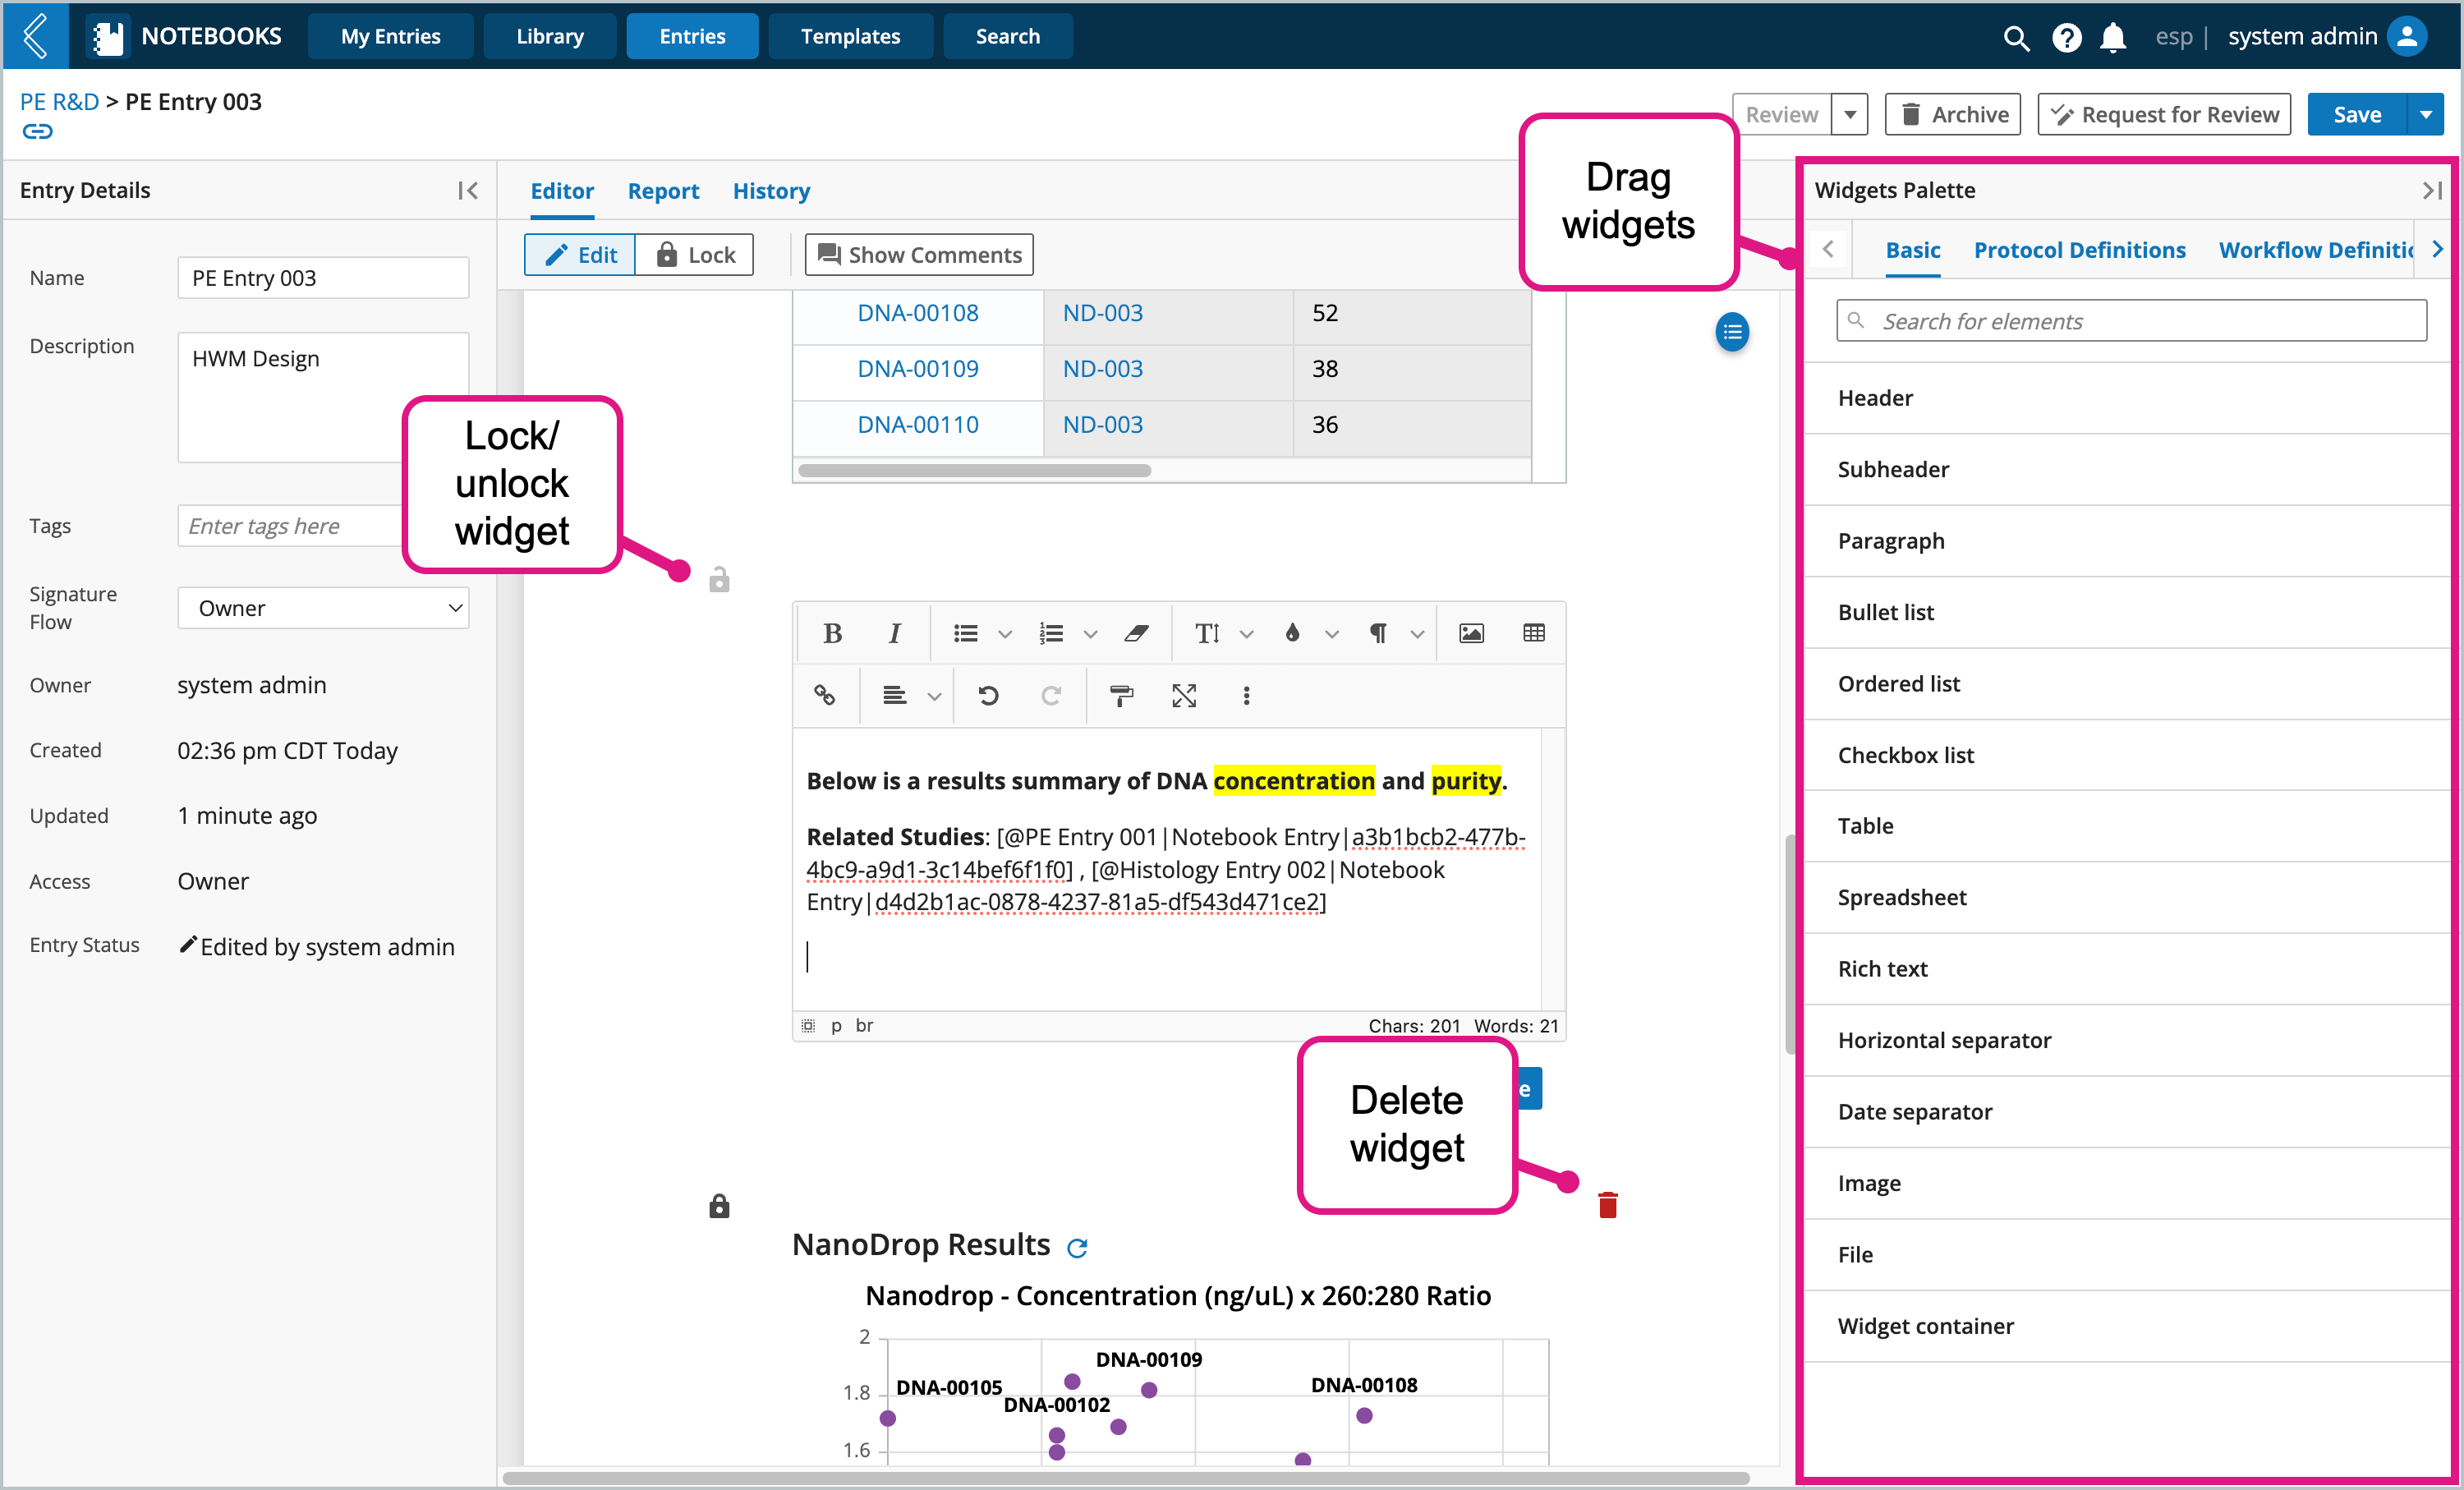
When viewing an Entry, you can add widgets to the page by dragging and dropping any of the widgets listed in the Widgets Palette library.
Once a widget has been added, you can record your data.
To delete a widget, hover over the widget and click the red trash can that appears on the far right of the widget.
Some widgets also have the option to be locked. The lock icon will appear in the upper left corner of the widget. When unlocked, you can record your data and interact with the widget. Once done, you can lock the widget to prevent yourself (or others) from making changes to the recorded information. Just click the locked icon again to unlock the widget if changes are needed.
 |
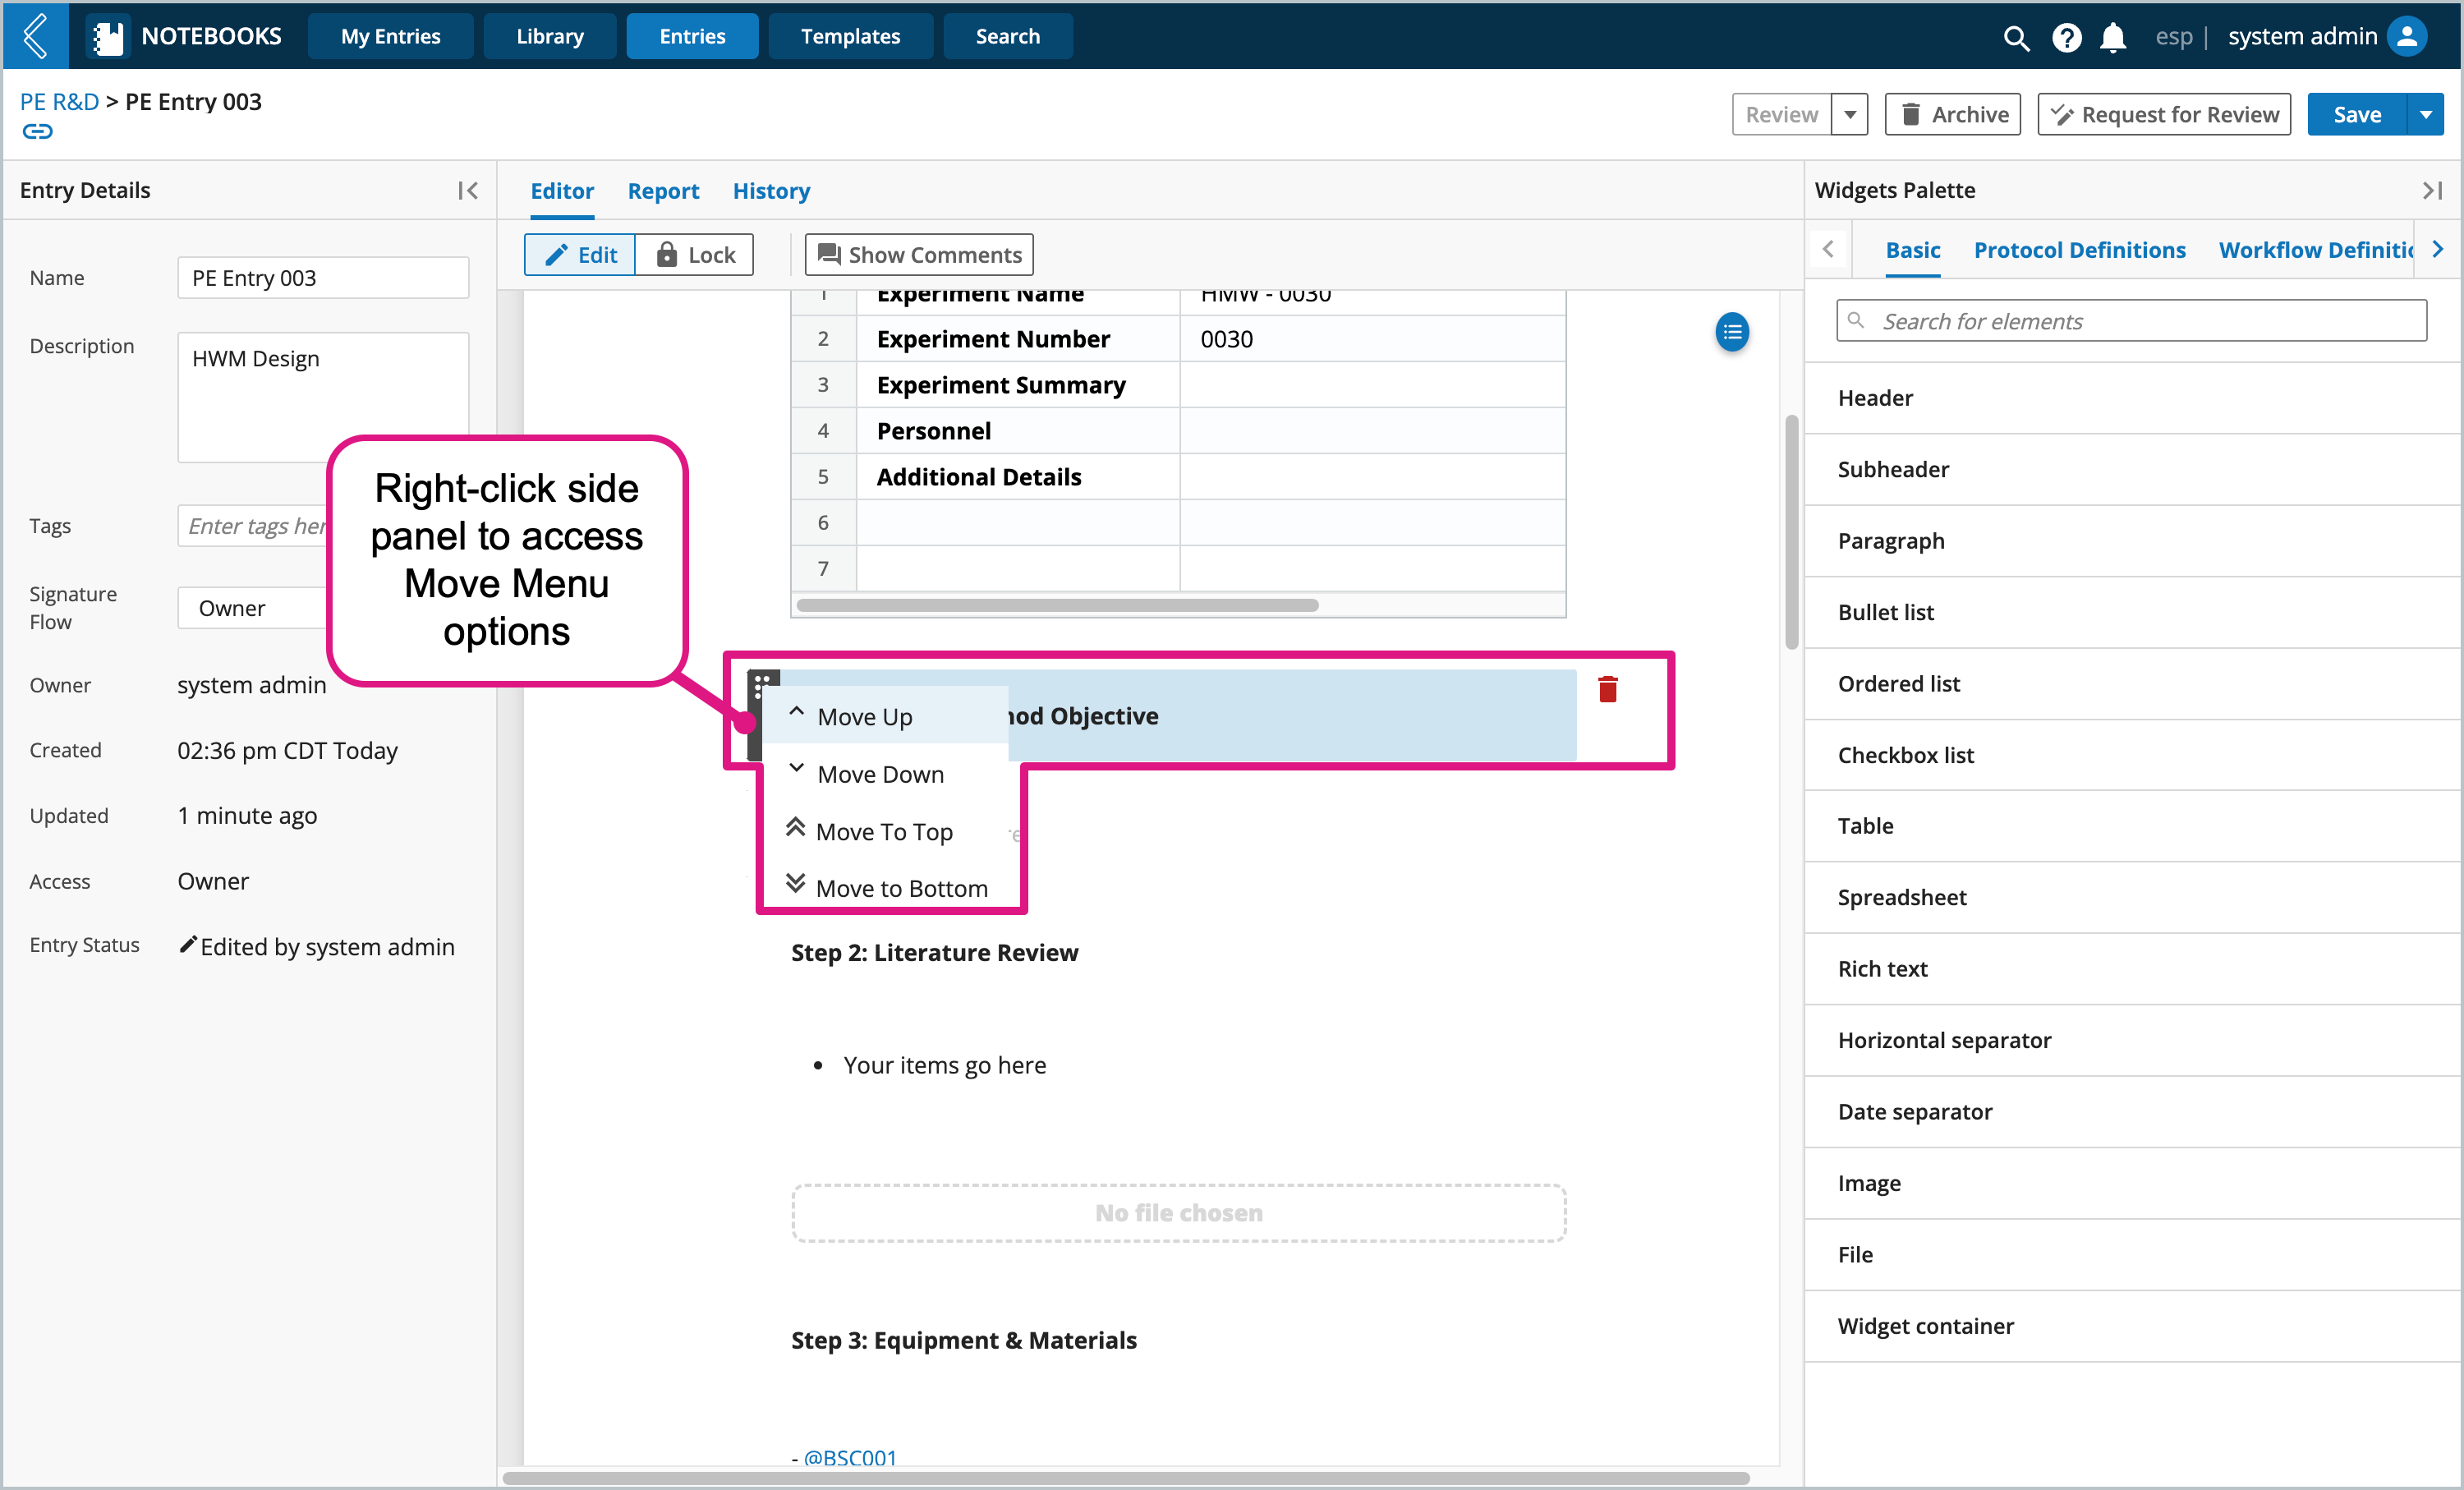
The placement of widgets can be changed at any time by simply dragging them to a new location or by using the move menu options.
Option 1: Drag and Drop - Move your cursor to the far left side of the widget to activate the widget’s side panel, click the side panel then drag and drop the widget to its new placement. When moving the widget you can also see the type of widget you are moving (i.e., Subheader, Paragraph, etc).
Option 2: Move Menu - Move your cursor to the far left side of the widget to activate the widget’s side panel, right click the panel to open the menu of move options.
 |
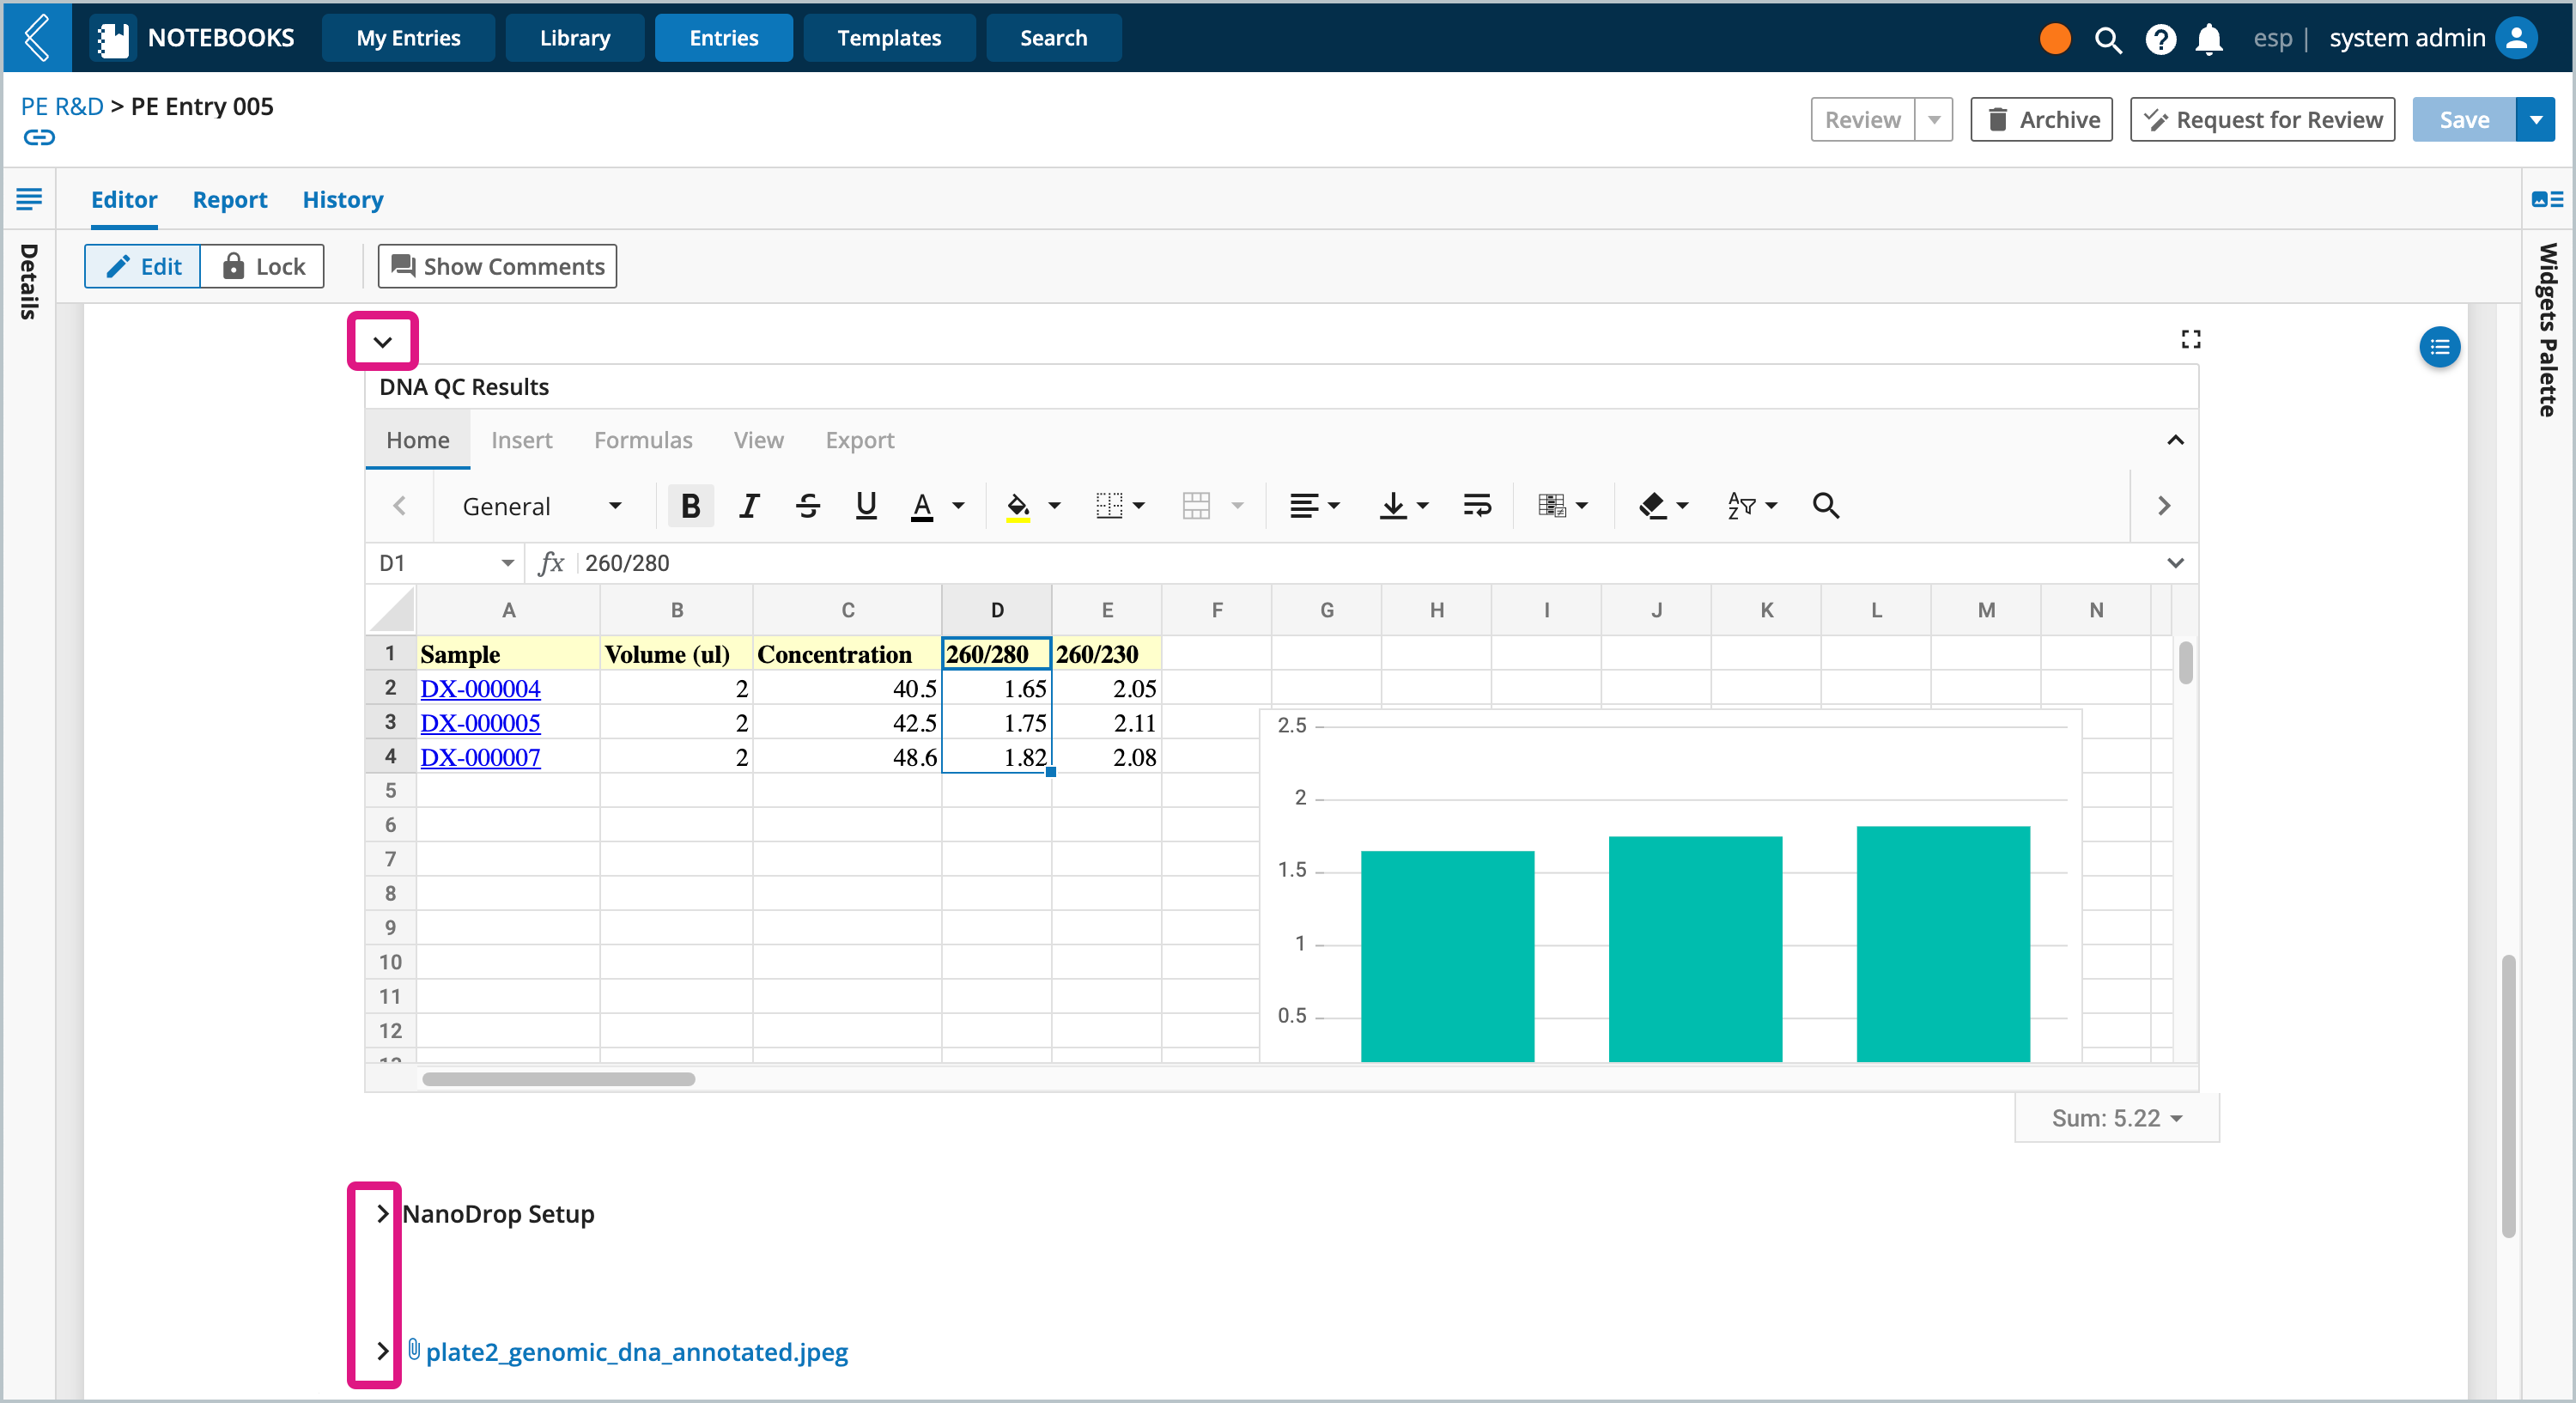
Several types of widgets have the option to be collapsed and expanded to streamline what information is displayed on the page. The following widget types are supported, simply click the expand/collapse arrow in the top left corner of the widget.
File
Image
Spreadsheet
Worksheet
Rich Text
Widget Container
Widget Types
The basic widgets offer simple-logic default widgets that are included in every instance of L7 Notebooks. These include,
Header
Subheader
Paragraph
Bullet list
Ordered list
Checkbox list
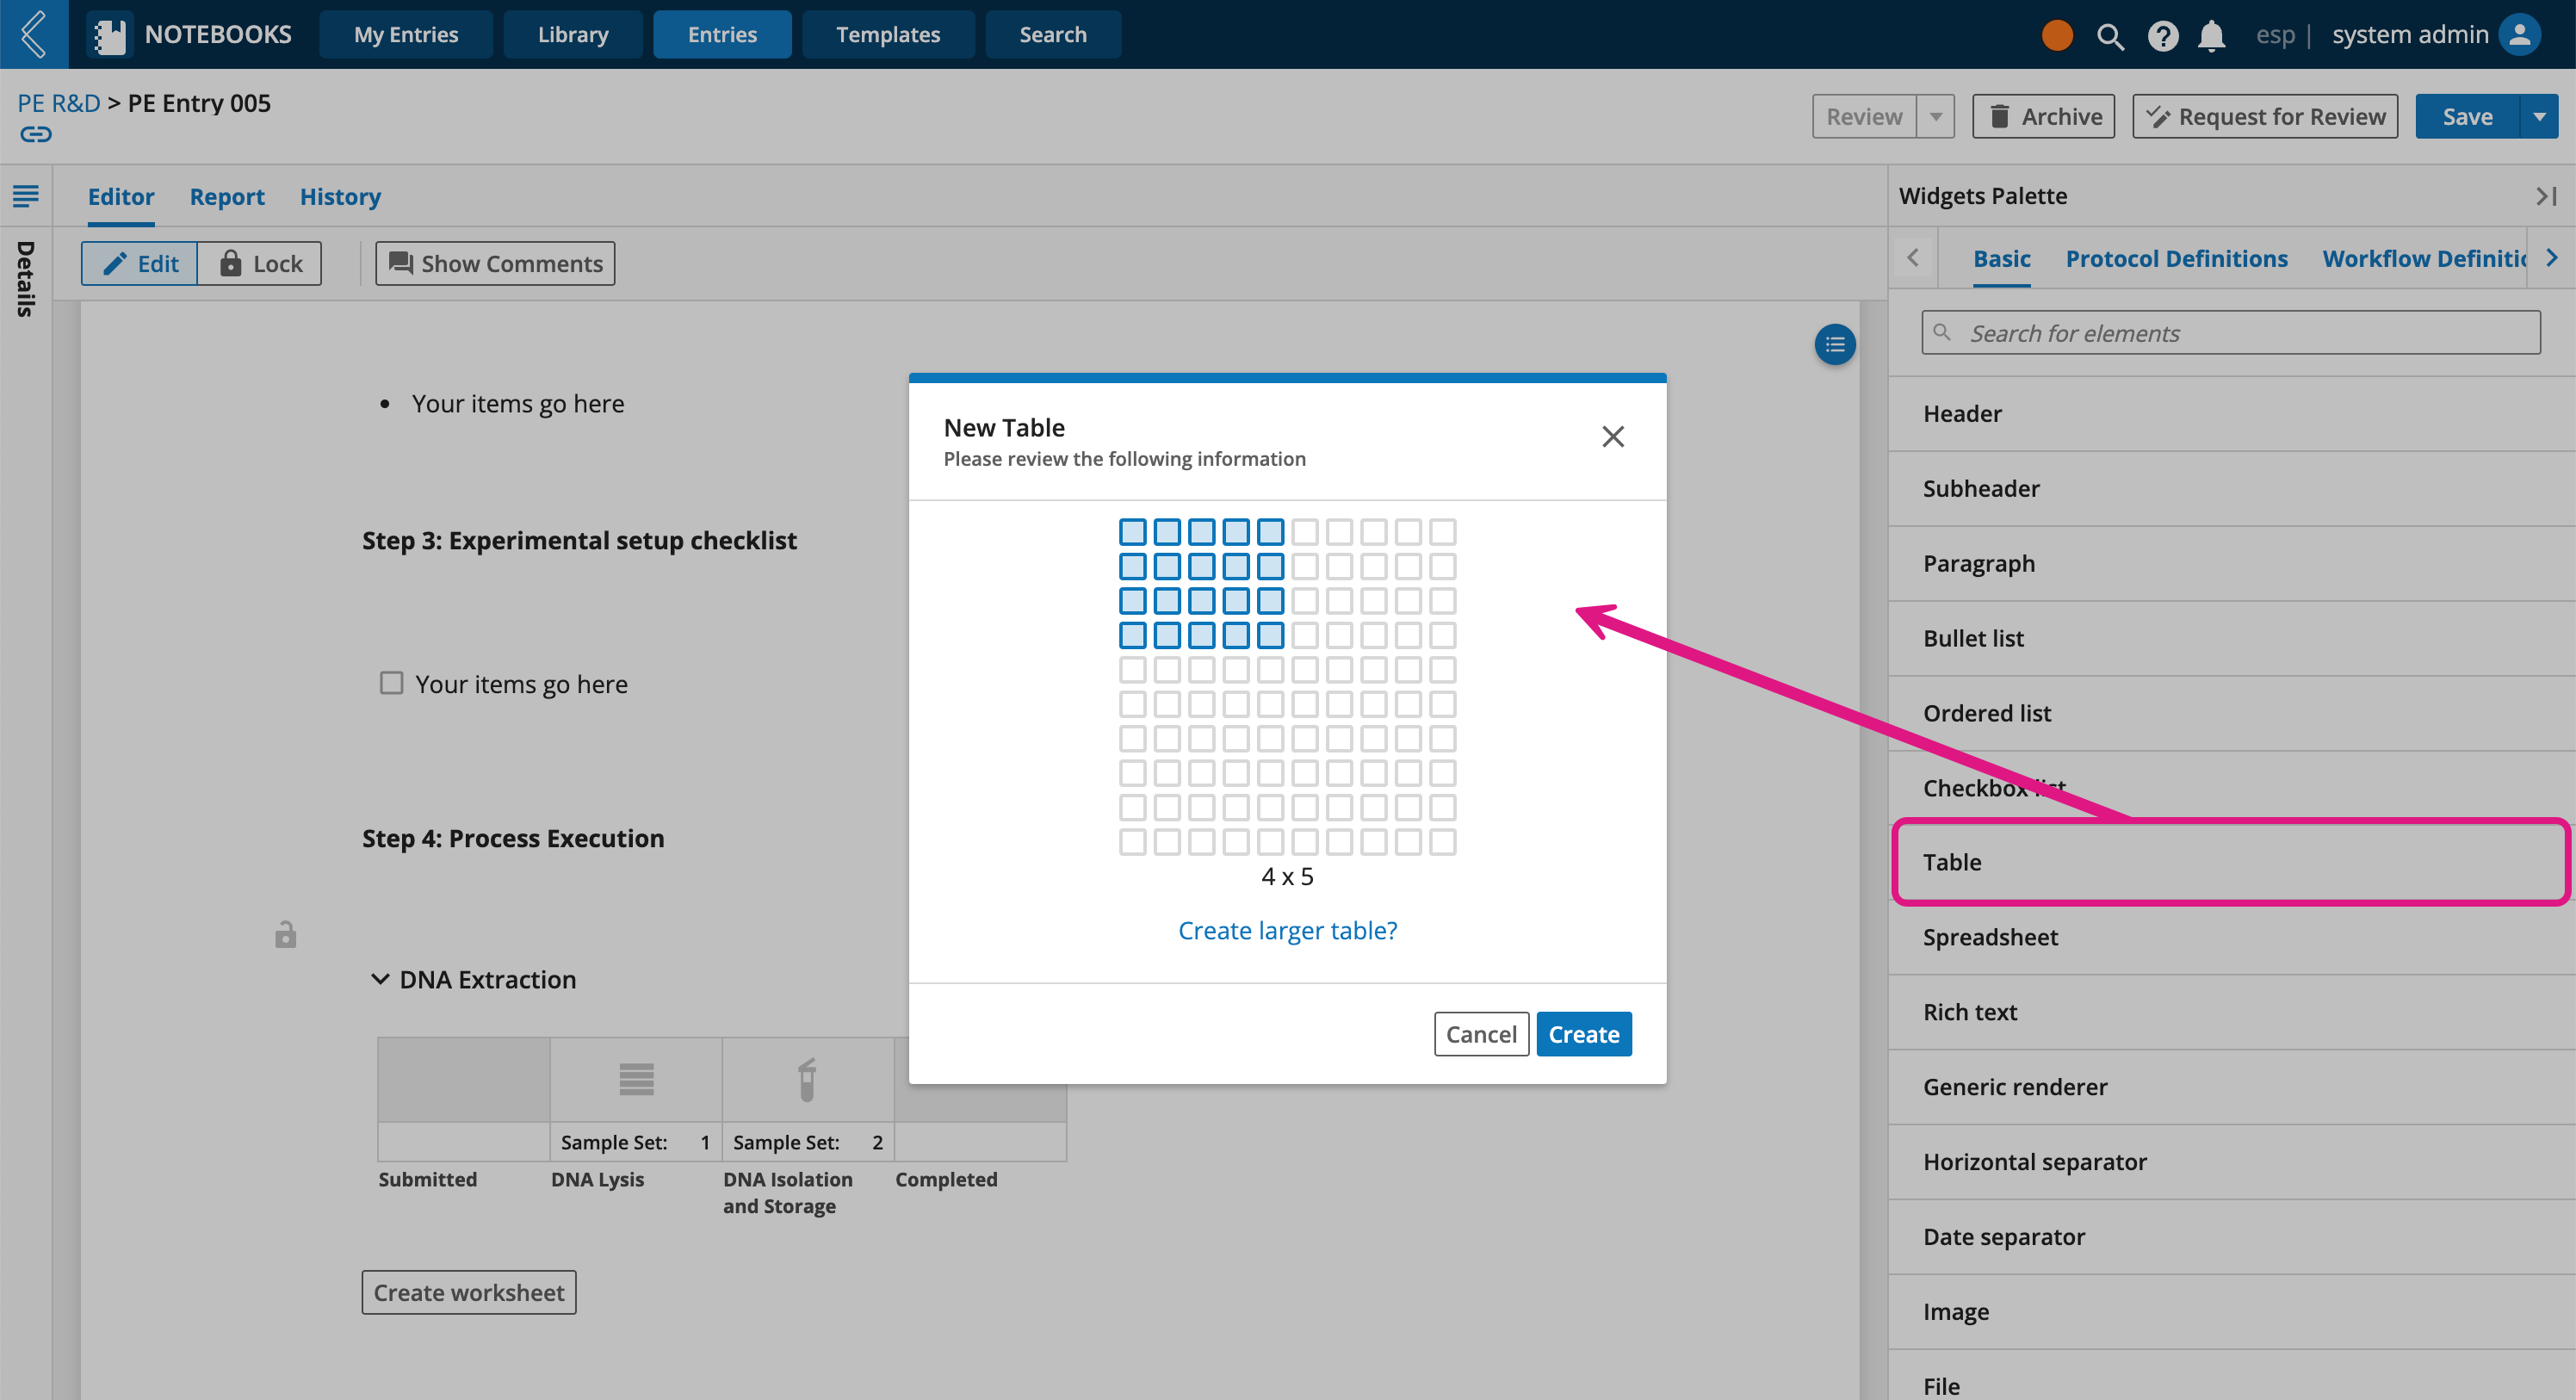
Table (see details below)
Spreadsheet (see details below)
Rich text
Horizontal separator
Date separator
Image (see details below)
File
Widget container - allows you to nest widgets
Table widget
The table widget allows you to create tables that support rich text formatting and linking/referencing other L7|ESP resources (using the @ symbol).
To get started, add the table widget to the Entry, then select the number of rows and columns.
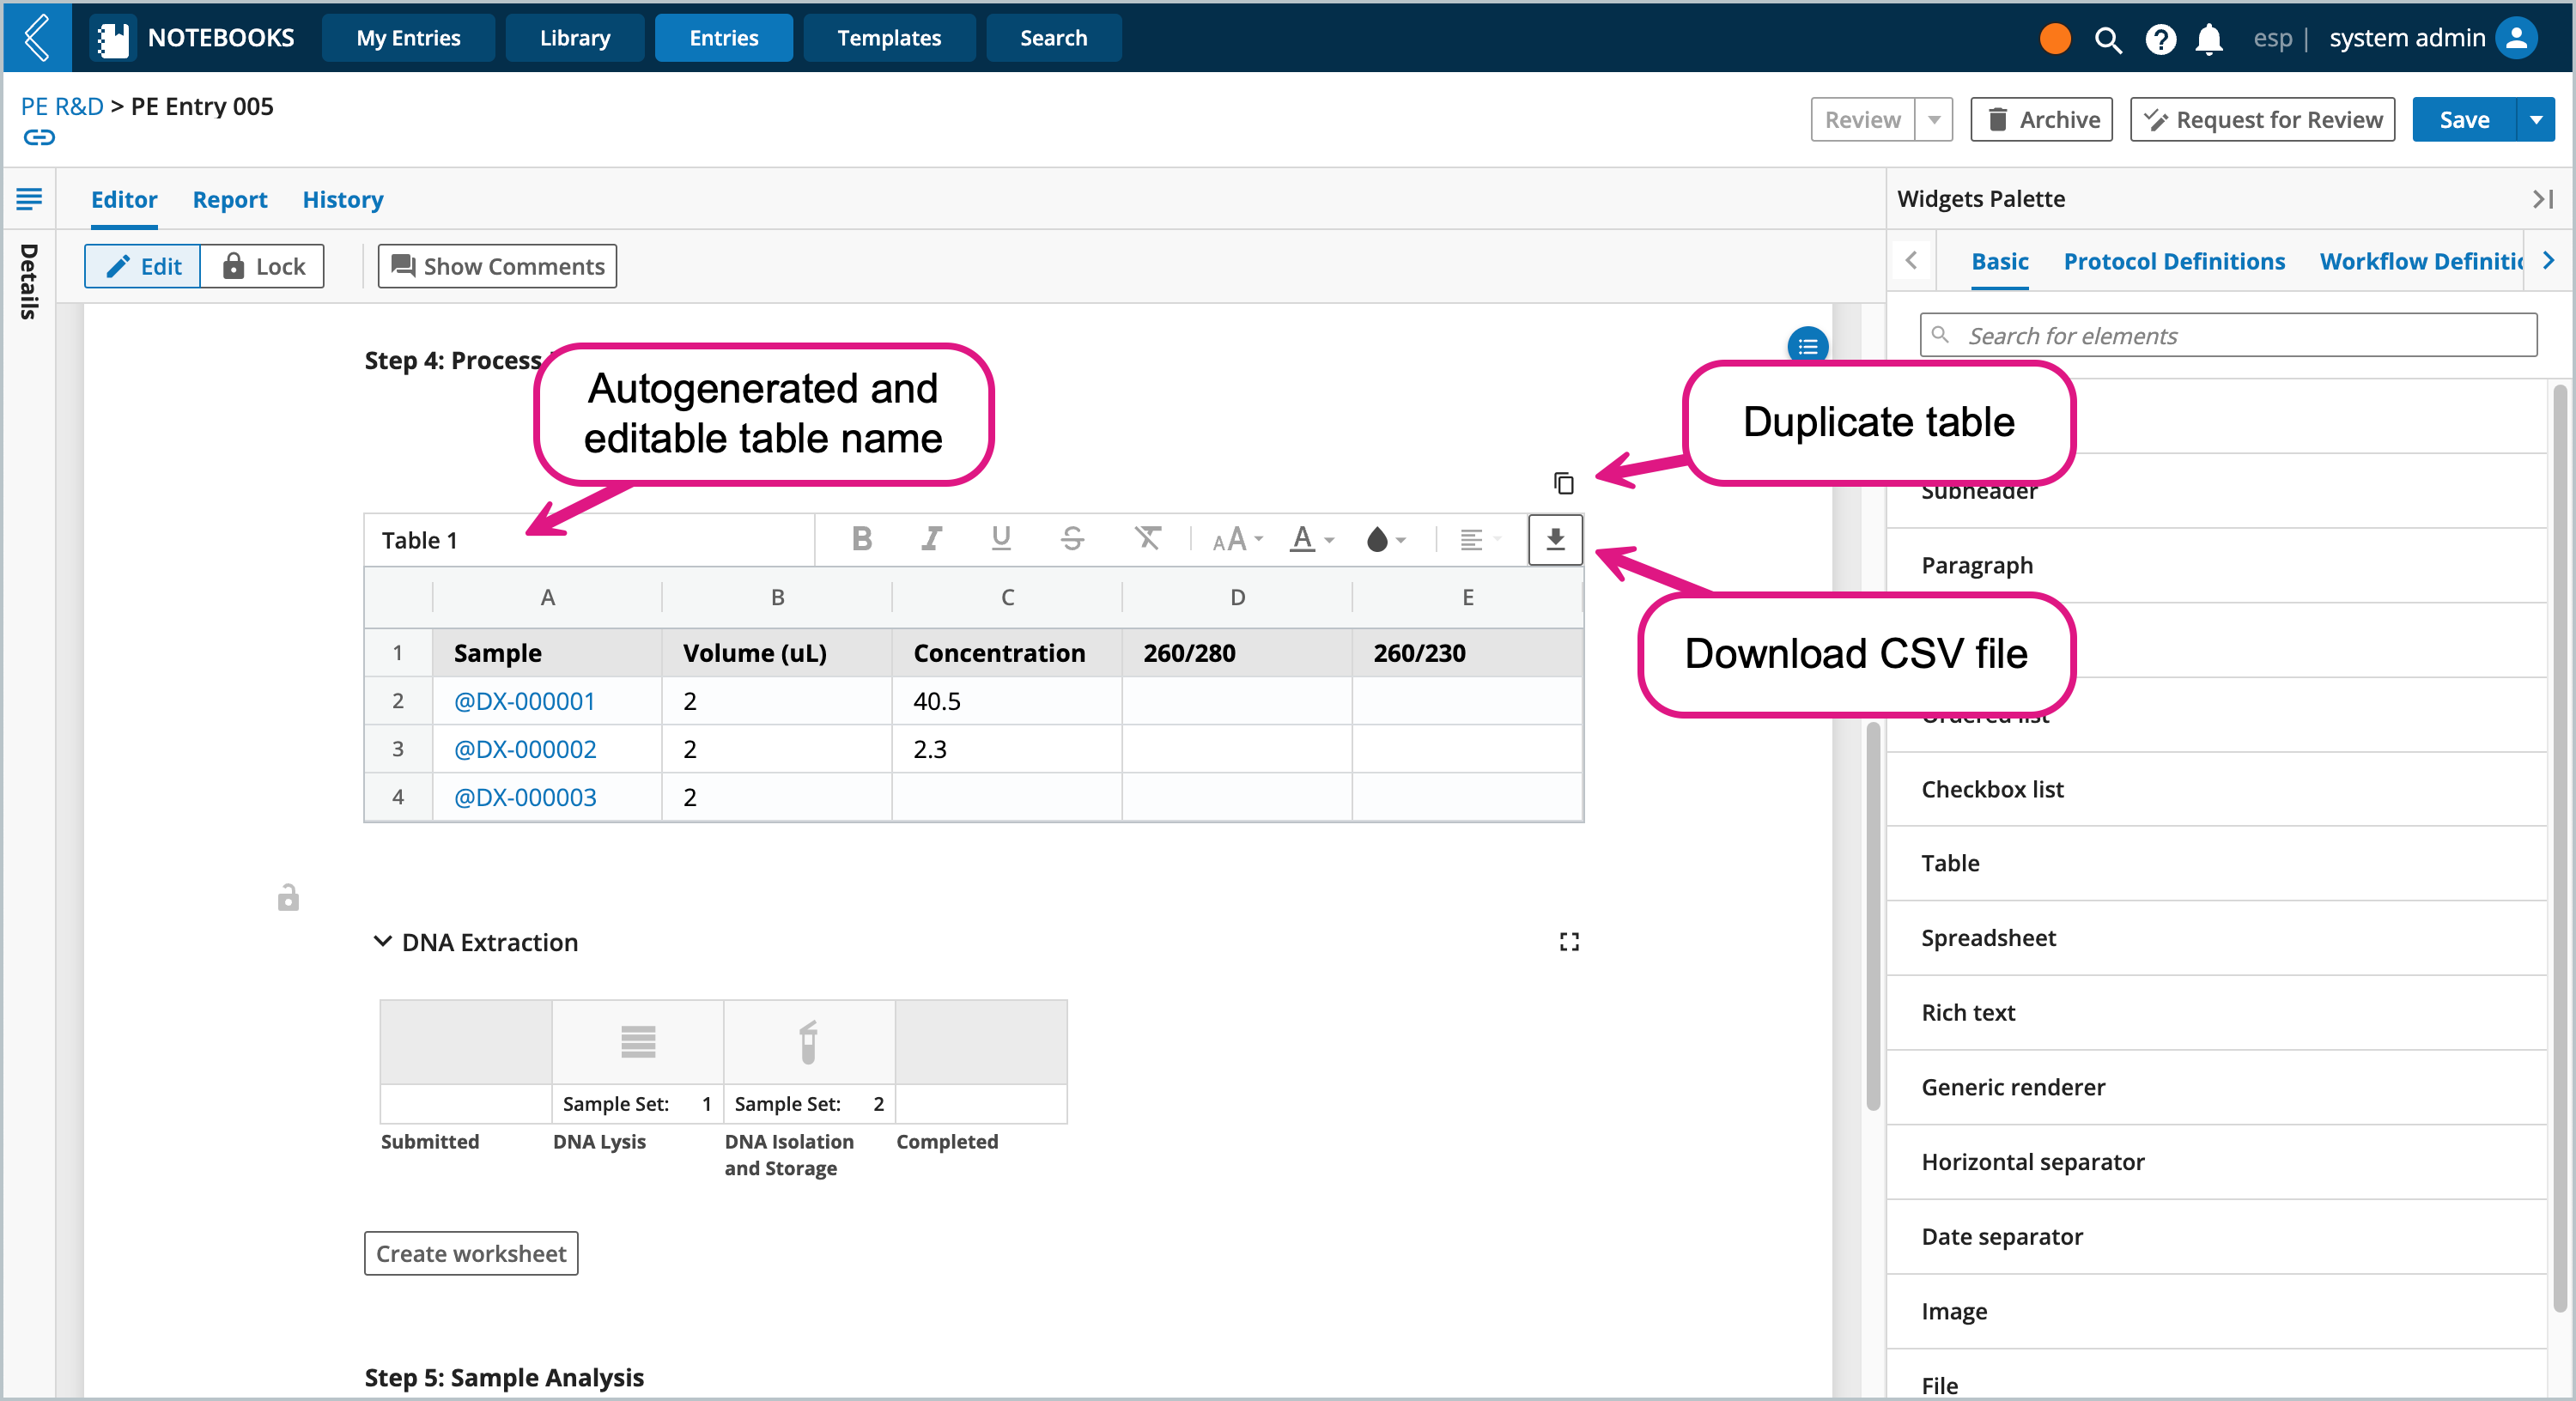
Record your data, format as desired, and use the download icon in the upper right hand corner to download a CSV file of the table. To add/remove rows and columns, right click a cell in the table, then select the action. You can also edit the table's autogenerated name and duplicate the table along with its formatted data.
Spreadsheet widget
The spreadsheet widget creates an Excel like spreadsheet in the Entry with the ability to utilize rich text, formulas and functions, as well as other copy, paste, and drag down capabilities. You can cross reference data entered in two spreadsheet widgets by typing = in any cell, then click on any cell in another spreadsheet widget to copy over the data. Spreadsheets can also be downloaded as a CSV file.
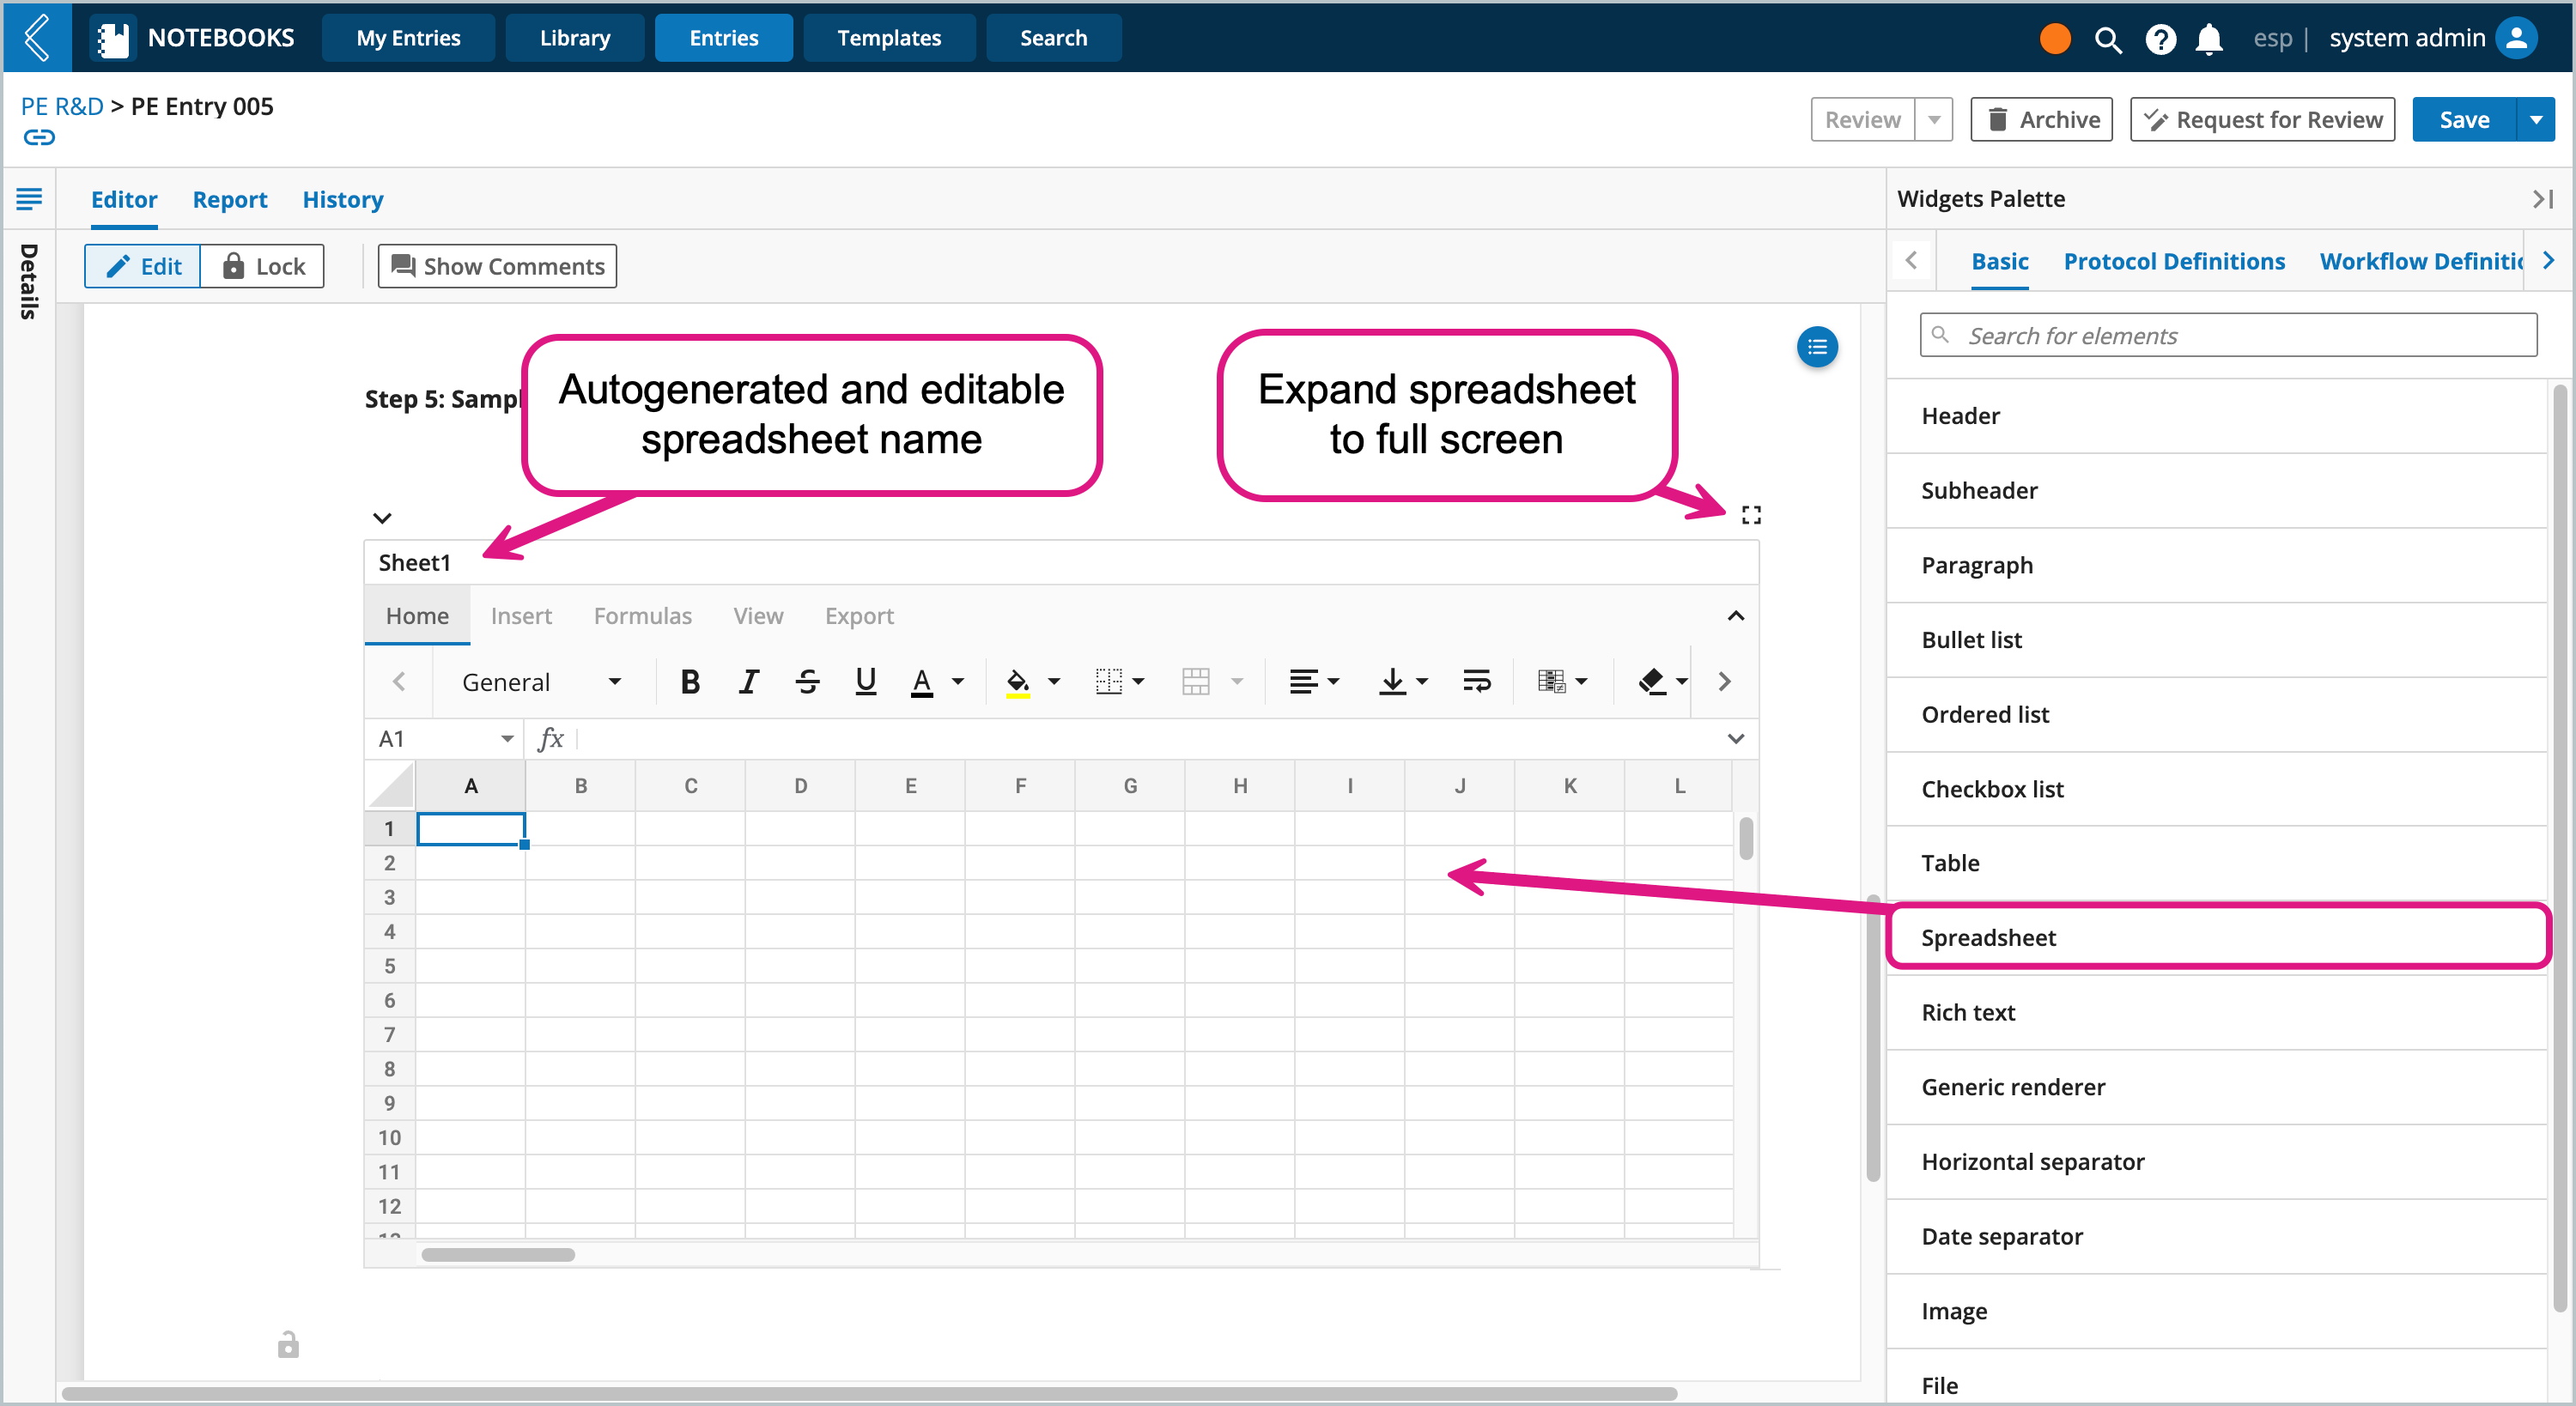
Charts and images can be generated directly in the spreadsheet from the Insert tab, then edited using the Chart Design tab.
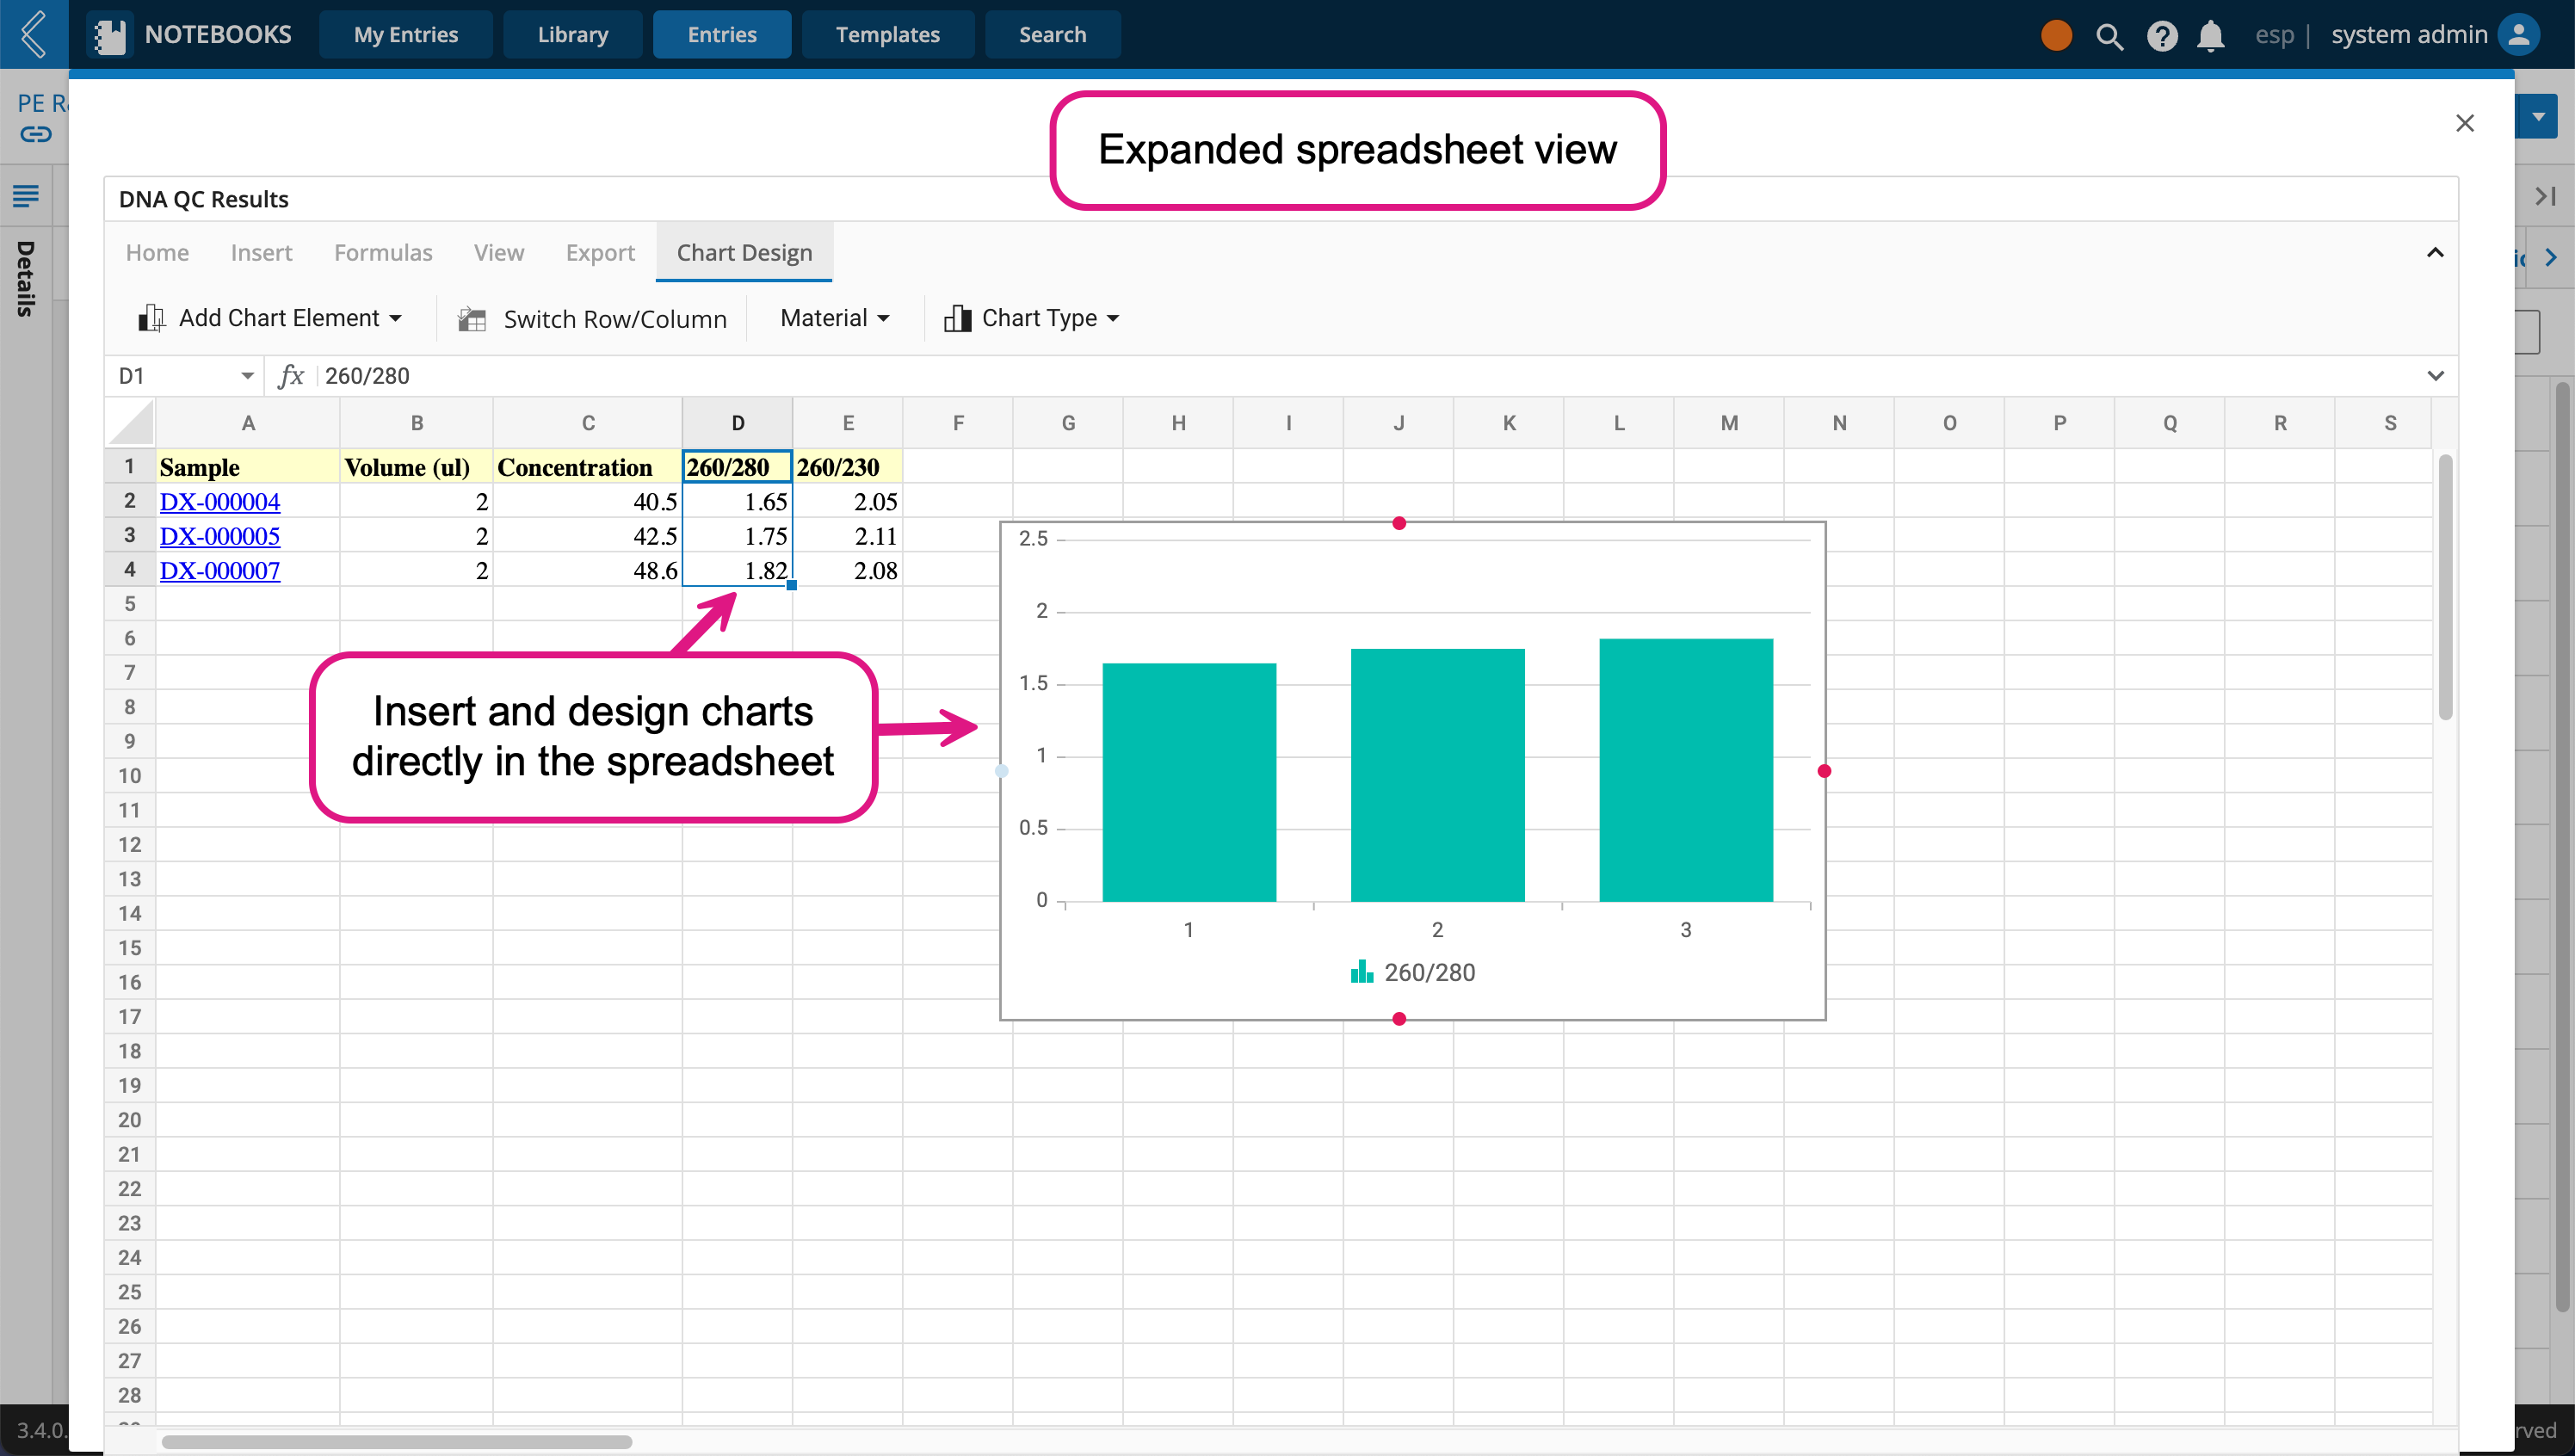
Image widget
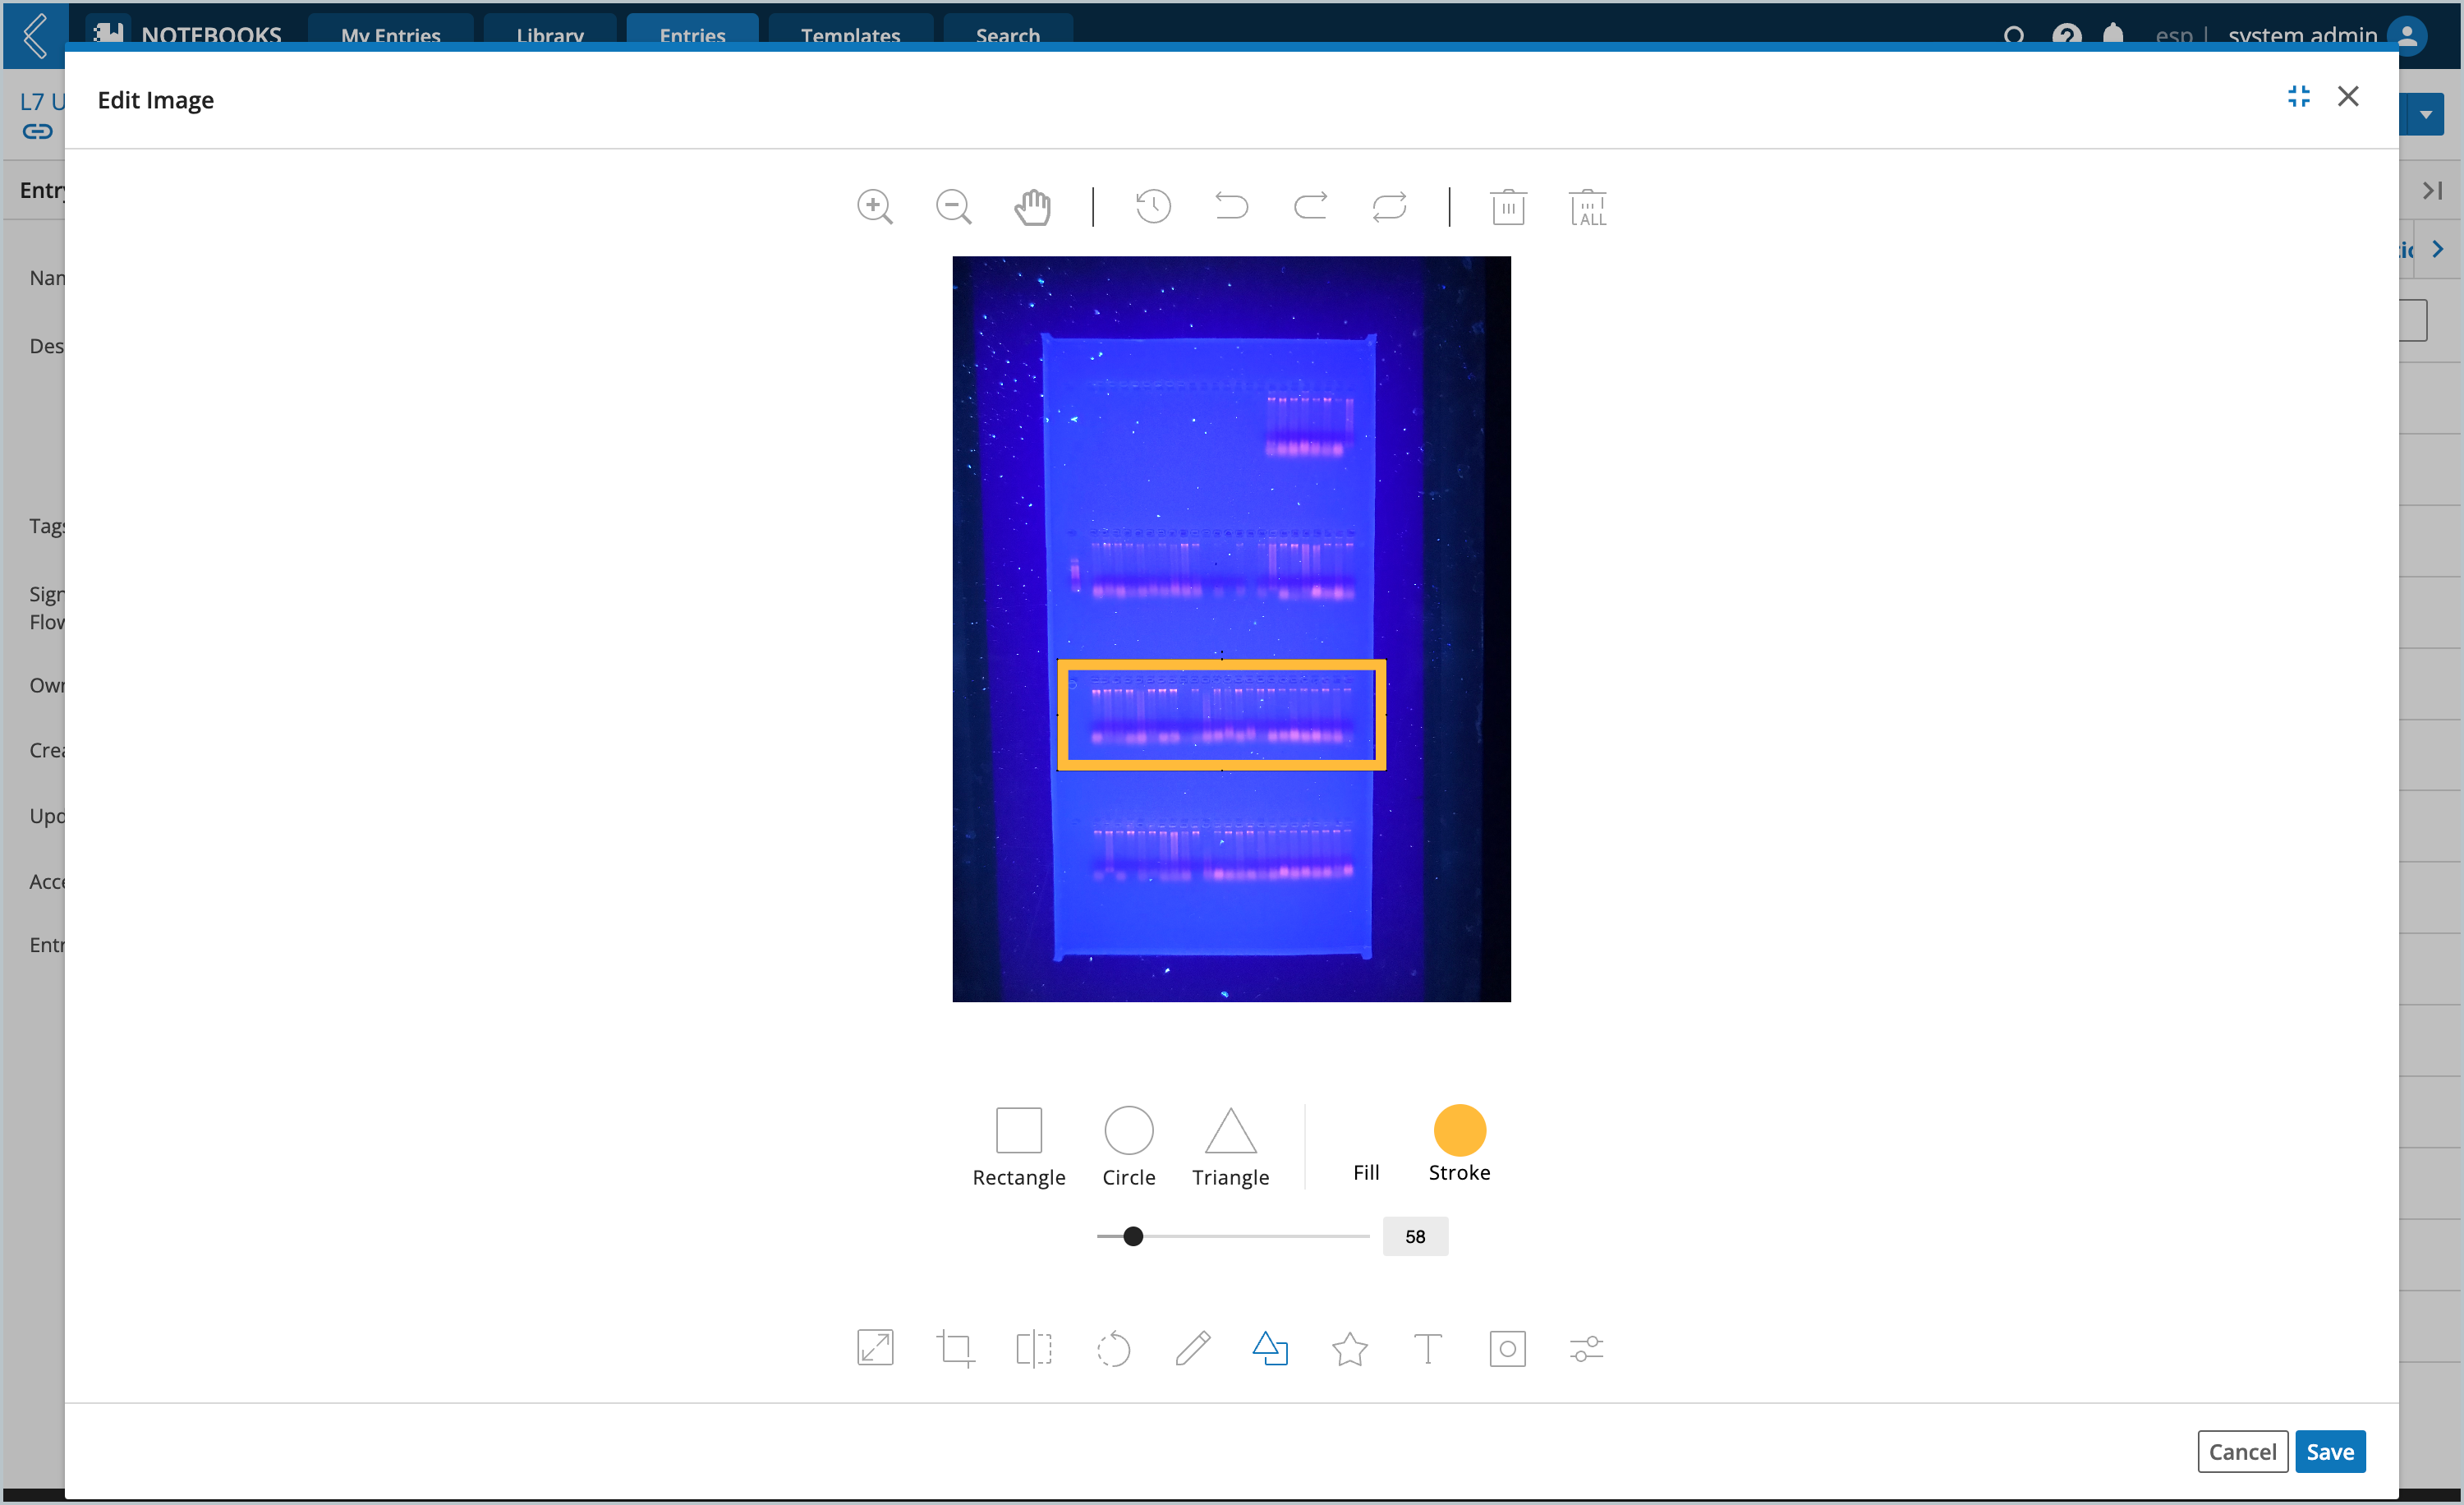
The Image widget allows you to upload, crop, rotate, and annotate images. Just double click on the uploaded image to open the editor.
 |
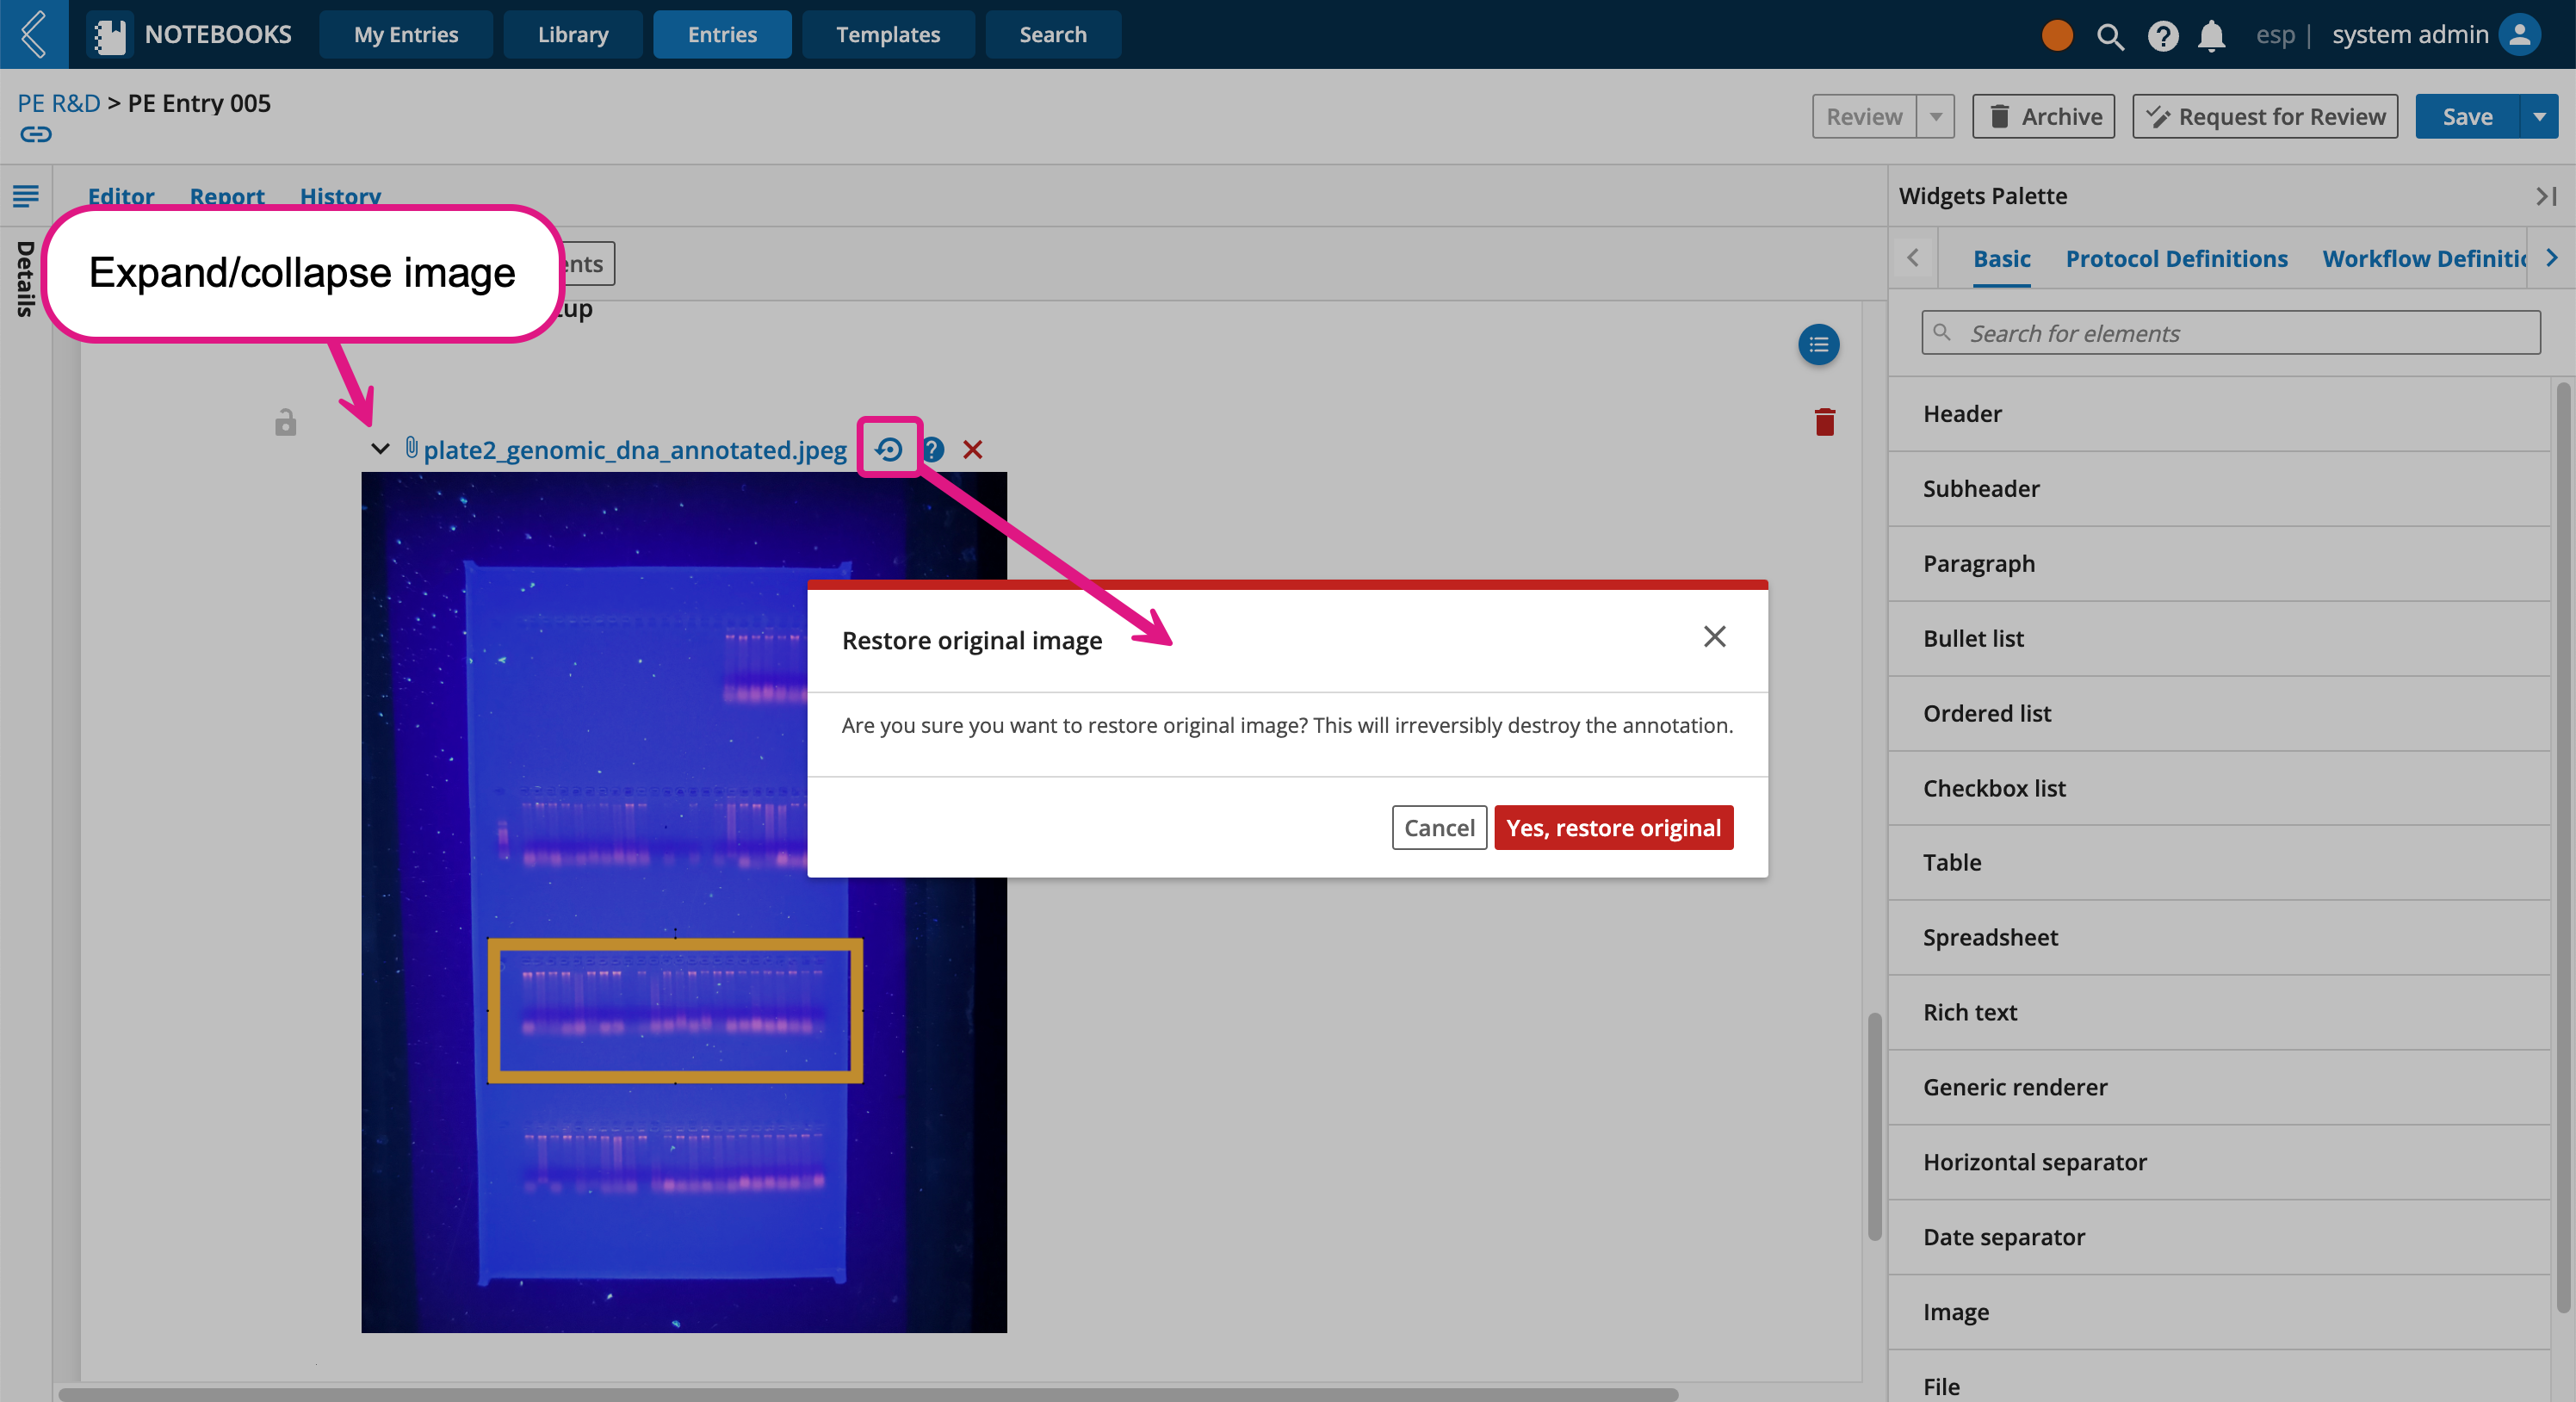
The original image can be restored, however you can not revert to previous versions of the image. The arrow next to the image's name allows you to hide/show the image preview.
The process widgets allow you to leverage structured Protocols and Workflows that have been modeled in L7|MASTER. To learn more about how to use these widgets, see Using Existing Protocols and Workflows in Entries.
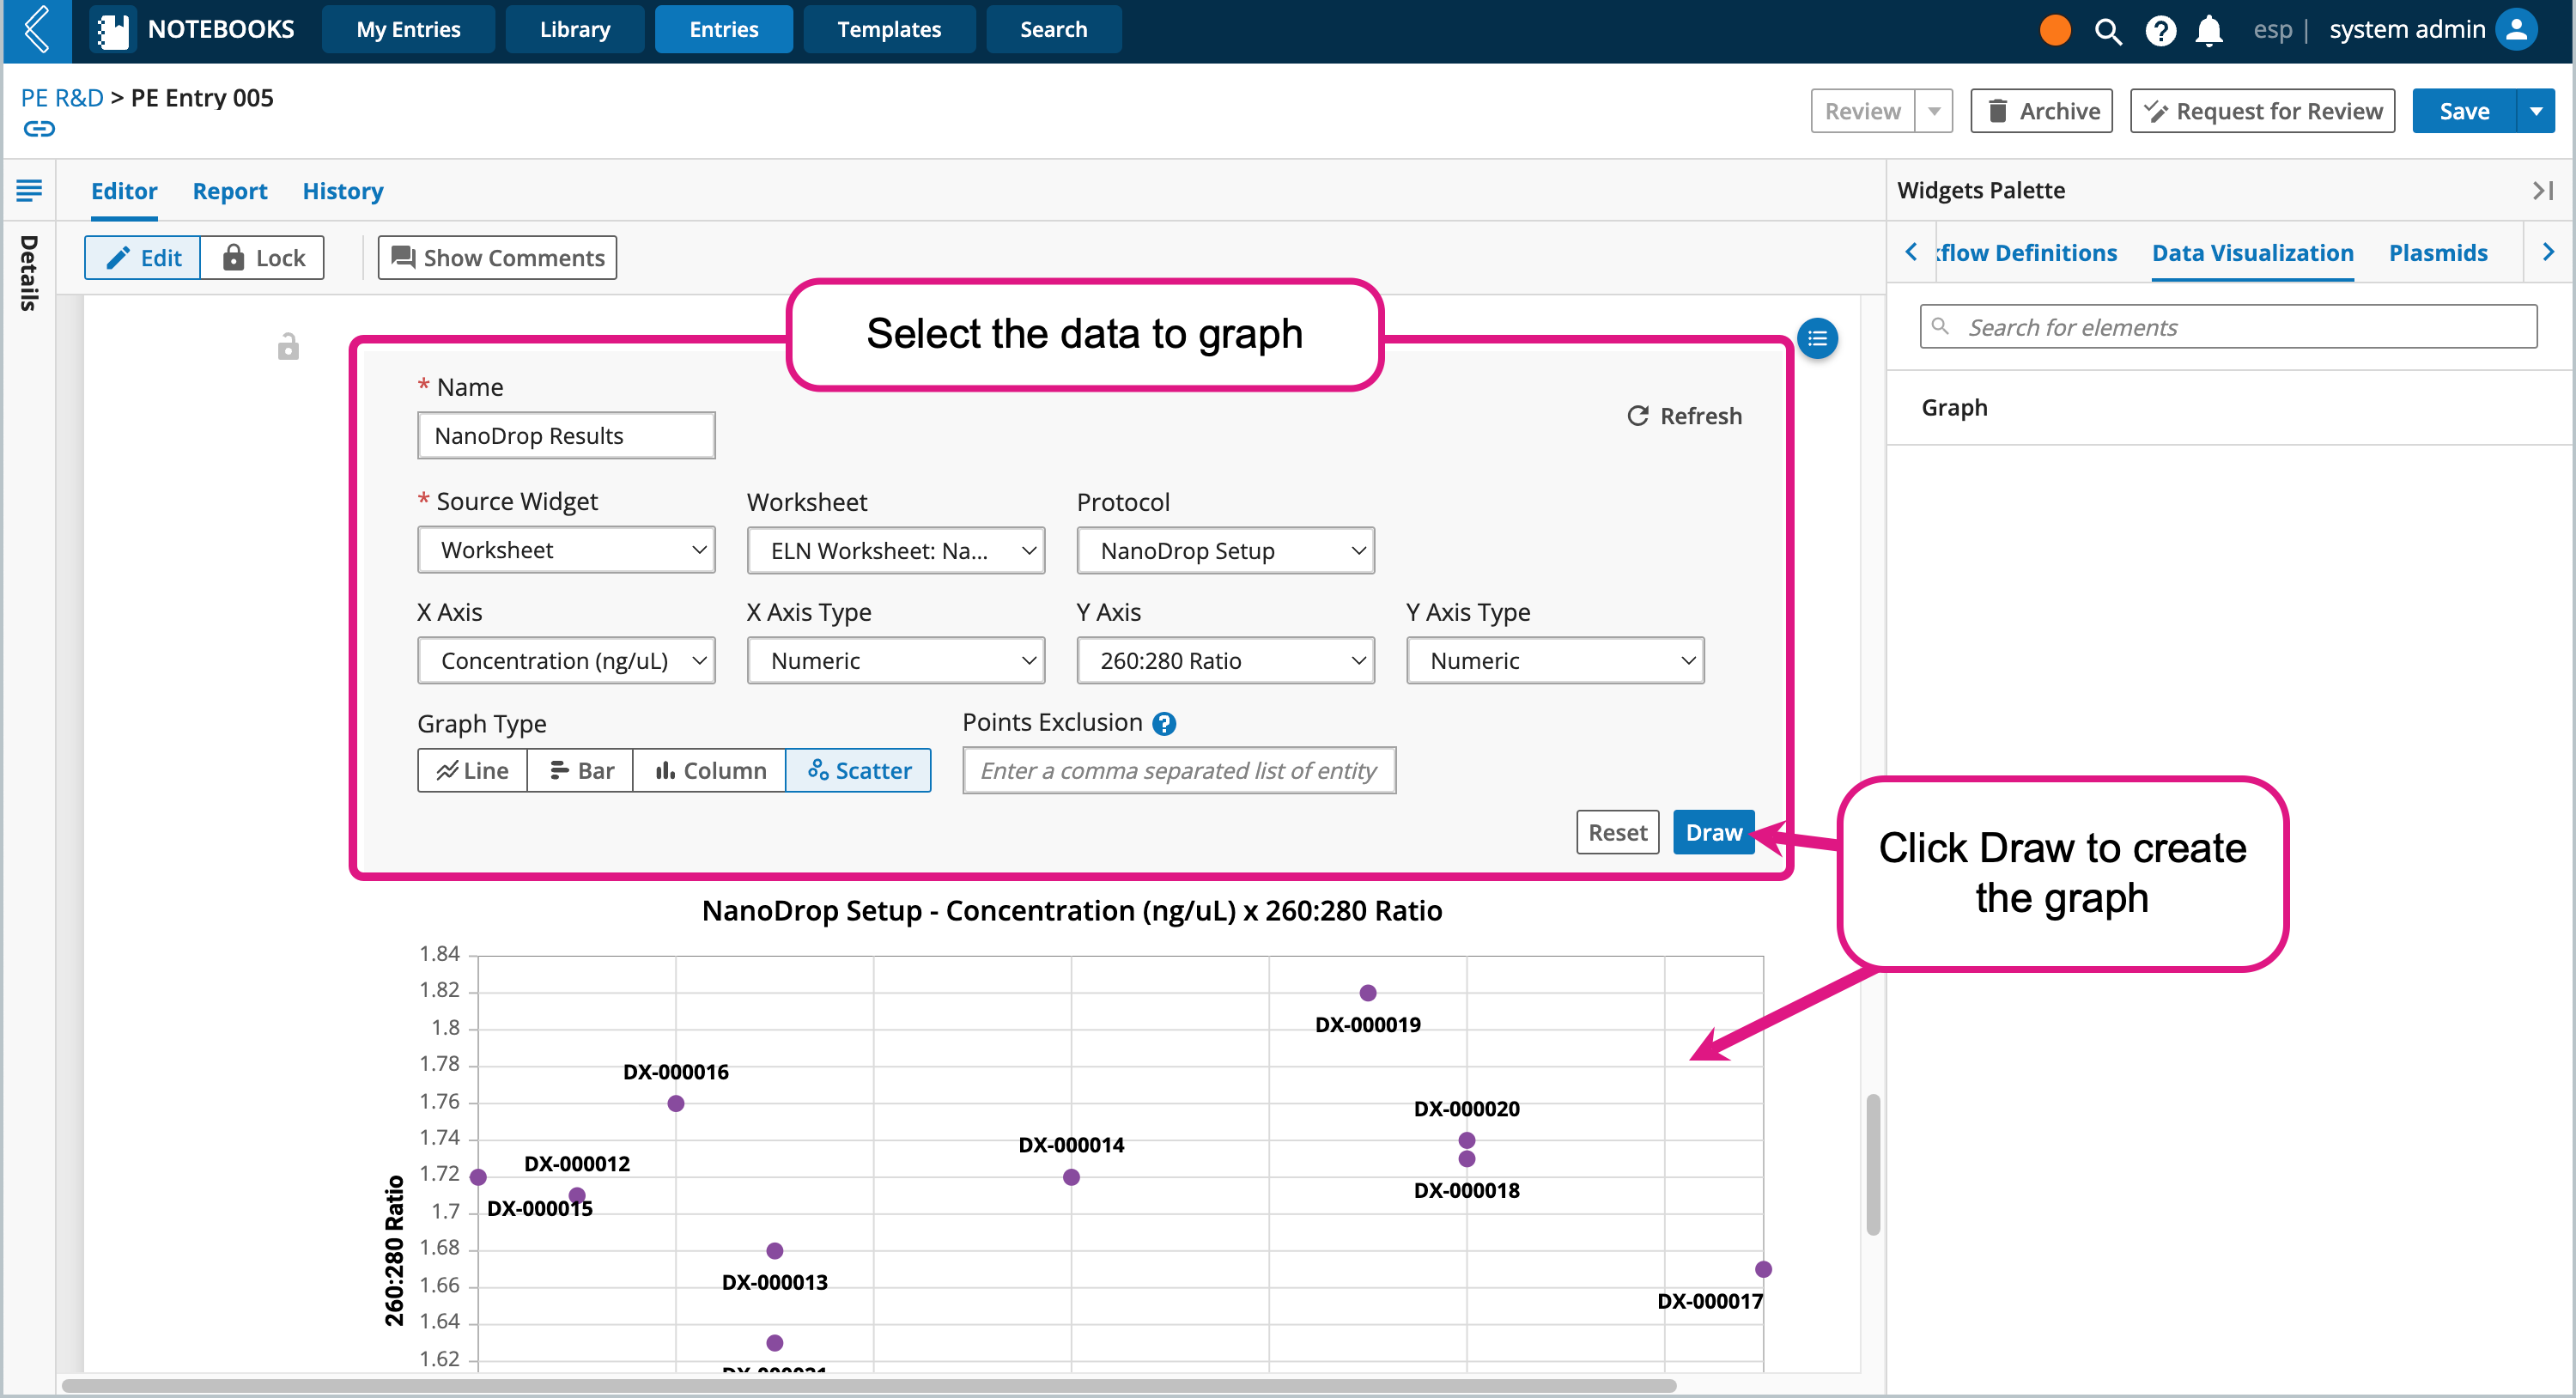
The data visualization widgets provide a way to visualize the data captured within your Entry.
Graph widget
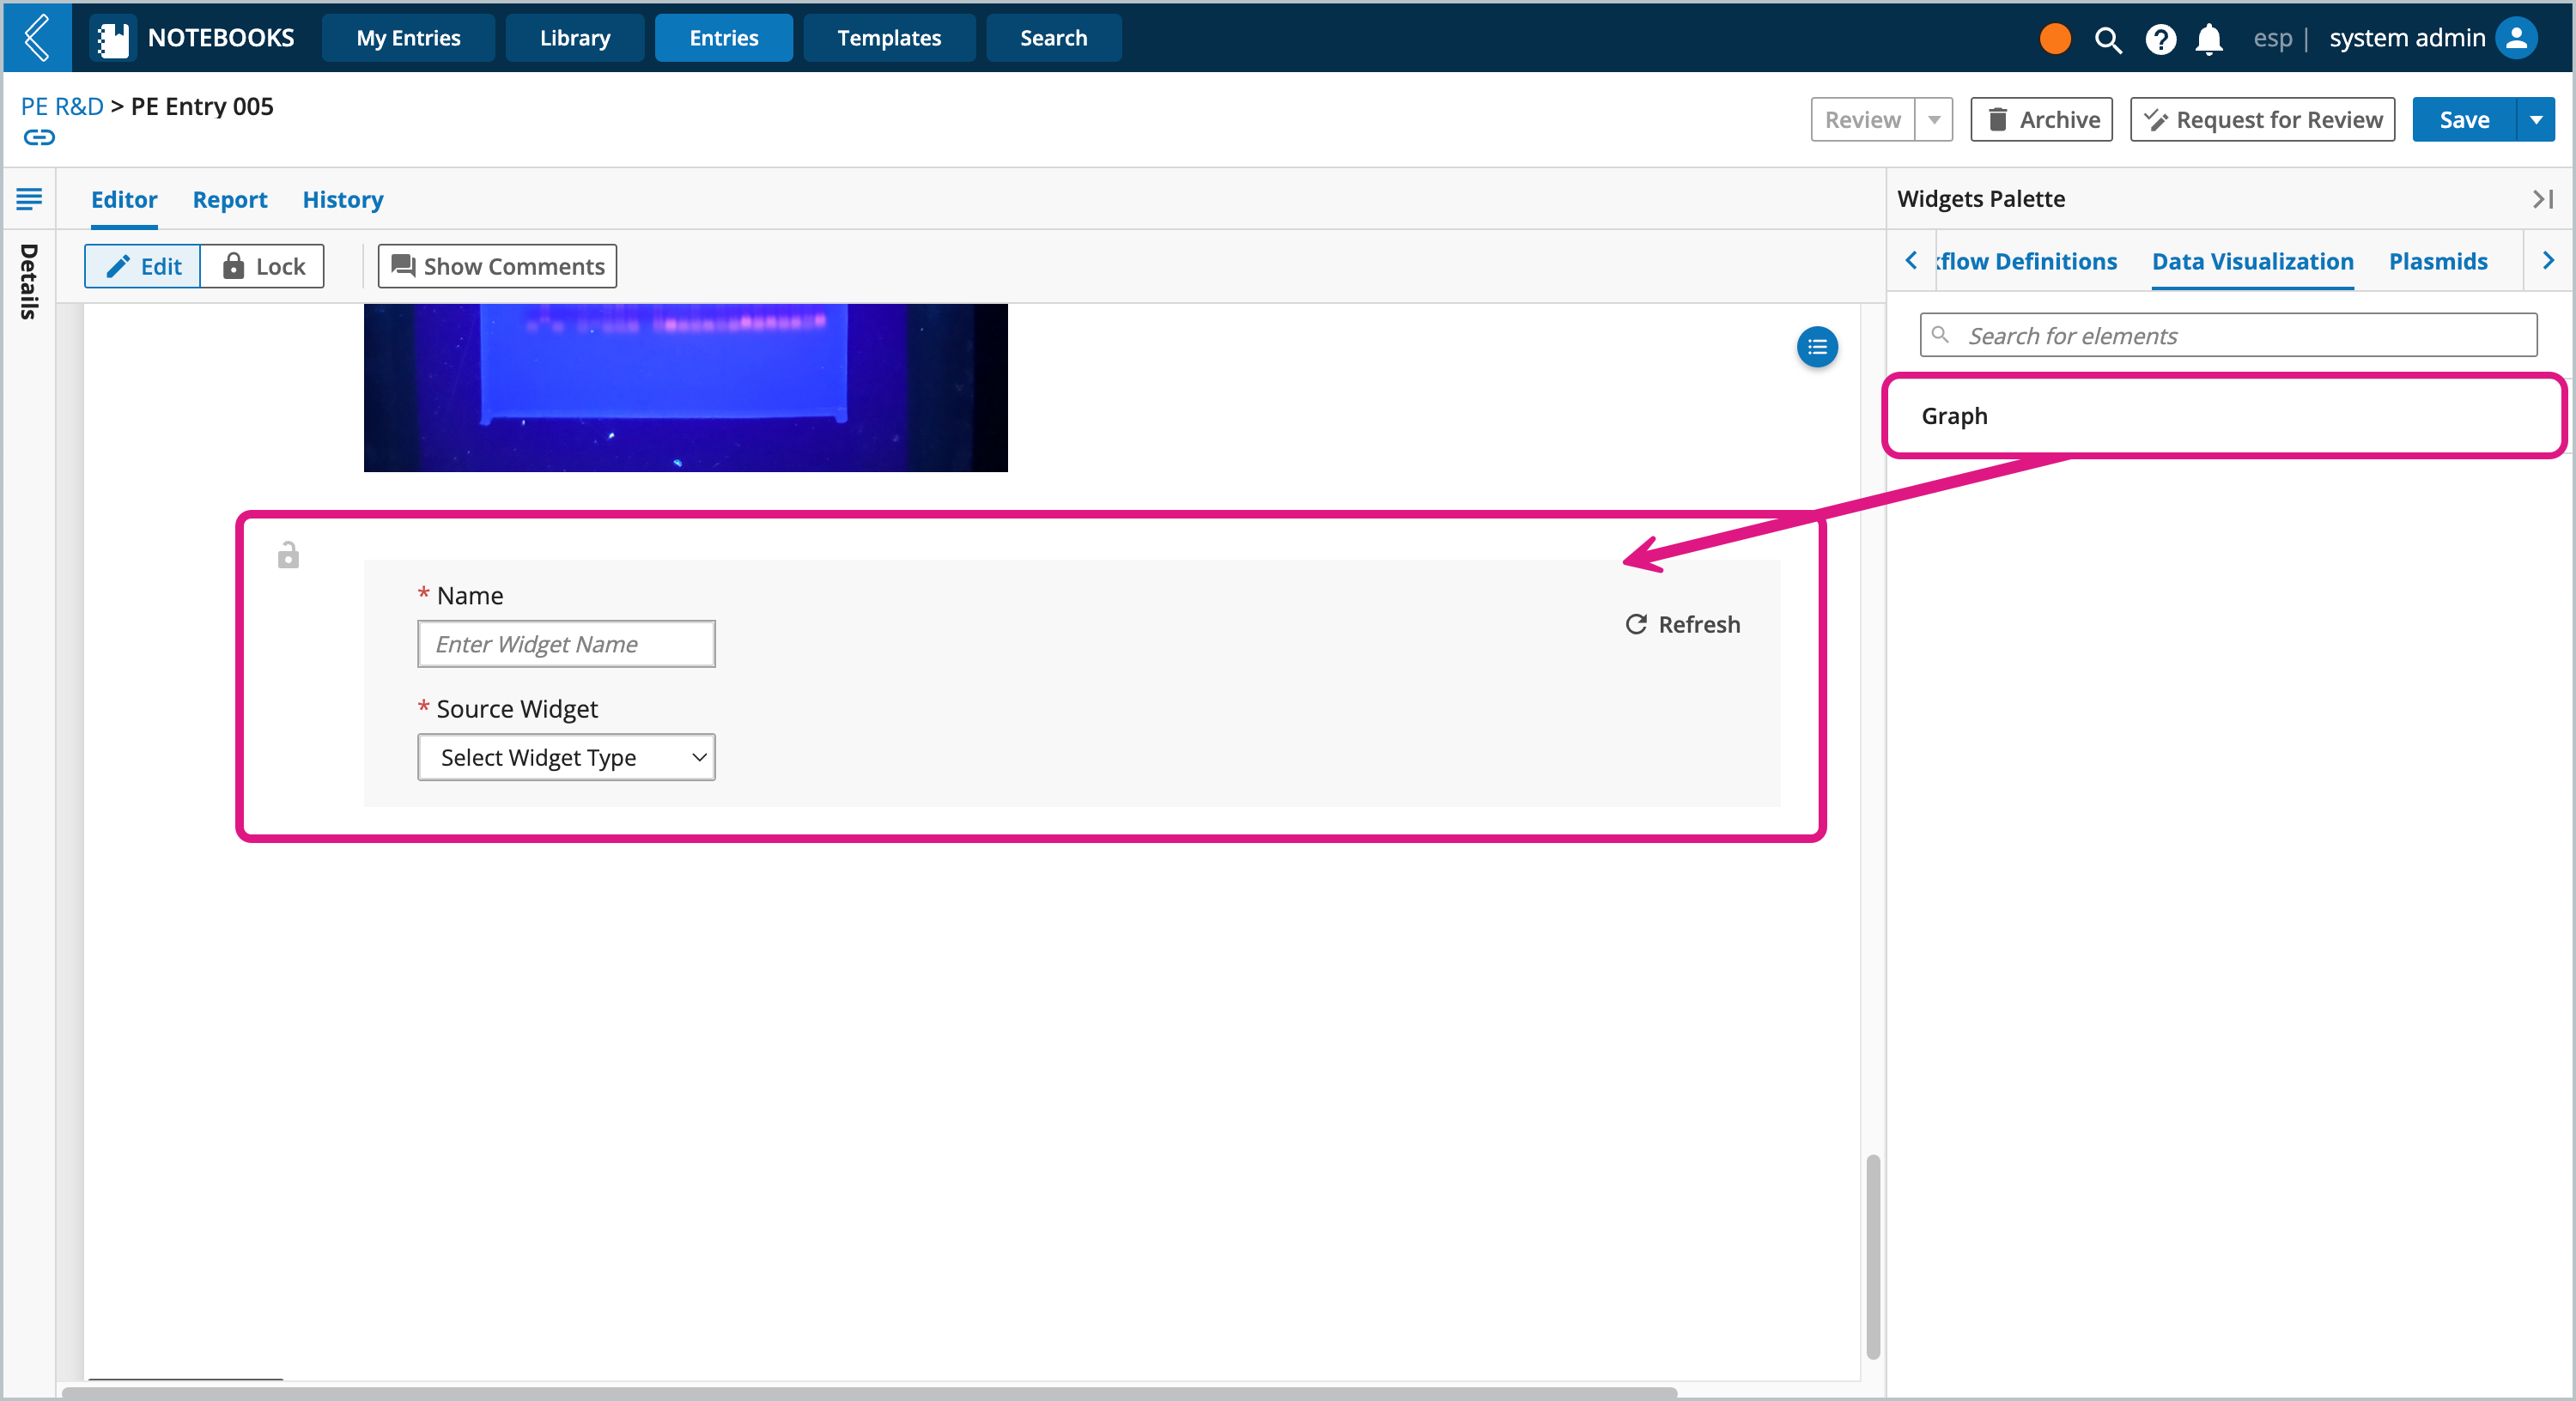
The Graph widget provides a way to visualize the data captured in spreadsheet and worksheet widgets.
When using the Graph widget, you will be prompted to provide a name for this instance of the graph widget and indicate the source widget where the data is located.
Graph type options include line, bar, column, and scatter plots.
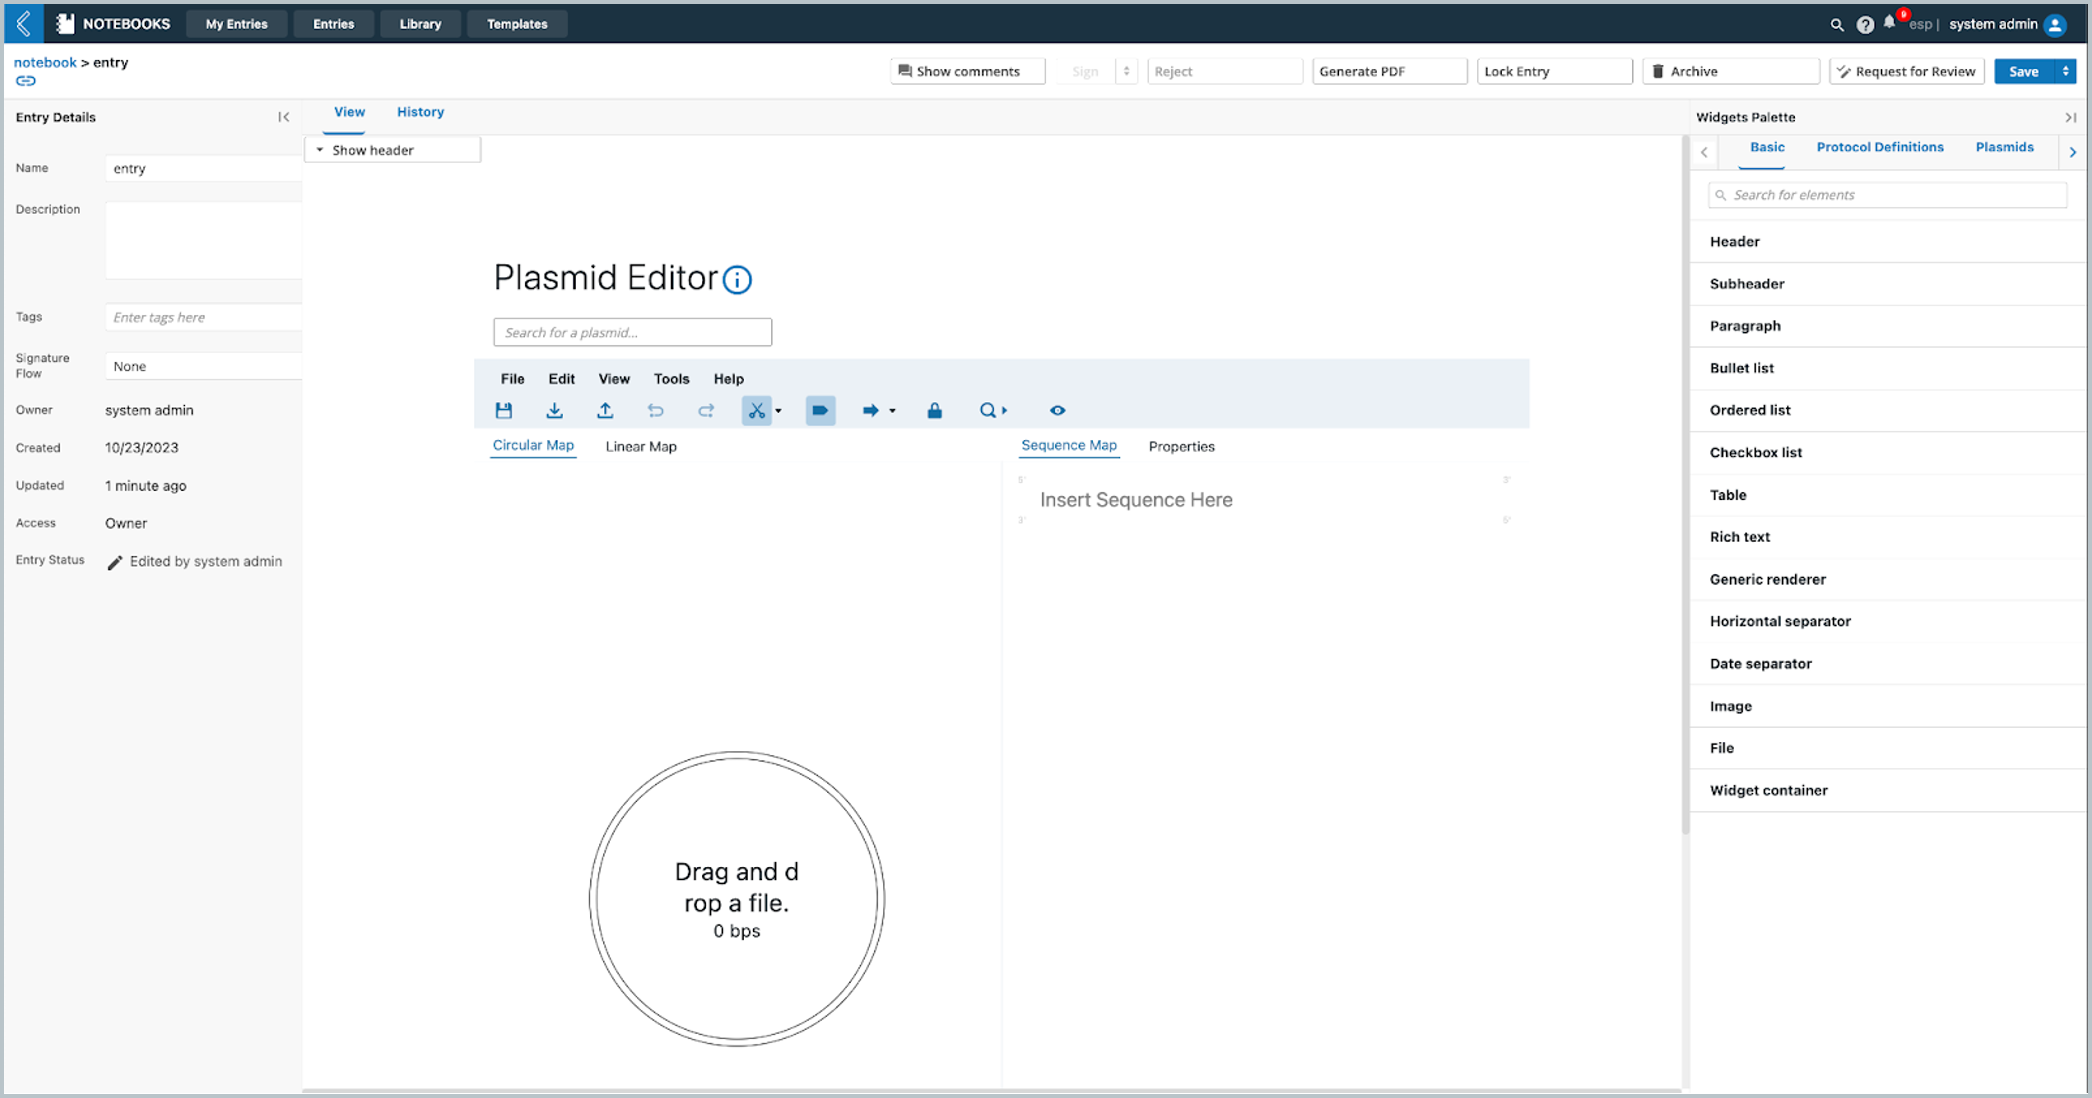
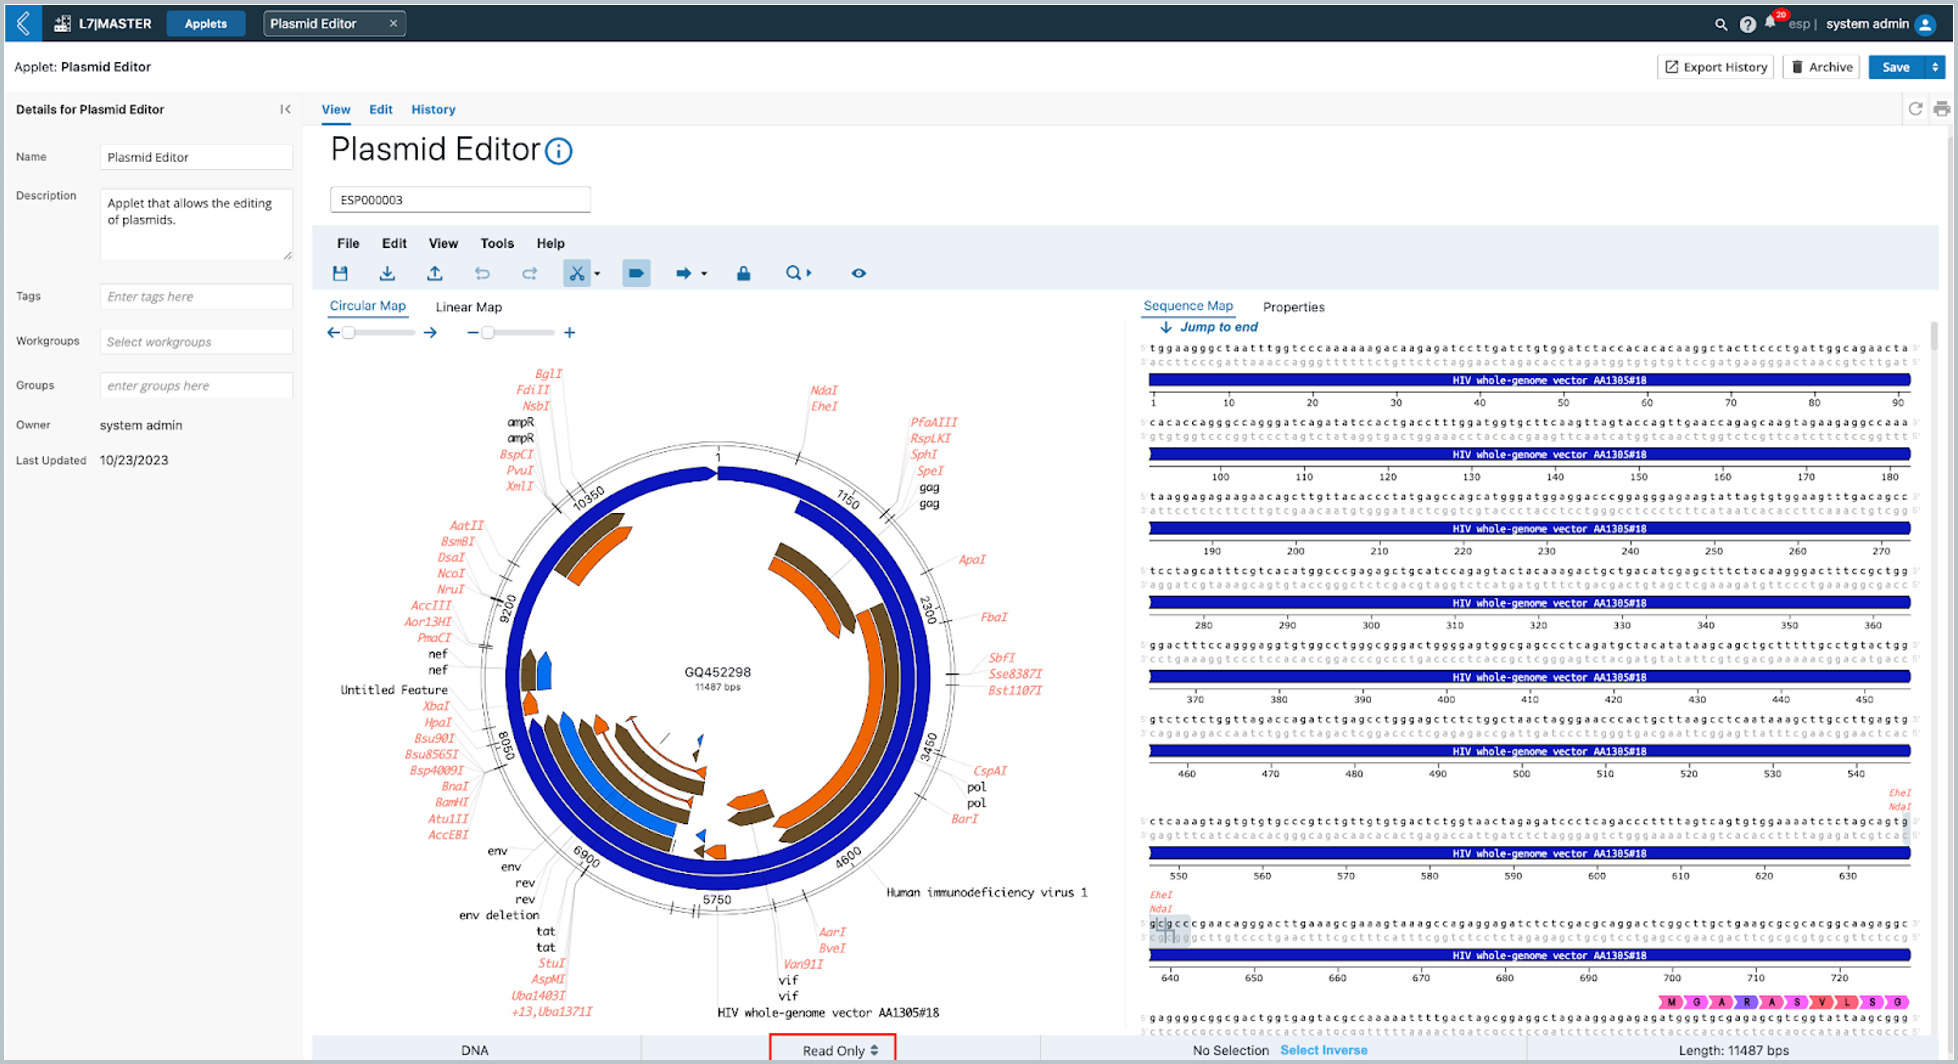
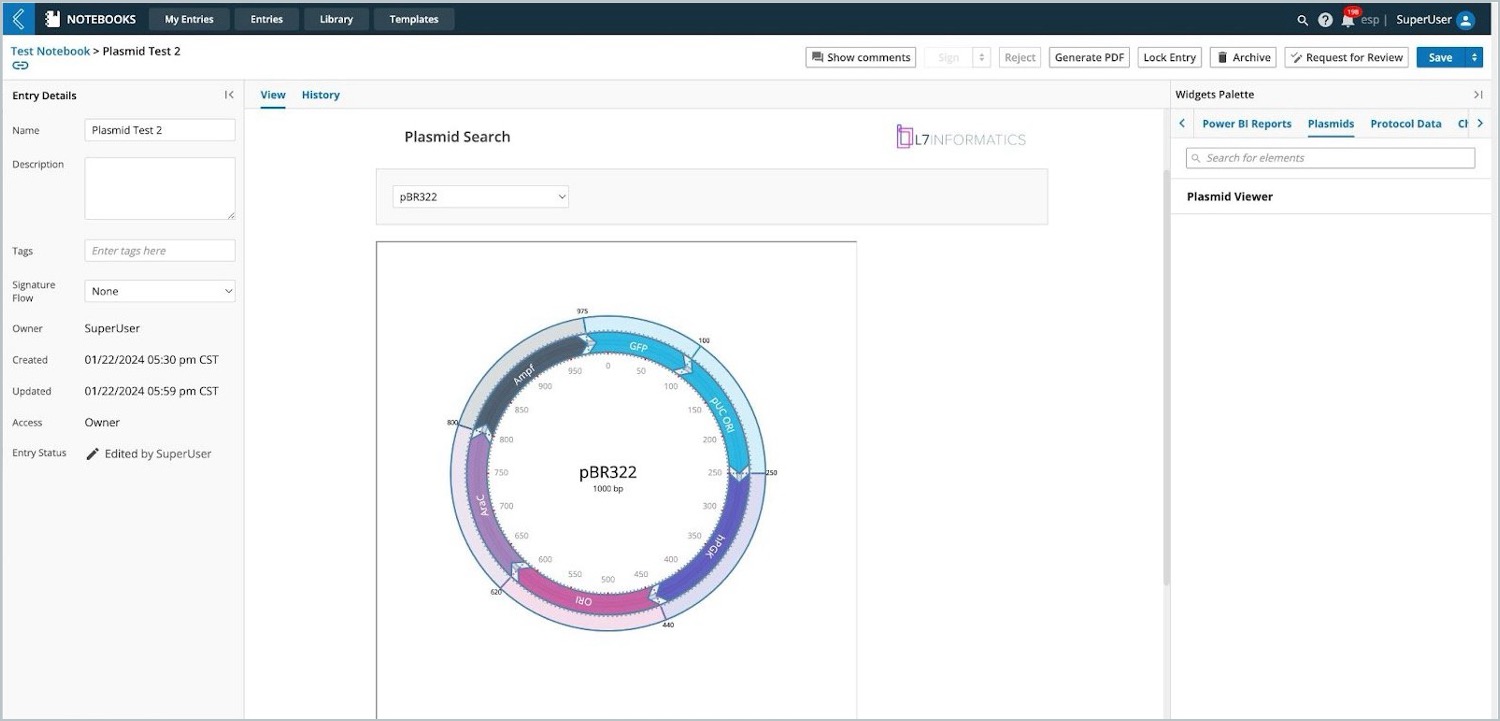
The Plasmid Editor bundle is available as a widget installable via L7|HUB®. If you’re interested in learning about the Plasmid Editor bundle that is part of L7’s standard content, see Plasmid Editor Bundle.
 |
 |
 |
Custom widgets can be created by a developer. If you are a developer looking to learn more, see Creating Custom Widgets.
