Modeling Dynamic Execution Plans (DEPs)
Goals
Know what Dynamic Execution Plans (DEPs) are and when to use them.
Know how to create new Dynamic Execution Plans.
What are DEPs?
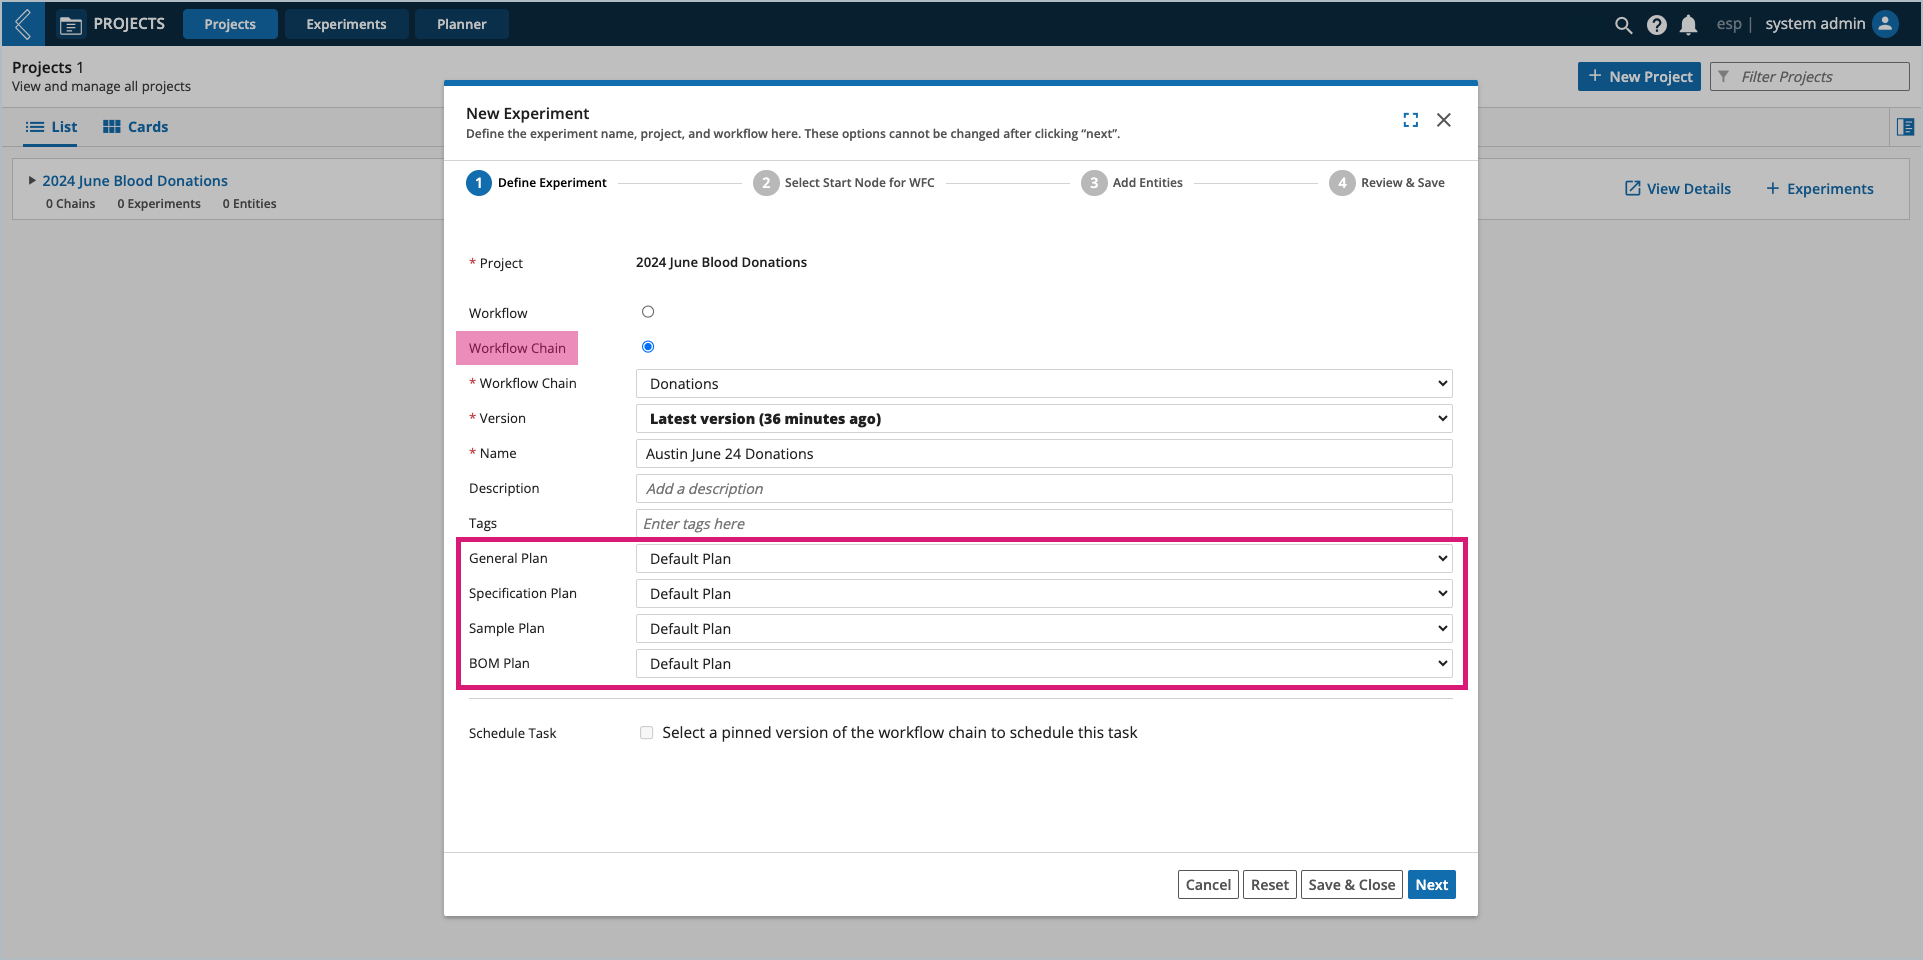
DEPs are process plans that provide alternative parameters for the Protocols associated with a Workflow Chain. DEPs allow you to make changes to the parameters of custom fields, without having to maintain multiple Workflow Chains.
Plan Type | Description |
|---|---|
General Plan | Used to modify the parameters of any custom field type. |
Sample Plan | Used to modify the parameters of Sample Points. |
Specification Plan | Used to modify the parameters of Specifications – numeric fields assigned a Spec Type and a min and/or max value. |
BOM Plan | Used to modify the parameters of Inventory Items Use fields and Resource Link fields of type Container that restrict Items to a kit. |
How does an End User use DEPs?
DEPs are assigned to Workflow Chain Experiments in L7 Projects. The General Plan is applied first, and where there is overlap, will be overridden by the Sample, Specification, or BOM Plan.

How to create new DEPs

To create a new DEP:
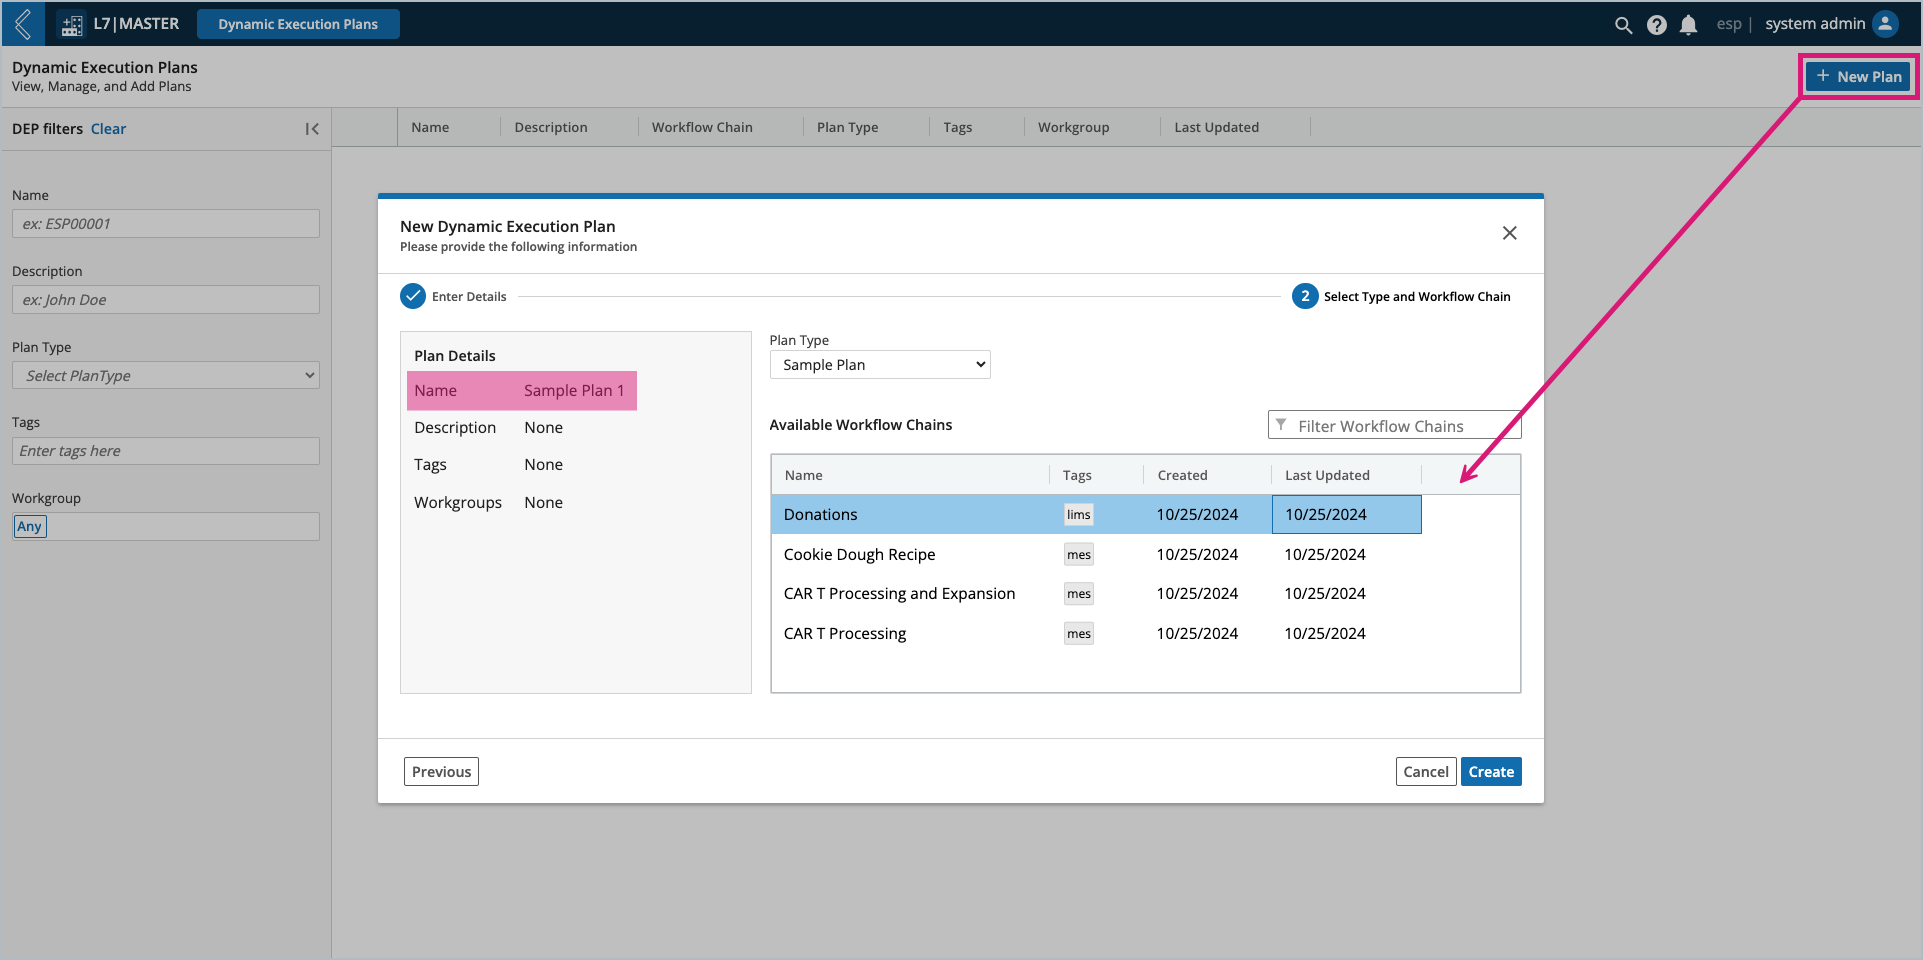
Go to: L7|Master → Dynamic Execution Plans.
Select + New Plan.
Enter a unique Name (the remaining fields are optional).
Select Next.
Select the Plan Type.
Select the Workflow Chain that the plan will be associated with.
For Sample Plans, only Workflow Chains with Sample Points will be available.
For Spec Plans, only Workflow Chains with Specifications will be available.
For BOM Plans, only Workflow Chains with BOM-related fields will be available.
Select Create.
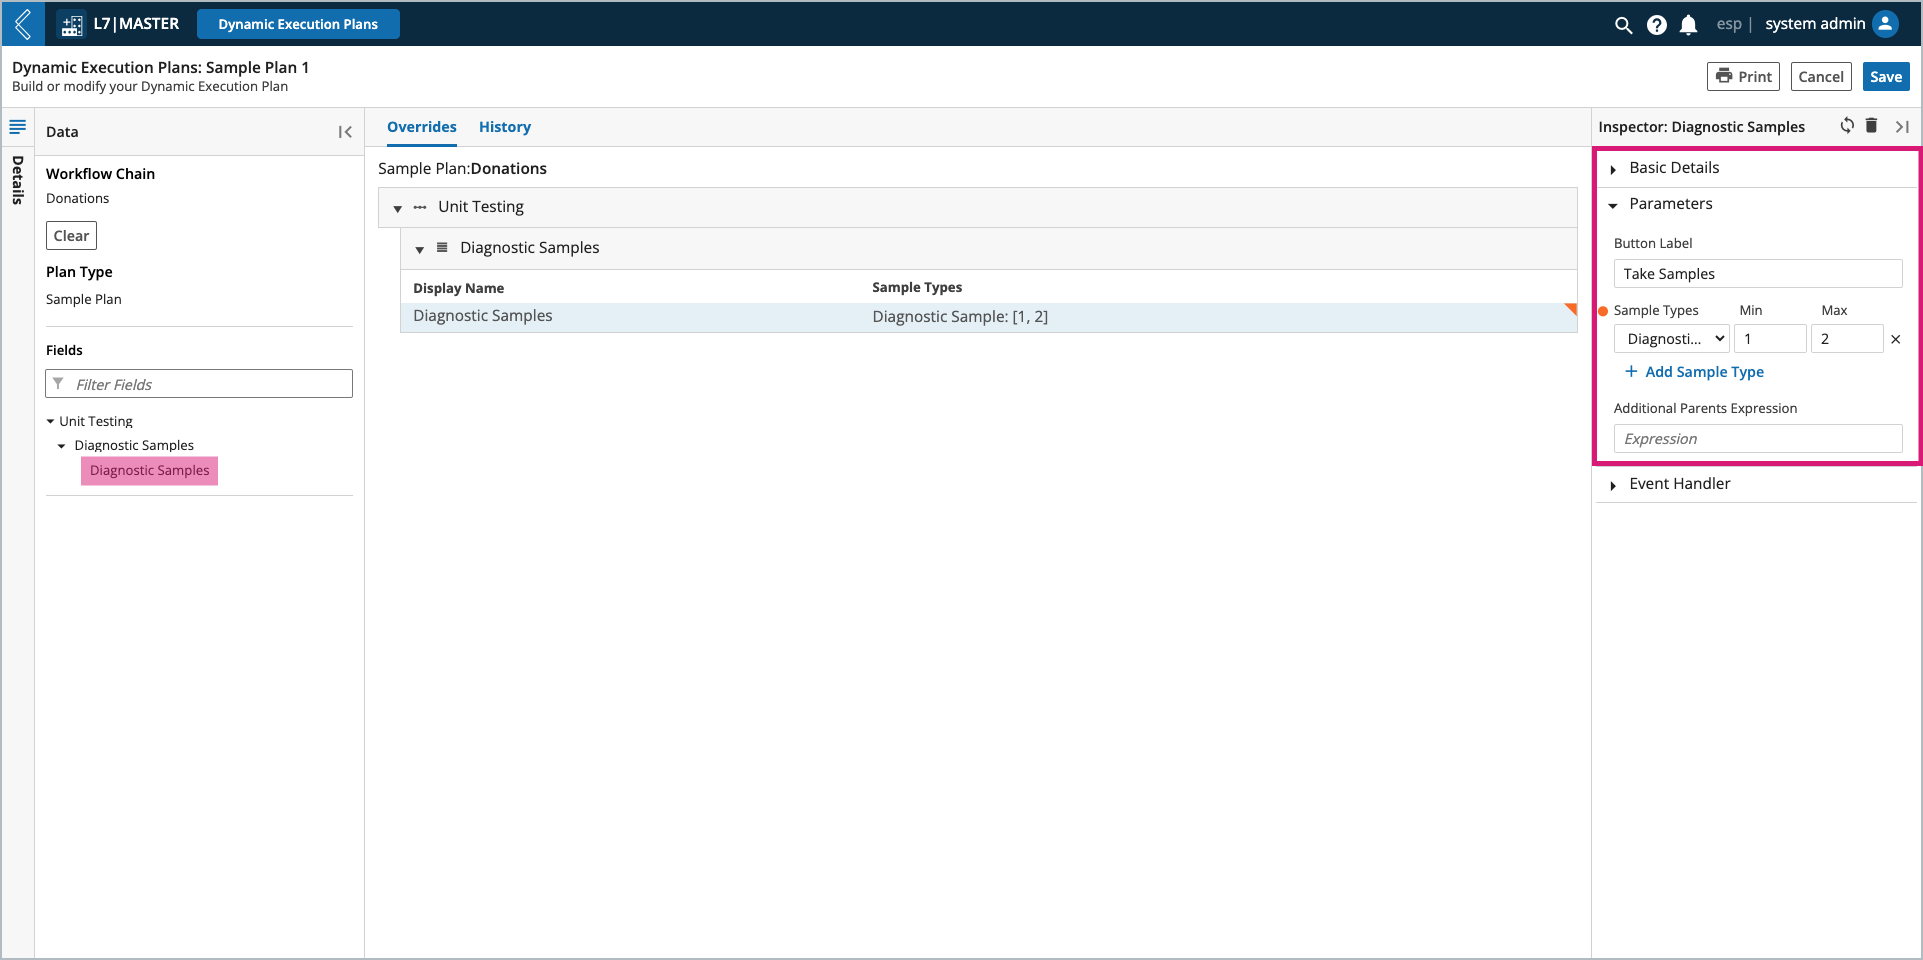
Lastly, define how the execution plan will override the default fields. The Data panel displays all of the fields in the Workflow Chain that match the chosen Plan Type. These fields must be in Standard Protocols.

To modify a field:
Select the desired field in the Data panel (organized by Workflow → Protocol → field). This will display the field in the Overrides tab.
Select the desired field in the Overrides tab. This will populate the Inspector panel.
Modify the field’s parameters. Once a parameter has been modified, an orange circle will appear next to it, and in the Overrides tab the field will have an orange earmark.
Select Save.
Repeat these steps for the remaining fields that need to be modified for the plan.
Note
Spec Types are managed in the esp Configuration under lims → field_spec_types.
DEPs cannot override a field’s ID, Type, or Grouping.
Additional exceptions include:
Picklist – cannot switch between single and multi-select.
Resource Link – cannot change the Link Type.
Date/Time – cannot switch between Date, Time, and Date & Time.
To restrict who has access to the DEP, expand the Details panel (to the left of the Data panel), then select the desired Workgroup(s).