Modeling Sample and Pipeline Protocols
Goals
Know what Sample and Pipeline Protocols are and when to use them.
Know what Sample Points and Pipeline buttons are and when to use them.
Key Terms
Term | Definition |
|---|---|
Protocol | Sequence of steps performed on an Entity. Protocols define the data to collect while performing the Experiment. |
Sample Protocol | Creates a child Entity or Item. |
Pipeline Protocol | Launches a Pipeline. |
Pipeline | Collection of Tasks (shell scripts) run on compute resources (cluster, cloud, or directly in L7|ESP). |
Protocol Action | Custom behavior triggered when a condition is satisfied while processing the Protocol. |
Sample Protocols
Sample Protocols have two (2) key components:
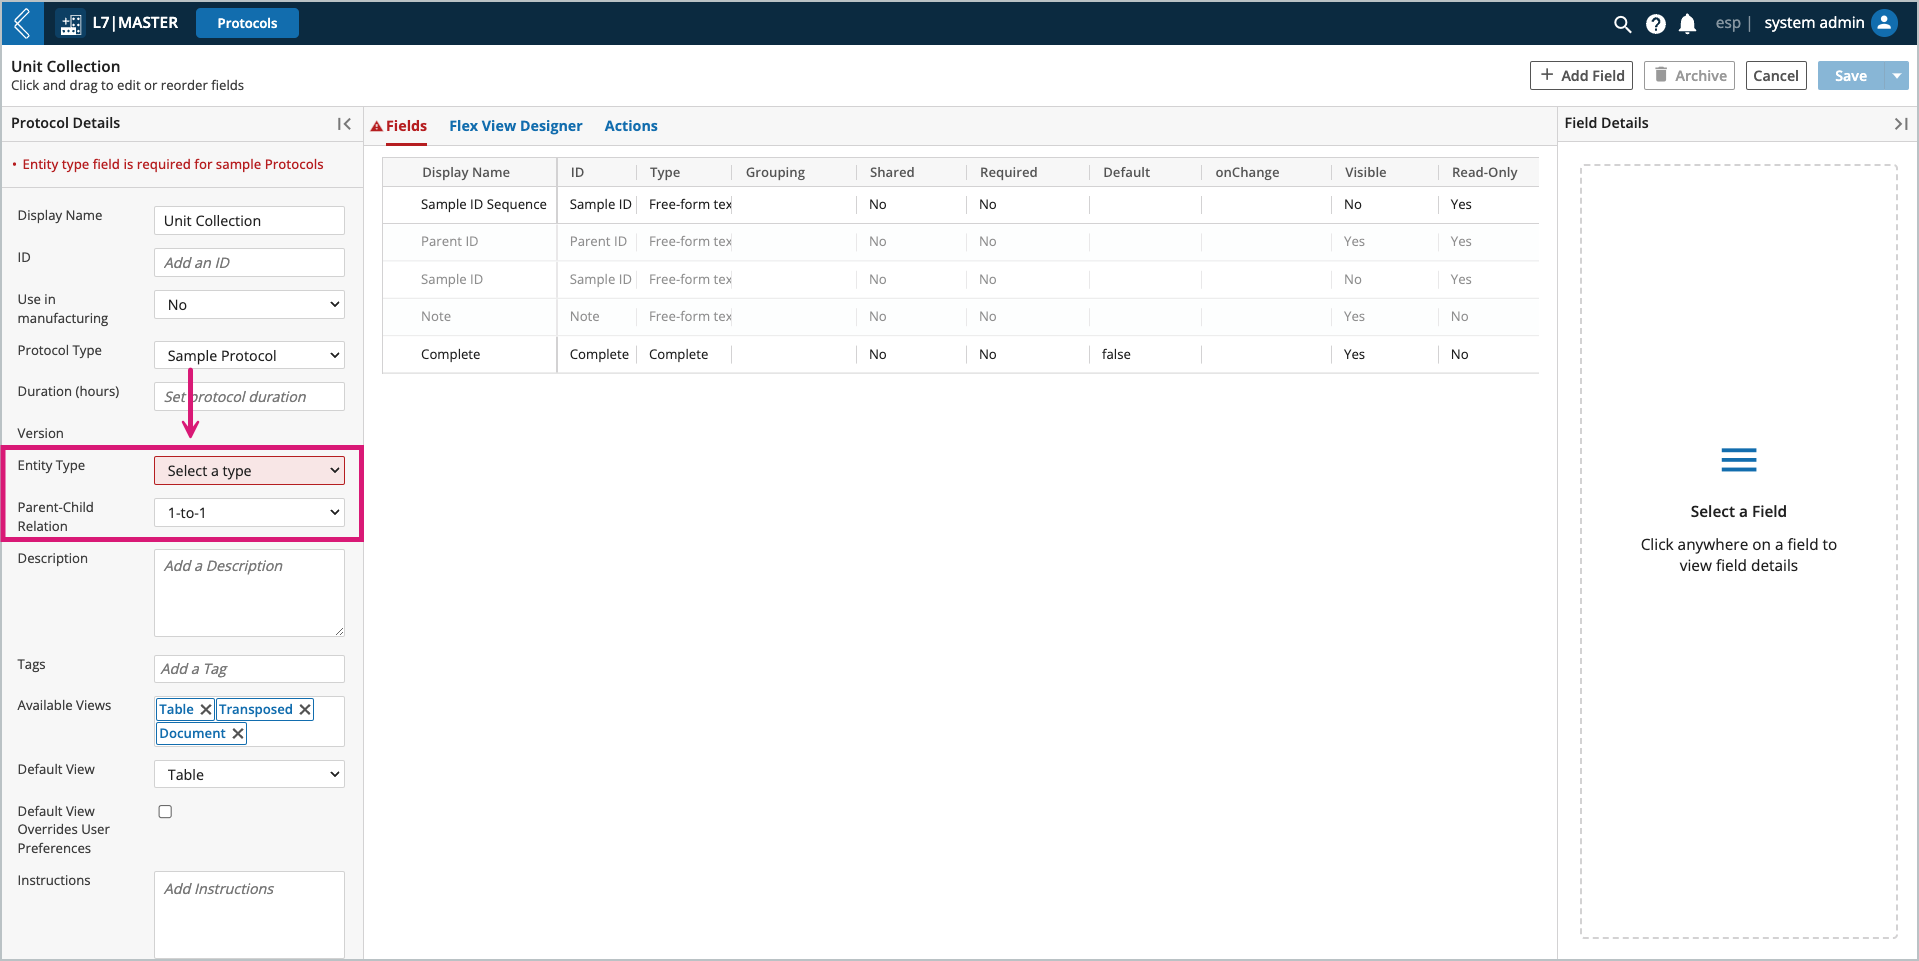
The Entity Type must be selected and represents the child Entity that will be created. Only one (1) Entity Type can be selected for each Sample Protocol.
The Parent-Child Relationship must be defined, there are three (3) options:

1-to-1 – each Entity in the upstream Protocol creates one (1) child Entity.
fan-in – multiple Entities in the upstream Protocol create one (1) child Entity.
fan-out – each Entity in the upstream Protocol creates multiple child Entities.
Warning
Sample Protocols can have shared fields, but they cannot be grouped.
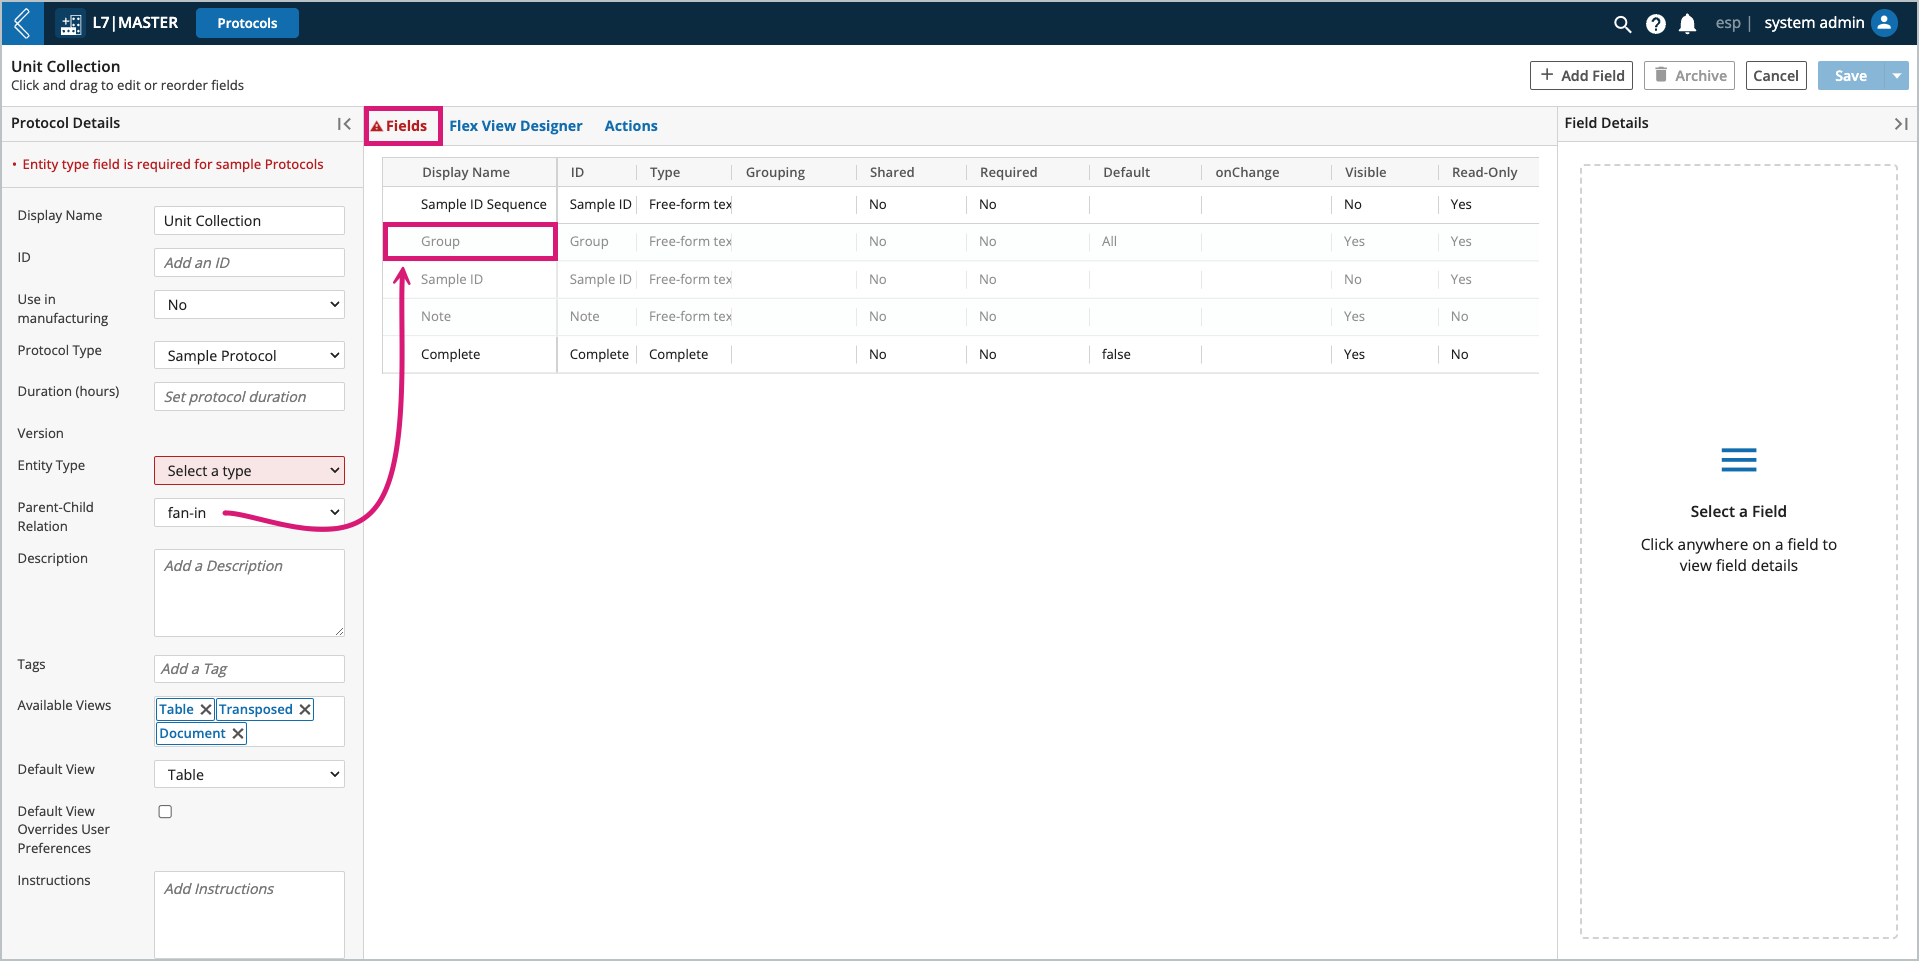
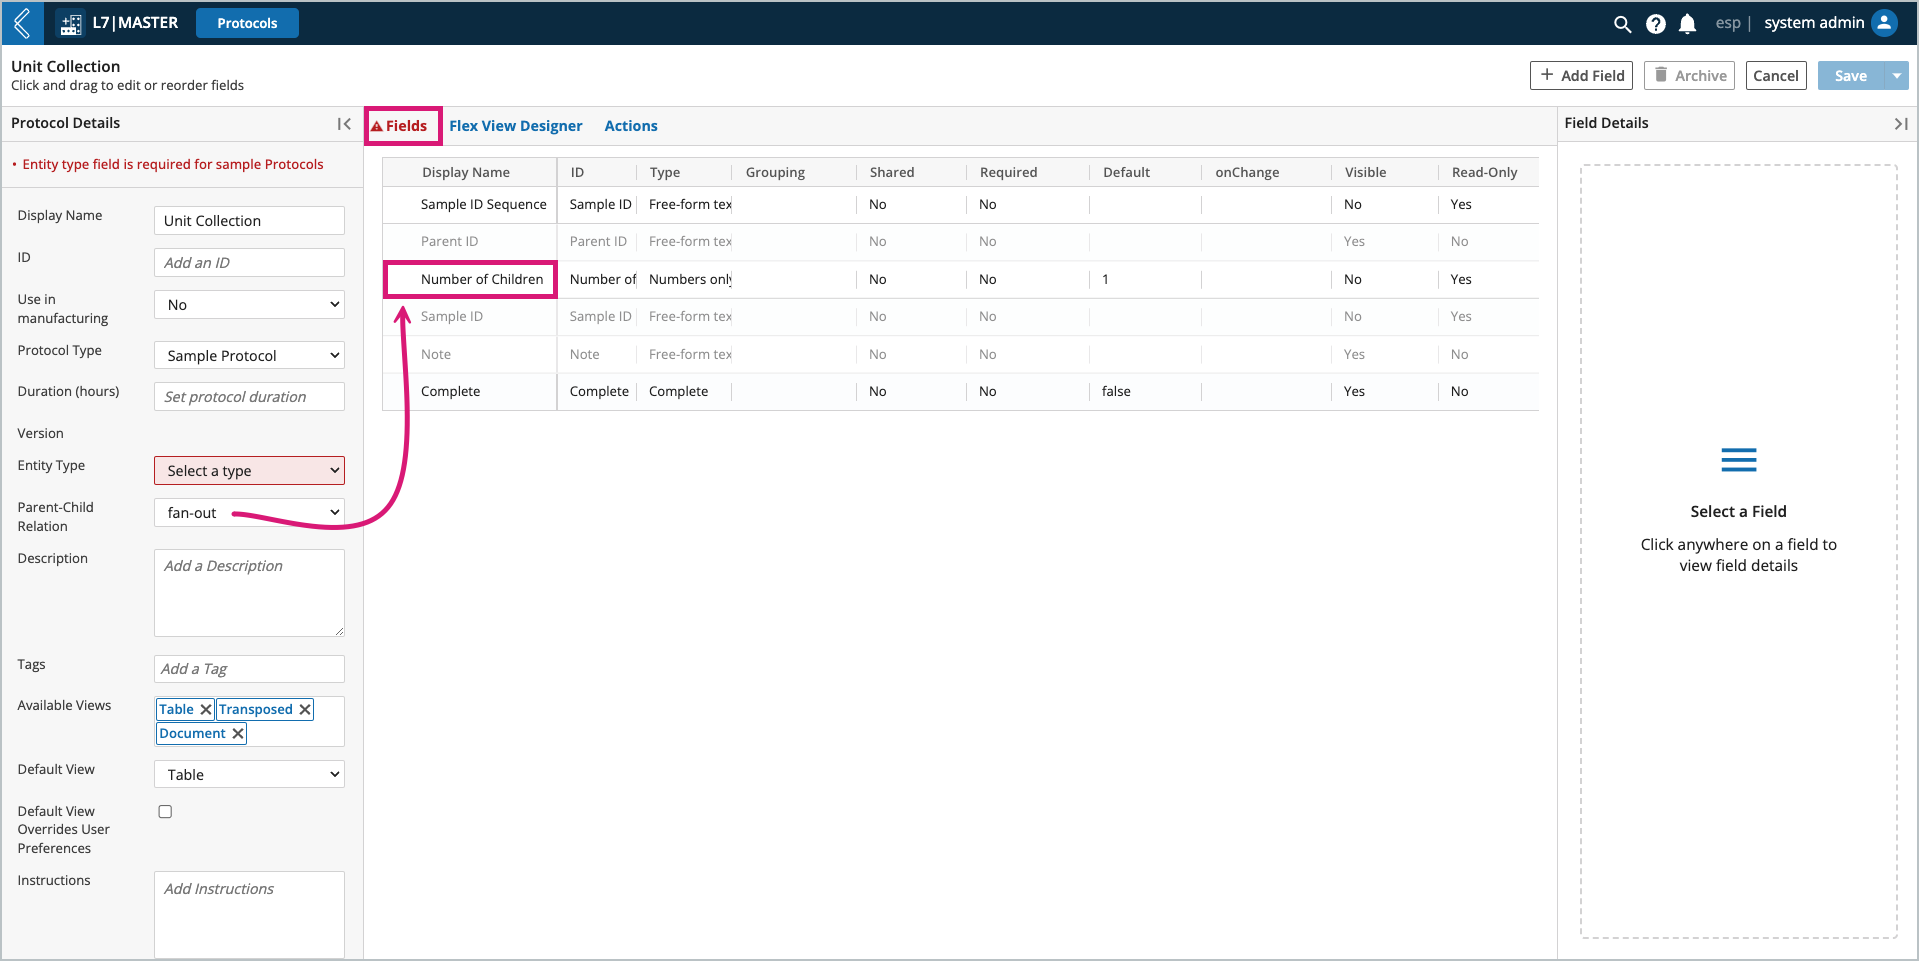
The default fields Sample ID Sequence, Parent ID, Sample ID, and Note appear at the beginning of Sample Protocols.
Note
Parent ID is replaced with the Group field in fan-in Sample Protocols, covered in more detail below.
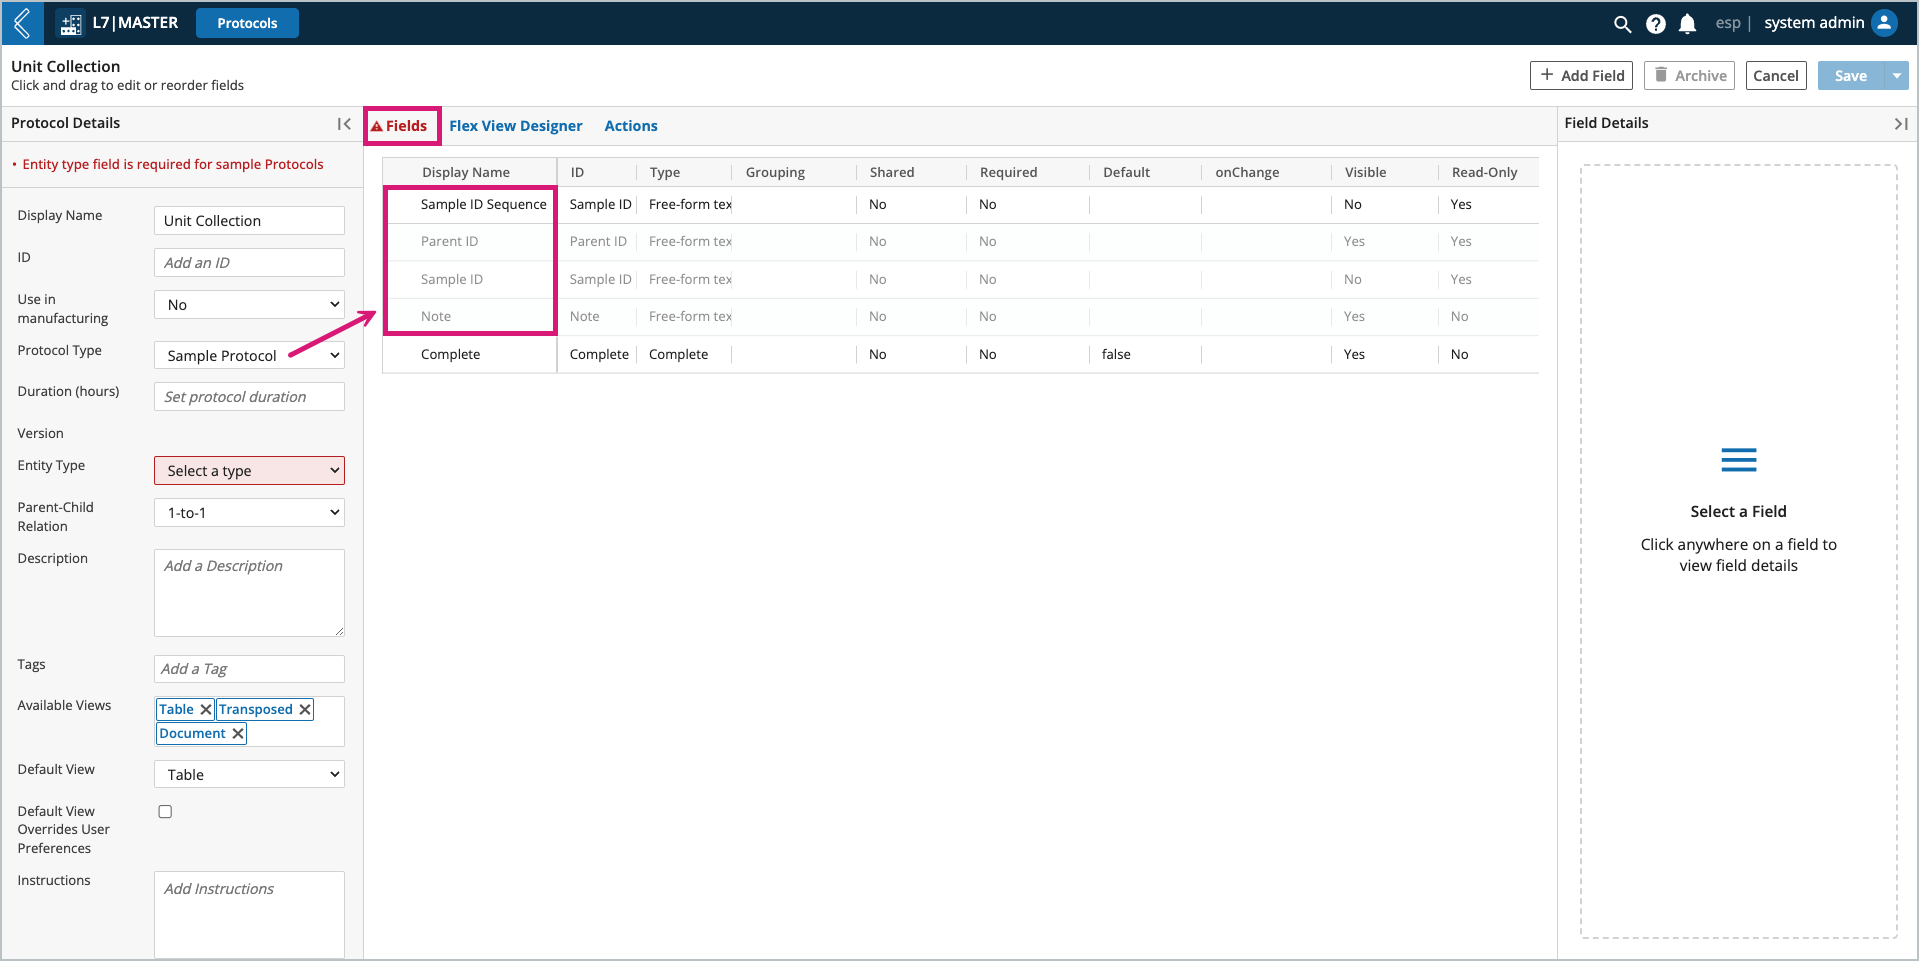
L7|ESP sets the Parent ID, user-provided Notes become the description of the newly created Entity.
The Sample ID Sequence field defines the ID Sequence that will be assigned to the child Entity or Item being created in the Sample Protocol.
Note
Sample ID Sequence and Sample ID are hidden by default in the Worksheet.
When an Item is created in a Sample Protocol, the following default fields are added to the Protocol: Initial Quantity, Lot ID, Serial ID, Status, Vendor, and Expiration.
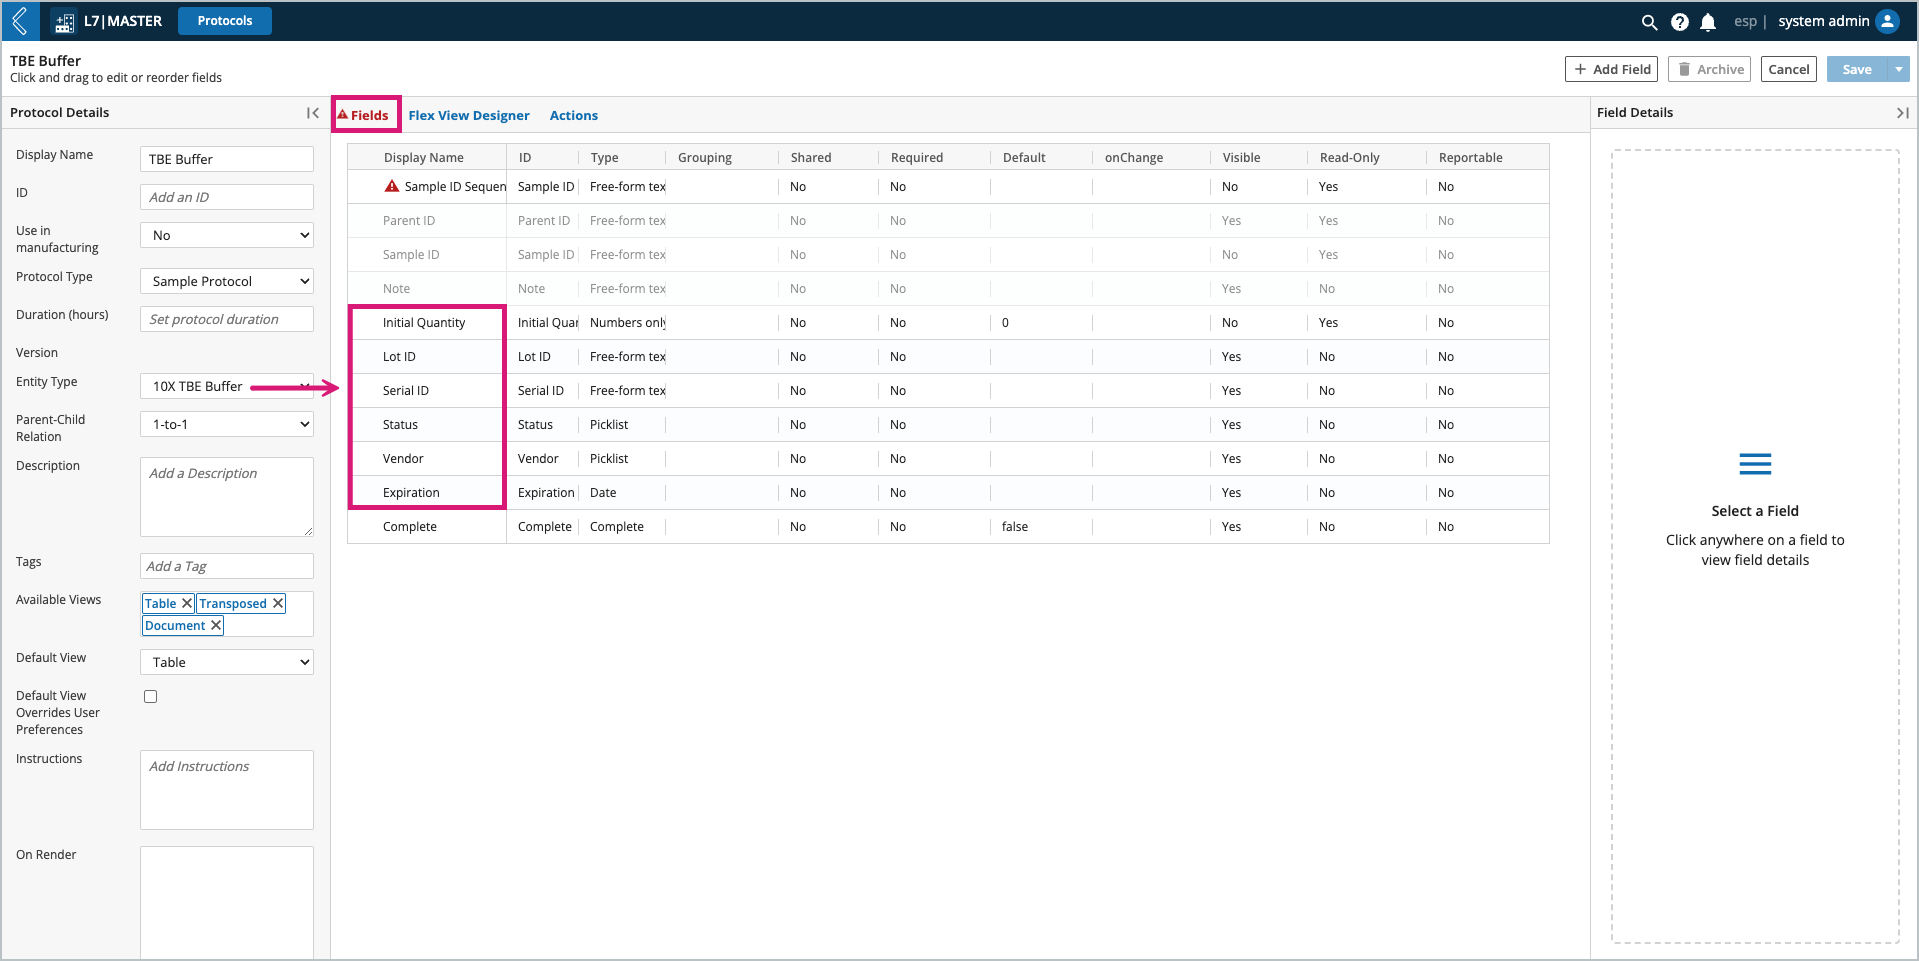
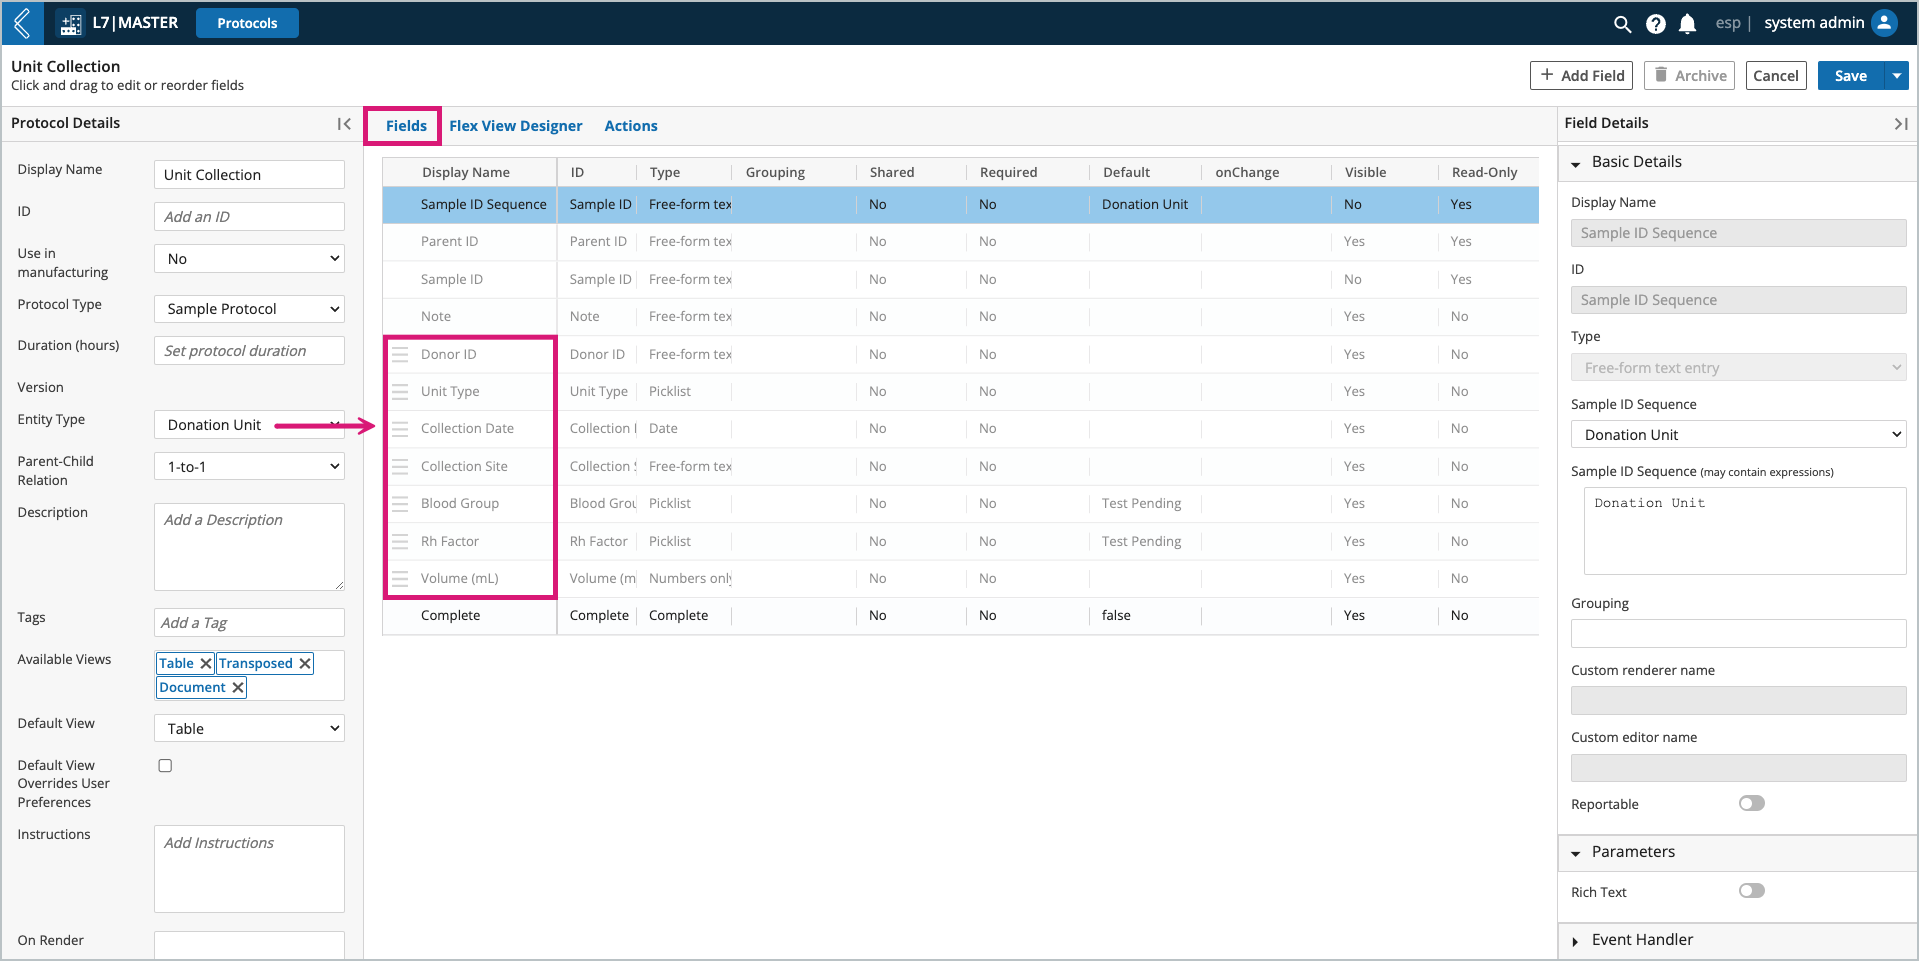
The custom fields attributed to the newly created Entity or Item will be added after these default fields.
Note
These custom fields are managed in the Entity Types and Item Types builders, respectively.
They cannot be edited in the Protocol builder.
Fan-in and fan-out Sample Protocols need additional data to create child Entities or Items.
Fan-in relationships have a Group field that is used to define how parent Entities or Items in the upstream Protocol are pooled together to create a new child Entity or Item.
Fan-out relationships have a Number of Children field that is used to define the number of child Entities or Items to create for each parent Entity or Item in the upstream Protocol.
Note
The values for Group and Number of Children can be specified via a data link or default value.
Sample Points
Sample Points are an alternate way to create child Entities that will not be used in the current Experiment.
Entities created in a Sample Point are not accessible in the current Worksheet.
This includes instances where the number of derived Entities may be zero (0), which cannot be achieved with a Sample Protocol. Sample Points also allow for child Entities to be created from more than one (1) Entity Type, and can be added to both Standard and Pipeline Protocols.
Warning
Sample Points cannot create Items.
To add a new Sample Point field:
Select + Add Field
Select Sample Point as the field type.
Under parameters:
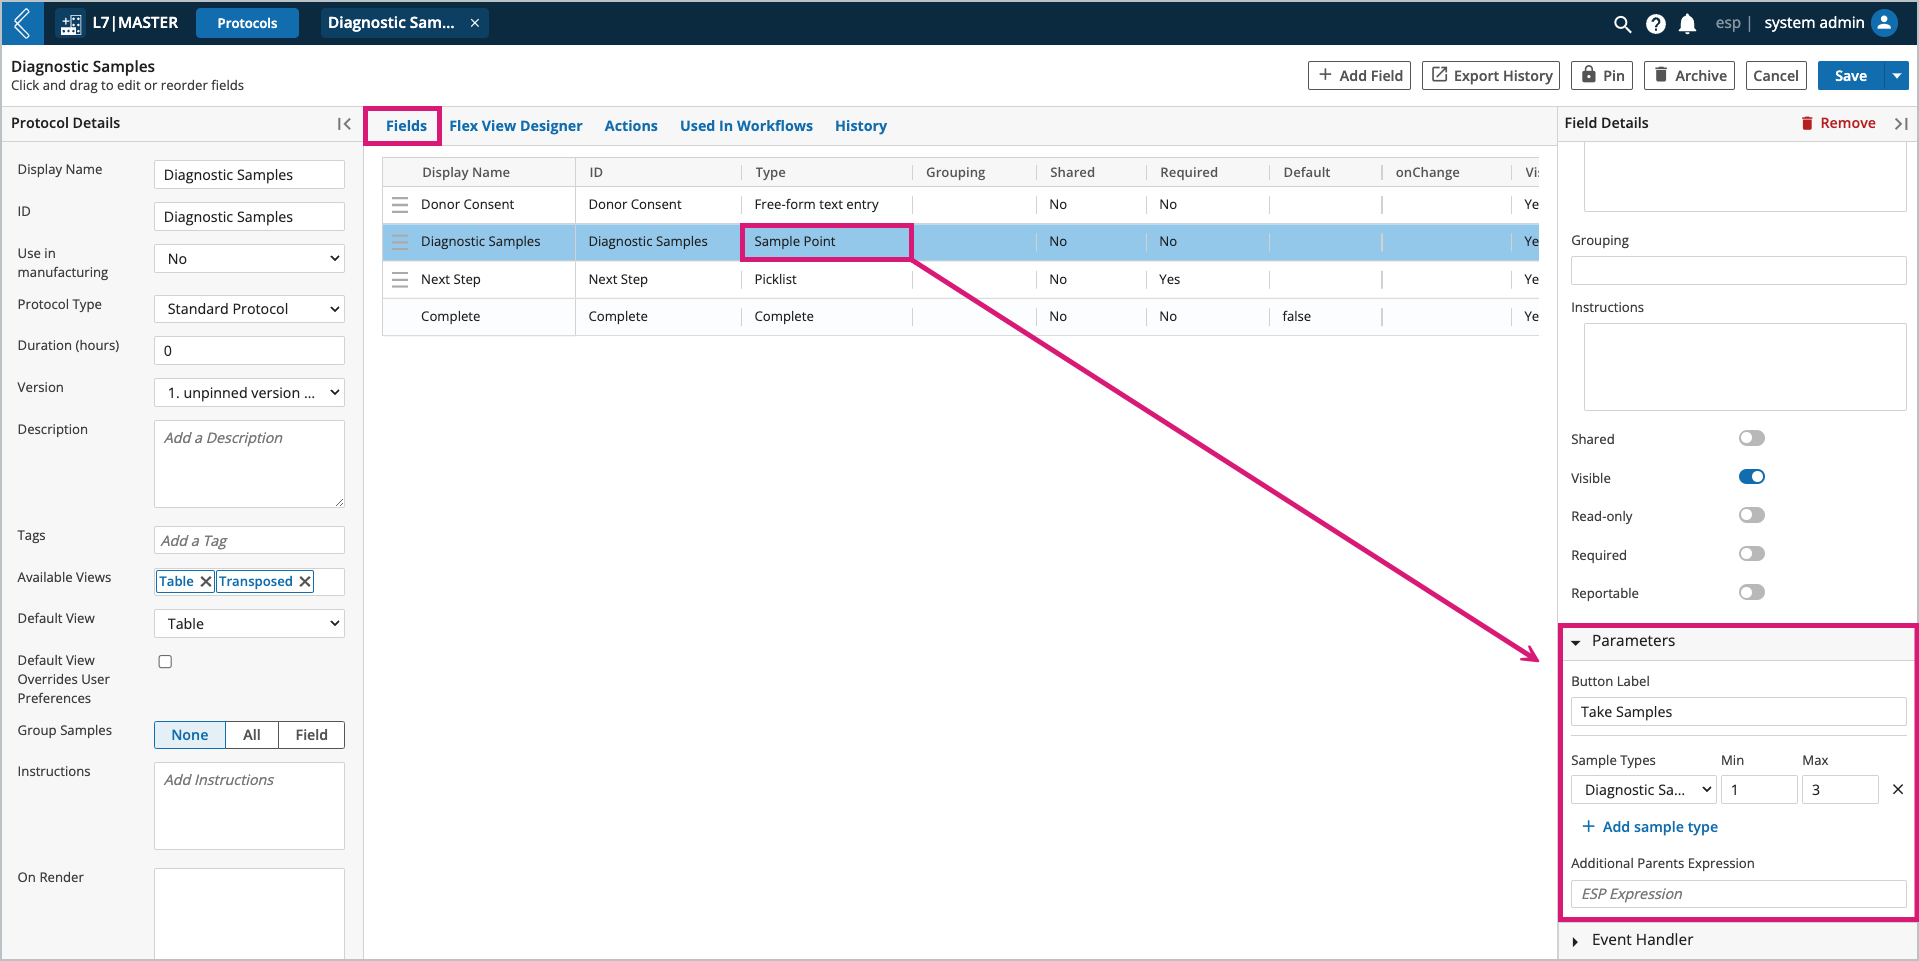
Provide a button label for the Sample Point in the Worksheet.
Add the Sample Type(s) and the min and max number of Samples that should be created.
Note
Any number of Samples can be created, including zero (0). No action, by default, is taken for out of range values.
Optionally add an Additional Parents Expression to make Samples created in an upstream Sample Point parents of the Entities created in the current Sample Point. This can be accomplished with the cell expression:
{{ cell('Upstream Sample Point Field ID', 'Protocol ID') }}
Pipeline Protocols
Pipeline Protocols have two (2) key components:
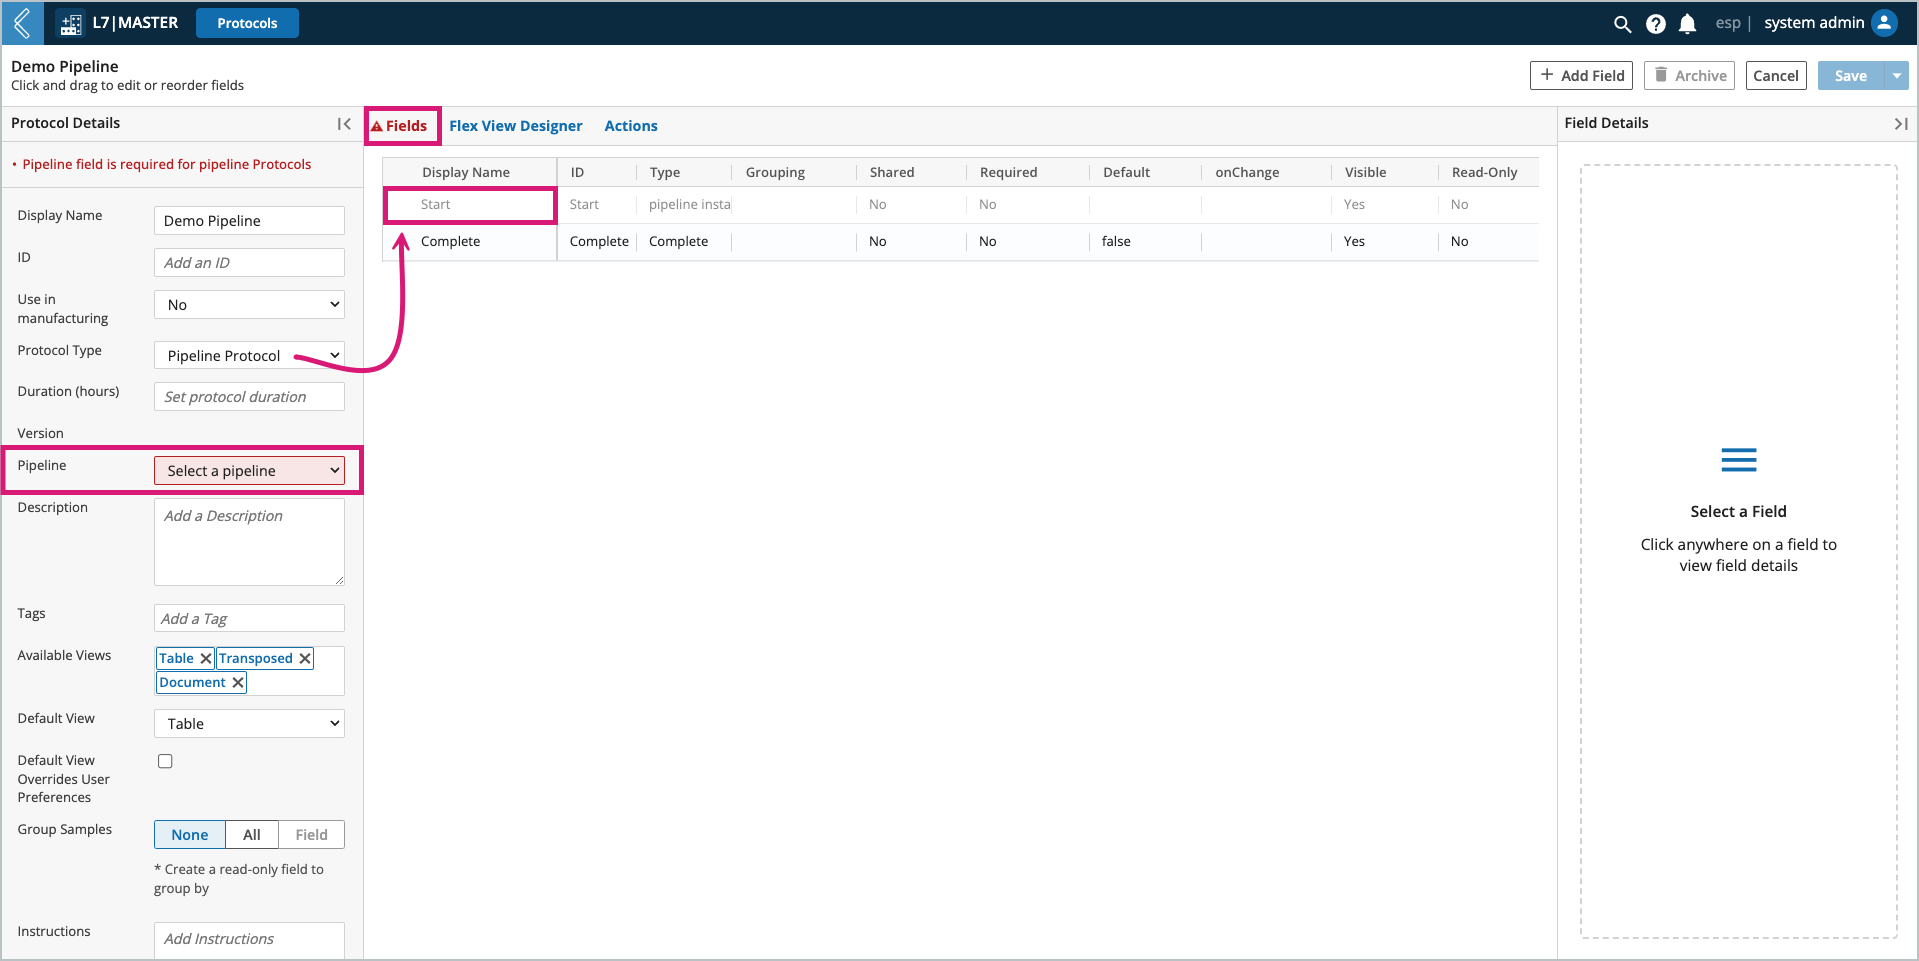
The Pipeline. Only one (1) Pipeline can be selected in each Pipeline Protocol.
The default Start button always appears before the Complete checkbox at the end of the Protocol.
When processing Entities in a Pipeline Protocol, the Pipeline is run by selecting the Start Pipeline button.
Once completed, the icon to the right of done or failed can be selected to view the metadata and reports associated with the Pipeline instance. For failed Pipelines, the modal will display the standard error and a button to resubmit the Pipeline.
Note
Upon completion, Pipeline Protocols complete the row and save the Worksheet.
Note
Pipeline are covered in more detail in Client-Side Development.
To register, please visit L7 University.
Pipeline Buttons
Pipeline buttons associate a Pipeline with a field instead of the Protocol, allowing Protocol authors to add more than one (1) Pipeline to Standard and Sample Protocols. Shared fields and grouping can be leveraged to collapse multiple Pipelines into one (1) Protocol, organized by group. The Unit Testing Workflow is an example of this.
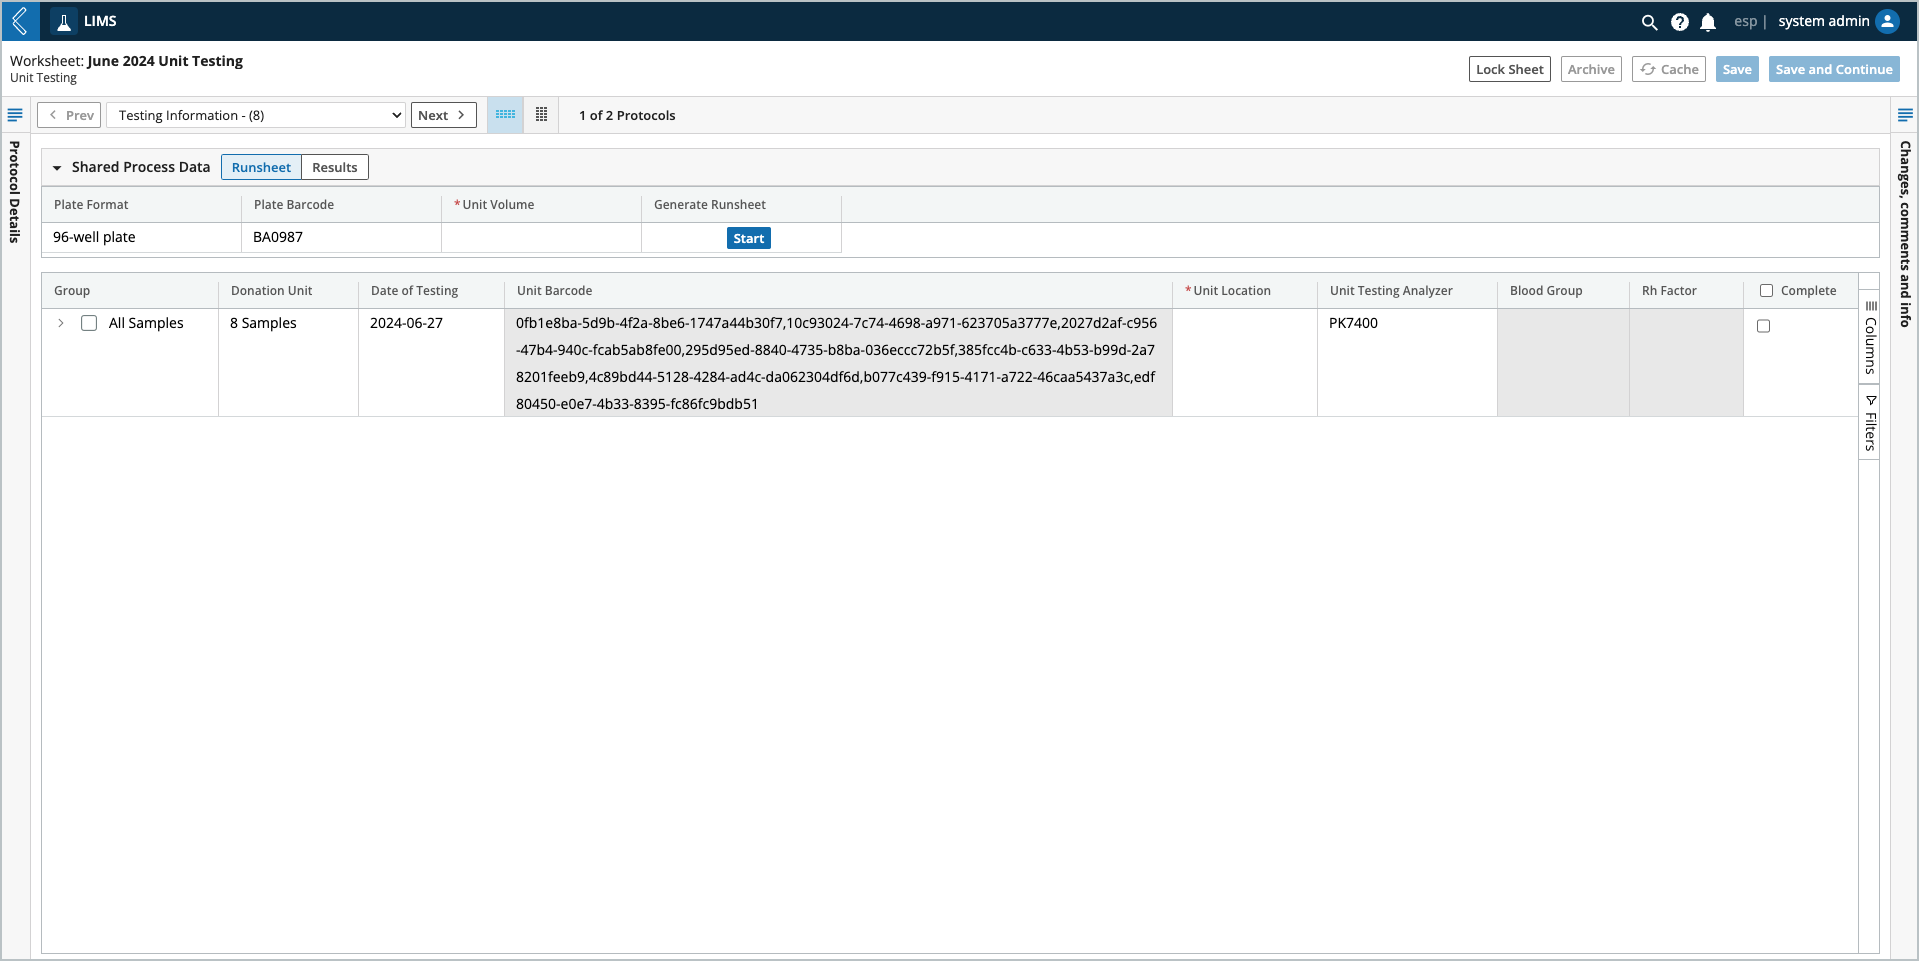
Note
Upon completion, Pipeline buttons do not complete the row and save the Worksheet.
Pipeline buttons also provide Developers with more flexibility in how Pipeline variables are defined, instead of forcing a custom field-per-variable.
Warning
In time, Pipeline buttons will likely replace Pipeline Protocols.
To add a new Pipeline button field:
Select + Add Field
Select Pipeline Button as the field type.
Under parameters:
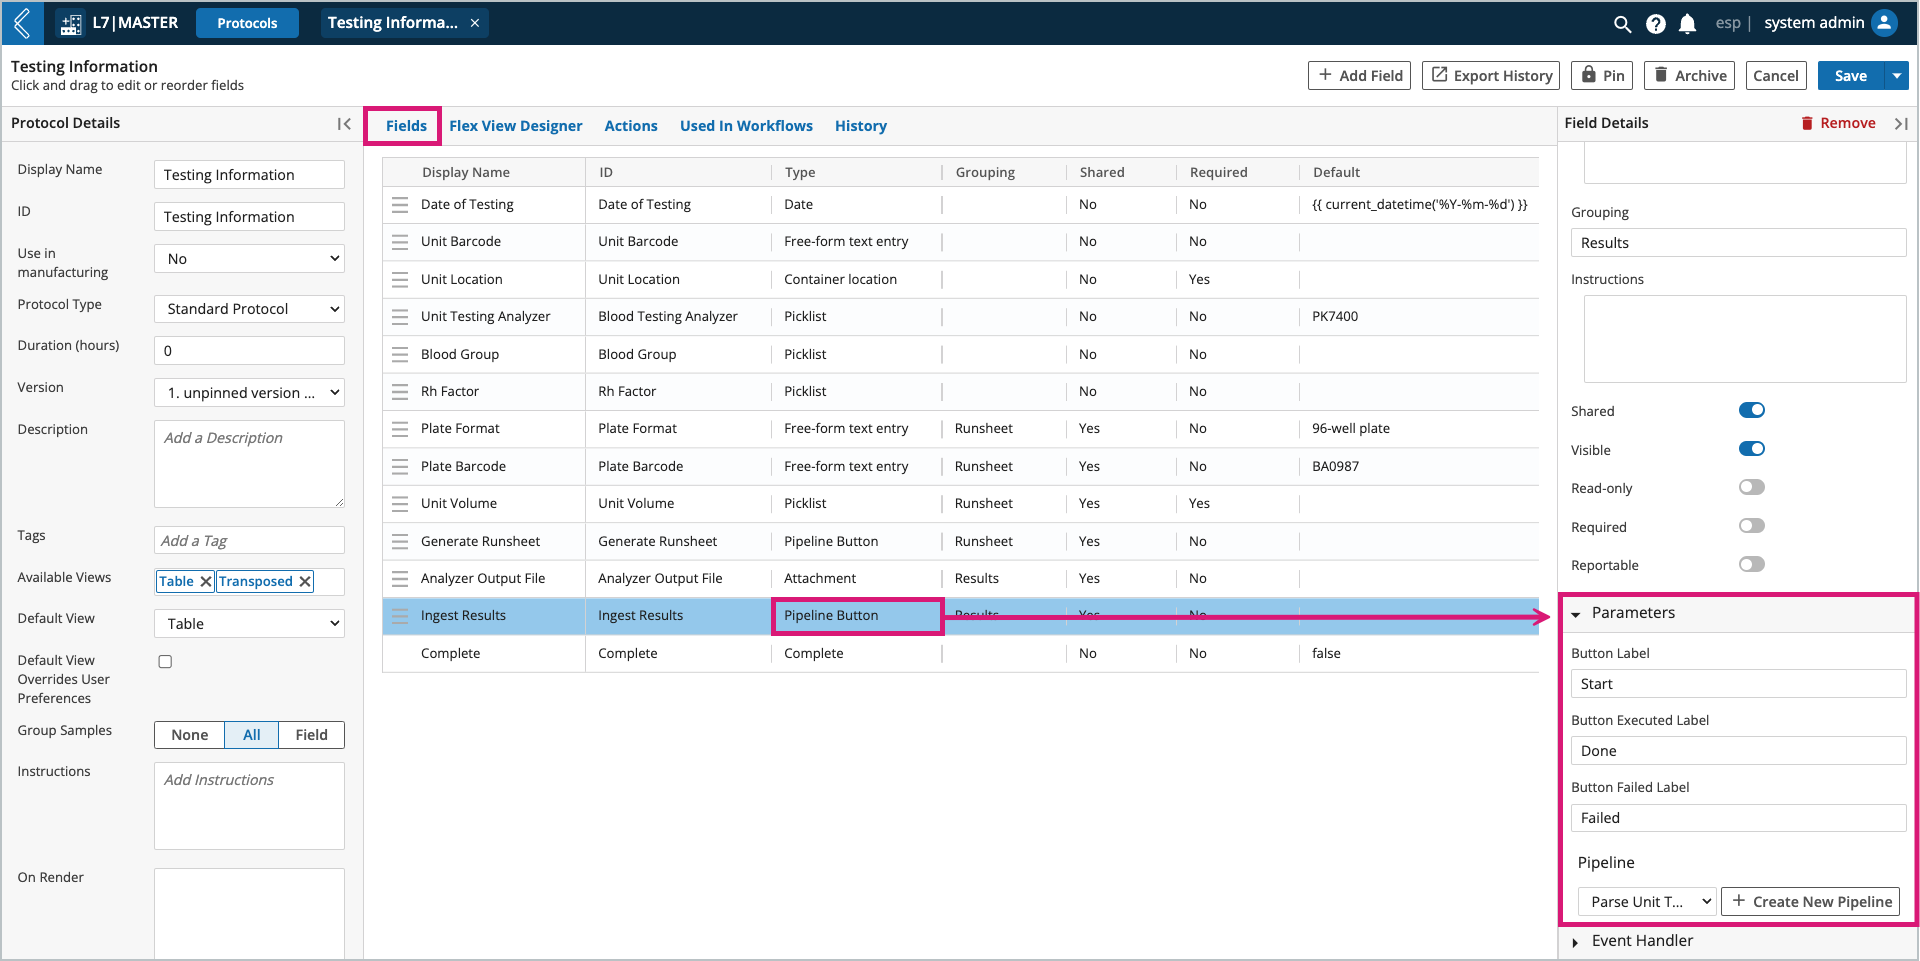
Provide a button label before and after execution in the Worksheet.
Select the Pipeline. Only one (1) Pipeline can be selected.
Define the Pipeline’s variables (if applicable to the selected Pipeline).