Creating and Managing Notebooks
Overview
The L7 Notebooks app serves as a customizable document editor of L7|ESP. Notebooks can be used for any kind of organizational grouping intended, such as a collection of projects, a set of a person’s data, a month of journals, etc. These Notebooks each consist of Entries, which are the individual items of whatever the Notebook grouping represents.
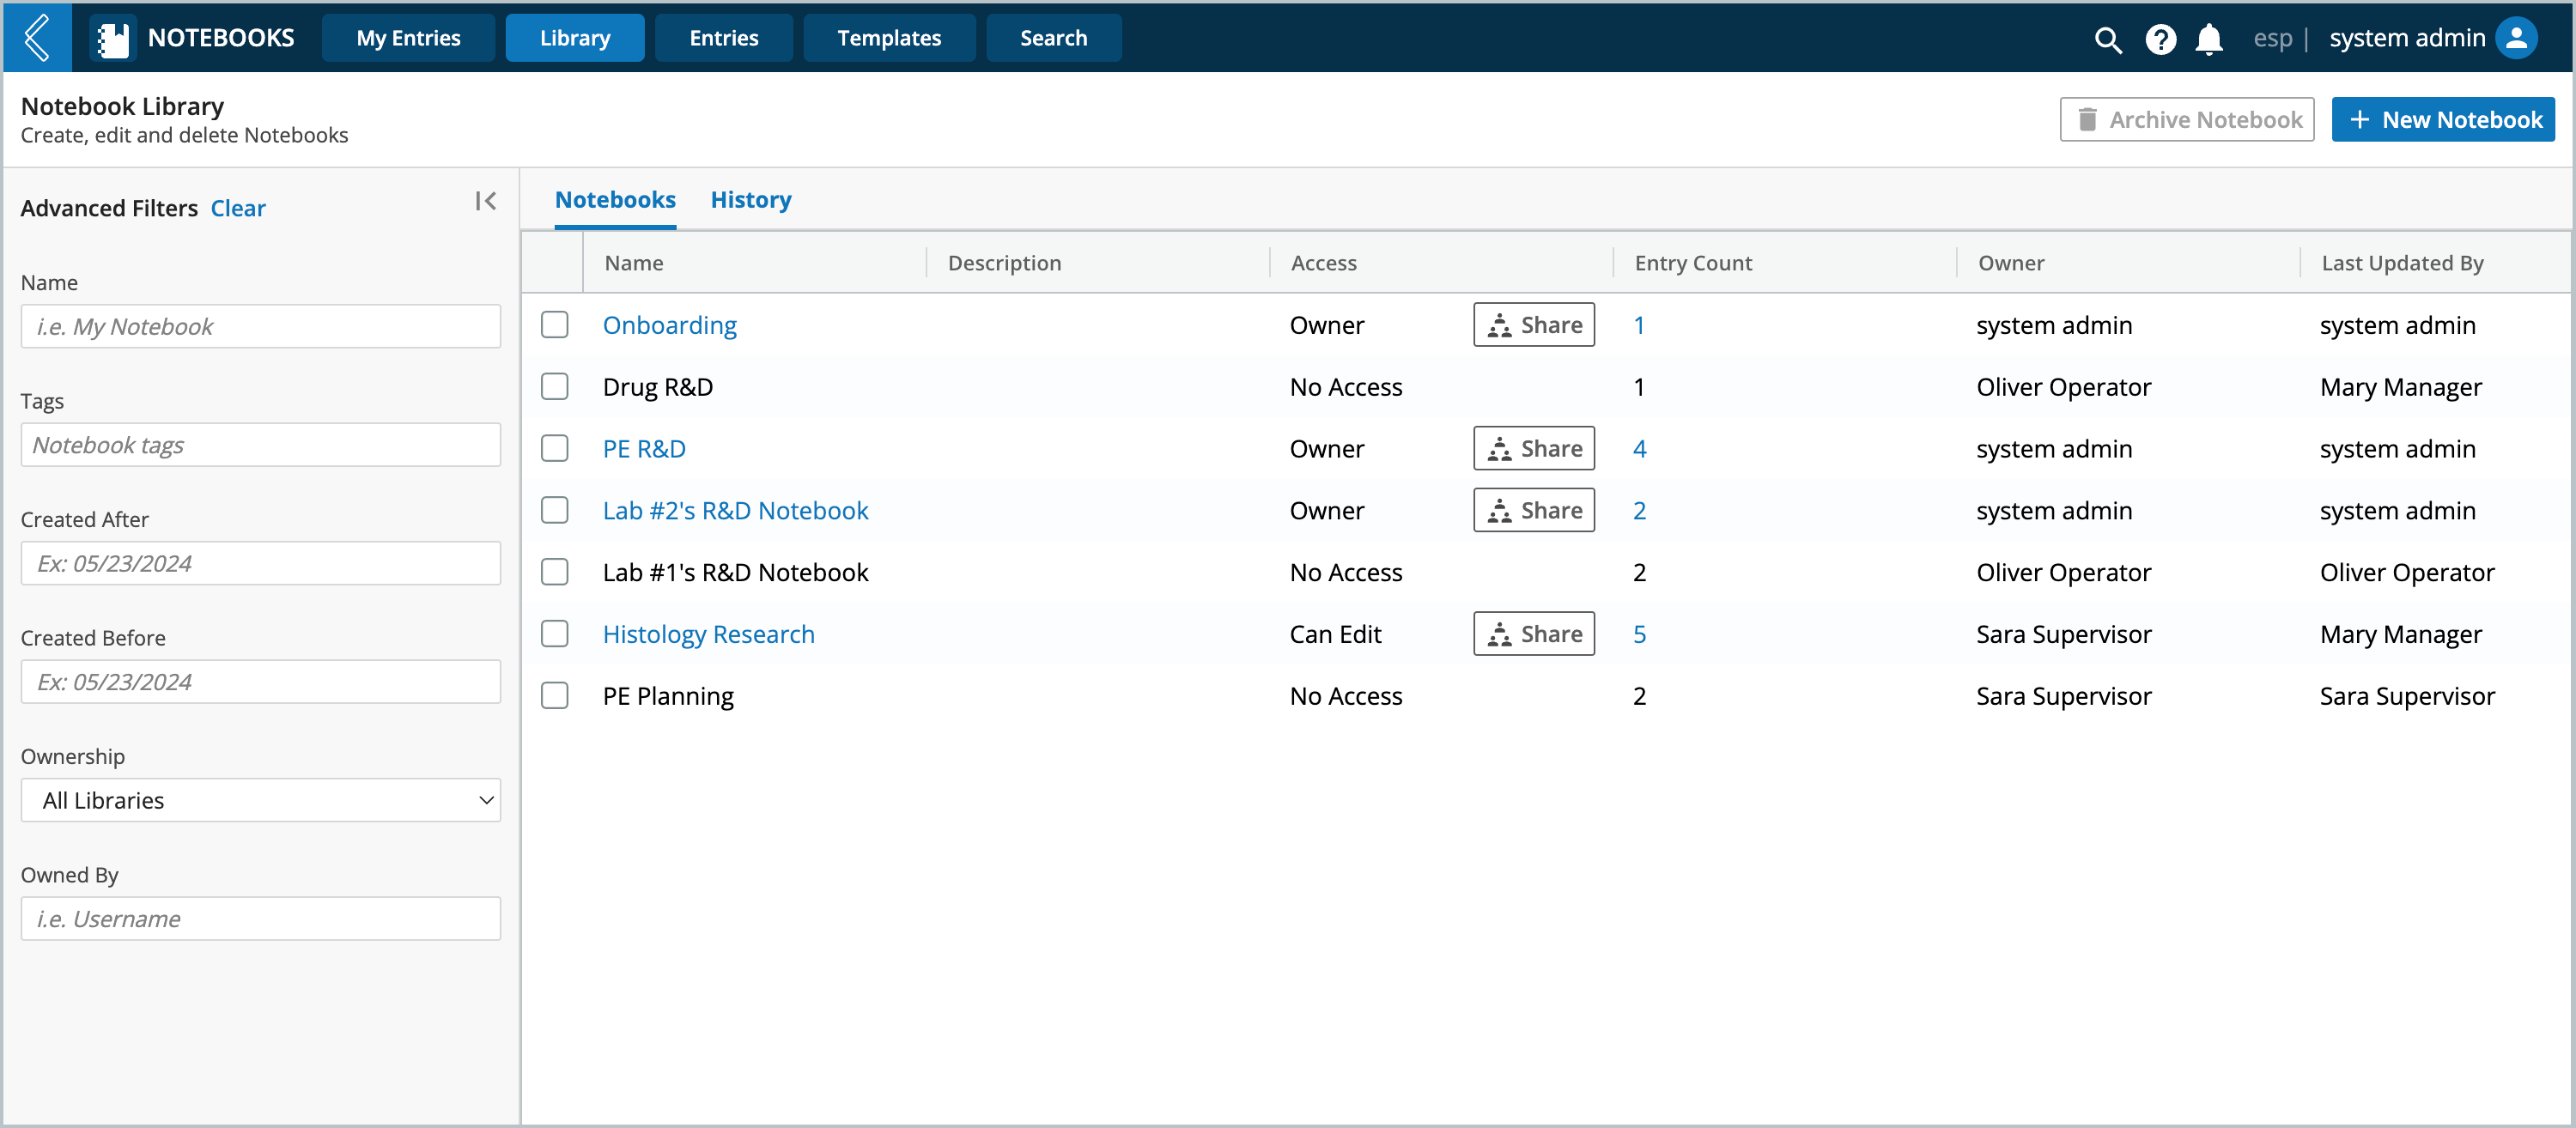
From the Library page you can view a list of existing Notebook libraries (or folders where Entries are organized), search through, filter, manage and create new Notebook library.
 |
Creating a New Notebook
Before you can create an Entry, you must first create a Notebook for it to belong to. Notebooks are created and managed from the Library tab. When creating Notebooks, you can select a naming template for how its Entries shall be named and you can share your Notebook with other users by adding collaborators.
Procedure
Navigate to Notebooks app -> Library
Click + New Notebook
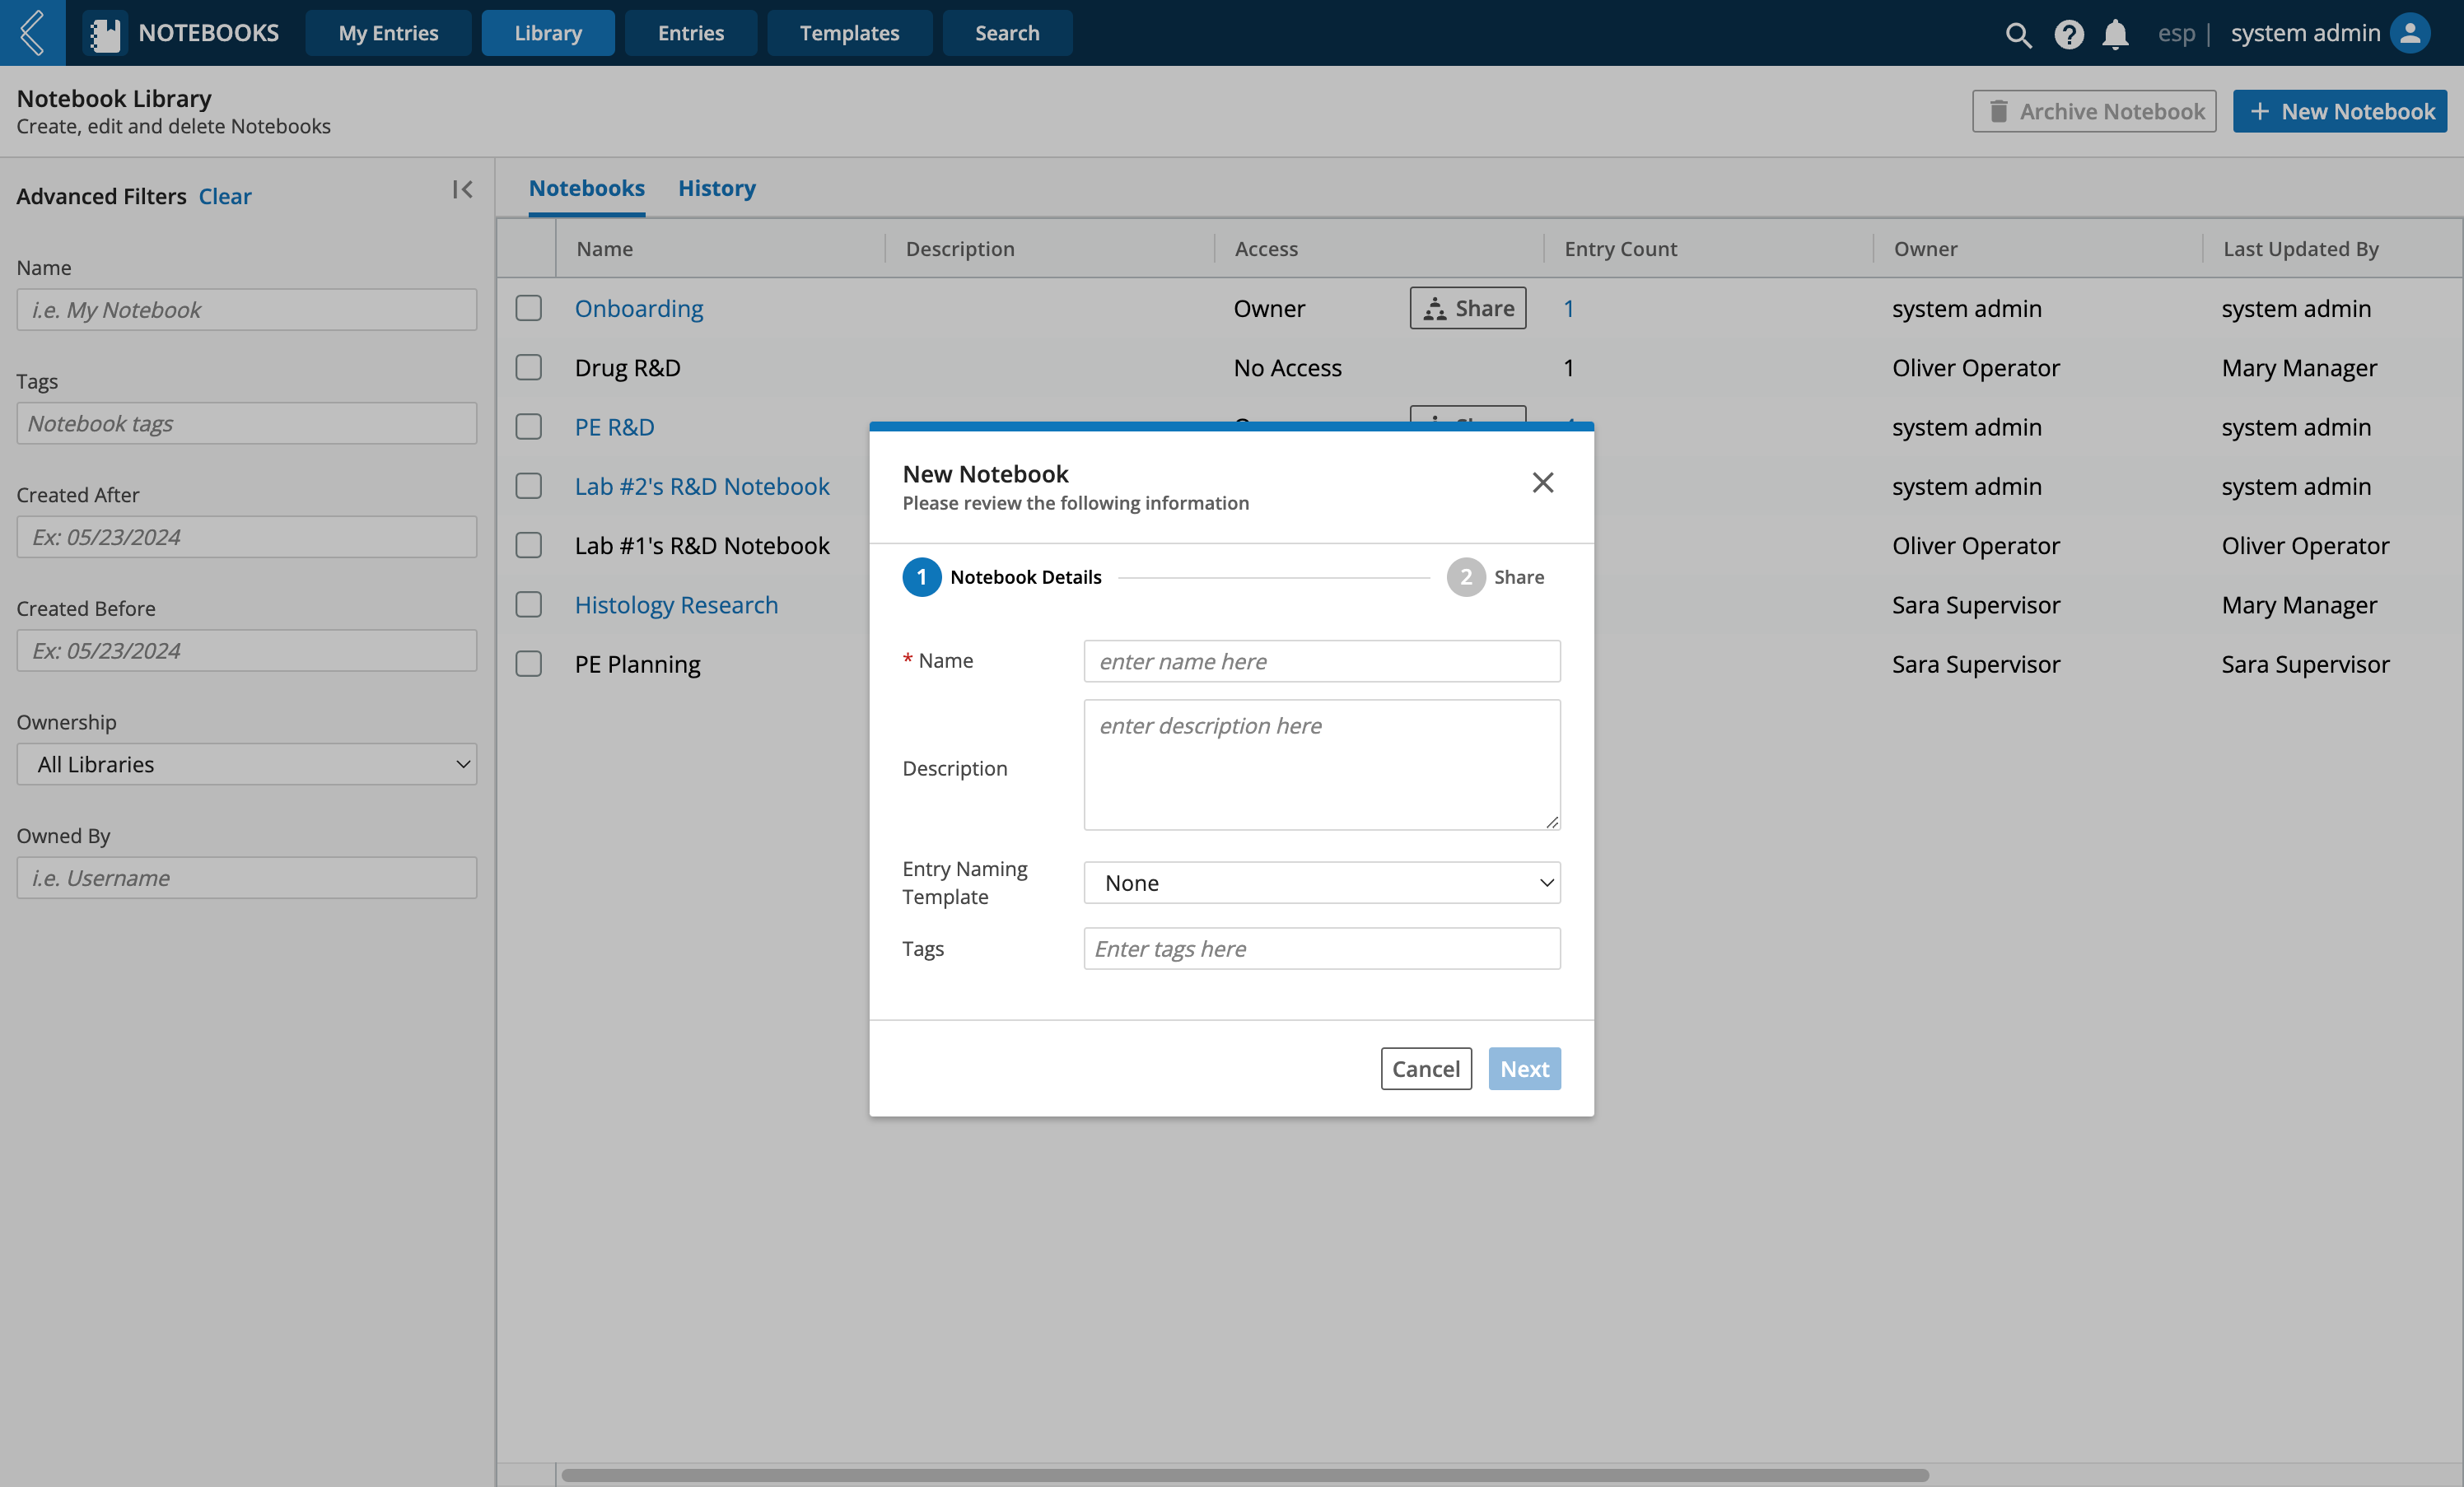
Enter a Name for the Notebook
Enter a Description (optional)
Select an Entry Naming Template (optional)
Apply a Tag(s) (optional)
Click Next (Note: If you see Save instead of Next, that means Notebook Sharing is disabled)
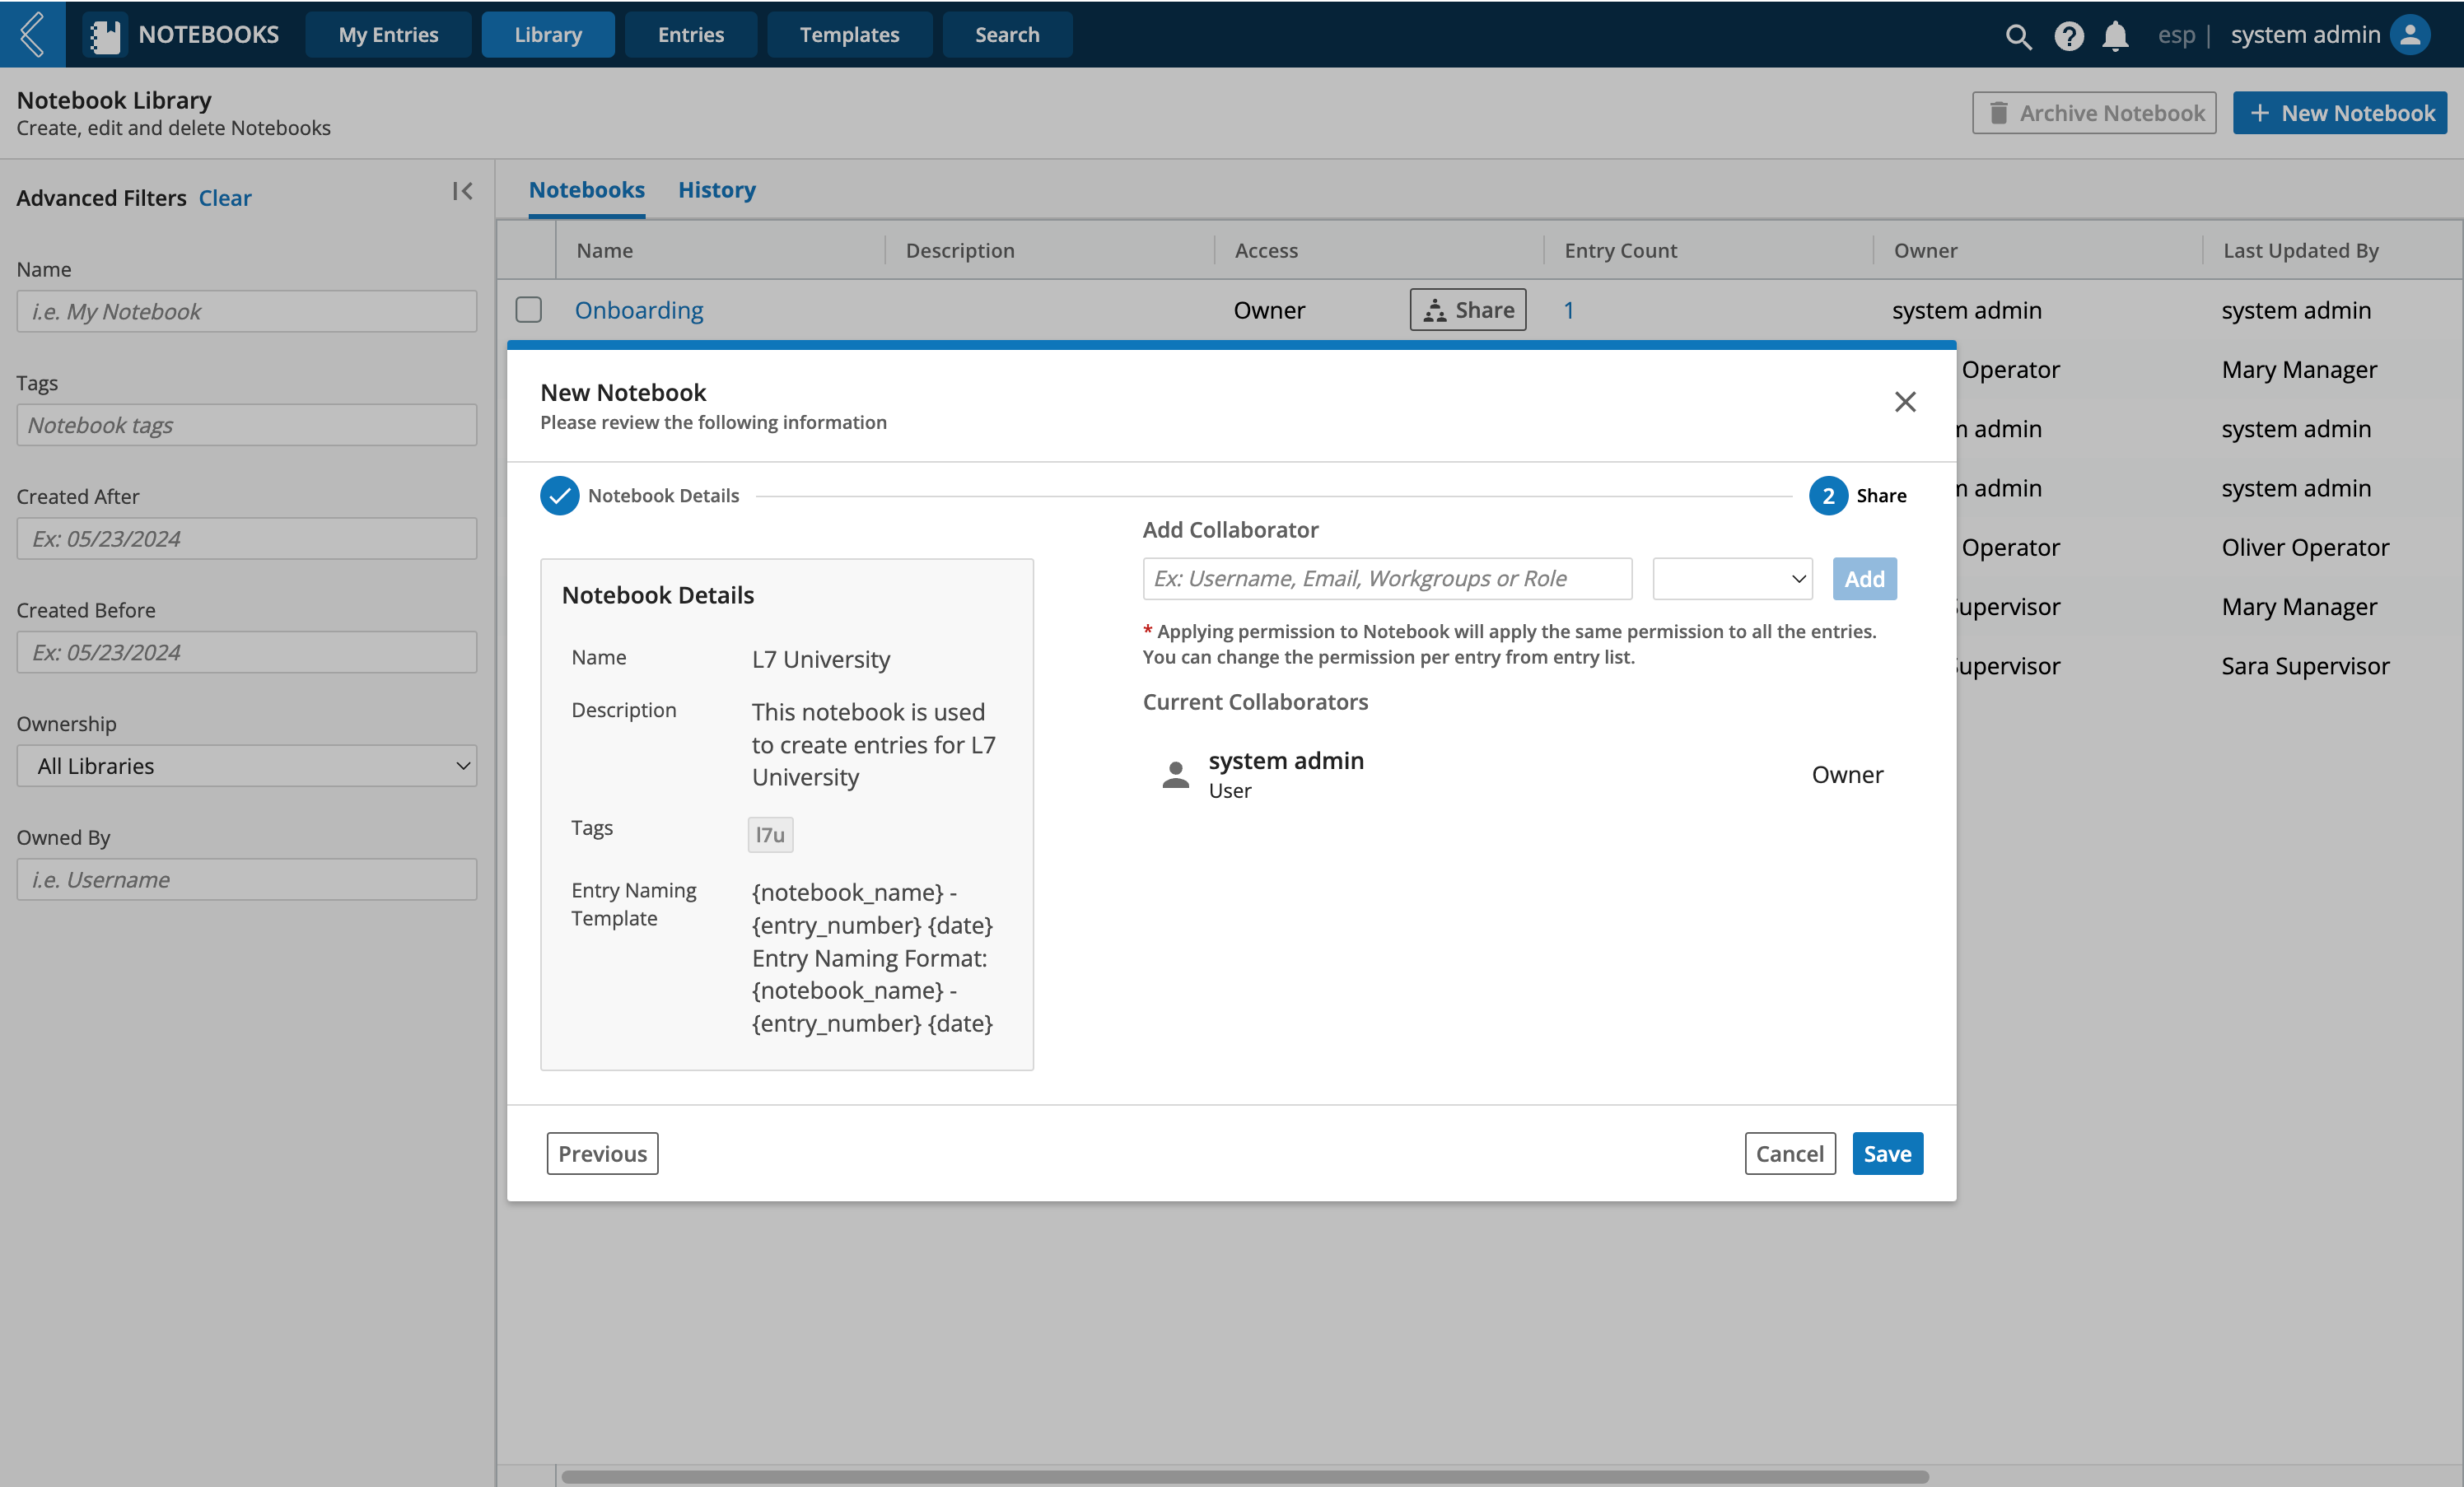
Add Collaborators and using the picklist select an access level to apply to all selected collaborators (No Access, Admin, Can Edit, or Can View)
Click Add, this will display the users you selected and you can adjust the access level for each individual
Click Save
Note
The Entry Naming Template options are configured in and pulled from the esp configuration file. If you select a naming template, the new Entries created within the library will be named based on the selected template. Once the naming template has been selected at the library level, it cannot be modified. However, the name of the new Entry can be modified as needed in the new Entry creation modal.
 |
 |
Managing Notebooks
From the Library page you can view a list of existing Notebook libraries, search through, filter, manage and create new Notebook libraries.
Sharing Notebooks
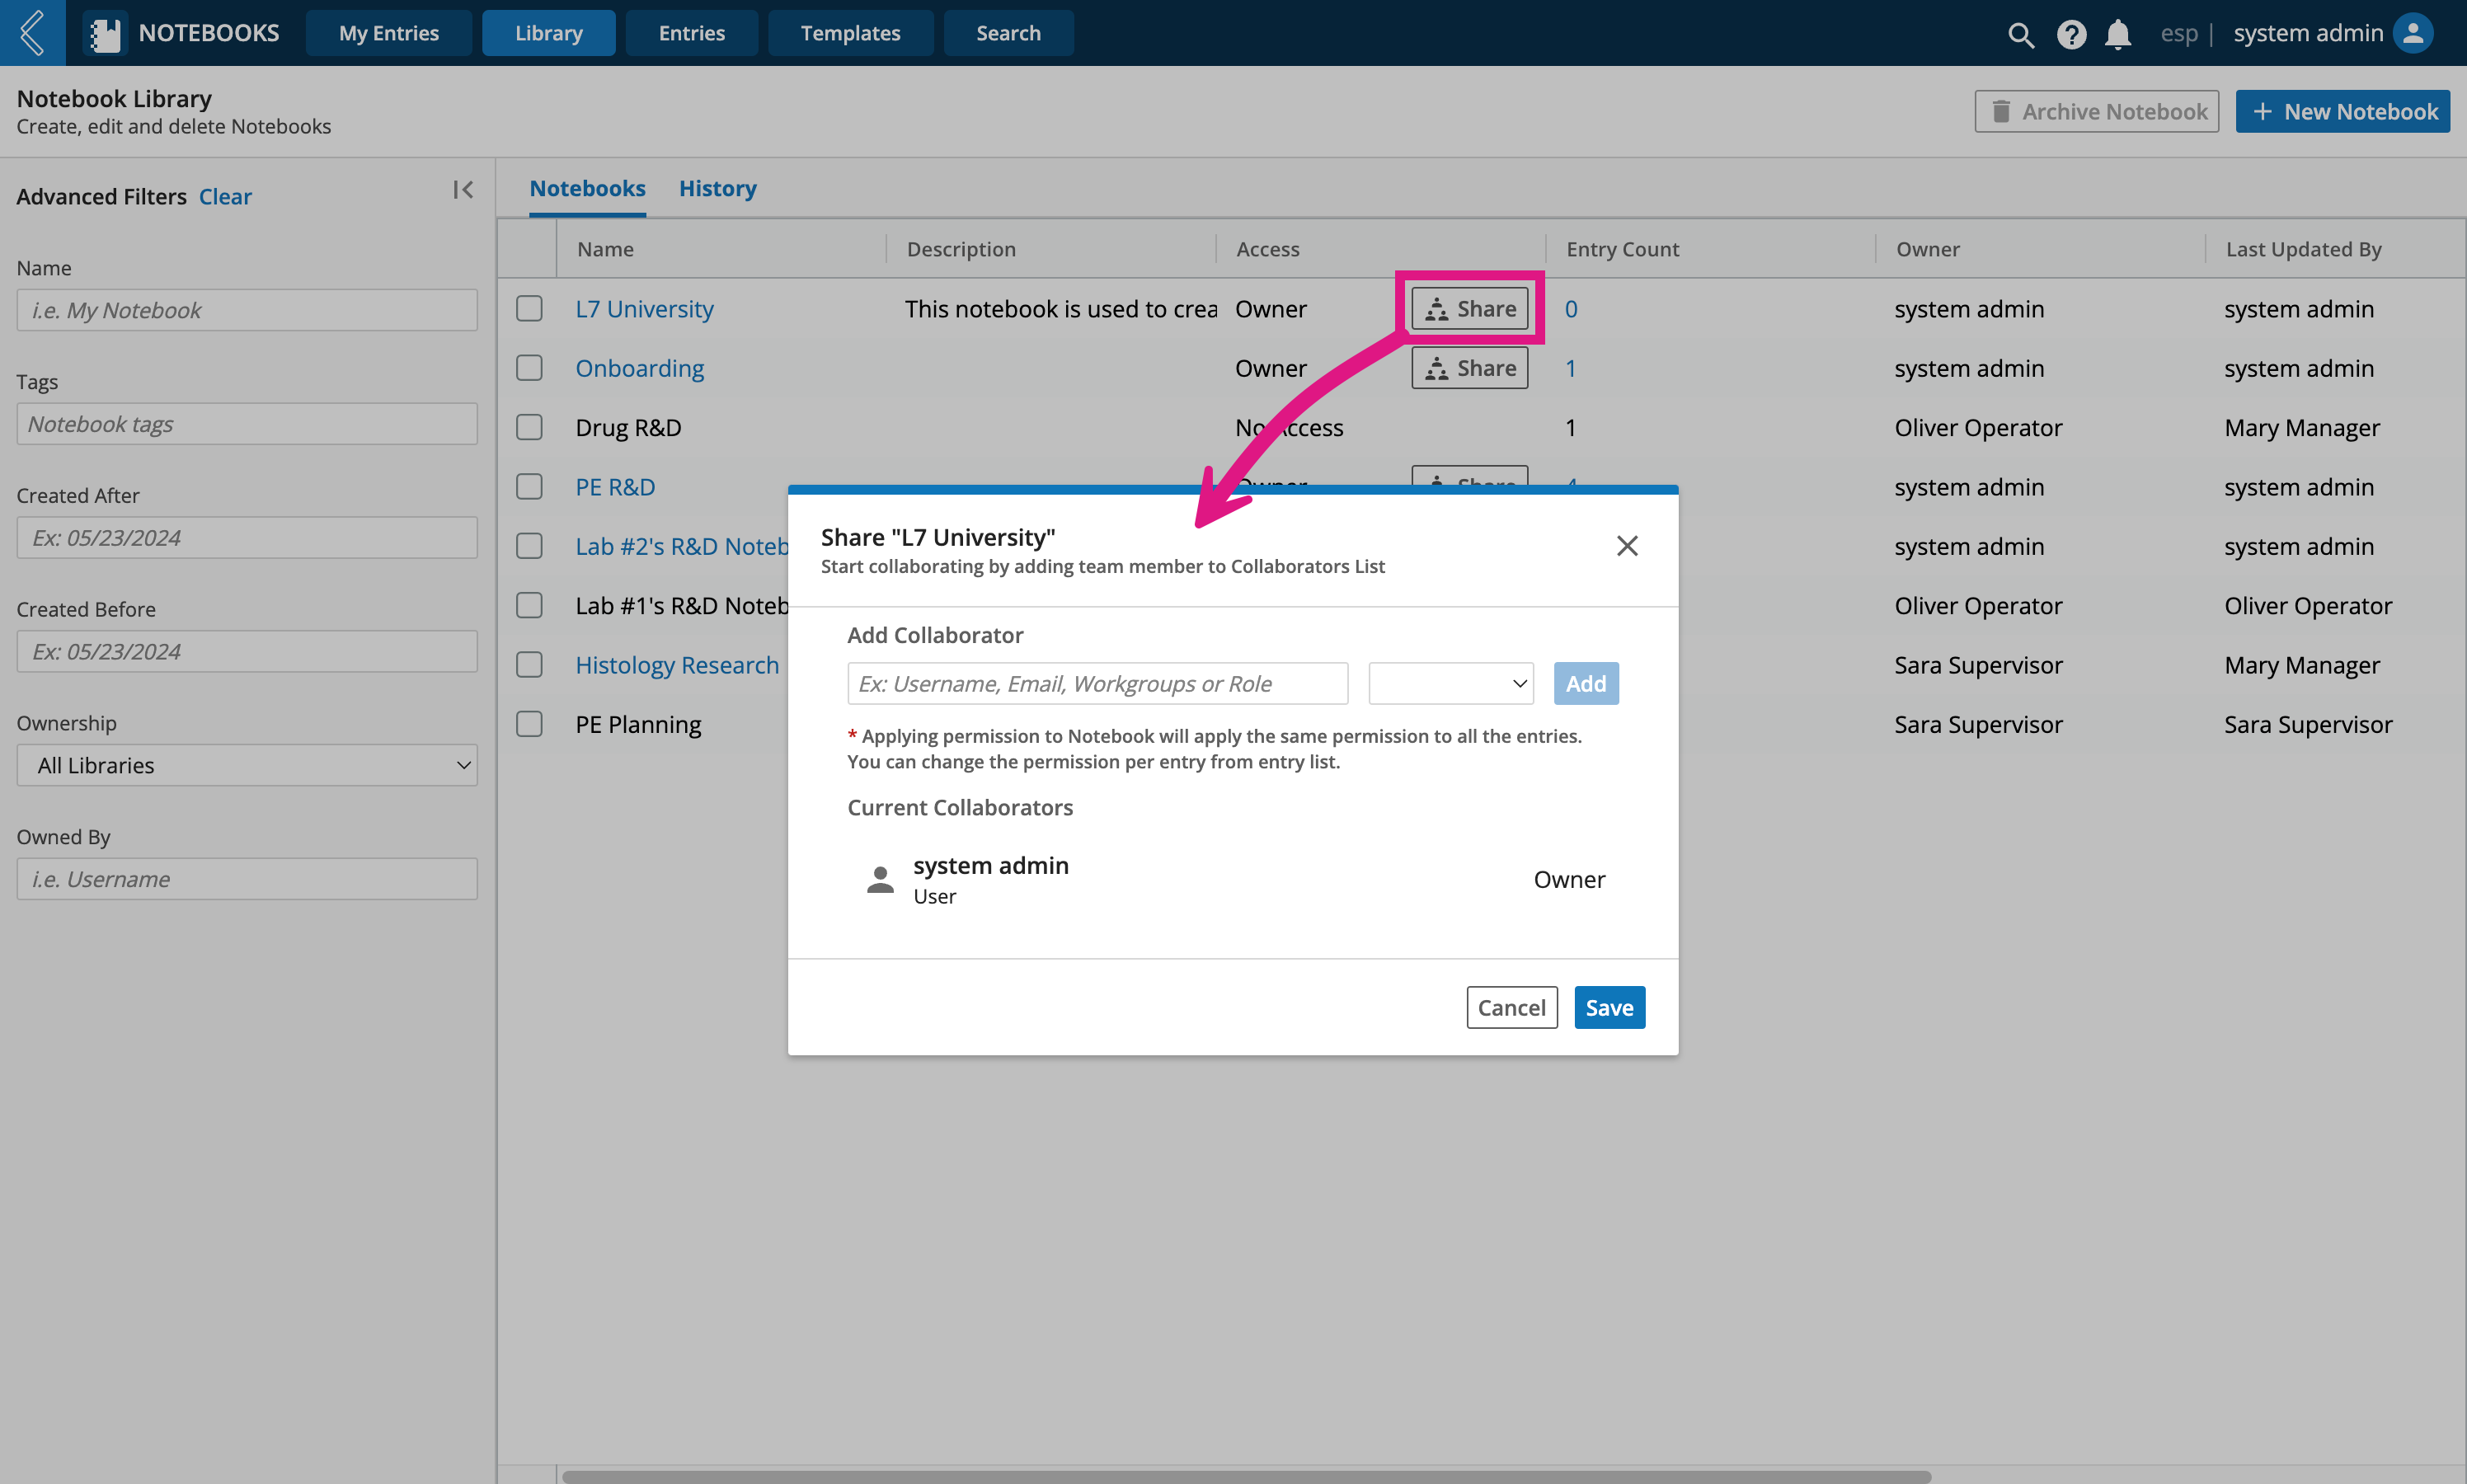
Notebooks can be used collaboratively across users, allowing multiple users to work on a single Entry. At any time you can share your Notebook with collaborators by selecting the Share button under the Access column. This will open a modal for you to add collaborators and assign their access permissions.
Note
The Share feature is only displayed when you have sufficient Access permissions for the Notebook (Owner, Can Edit, or Admin) and your instance of L7|ESP has enabled sharing.
 |
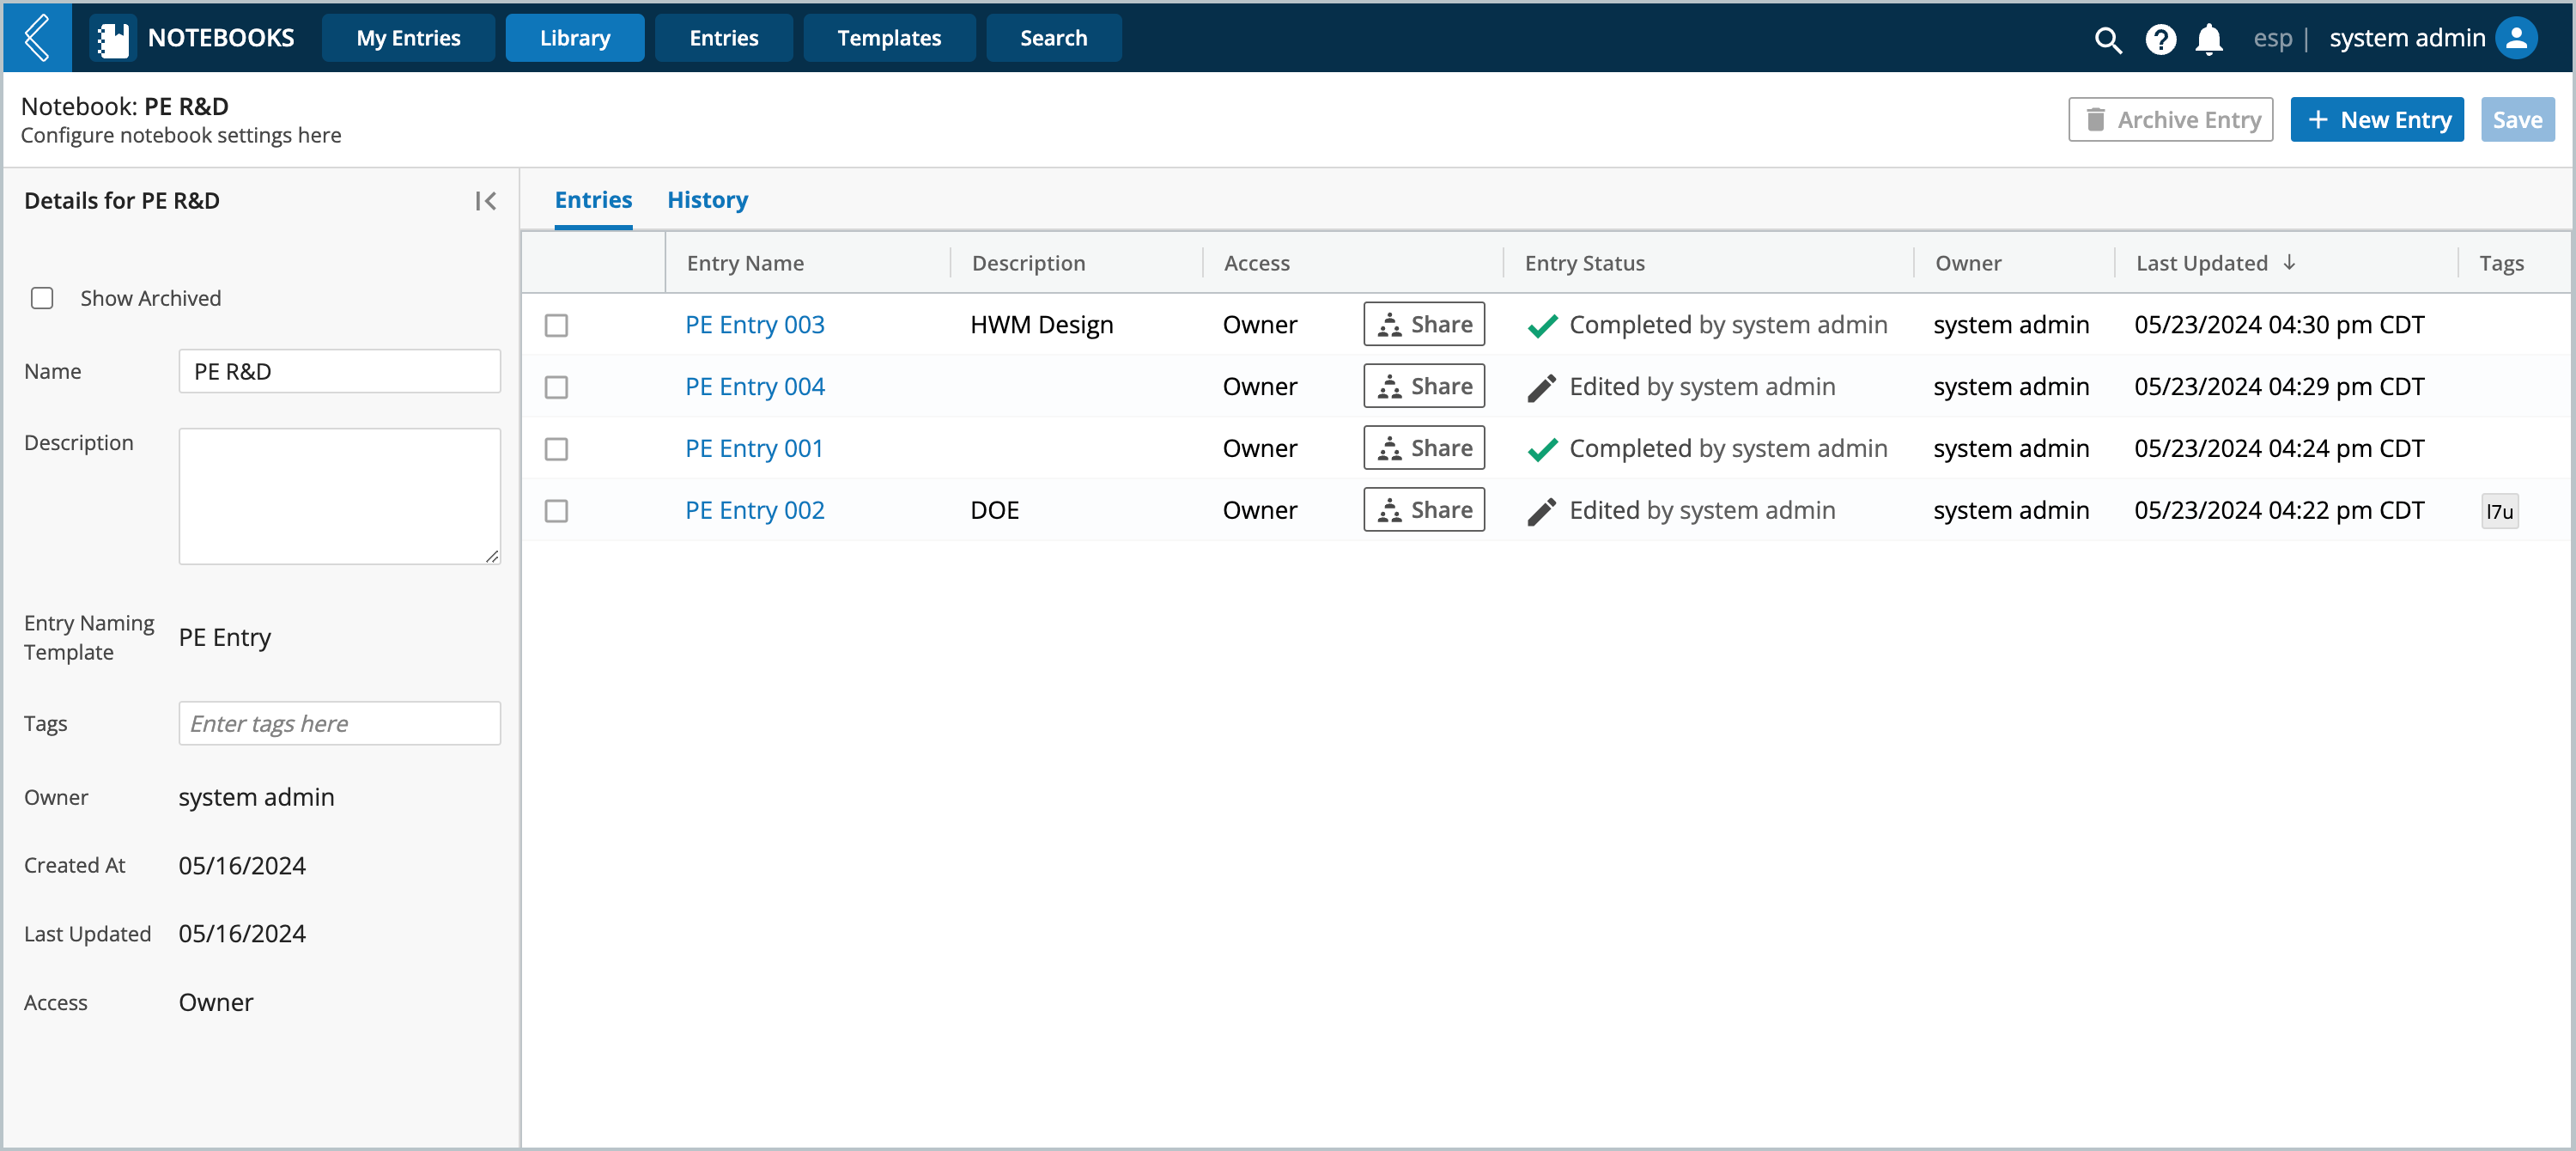
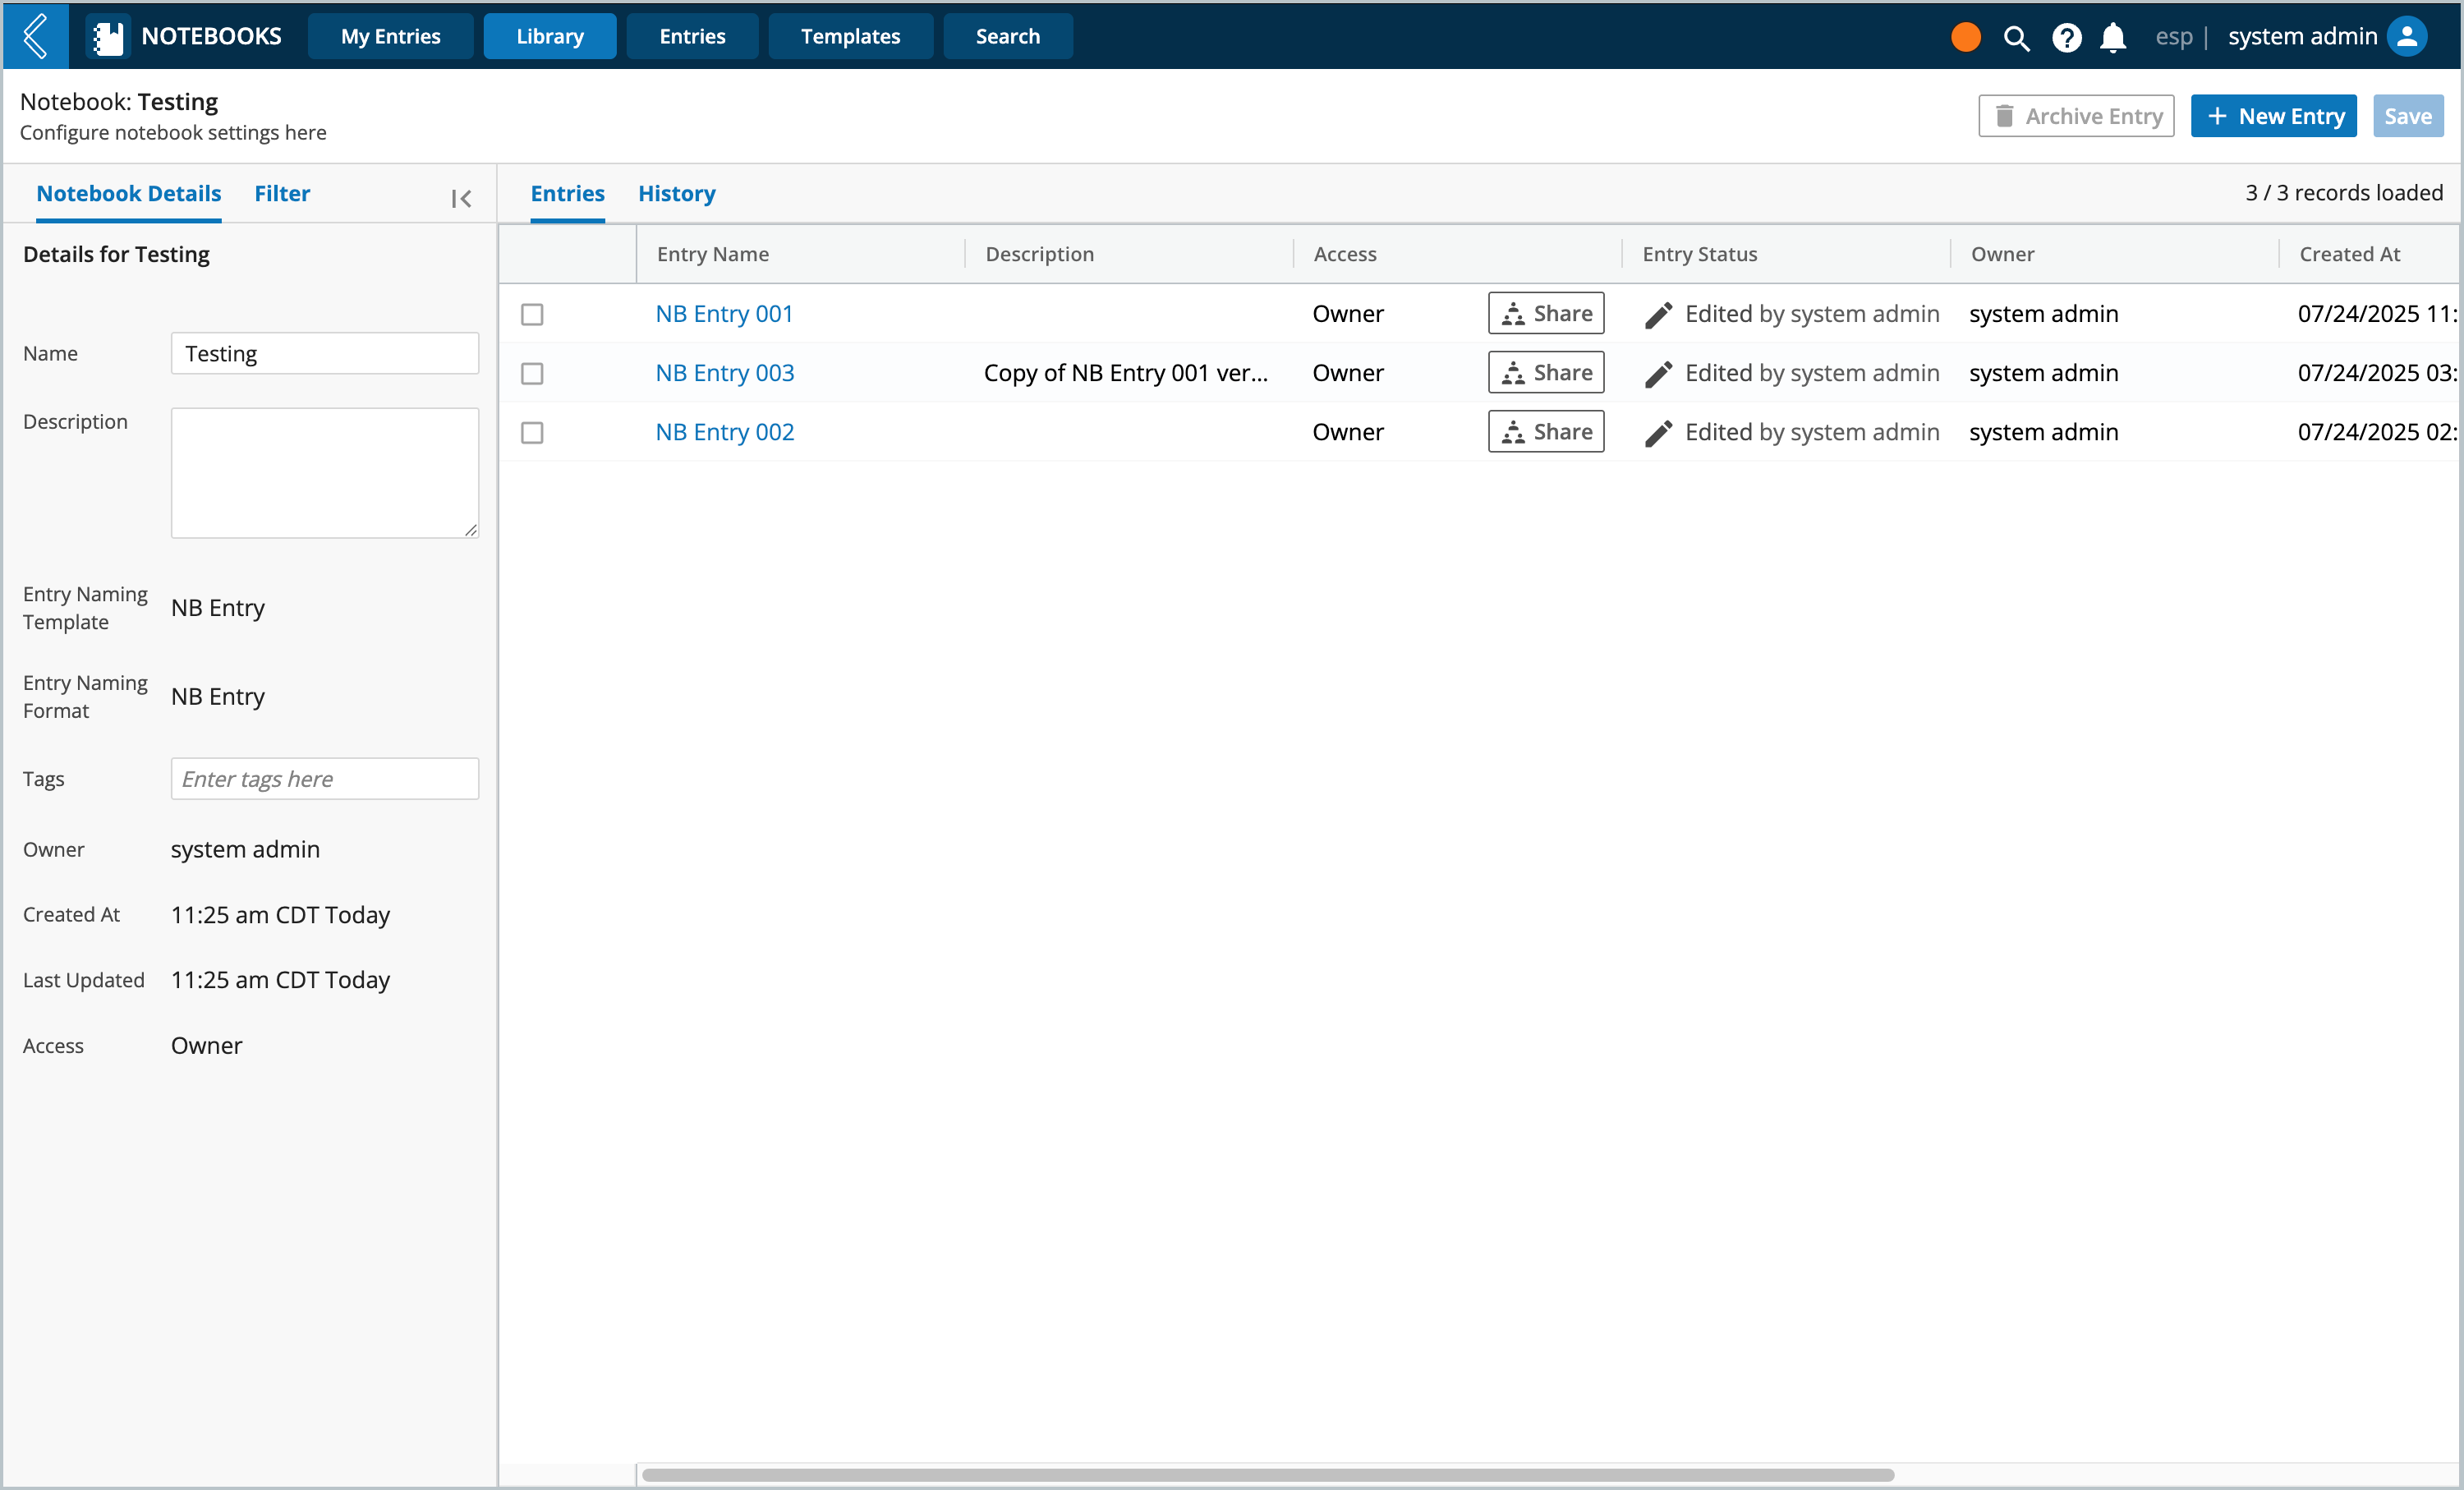
Accessing Notebook Details
Notebooks that you have access to will have their name displayed in blue text, clicking the name will bring you to its details. From here you can,
View/edit existing Entries
Share Entries
Create new Entries (+ New Entry)
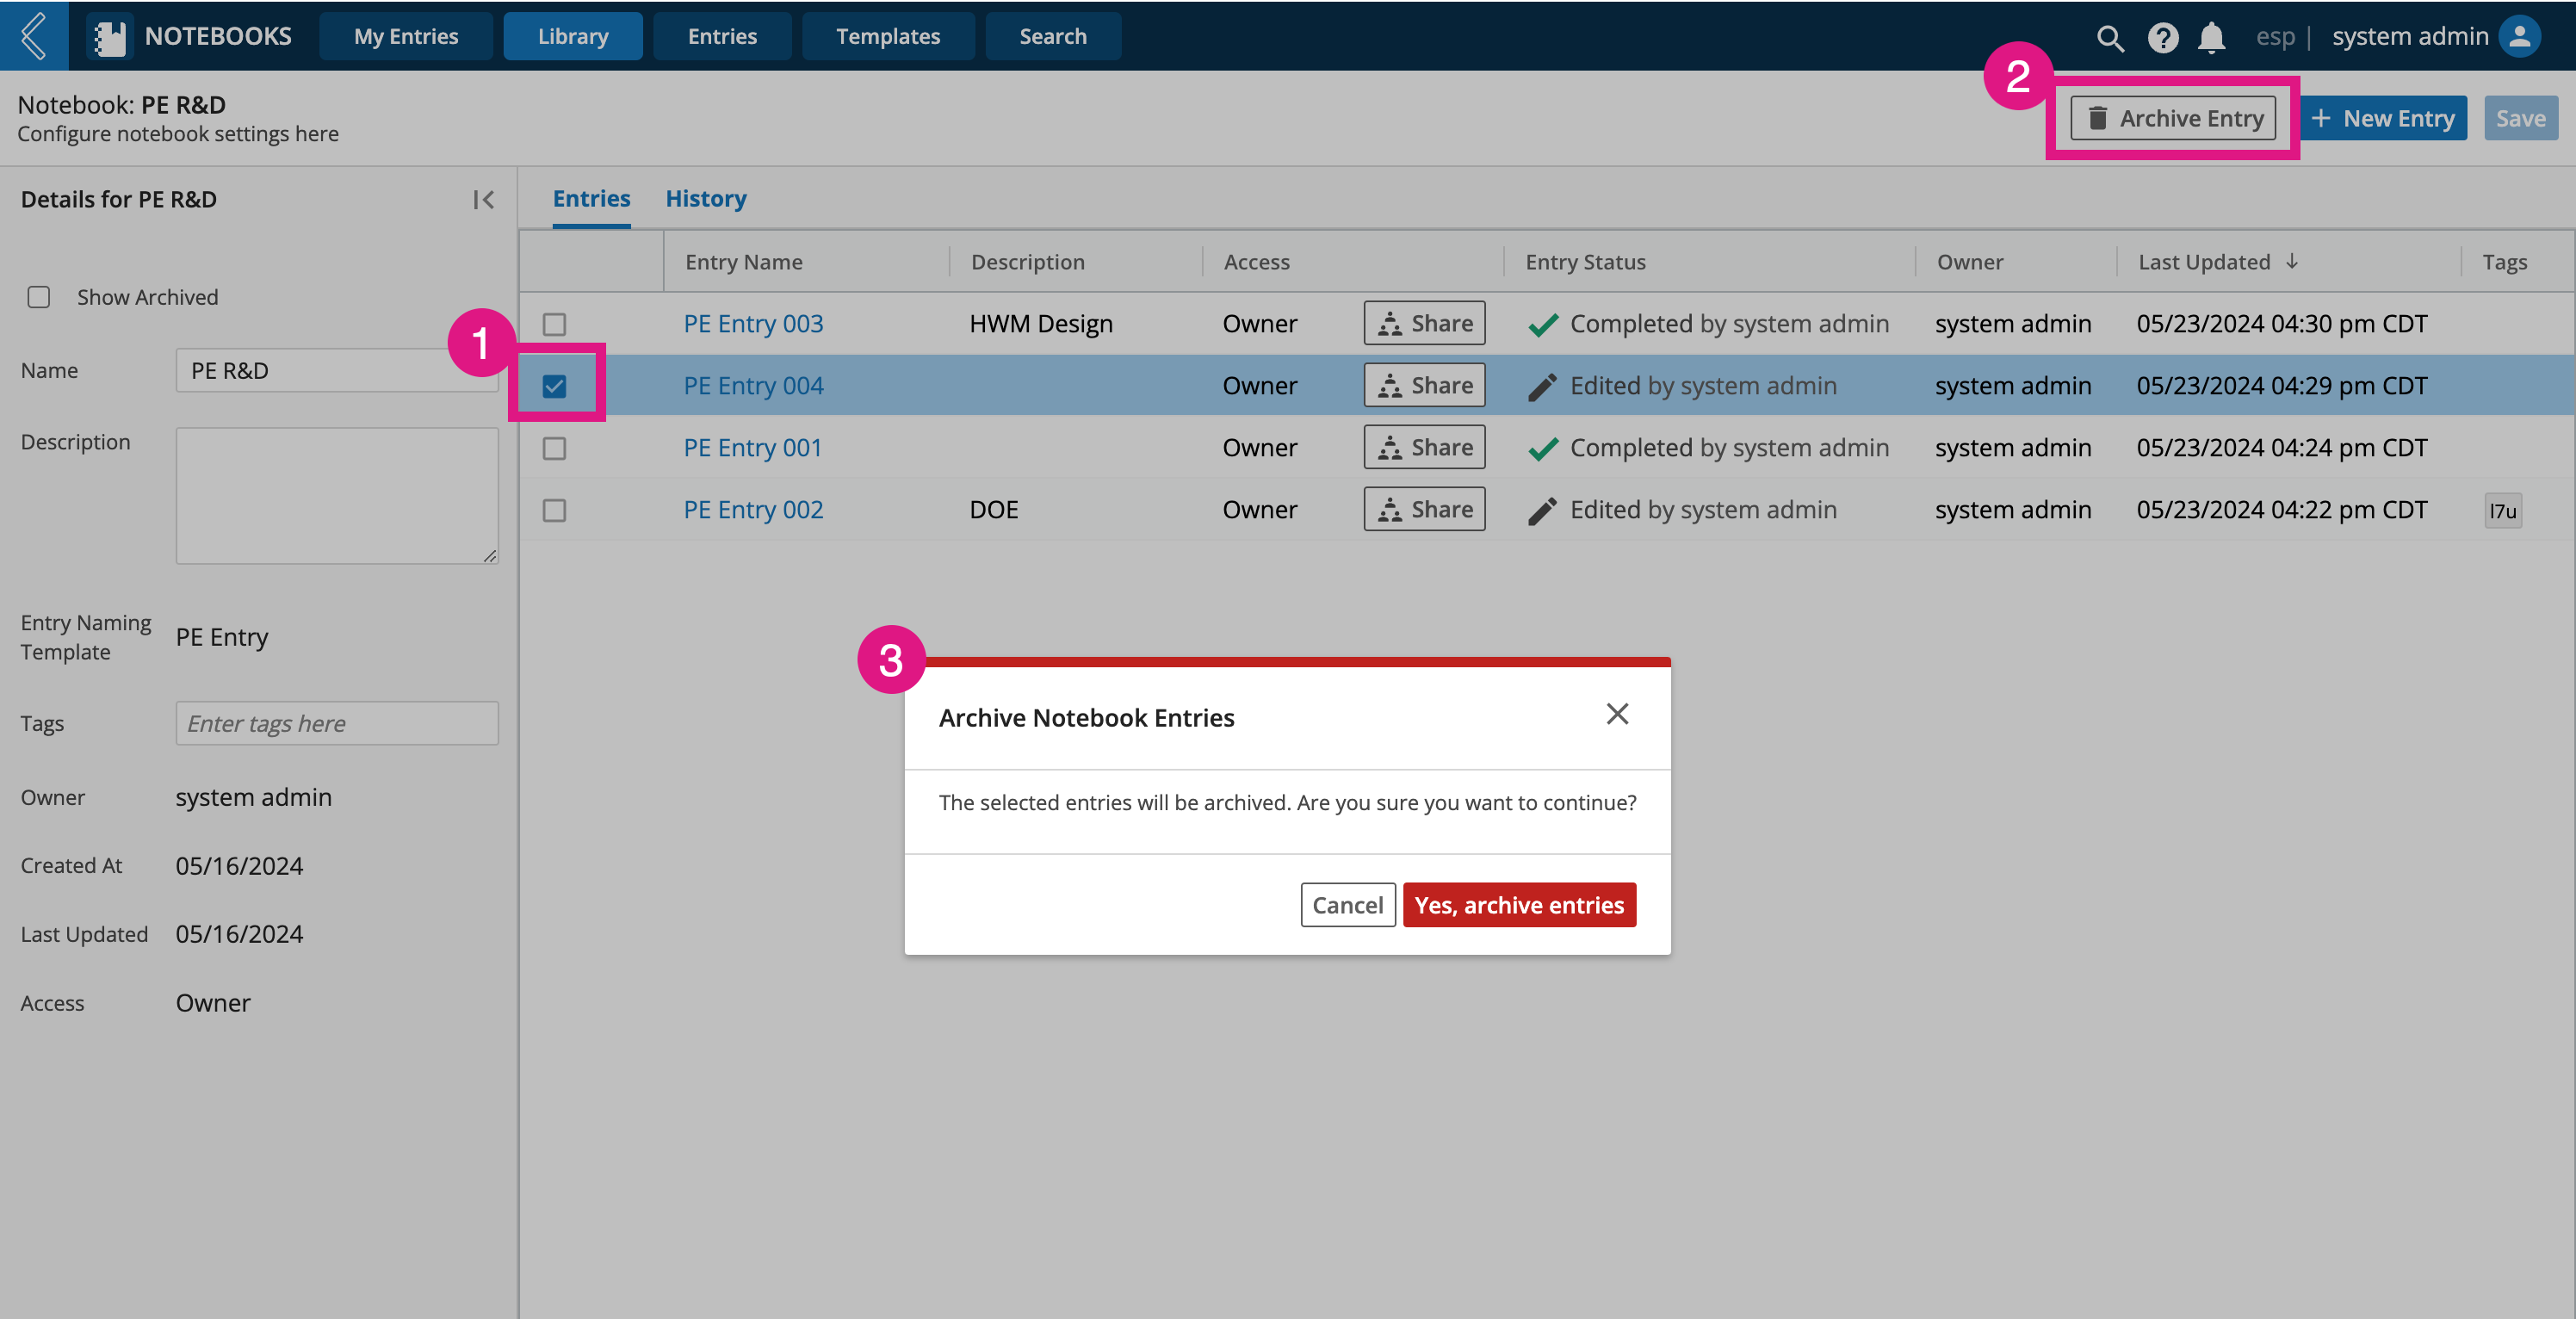
Archive Entry
View archived Entries (Show Archived checkbox)
Edit the Notebook’s Name, Description, and Tags
View History, the audit trail of user activity
 |
Archiving a Library from Library List View Page
If you have permissions to archive Notebooks (managed in L7 IAM), then you will see an checkbox next to each Notebook in the library that will enable the Archive Notebooks button.
Select one or more Notebook library(s) to enable the “Archive Notebook” button
Click Archive Notebook button
Click Yes, archive Notebook(s) to confirm you wish to continue
 |
Note
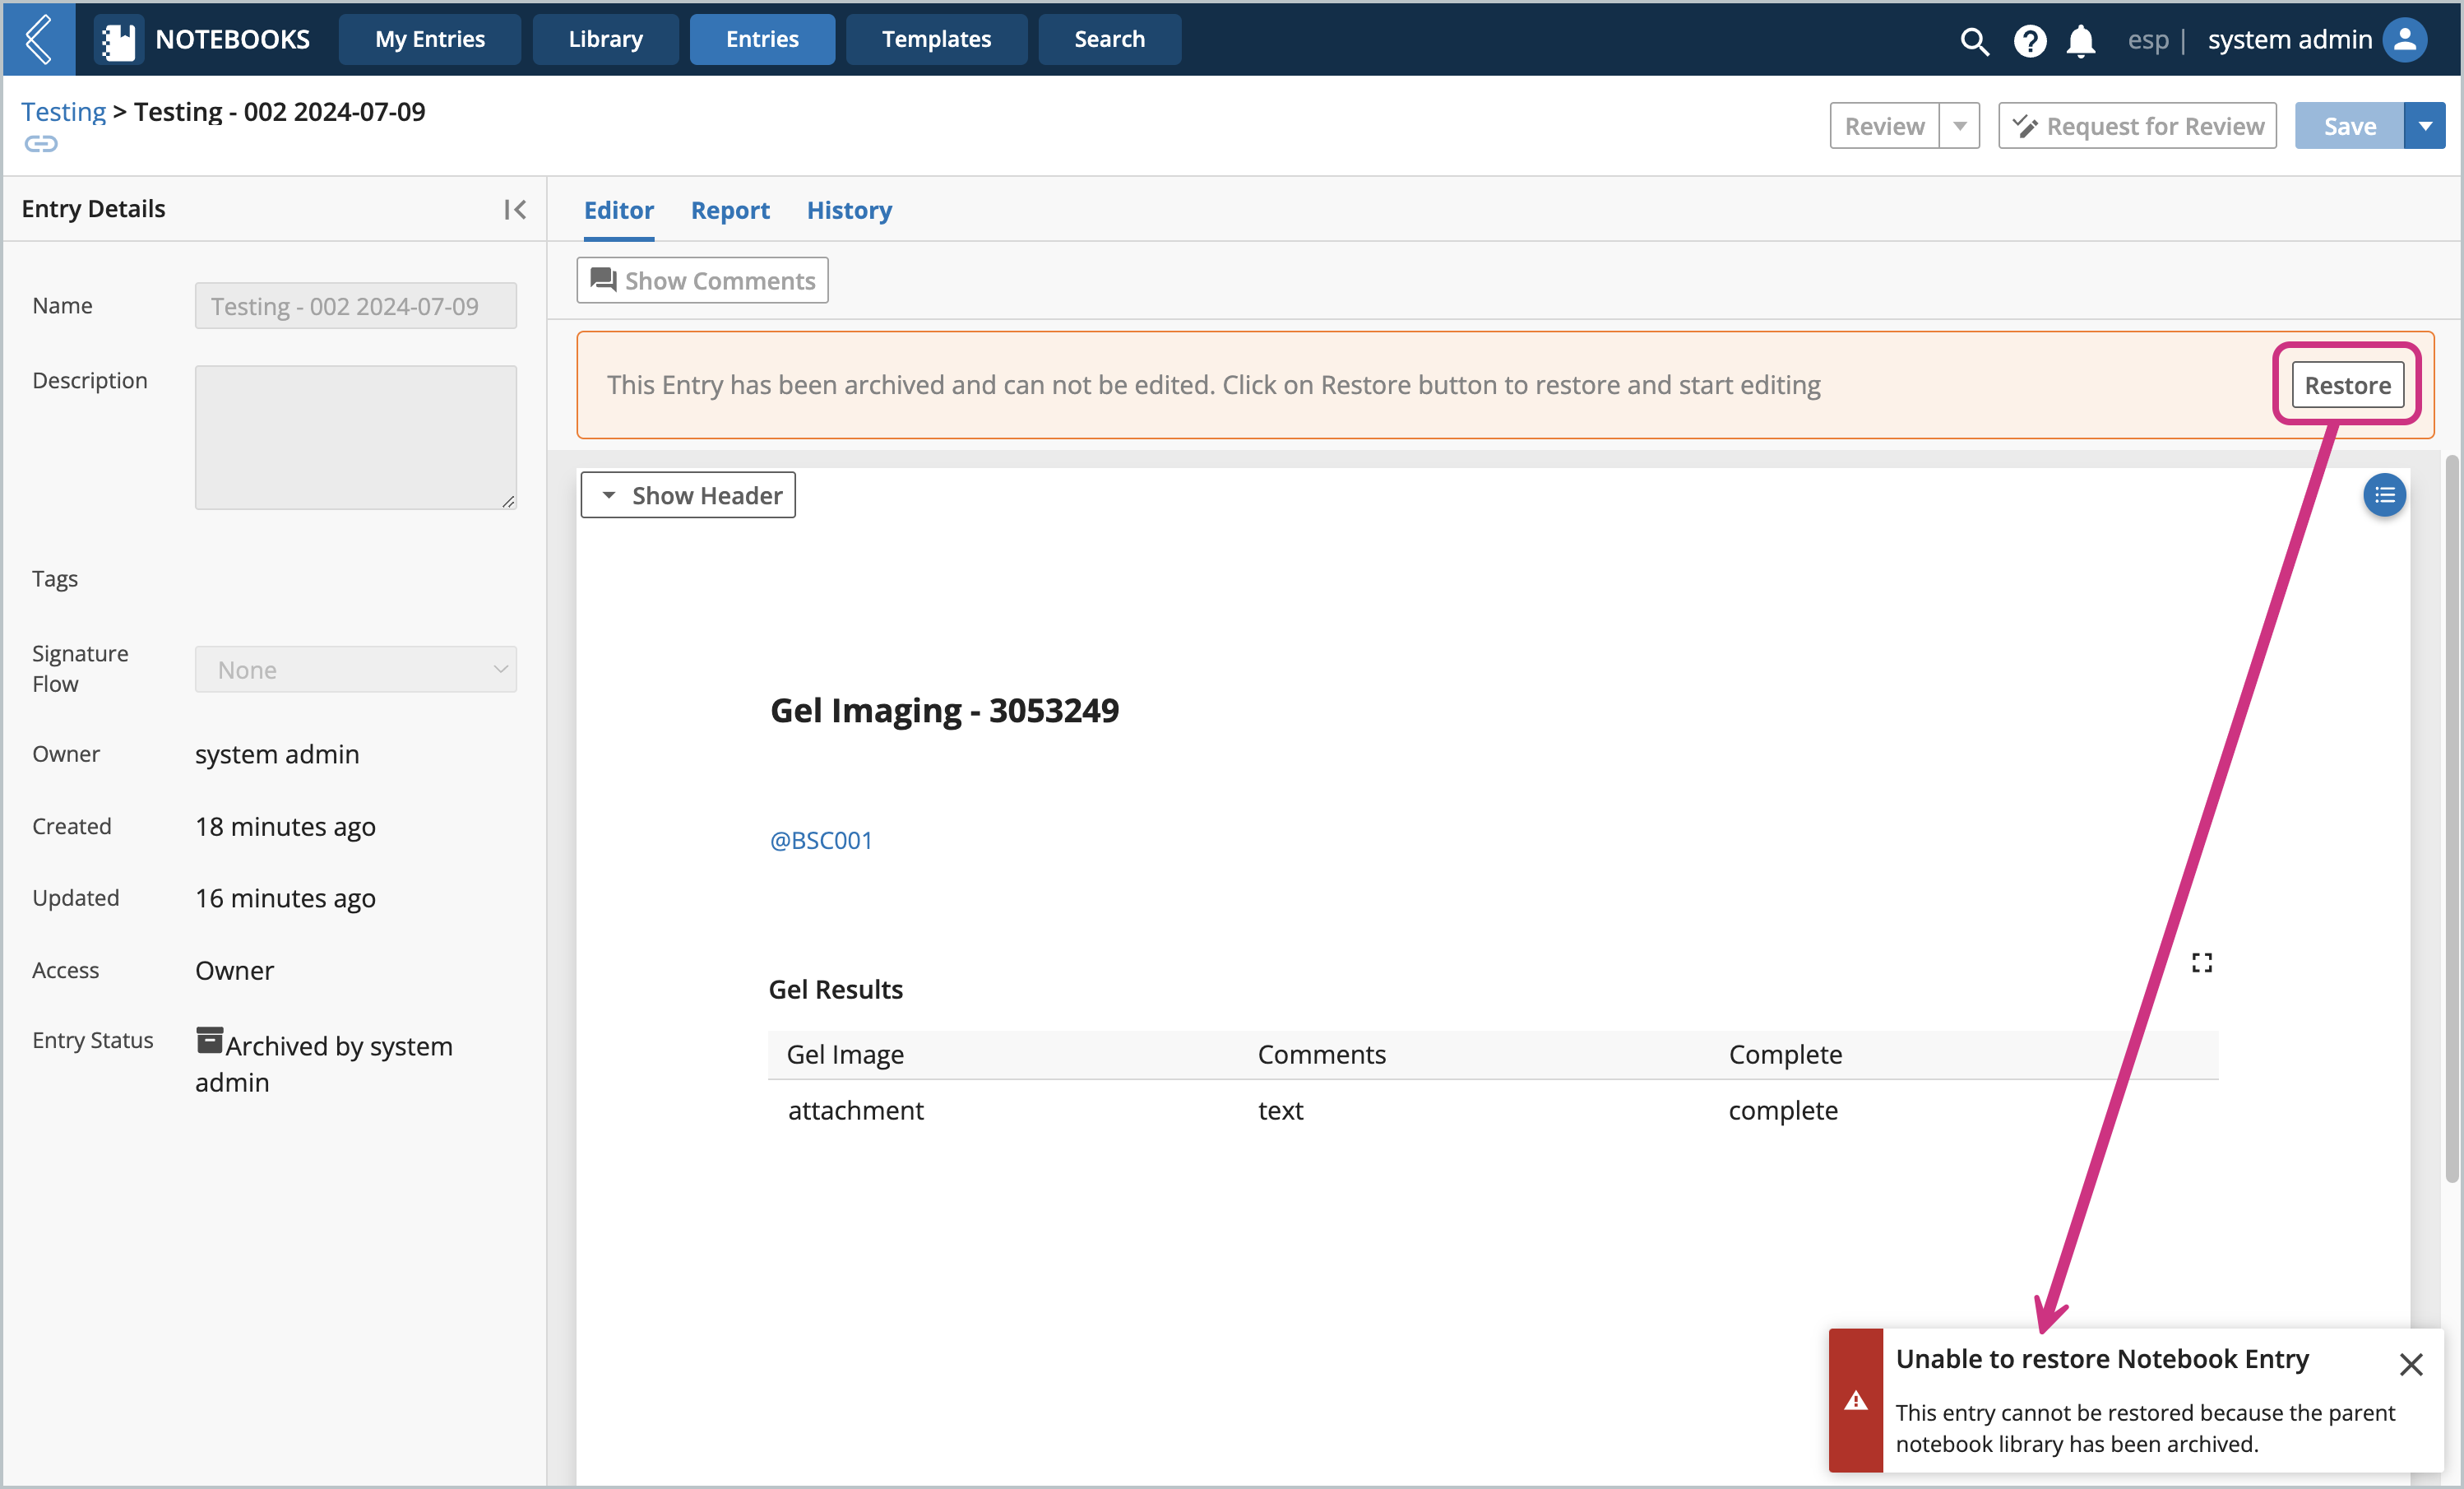
Archiving a Notebook library will also archive the Entry(s) within the archived library. Once archived, the Notebook library cannot be un-archived . However, if you go to the Entries page and select Show Archived you can access a read only copy of the Entry. If you have restore option enabled in configuration, you will see a Restore button, however because the parent Notebook library has been archived you will not be able to restore the Entry.
 |
History
The History tab on the Library page displays the audit trail of user activity on the library page for all updates to Notebook libraries.