Creating and Managing Schedules
Overview
Schedules are used to define the working hours for personnel, and the availability blocks for resources. They allow you to keep track of personnel availability, be notified upon schedule conflicts, and keep track of available and unavailable resources. These insights are used to maximize production capacity and meet operational efficiency.
L7 Scheduling comes with four schedulable resource types (Personnel, Workgroups, Locations, and Equipment). The Availability tab organizes these resource types into tabs where you can view, manage, and create new schedules. New custom resources/tabs can be created in L7|MASTER by creating schedulable Entity Classes.
Creating New Schedules
Schedules let you define the working hours and availability of a resource. When creating the schedule, you will capture the general information in the panel on the left, then build out the working hours by week. If a resource has a static schedule, then a single "Week" is sufficient. But if a resource's availability changes from week to week, then you can build out multiple weeks in a given schedule.
Navigate to L7 Scheduling app -> Availability
Click + New Schedule
Enter a Schedule Name
Select the Resource Name corresponding to the type of resource you're creating a schedule for
Select the specific resource you're creating the schedule for
Optionally you can opt to Use a Template, if available
Note
Templates will use preconfigured Working Hours and Breaks. To learn how to create a template, see Creating Schedule Templates.
Select a Start date
Select an End date. Using the picklist you can select on to set an end date or select never to opt out of an end date
Apply Tags (optional)
Enter a Description (optional)
Enter a Week Name
Enter a Description for the week (optional)
Select which Days the resource will be working/available for use
Enter the Start and End times for each day
Tip
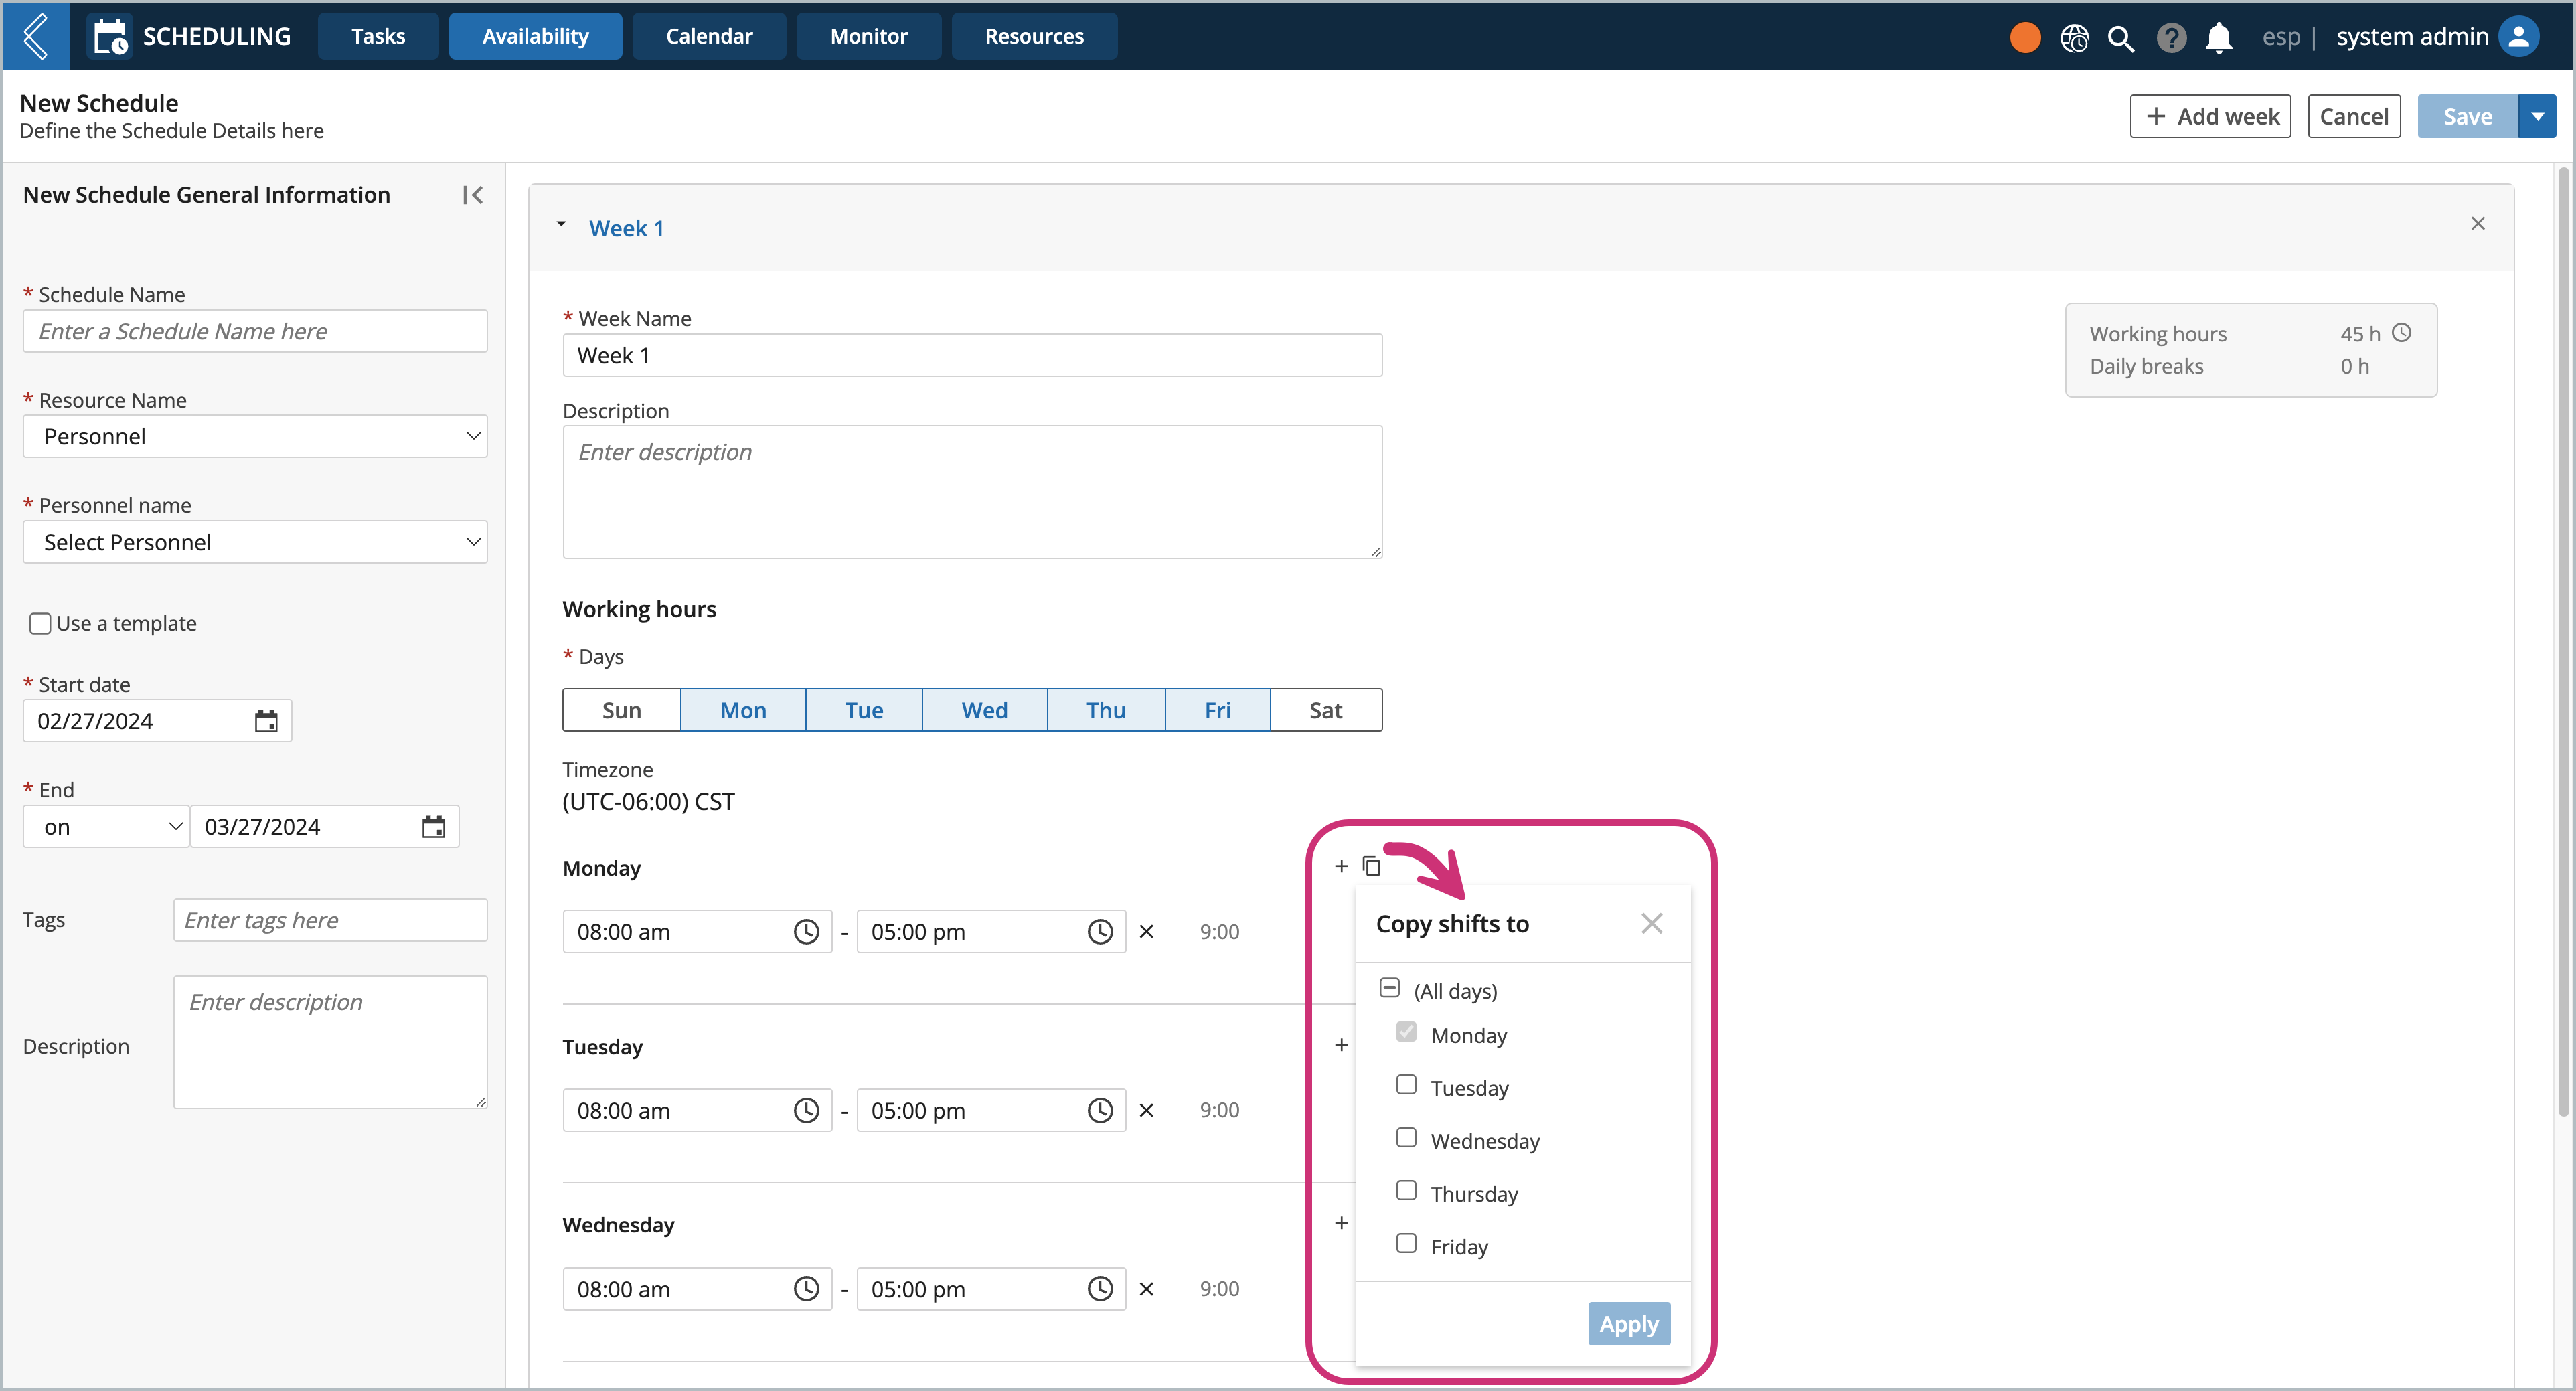
Creating recurring working hours? Use the Copy icon to copy and apply the shift hours to additional days.
Save
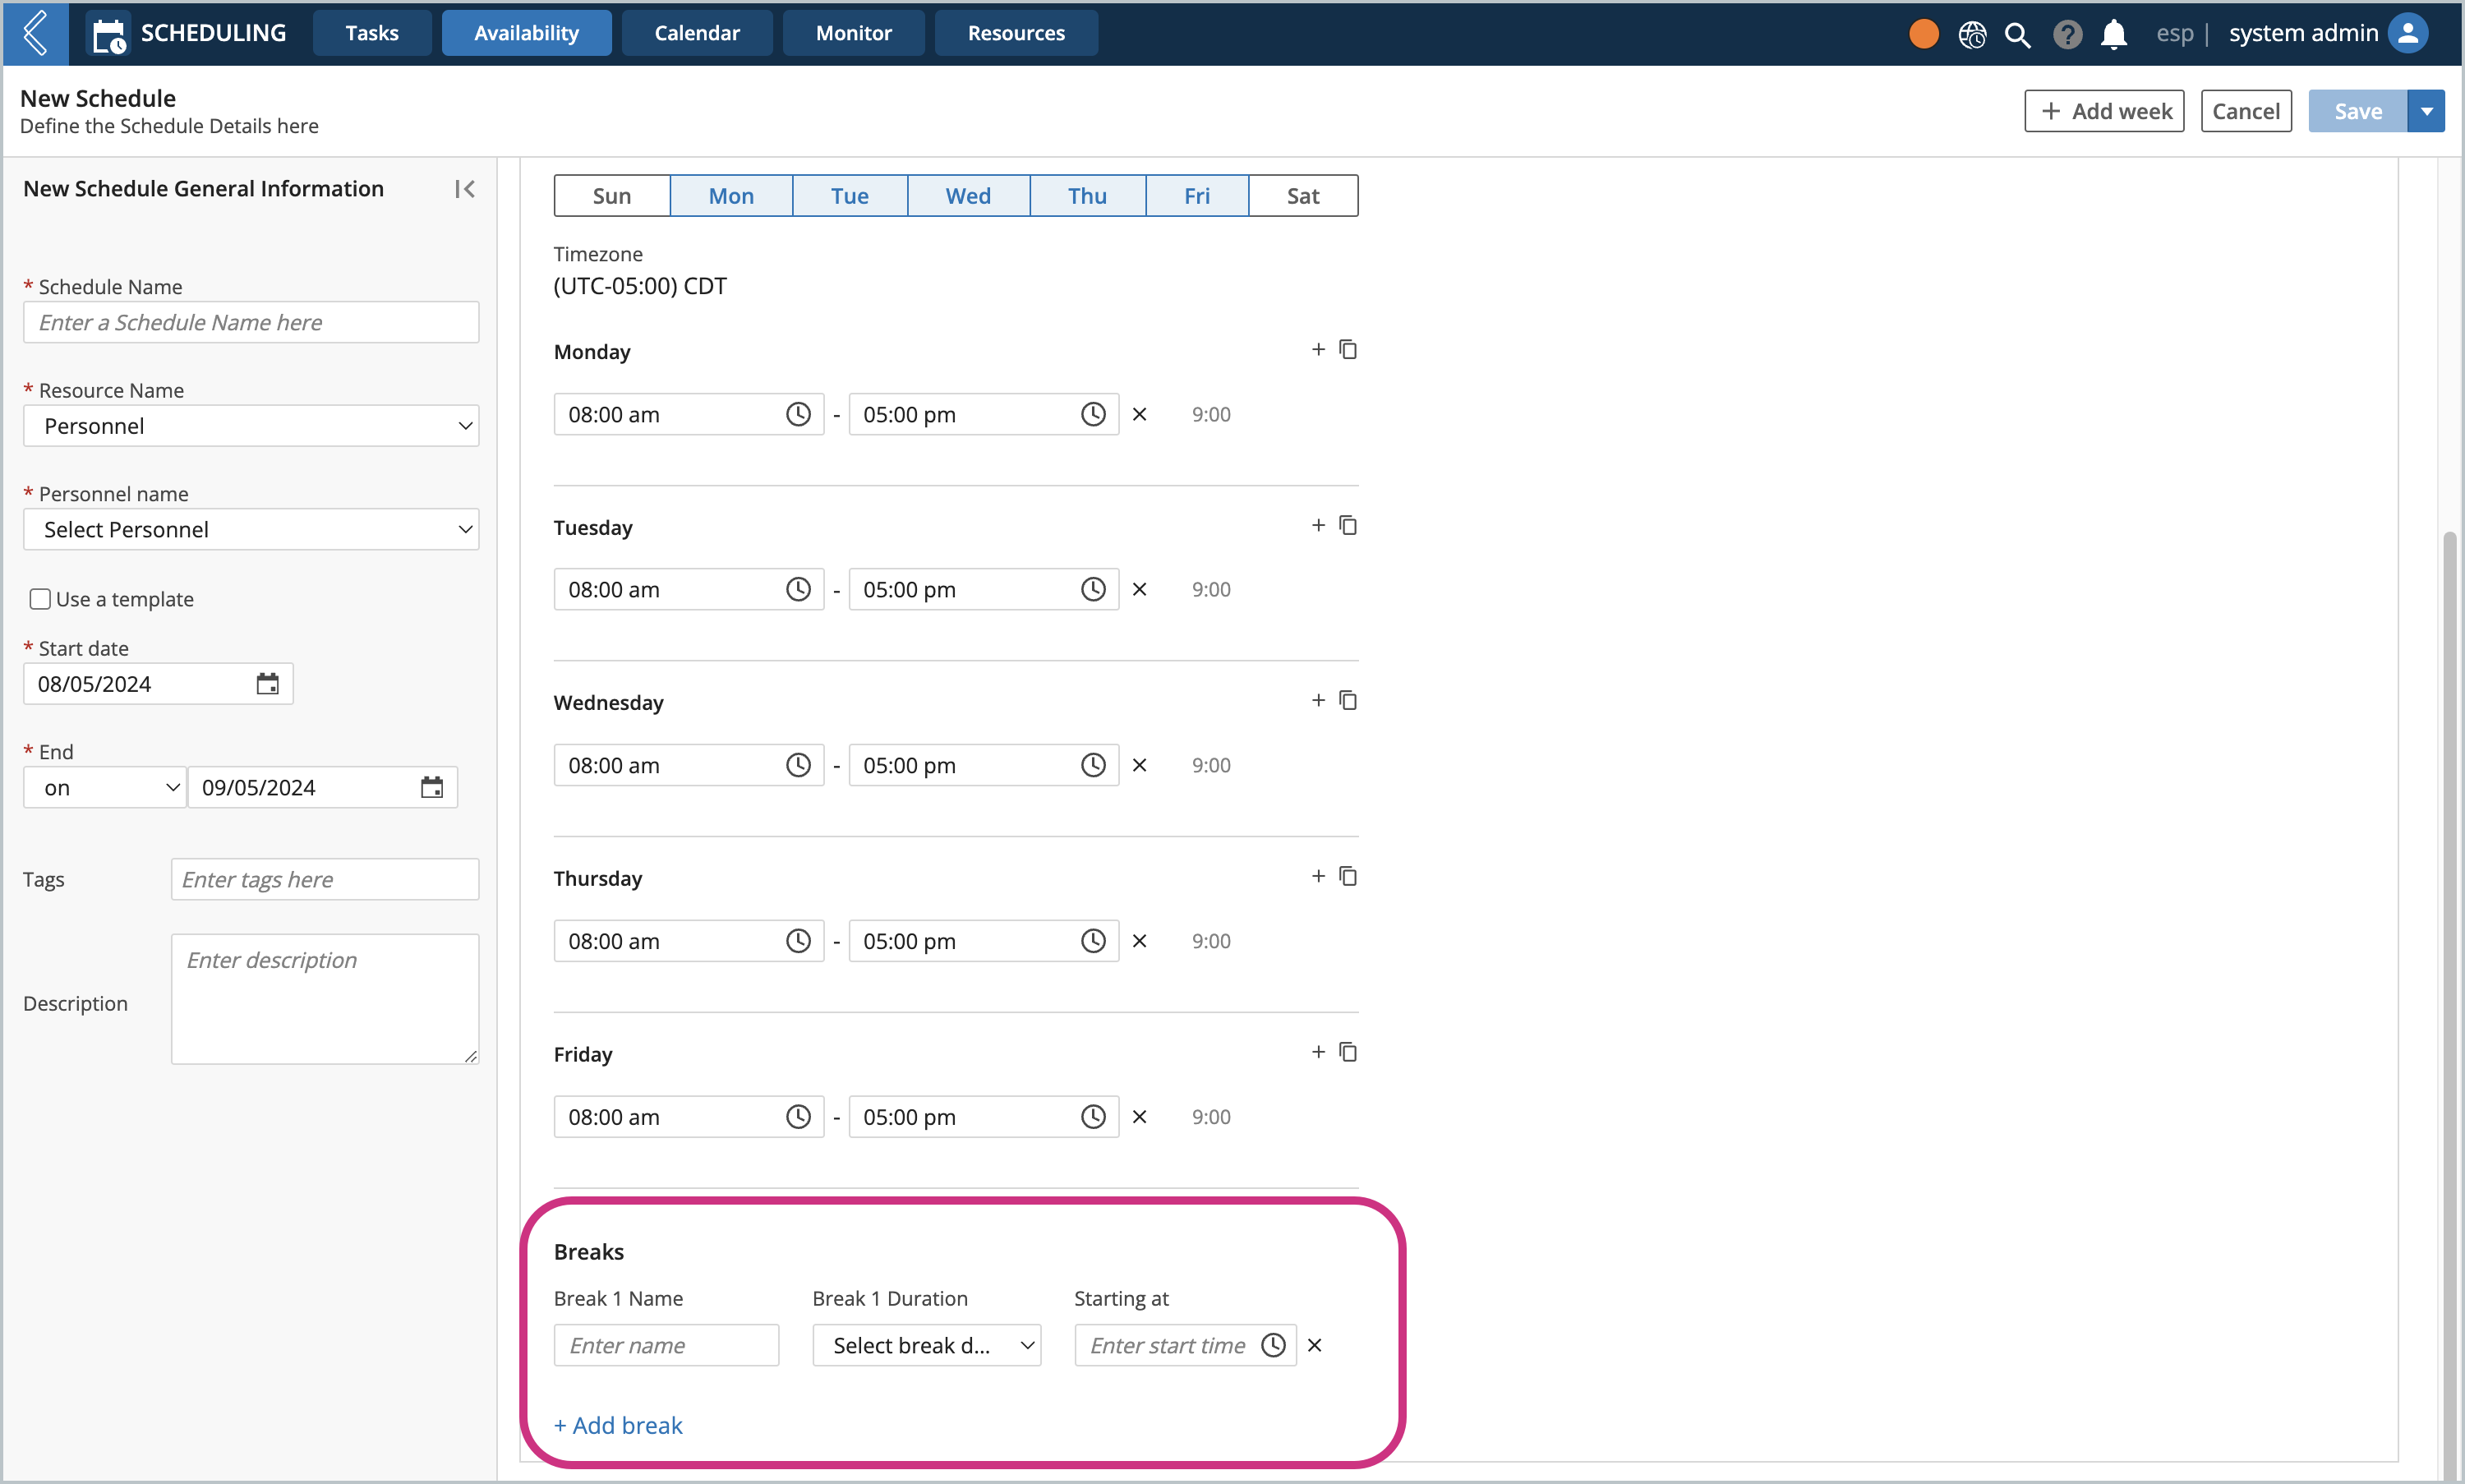
To add work breaks to a schedule, such as morning or lunch breaks, follow the steps below.
Select + Add break
Enter a Break Name
Select a Break Duration
Enter a Starting at time
Optionally select + Add break to create additional shift breaks
Tip
L7 Scheduling will calculate the total number of "Working Hours" and "Daily Breaks" as you build out the schedule, located in the top right corner of each week.
Daily breaks are subtracted from the weekly "Working hours" total.
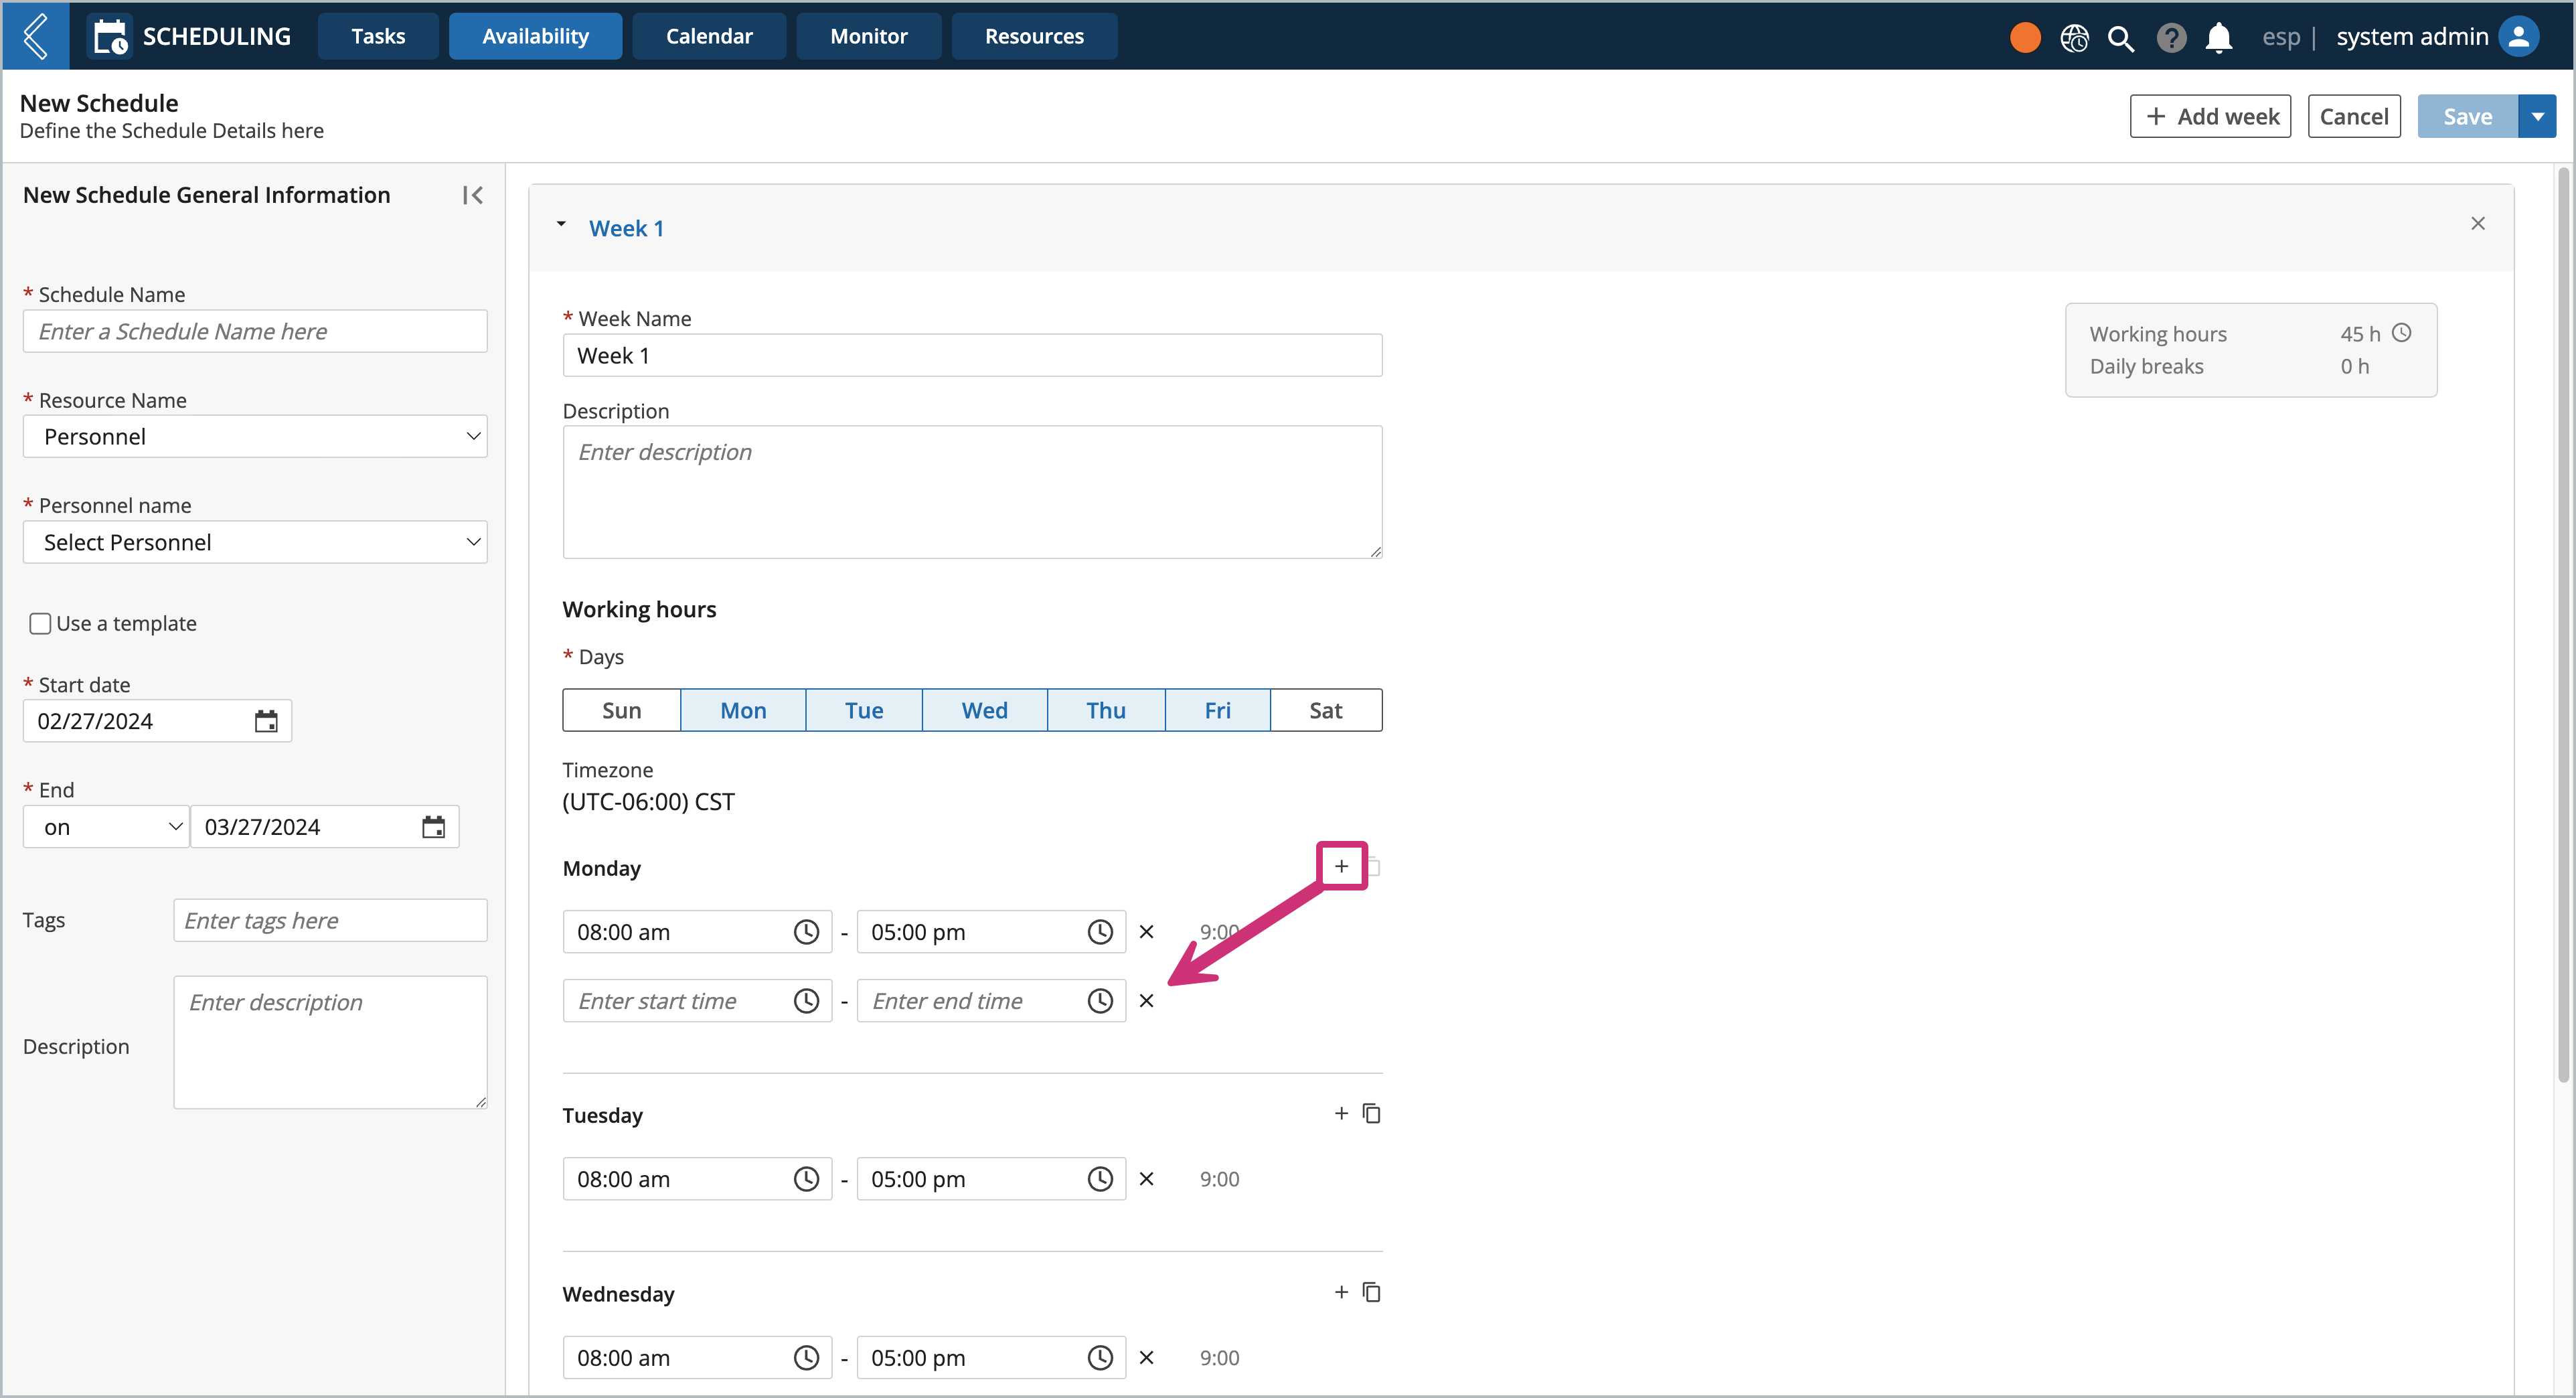
If your personnel's work day is split into two or more parts, you can create split shift schedules.
Click the + icon inline with the day you're adding the split shift to
Enter a Start and End time
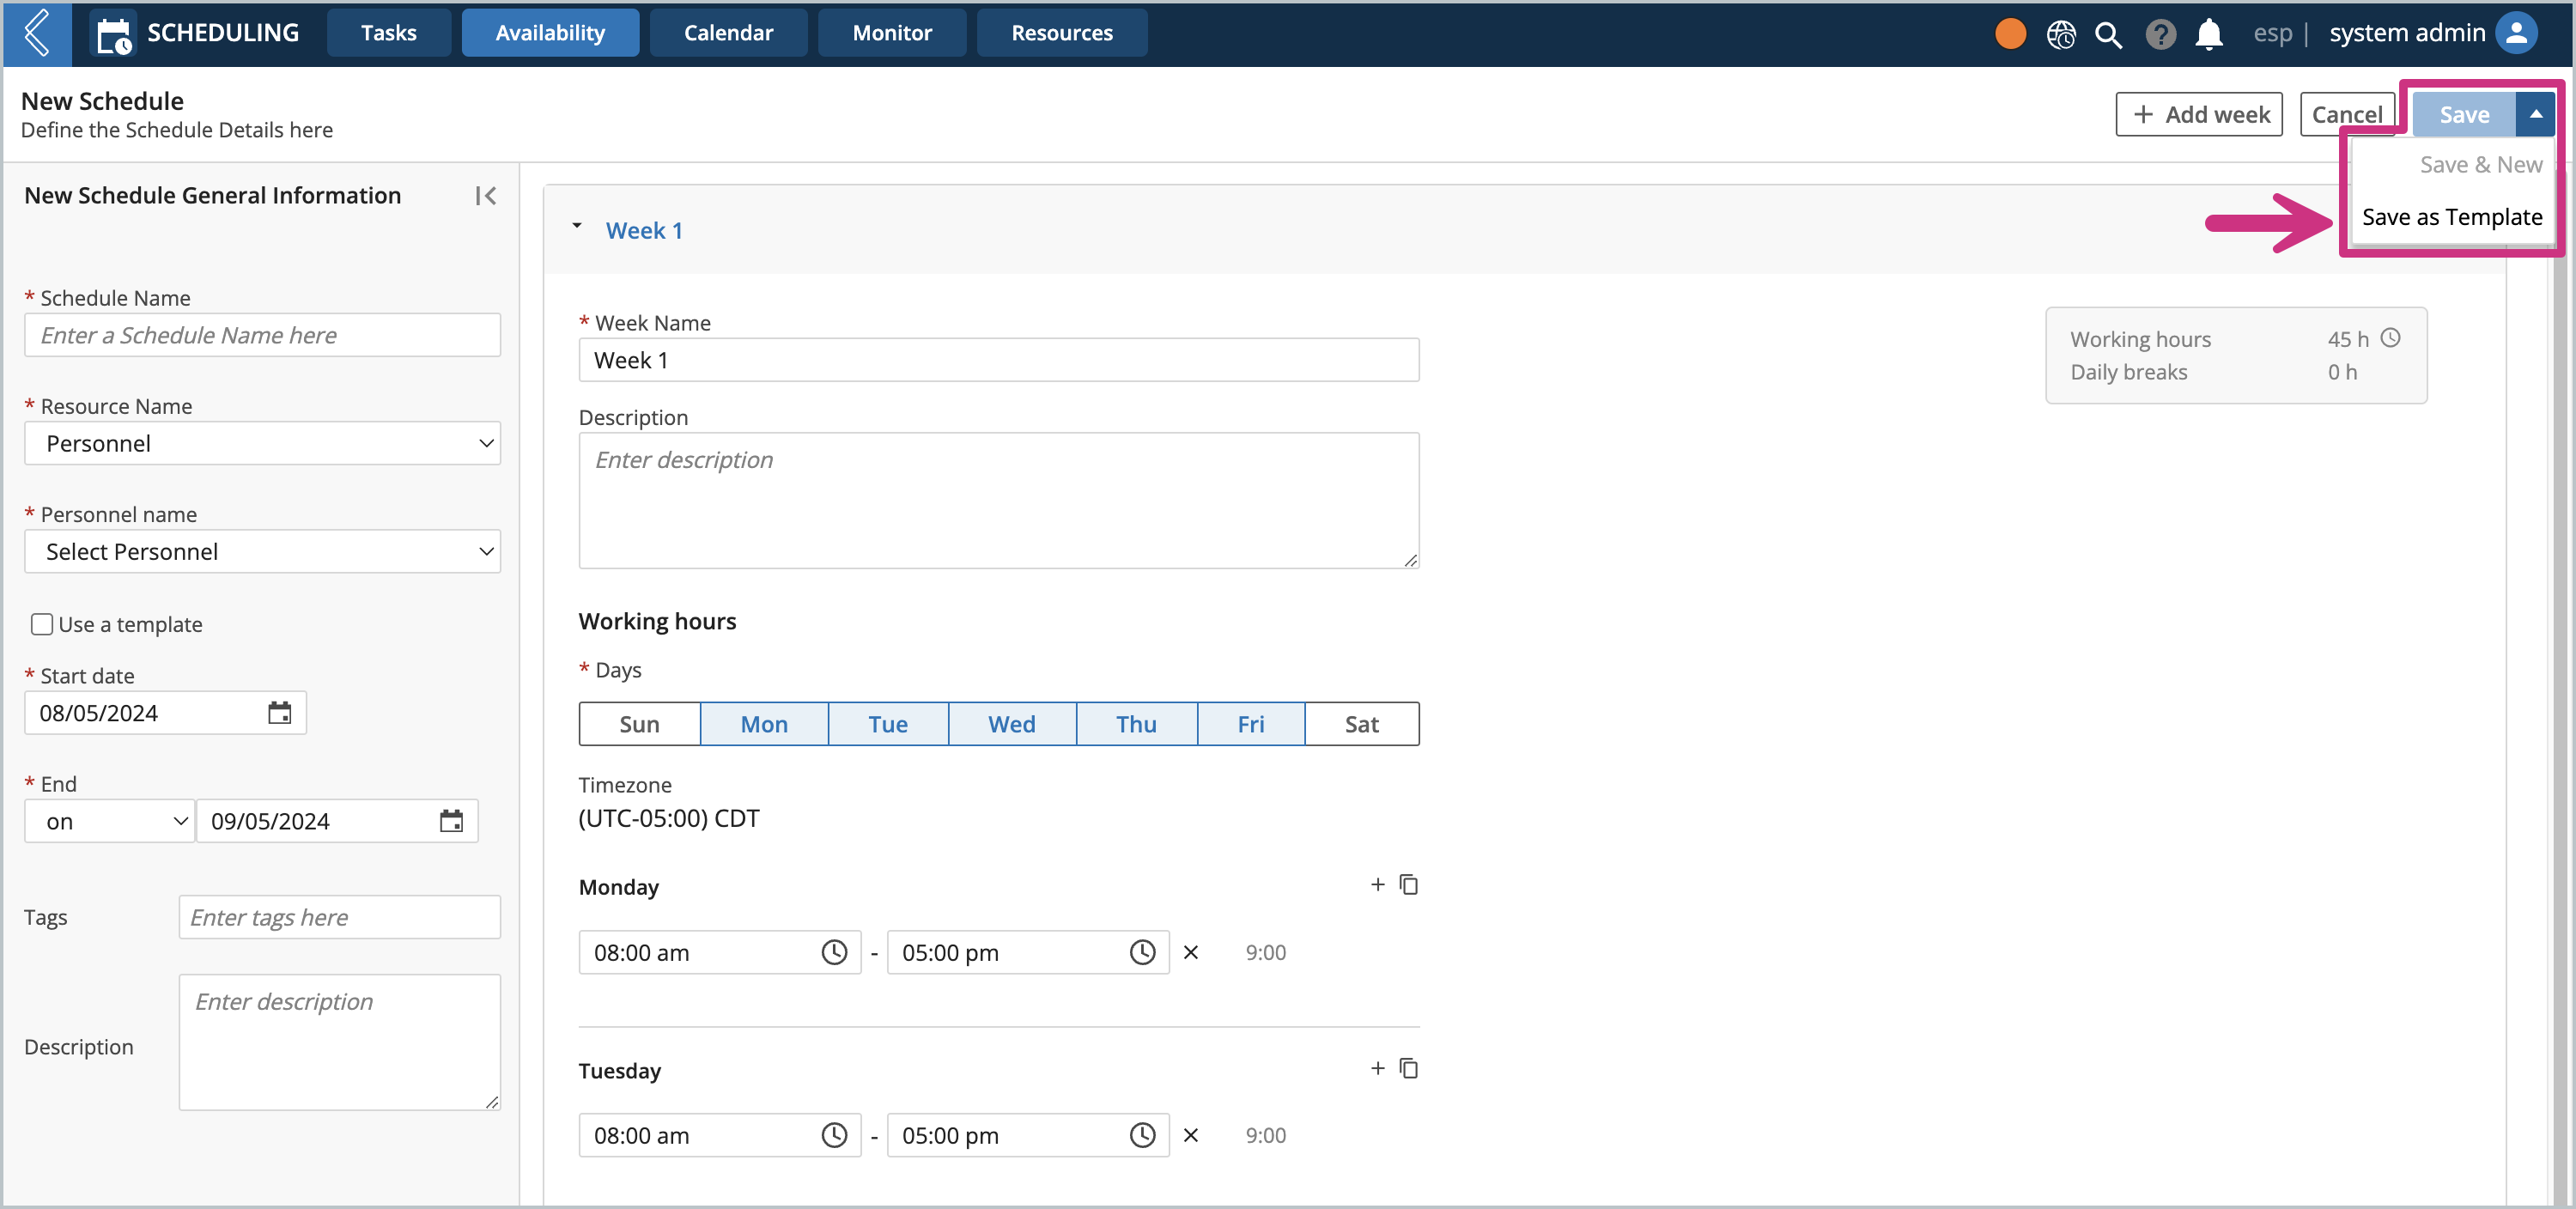
Schedules are created for and applied to individual resources. If you have several resources that will use the same schedule, then you can create a schedule template to apply the Working Hours and Breaks to additional resources.
Build out the schedule, following the normal procedure (but don't click Save)
Click the arrow next to Save
Select Save as Template
Enter a Name for the template
Click Save
Managing Schedules
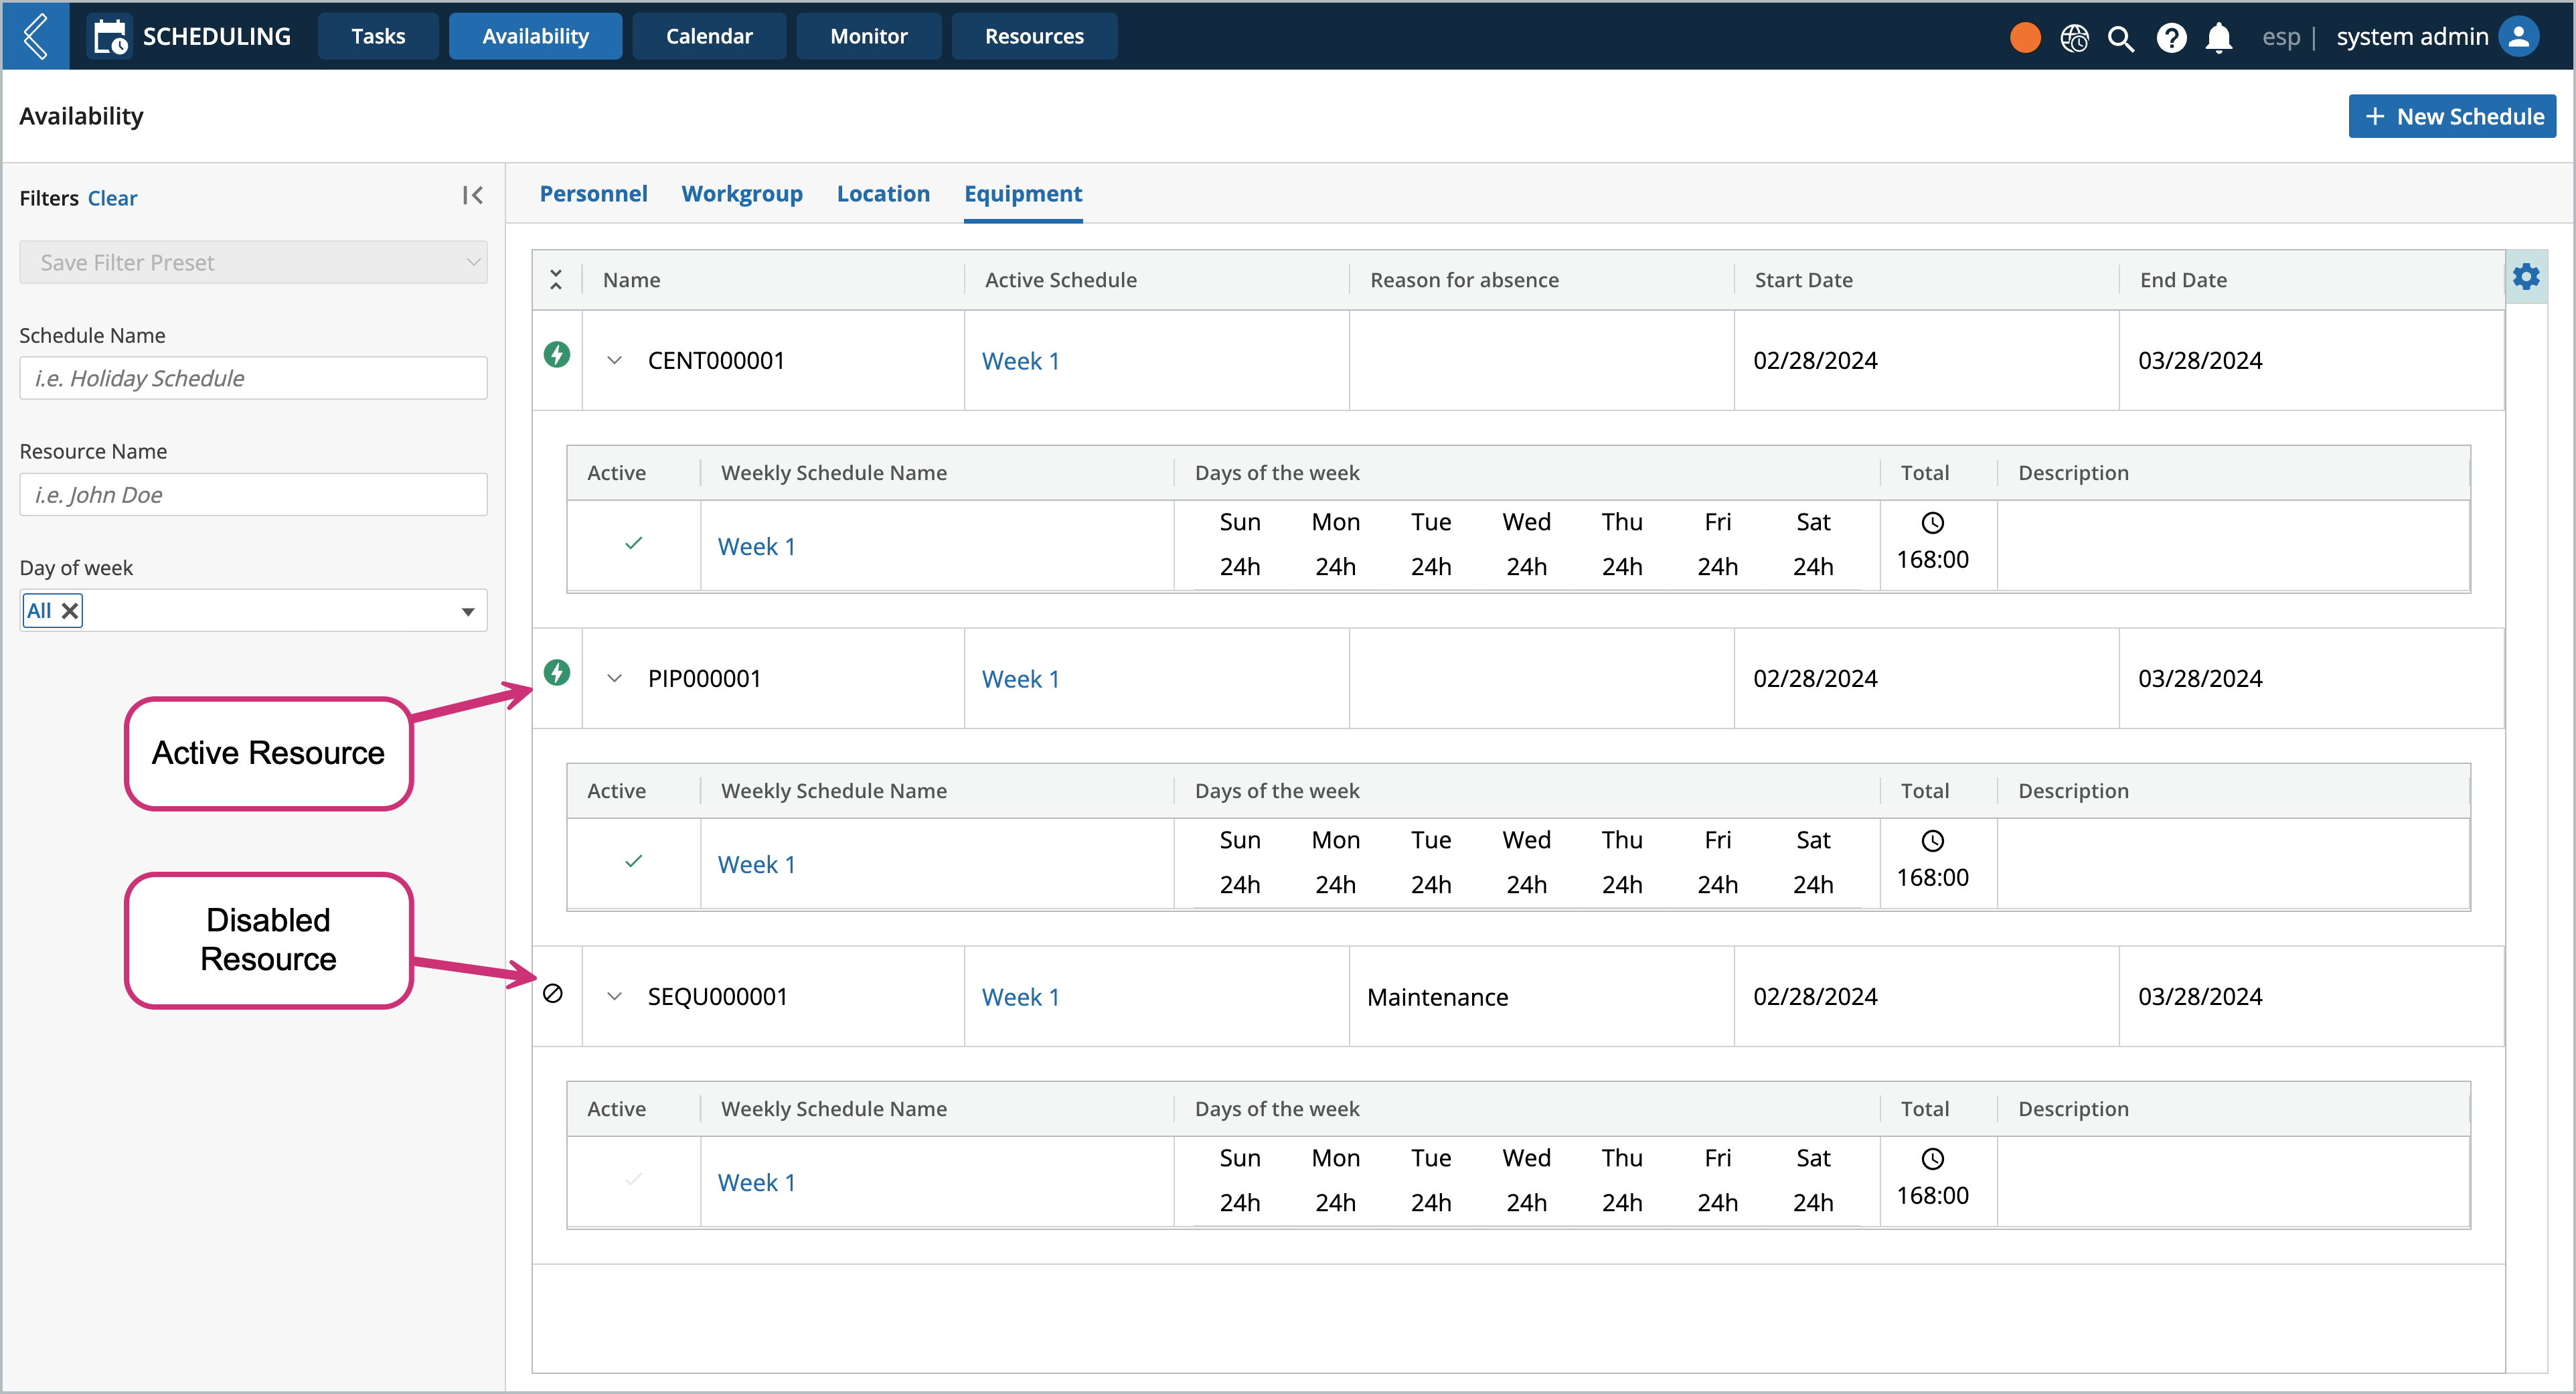
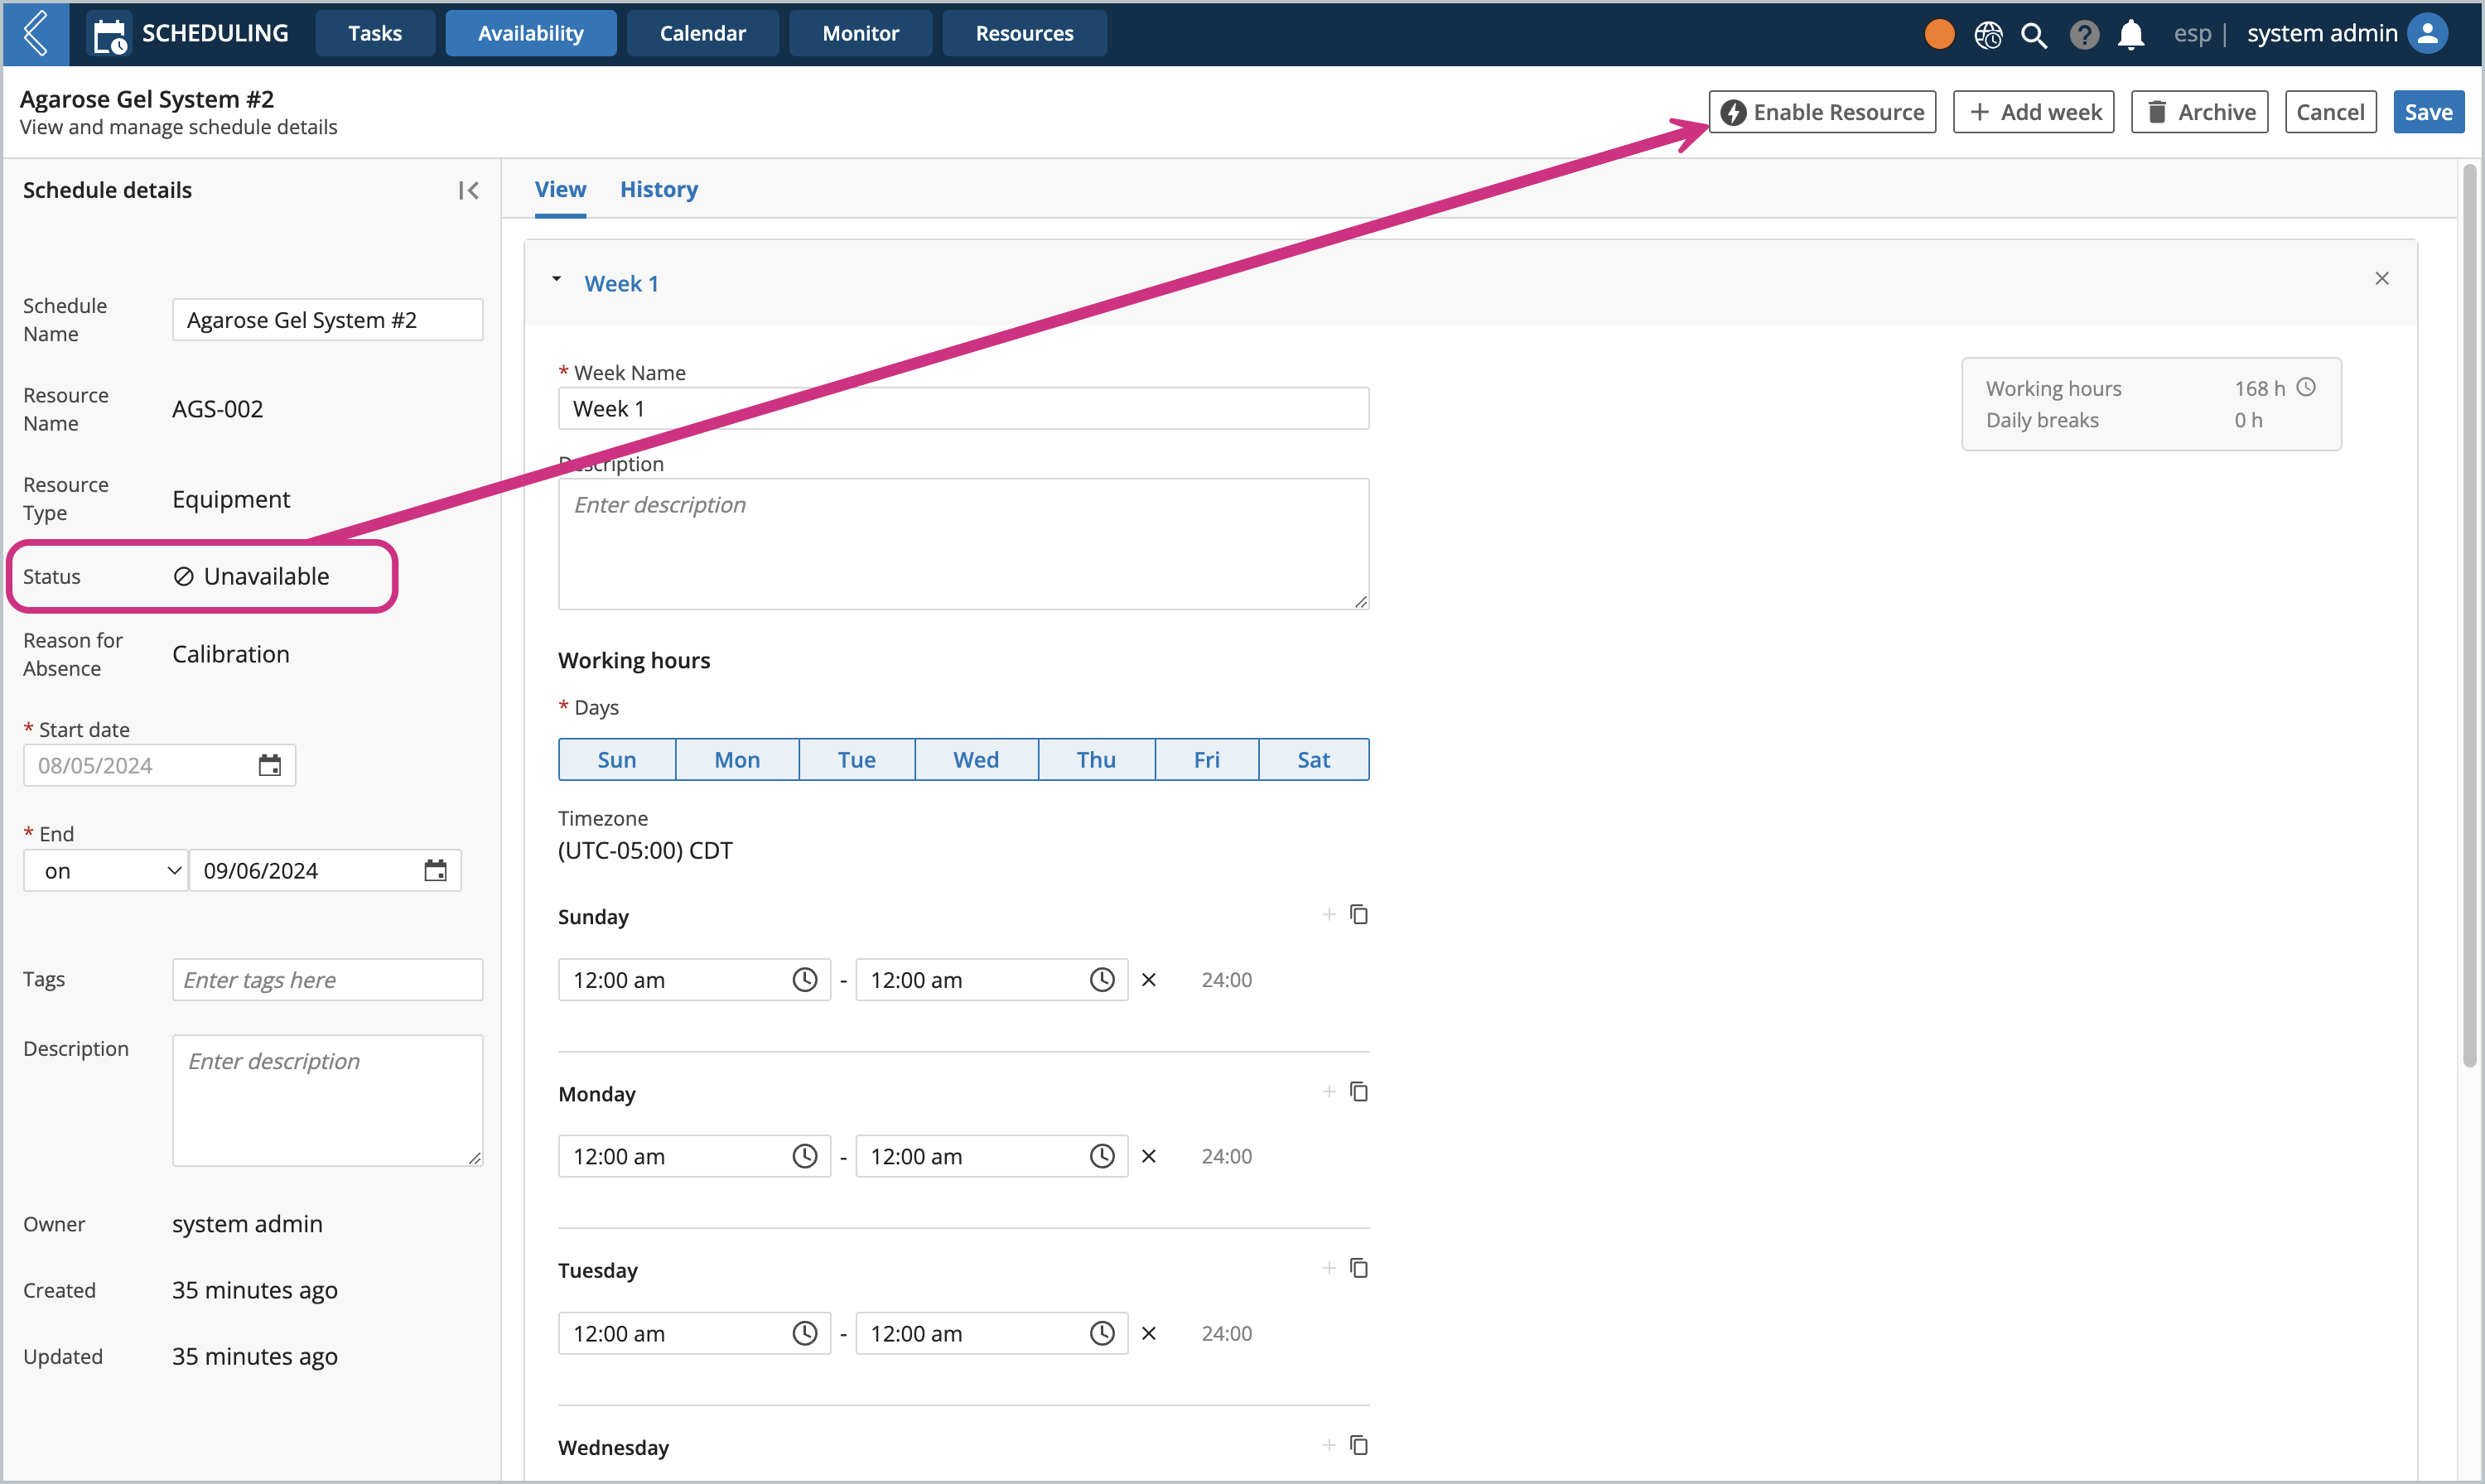
At times you may want to disable a resource, making it unavailable (i.e., equipment calibration, instrument offline for maintenance, personnel on parental leave, etc.). When a resource is made unavailable, it will be removed from all assigned tasks during the specified duration.
Active/available resources will display a green thunderbolt icon next to their name, while unavailable resources will have an unavailable icon.
Procedure
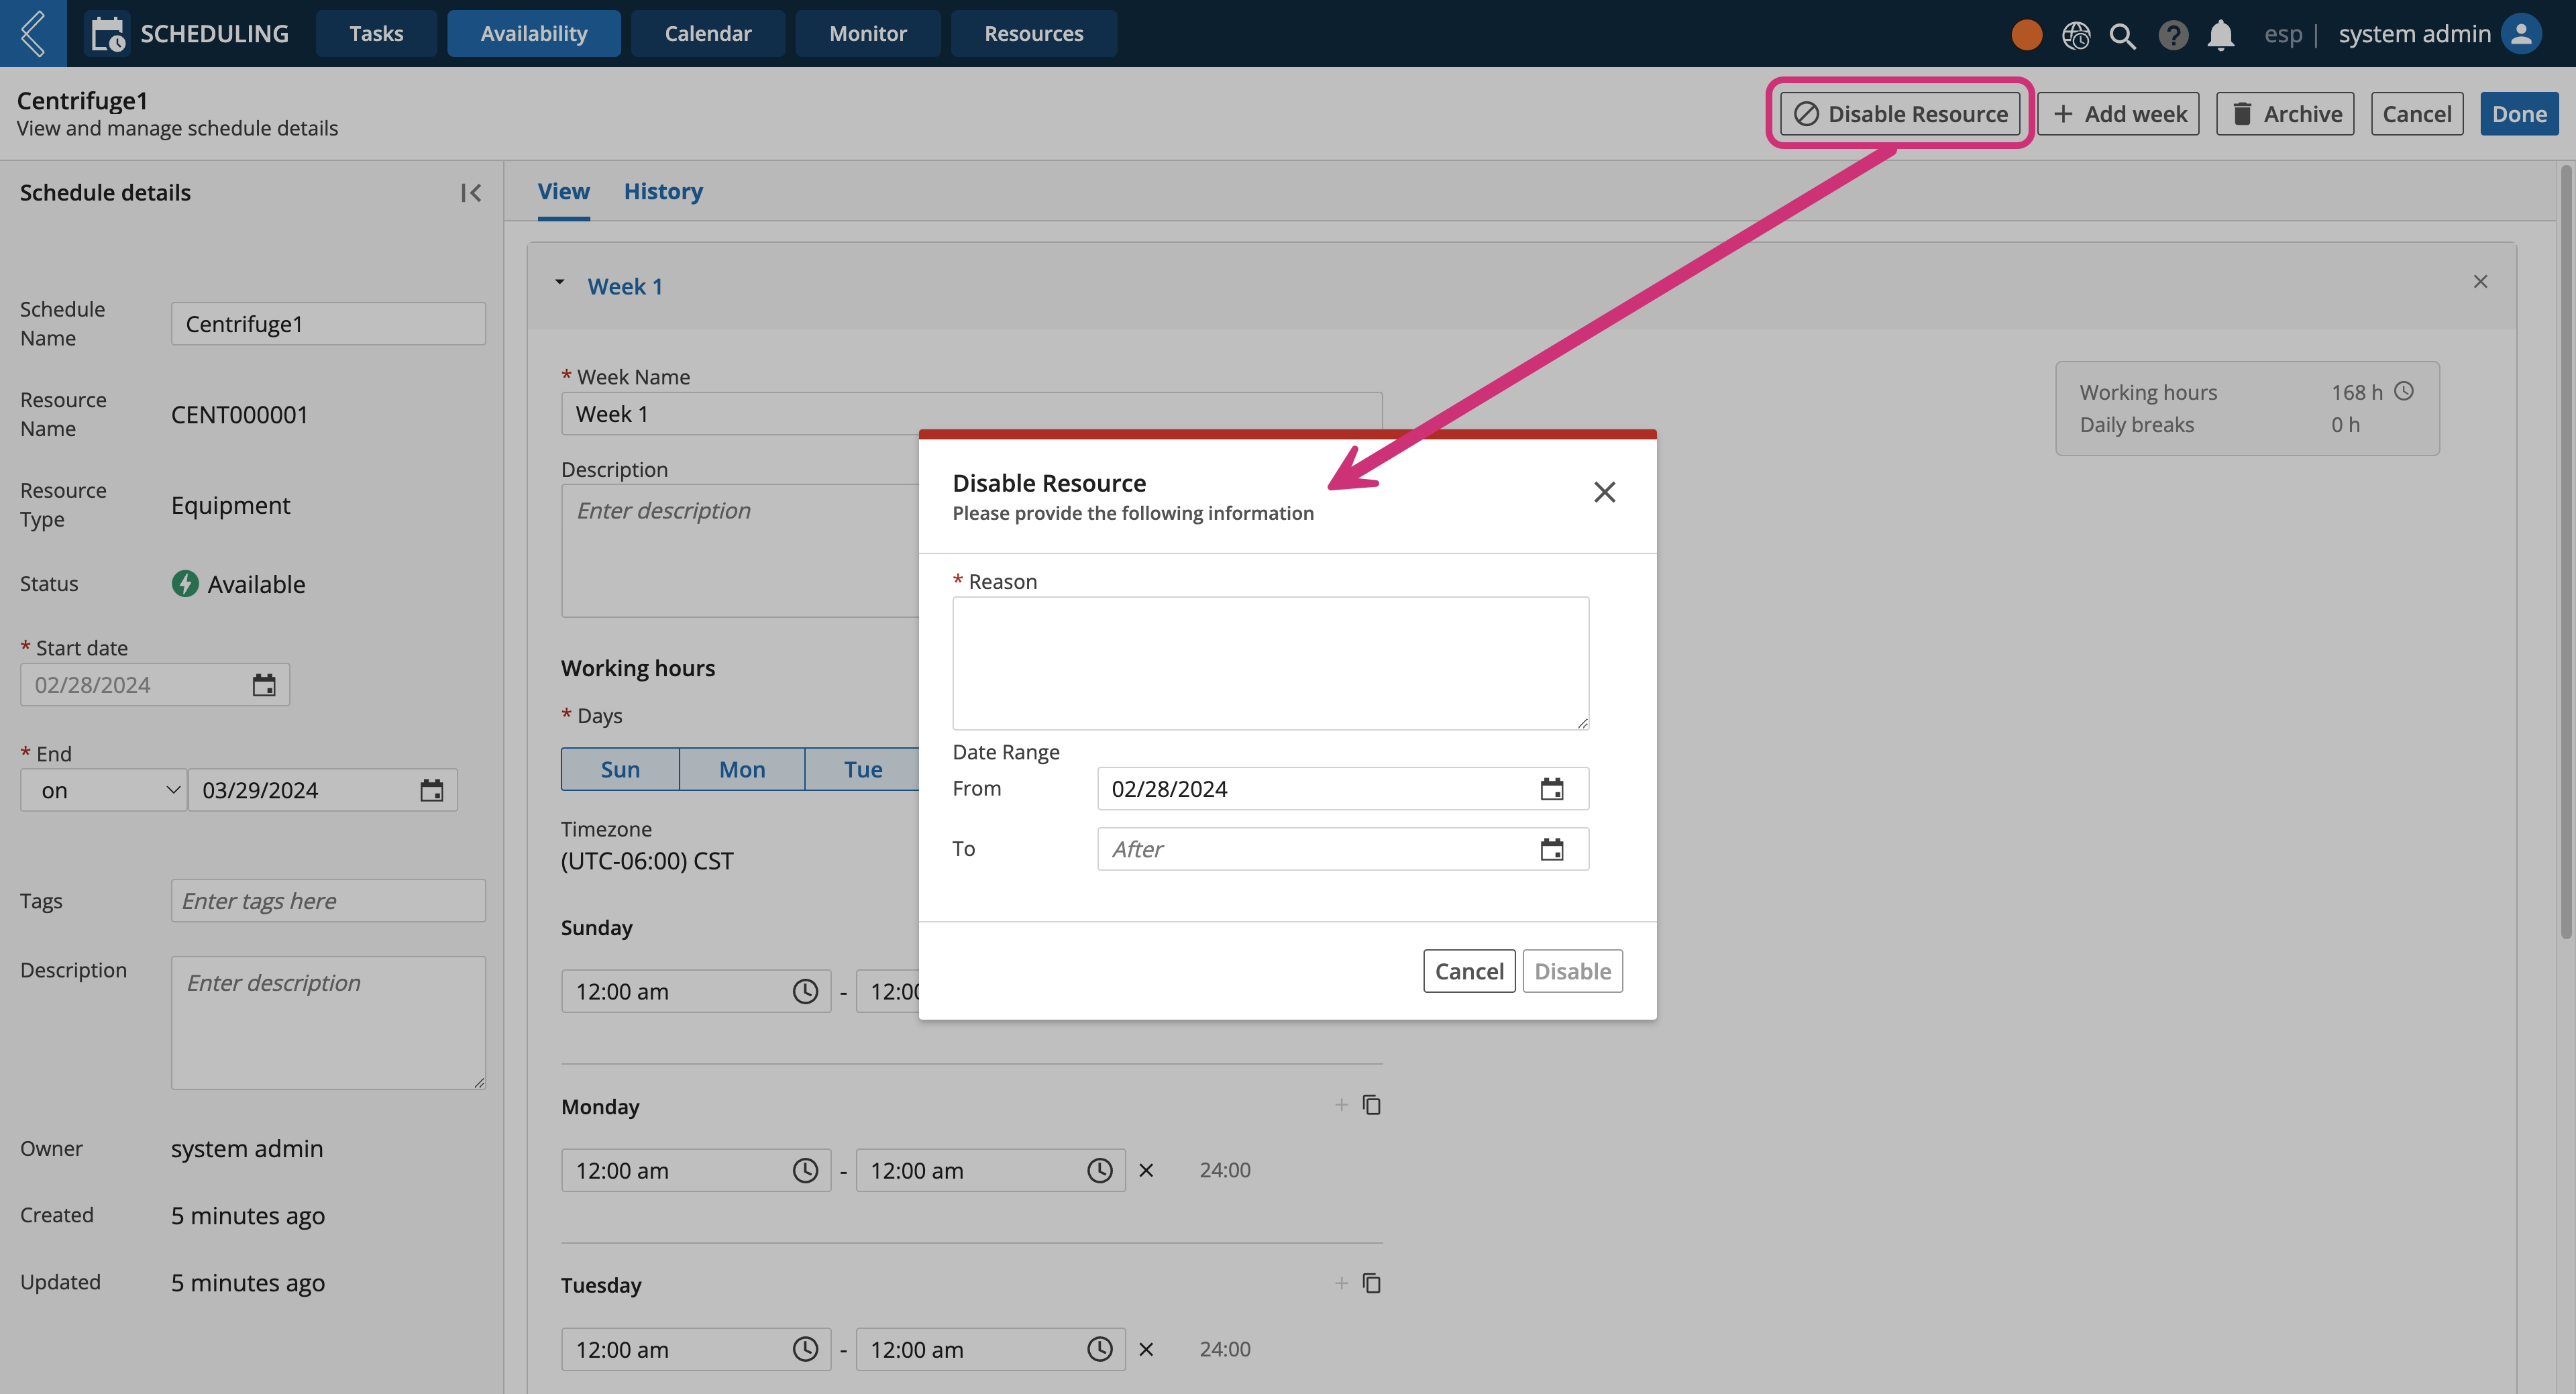
Navigate to the resource's "Schedule details" view
Click Disable Resource
Enter a Reason for disabling the resource
Select a Date Range
Click Disable
Tip
Unavailable/disabled resources can be reenabled by navigating to the resource's "Schedule details" view, then click Enable Resource.
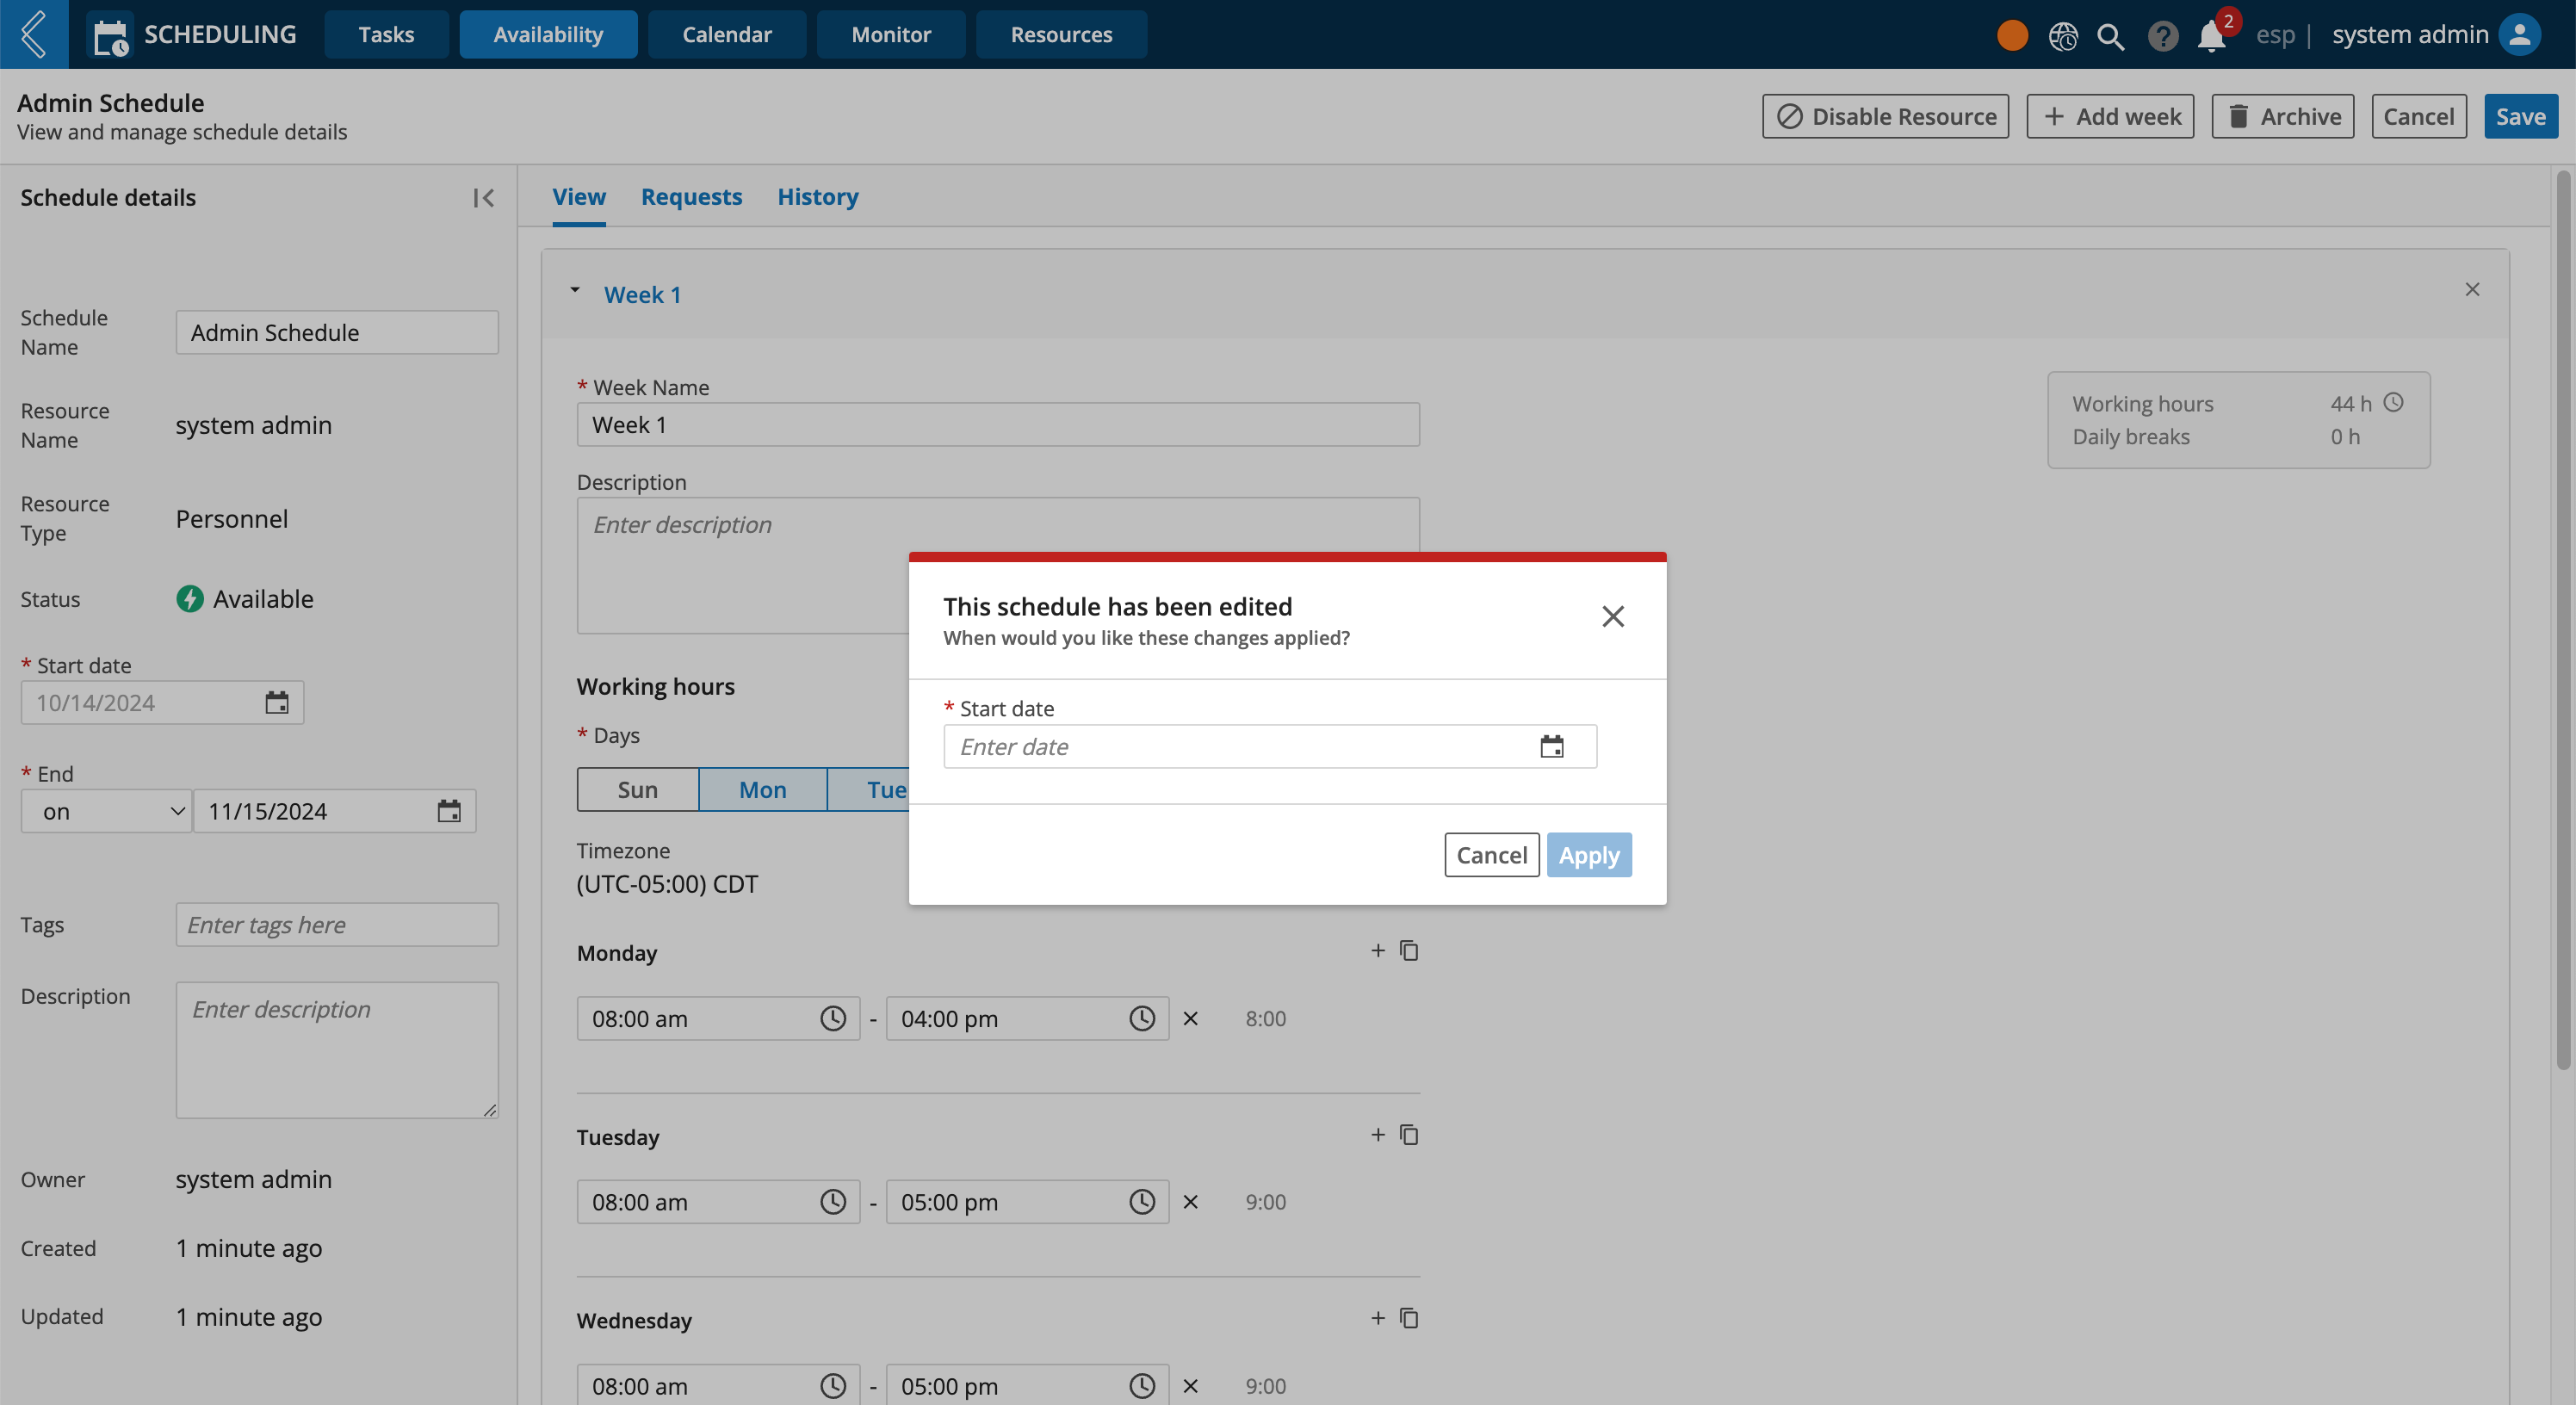
Schedules with a future start date can easily be changed by updating the Start Date from the Schedule details panel.
However, if the schedule's Start Date is today or in the past, then the Start Date field will be non-editable. To update the Start Date, modify at least one of the day/time settings, then click Save. A new modal will appear prompting you to select a new Start Date.
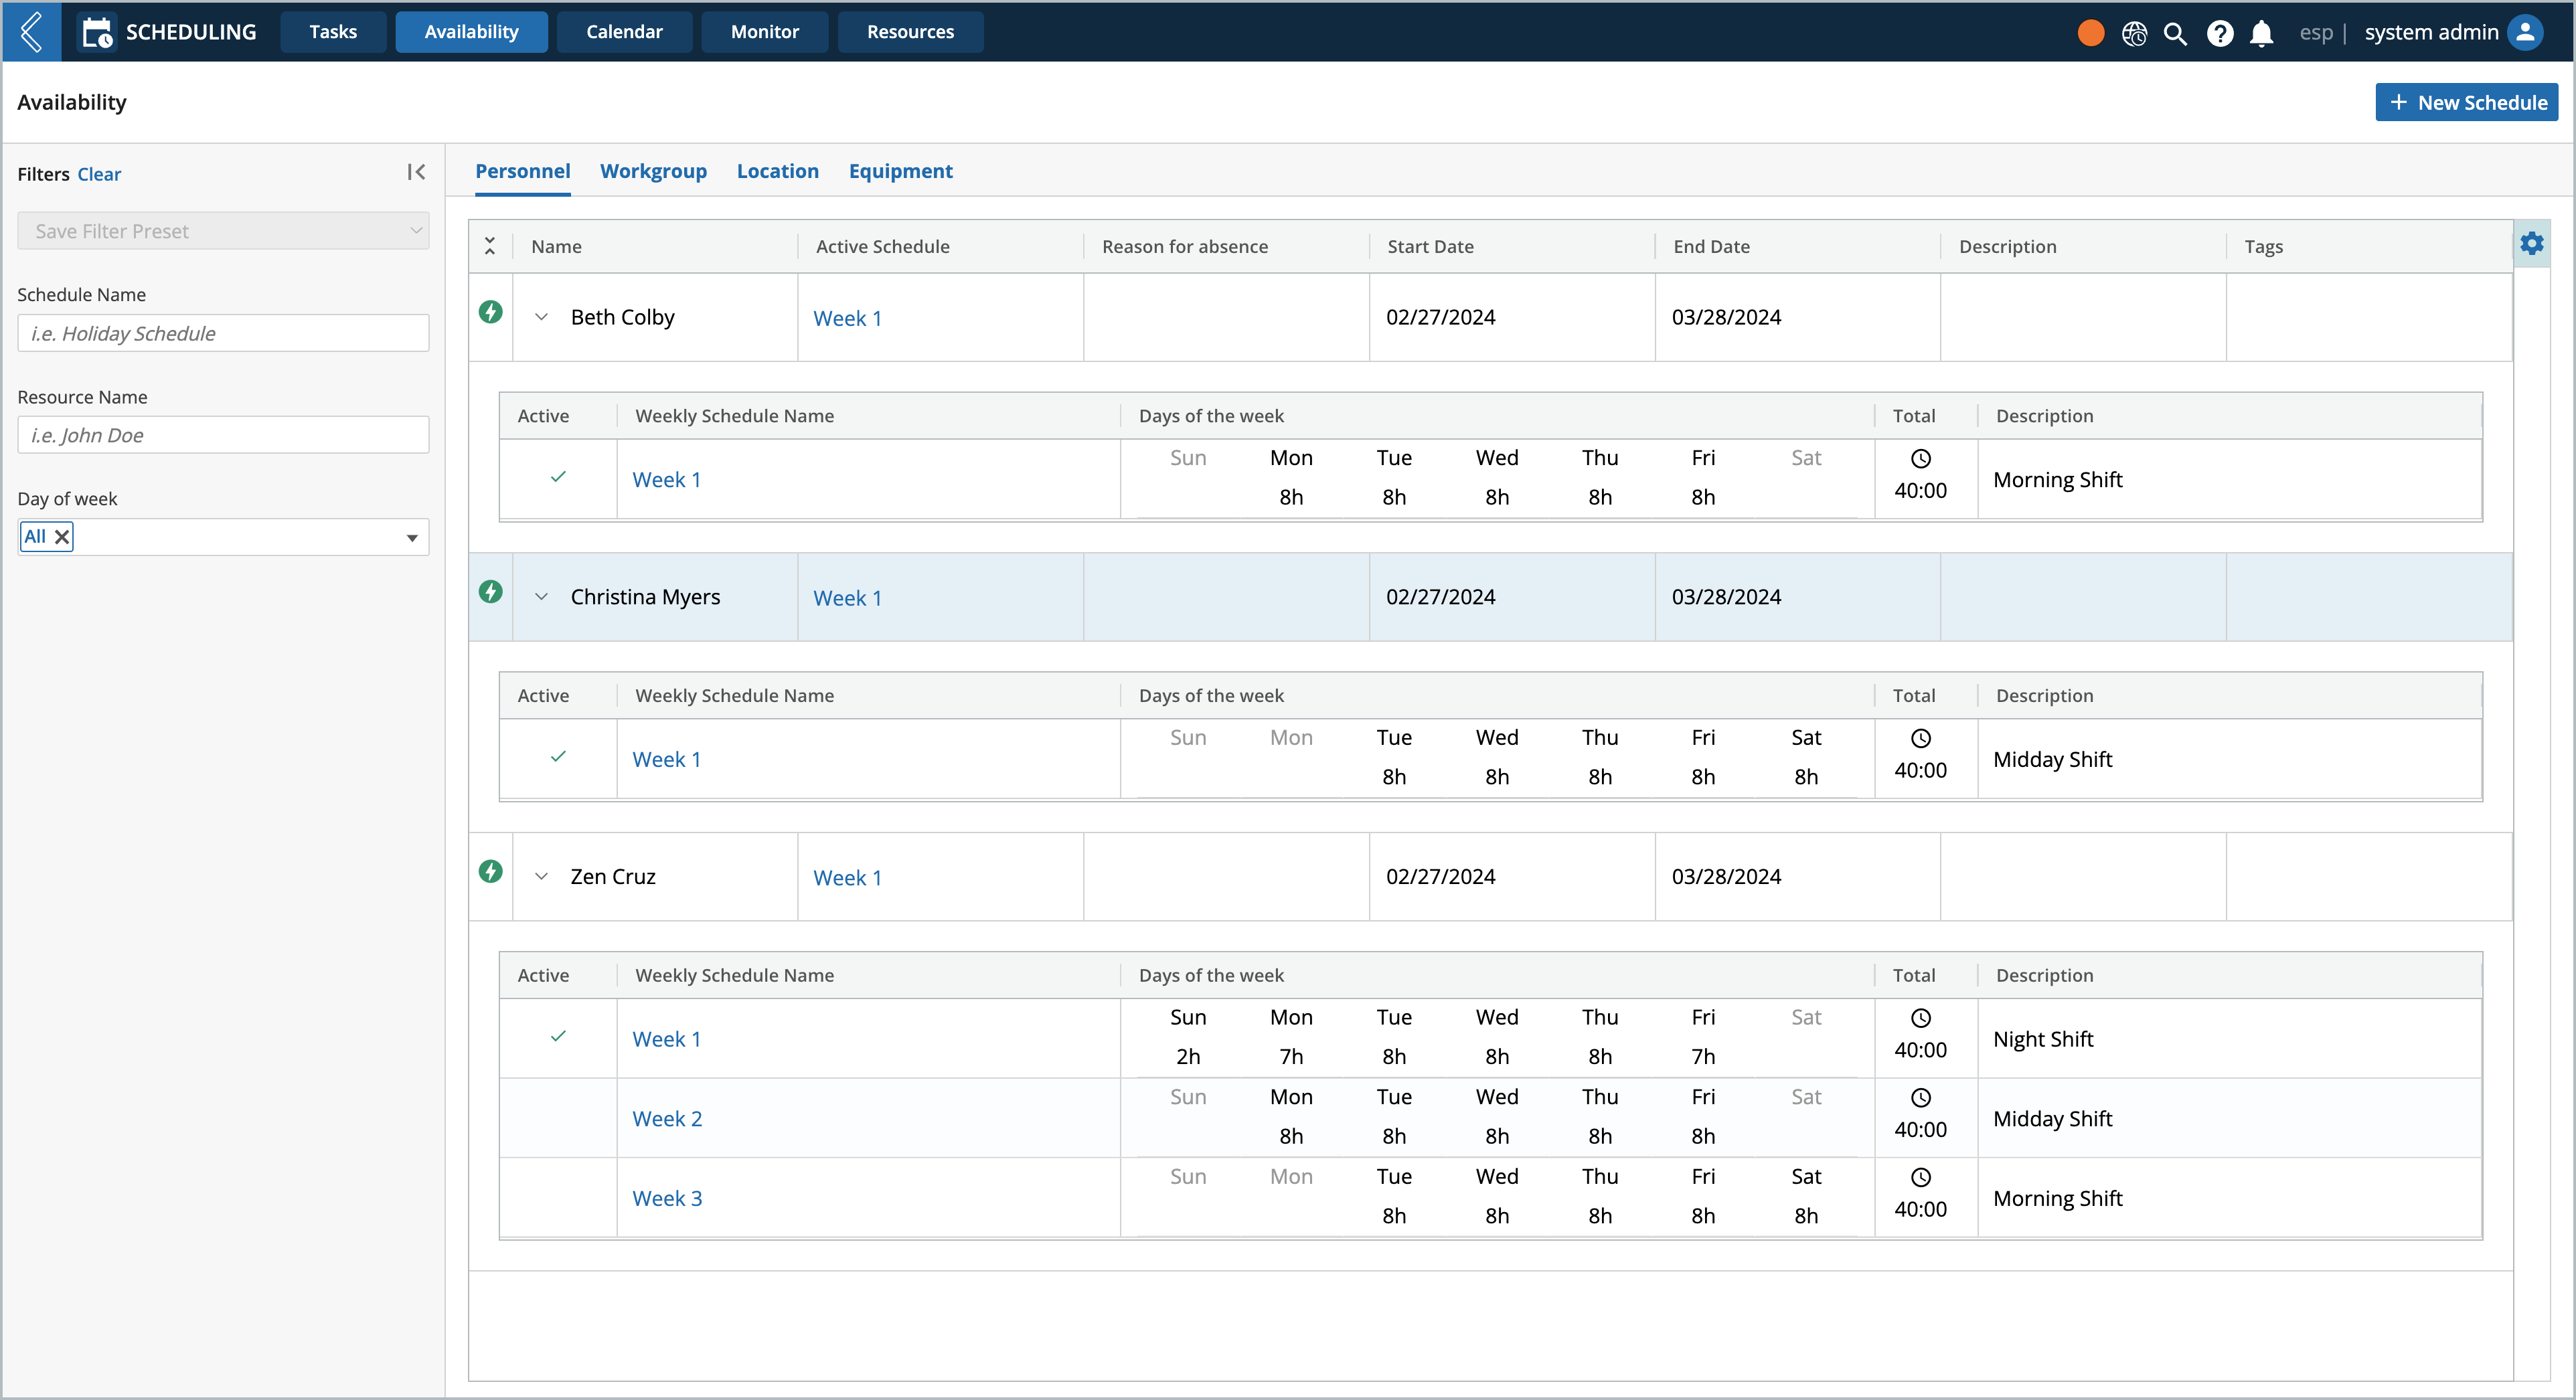
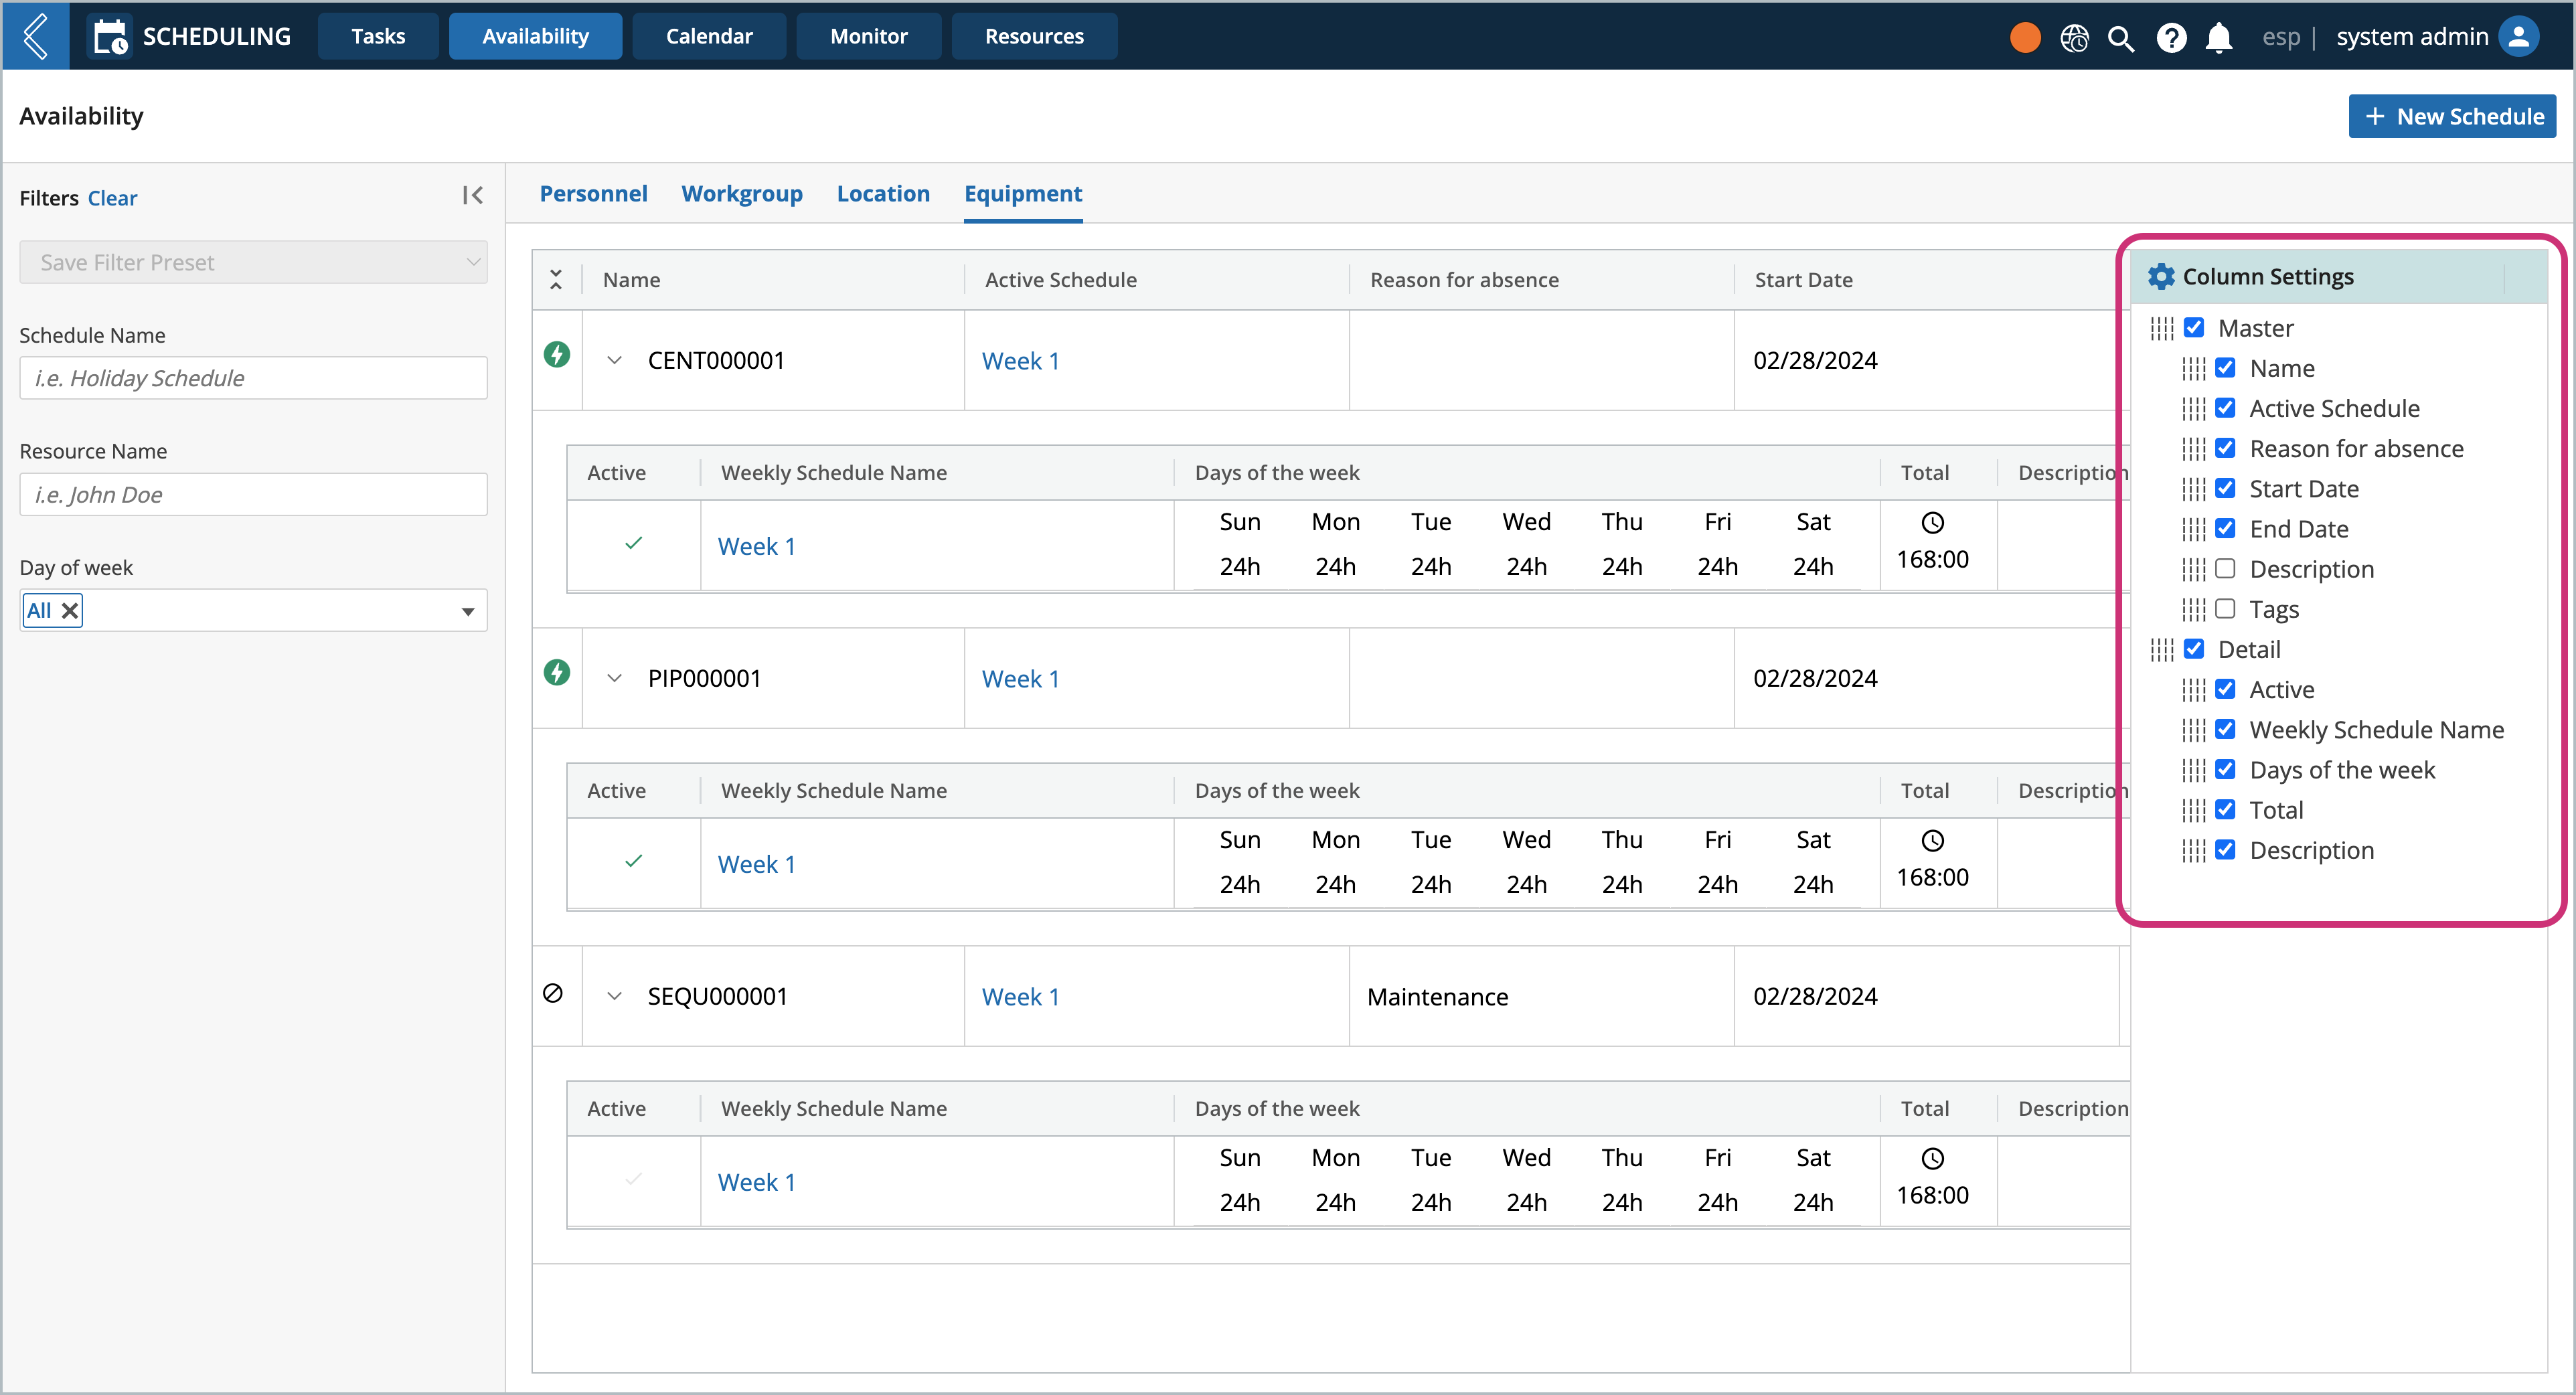
From the Availability landing page, you can see an overview of each schedule's details organized into columns. Using the Column Settings panel, you can control which columns are displayed.
Select the gear icon on the far right
Select/deselect the columns you wish to see/hide, respectively
Note
Column Settings are applied to the logged in user.
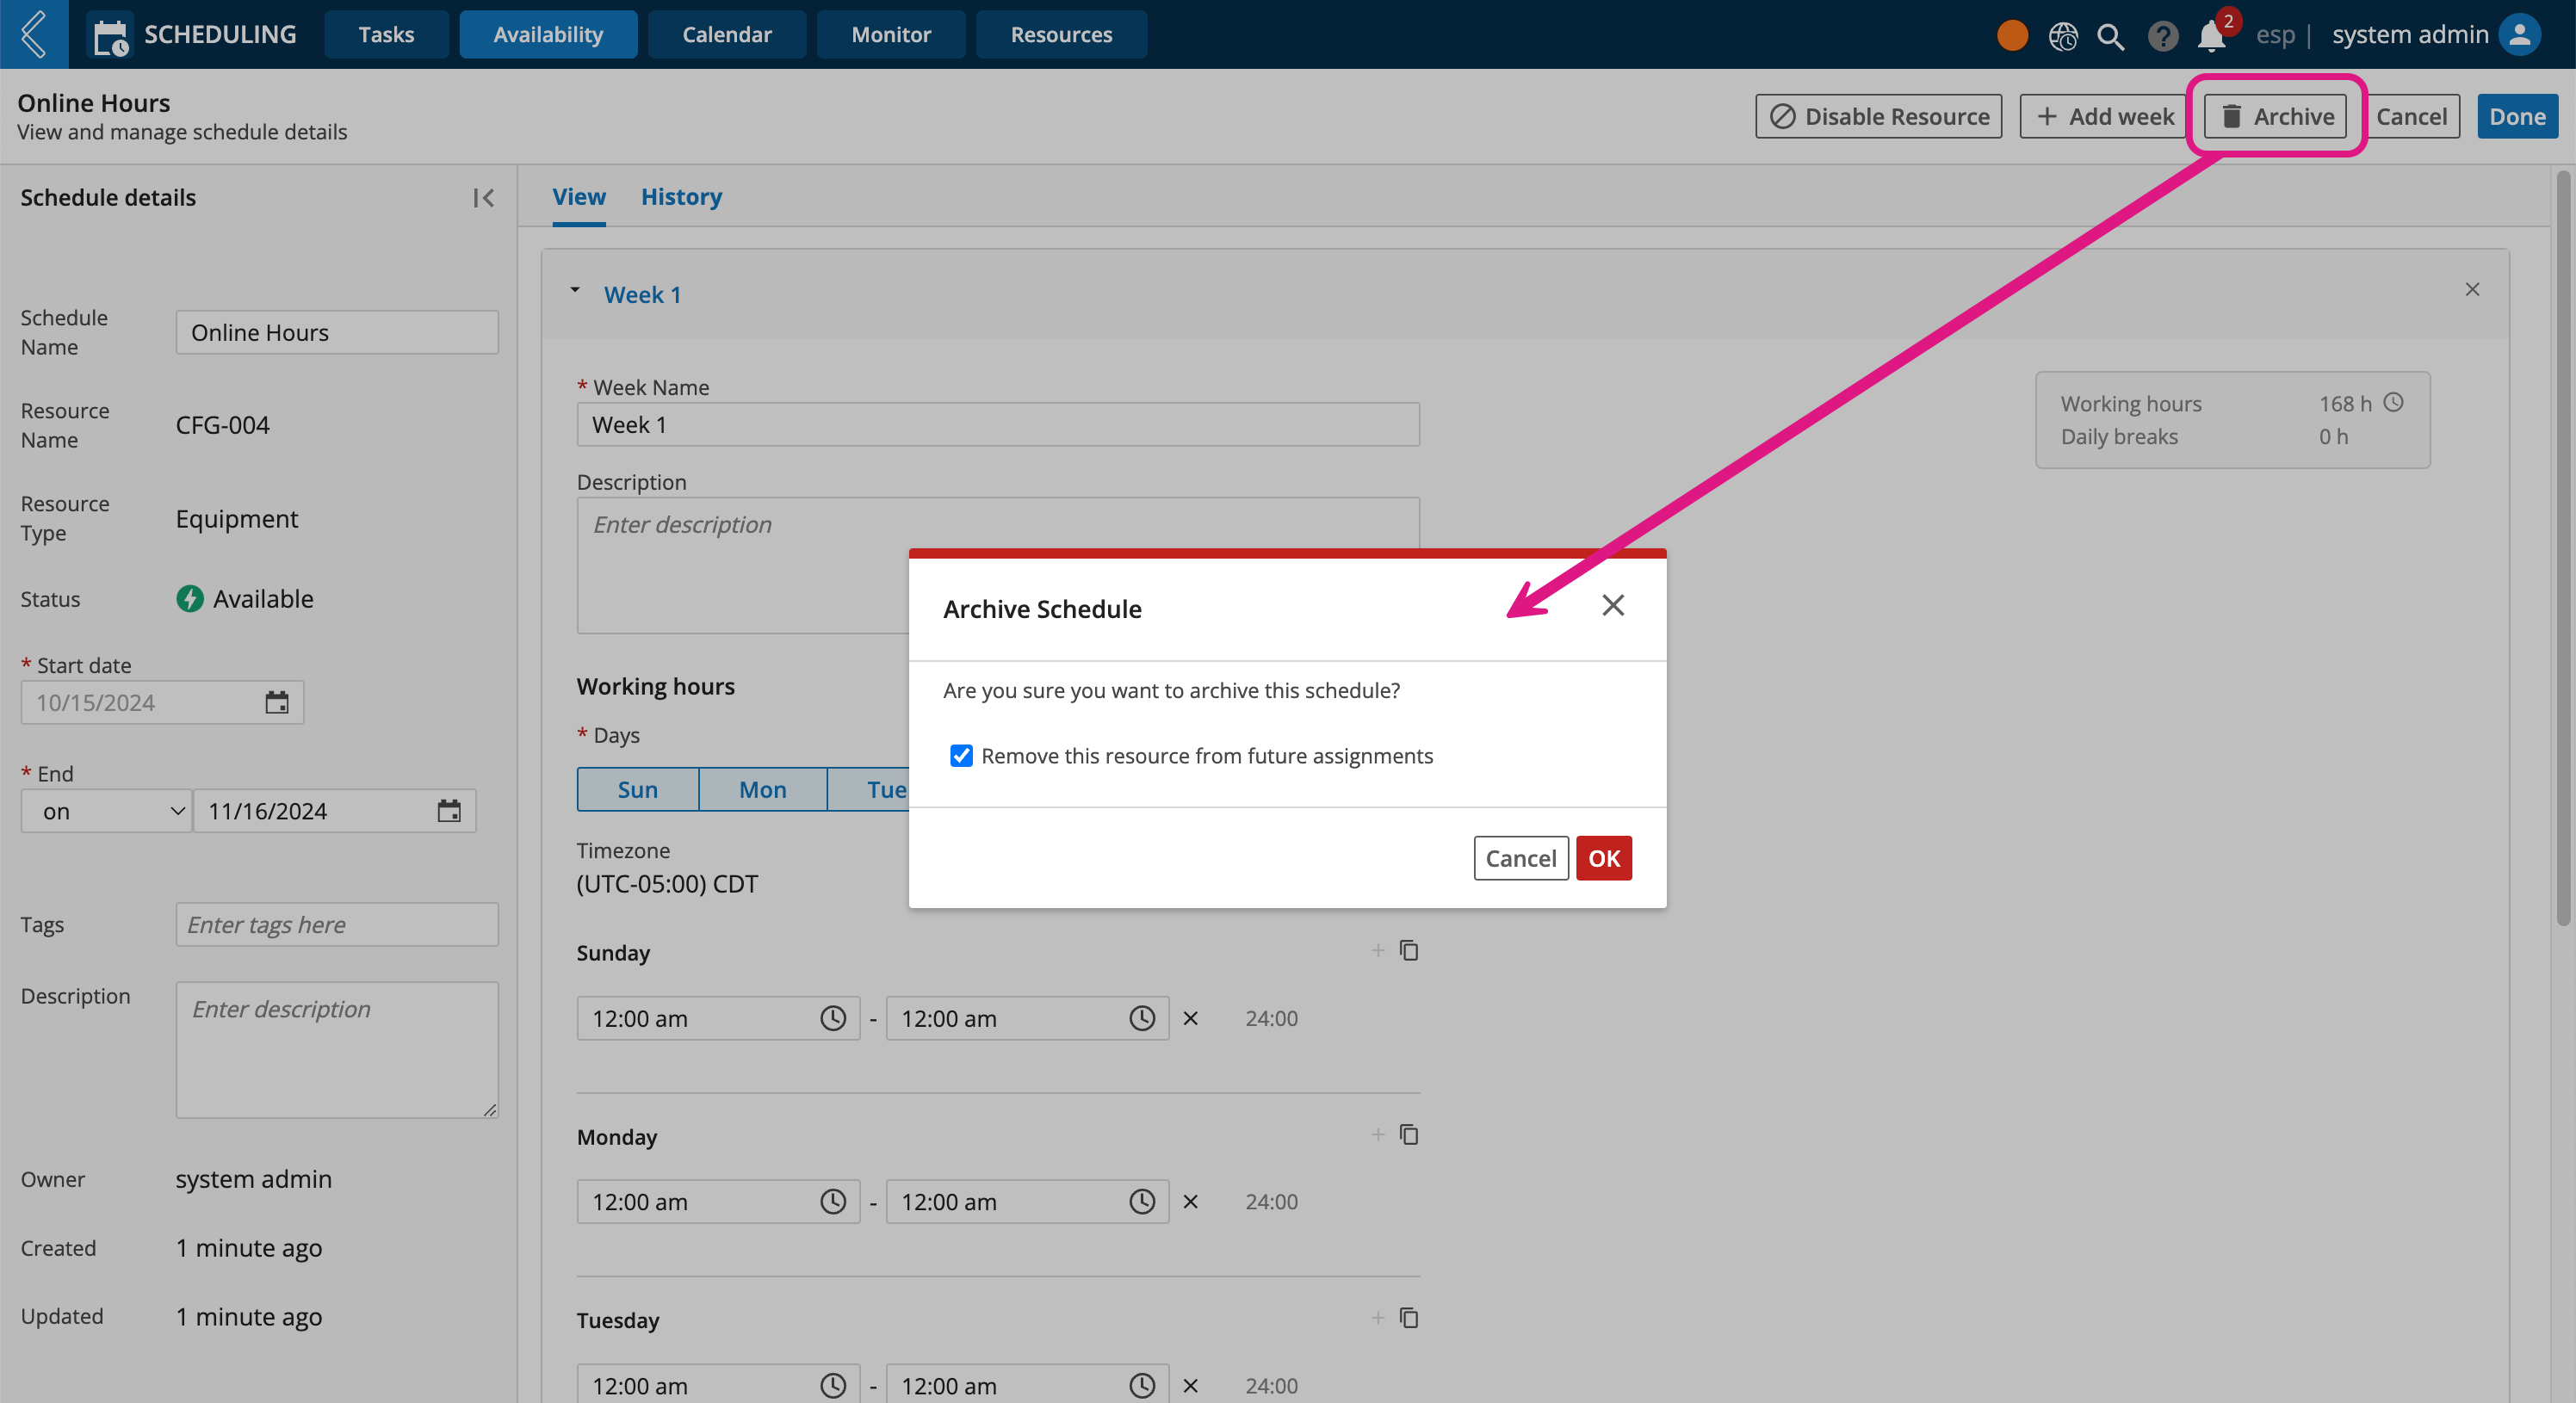
When a schedule is no longer needed and you want to remove it from the user interface, you can archive it.
Navigate to the "Schedule's details" view: L7 Scheduling -> Availability -> select the desired schedule
Click Archive
Click Yes, Archive this Schedule
Warning
Archiving a schedule cannot be undone.
Note
Archiving a resource's schedule when that resource is currently assigned to a future task will trigger a notification, allowing you to decide if you want to remove this resource from upcoming assignments.
