Manufacturing Technician
Goals
Understand the role of the Manufacturing Technician.
Know how to navigate and execute a Batch Record.
Know how to reconcile unused Sample labels.
Term | Definition |
EBR | The Electronic Batch Record (EBR) for the Recipe, based on the Sample Plan and Specification Plan selected. |
Sample Plan | The Sample Plan tab displays information about the Sample IDs reserved and later assigned to Samples collected during Batch production. It also allows users with the appropriate permissions to acknowledge the physical destruction (reconciliation) of unused Sample labels. |
BOM | The Bill of Materials (BOM) tab displays information about Kits associated with the Batch (Available Items) and the Items consumed during Batch production (Item Usage). |
Specifications | The Specifications tab displays the Specifications for the Batch, including their type, min and max limits, the value recorded (if saved), and an indication of exceptions. |
Signature Flow | Structured signature queues configured in L7|Master. |
L7 MES Tab | Activity | Permission(s) |
|---|---|---|
EBR | Enter data | MES → Data Entry LIMS → Sample Sheet → Update |
EBR | Register Samples | MES → Data Entry LIMS → Sample → Create |
EBR | Run Pipelines | MES → Data Entry Analysis → Pipeline → Execute |
EBR | Attach a File | MES → Data Entry Data → File → Register |
EBR | Sign a Signature Flow | Access to L7 MES |
Sample Plan | Reconcile labels | MES → Data Entry or MES → Operations Review |
The Manufacturing Technician may be performing, observing, or verifying the Steps in the Batch Record. Throughout production they will collect Samples for QC, R&D, etc., destroy (reconcile) unused labels, and reference the materials and specifications assigned to the Batch using the EBR, Sample Plan, BOM, and Specification tabs in the Batch Record.
 |
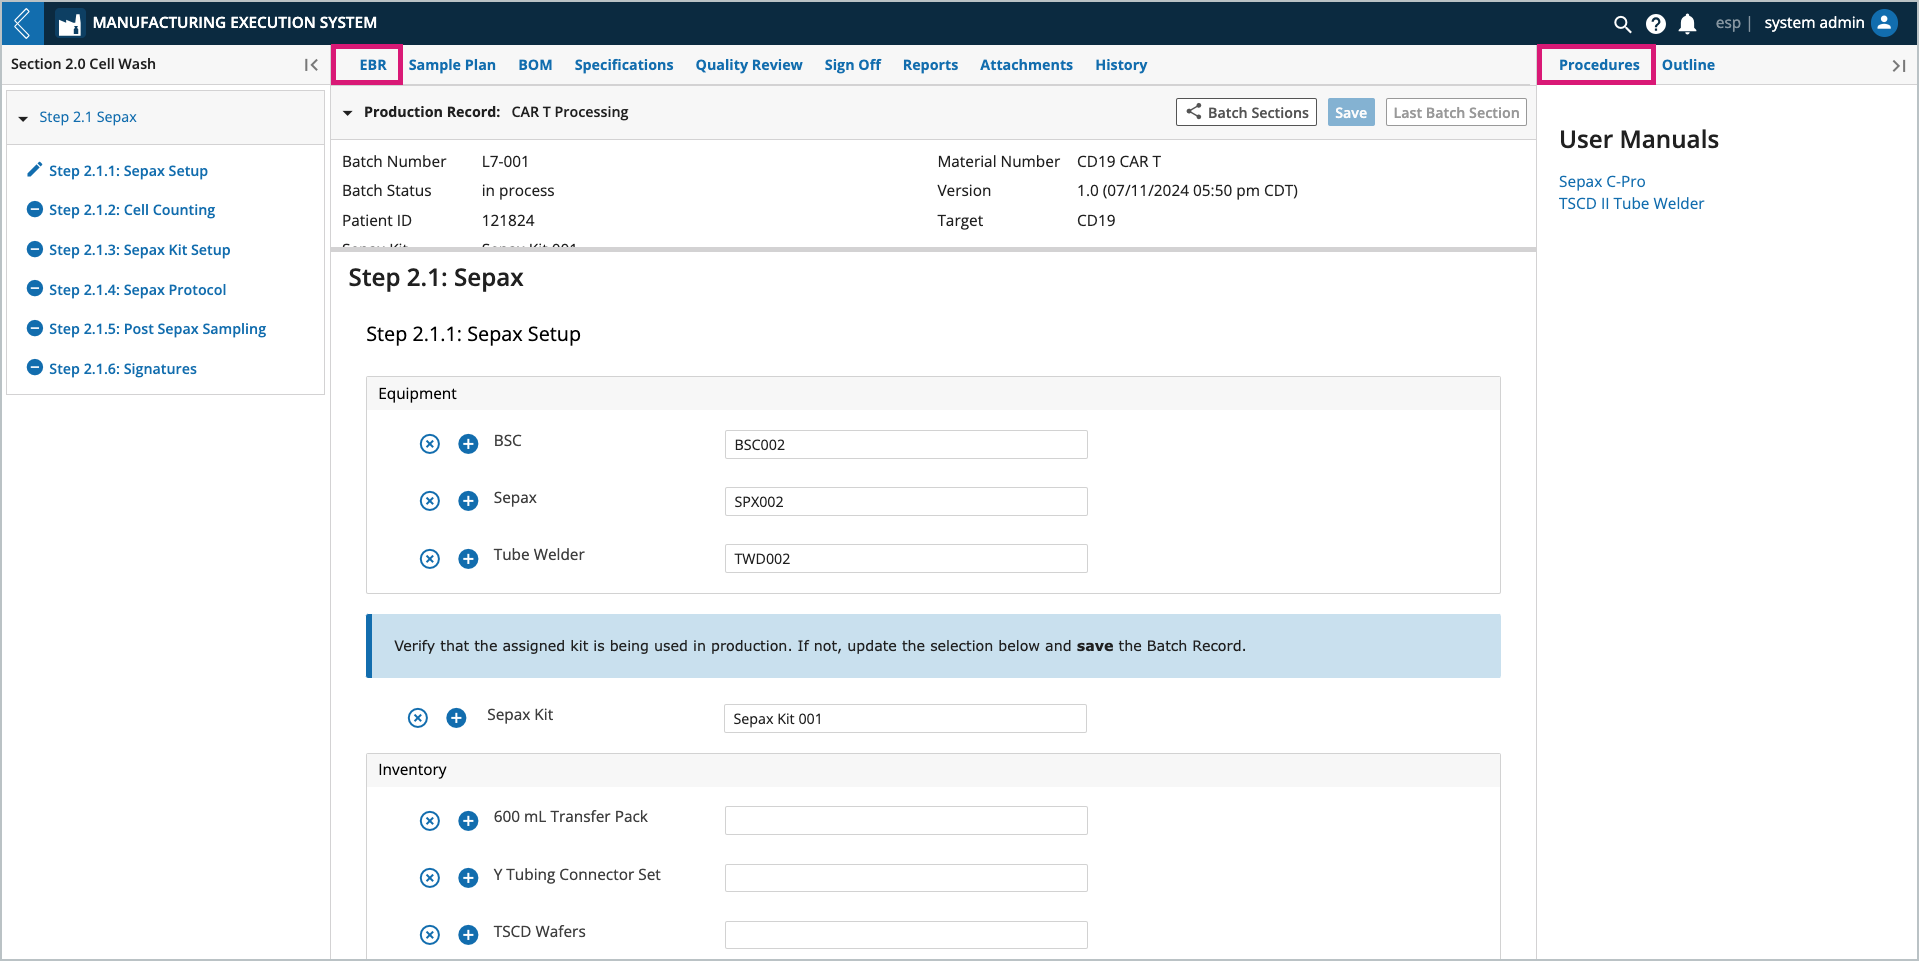
Each Batch has the following tabs:
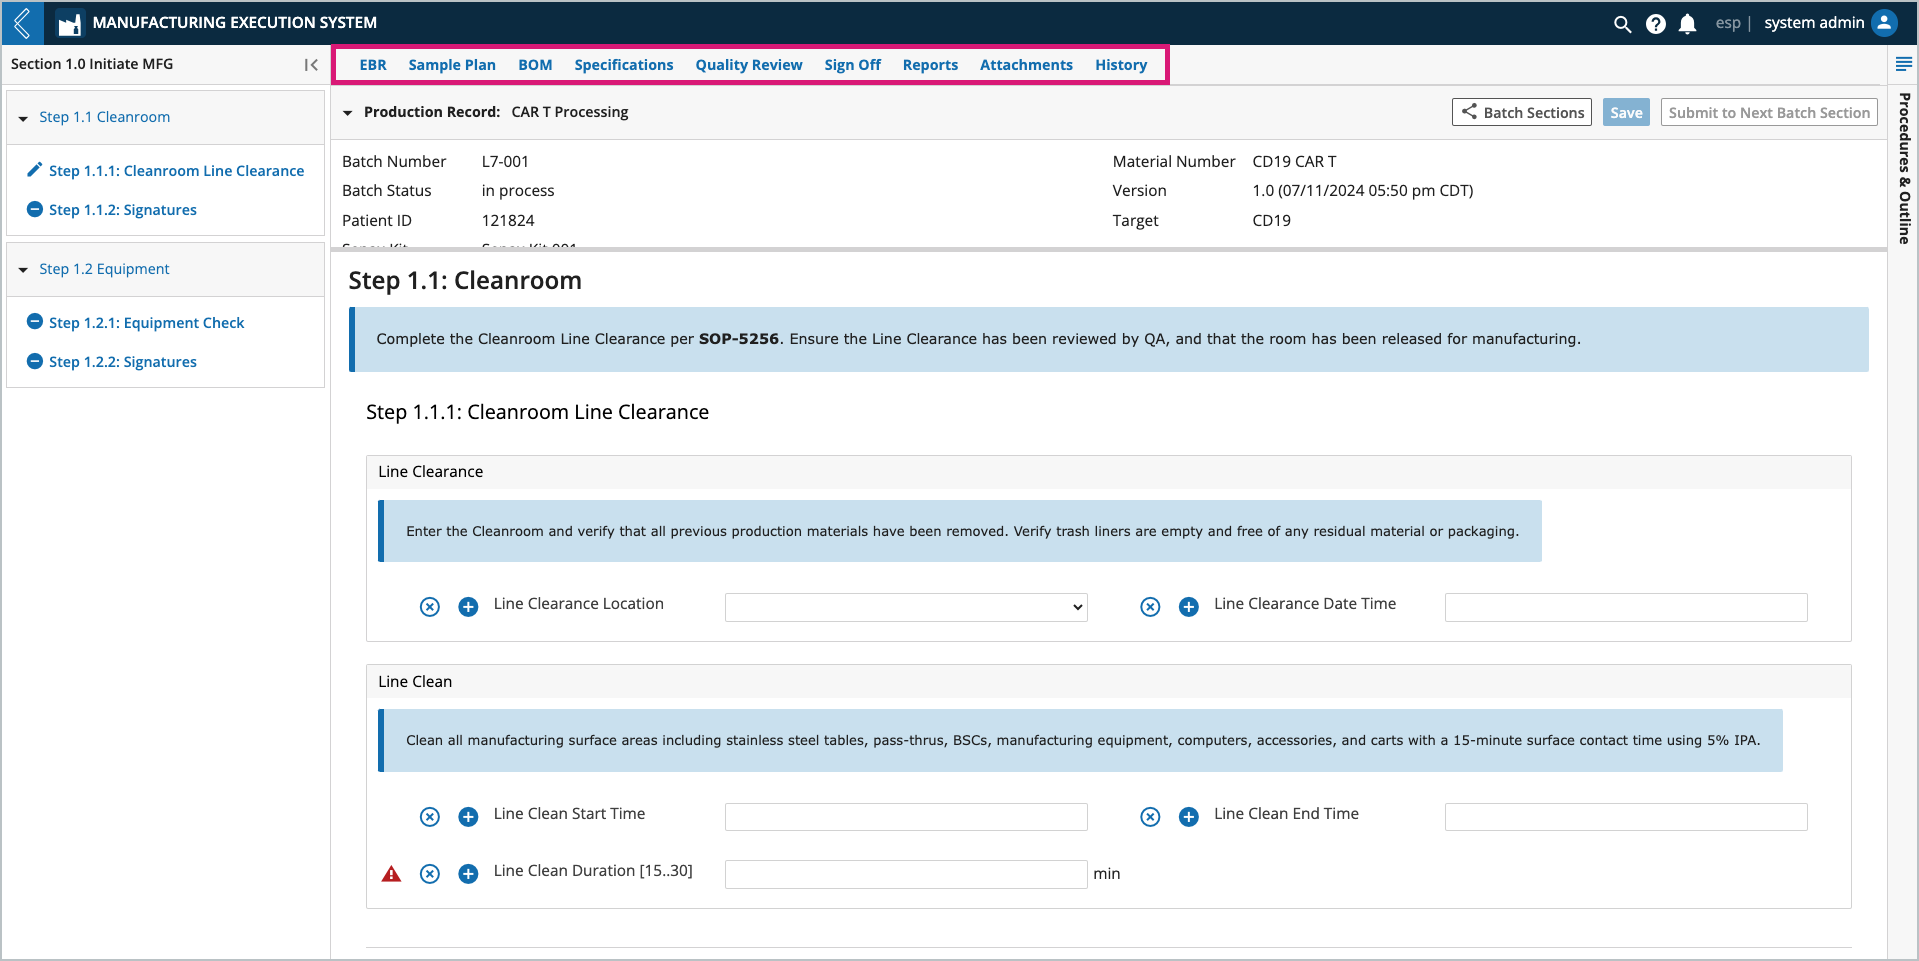
EBR – electronic Batch Record, based on the Sample Plan and Specification Plan selected.
Sample Plan – Samples collected during Batch production.
BOM – Kits associated with the Batch (Available Items) and the Items consumed during Batch production (Item Usage).
Specifications – numeric fields with upper and/or lower limits.
Quality Review – review and correct data in the Batch Record.
Sign-off – final review signatures.
Reports – out-of-box and custom reports for the Batch.
Attachments – files associated with the Batch.
History – all actions performed against the Batch, including who performed the action and when.
Node Numbering
L7|ESP uses the following rules for numbering Sections, Steps, and Sub-Steps in the Batch Record:
The start node is assigned the number one (1), with the following nodes assigned the next number in succession.
Numbering traverses each branch to the end, then travels back to the root before traversing the next branch in order.
The branch furtherest to the left is numbered first.
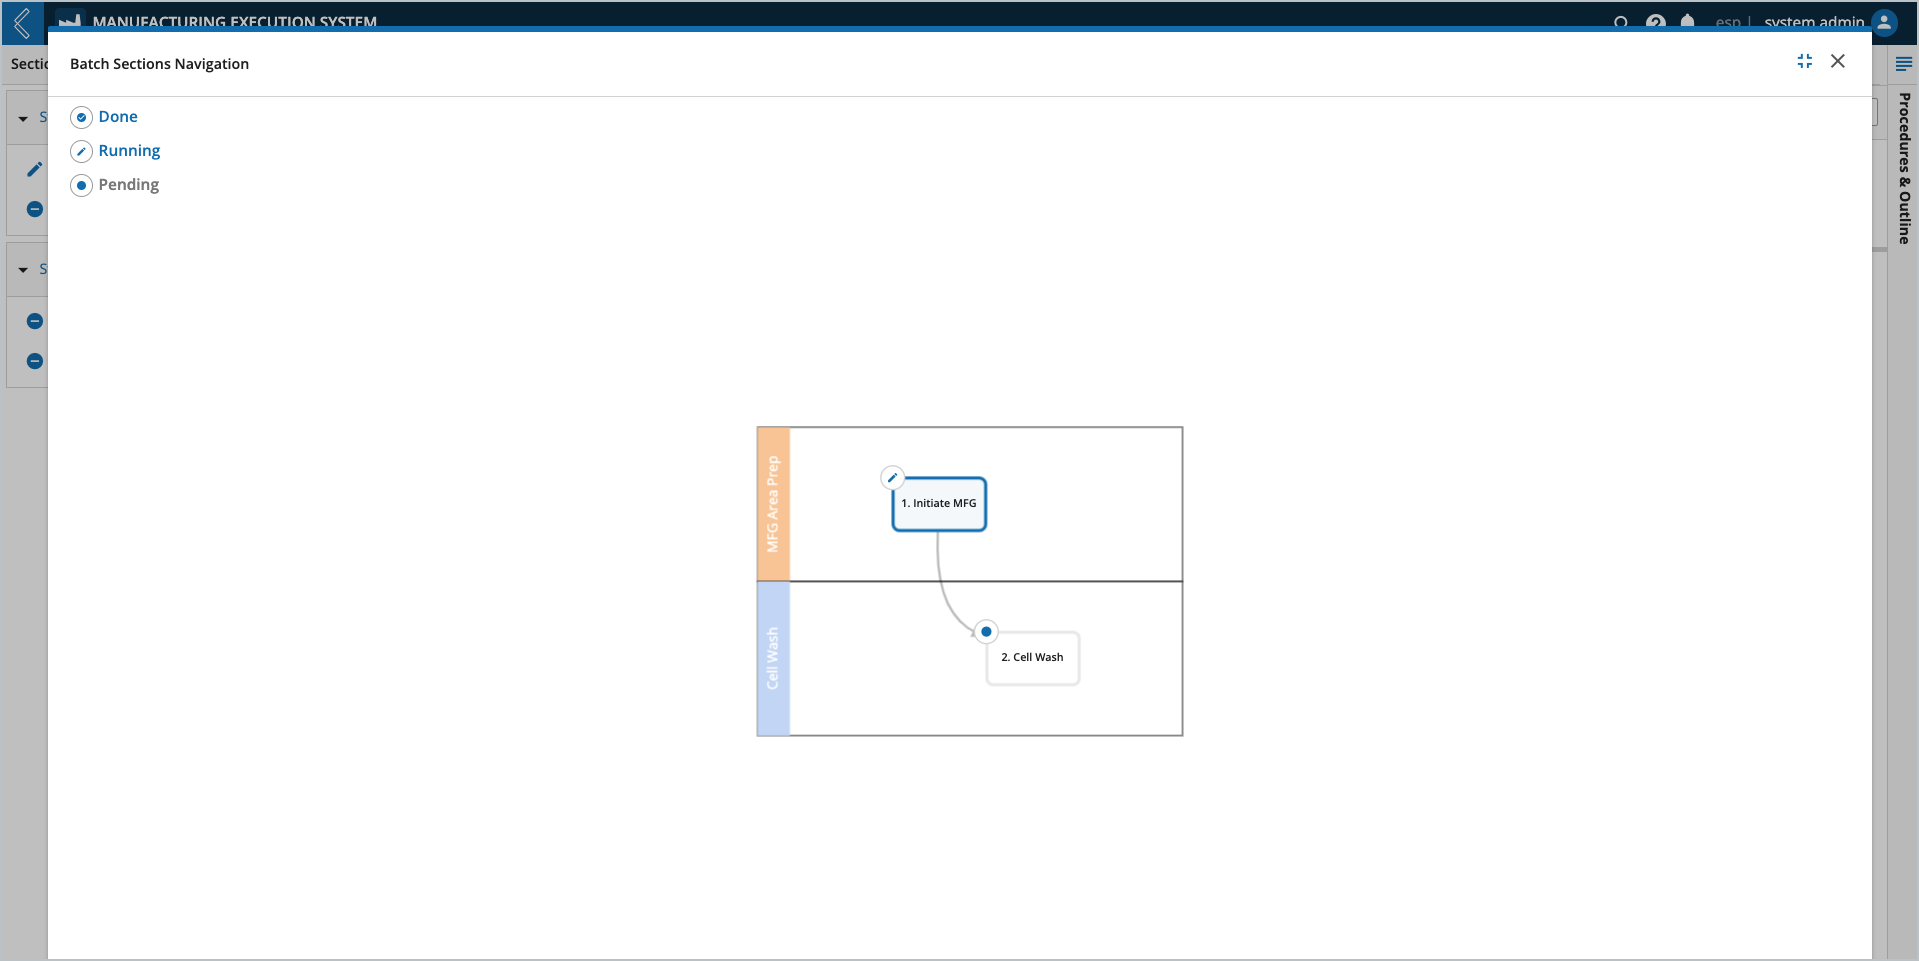
Workflows (Sections) are assigned the number “N”.
If Sections are repeated, their numbering will be updated to append a letter to the Section number each time the node is executed (i.e., 1 → 2 → 2A → 2B → 3).
Protocols (Steps) are assigned the number “N.X”.
“X” is the order of the Protocols in the Workflow.
Sub-Steps (contiguous fields with the same Var Group) as assigned the number “N.X.Y”.
“Y” is the order of the fields in the Protocol.
Inventory Item usage
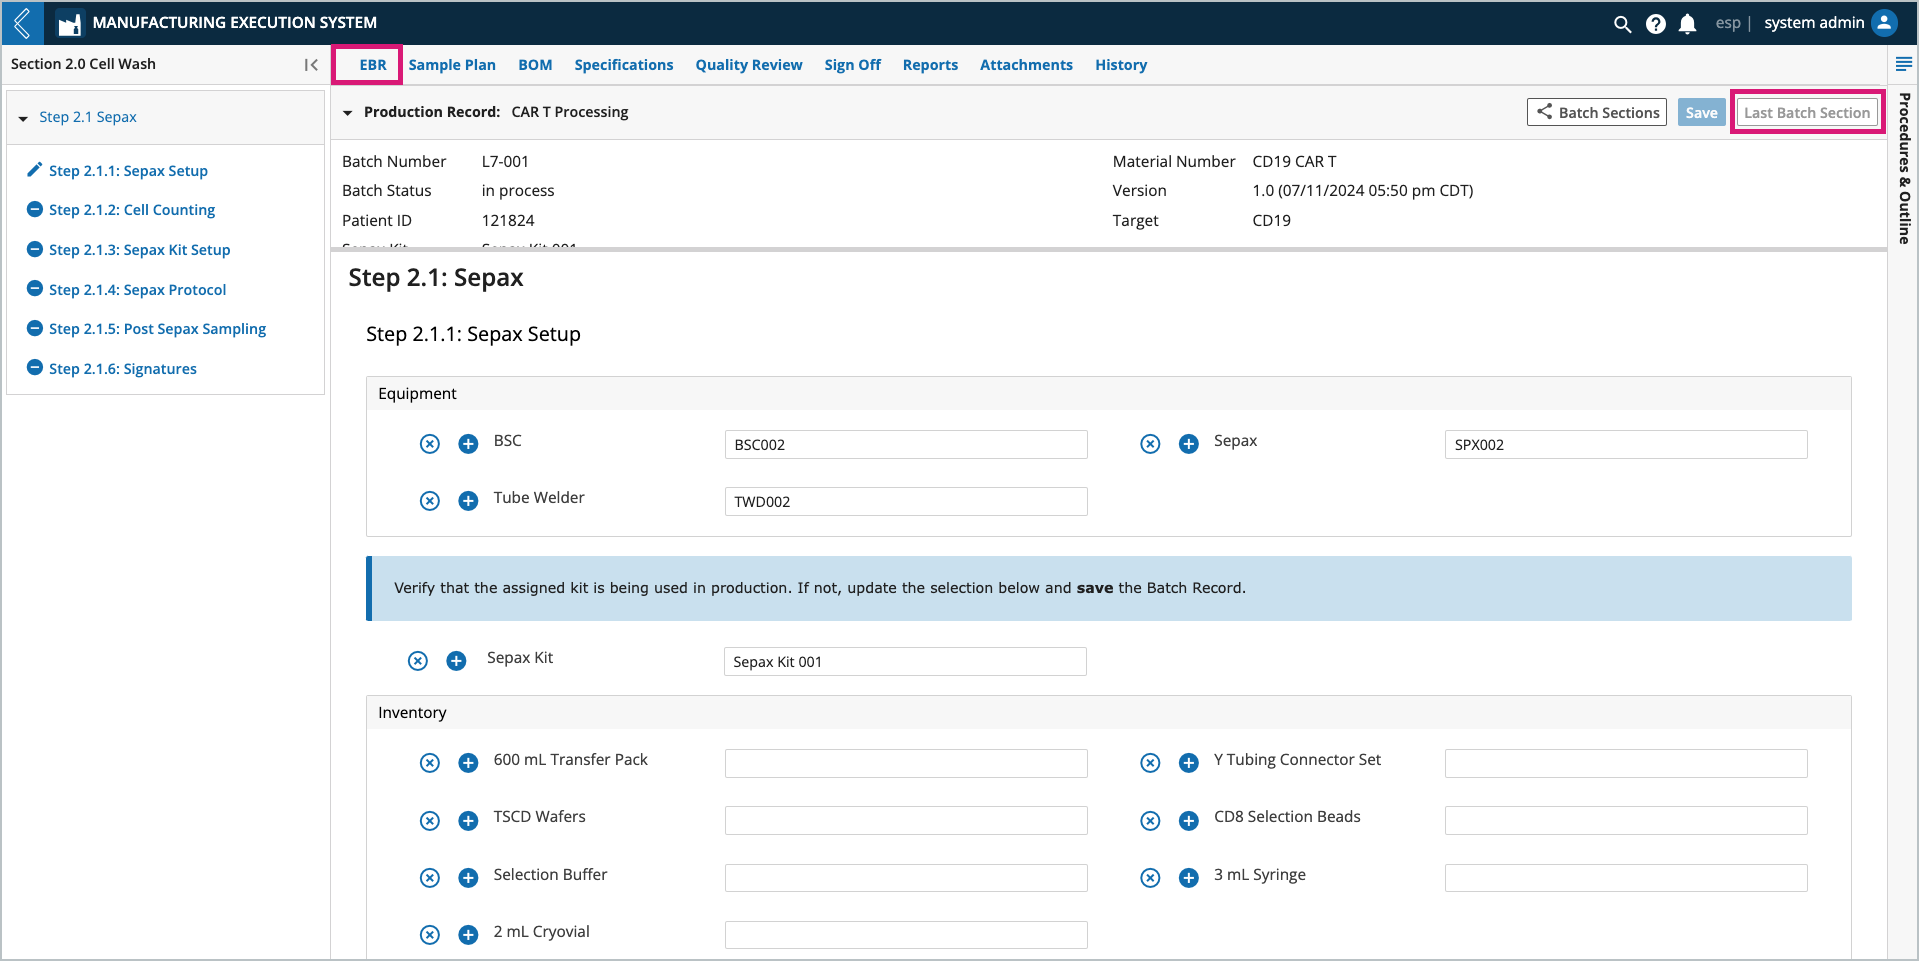
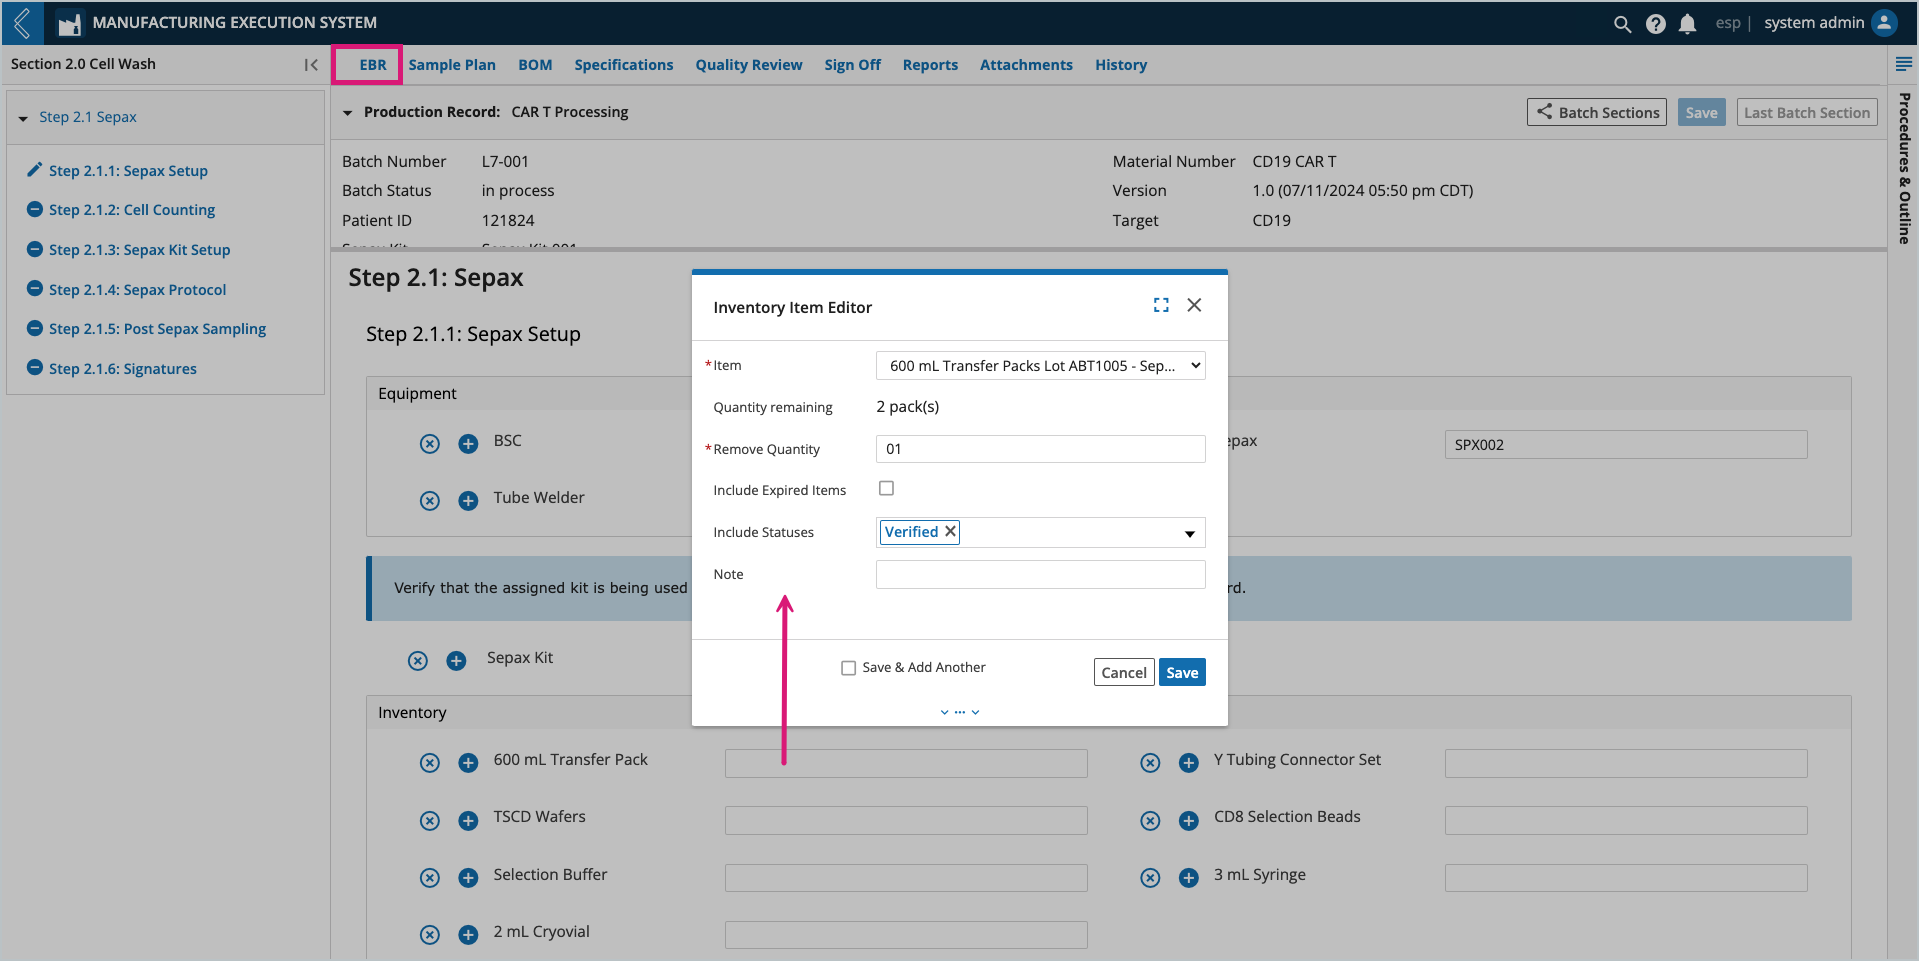
The EBR tab in L7 MES is used to record data during Batch production. Kits can be assigned by the Planner during Batch creation, then confirmed or replaced by the Manufacturing Technician during production.
Note
If the Kit is replaced, save the Batch Record before consuming Items in the Kit.
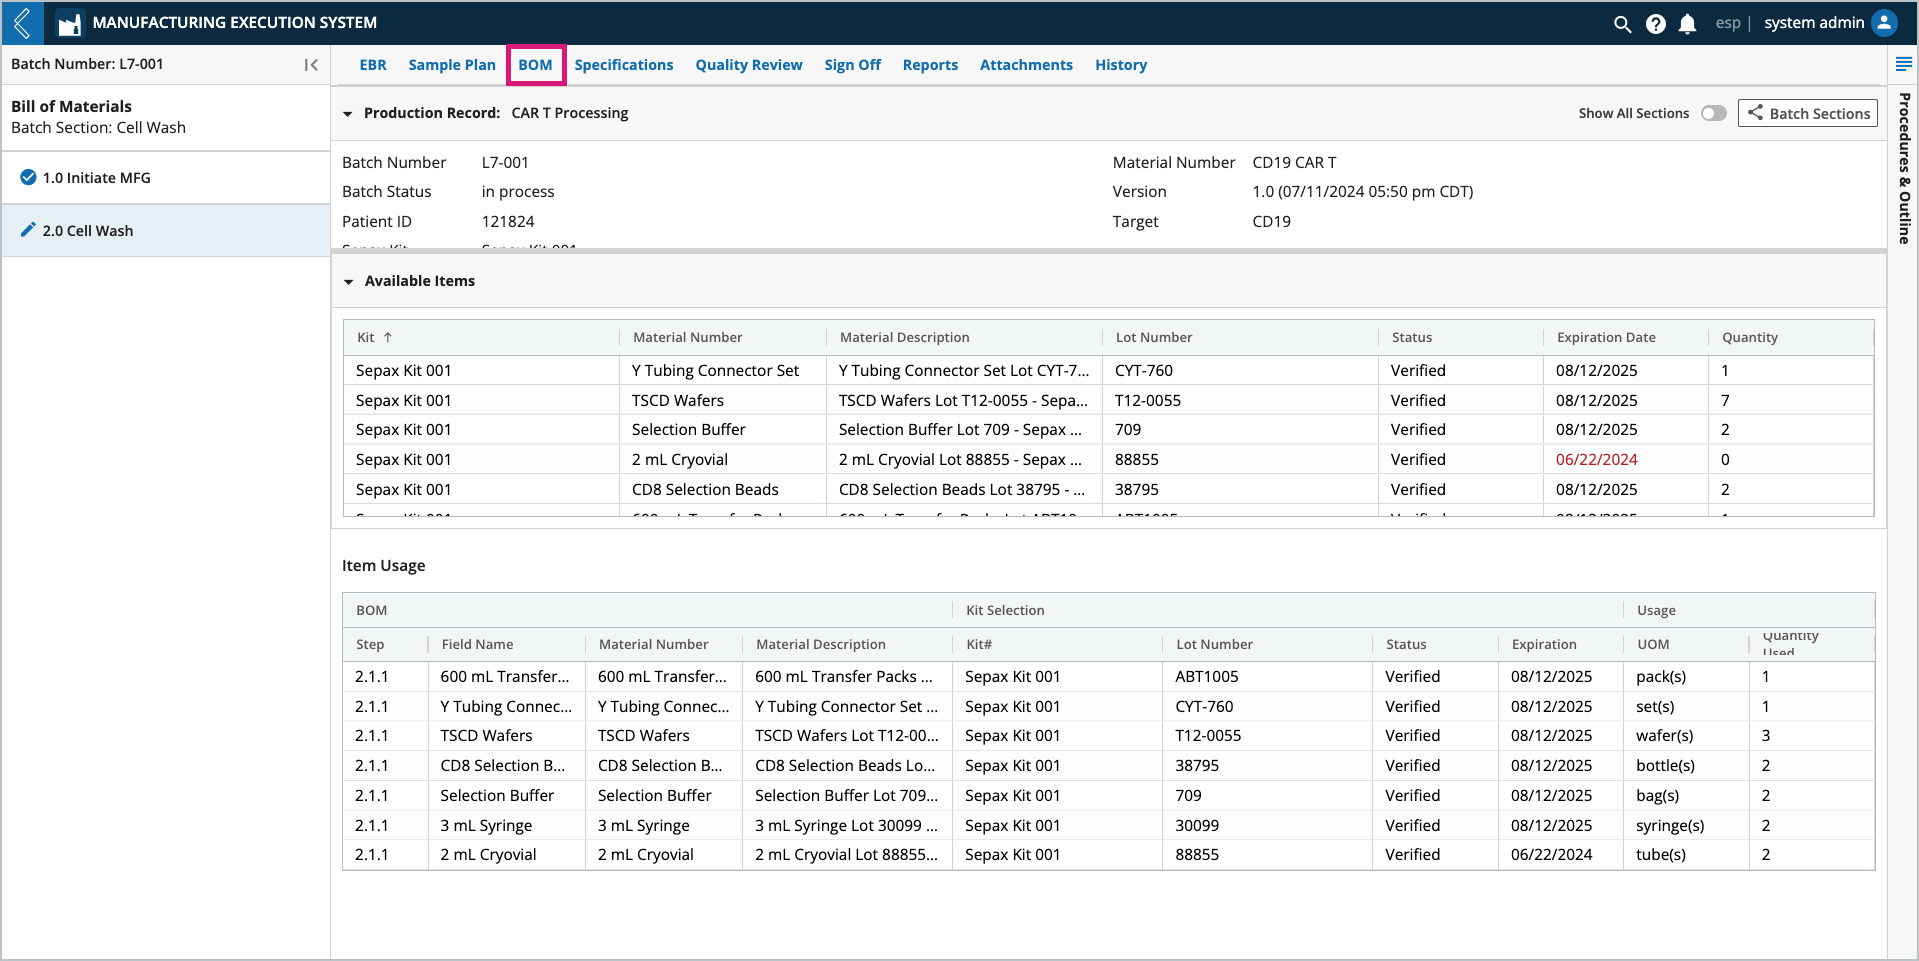
Selected Kits are displayed in the BOM tab in the “Available Items” table. The “Item Usage” table tracks the quantity of each Item consumed in the Batch. The information displayed in these tables is dependent on the Batch Section selected in the left panel. To view all Sections in the Batch, select the Show All Sections button at the top of the tab.
Note
Items can be tracked independent of quantity in L7 MES. For these Items, Unit of Measure (UOM) and Quantity Used are null and N/A, respectively.
Reserving Sample IDs
During Batch creation, L7 MES reserves Sample IDs so that labels can be pre-printed. These Sample IDs are organized by Step in the Sample Plan tab.
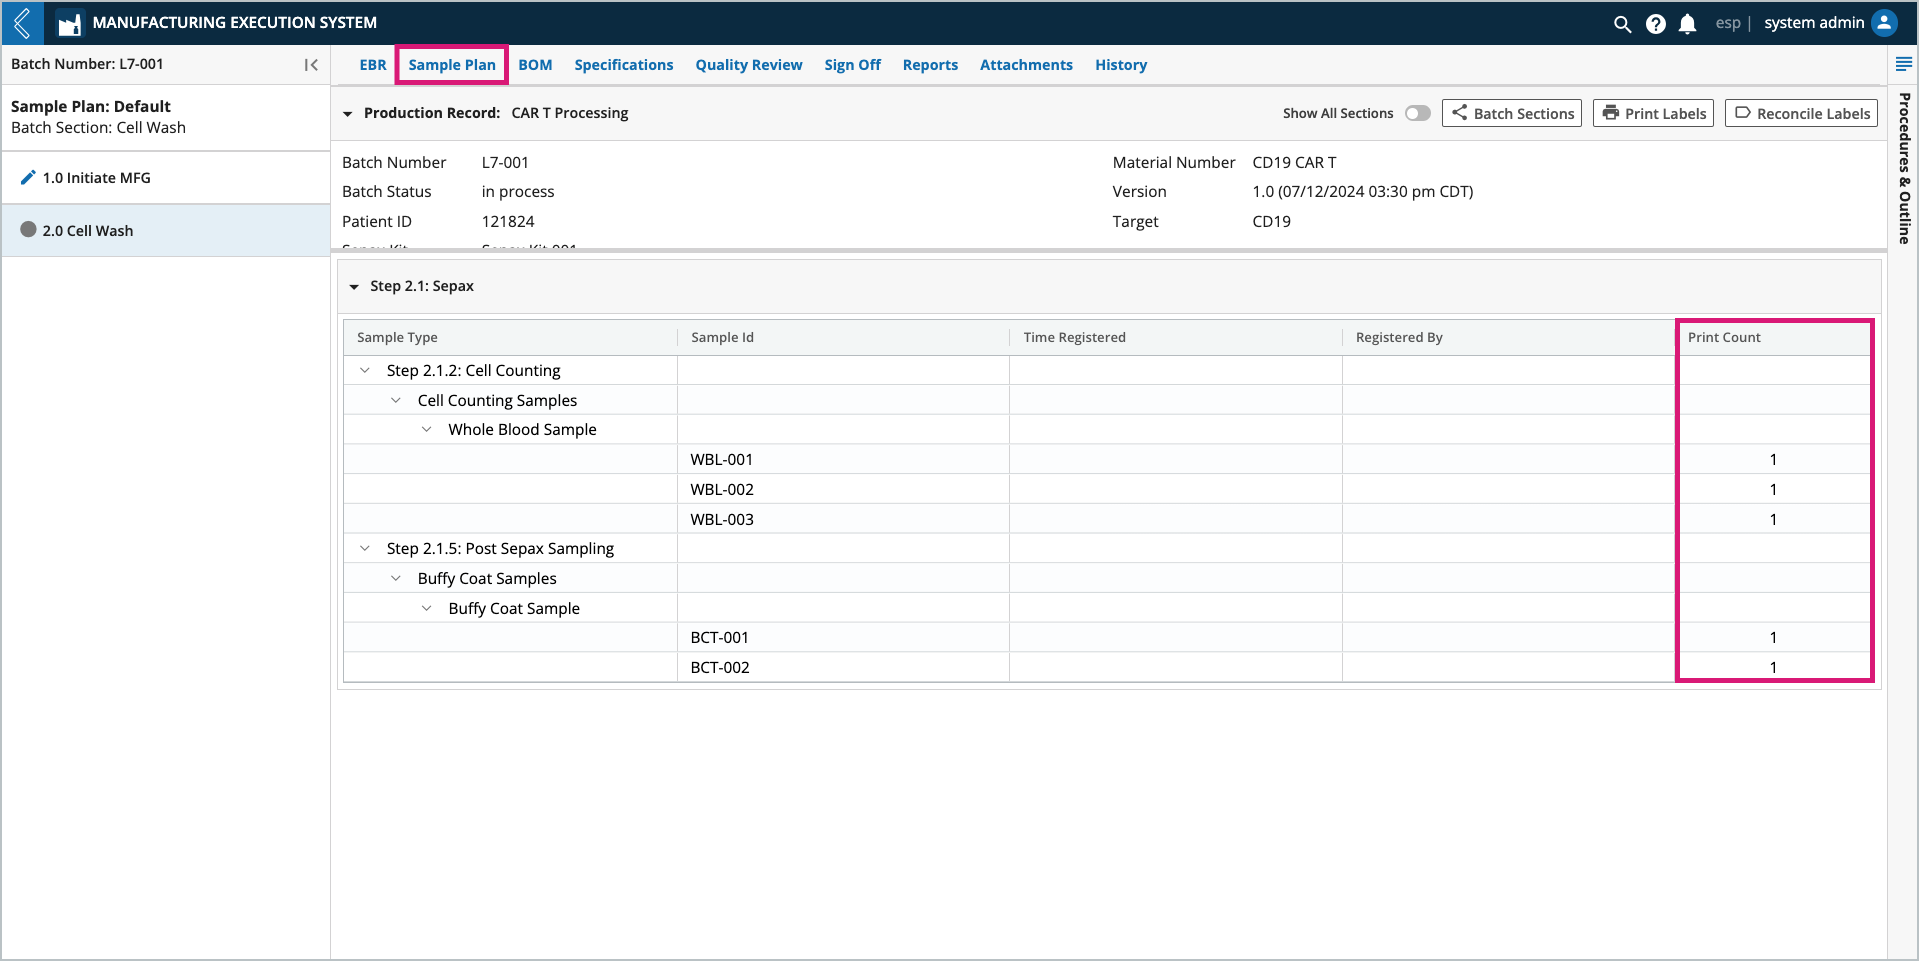
The rules that L7 MES uses when reserving Sample IDs are:
Reserve the maximum number of IDs if it is defined.
If a maximum is not defined but a minimum is, reserve the minimum.
If no maximum or minimum is defined, reserve one (1).
If the maximum and minimum are both set to zero (0), do not reserve any IDs.
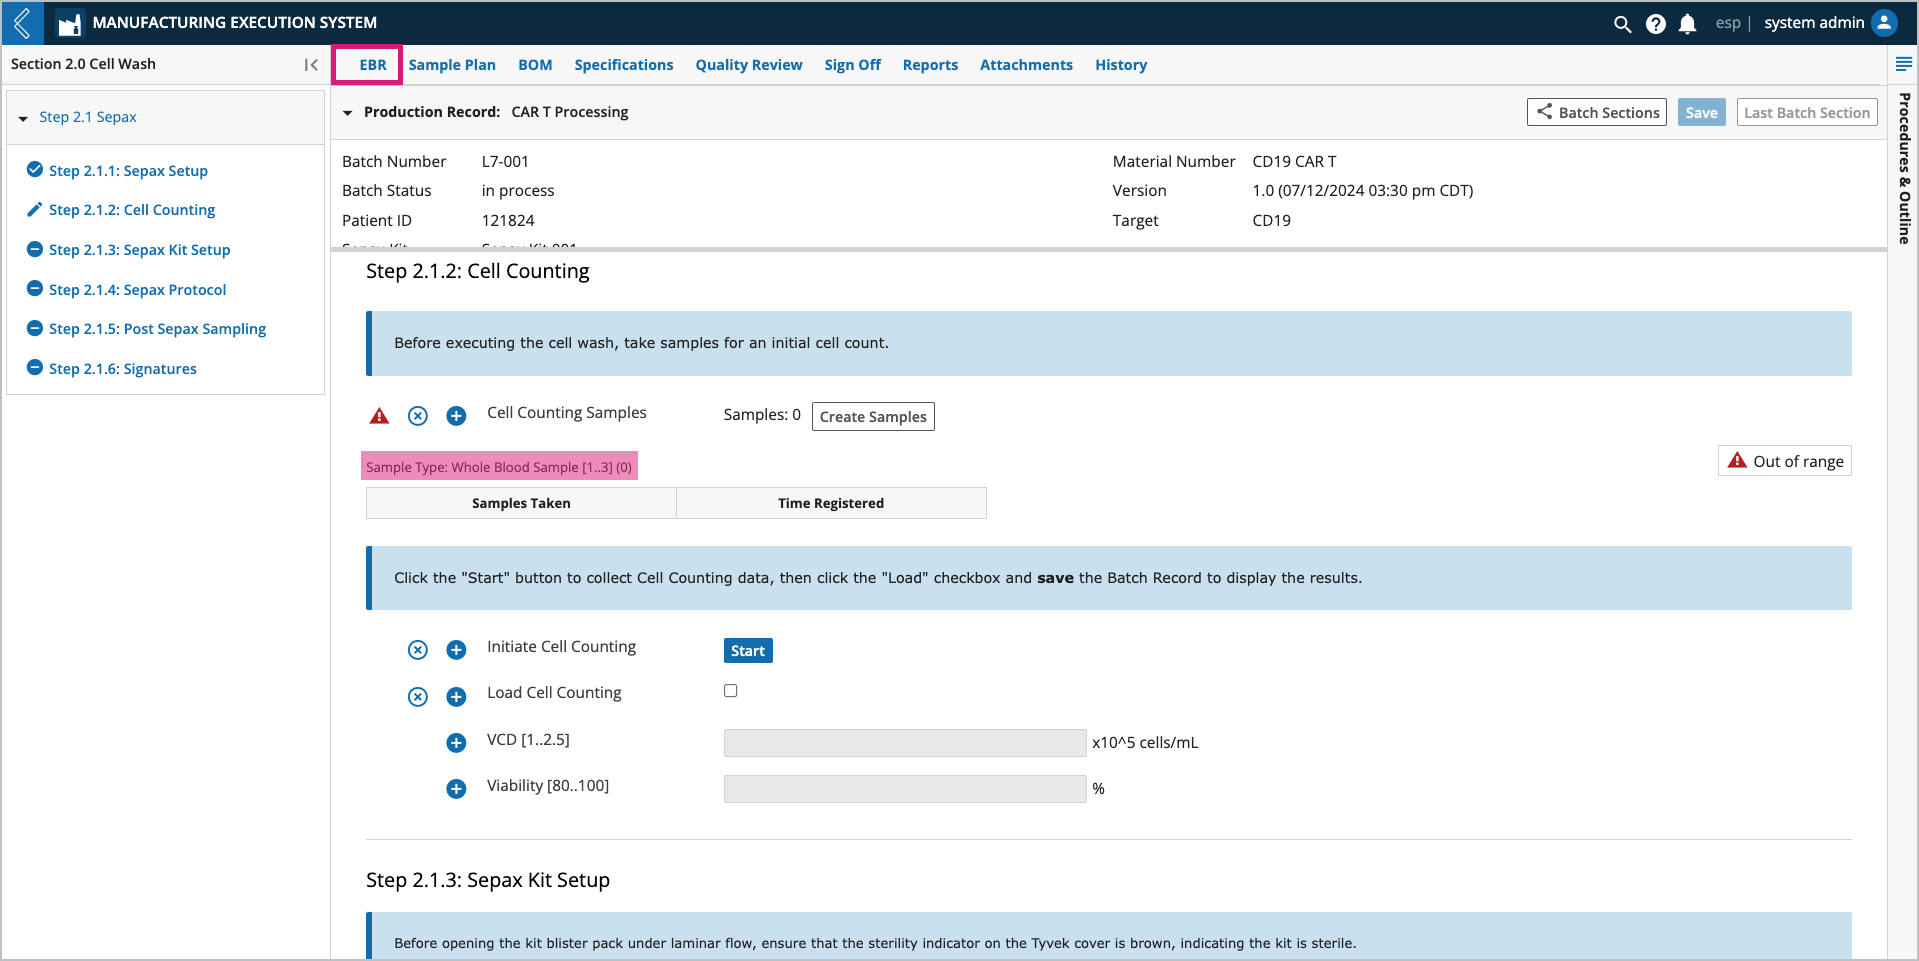
Minimum and maximum values are displayed in brackets next to the Sample Type. The number of Samples registered is displayed in the parenthesis.
Note
For Specifications, these values are displayed in brackets next to the field name.
Sample Points
These reserved IDs directly correlate to the Sample Points in the Batch Record.
Sample Points create parent-child relationships between the Batch Entity Type and the Samples being collected, but data cannot be collected against these new Samples in the Batch Record. For example, Samples may be collected throughout production for quality control and stability testing.
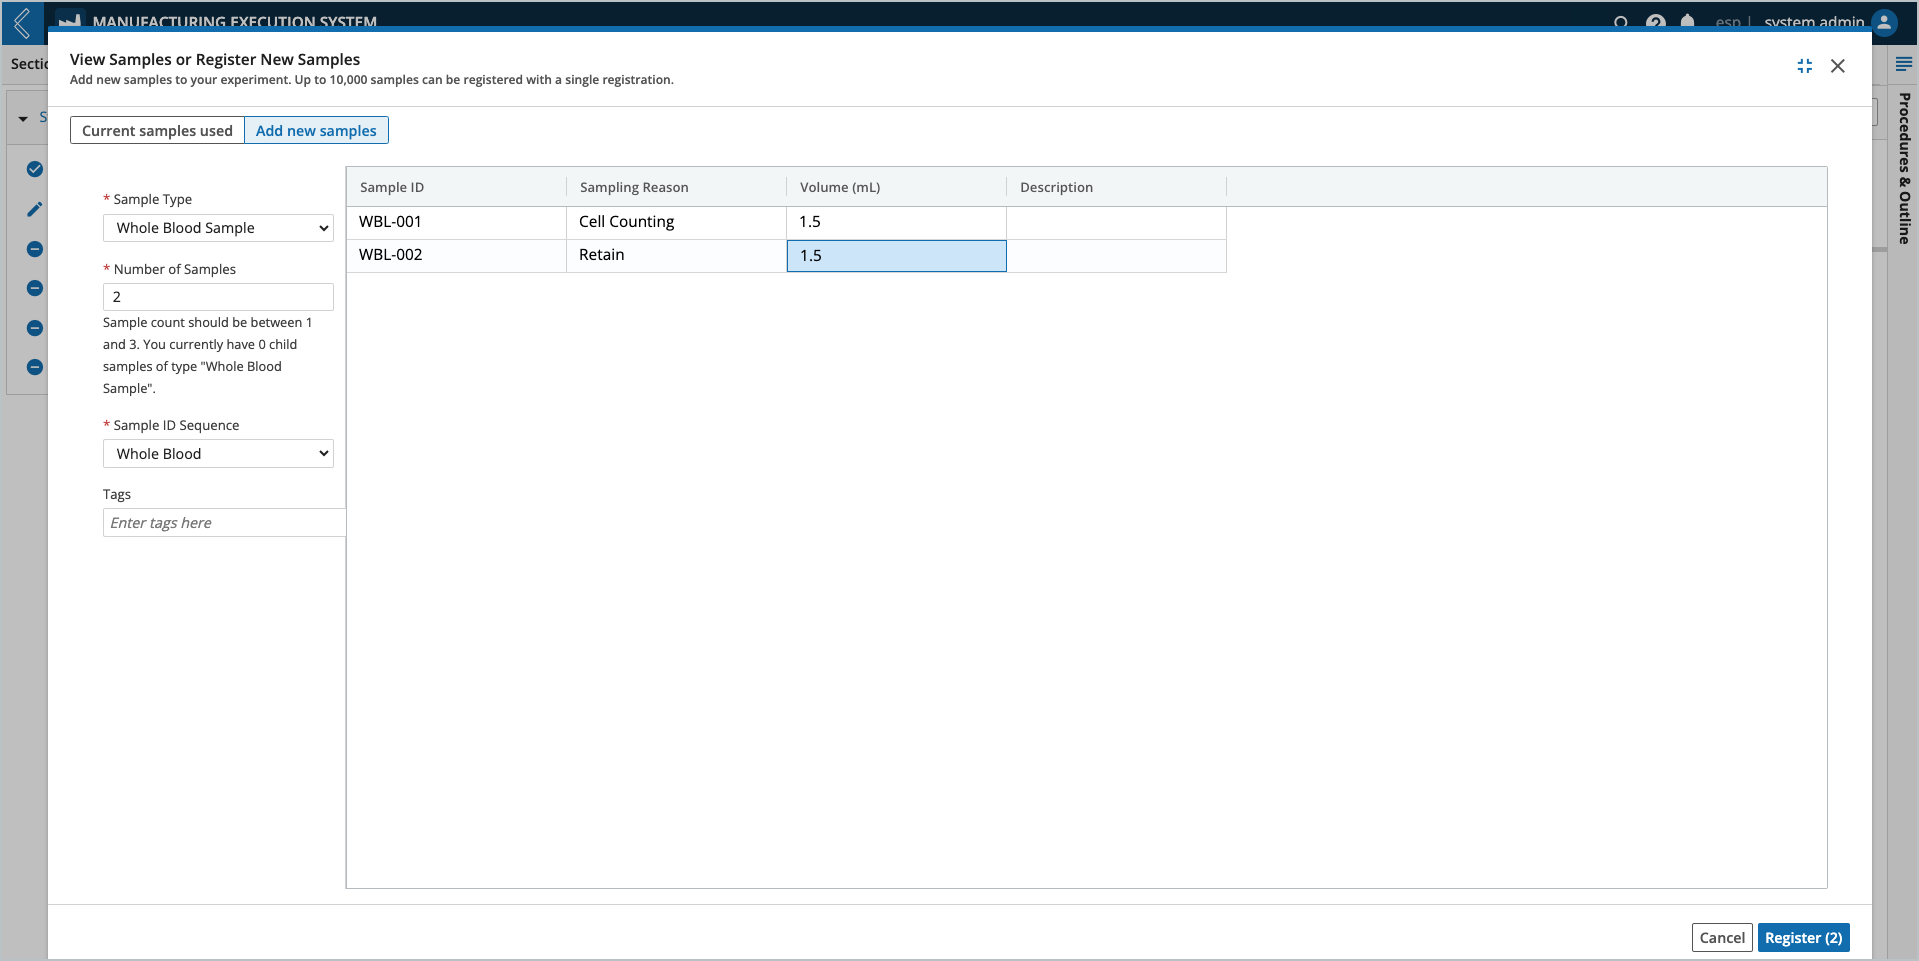
The Sample Point in the EBR displays a button to create new Samples (see Step 2.1.2 Cell Counting in the previous figure). The Manufacturing Technician registers the new Samples in the modal, using the reserved Sample IDs and labels pre-printed by the Planner.
The <generated id> should be replaced with the reserved Sample ID. This ID can be scanned from the label or manually entered by the Manufacturing Technician. Failure to do so will generate a new ID, which will not be included in the pre-printed labels.
Reconciling Sample labels
Label reconciliation applies to all Samples within a Batch Section. Reconciliation is only allowed after data entry is complete for all Steps in the Section.
Note
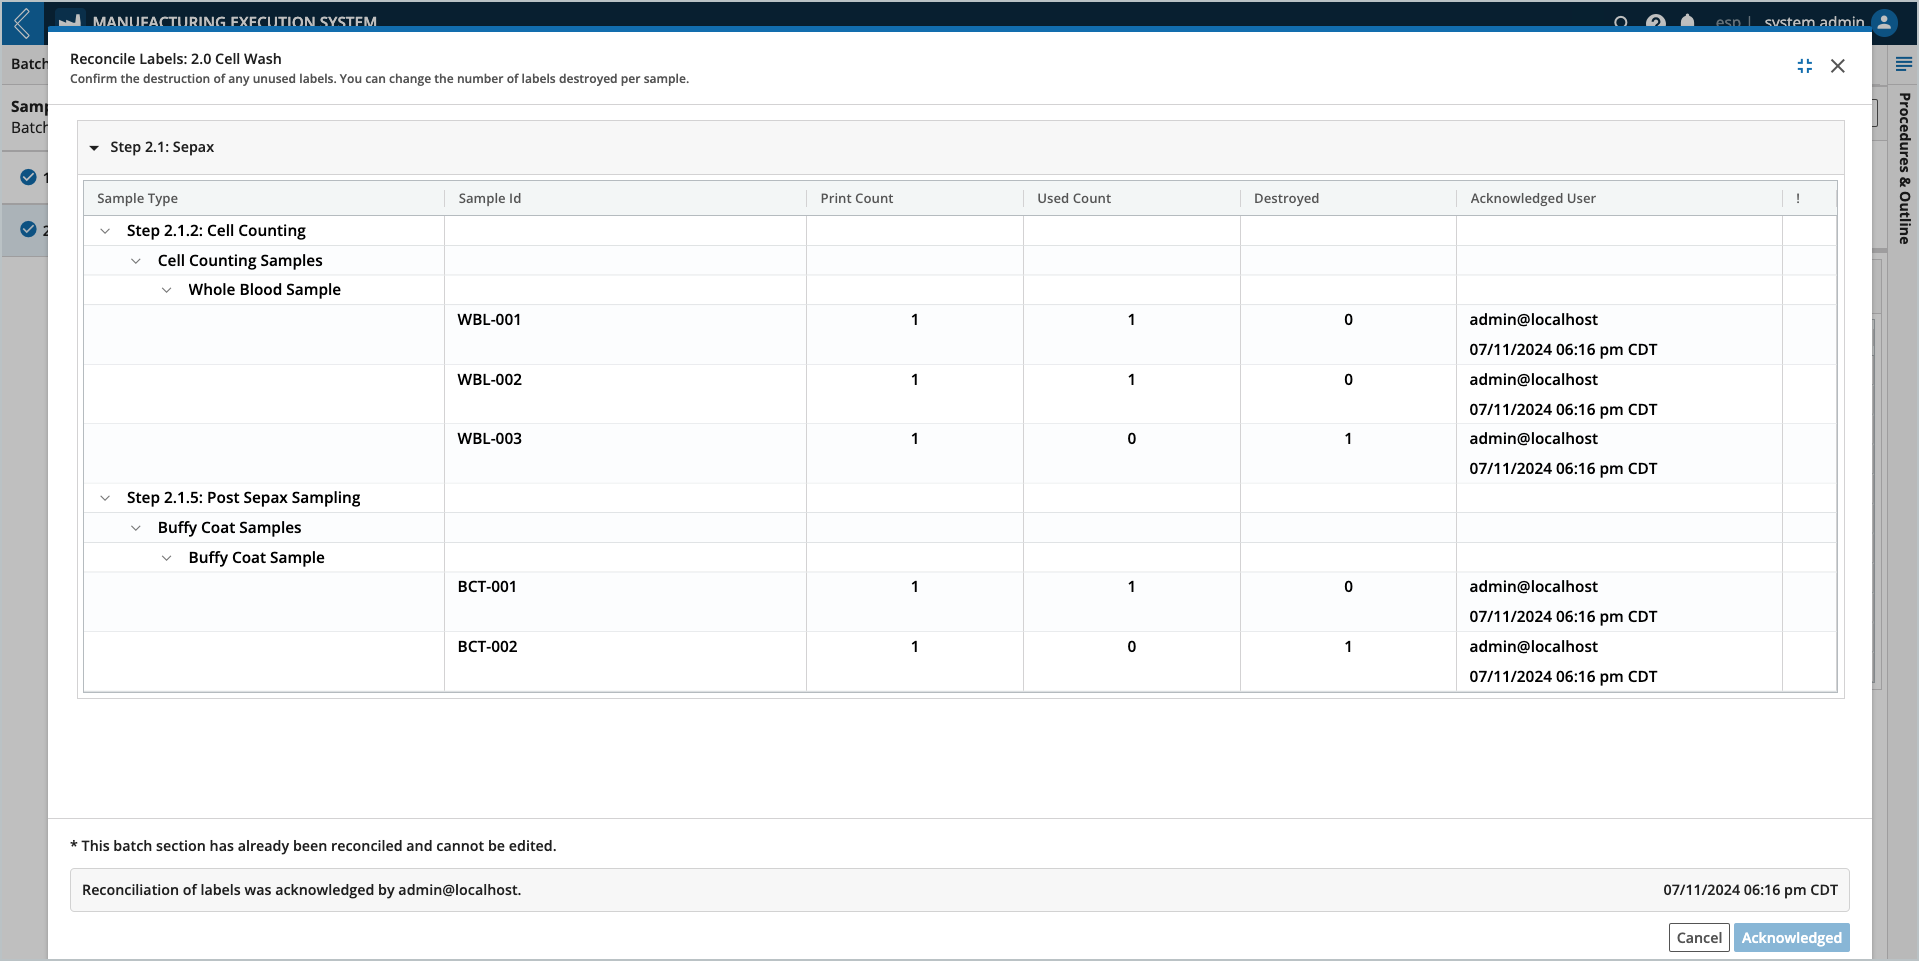
It is not possible to modify the results of this action after completion.
To reconcile Sample labels:
Select the Batch Section to reconcile from the left panel in the Sample Plan tab. Only one (1) Section can be reconciled at a time.
Select Reconcile Labels at the top of the tab.
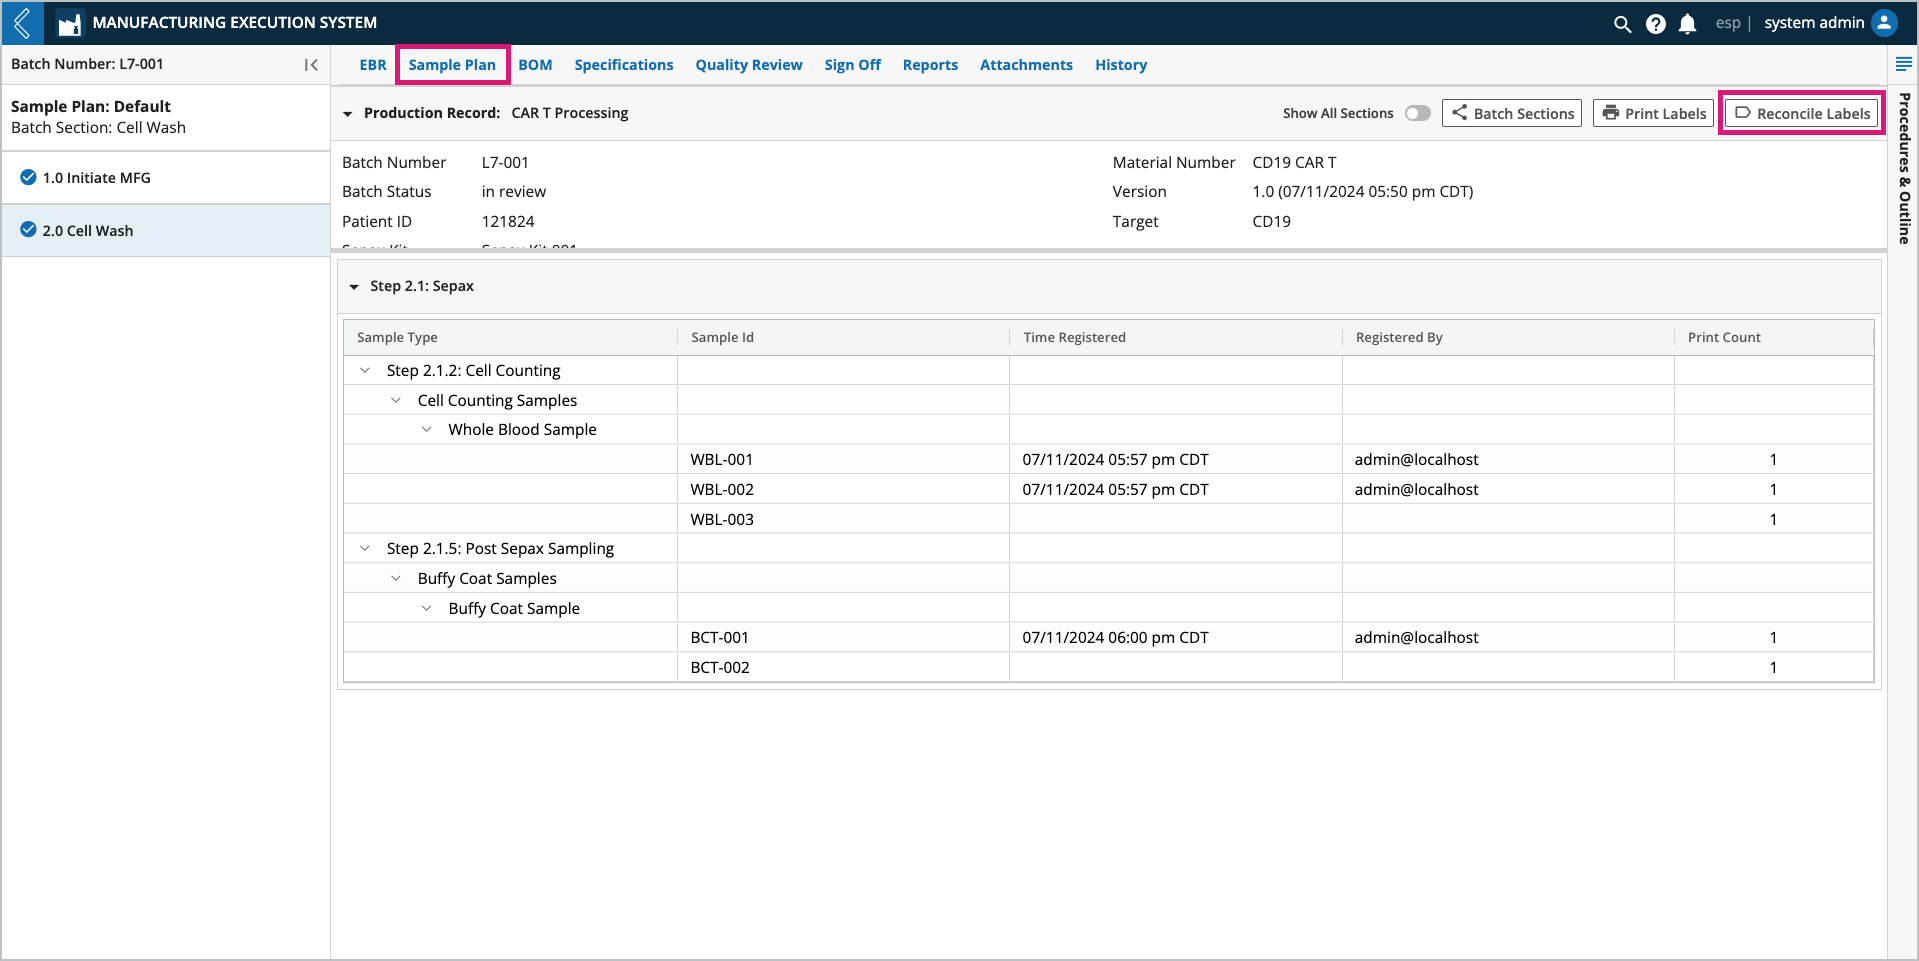
In the Reconcile Labels modal, review the values recorded in the Destroyed column.
These values are equal to the Print Count minus the Used Count, but can be updated.
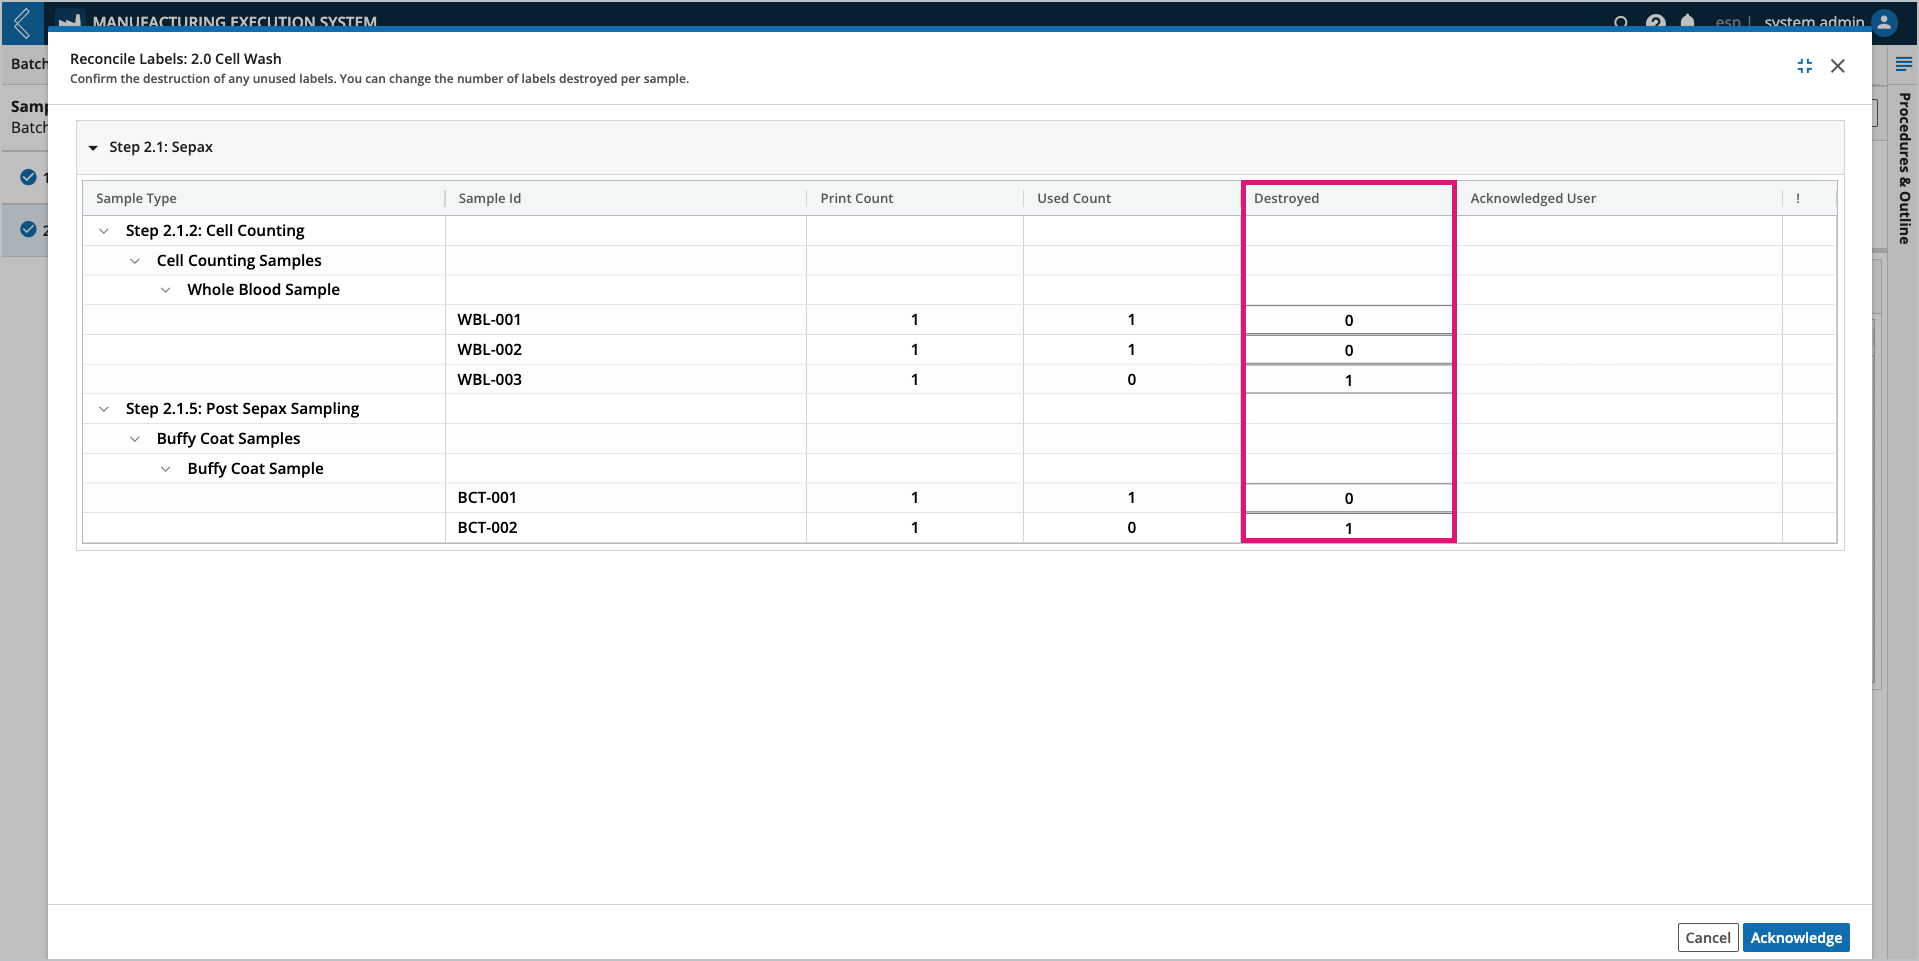
Select the Acknowledge button at the bottom of the window.
Enter your L7|ESP password (must be the logged-in user).
Select Confirm.
Vector fields
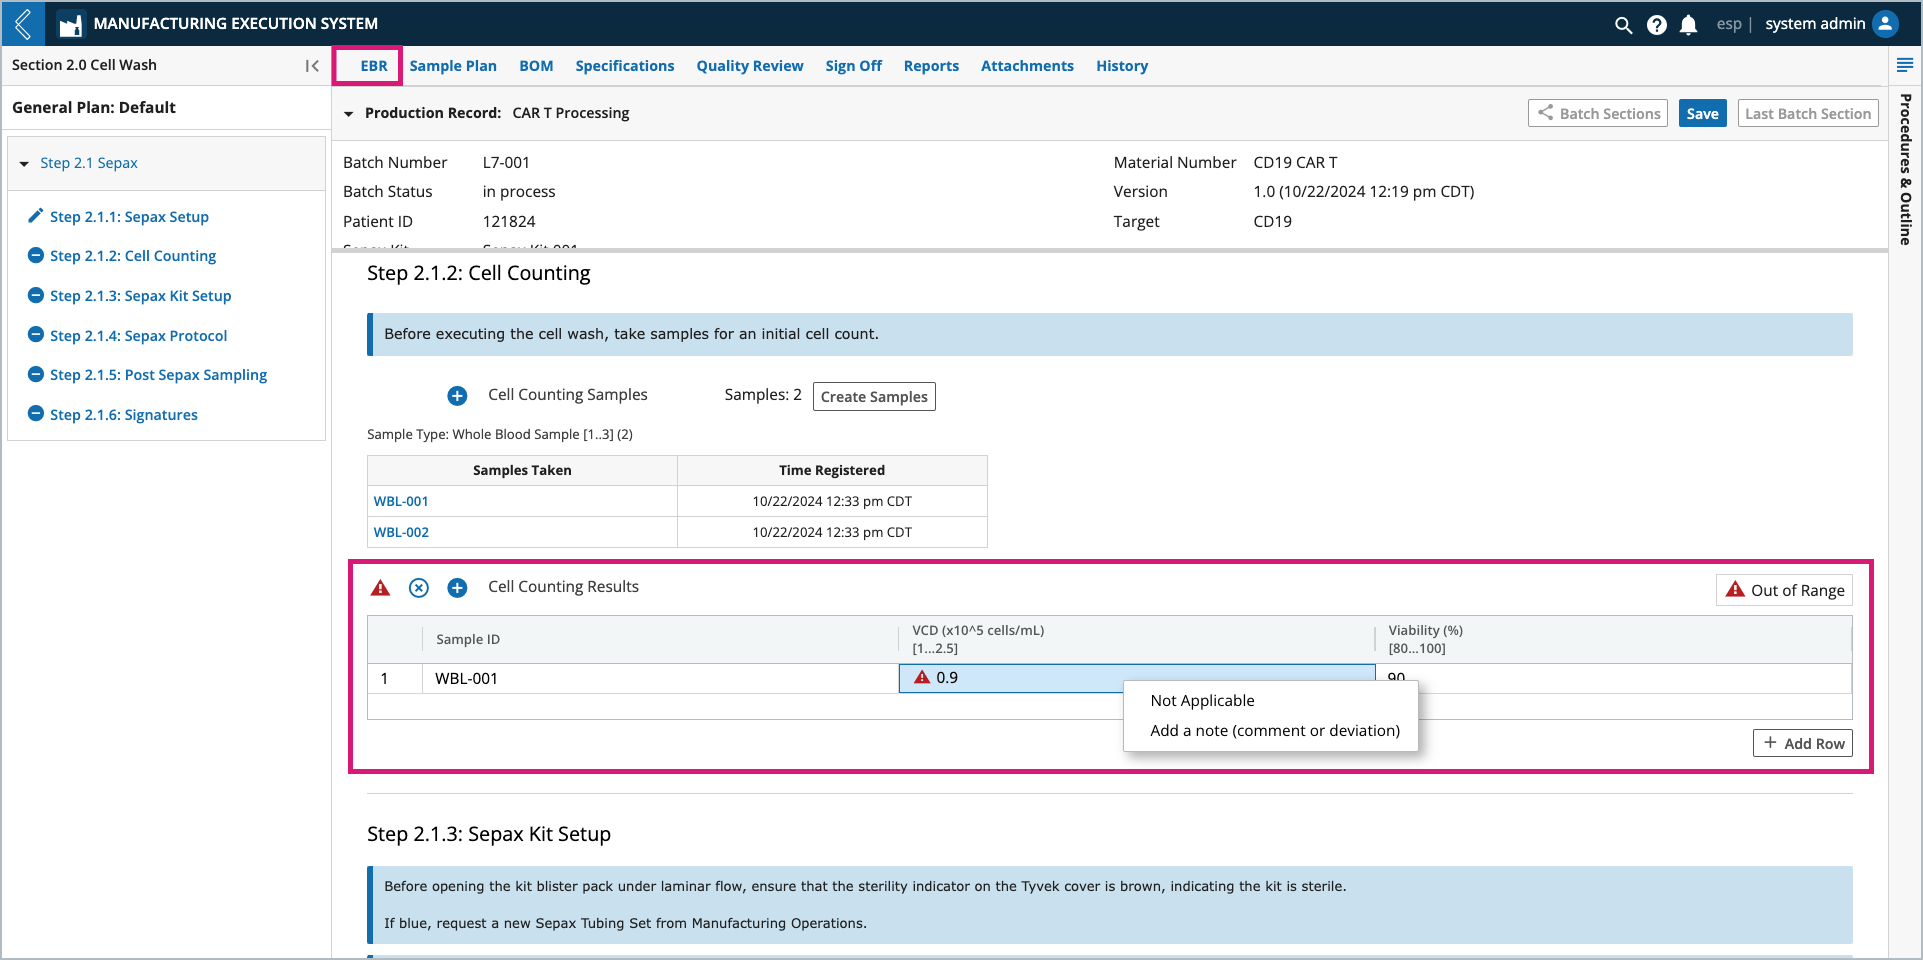
Imagine cells from the same Whole Blood Sample or multiple Whole Blood Samples are counted a dynamic number of times. To account for this, the series of fields associated with this event can be displayed as columns in a table. Each cell count then represents a row in the table.
Note
Right-click a cell in the table to add a note (comment or deviation) to the field or set its value to N/A.
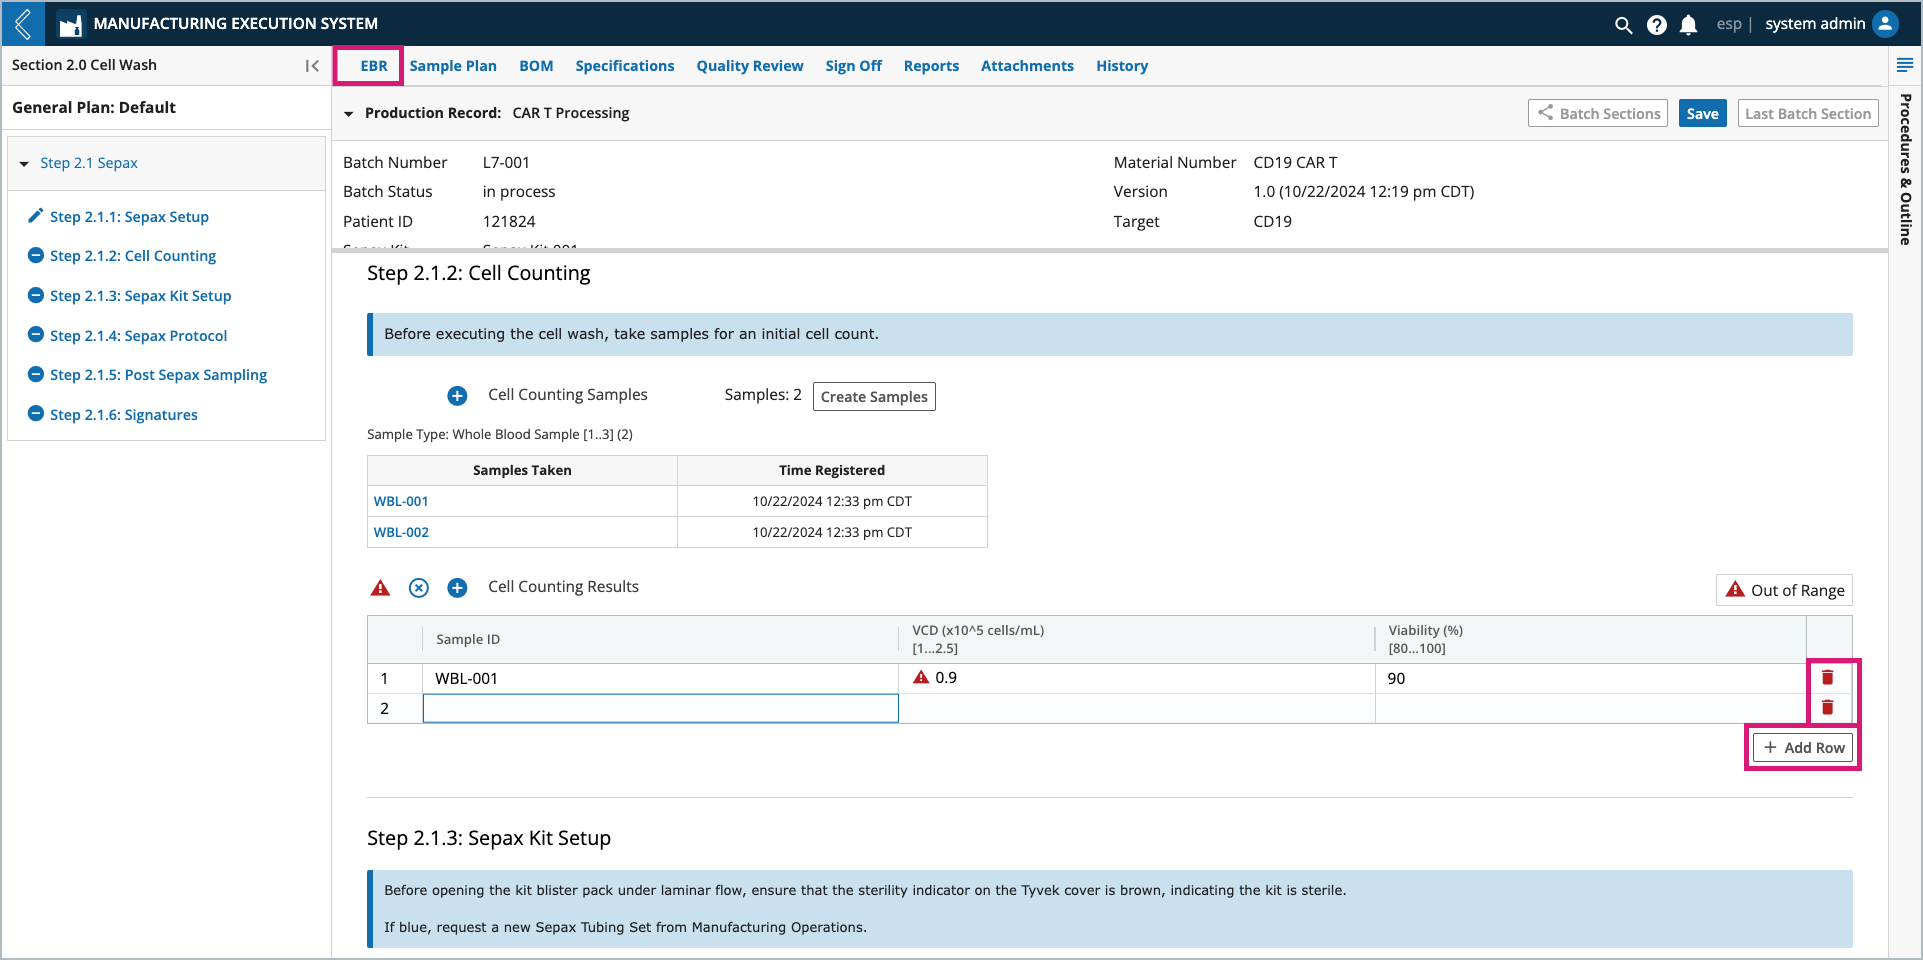
Users can add and remove rows by selecting the + Add Row button and trash can icon, respectively. The table must have at least one (1) row.
Electronic signatures
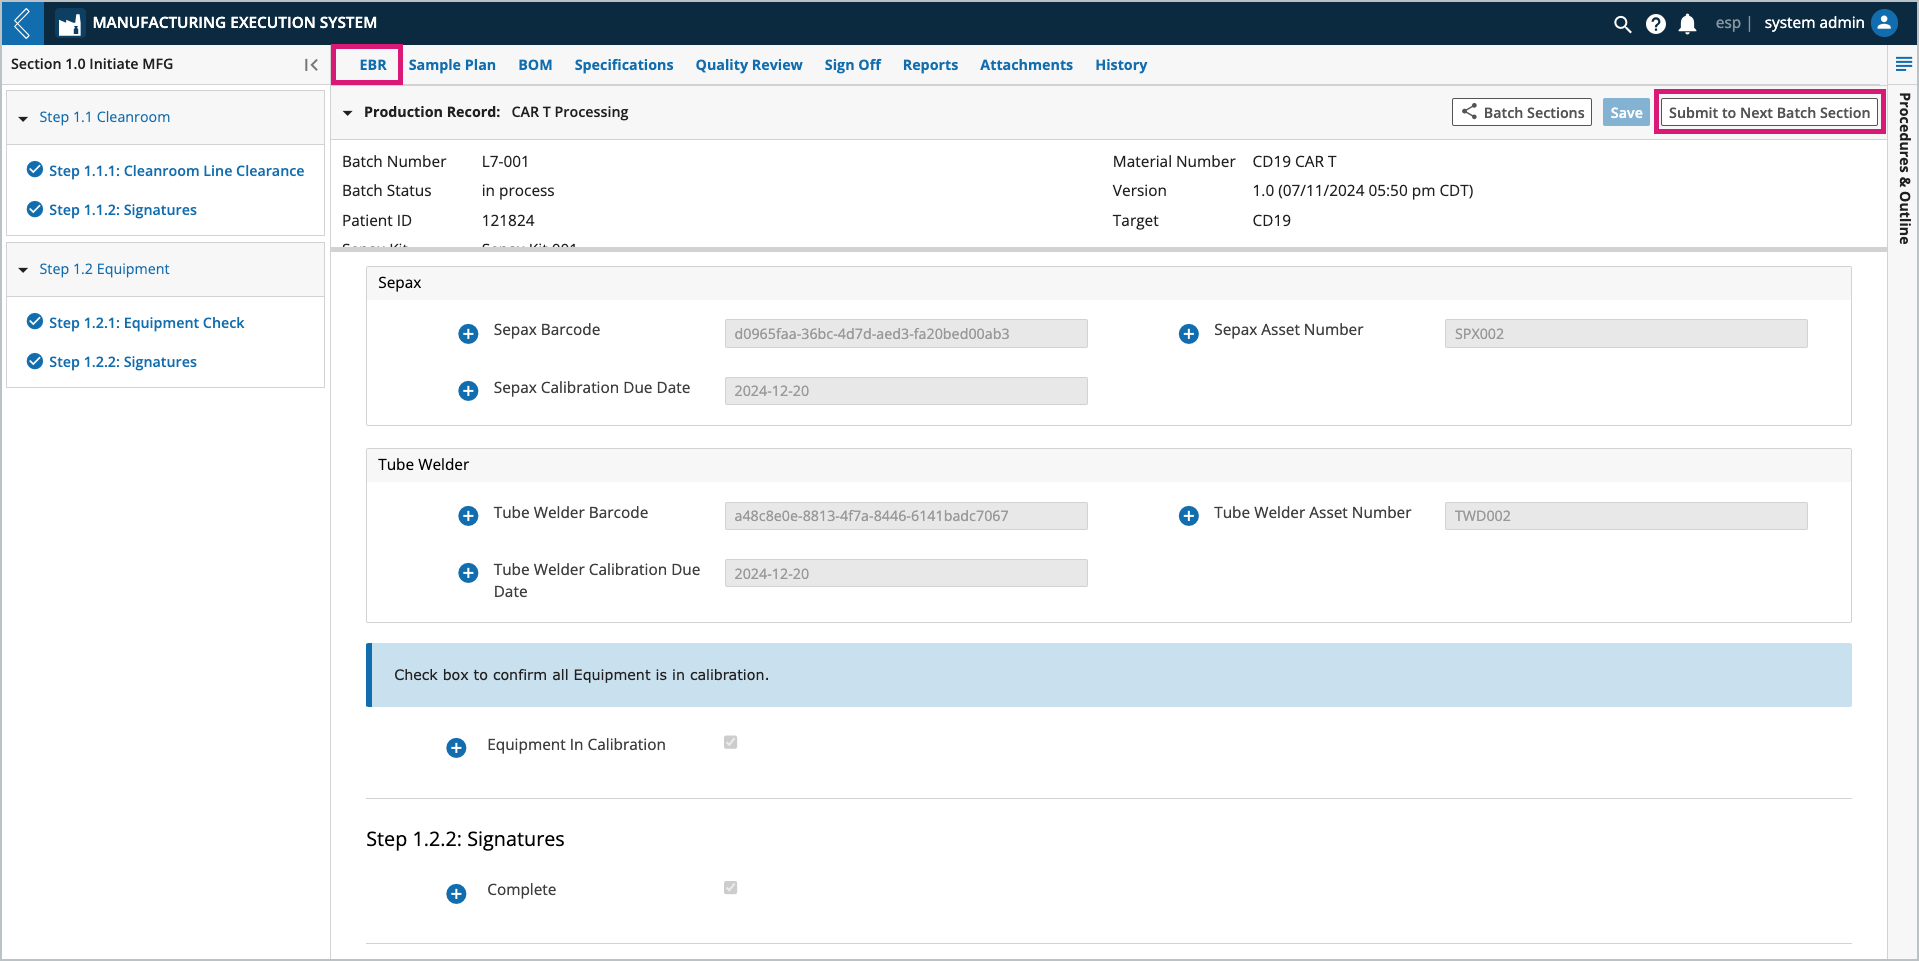
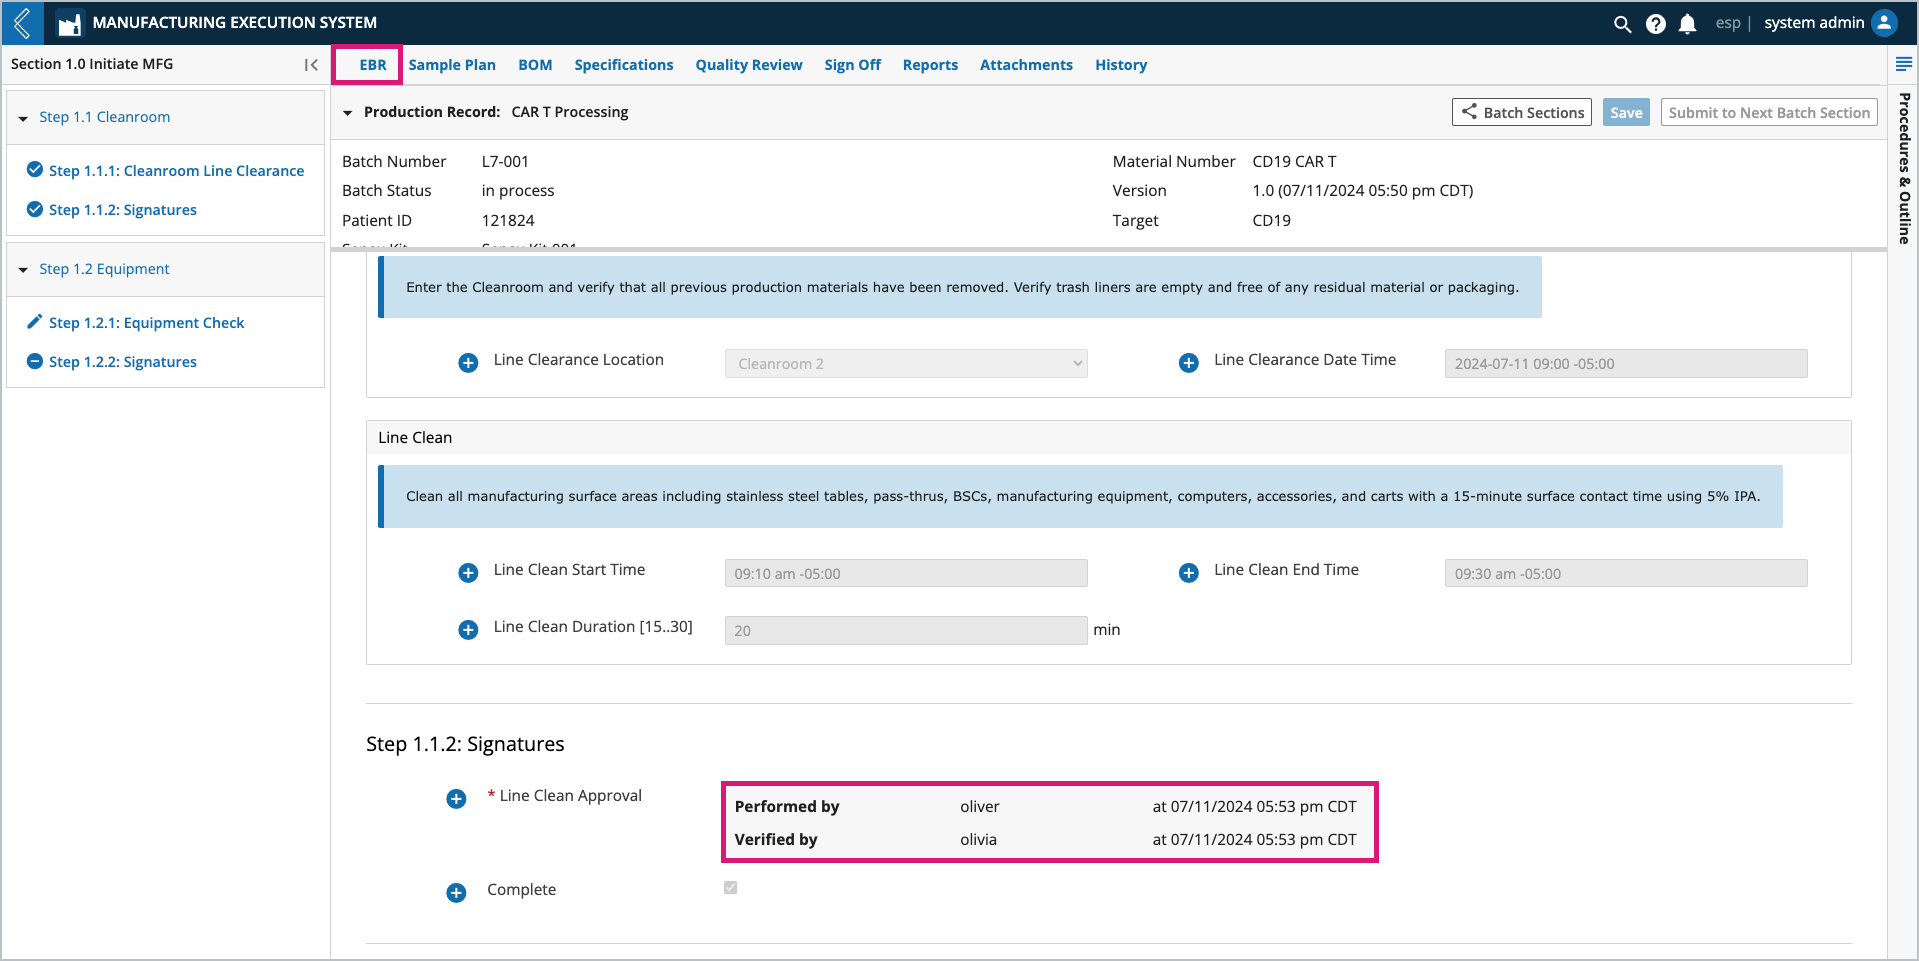
Throughout production users need to indicate who performed and who observed/verified each Step in the Batch Record. Users enter their L7|ESP username and password to record their signature, which is part of a Signature Flow configured in L7|Master. The signer does not have to be the logged-in user.
Note
Completed signatures record the reason, username, and date time of the signature, making them 21 CFR Part 11 compliant.
Marking fields as Not Applicable (N/A)
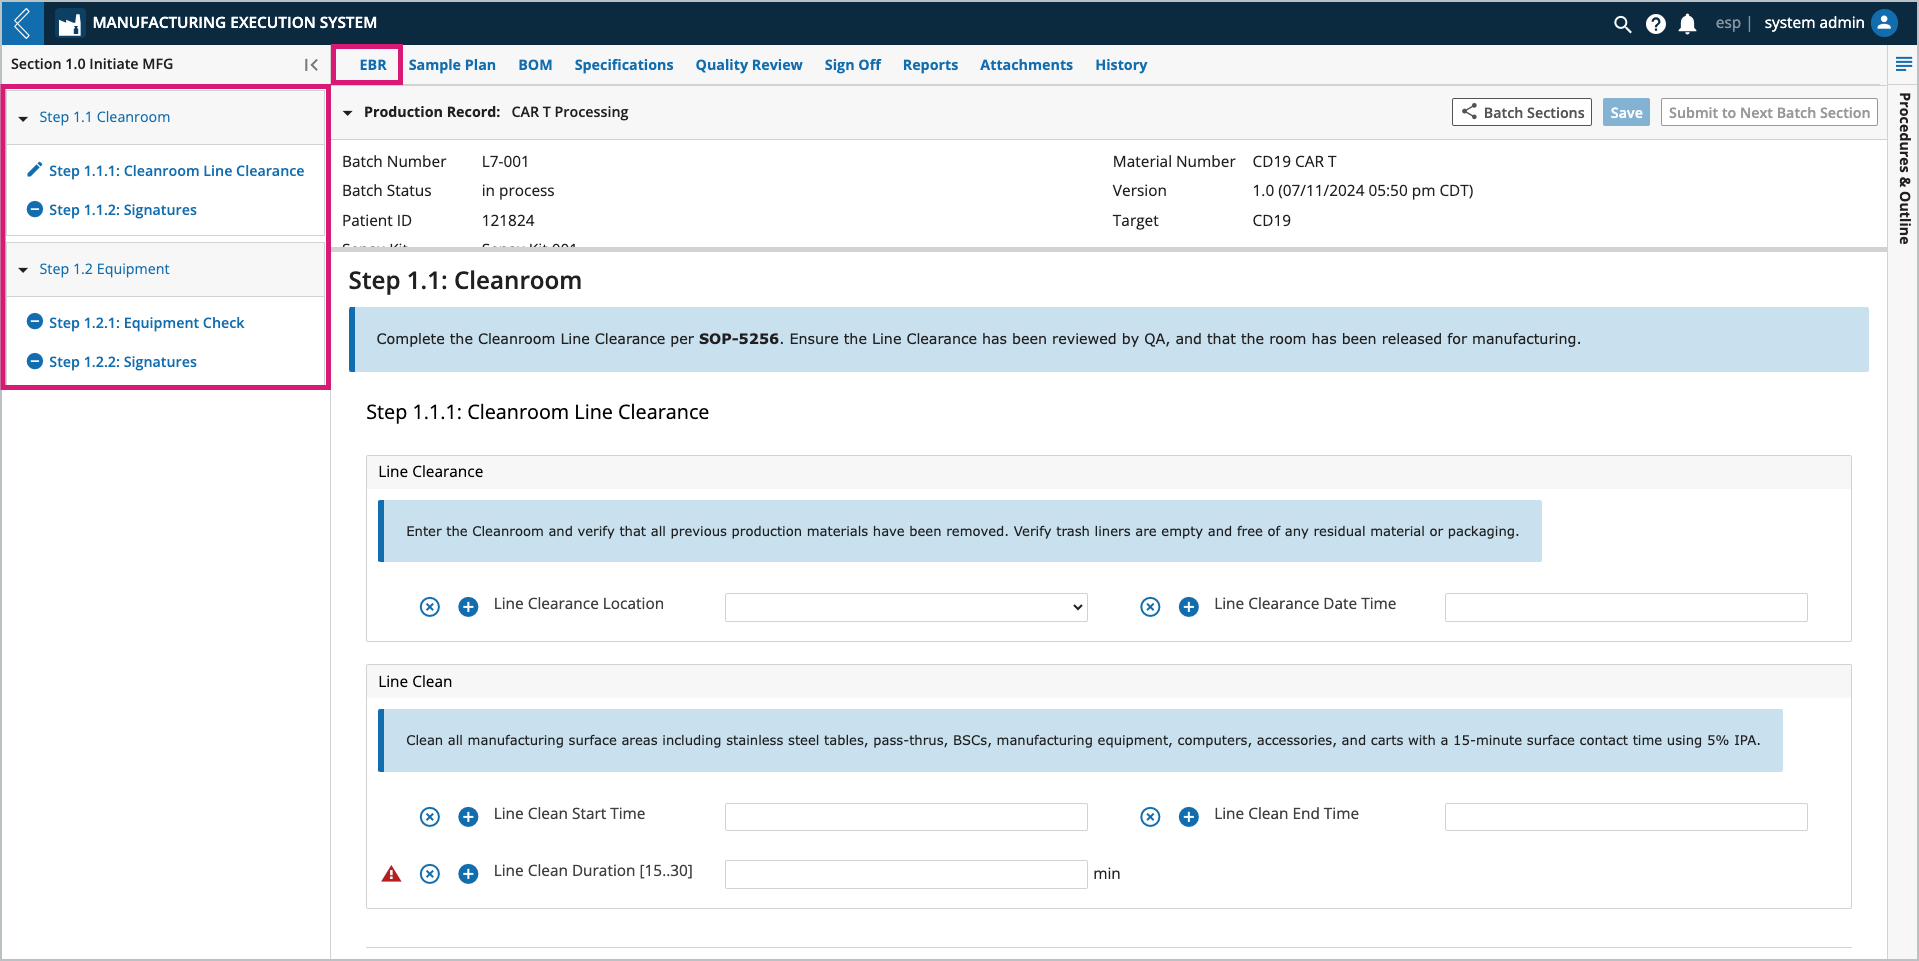
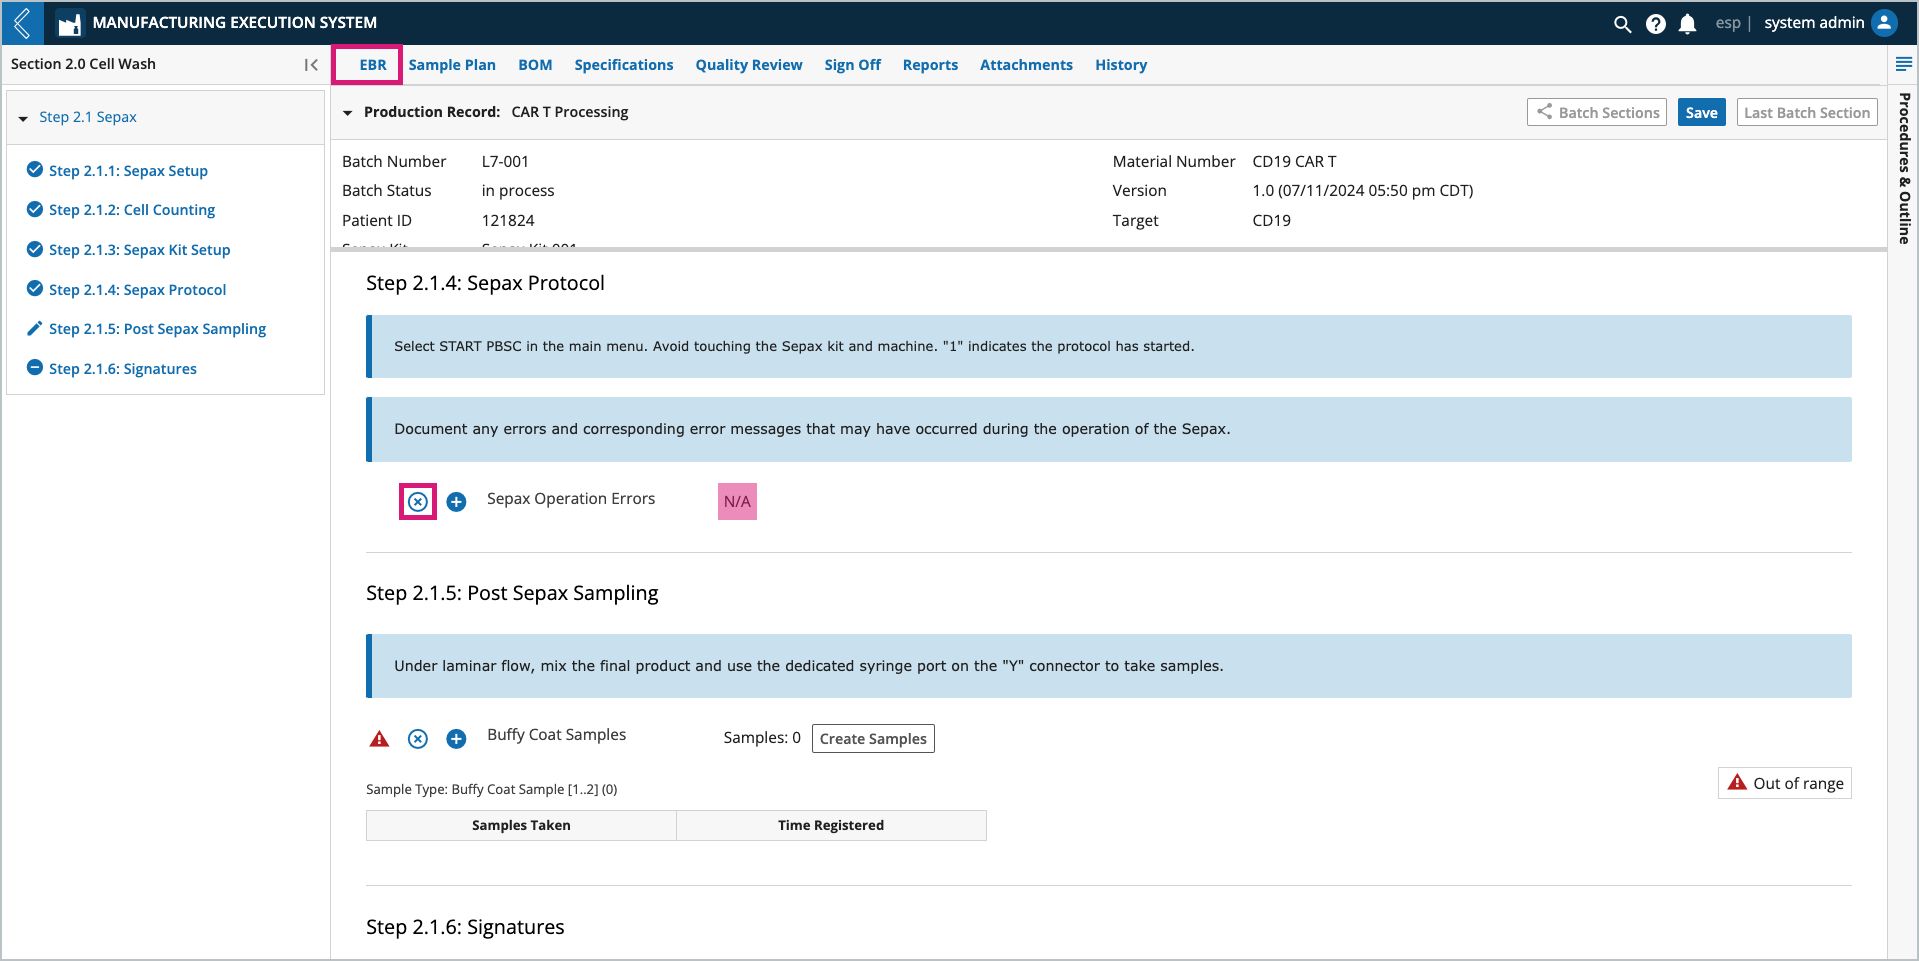
Rather than leaving a field blank, mark the field as N/A by selecting the x icon next to the field.
Note
Electronic signatures and the complete checkbox cannot be marked N/A.
Adding field notes
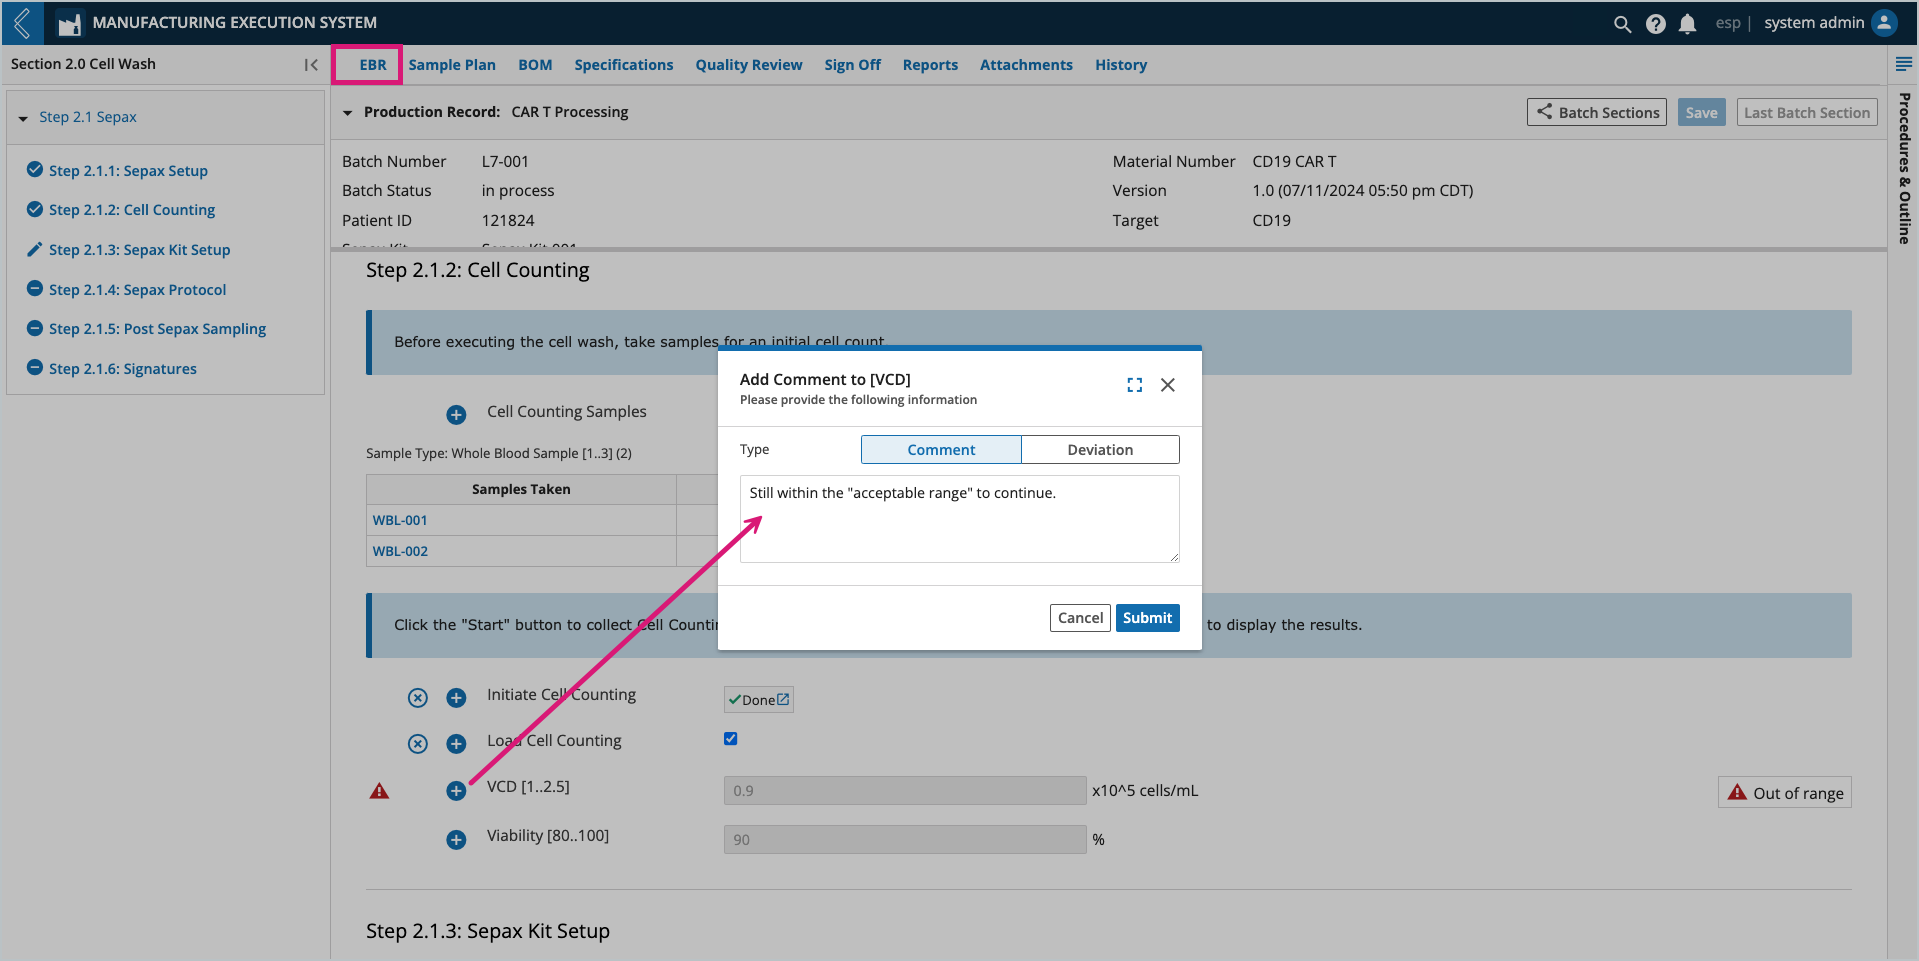
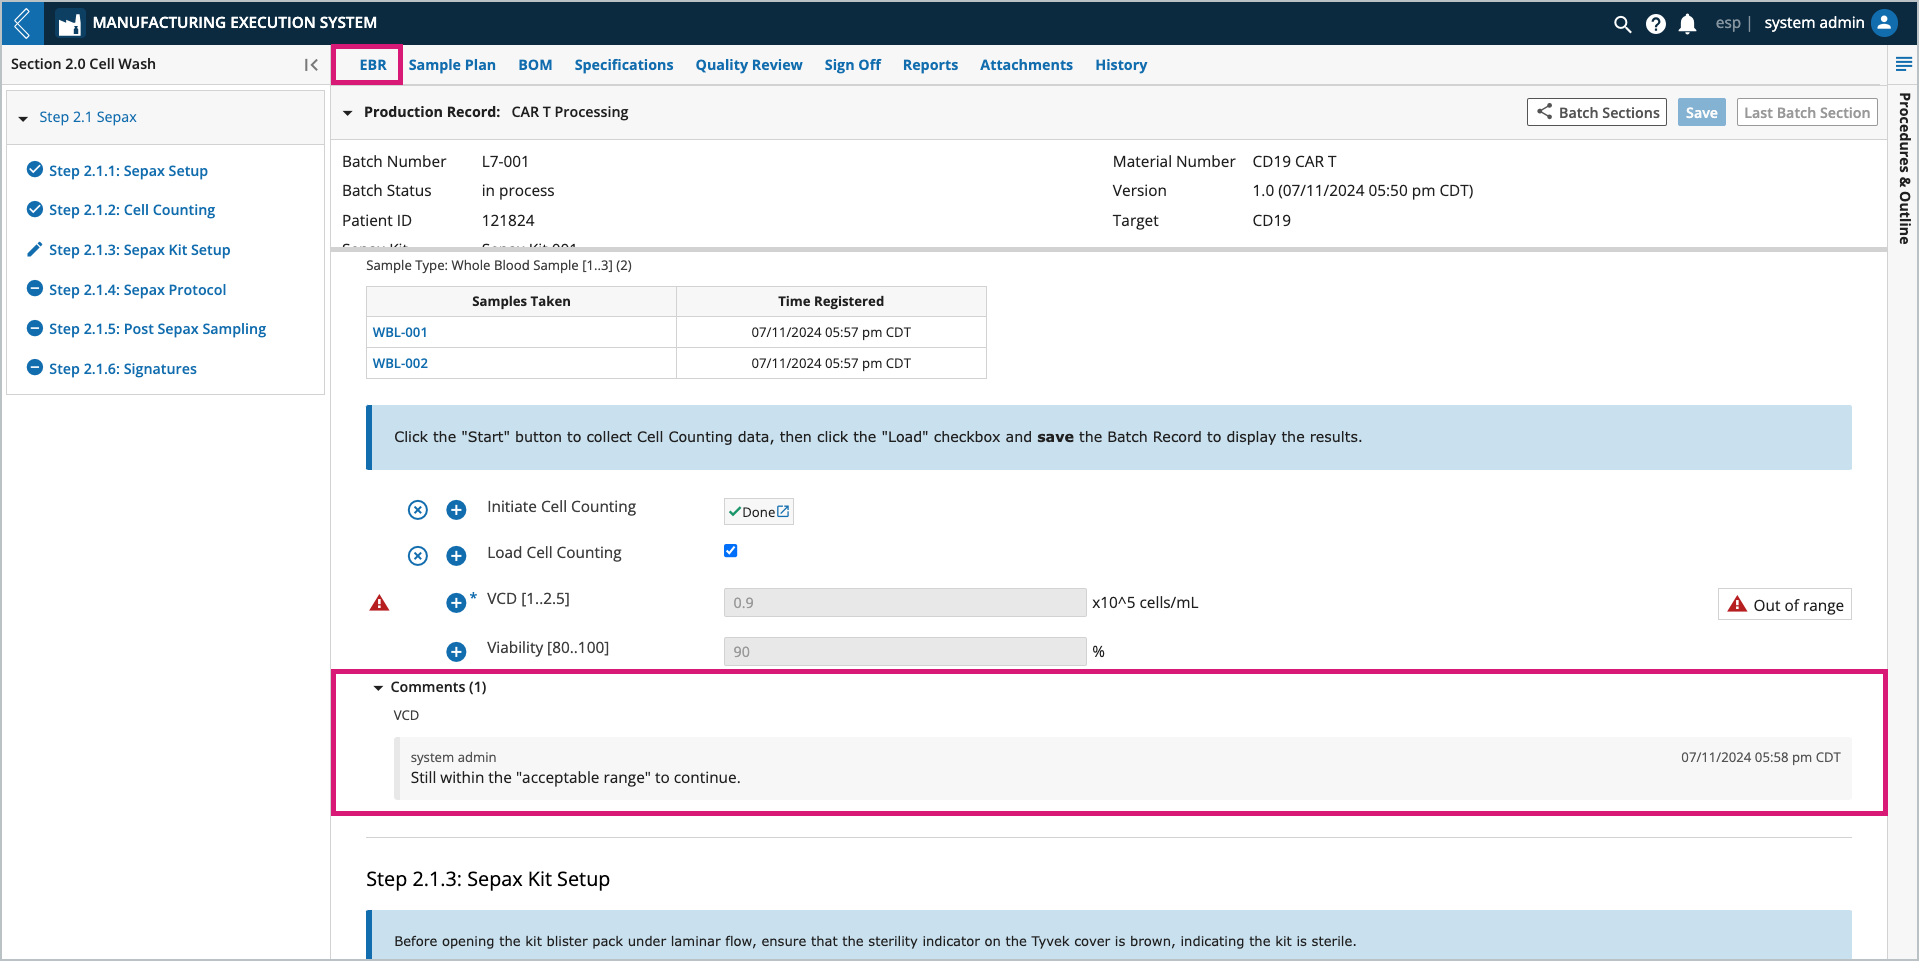
Notes can be added to any field by selecting the + icon next to the field. Notes can be configured as a comment or deviation. The user who added the note and the date/time it was recorded appear with the note at the bottom of the field’s Sub-Step.
Note
All field notes (comments and deviations) are recorded in the Final Batch Report.
Computed fields
Field values can be entered by a Manufacturing Technician or computed by L7|ESP. If the computed value is derived from an Expression, and the Expression cannot evaluate, a red triangle with an ! will appear to the right of the field. Select the triangle to view the Expression error.
The Expression usually cannot evaluate because one (1) or more of its variables is not defined.
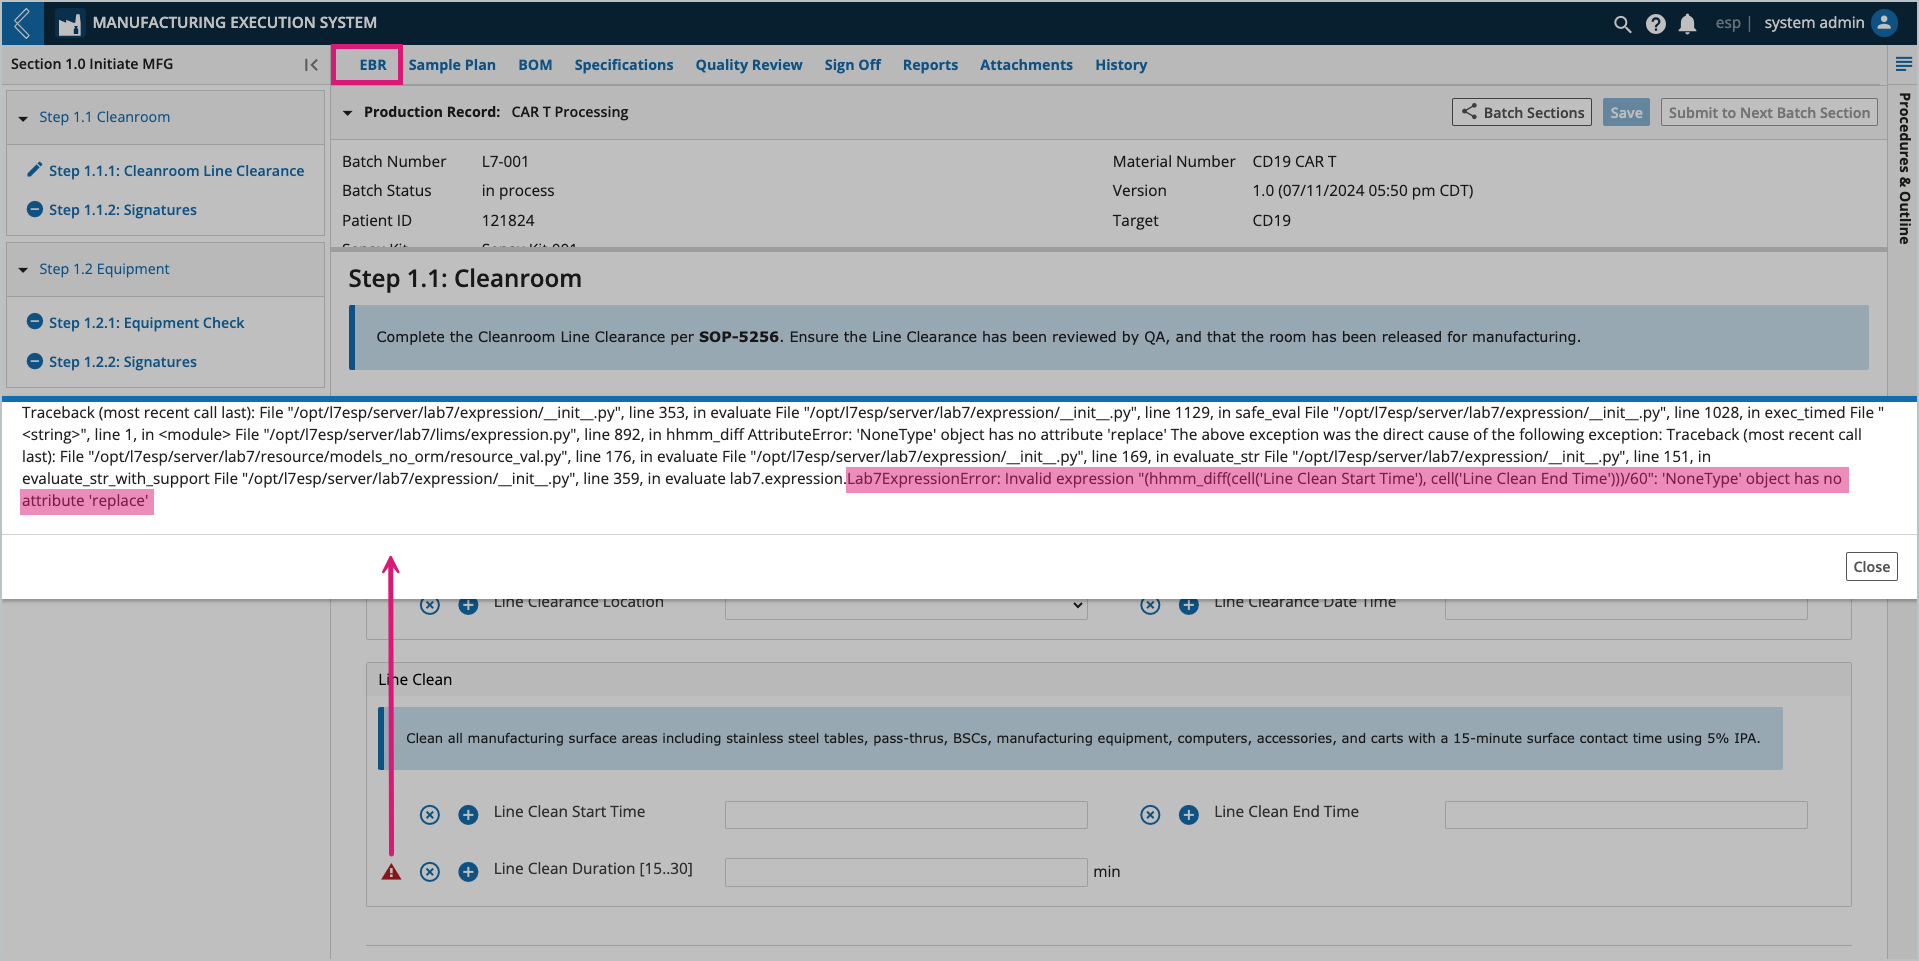
In this example, Line Clean Duration cannot be computed until values for Line Clean Start Time and Line Clean End Time have been saved.
Saving data
Data may be saved at any time by selecting the Save button at the top of the tab.
Note
Electronic signatures perform an implicit Save.
If data has been collected but not saved before exiting the Batch Record or L7 MES, reentry into the Batch Record will display a notification with the following options:
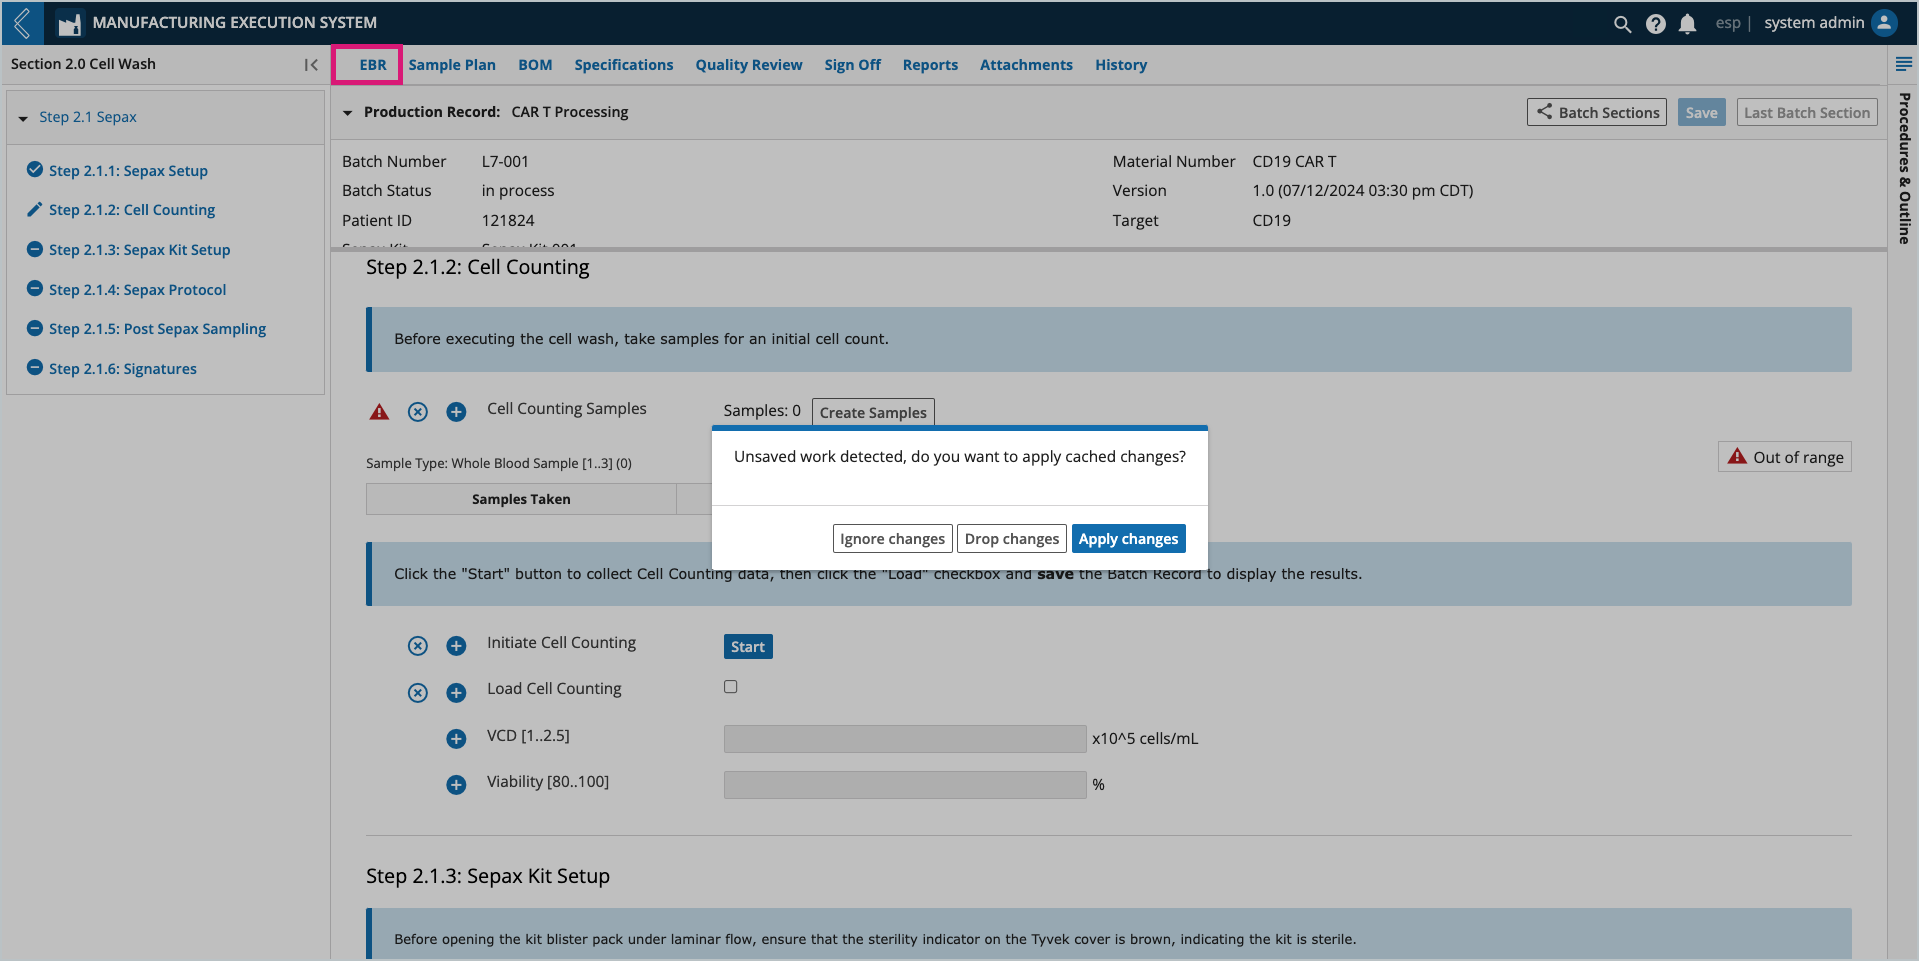
Ignore changes – allows the user to proceed while leaving the data cached. If subsequent changes are made, the cached data is discarded.
Drop changes – the cached data is discarded.
Apply changes – the cached data is applied and the user can proceed.
