Understanding Projects and Experiments
Goals
Understand the relationship between Projects, Experiments, and Worksheets.
Know how to create Projects and Experiments.
Know how to create and complete Worksheets.
Key Terms
Term | Definition |
|---|---|
Project | Collection of Experiments. |
Experiment | Collection of Entities submitted to a Workflow or Workflow Chain. |
Protocol | Sequence of steps performed on an Entity. Protocols define the data to collect while performing the Experiment. There are three (3) types of Protocols in L7|ESP: standard, sample, and pipeline. |
Standard Protocol | Associates experimental (process) data with an Entity. |
Sample Protocol | Creates child Entities of the same or different Entity Type. |
Pipeline Protocol | Launches a Pipeline. |
Pipeline | Collection of Tasks (shell scripts) run on compute resources (cluster, cloud, or directly in L7|ESP). |
Workflow | Ordered collection of Protocols, representing a discrete unit of operation. |
Workflow Chain | Ordered collection of Workflows, representing an end-to-end business process. |
Worksheet | Spreadsheet-style data entry for Entities submitted to an Experiment. |
Relationship between Projects, Experiments, and Worksheets
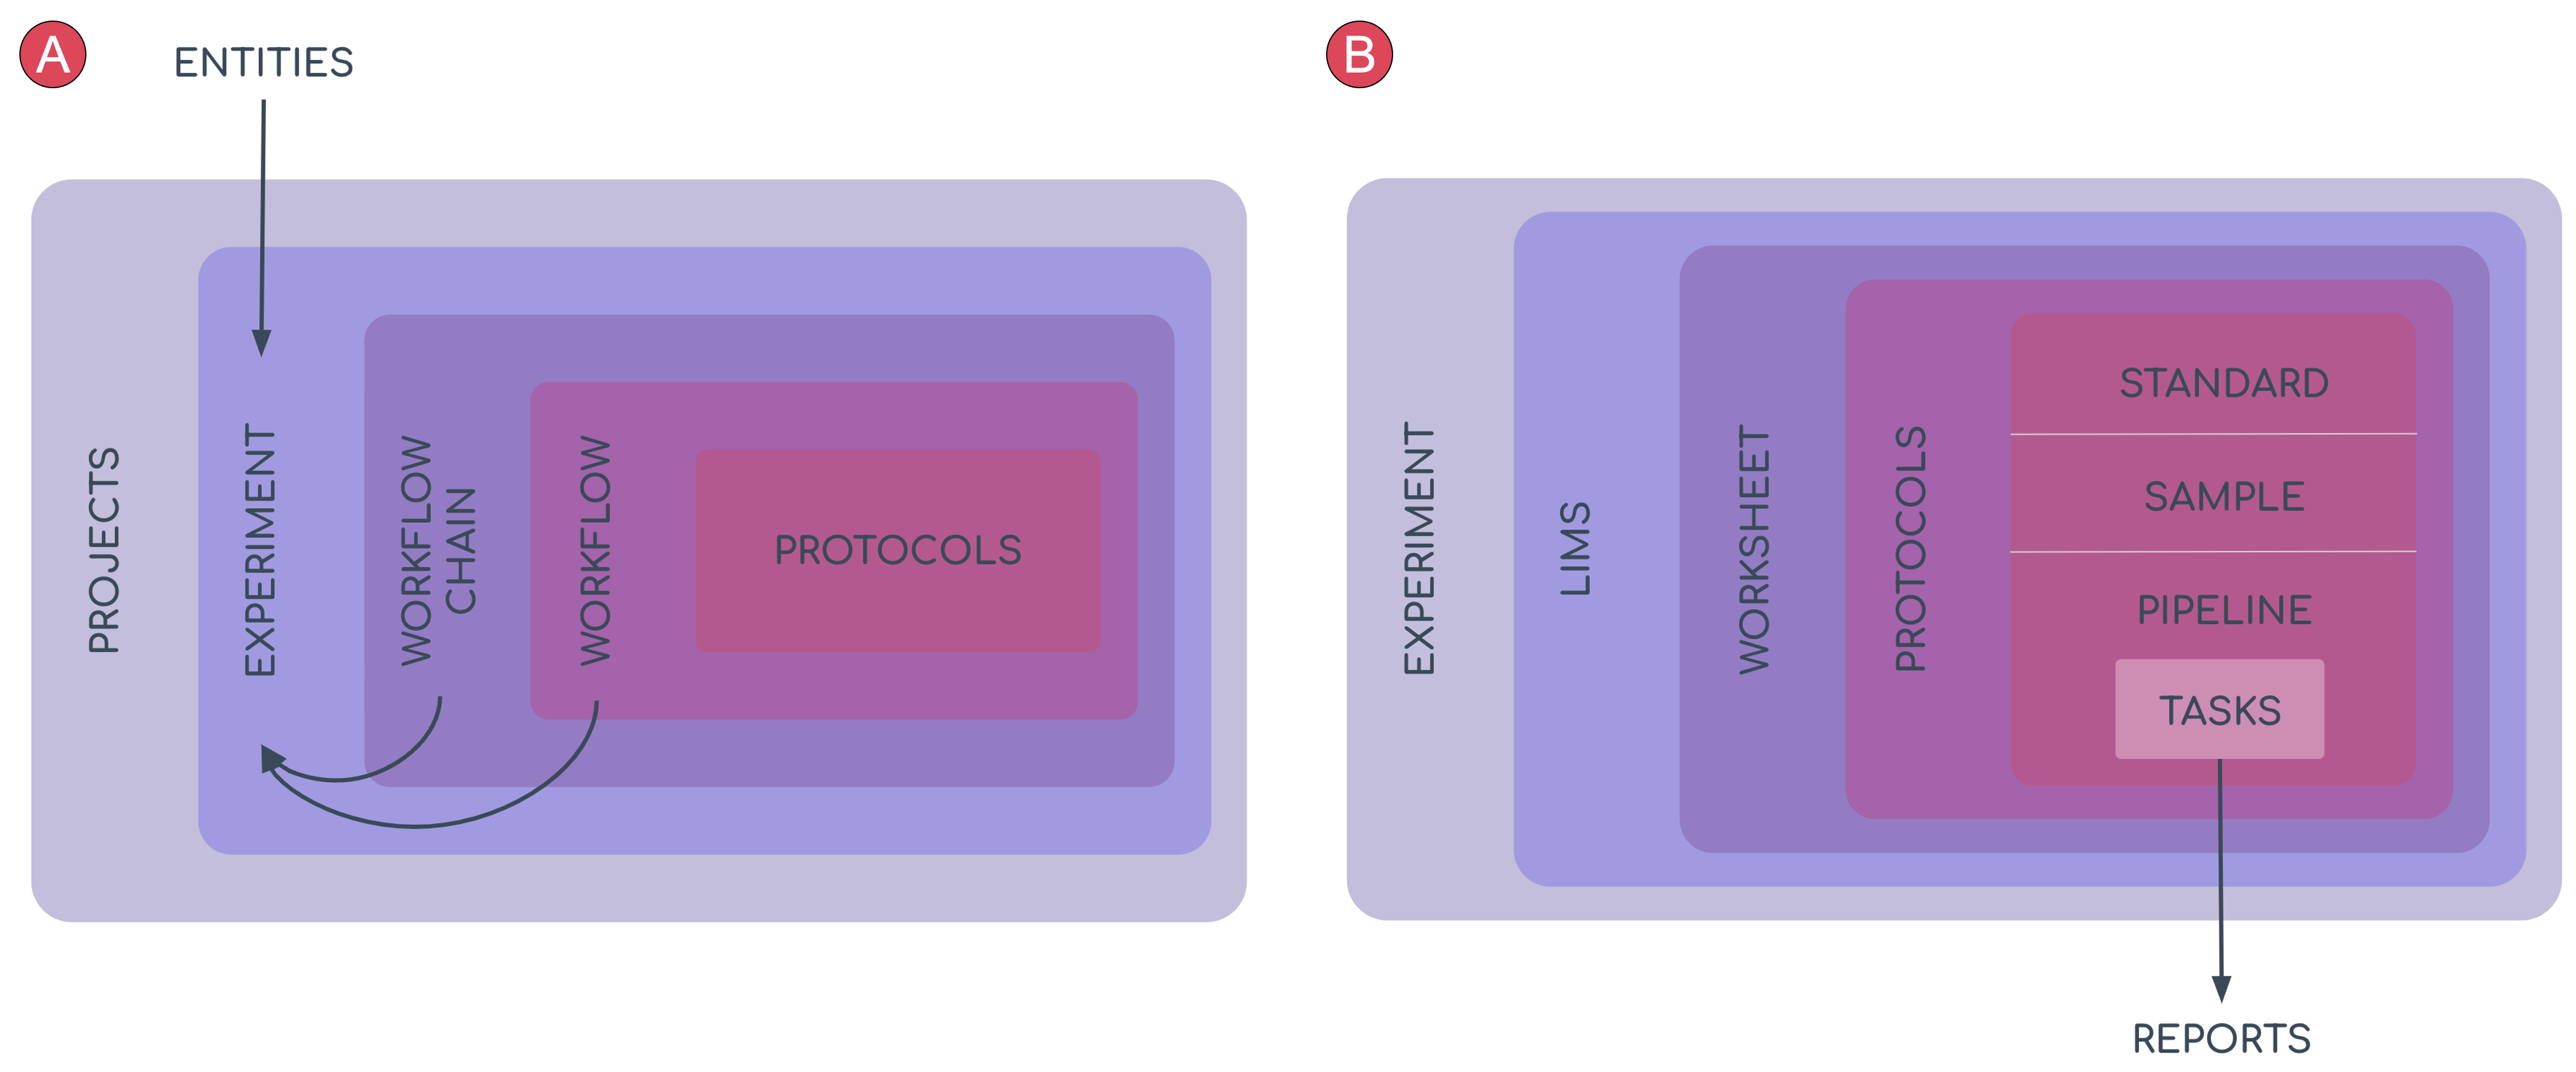
Projects are a collection of one (1) or more Experiments. An Experiment is defined by the data (Entity) and process (Workflow or Workflow Chain) assigned to it (A). Experimental data is recorded at the Protocol level in a LIMS Worksheet (B).
Who uses Projects, Experiments, and Worksheets?
Everyone! End Users will use L7 Projects to create both Projects and Experiments, and L7 LIMS to process these Experiments. As a Super User, you will routinely use these two (2) apps to test the content you are creating.
How to create Projects and Experiments
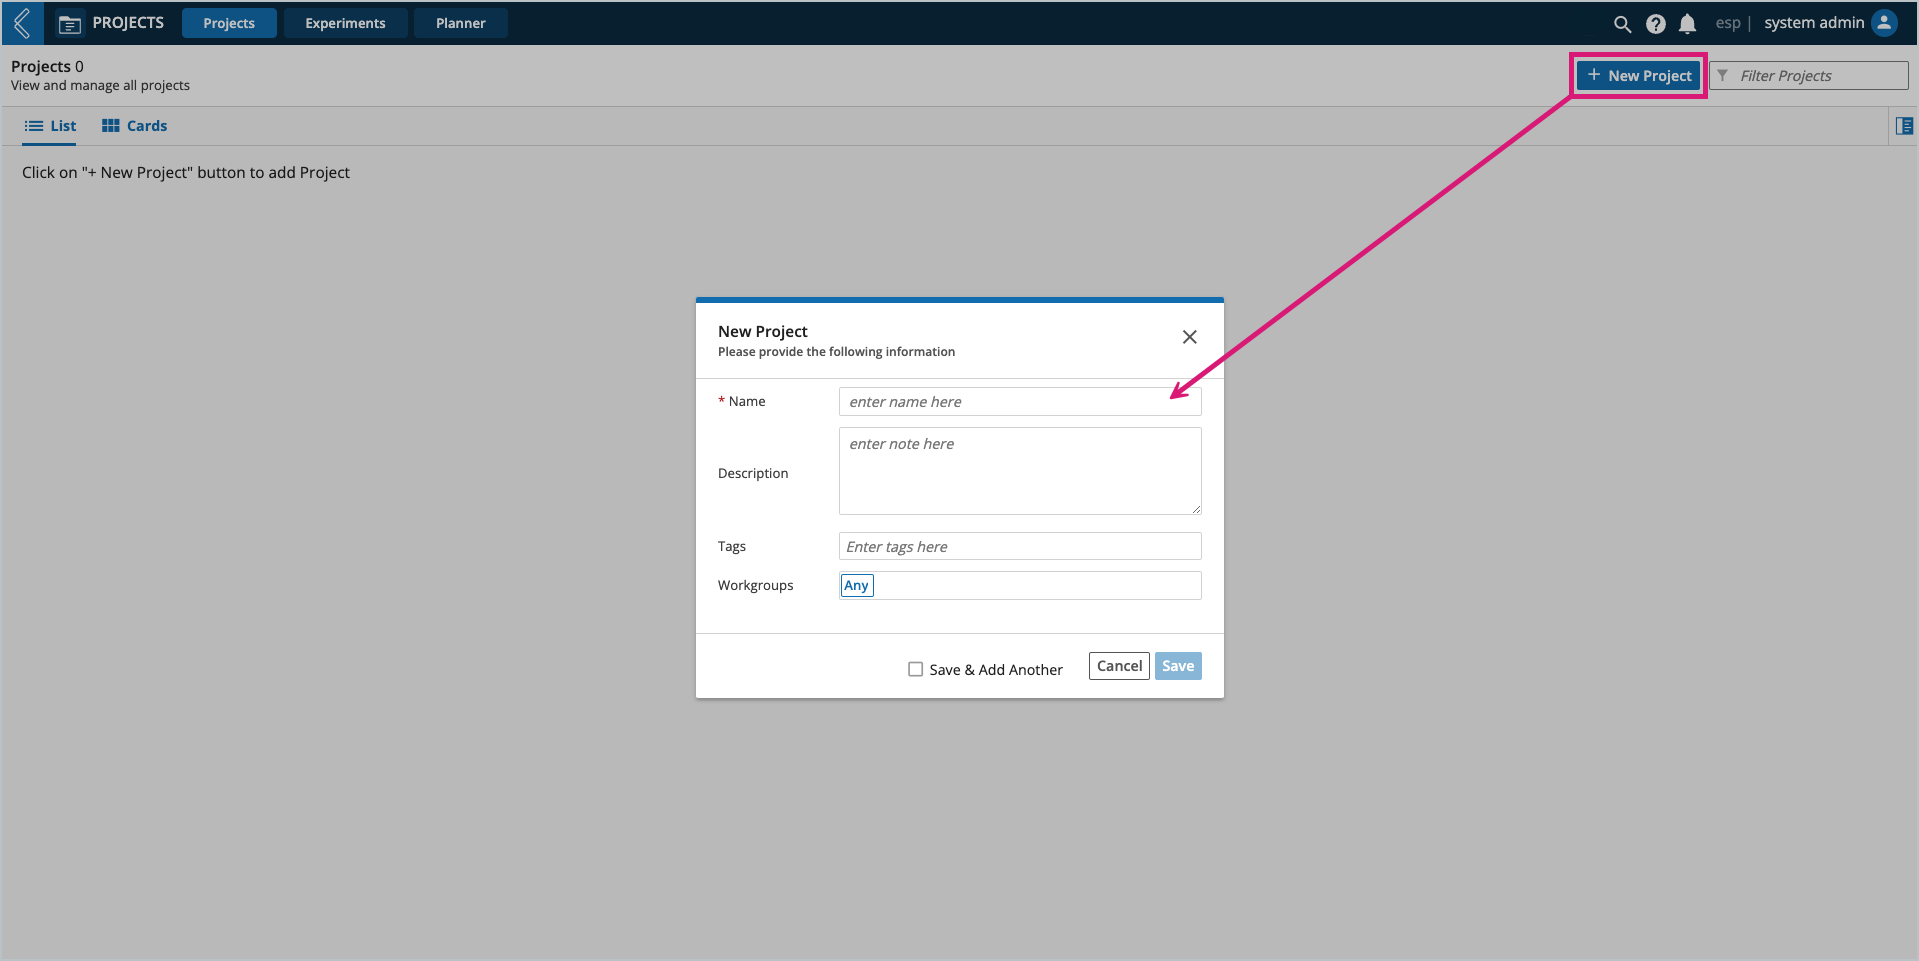
To create a new Project, go to: L7 Projects → + New Project
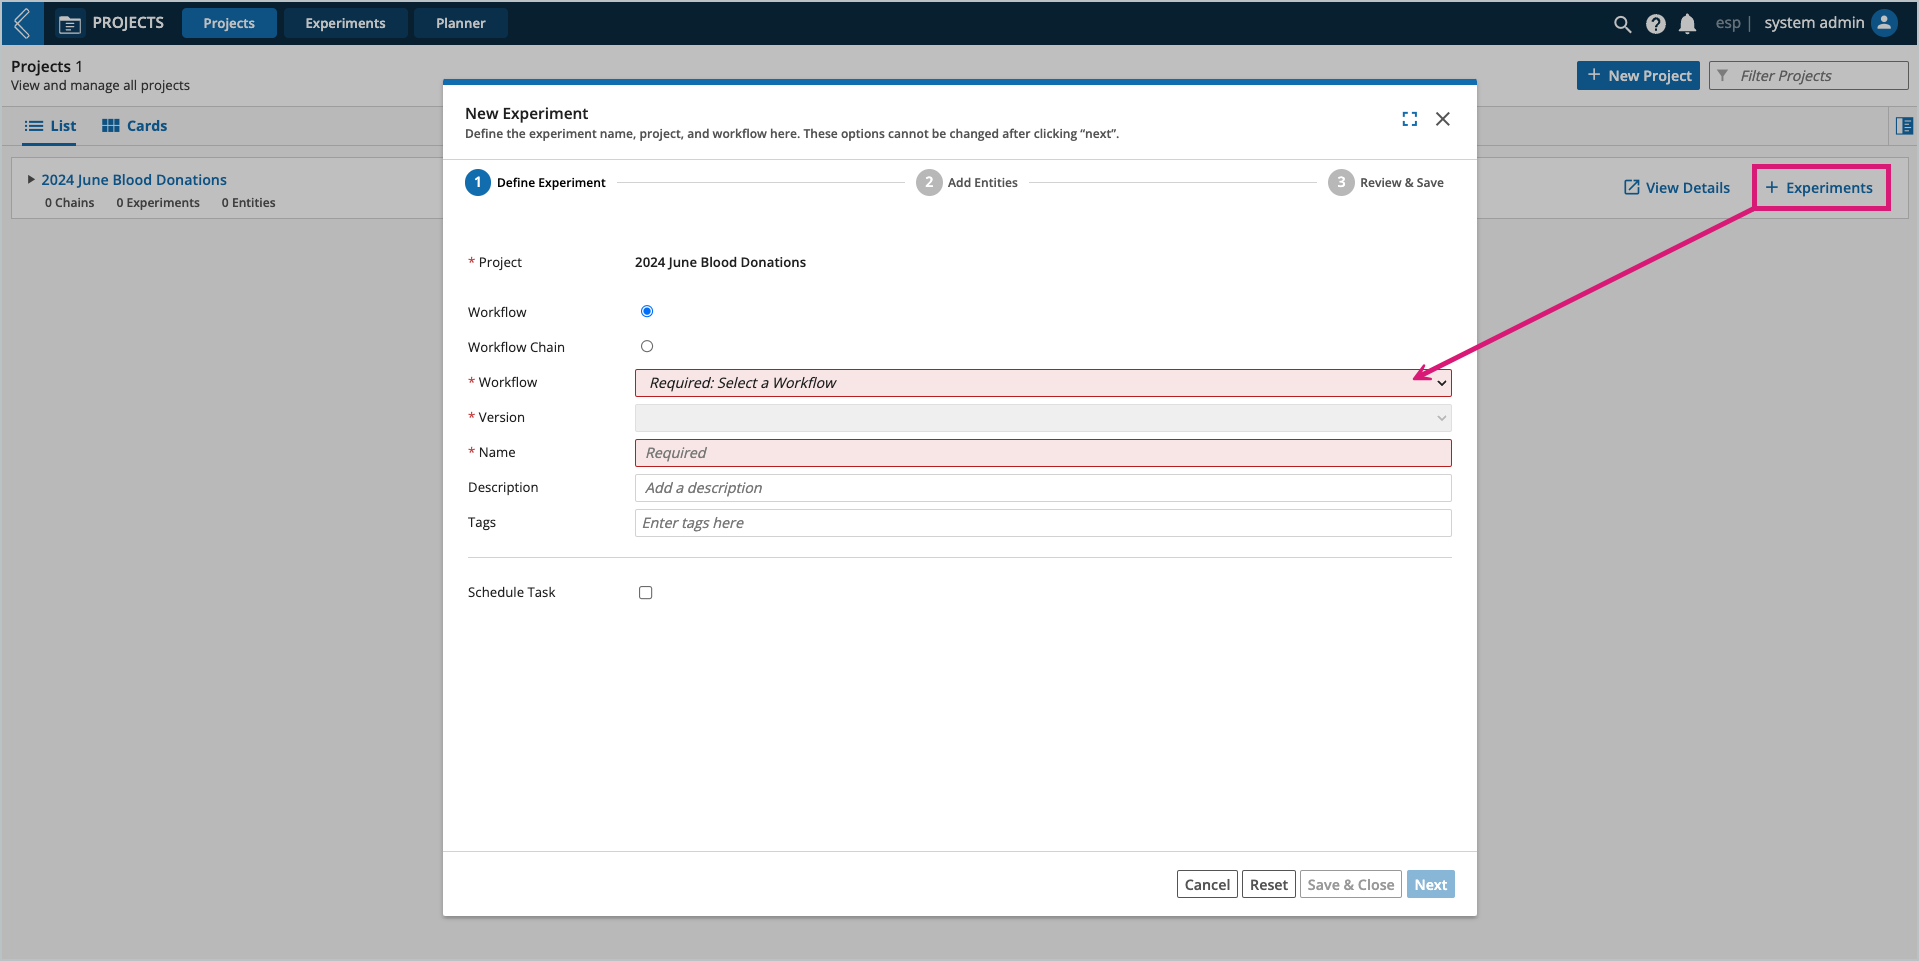
There are two (2) ways to create a new Experiment:
L7 Projects → + Experiment (in the row of the Project you wish to add the Experiment to).
L7 Projects → Experiments tab → + New Experiment
For now we will focus on creating a new Experiment for a single Workflow, which is a three (3) step process.
Step 1: Define Experiment
Complete the required fields.
Note
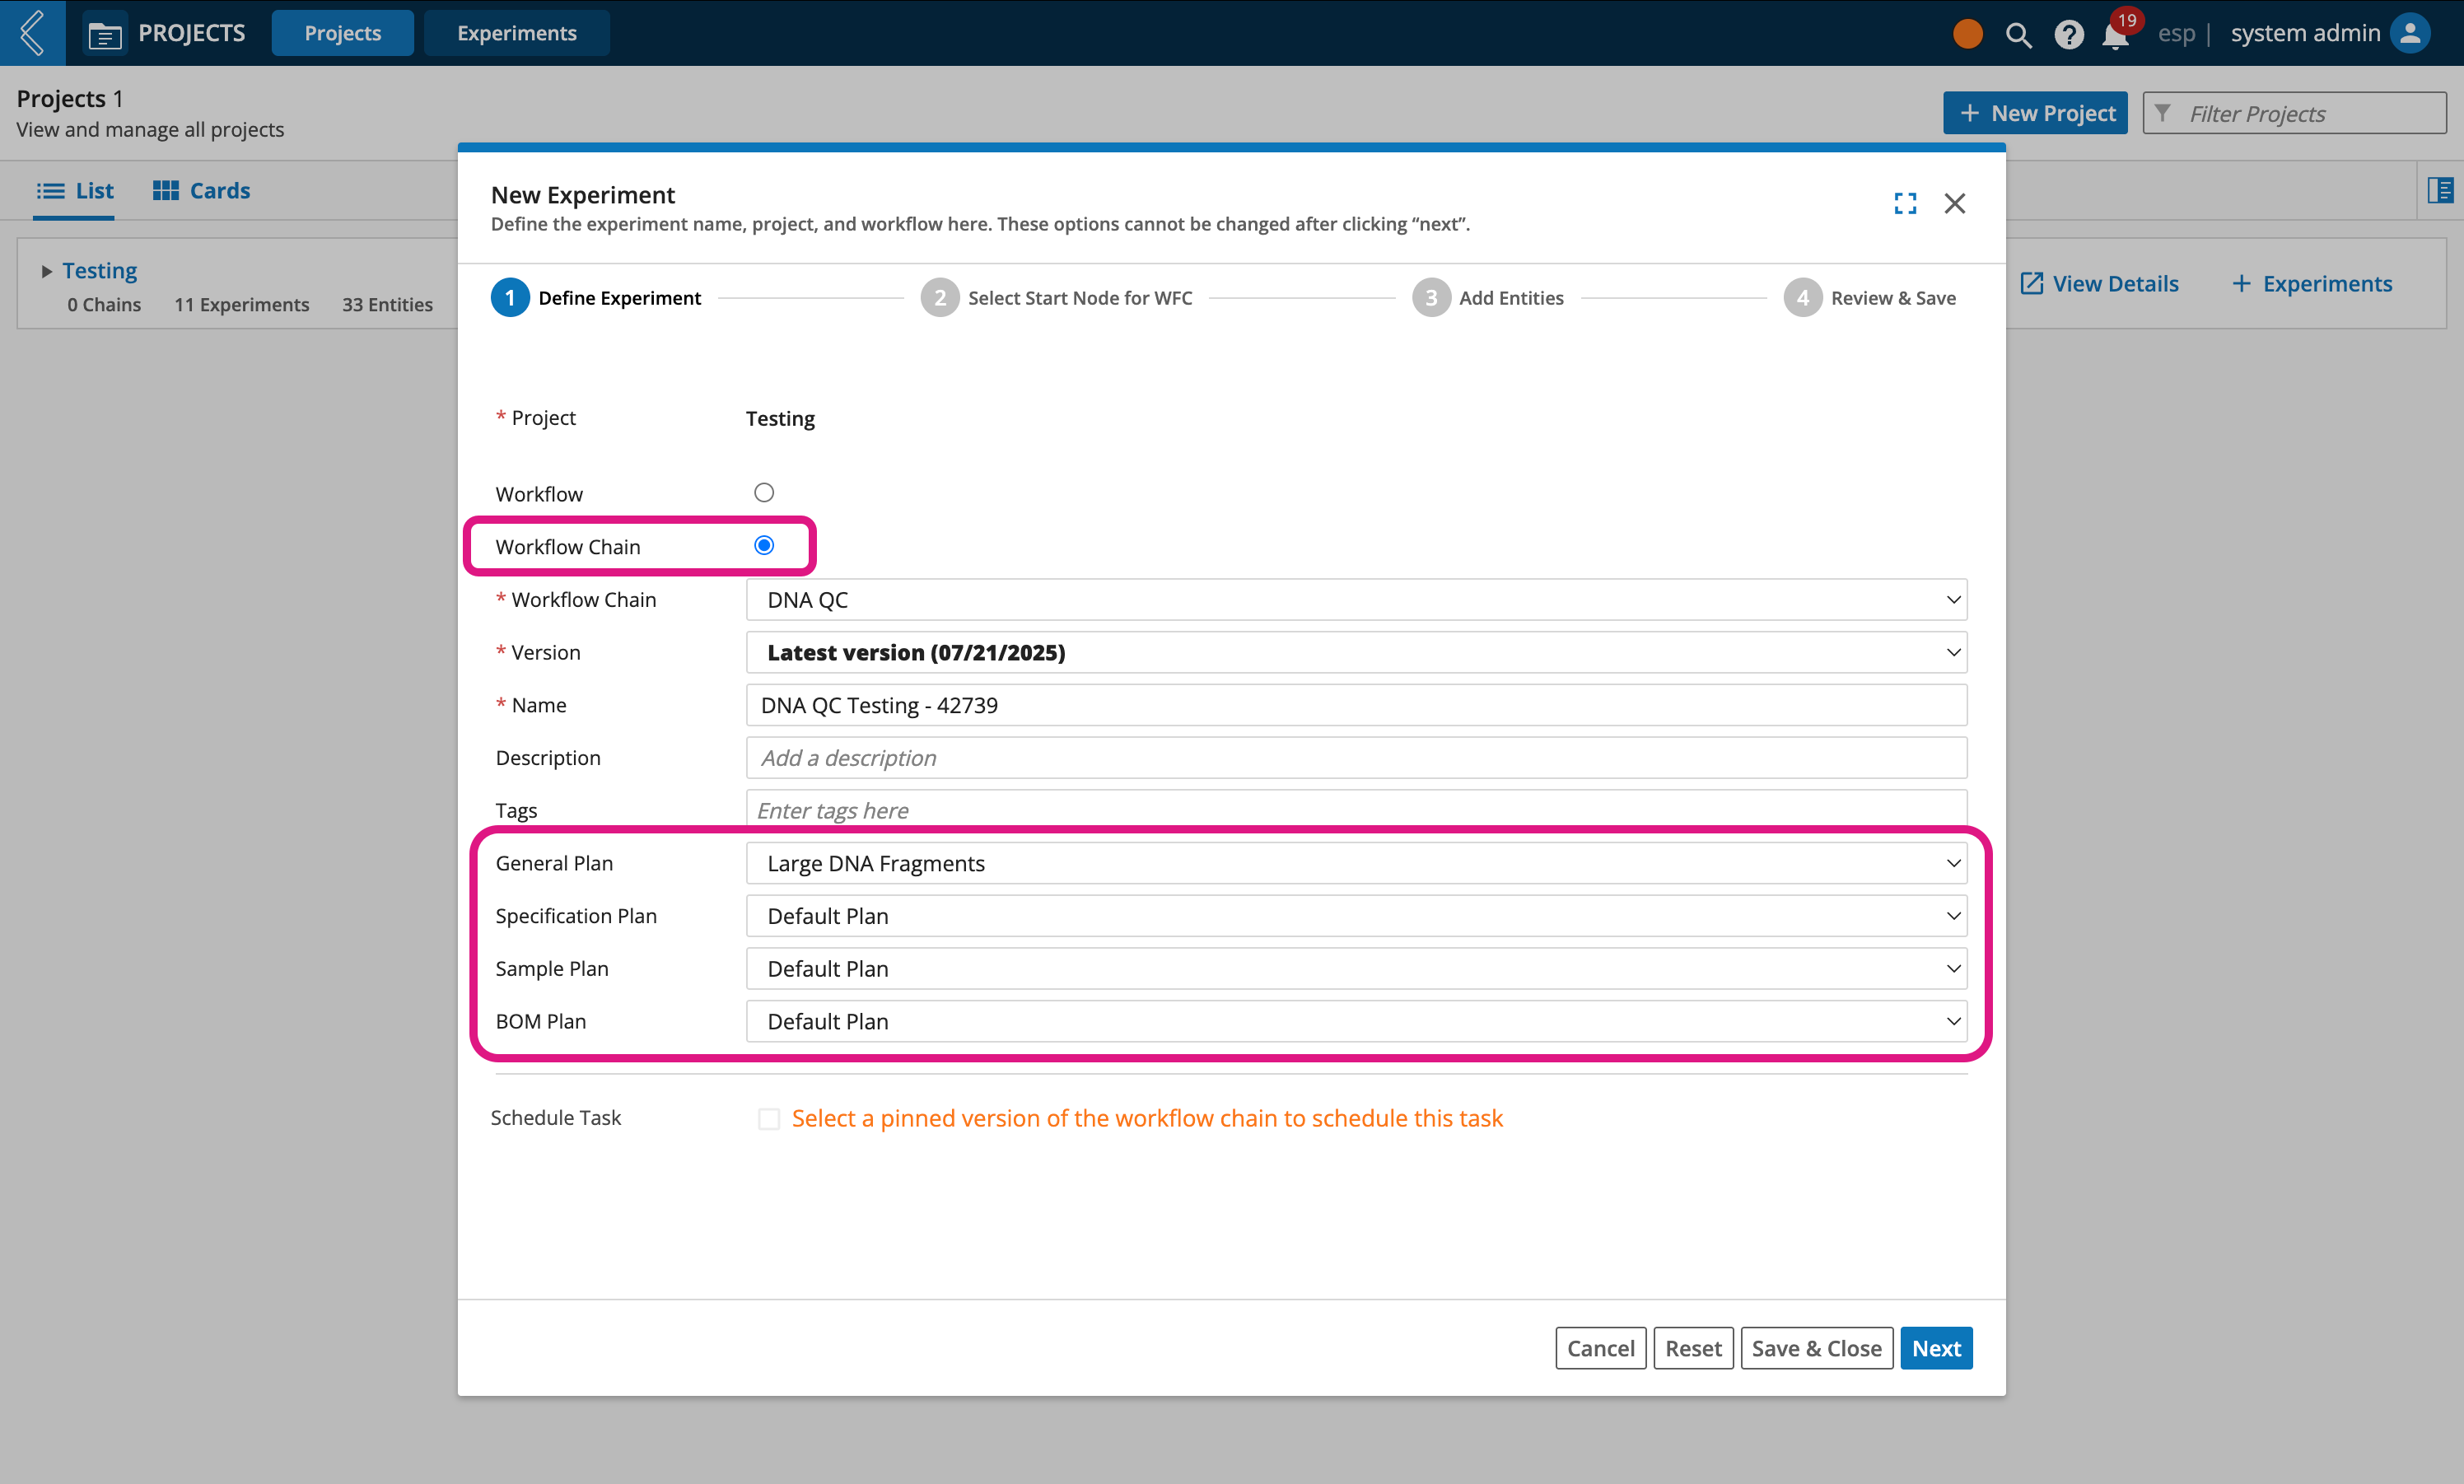
Users can also select a Dynamic Execution Plan (DEP) for Workflow Chain Experiments.
DEPs were introduced in L7|ESP v3.3. General and BOM Plans were added in v3.4.
Scheduled tasks are used in L7 Scheduling.
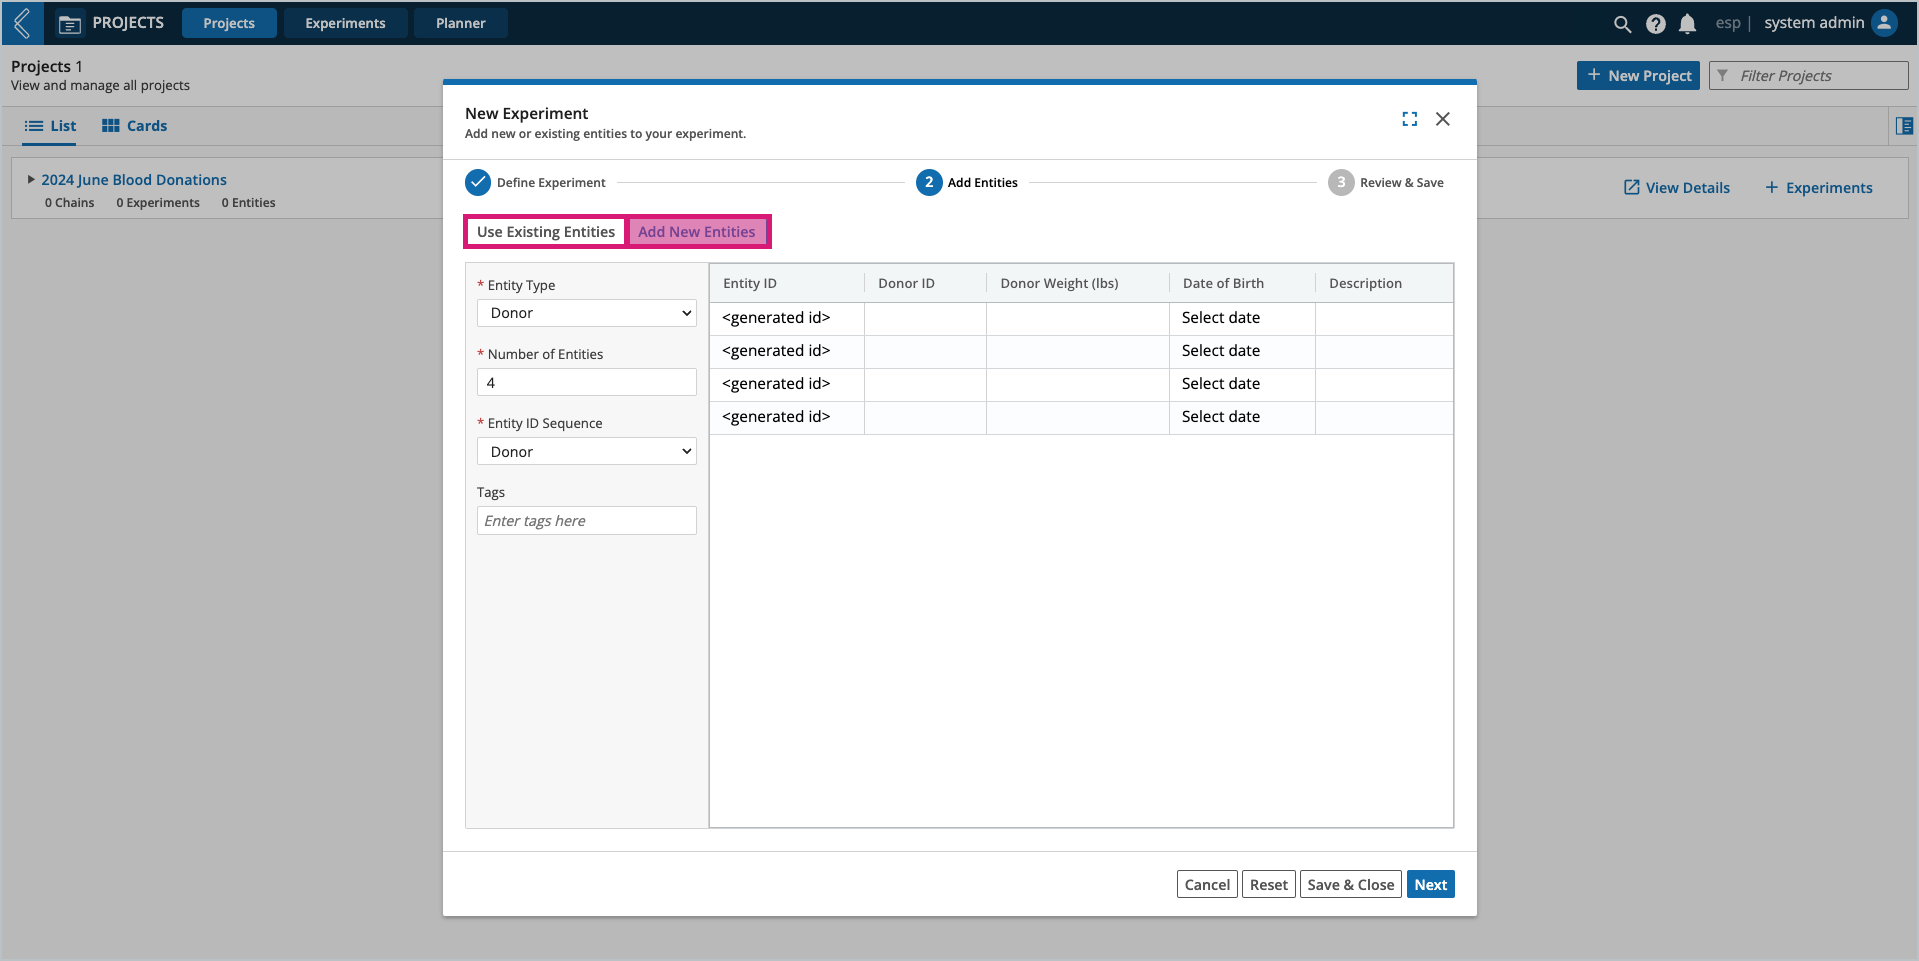
Step 2: Add Entities
Add existing or new Entities to the Experiment.
Tip
Barcode scanning: When adding existing Entities, rather than manually searching and selecting them from the list, you can scan their barcodes to automatically find and select them.
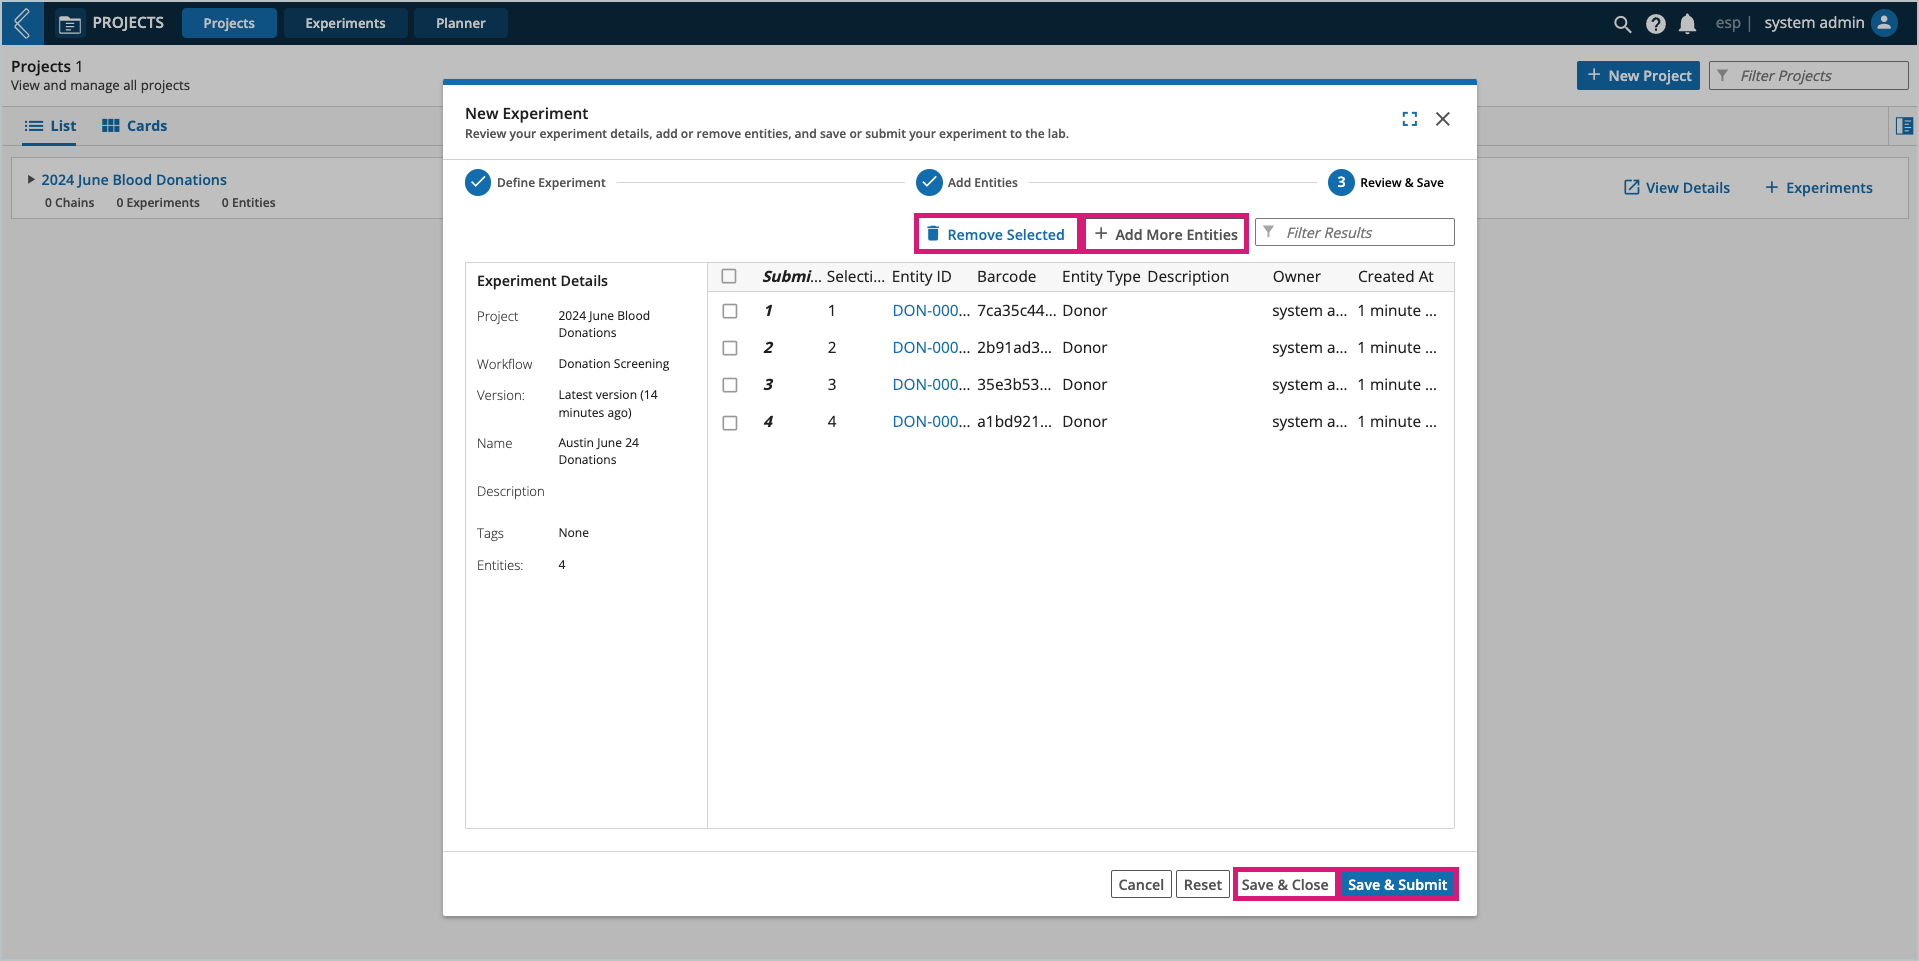
Step 3: Review & Save
Add or remove Entities.
Save & Close creates the Experiment, but does not submit it to L7 LIMS for processing.
This leaves the Experiment in the pending state, which allows users to edit its name and Entities prior to submission.
Save & Submit creates the Experiment and submits it to L7 LIMS for processing.
How to create and complete Worksheets
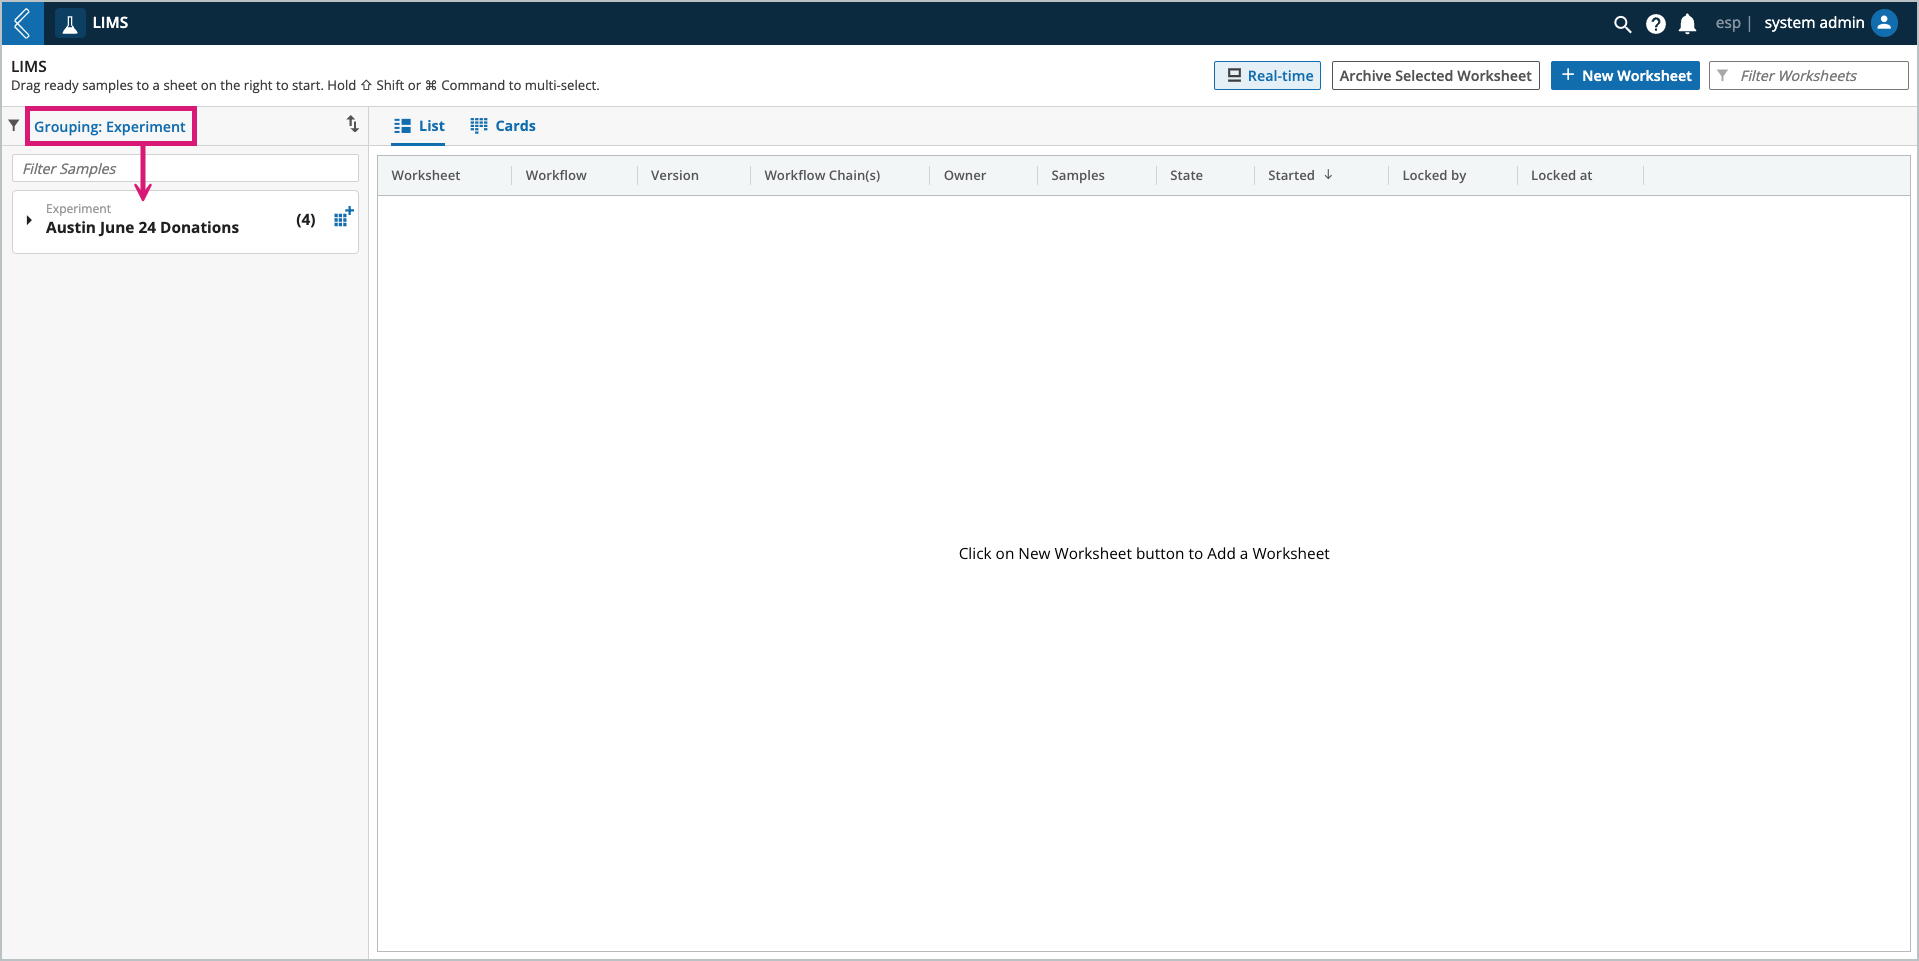
The landing page of L7 LIMS displays queued Entities and the Worksheets created to process them. Queued Entities are grouped by Experiment in the backlog, but this default grouping can be adjusted and include up to three (3) attributes.
There are two (2) ways to create a new Worksheet:
+ New Worksheet
Enter a Name.
Choose a Workflow.
Add queued Entities from the backlog.
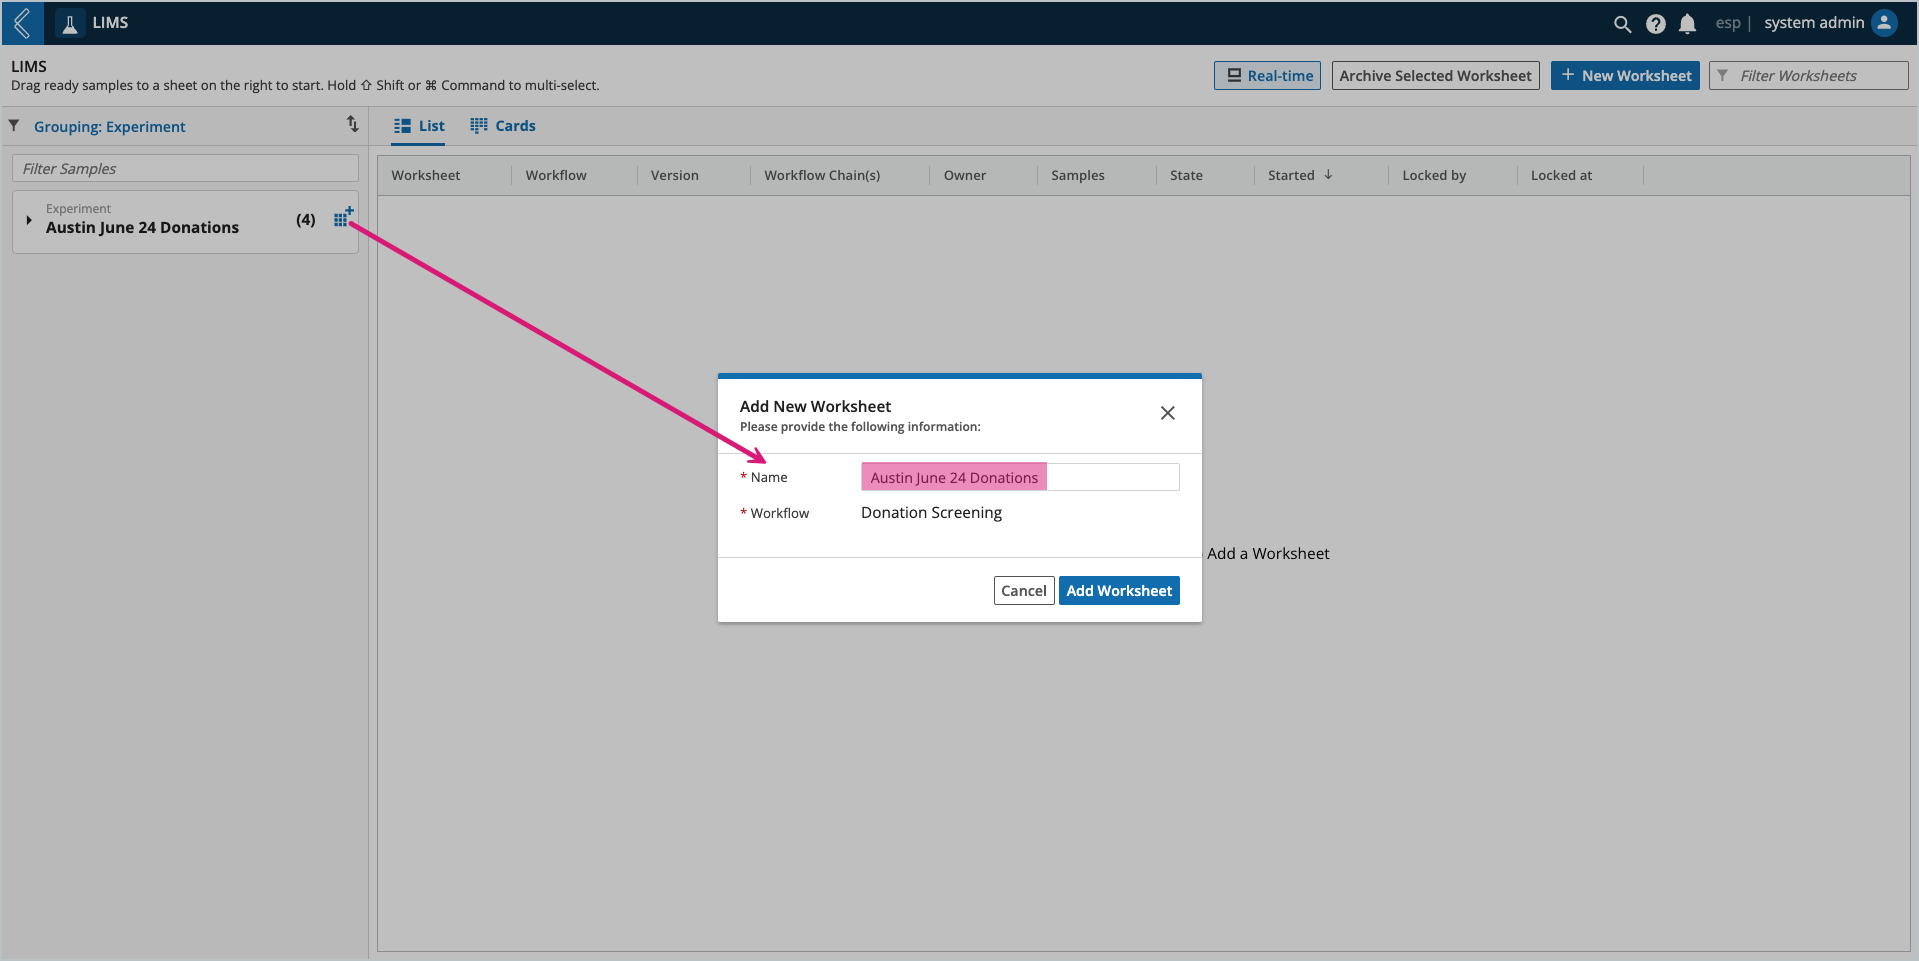
Select the blue icon next to a group of queued Entities in the backlog.
The name will default to the value of the first Grouping attribute.
The Entities are already assigned to a Workflow and added to the Worksheet.
Once created, the Worksheet will appear in the main viewing window in the empty or loading state.
Empty – the Worksheet does not have any Entities.
Loading – all of the Entities are in the first Protocol of the Worksheet.
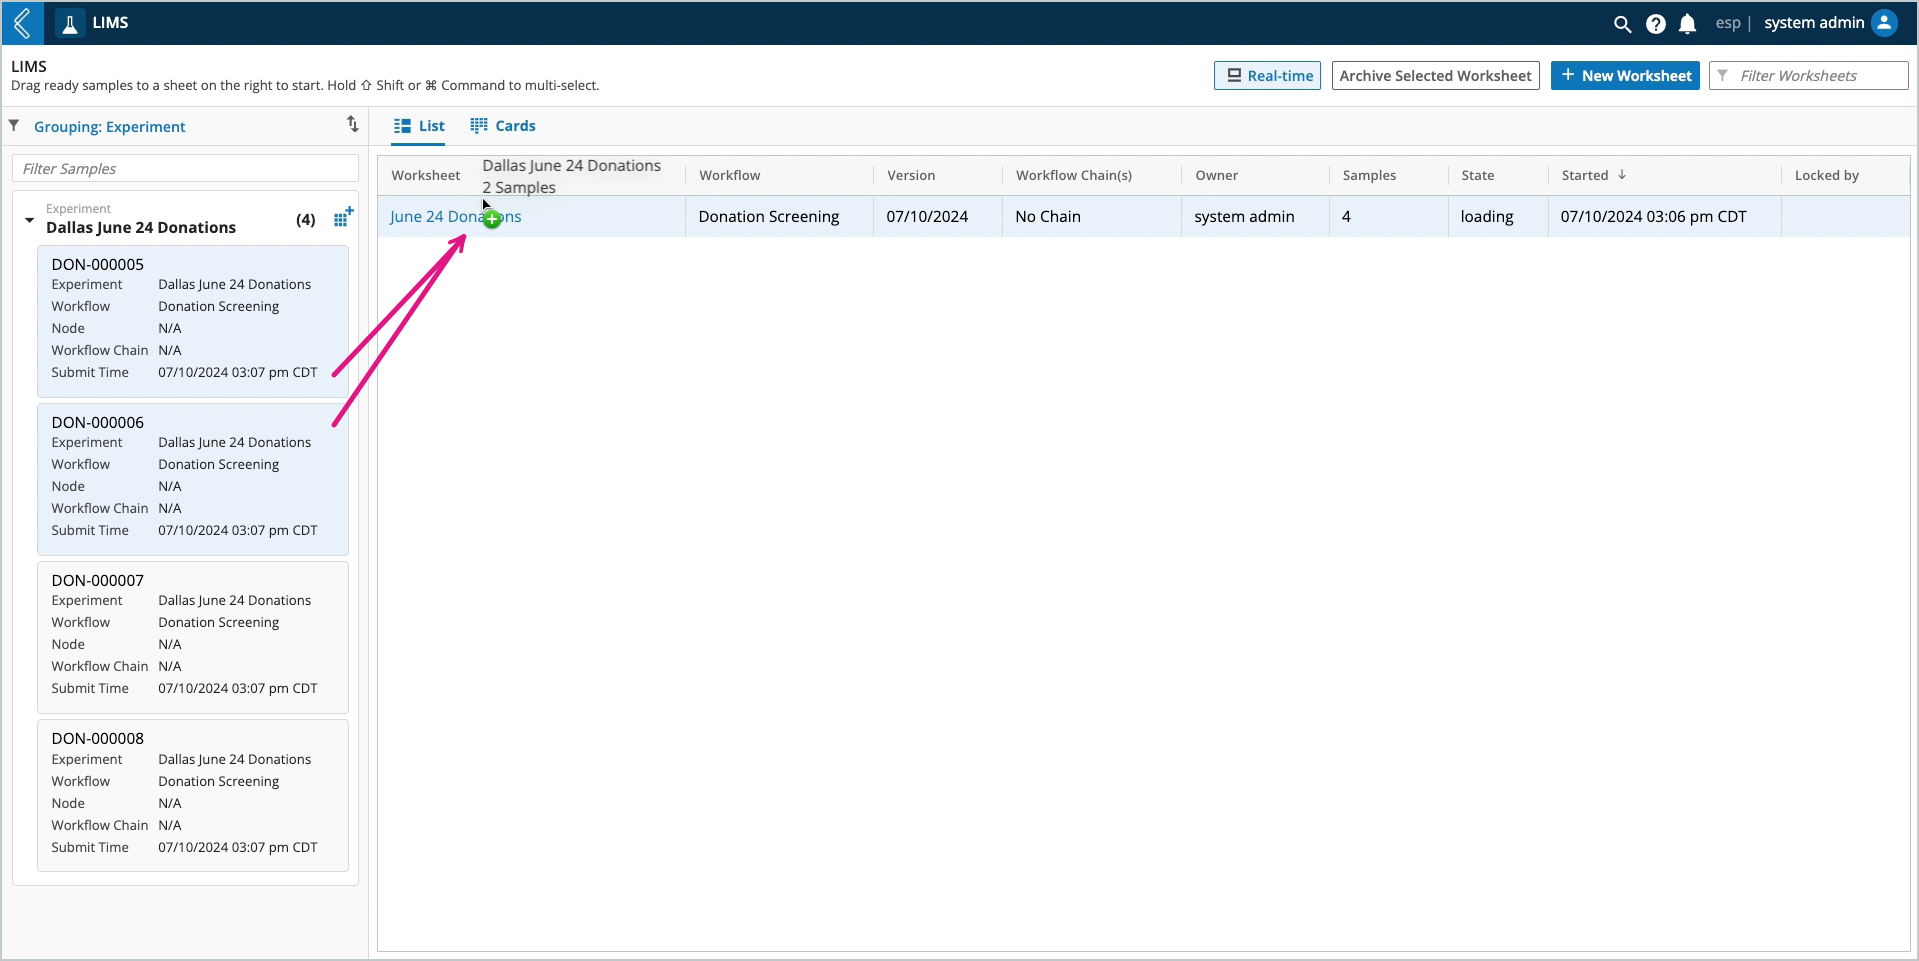
Entities can be added to Worksheets in these two states IF they were submitted to the same version of the same Workflow.
Note
This allows Entities to be pooled into one (1) or split into multiple Worksheets.
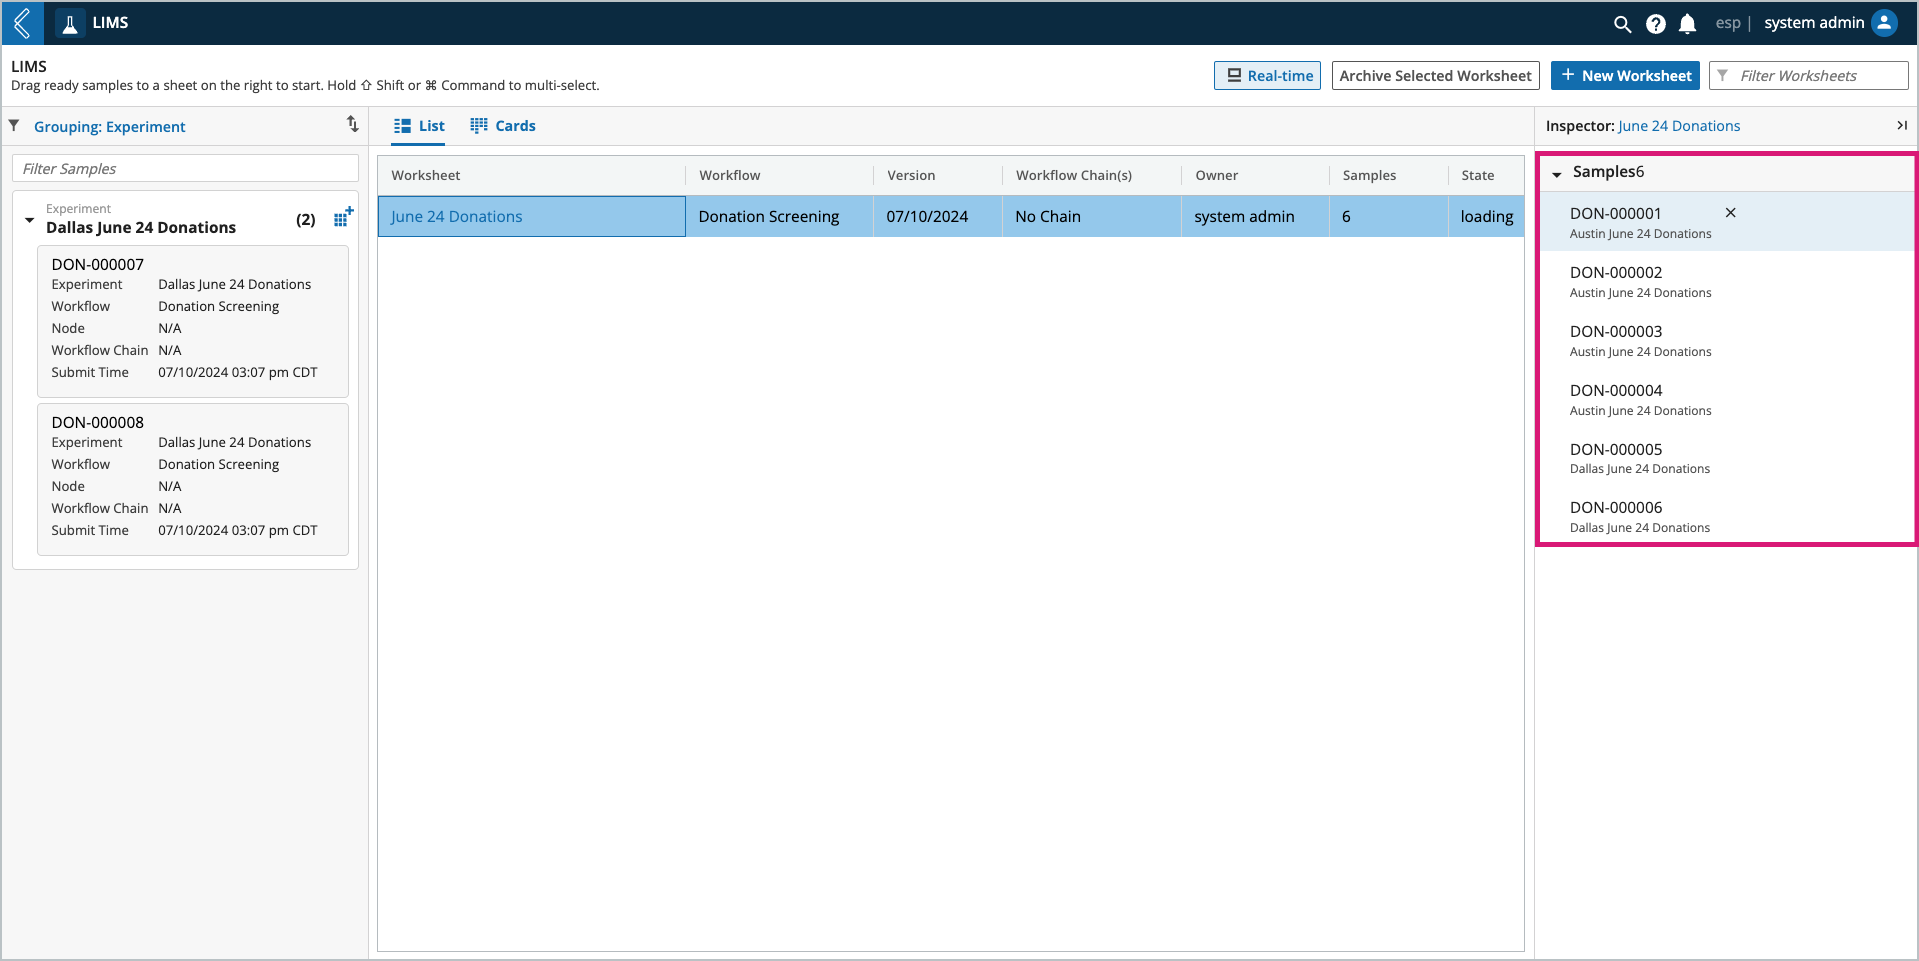
Entities can be removed from Worksheets in the loading state by selecting the Worksheet row and the "x" next to the Entity in the inspector panel. This will return the Entity to the backlog for future processing.
Active (incomplete) Entities can be removed from Worksheets in the running state by selecting the checkbox at the beginning of the row and the Abort Selected button.
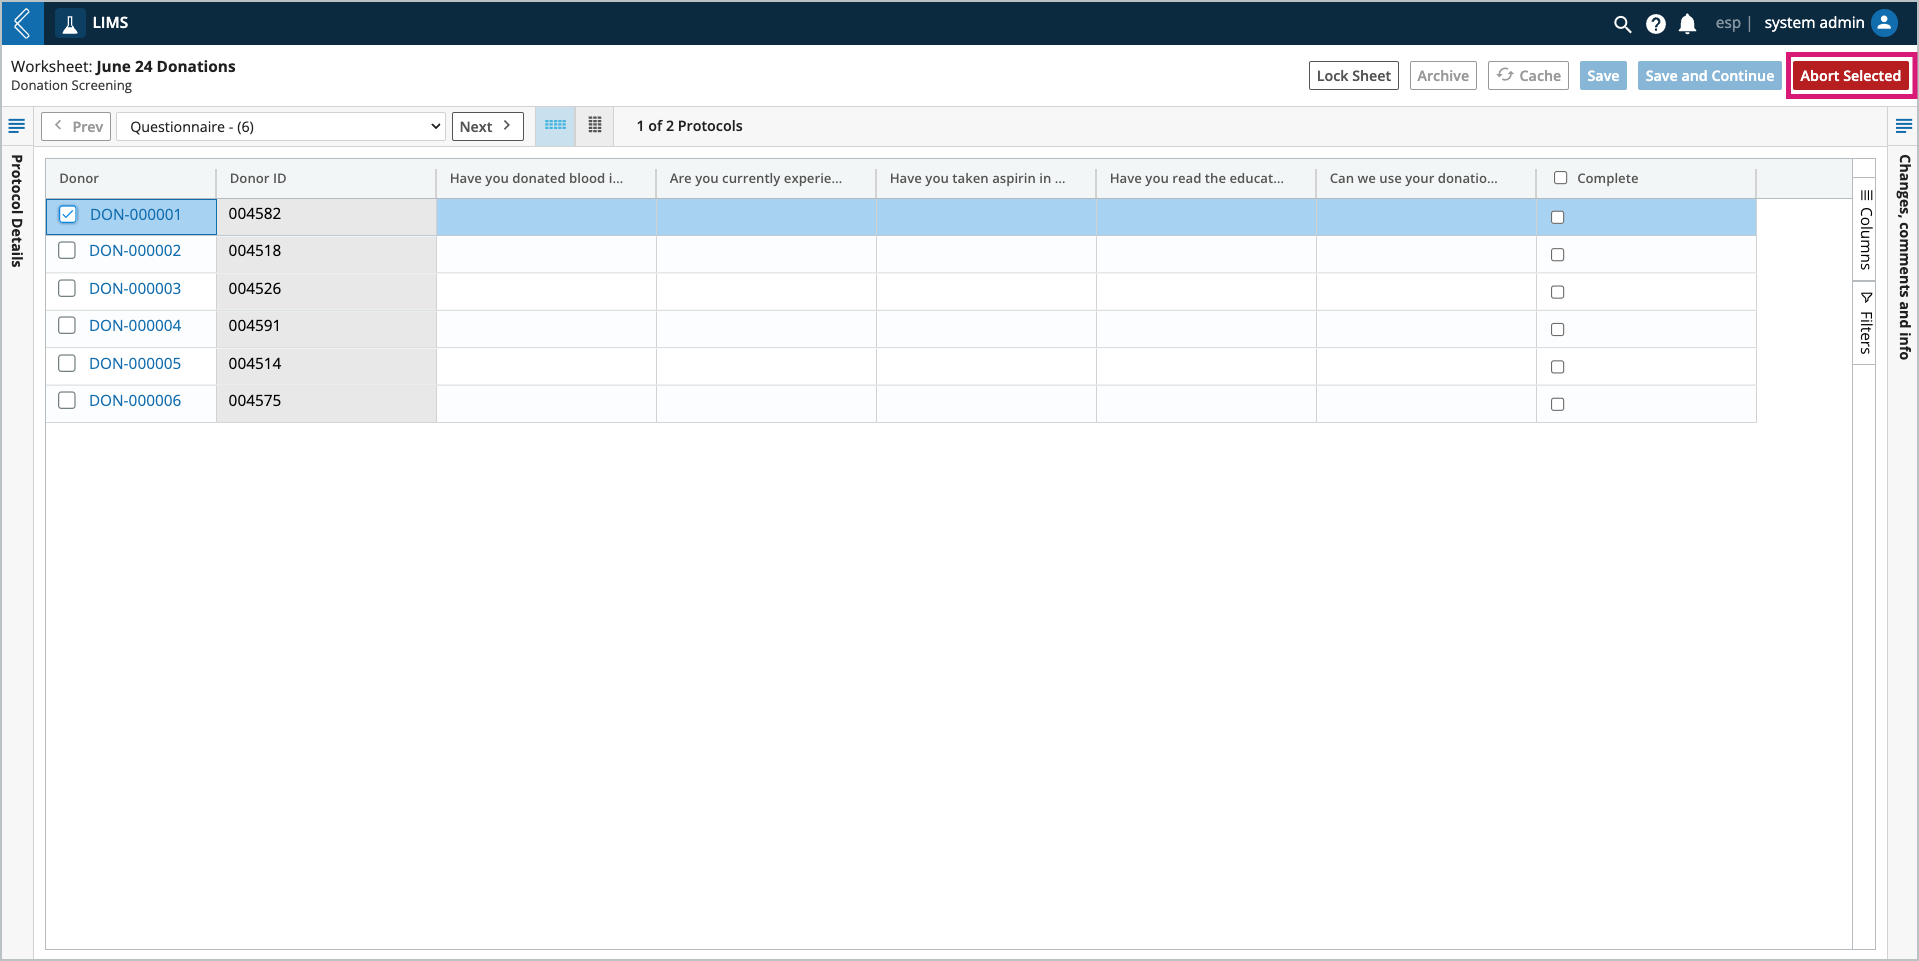
Worksheets support spreadsheet-style data entry for Entities submitted to an Experiment. Each Entity corresponds to a row in the Worksheet, and the columns represent the custom fields associated with each Protocol in the Workflow.
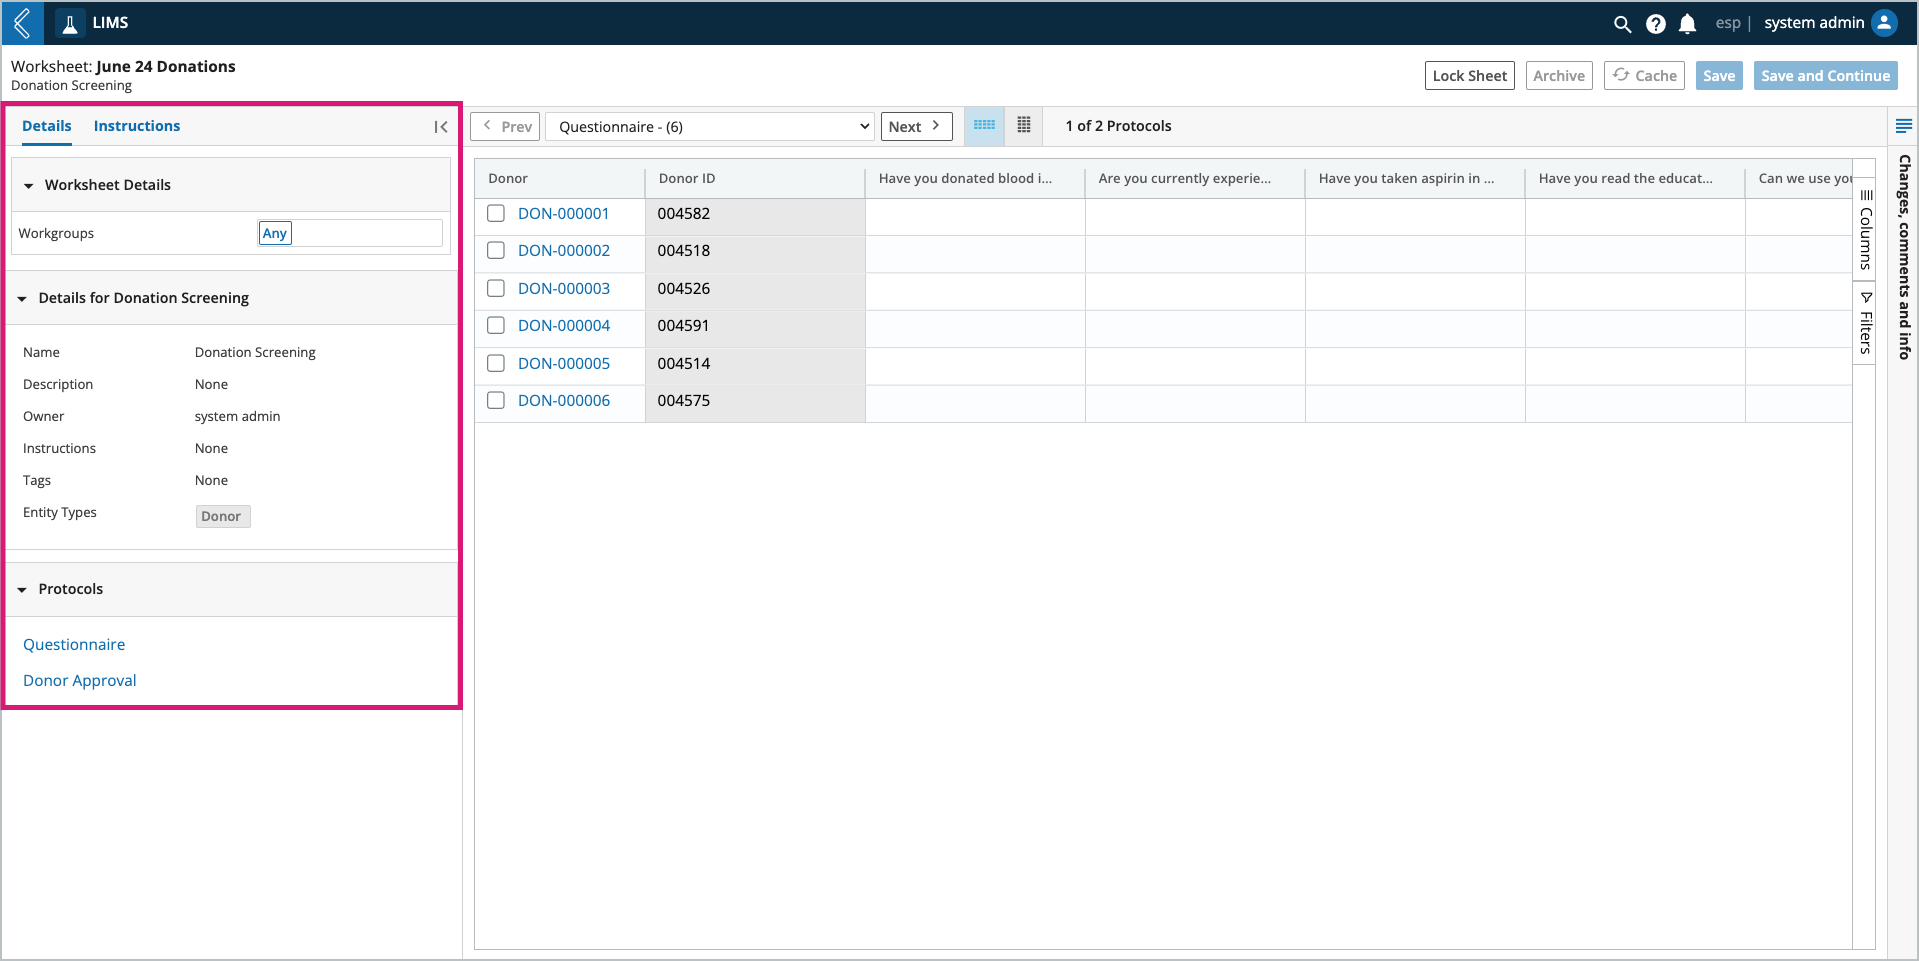
Worksheet details and Protocol-level instructions are hidden by default, but can be expanded on the left side of the screen.
Field-level changes, comments, and insights are hidden by default, but can be expanded on the right side of the screen.
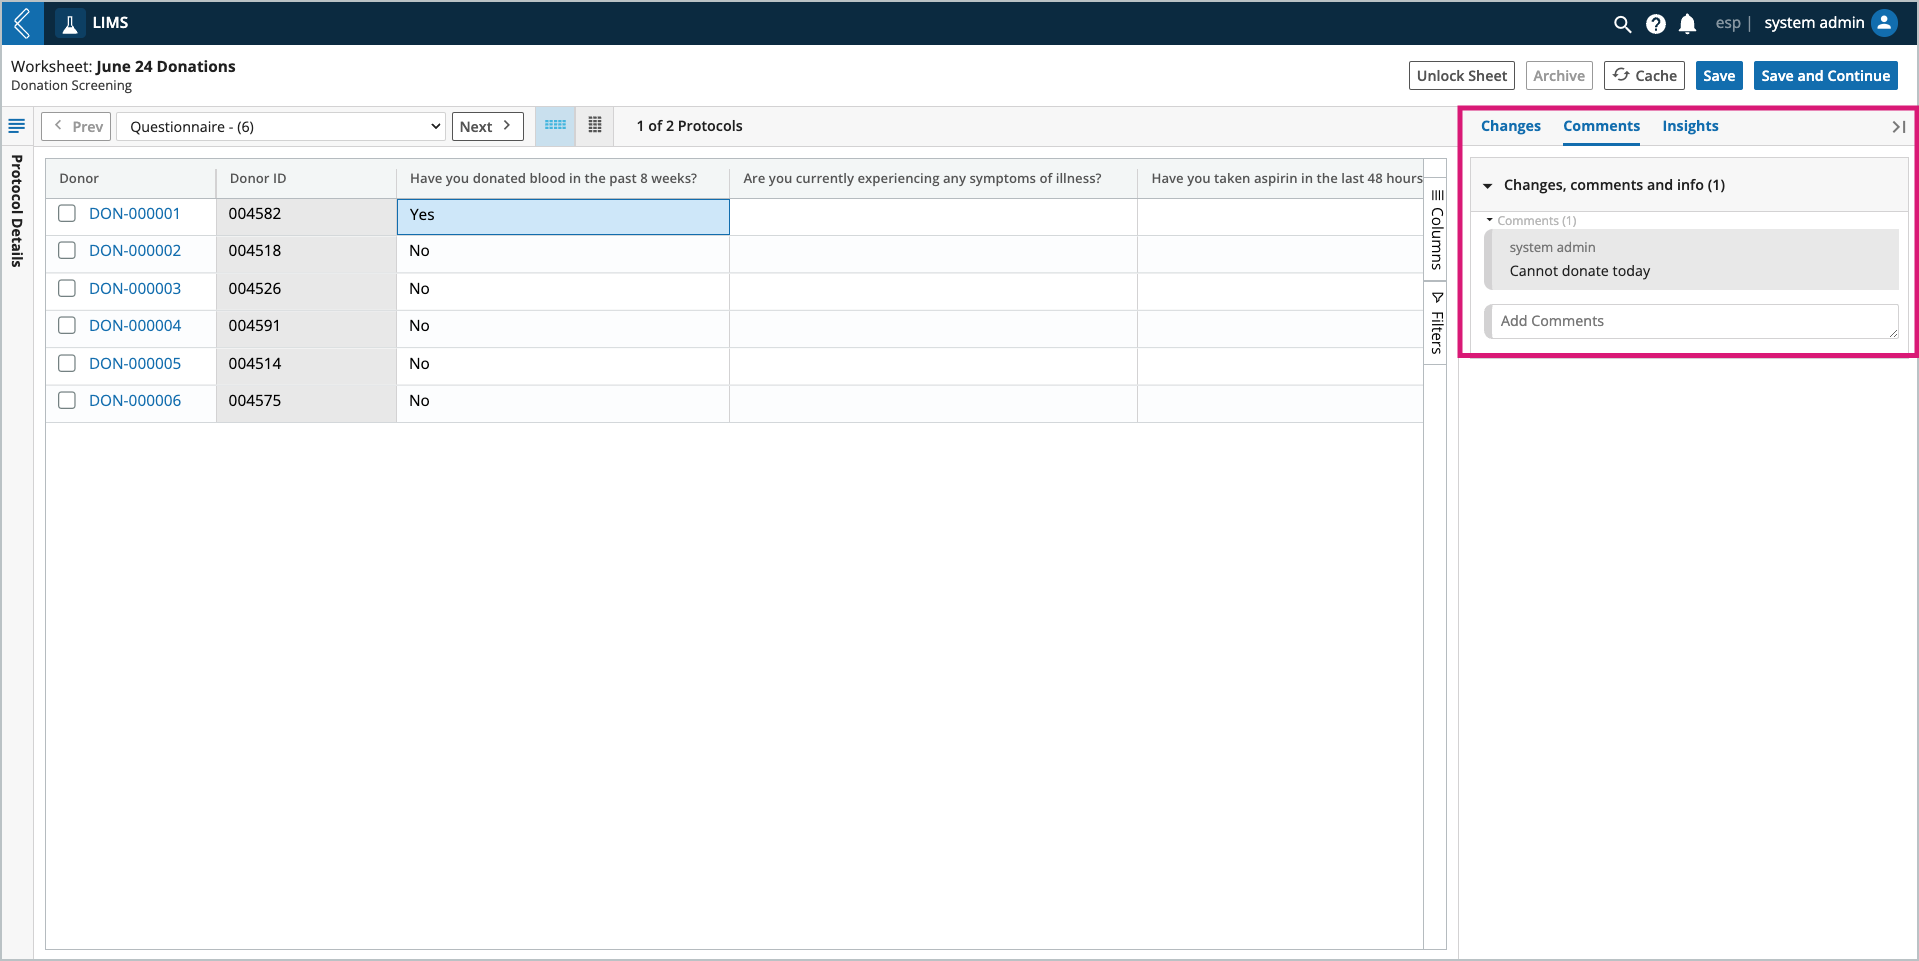
Note
Users must have the LIMS → Sample Sheet → Force Update permission to change the value of a completed field.
These changes are made in isolation. Downstream fields that are dependent on this value are not updated.
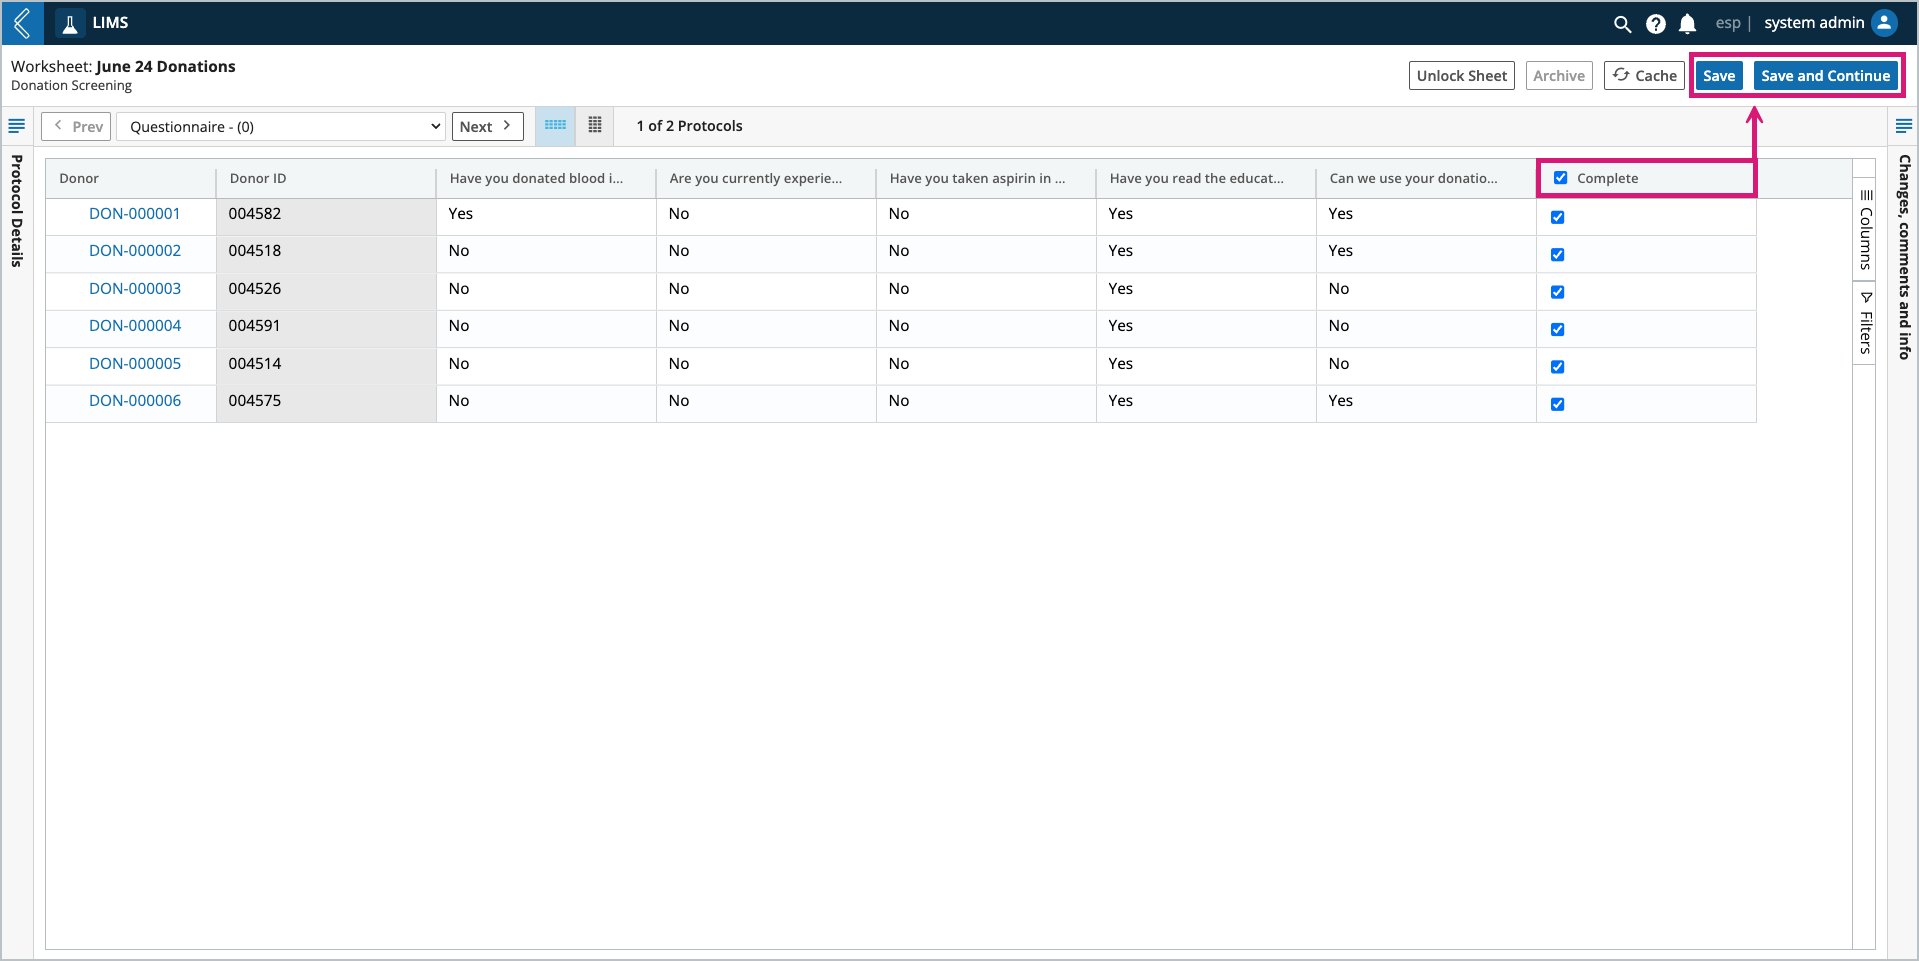
Once data has been recorded for all active Entities in the Protocol, select the Complete checkbox followed by Save or Save and Continue to advance to the next Protocol.
Note
L7|ESP automatically locks a Worksheet when data is entered or updated. This prevents two (2) users from editing the same Worksheet simultaneously.
The sheet will remain locked until saved, however, a user can override this default behavior by selecting the Lock Sheet button.
This will keep the sheet locked until the same user or a different user with the elevated LIMS → Sample Sheet → Force Unlock permission unlocks it by selecting the Unlock Sheet button.