Supply Chain Technician
Goals
Understand the role of the Supply Chain Technician.
Know how to create and manage inventory Items.
Know how to create and manage Kits.
Know how to use the BOM tab L7 MES.
Term | Definition |
Item | A resource that is consumed as part of a business process. Items are instances, or occurrences, of Item Types. |
Item Type | Defines the attributes of an Item, including its type (consumable or reagent), units, custom fields, Vendors, and ID Sequences. |
Container (Kits) | A physical location that stores Entities, Items, and/or other Containers. Containers are instances, or occurrences, of Container Types. |
Container Type | Defines the attributes of a Container, including its content, dimensions, and custom fields. |
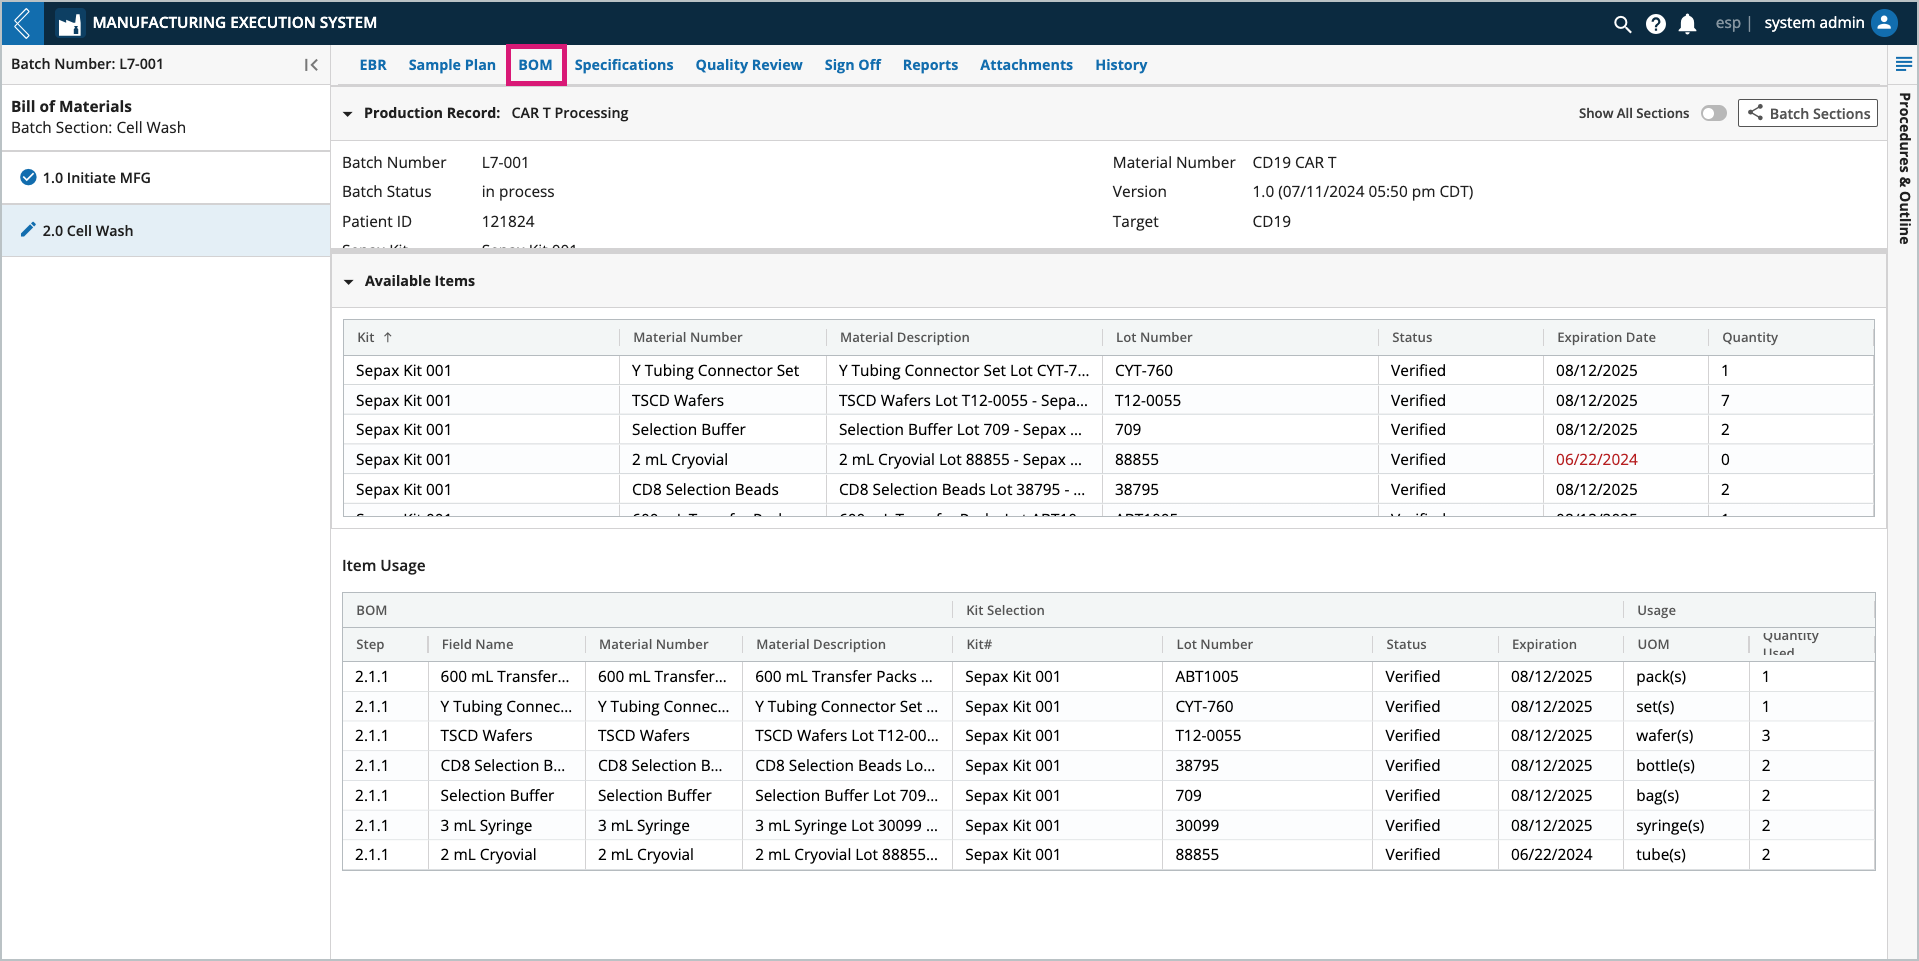
BOM | The Bill of Materials (BOM) tab displays information about Kits associated with the Batch (Available Items) and the Items consumed during Batch production (Item Usage). |
L7|ESP App | Activity | Permission |
|---|---|---|
L7 Inventory | Create new Items | Inventory & Billing → Item → Create |
L7 Inventory | Record Item Usage | Inventory & Billing → Item → Update |
L7 Location | Create new Kits | Inventory & Billing → Container → Create |
L7 Location | Add Items to a Kit | Inventory & Billing → Container → Update |
The Supply Chain Technician is responsible for managing inventory Items and Kits for manufacturing. To complete these tasks, they use the L7 Inventory and L7 Location, respectively.
 |
Overview of L7 Inventory
Items are created in L7 Inventory and grouped by Item Type.
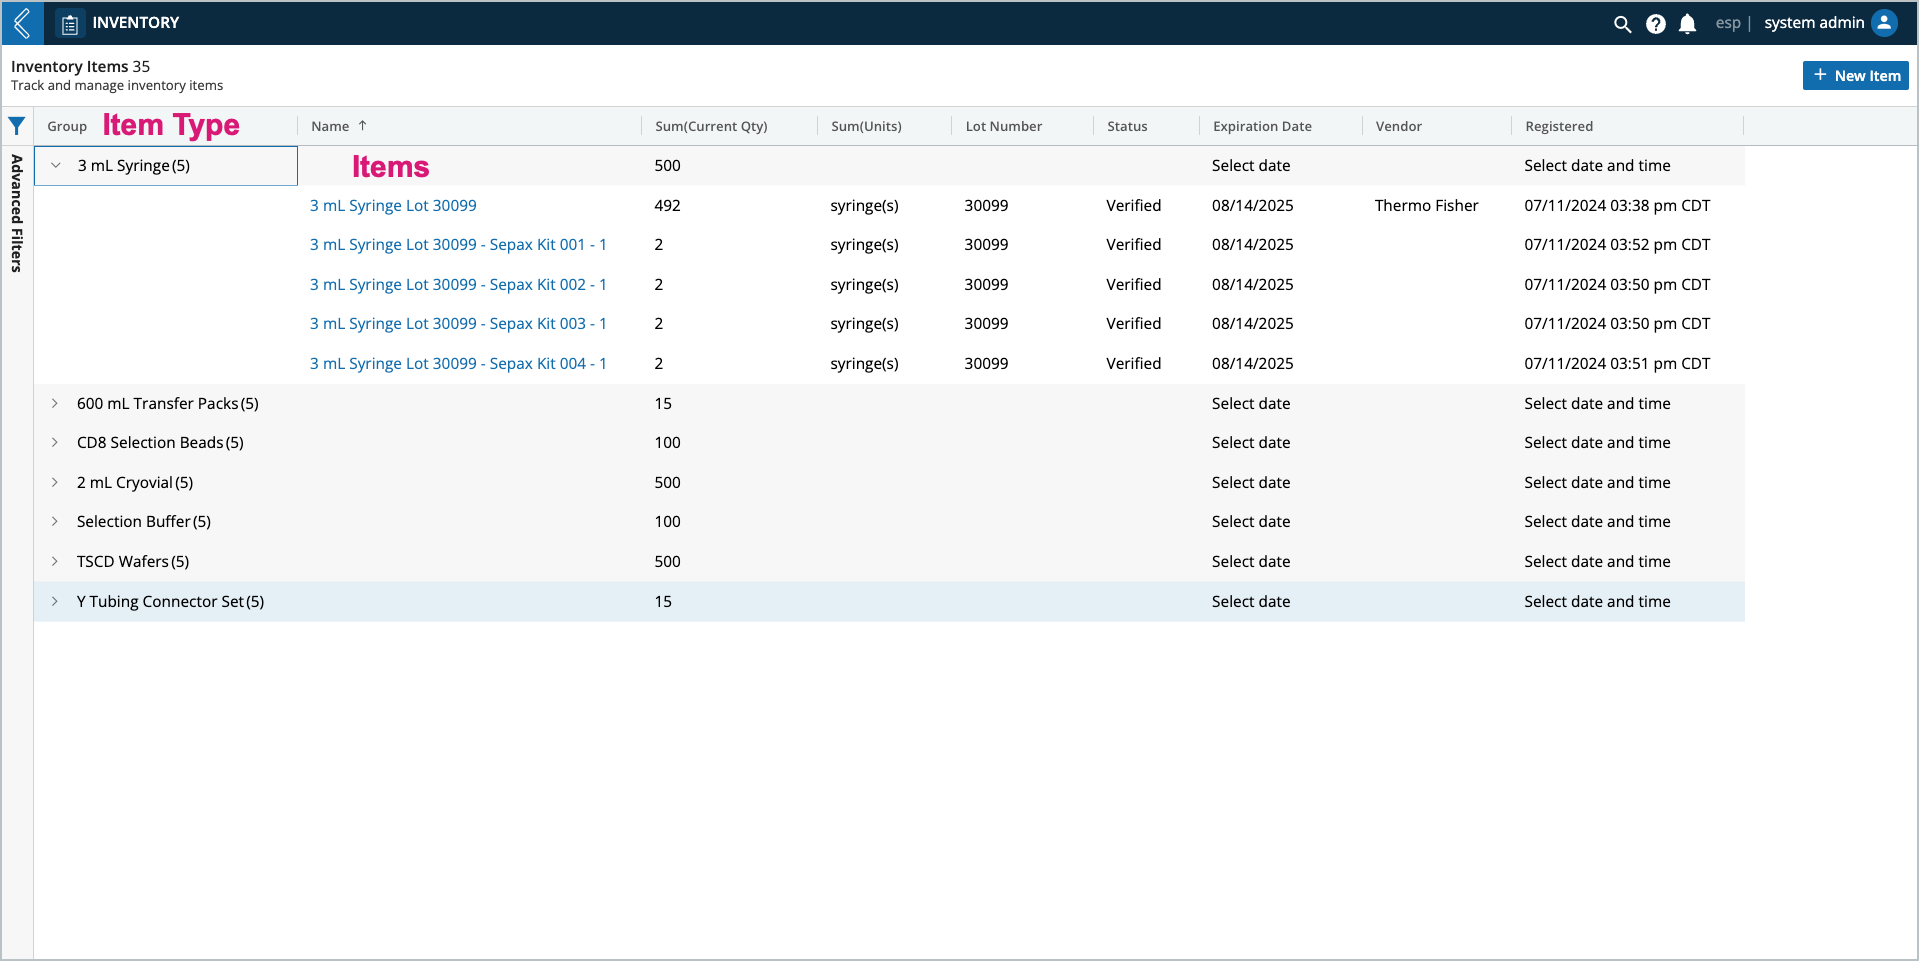
When you select an Item, you see:
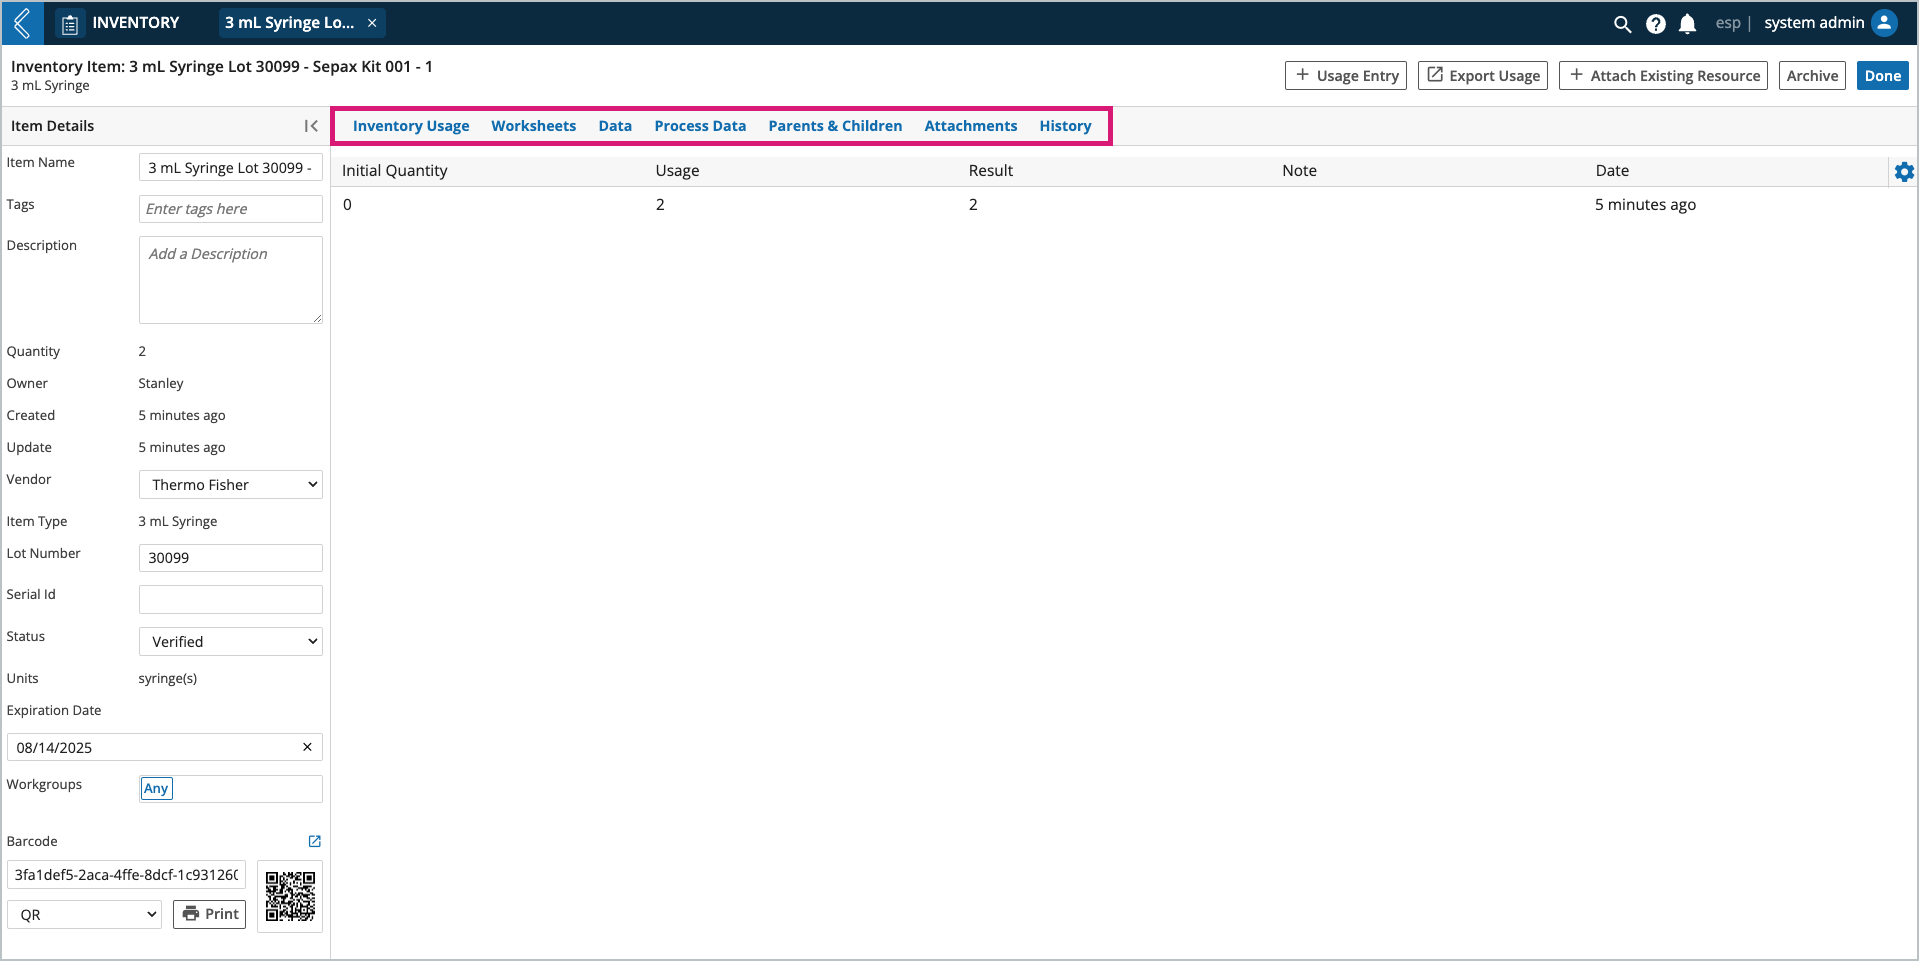
The Item’s usage history (Inventory Usage tab).
The Batches the Item is associated with (Worksheets tab).
The Item’s metadata (Data tab).
Production data associated with the Item (Process Data tab).
The Item’s relationship to other Entities (Parents & Children tab).
The files the Item is associated with (Attachments tab).
The Item’s history (History tab).
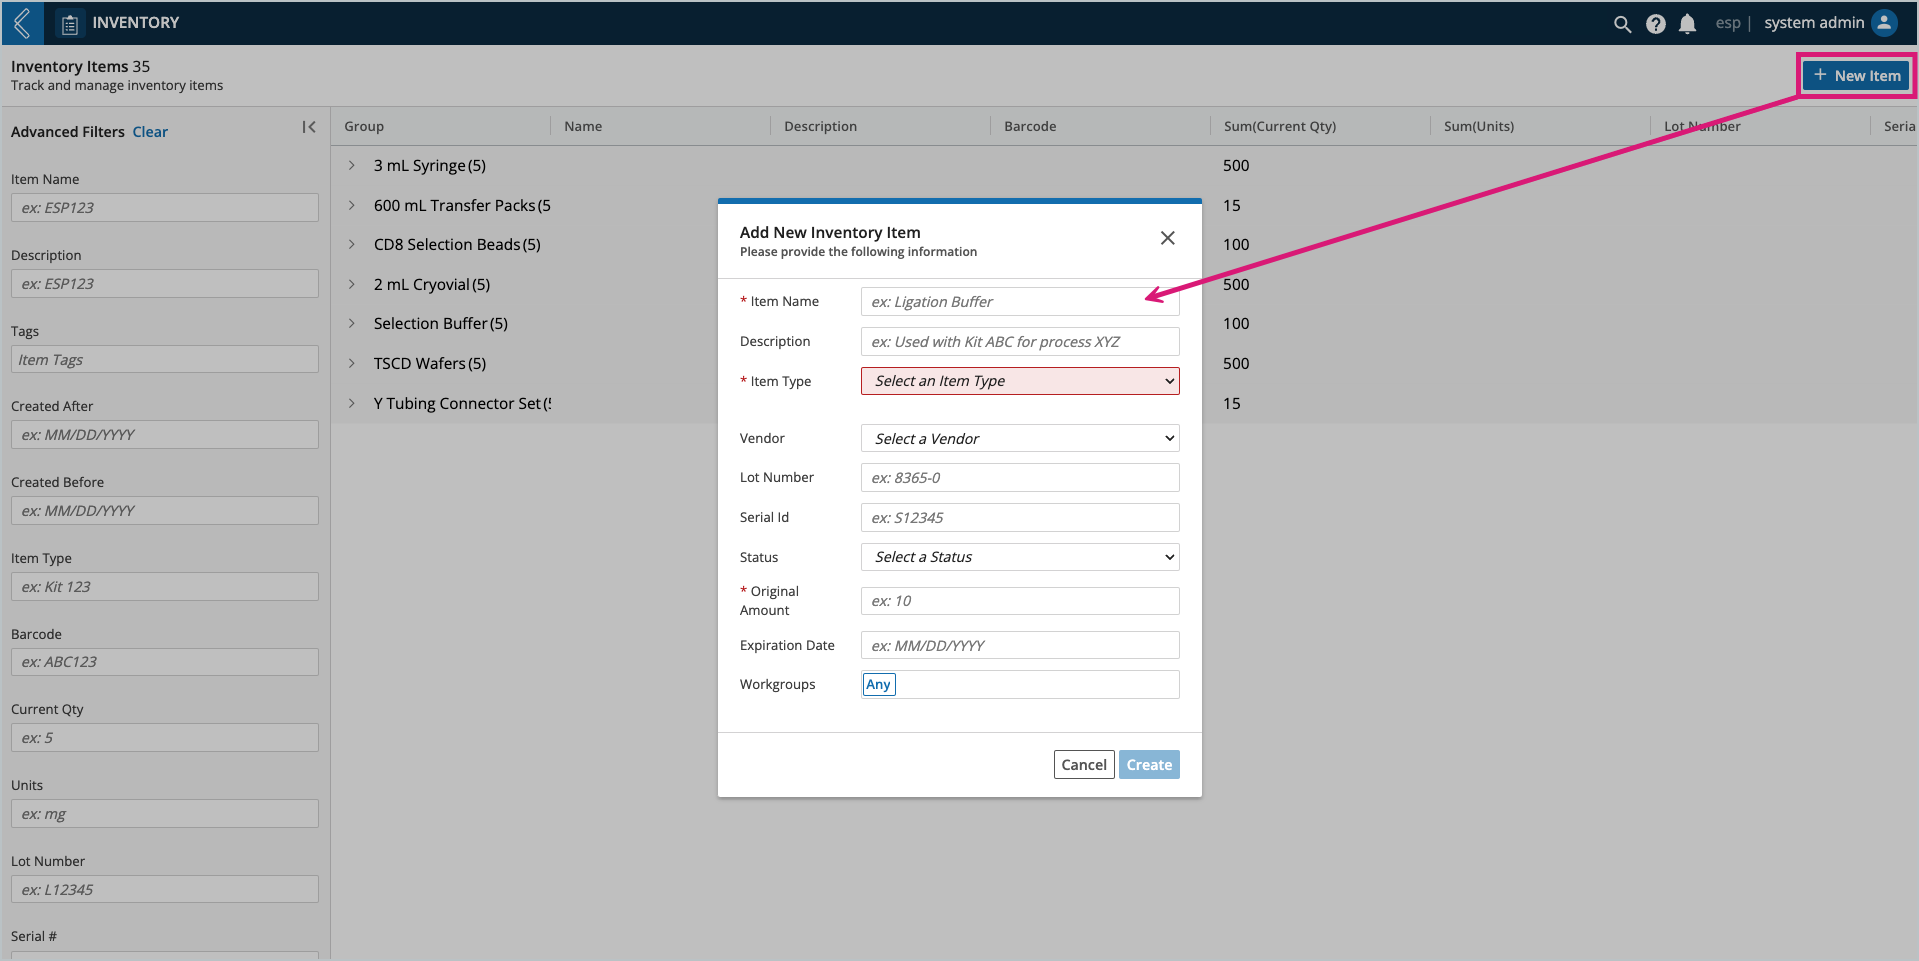
How to create new Items
Go to: L7 Inventory → + New Item
How to record Item usage
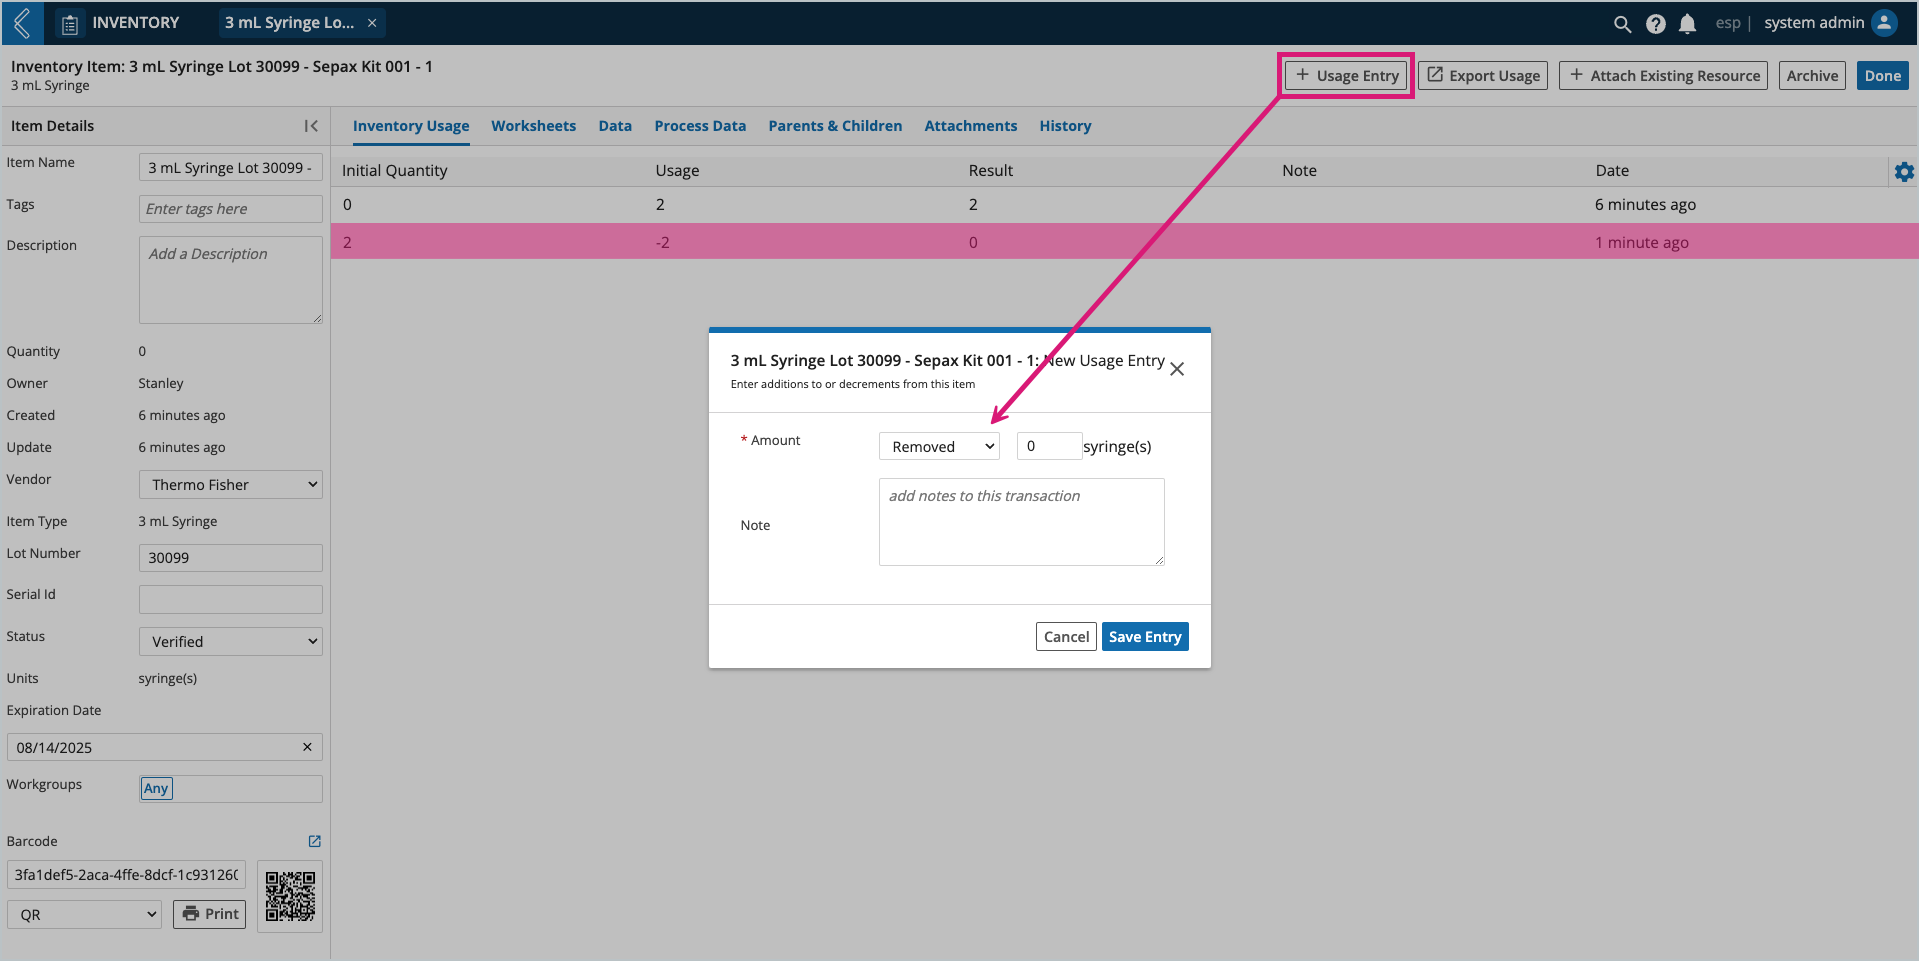
Item quantities can be adjusted independent of a business process by adding a usage entry.
Go to: L7 Inventory → Select an Item → + Usage Entry
You have the option to remove, add, or transfer Item quantities.
When transferring, you can move some or all of an Item to or from another Item of the same type. Both Items must also have the same lot number, status, and expiration date.
Transferring from another Item of the same type adds to the current Item’s quantity.
Transferring to another Item of the same type subtracts from the current Item’s quantity.
The corresponding addition/subtraction is also made to the other Item.
Tip
Transfers should be used to move Items from Kits back into available inventory.
L7|ESP will warn the user if the transfer will result in a negative quantity.
Note
L7|ESP will not warn the user if the deduction results in a negative quantity.
Overview of L7 Location
Tree view displays a list of all registered Containers and their Container hierarchy.
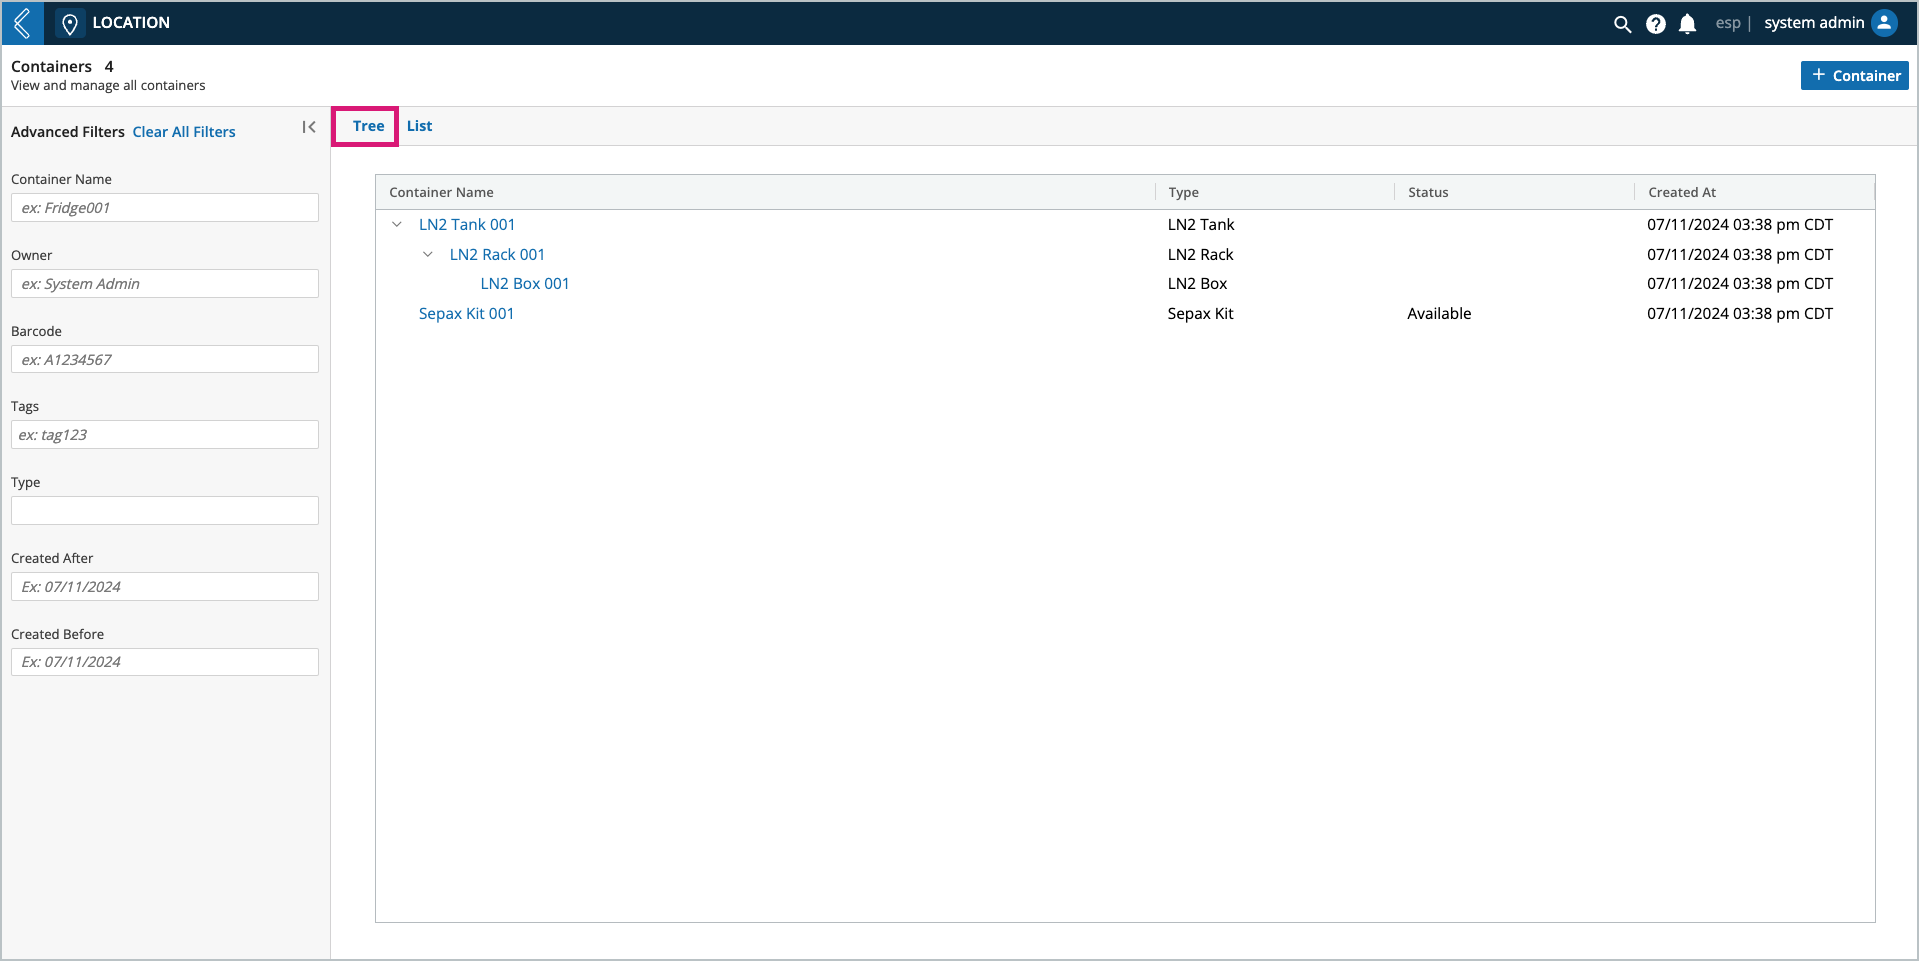
When you select a Container, you see:
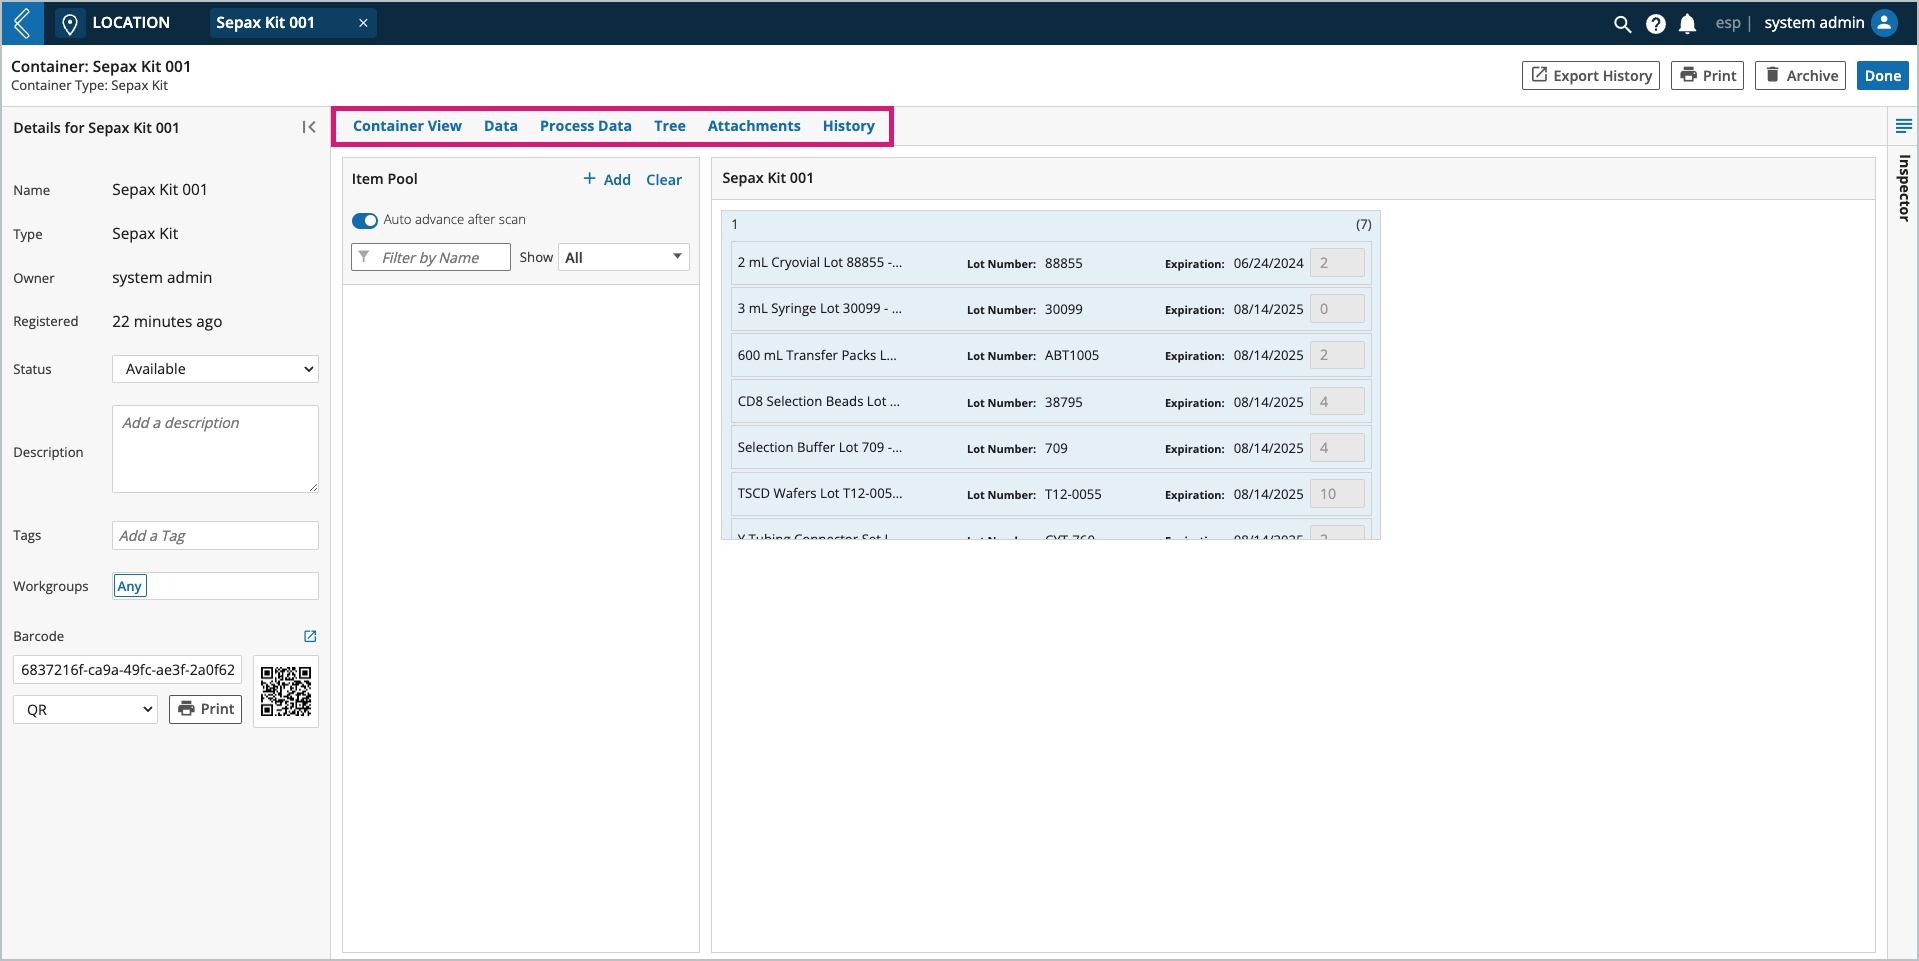
What is stored at the highest level of the Container (Container View tab).
Stored Items display Lot Number, Expiration, and Quantity (if “Specify Item Quantities” has been selected for that Container Type in L7|Master).
The Container’s metadata (Data tab).
Production data associated with the Container (Process Data tab).
The Container hierarchy of the Container (Tree tab).
The files the Container is associated with (Attachments tab).
The Container’s history (History tab).
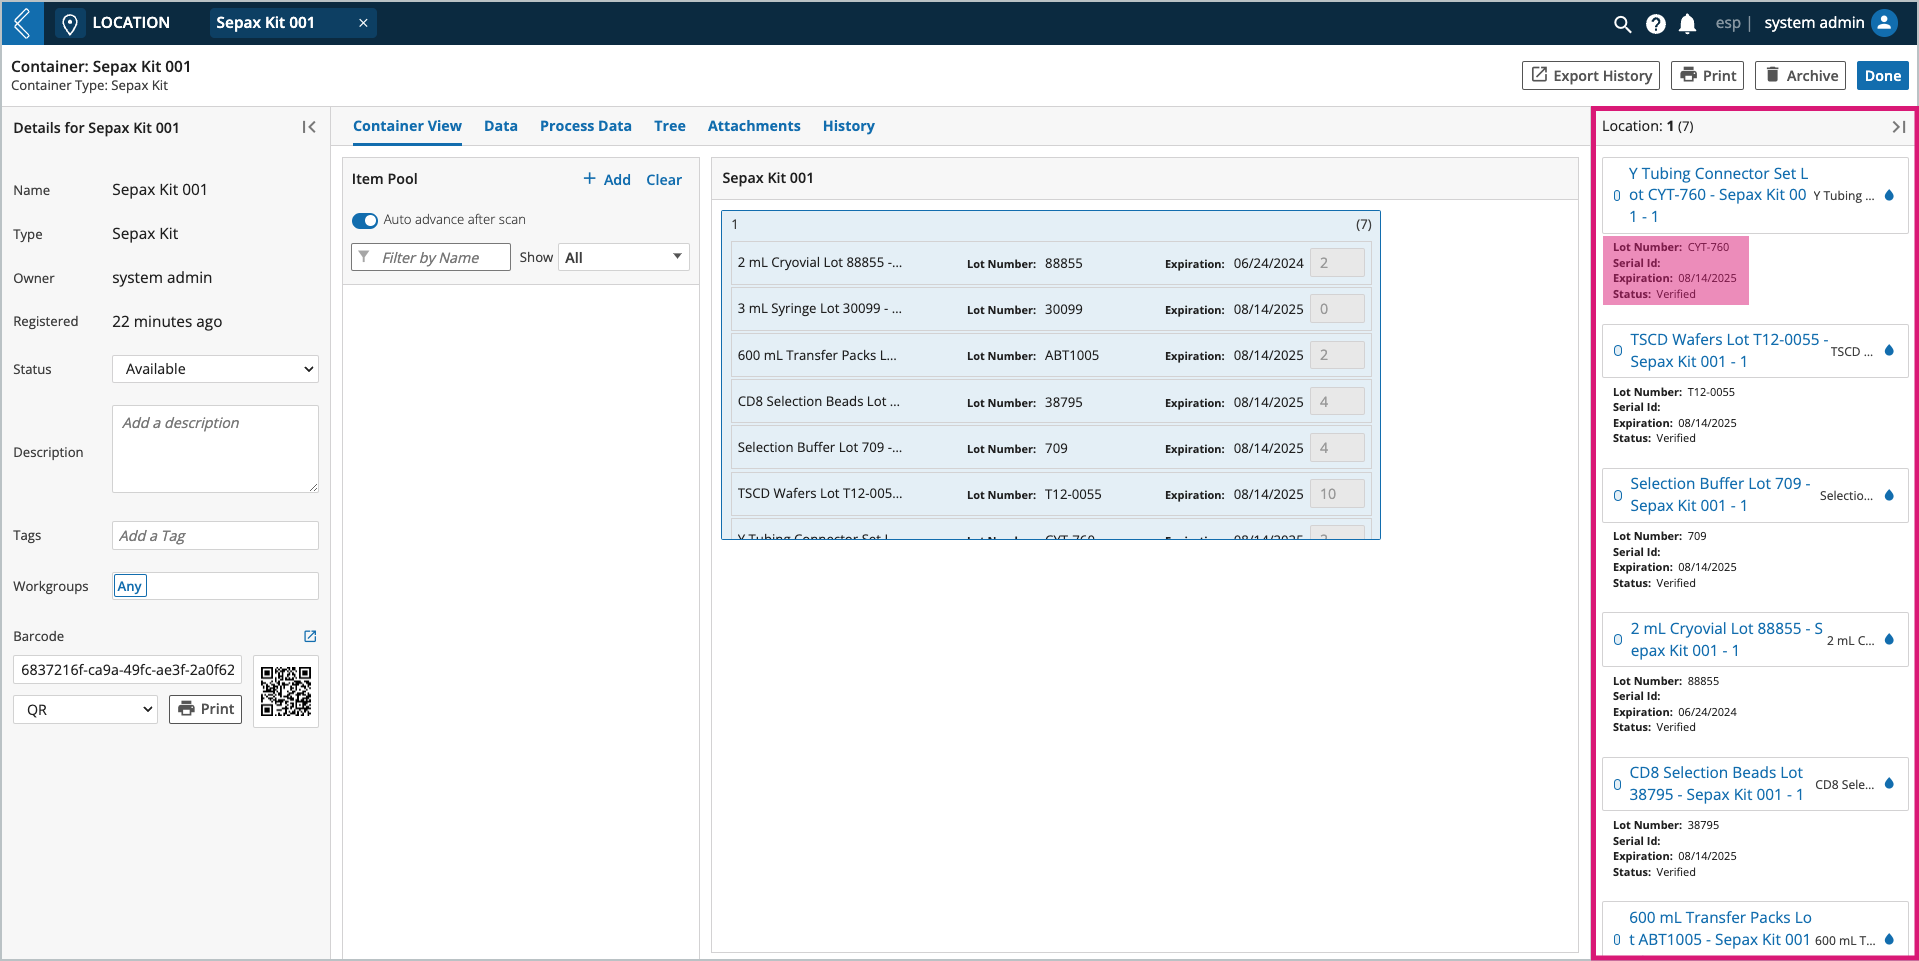
The Inspector panel displays details for the stored Items, including Lot Number, Serial Id, Expiration, and Status.
How to create new Containers (Kits)
Go to: L7 Location → + Container
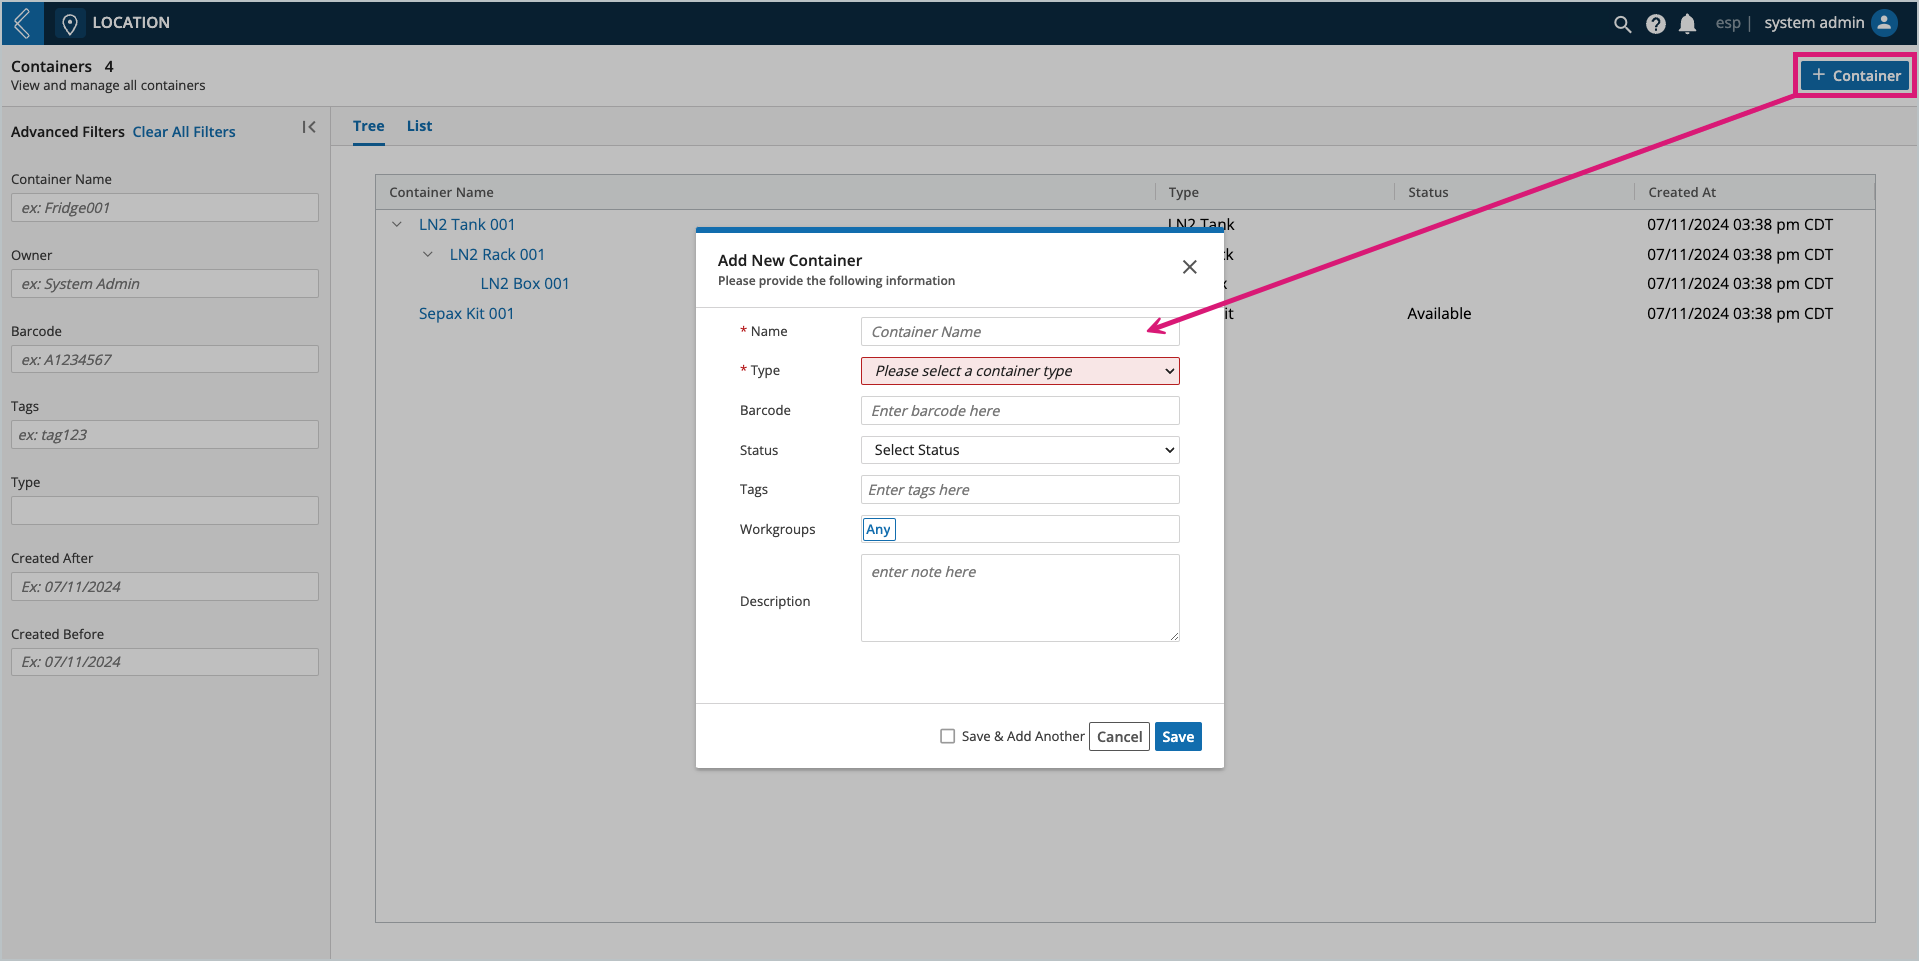
Select the Kit type and enter a unique name. The remaining fields are optional, but Kits can be assigned a status, which can be leveraged by Super Users in L7|Master to restrict which Kits (by status) can be used in a manufacturing process. The Kit’s status can be configured to change (e.g., Available → Unavailable) after the selection is saved. This prevents the same Kit from being assigned to more than one (1) Batch.
How to assemble Kits
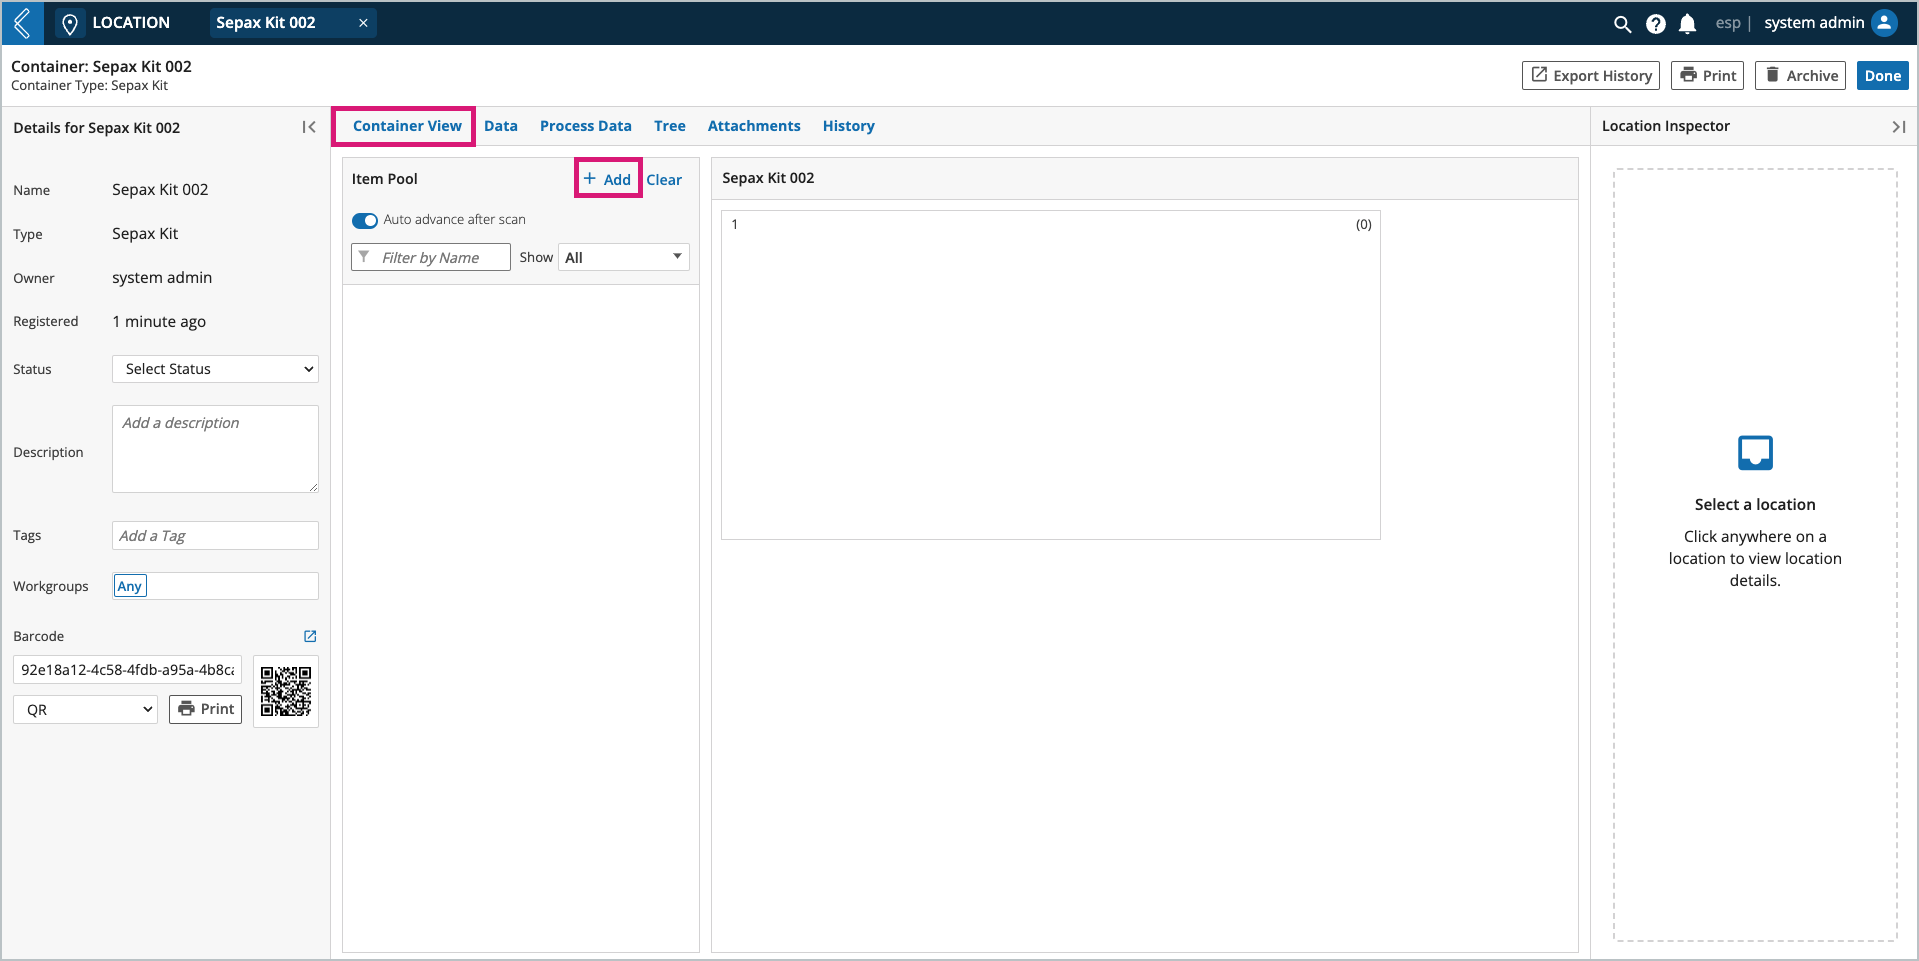
To add Items to a Kit:
Select the Kit and
Scan each Item’s barcode, or
Manually add Items to the Item Pool.
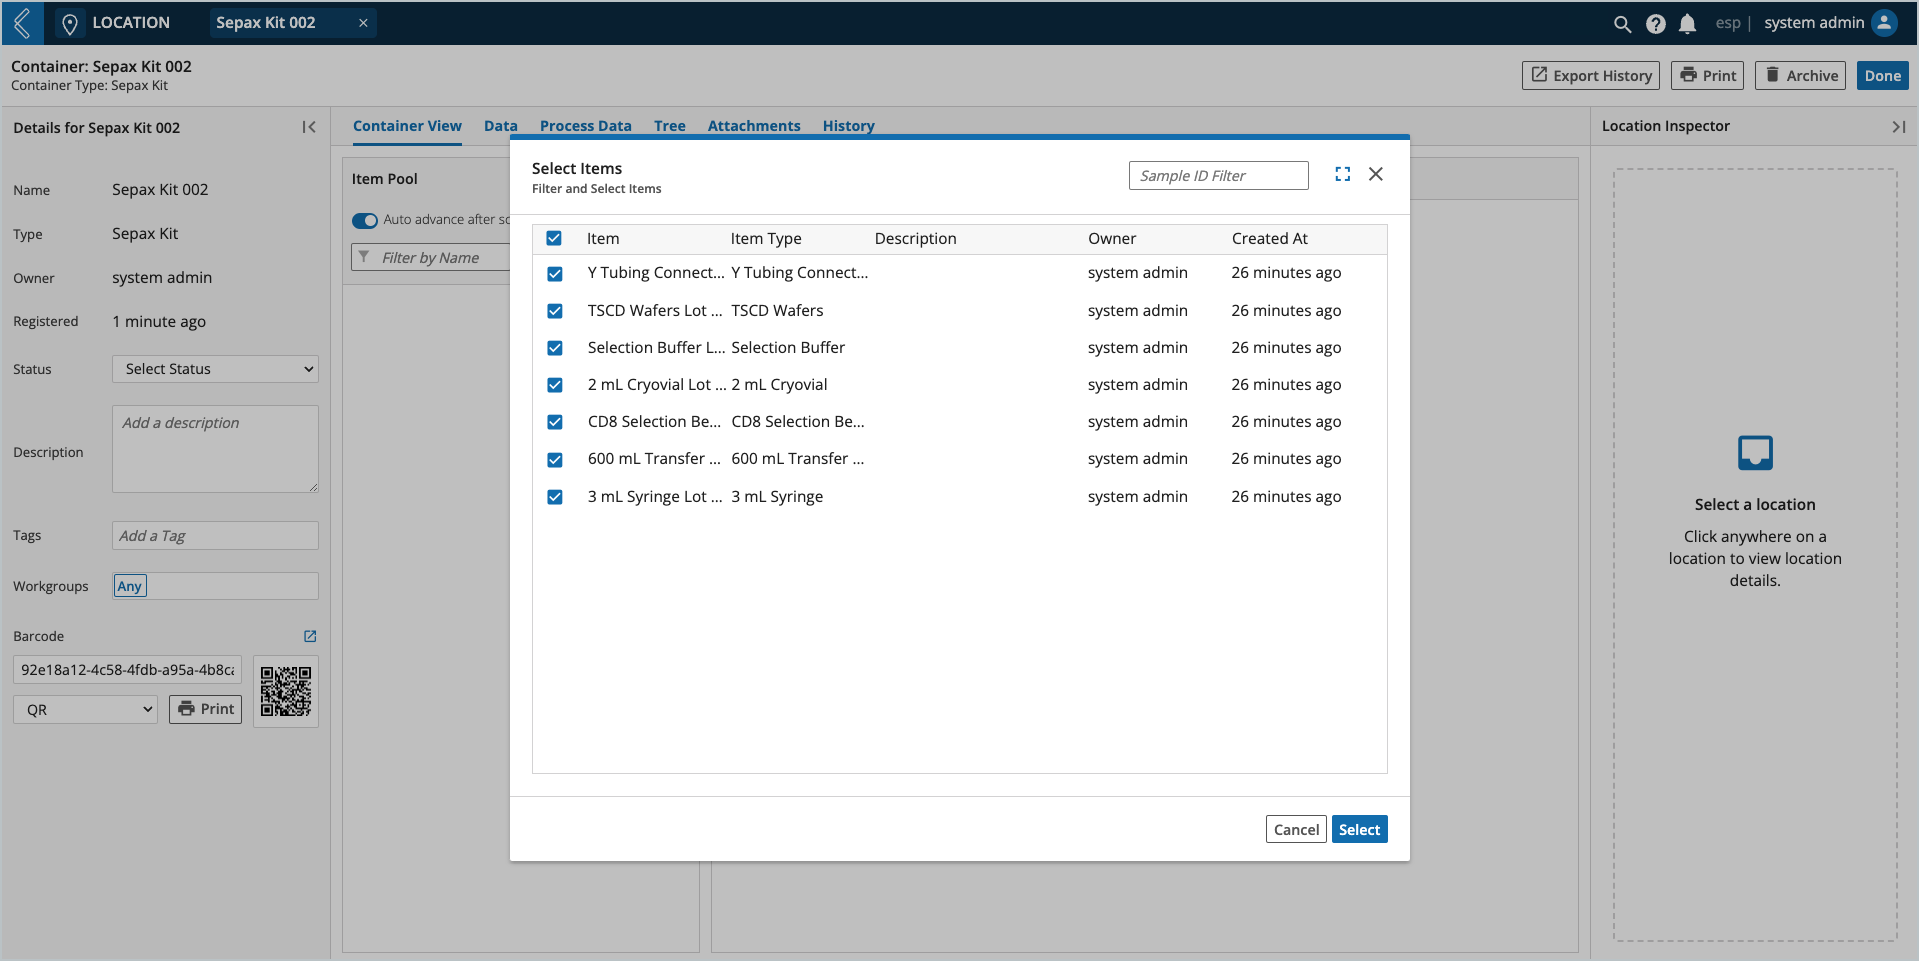
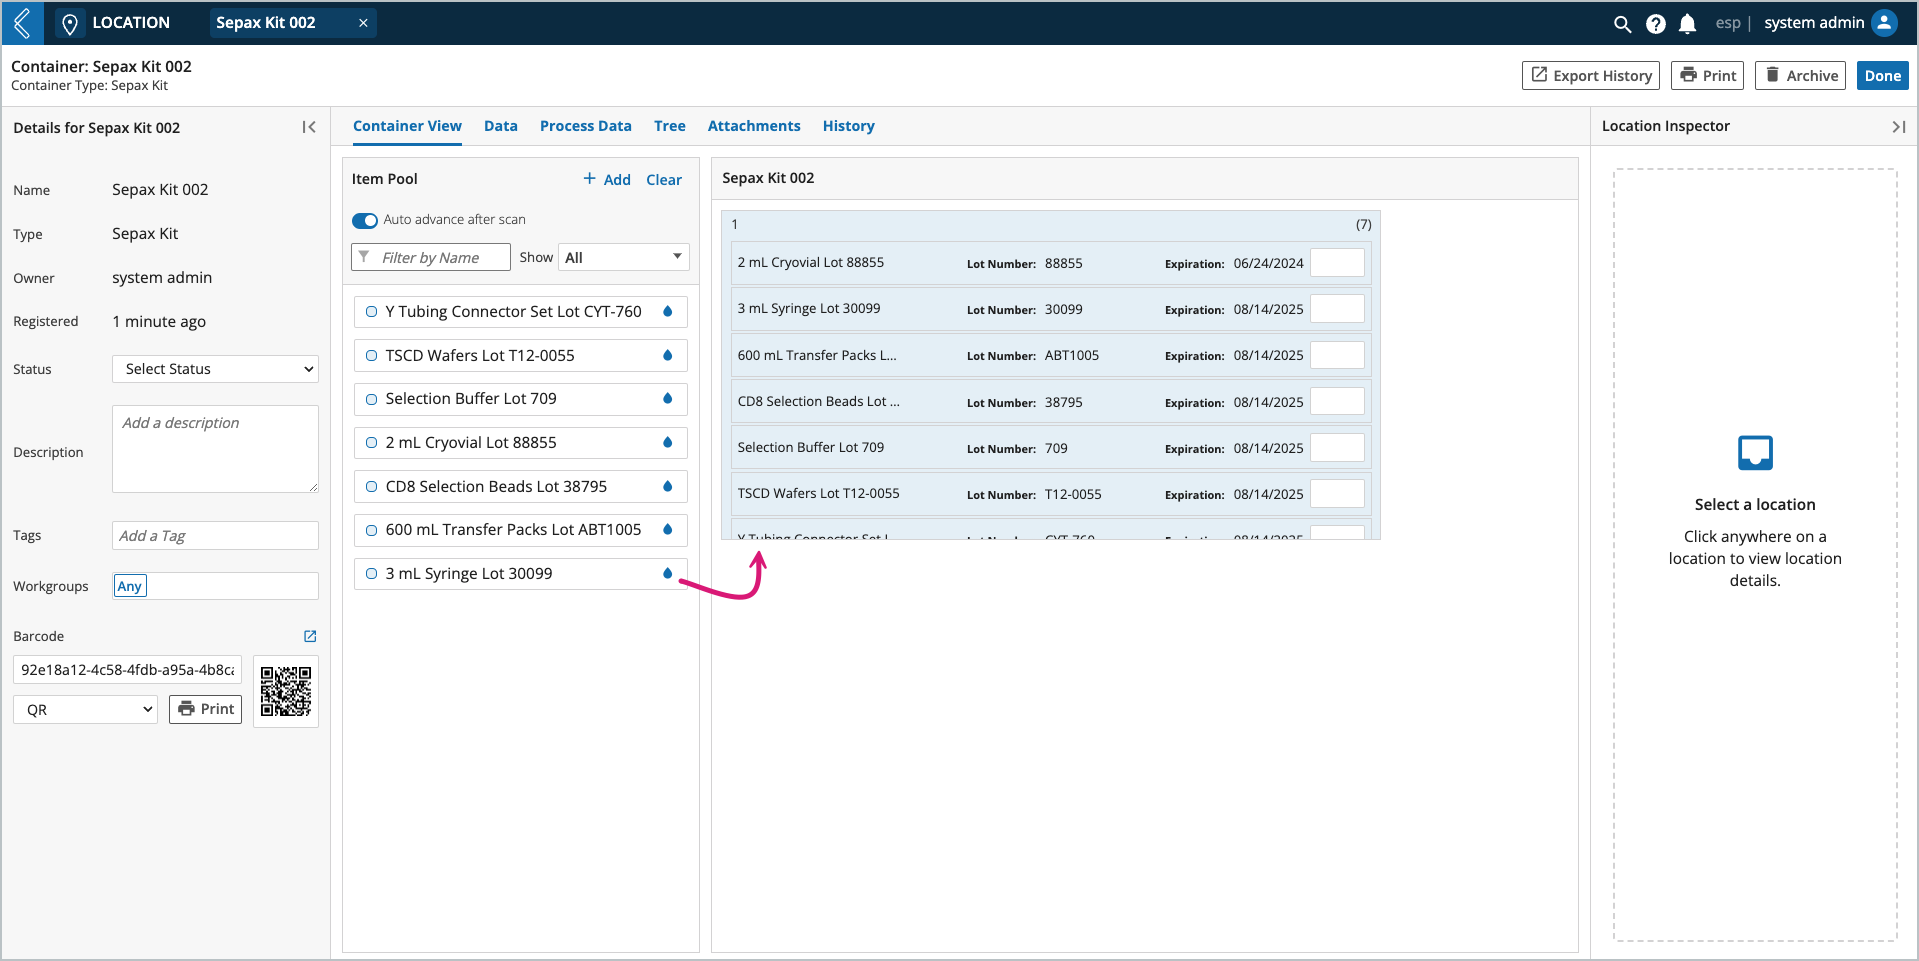
Move Items from the Item Pool to the Container.
Use the shift and command keys to select a continuous or discontinuous list of Items, respectively.
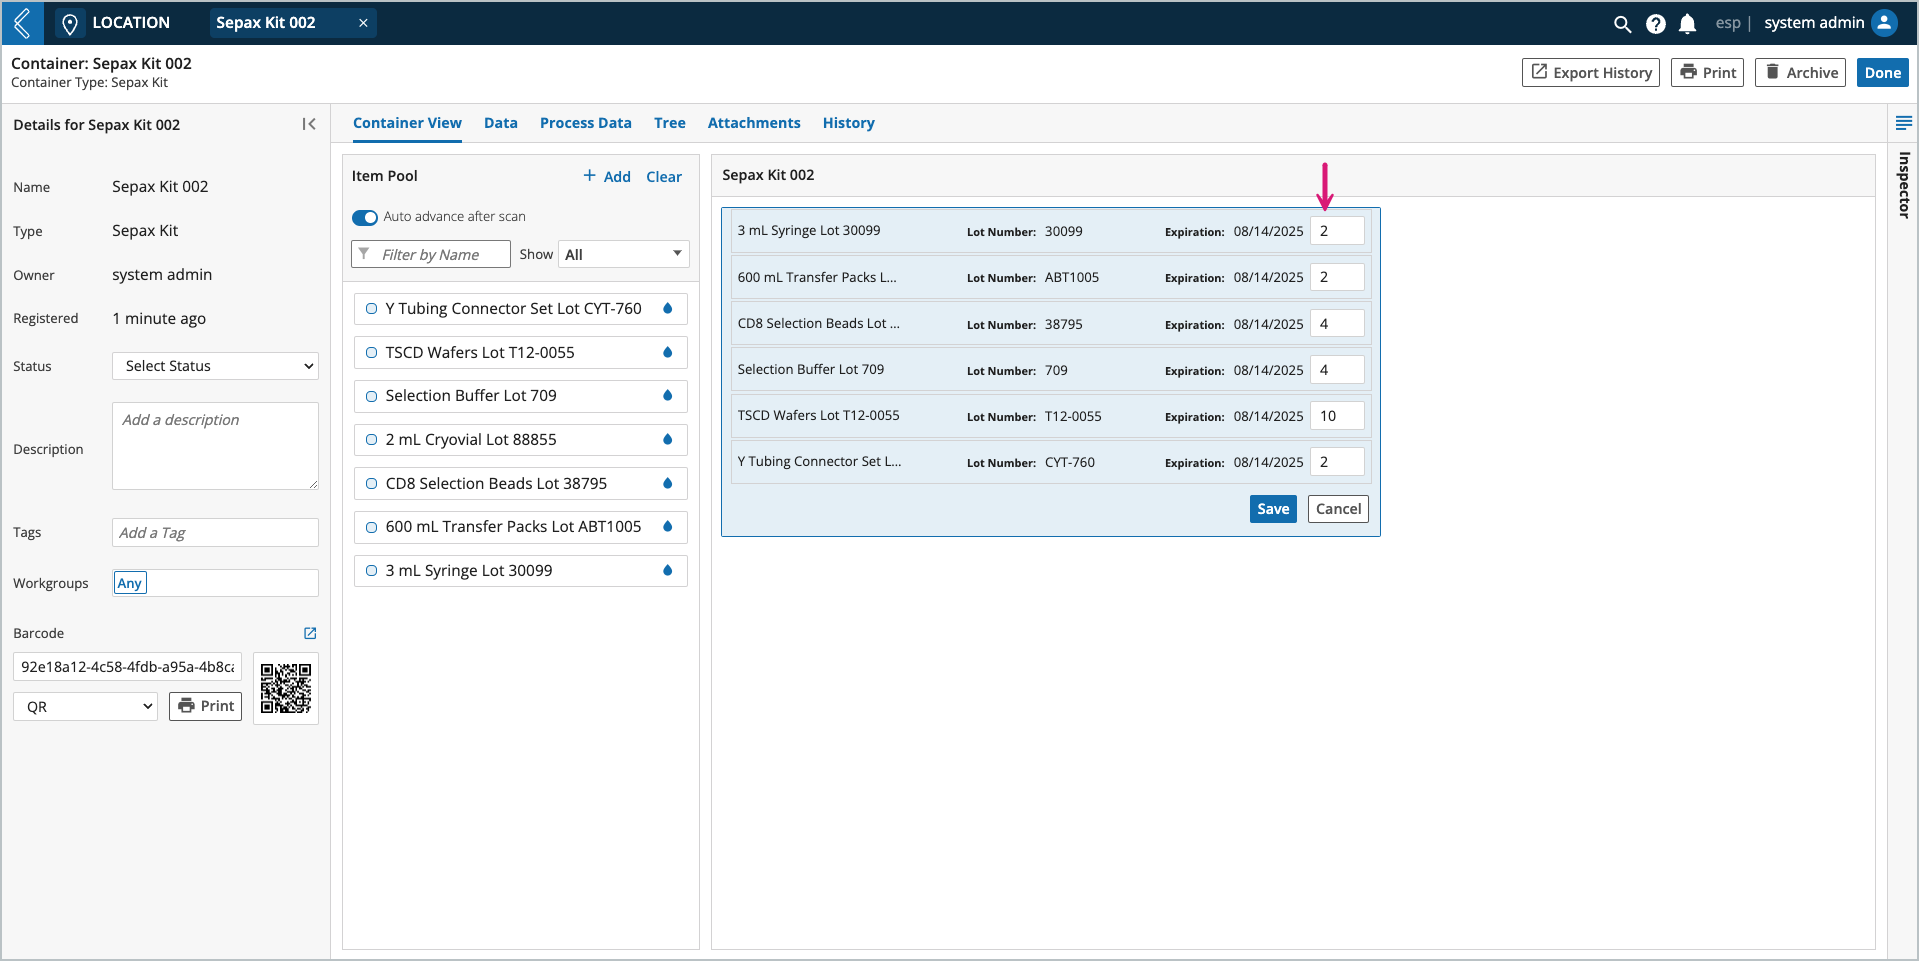
Enter the quantity of each Item being transferred, then Save.
Note
If the Kit has been configured to receive a min and/or max quantity of each Item, users will be warned of invalid transfer quantities, but they are not prohibited.
Quantity limits apply to each transfer, not the sum of all transfers.
Adding additional Items to the Kit
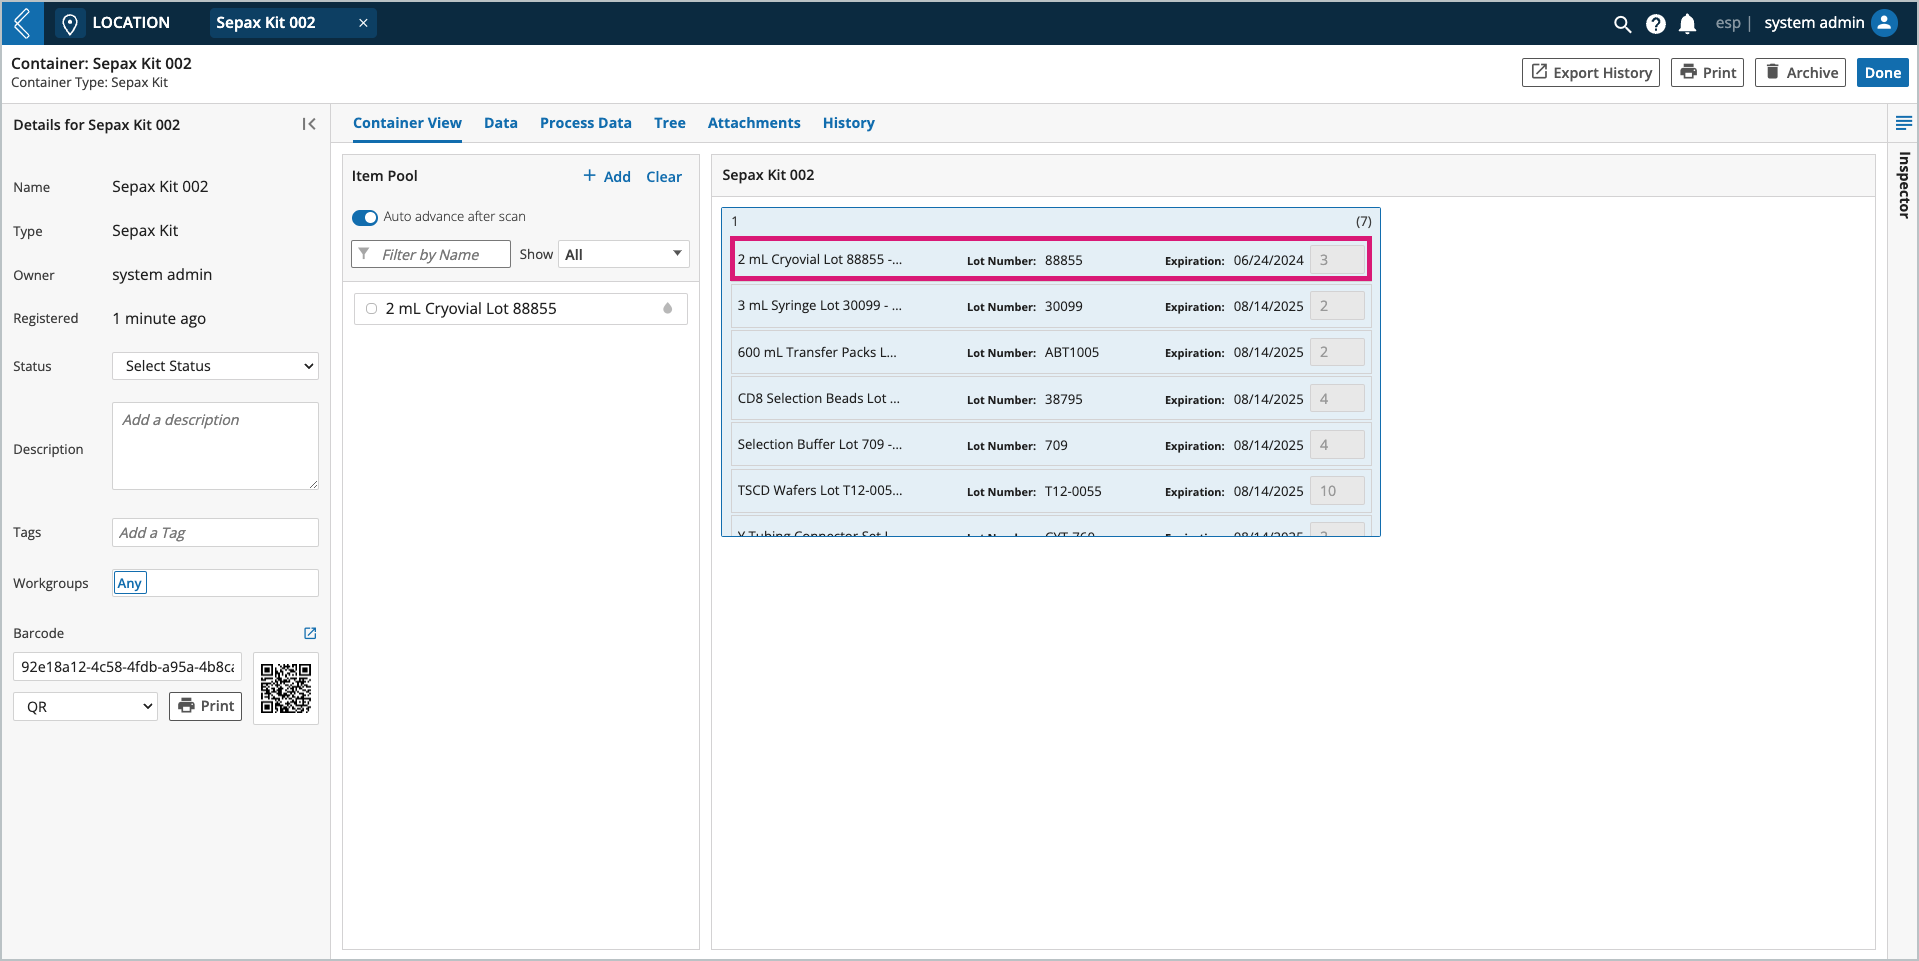
If more than one (1) Item of the same type, with the same lot number, status, and expiration date is added to the Kit,
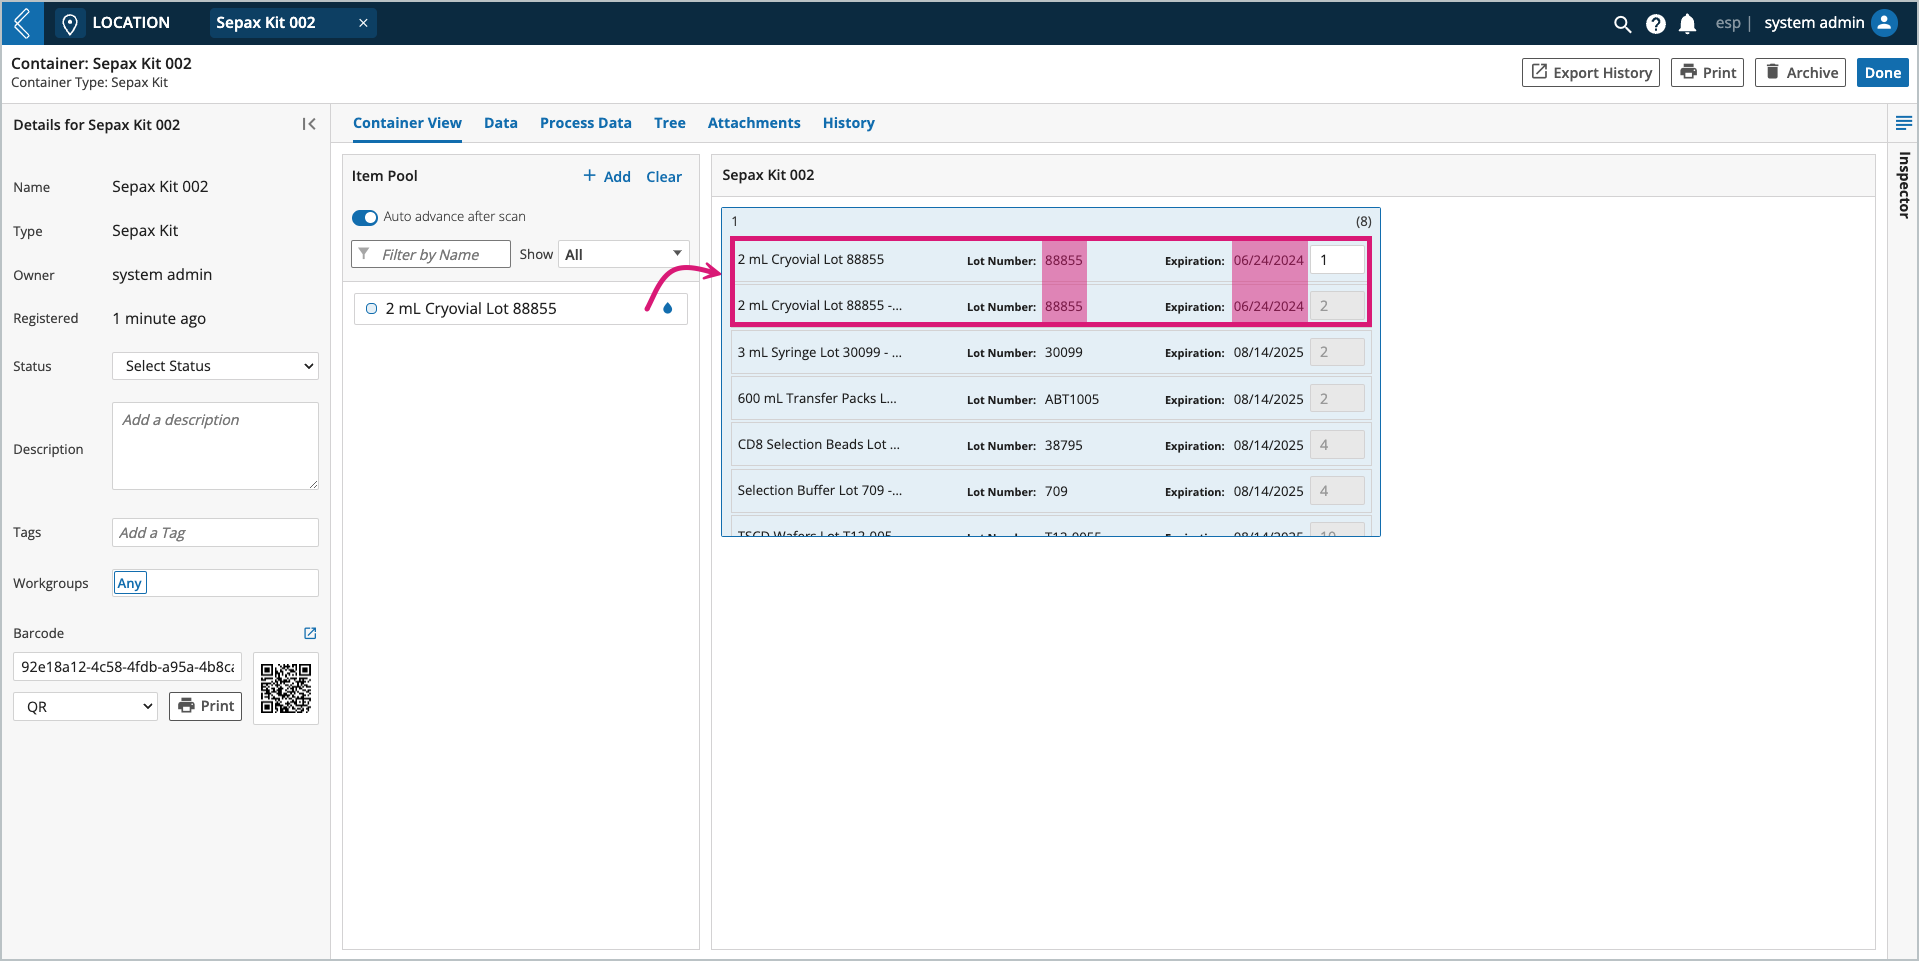
they will be combined to represent one (1) Item in the Kit.
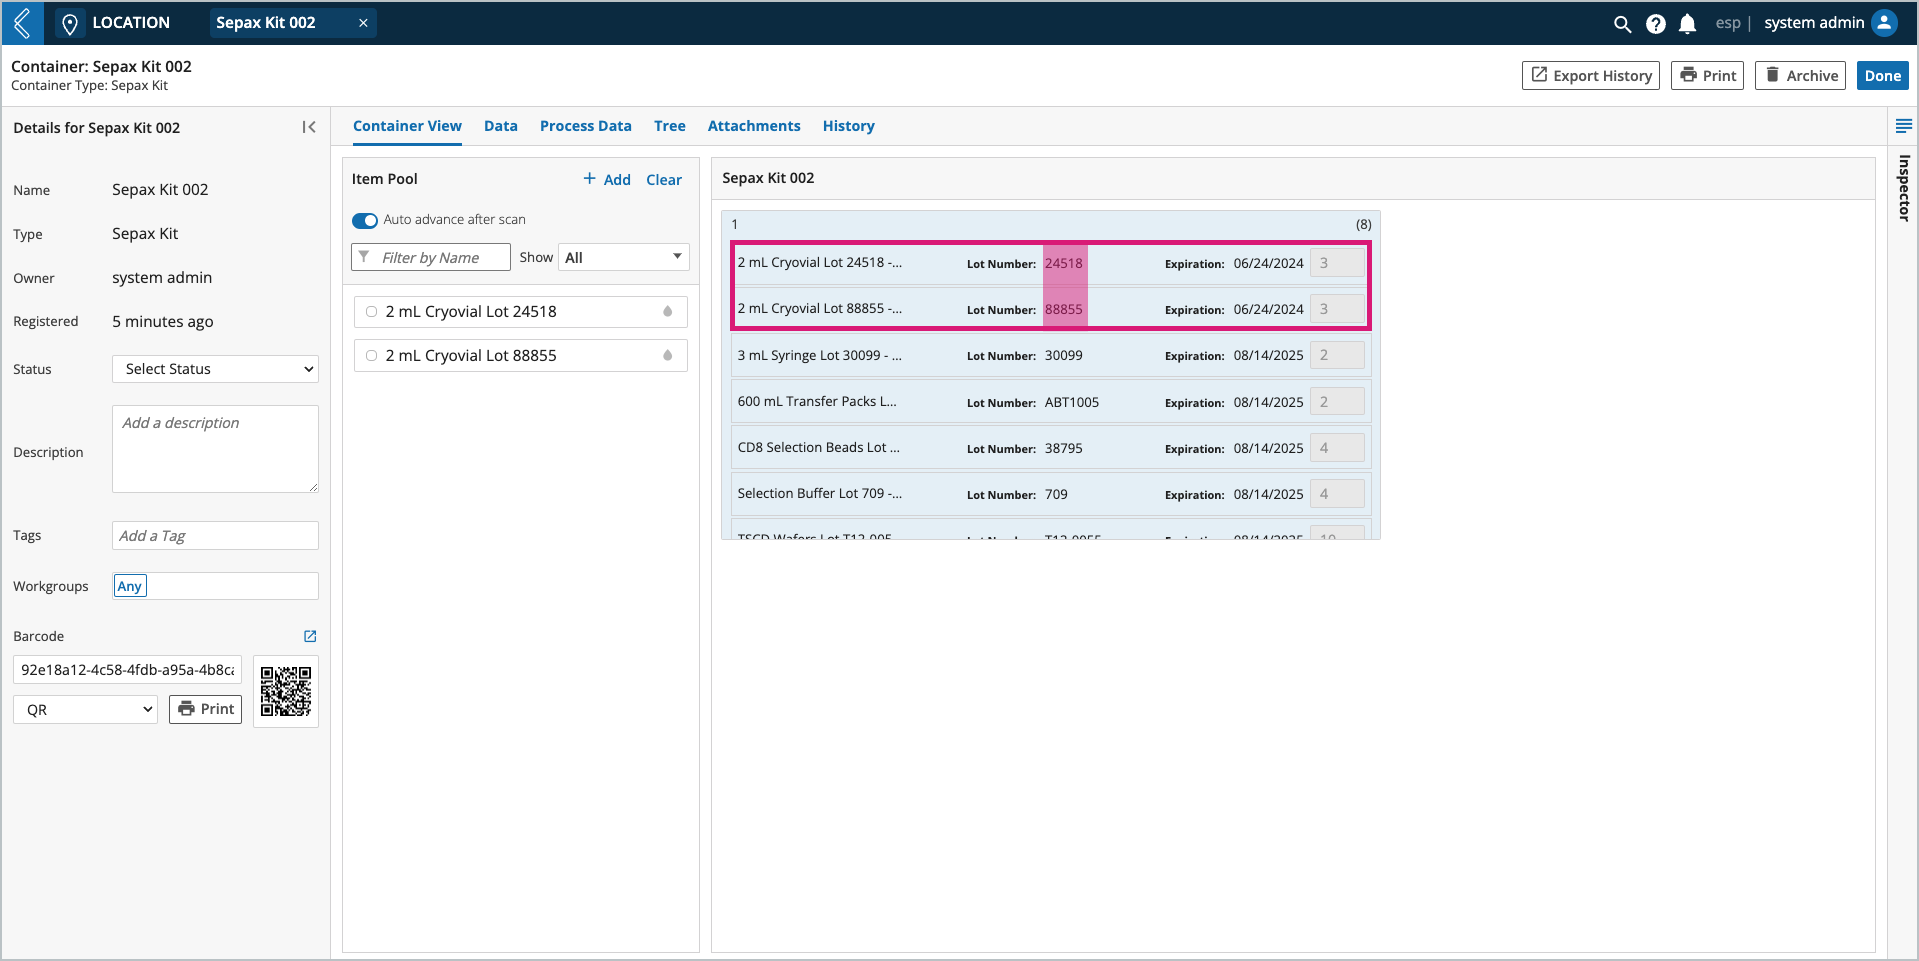
If the Items have a different lot number, status, or expiration date,
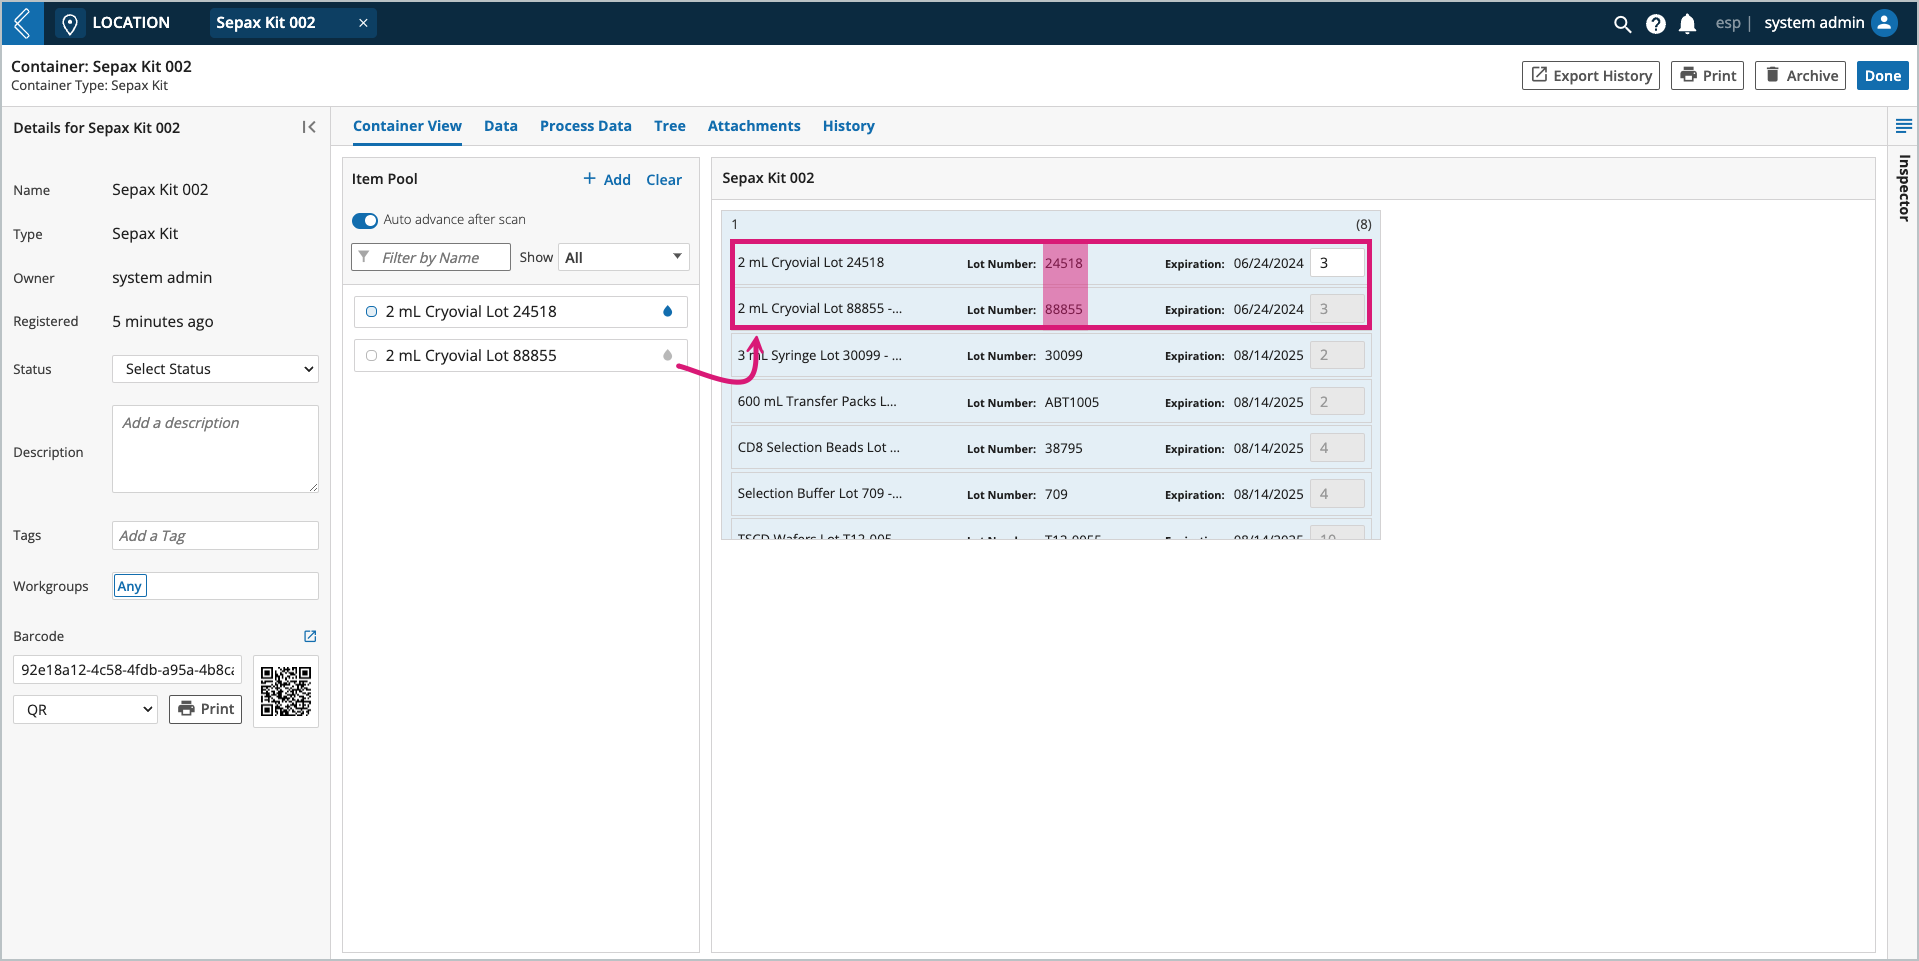
they will appear as separate Items in the Kit.
Adding Items to a Kit creates coalesced resources
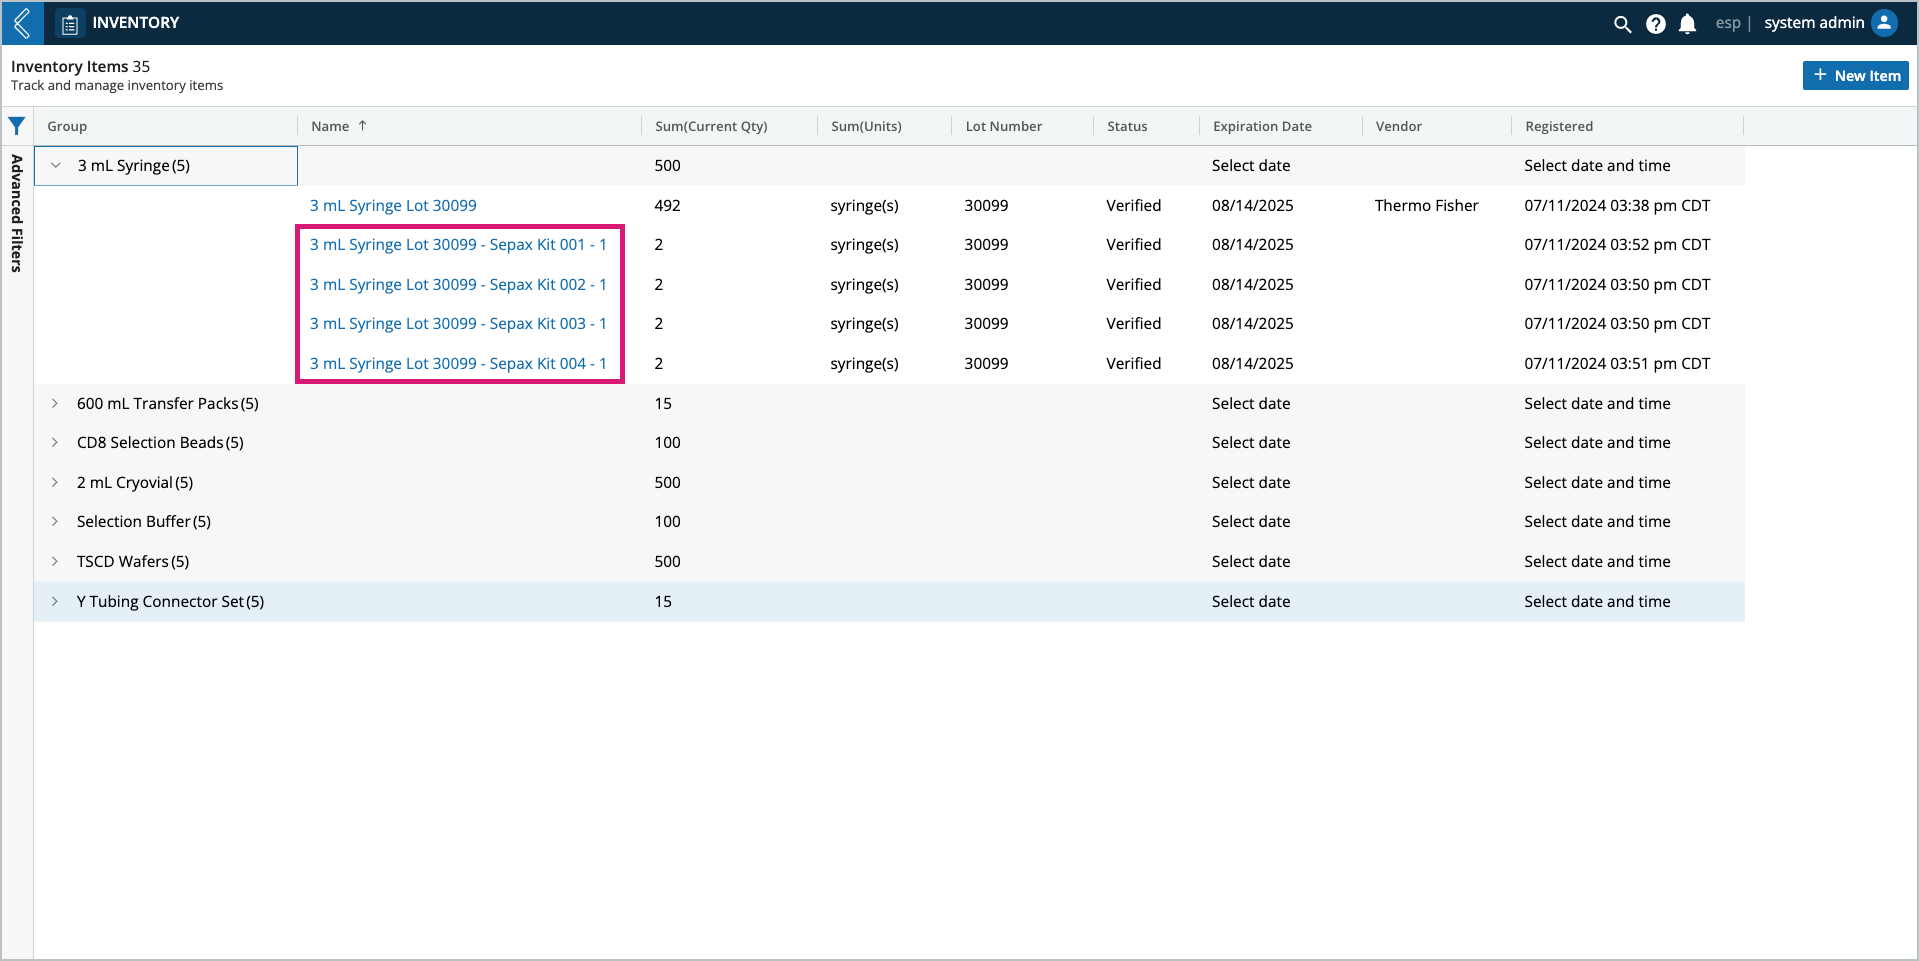
Transferring an Item to a Kit with a specified quantity creates a coalesced resource in L7 Inventory, which can then be tracked and consumed in L7 MES.
Available Items Table
When a Kit is used in L7 MES, a summary of its contents is listed under the BOM tab in the “Available Items” table. Select the Batch Section in the left panel to populate the table with the Kit(s) used in that Section.
To view all Sections in the Batch, turn on Show All Sections at the top of the tab.
Note
Items do not have to belong to a Kit to be used in L7 MES, but must be assigned to a Kit to appear in this table.
Item Usage Table
The “Item Usage” table tracks the quantity of each Item consumed in the Batch. Select the Batch Section in the left panel to populate the table with the Item(s) consumed in that Section.
To view all Sections in the Batch, turn on Show All Sections at the top of the tab.
Note
Items can be tracked independent of quantity in L7 MES. For these Items, Unit of Measure (UOM) and Quantity Used are null and N/A, respectively.