Workflow Chain Transitions
In this section
This section will help you:
Know what Transition Strategies are and how to use them.
Know what Transition Rules are and how to use them.
Know the difference between virtual and non-virtual transitions.
Key Terms
Term | Definition |
|---|---|
Transition Strategy | A logic statement that states which Entities will transition to the next Workflow in a Workflow Chain. |
Transition Rule | A logic statement that determines when Entities will transition to the next Workflow in a Workflow Chain. |
What is the Transition Editor?
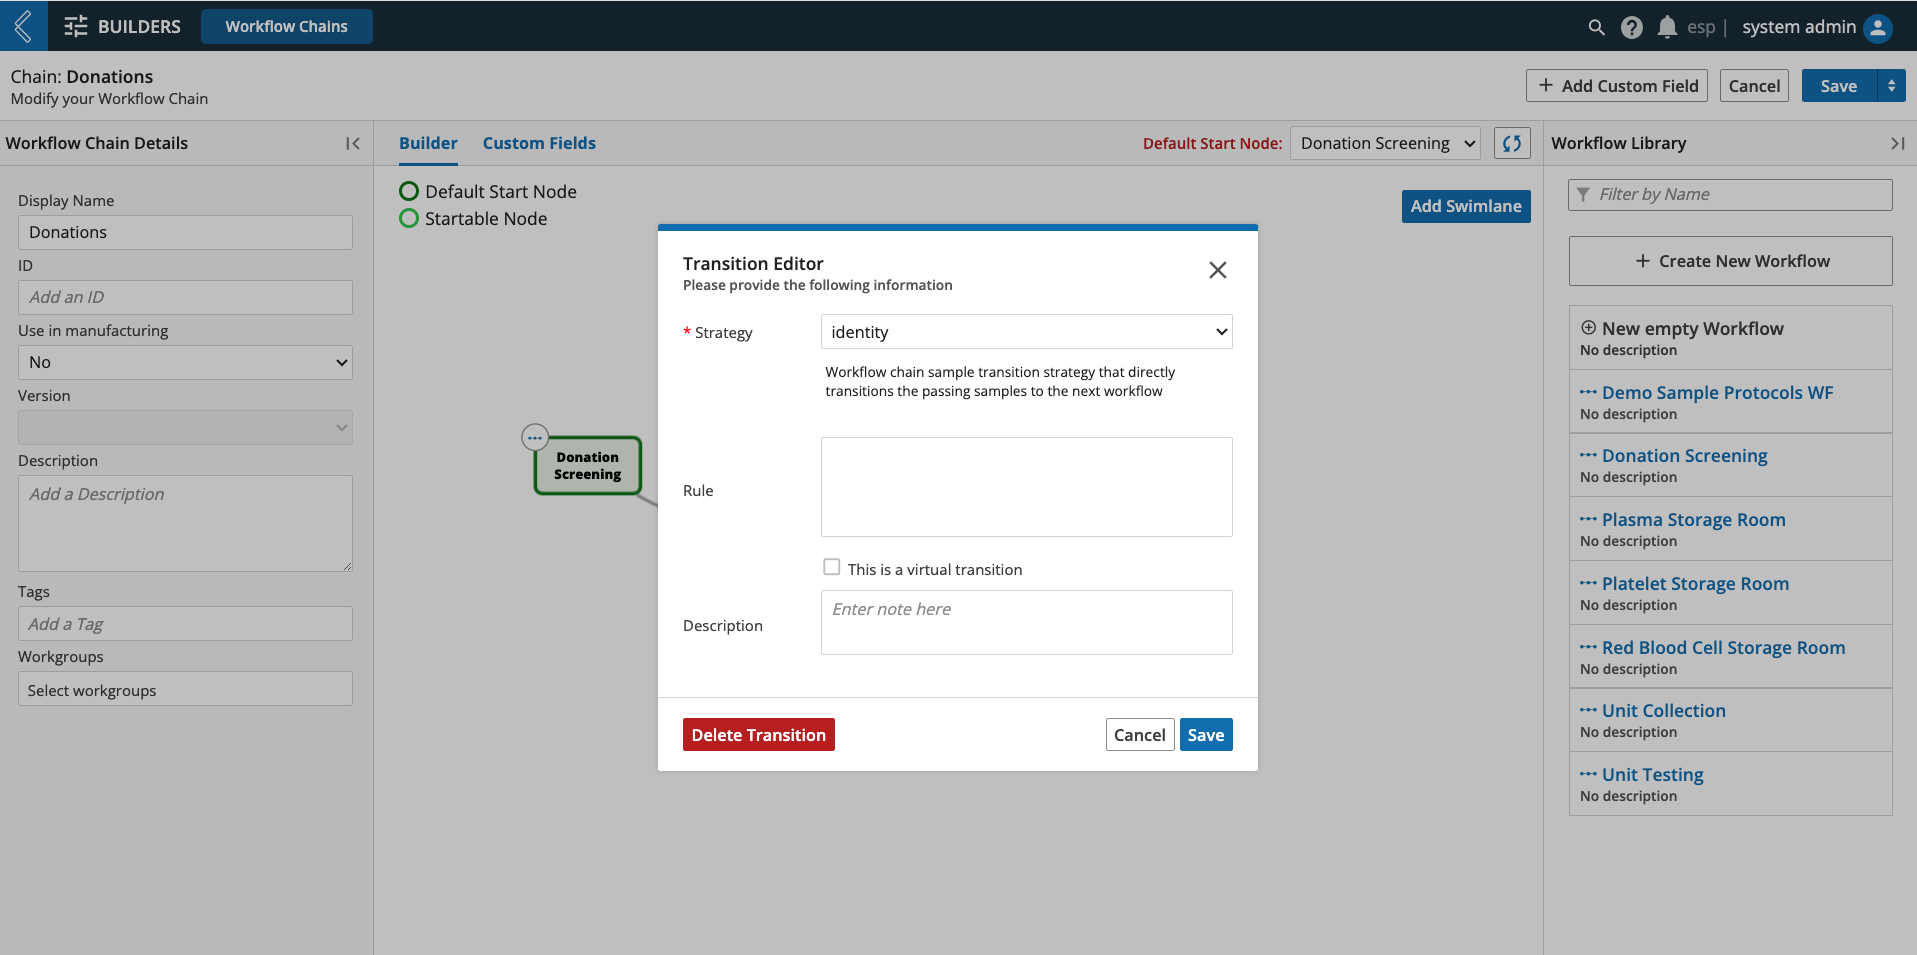
The Transition Editor is the modal used to define how Entities move through a Workflow Chain. To access the Transition Editor, either click on an arrow that joins two existing nodes or select the blue dot at the top of a node and drag the arrow to an existing node to form a new connection.
The Transition Editor has two key components: strategy and rule. Think of the strategy as the “who” and the rule as the “when” - which Entities will be transitioned and when will they be transitioned.
 |
How to use Transition Rules
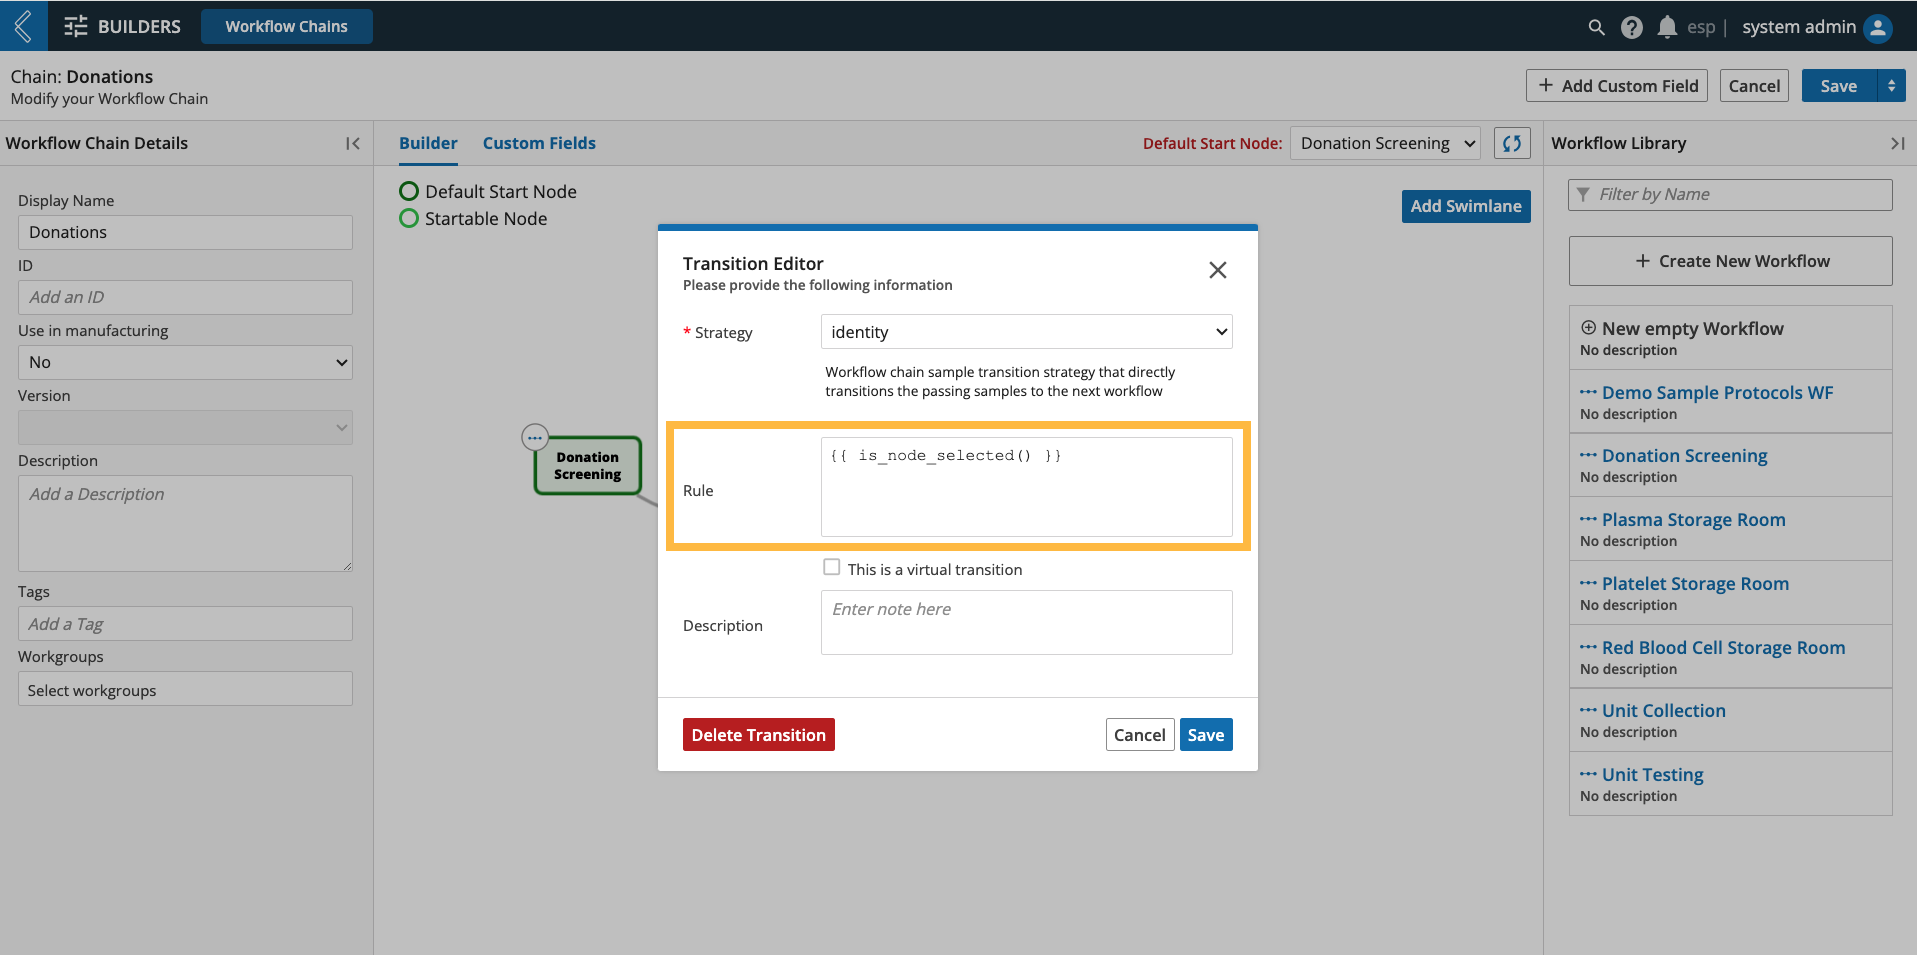
Rules are encoded in Python. Two (2) of the most common rules are:
{{ True }} - transitions all Entities set by the strategy when the End User completes the upstream Workflow.
{{ is_node_selected() }} - transitions the Entities set by the strategy to the Workflow(s) selected in the Next Step field of the upstream Workflow. This field can have a default value dependent on the data collected and supports the dynamic nature of branching Workflow Chains.
 |
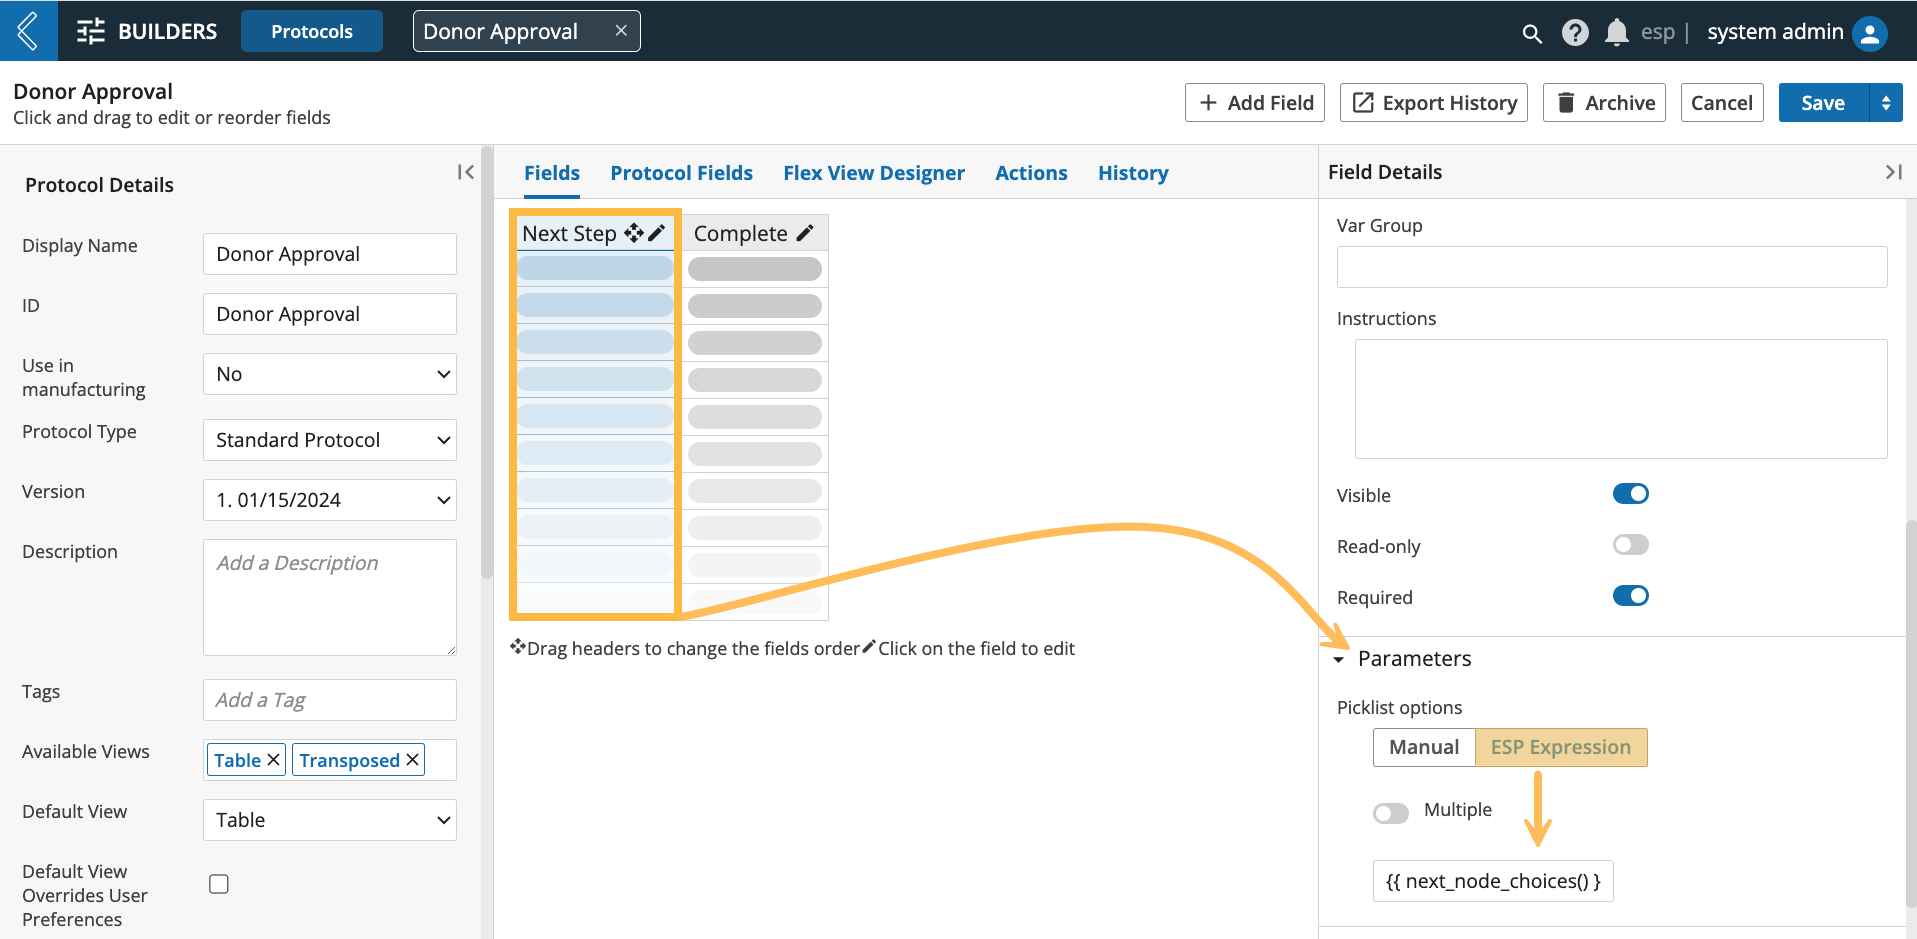
Next Step must be a picklist with options set by L7|ESP Expression {{ next_node_choices() }} for this rule to work. If more than one Workflow can be selected, make this field a multi-select picklist.
 |
Note
{{ is_node_selected() }} and {{ next_node_choices() }} are covered in more detail here and in Section 6.2.5 of the User Documentation.
Additional Examples
Evaluating an Entity value:
{{ entity_value('Field Name') == 'Value' }}Evaluating a boolean (checkbox) value:
{{ str(cell('Field ID')).lower() == 'true' }}Evaluating a picklist value:
{{ cell('Field ID', 'Protocol ID') == 'Value' }}Evaluating more than one (1) picklist value:
{{ cell('Field ID', 'Protocol ID') in ['Value 1', 'Value 2'] }}Note
By default, only {{ is_node_selected() }} excludes failed Entities in the transition, unless paired with the Resubmit transition strategy.
To exclude failed Entities, include and not sample['failed'] in all other rules.
How to use Transition Strategies
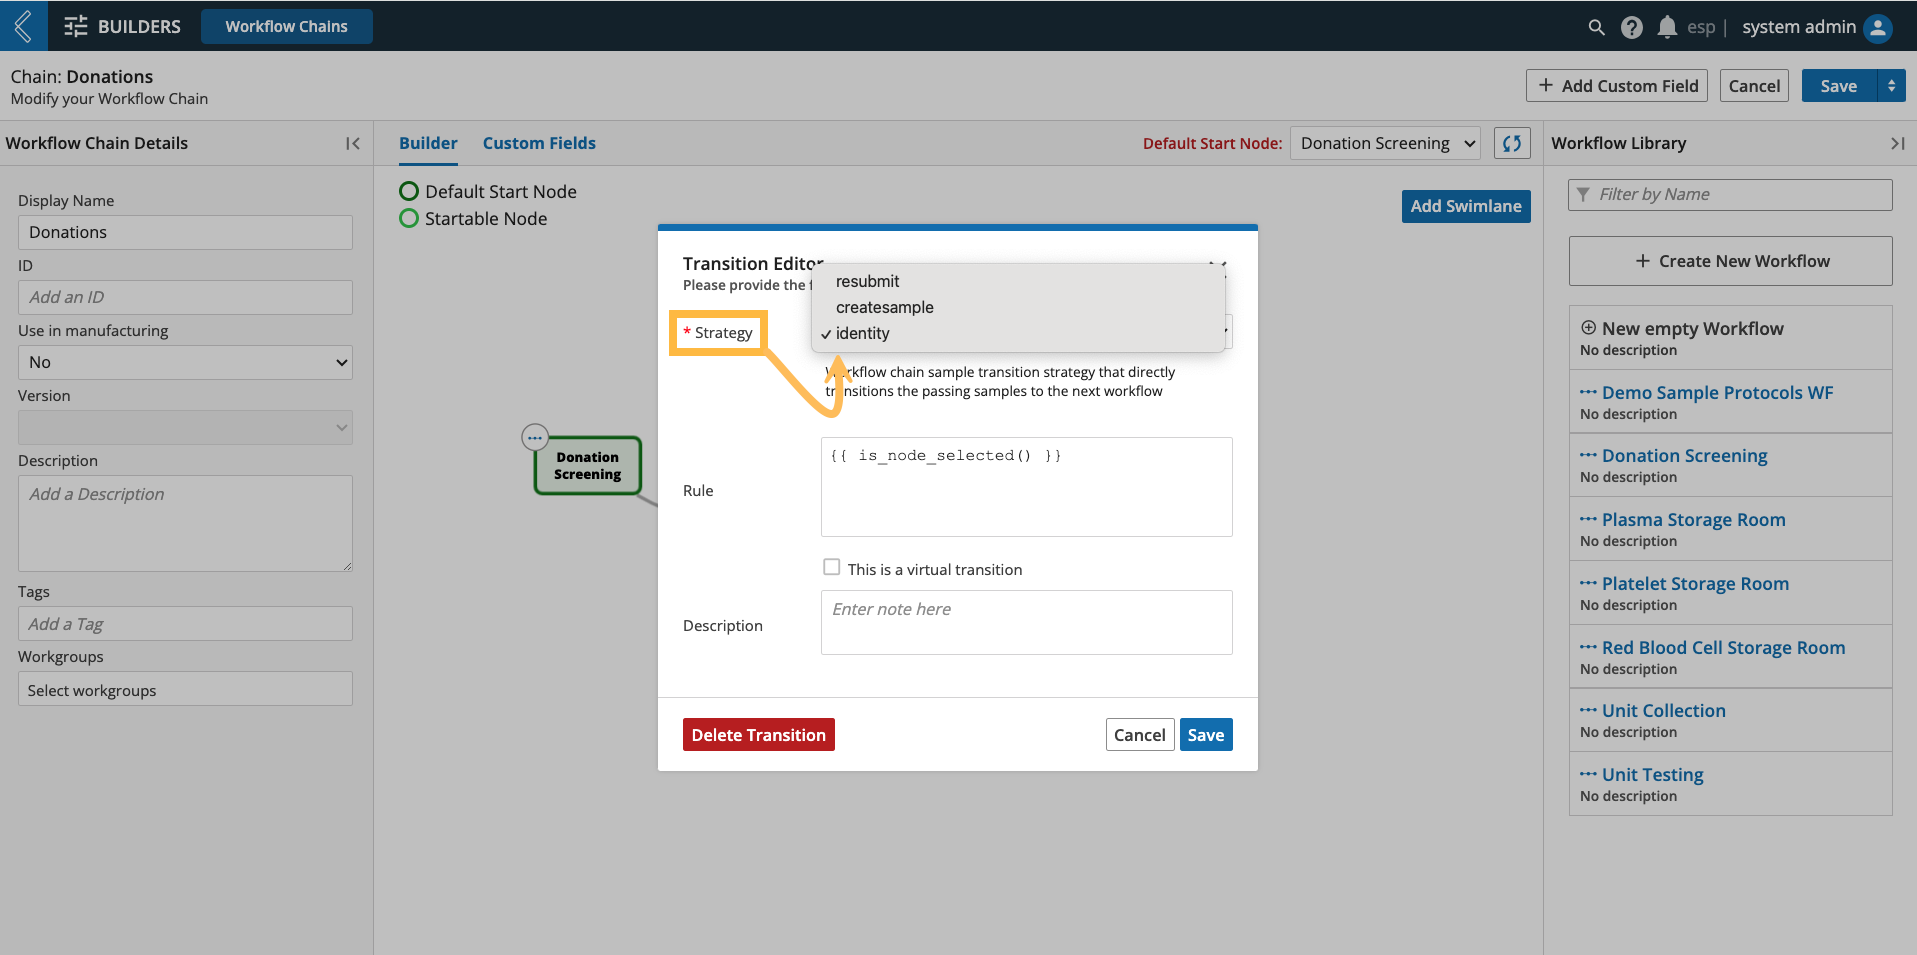
L7|ESP has three out-of-box strategies:
Identity – transitions the final Sample Set in the upstream Workflow.
Resubmit – transitions the starting Sample Set for the selected Workflow.
Createsample – creates Samples from the selected Sample Type as children of the final Sample Set in the upstream Workflow. This transition strategy is not as flexible as a Sample Protocol, and is typically used for in-flight Sample creation, as Workflows cannot begin with a Sample Protocol.
 |
Note
Developers can create custom Transition Strategies, which is a topic of the Developer MasterClass.
Section 7.2.3 of the User Documentation provides an example of a custom Transition Strategy.
How to use Virtual and Non-Virtual Transitions
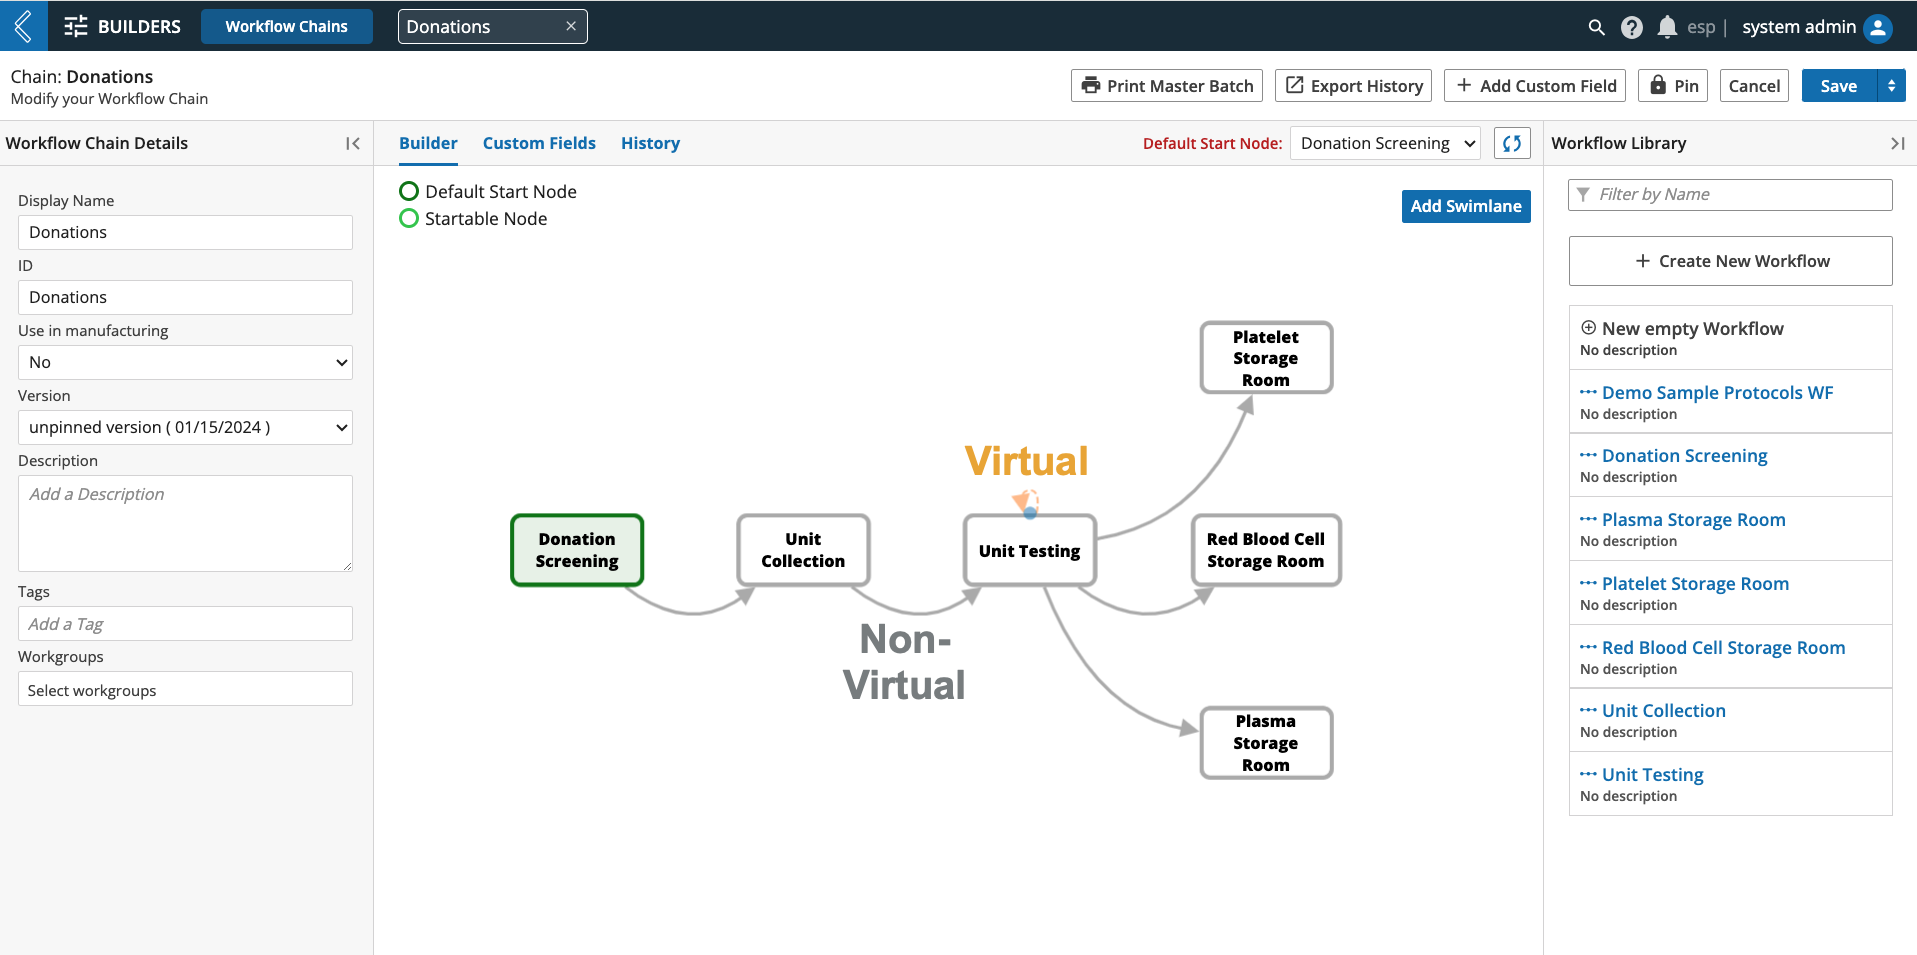
The “This is a virtual transition” checkbox converts the solid grey arrow to an orange dashed arrow. There is no functional difference between a virtual and non-virtual transition. Virtual transitions are typically seen as optional, whereas non-virtual transitions serve as the consistent path for Entities to take across the Workflow Chain.
 |