Sample Plans
Goals
Understand how Sample Points are used in MES
Understand the relationship between Sample Points and the Sample Plan
Know how to create new Sample Points
Know how to manage Sample labels
Key Terms
Term | Definition |
|---|---|
Sample Point Field | A type of custom field used to create new Samples during production. It creates parent-child relationships between the Batch Entity Type and the Samples being collected, but data cannot be collected against these new Samples in the Batch Record. |
Sample Plan | The Sample Plan tab displays information about the Sample IDs reserved and later assigned to Samples collected during Batch production. It also allows Users with the appropriate permissions to print and reconcile unused Sample labels. NoteMES End User activities and permissions can be found here Sample Plans will be covered more in Dynamic Execution Plans (DEPs) |
What are Sample Points and when do you use them in MES?
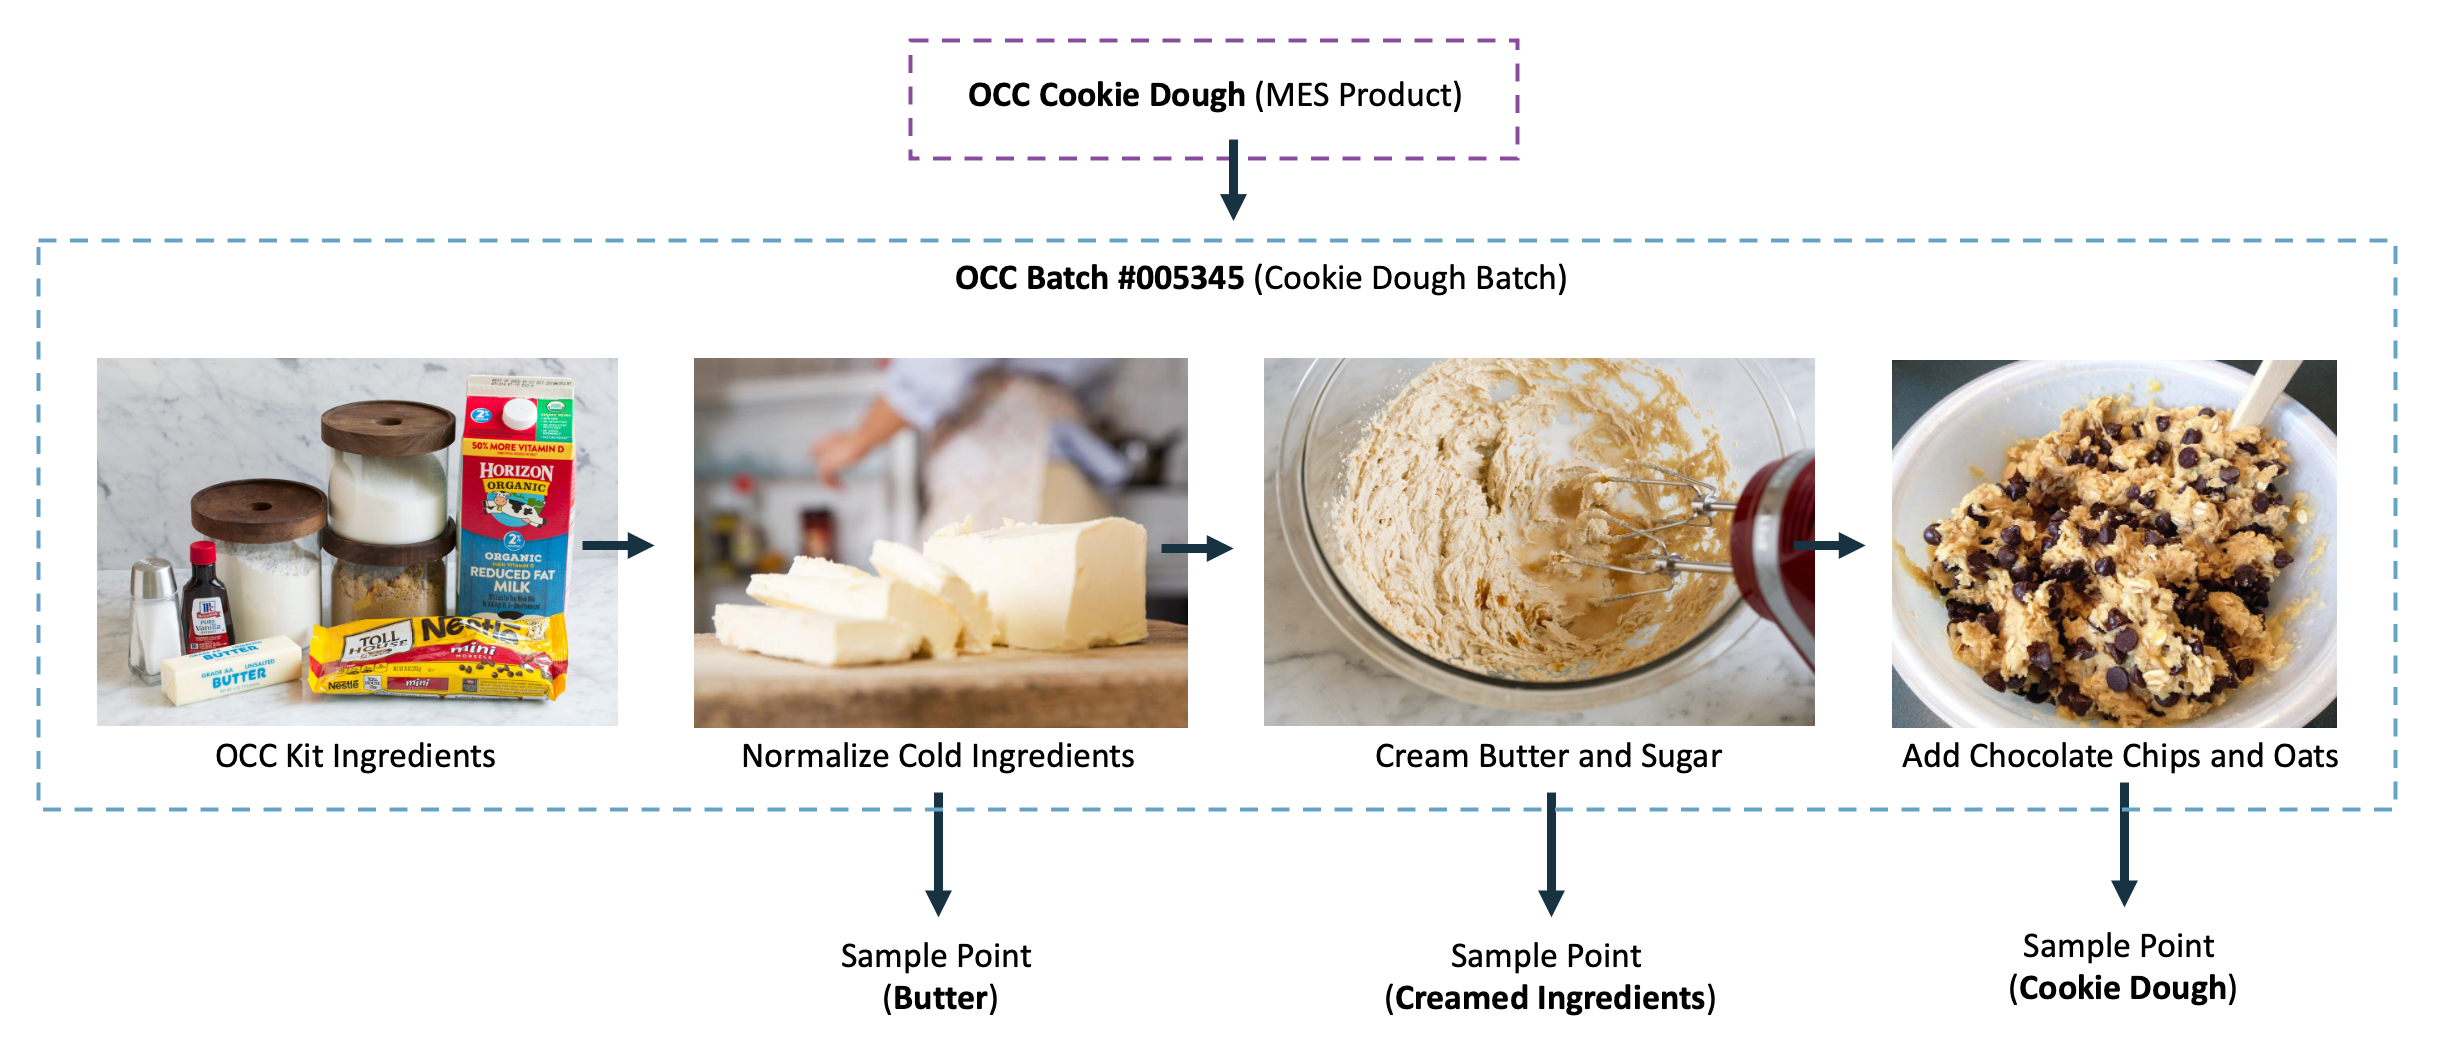
Sample Points create parent-child relationships between the Batch Entity Type and the Samples being collected, but data cannot be collected against these new Samples in the Batch Record. For example, Samples may be collected throughout production for quality control and stability testing.
 |
How does an End User use Sample Points in MES?
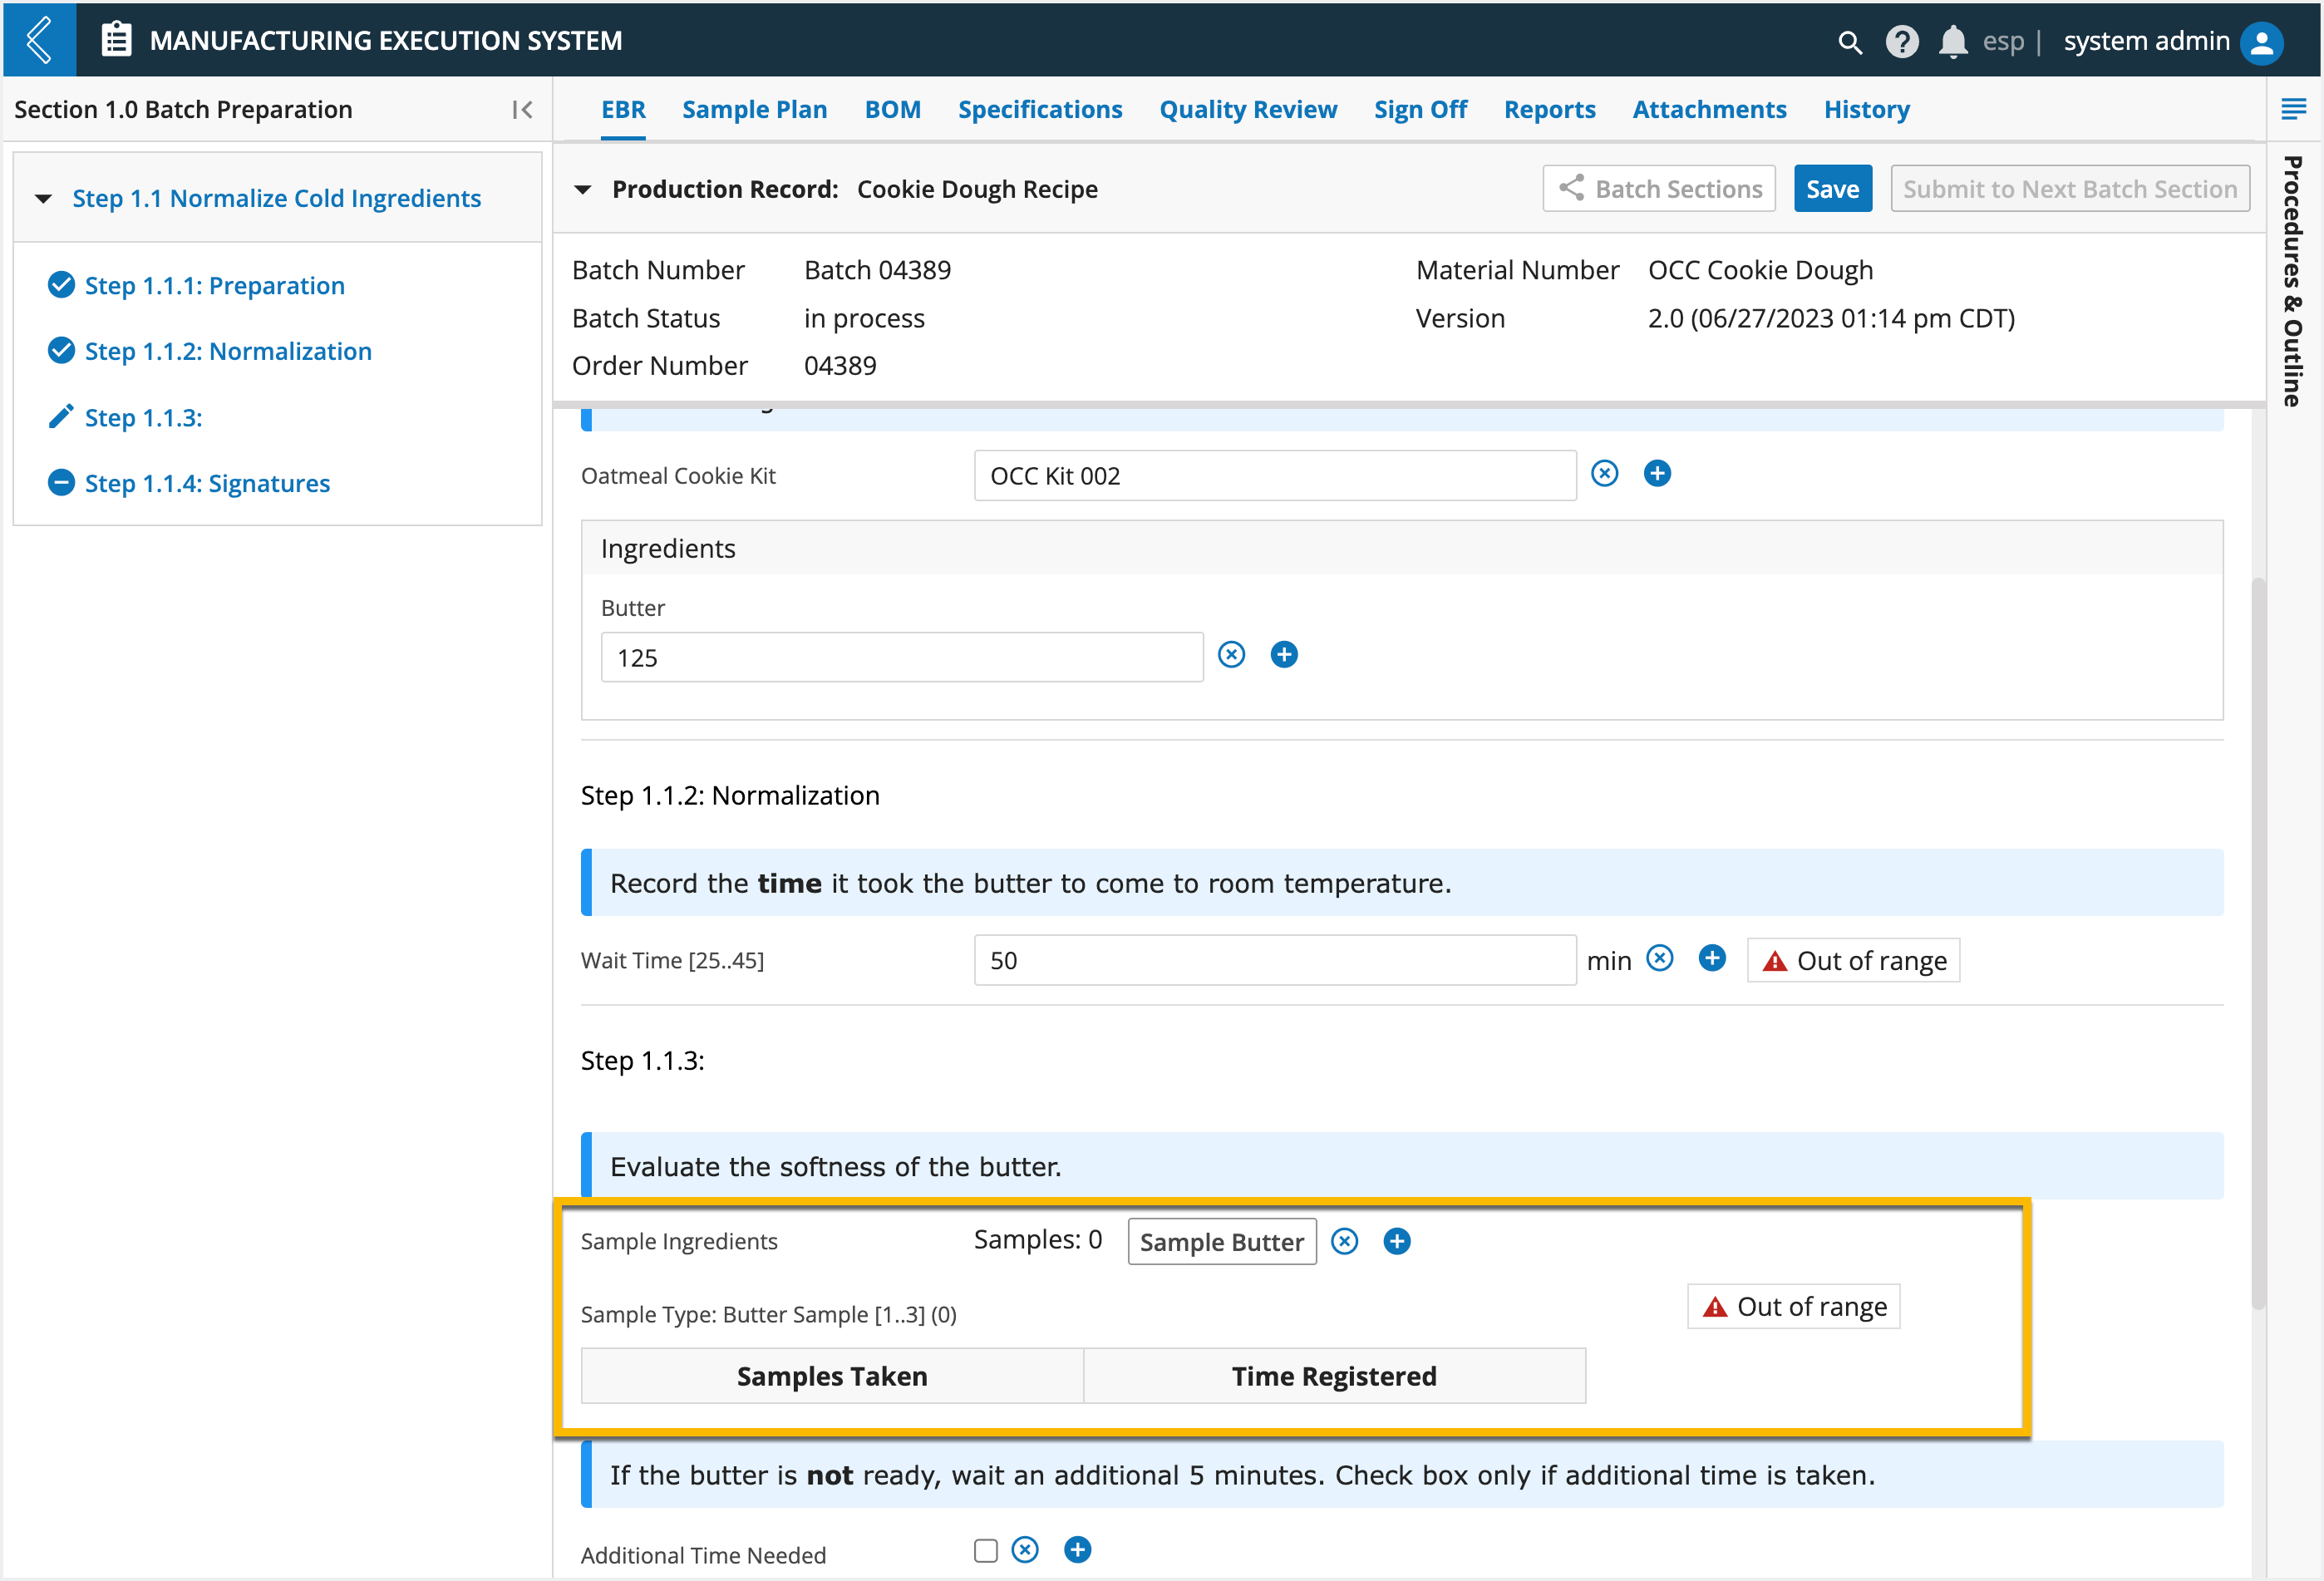
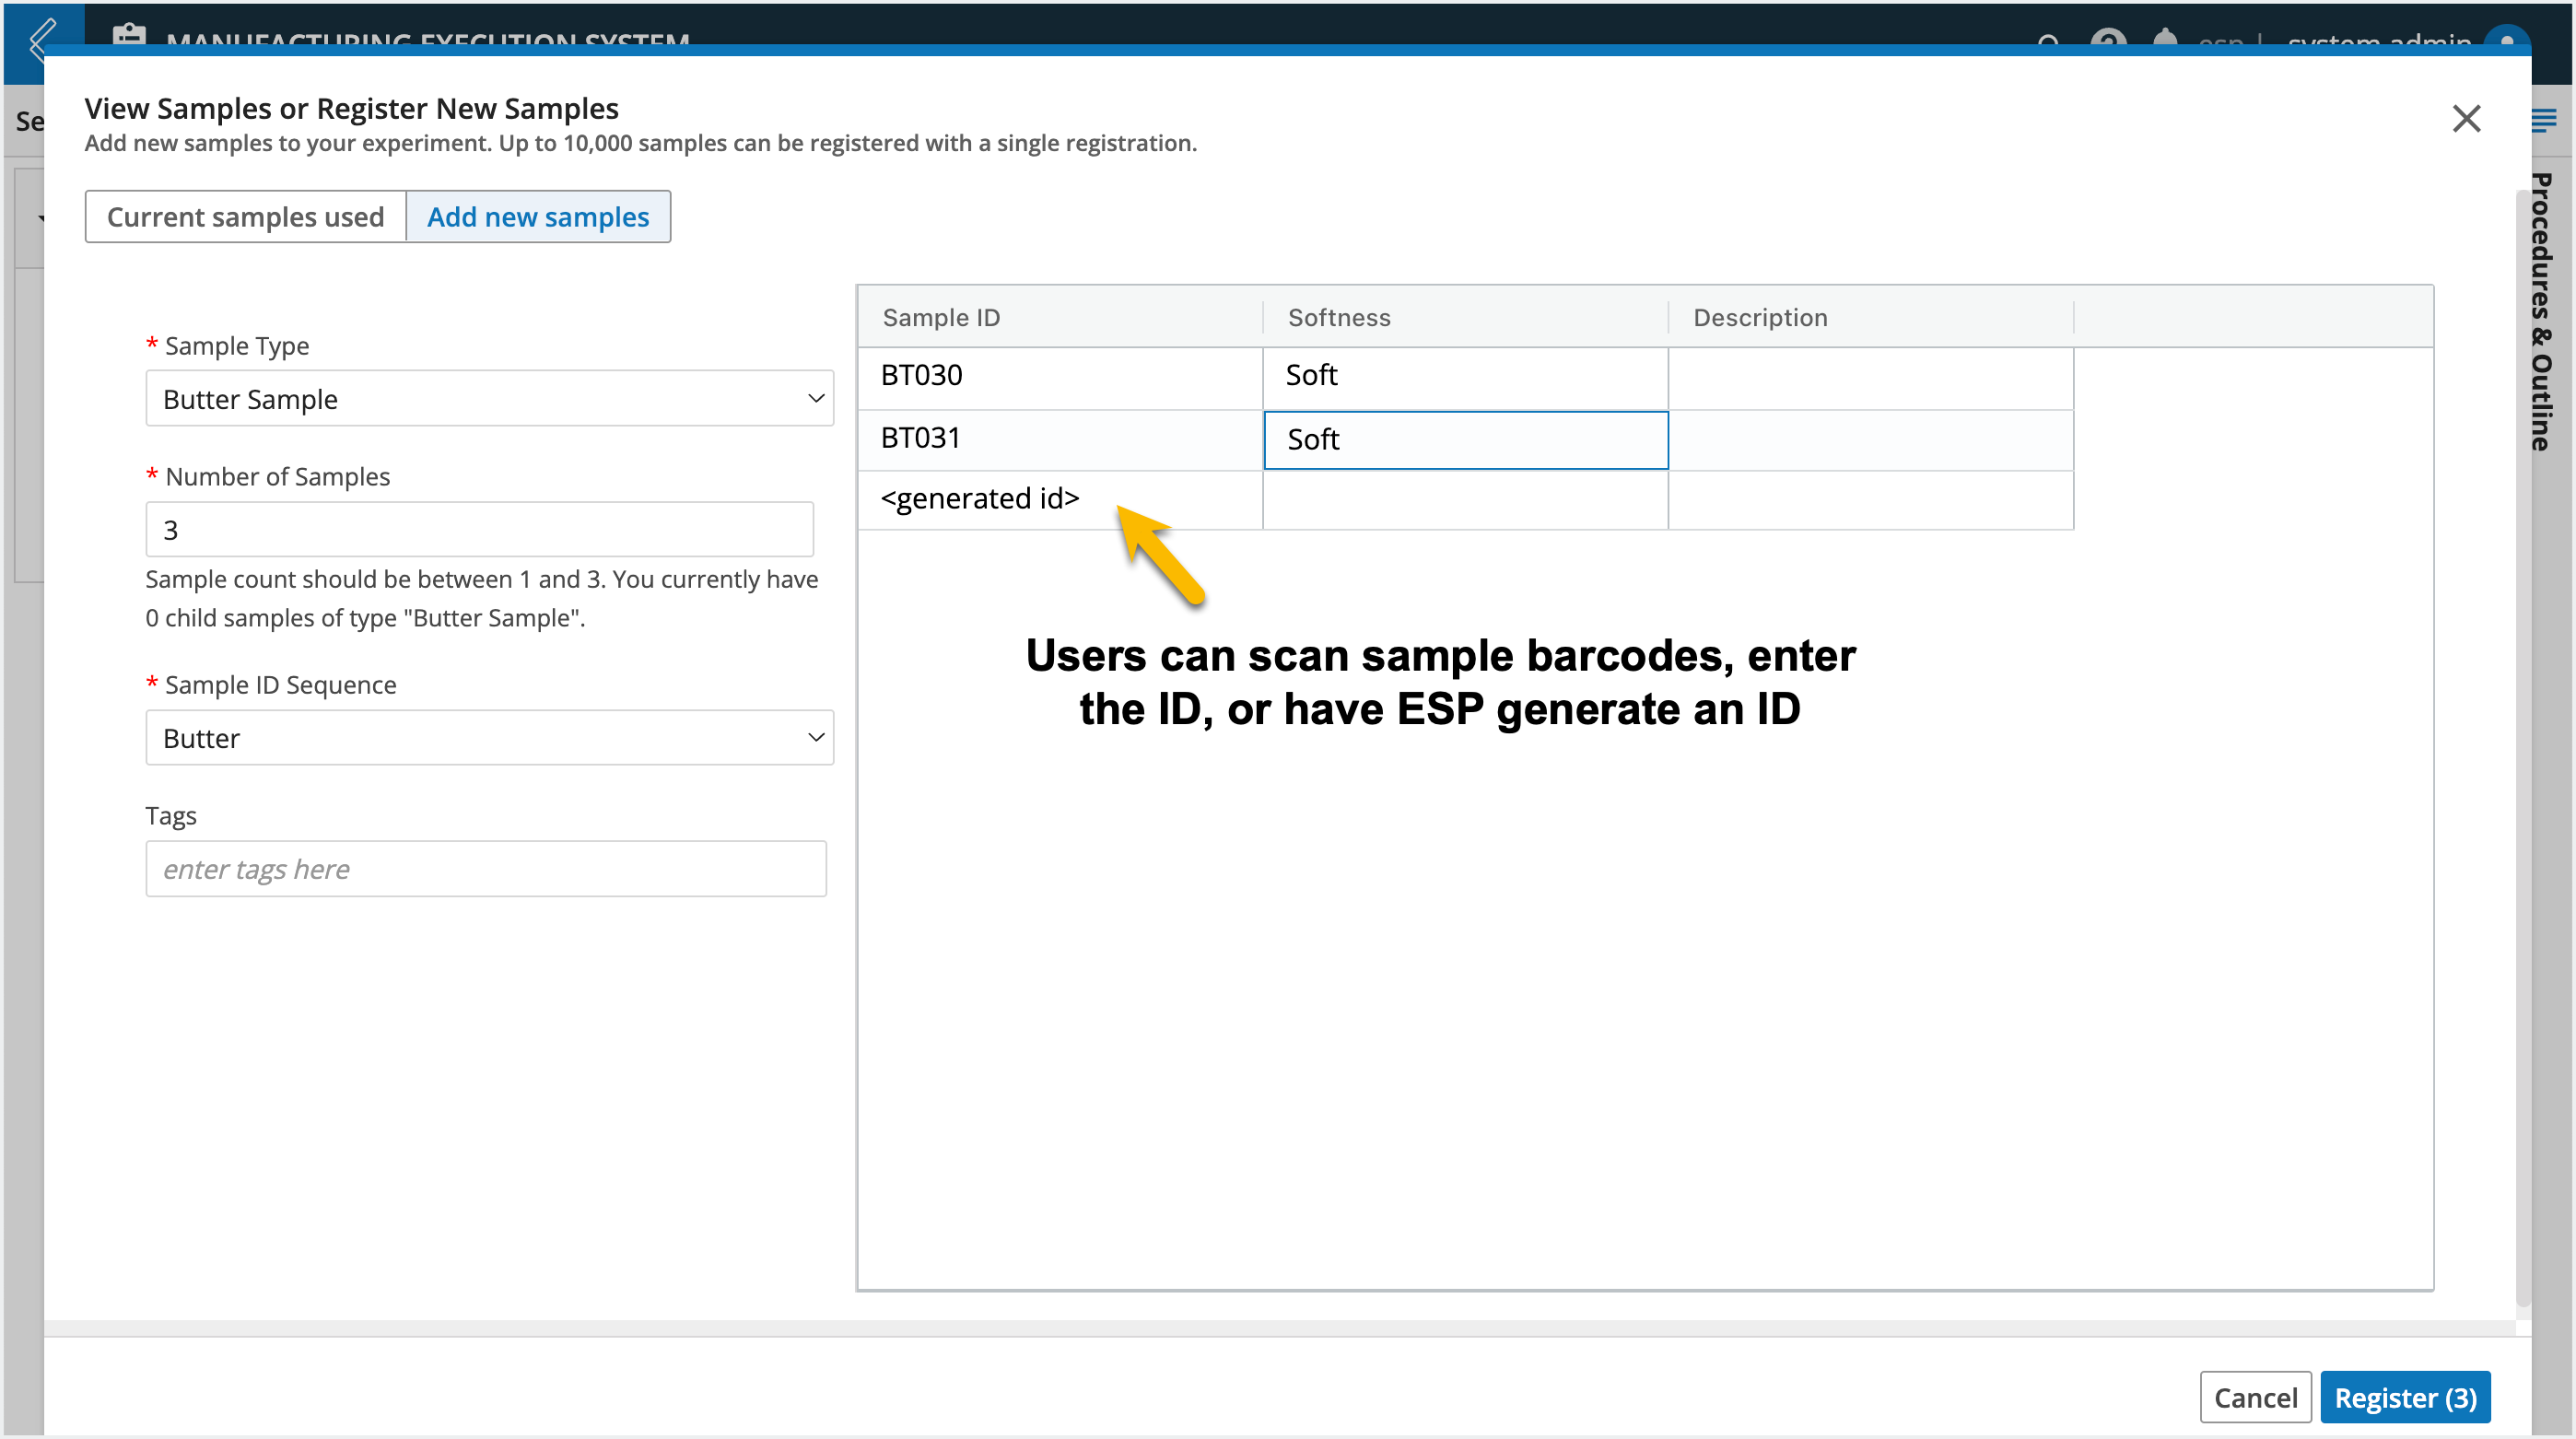
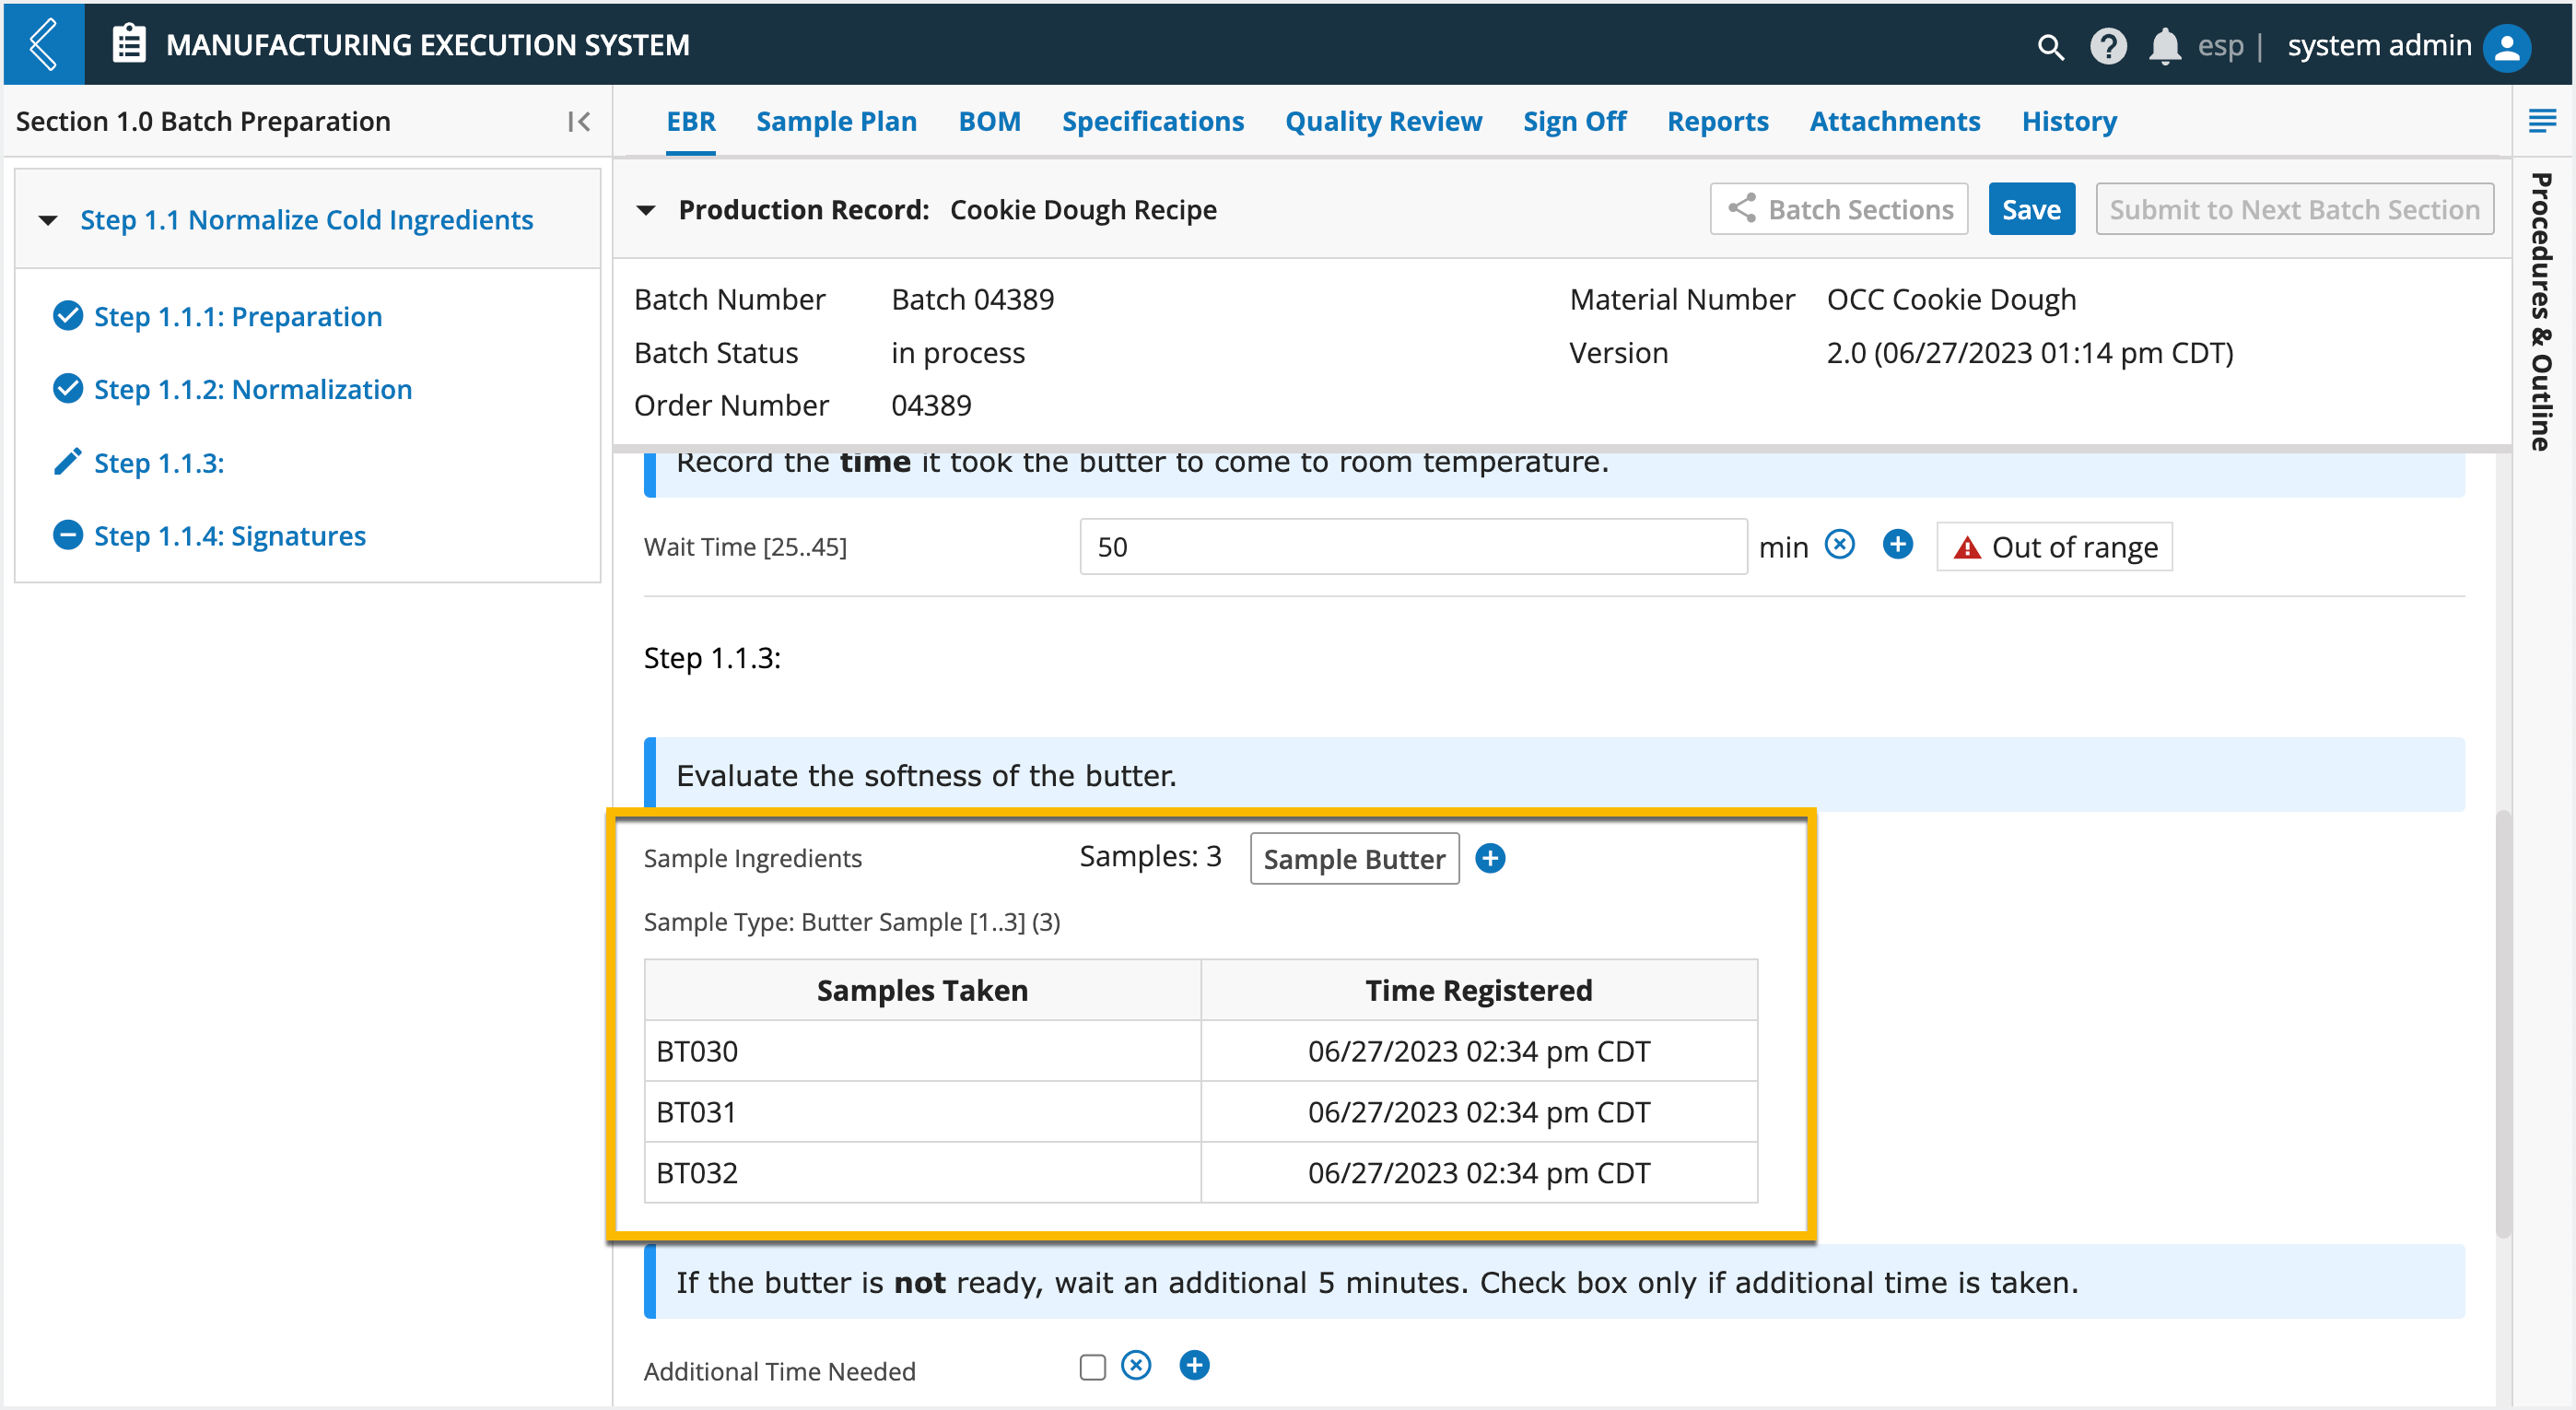
The End User will interact with Sample Point fields in the EBR tab of MES. As they are processing the Batch, the Sample Point field will display a button for them to select when it is time to take samples. Once selected, the “View Samples or Register New Samples” modal will appear, enabling them create new samples and/or scan the barcodes of previously registered sample to create parent-child relationships.
How to model Sample Points
Go to: Builders (L7|Master) → Protocols → select an existing Protocol or + New Protocol
To add a new Sample Point field:
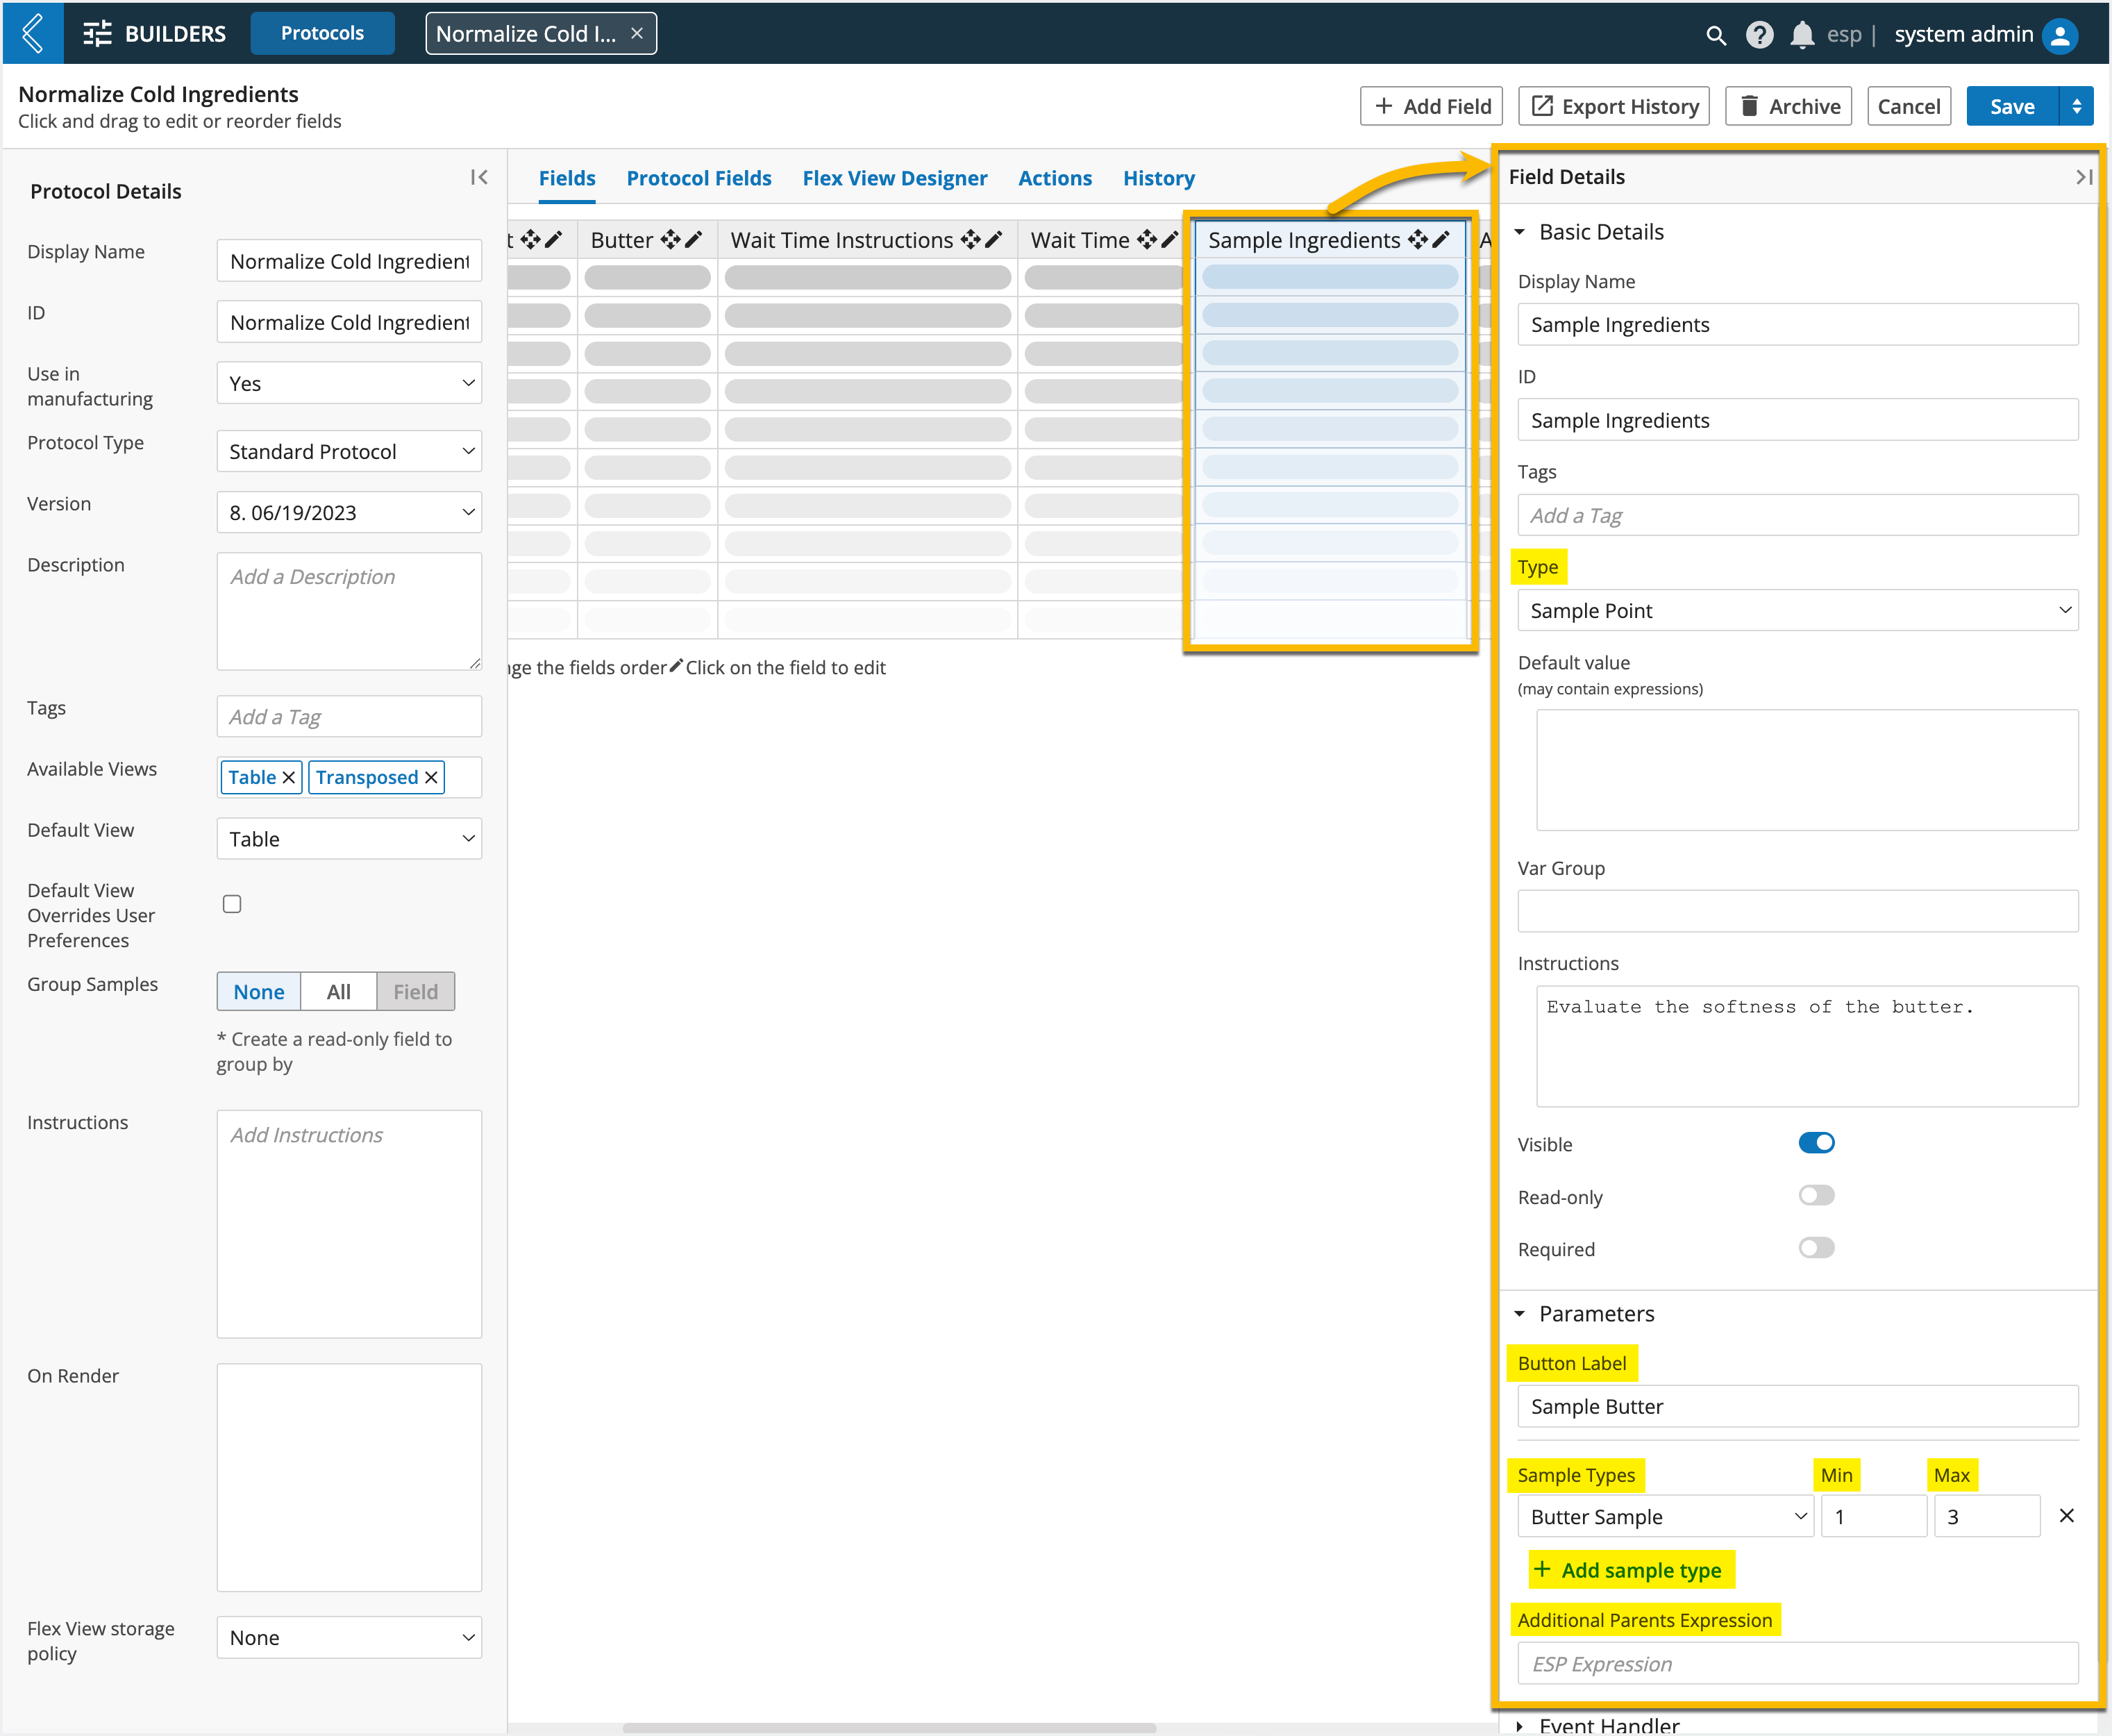
Select + Add Field.
Select Sample Point as the Type.
Provide a Button Label - when selected during processing, this button will open the View Samples or Register New Samples modal for the User to create new samples. The default button label is
AddSelect + Add sample type - choose the Sample Type(s) the User is allowed to create, then set the minimum and maximum number of samples that can be created. Several Samples Types can be created at once.
Optionally add an Additional Parents Expression - gives you the flexibility to assign additional Entities as parents. For example, while processing a Batch, multiple sample points may be taken and you may want to capture the relationship between these different samples taken throughout the process. To do so, you can use the
cellexpression:{{ cell('A different Sample Point Field', 'Protocol ID') }}
Note
The min and max settings are soft limits, meaning the User will receive a warning message that the number of samples selected is outside of this range, but they can still create the samples. Sample points allow the User to opt out of taking samples by electing to create 0 new samples.
Any out of range values will also appear under the Quality Review tab in MES.
How Sample Points are reflected in the Sample Plan tab
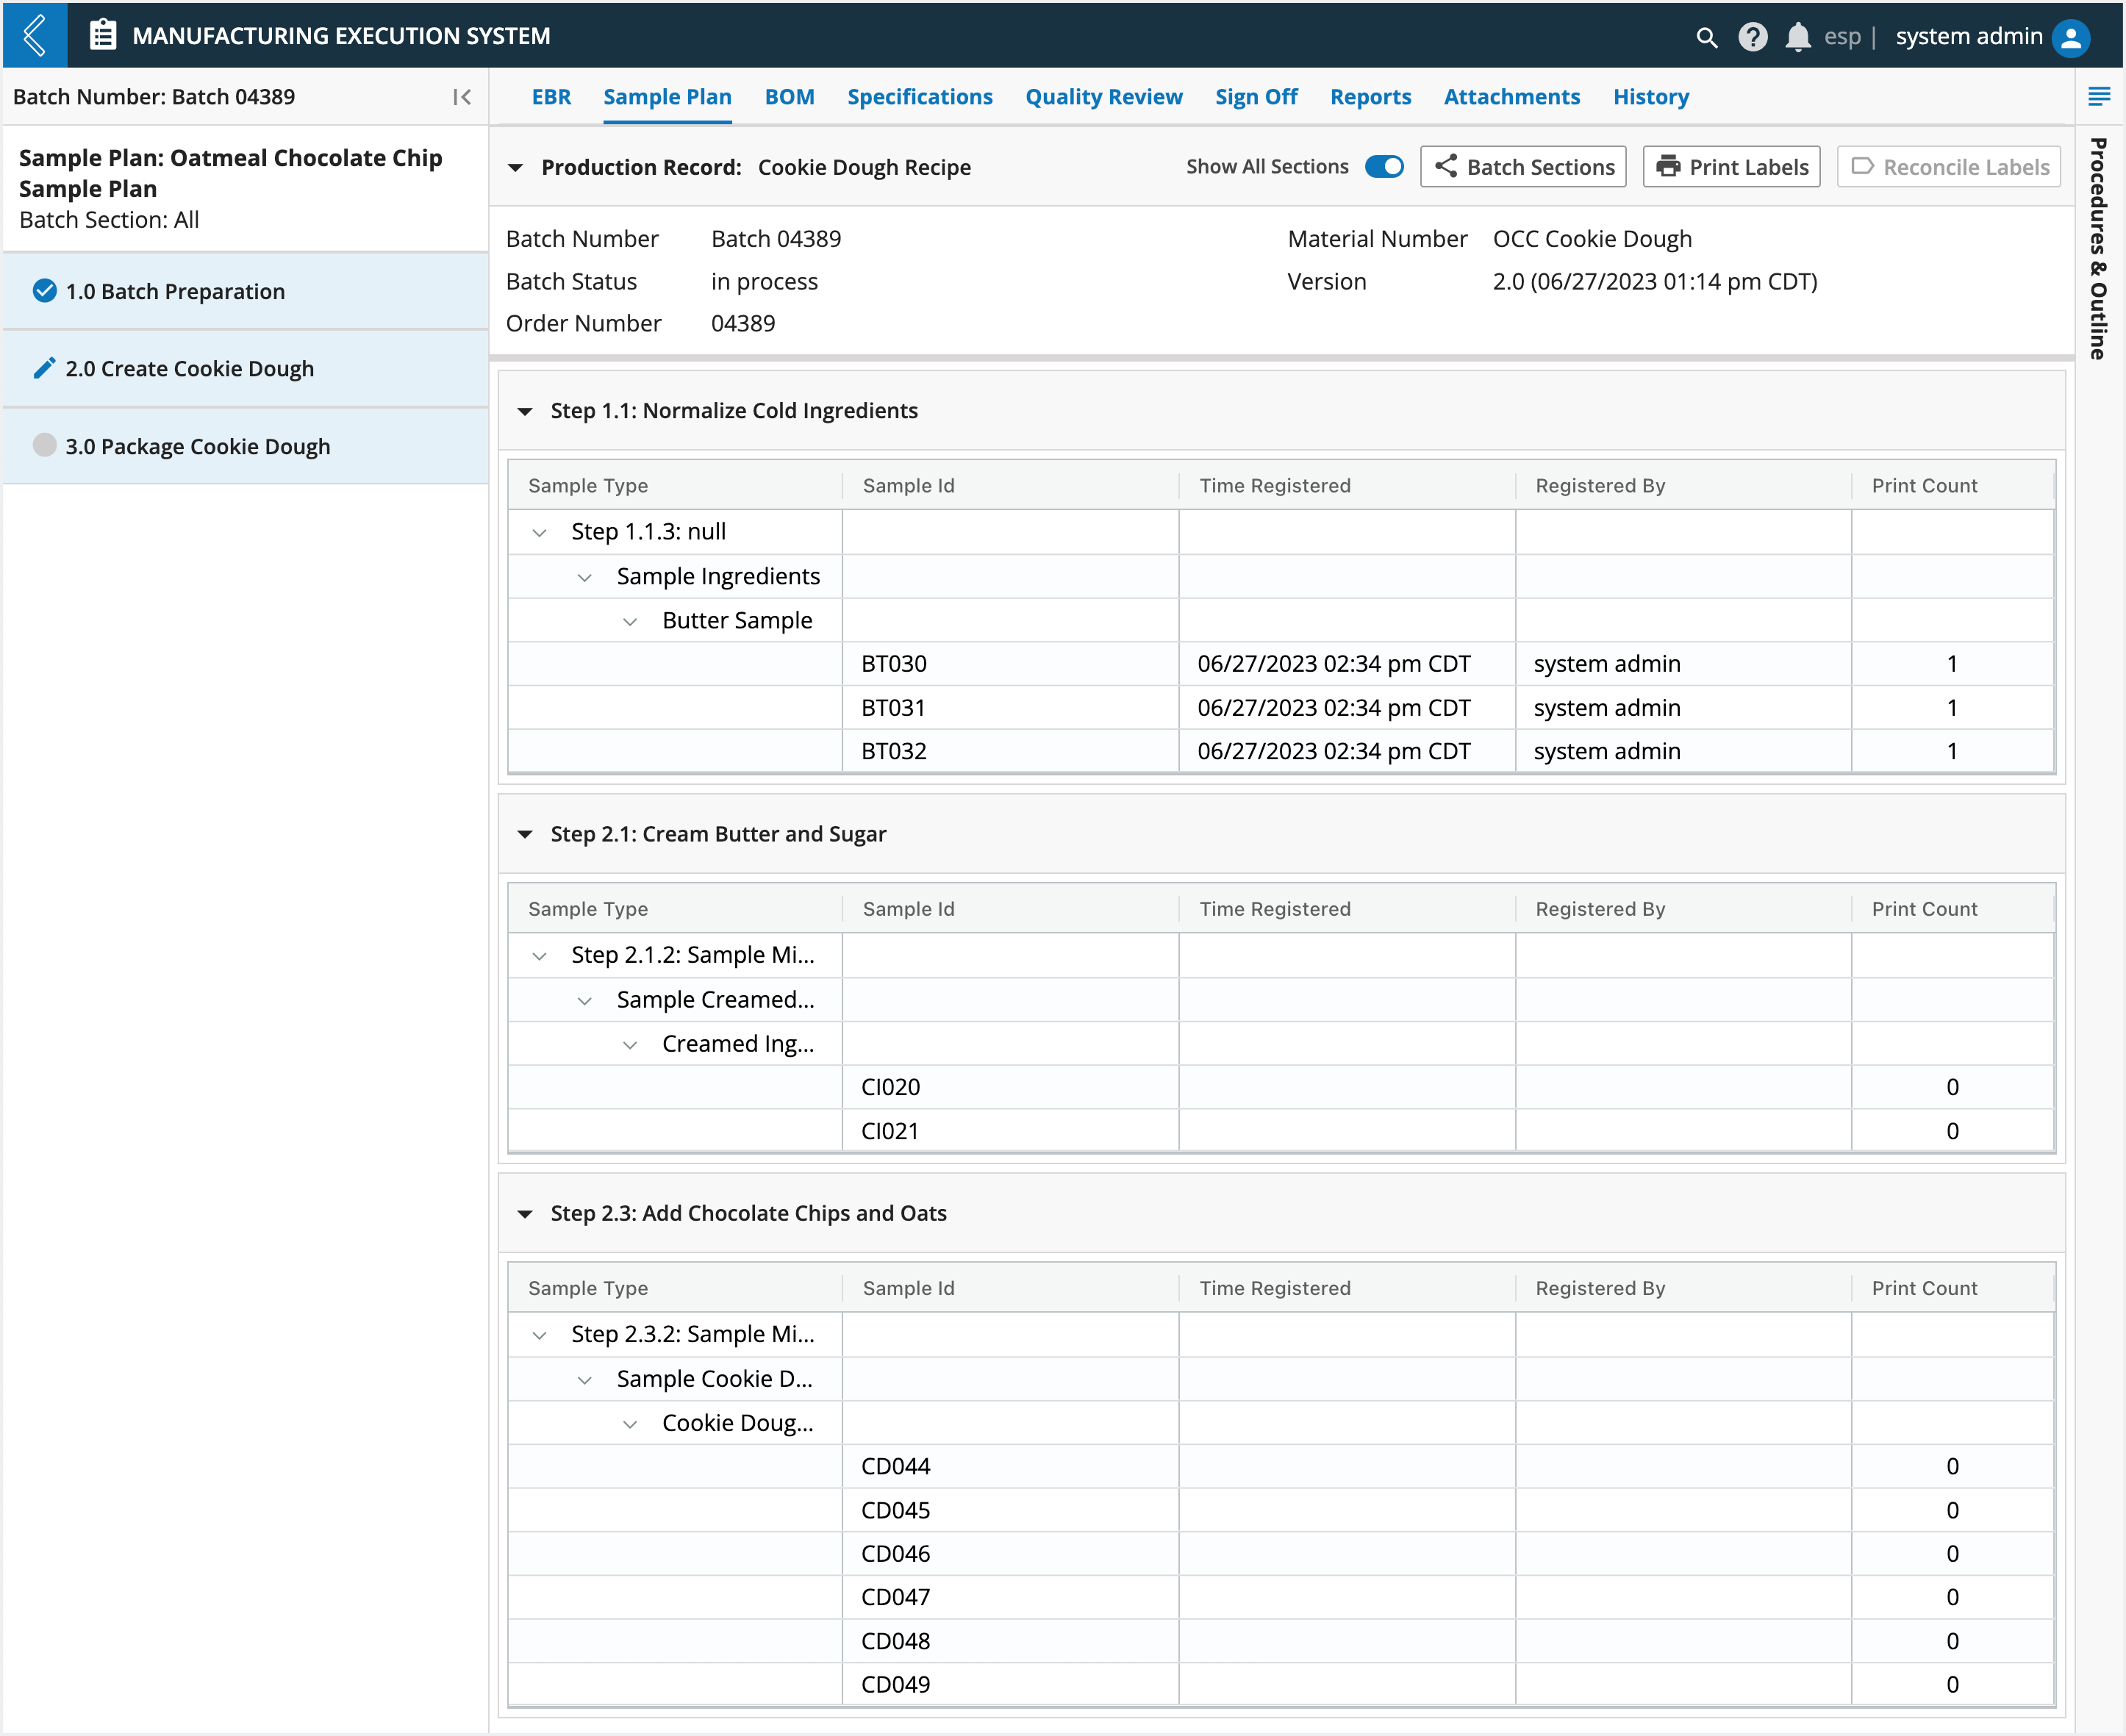
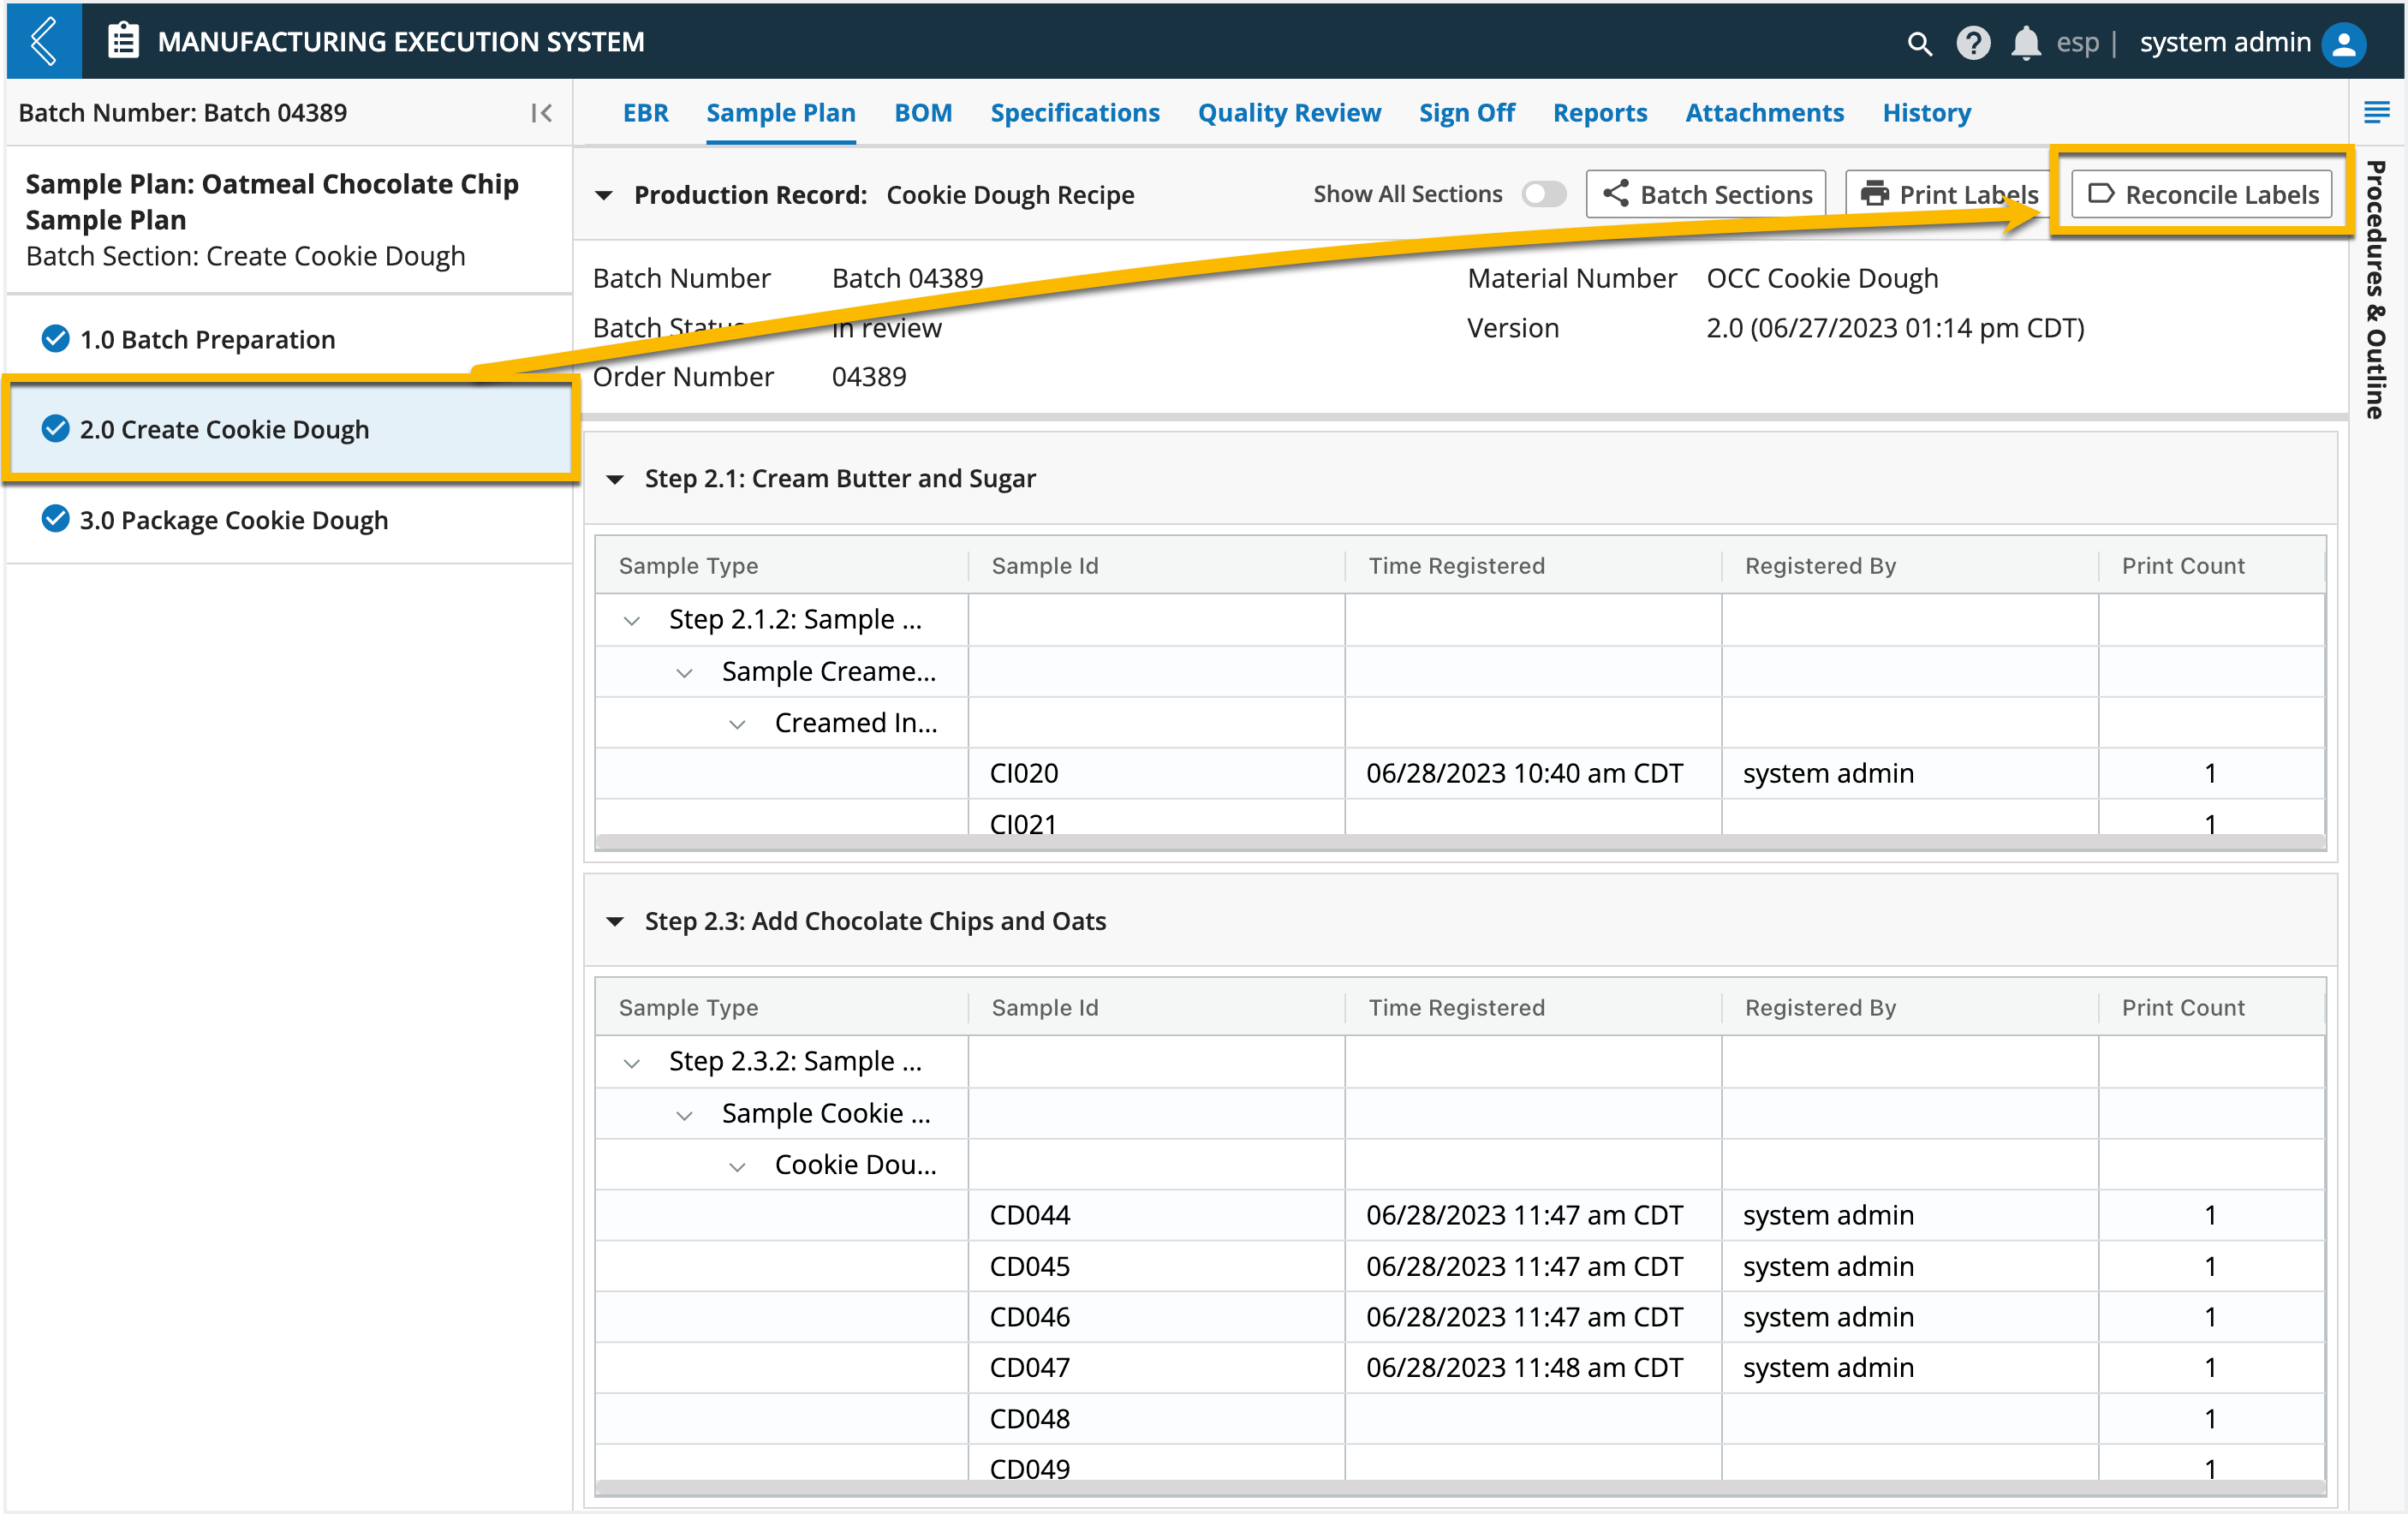
The Sample Plan tab displays information about the Sample IDs reserved and later assigned to Samples collected during Batch production. Sample Points can be viewed for a single Section or all Sections in the Batch. To view a single Section, select the Section in the left panel. To view all Sample Points in the Batch, turn on Show All Sections at the top of the tab.
The Batch Sections button displays an overview of the manufacturing process (Recipe).
Note
In the Sample Plan tab, this is for viewing purposes only.
The main panel displays information about the Sample Plan for the Batch. This information includes:
Step – organizes the Sample Points in the Batch Section.
Sample Type – Further organizes Sample Points by Sub-Step, Field, and Sample Type.
Sample ID – the Sample ID that has been reserved and/or assigned to the Sample.
Time Registered – the date and time the Sample was registered.
Registered By – the User who registered the Sample
Print Count – the number of labels printed for the Sample.
How to manage Sample Labels
During Batch creation, MES reserves Sample IDs so that labels can be printed before production. These labels are typically attached to the Sample and scanned during production to complete registration.
Unused labels should be physically destroyed and the destruction acknowledged through reconciliation.
Reserving Sample IDs
The rules that MES uses when reserving Sample IDs are:
Reserve the maximum number of IDs if it is defined.
If a maximum is not defined but a minimum is, reserve the minimum.
If no maximum or minimum is defined, reserve one (1).
If the maximum and minimum are both set to zero (0), do not reserve any IDs.
Printing Sample Labels
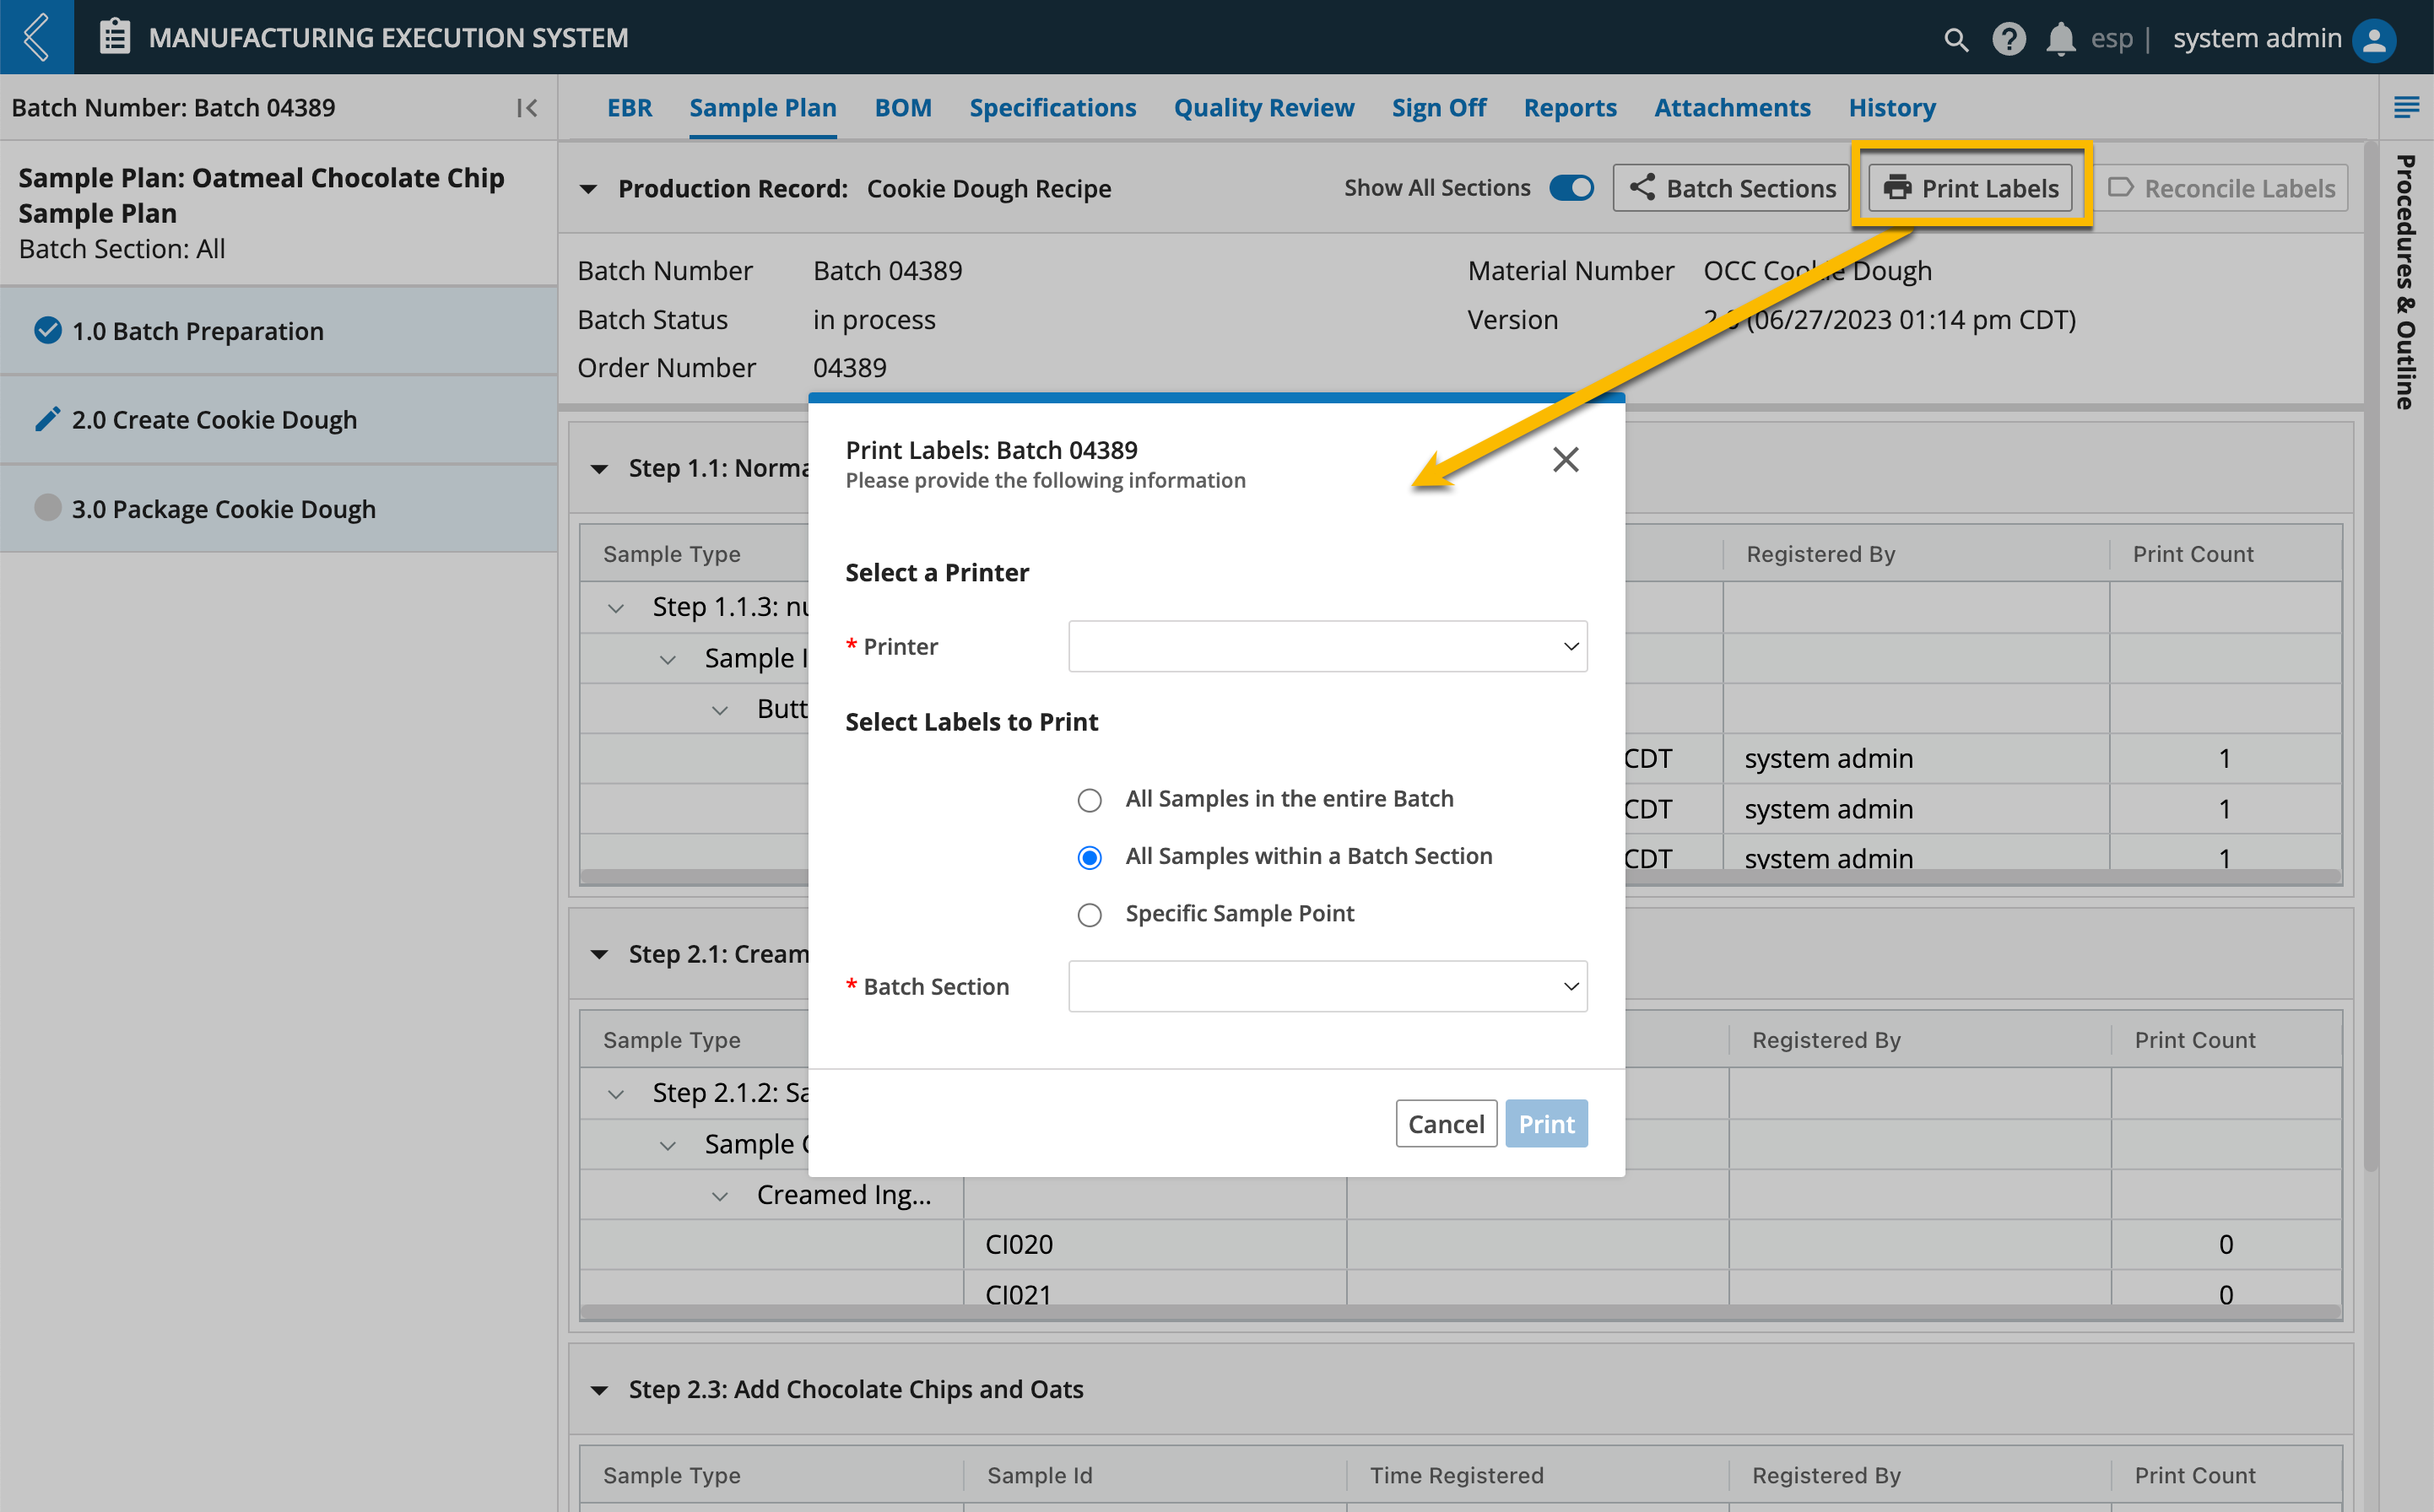
To print Sample labels:
Go to the Sample Plan tab.
Click Print Labels at the top of the tab.
Select a Printer.
Select the labels to print:
All samples in the entire Batch – print one label for every Sample ID reserved for the entire Batch.
All samples within a Batch Section – print one label for every Sample ID reserved in the selected Batch Section.
Specific Sample Point – print one label for every Sample ID reserved in the selected Sample Point.
Click Print.
MES uses a Pipeline that is associated with the Recipe to print Sample labels. If printing is successful, the Print Count for each label is incremented.
Note
Printing Sample labels requires the configuration of one (1) or more printers. More information on this Configuration and the Pipeline to print Sample labels can be found here
Reconciling Labels
Label reconciliation applies to all Samples within a Batch Section. Reconciliation is only allowed after data entry is complete for all Steps in the Section.
Note
It is not possible to modify the results of this action after completion.
To reconcile Sample labels:
Select the Batch Section to reconcile from the left panel in the Sample Plan tab. Only one (1) Section can be reconciled at a time.
Click Reconcile Labels at the top of the tab.
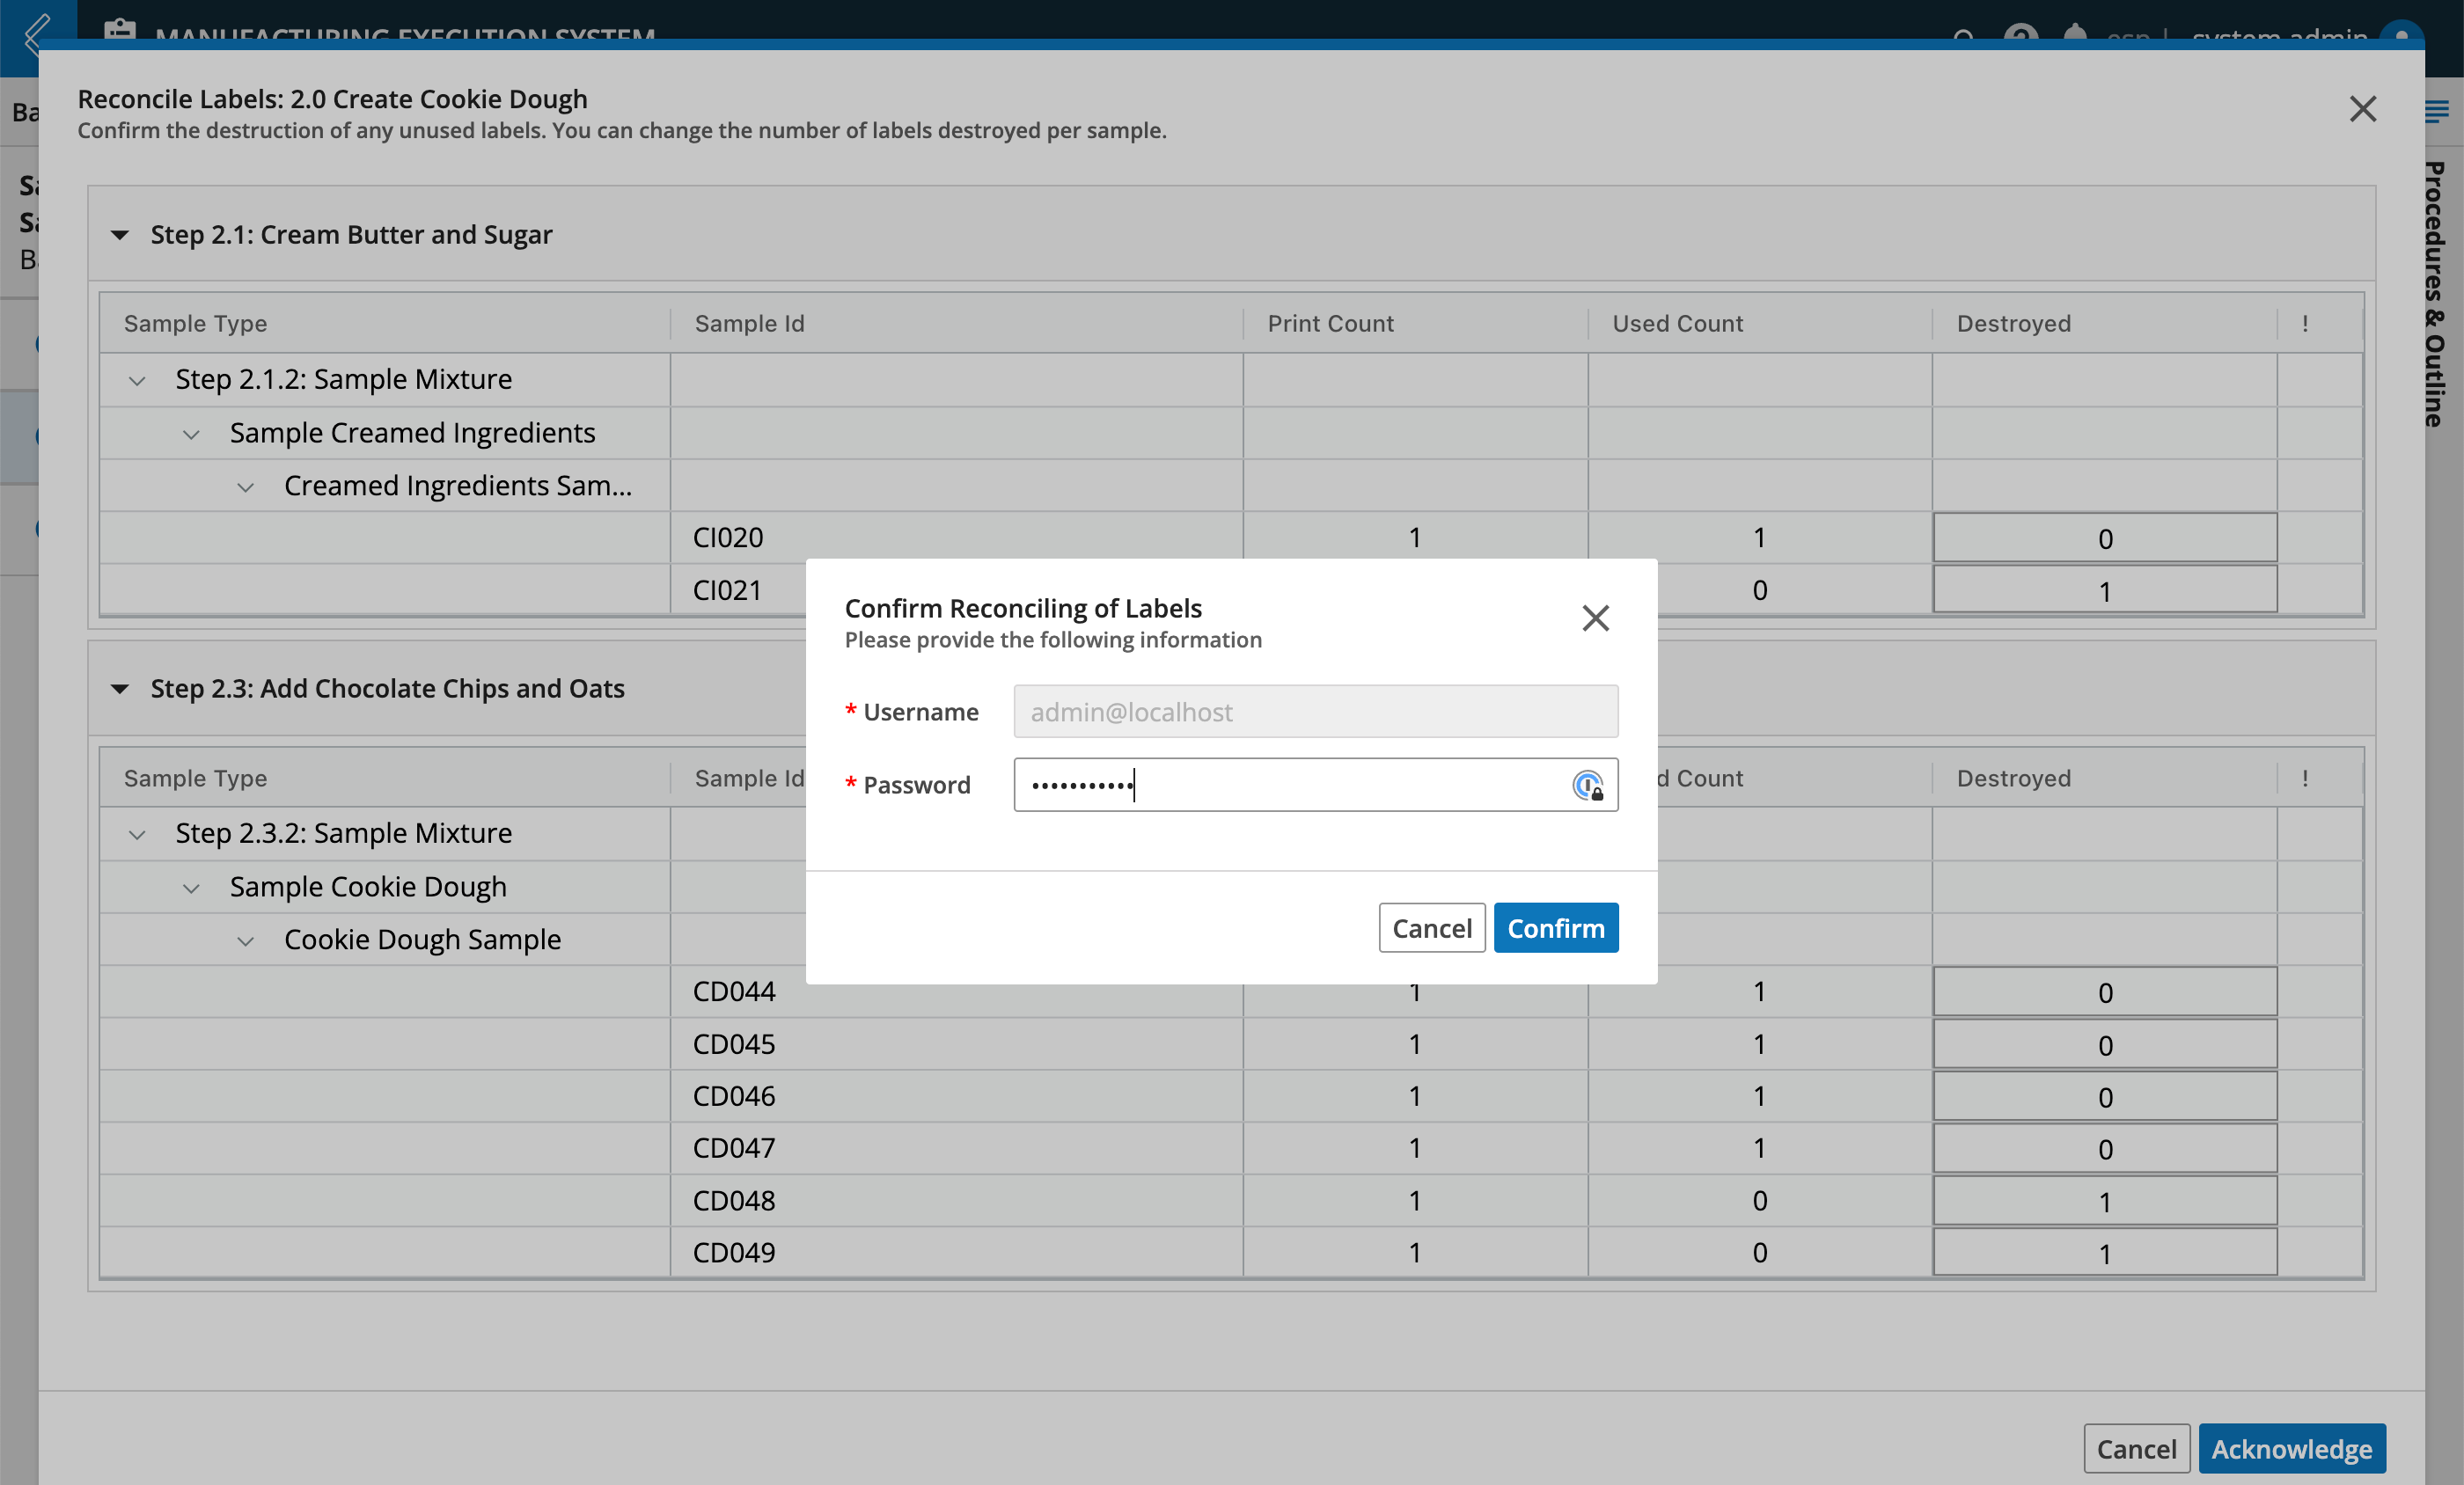
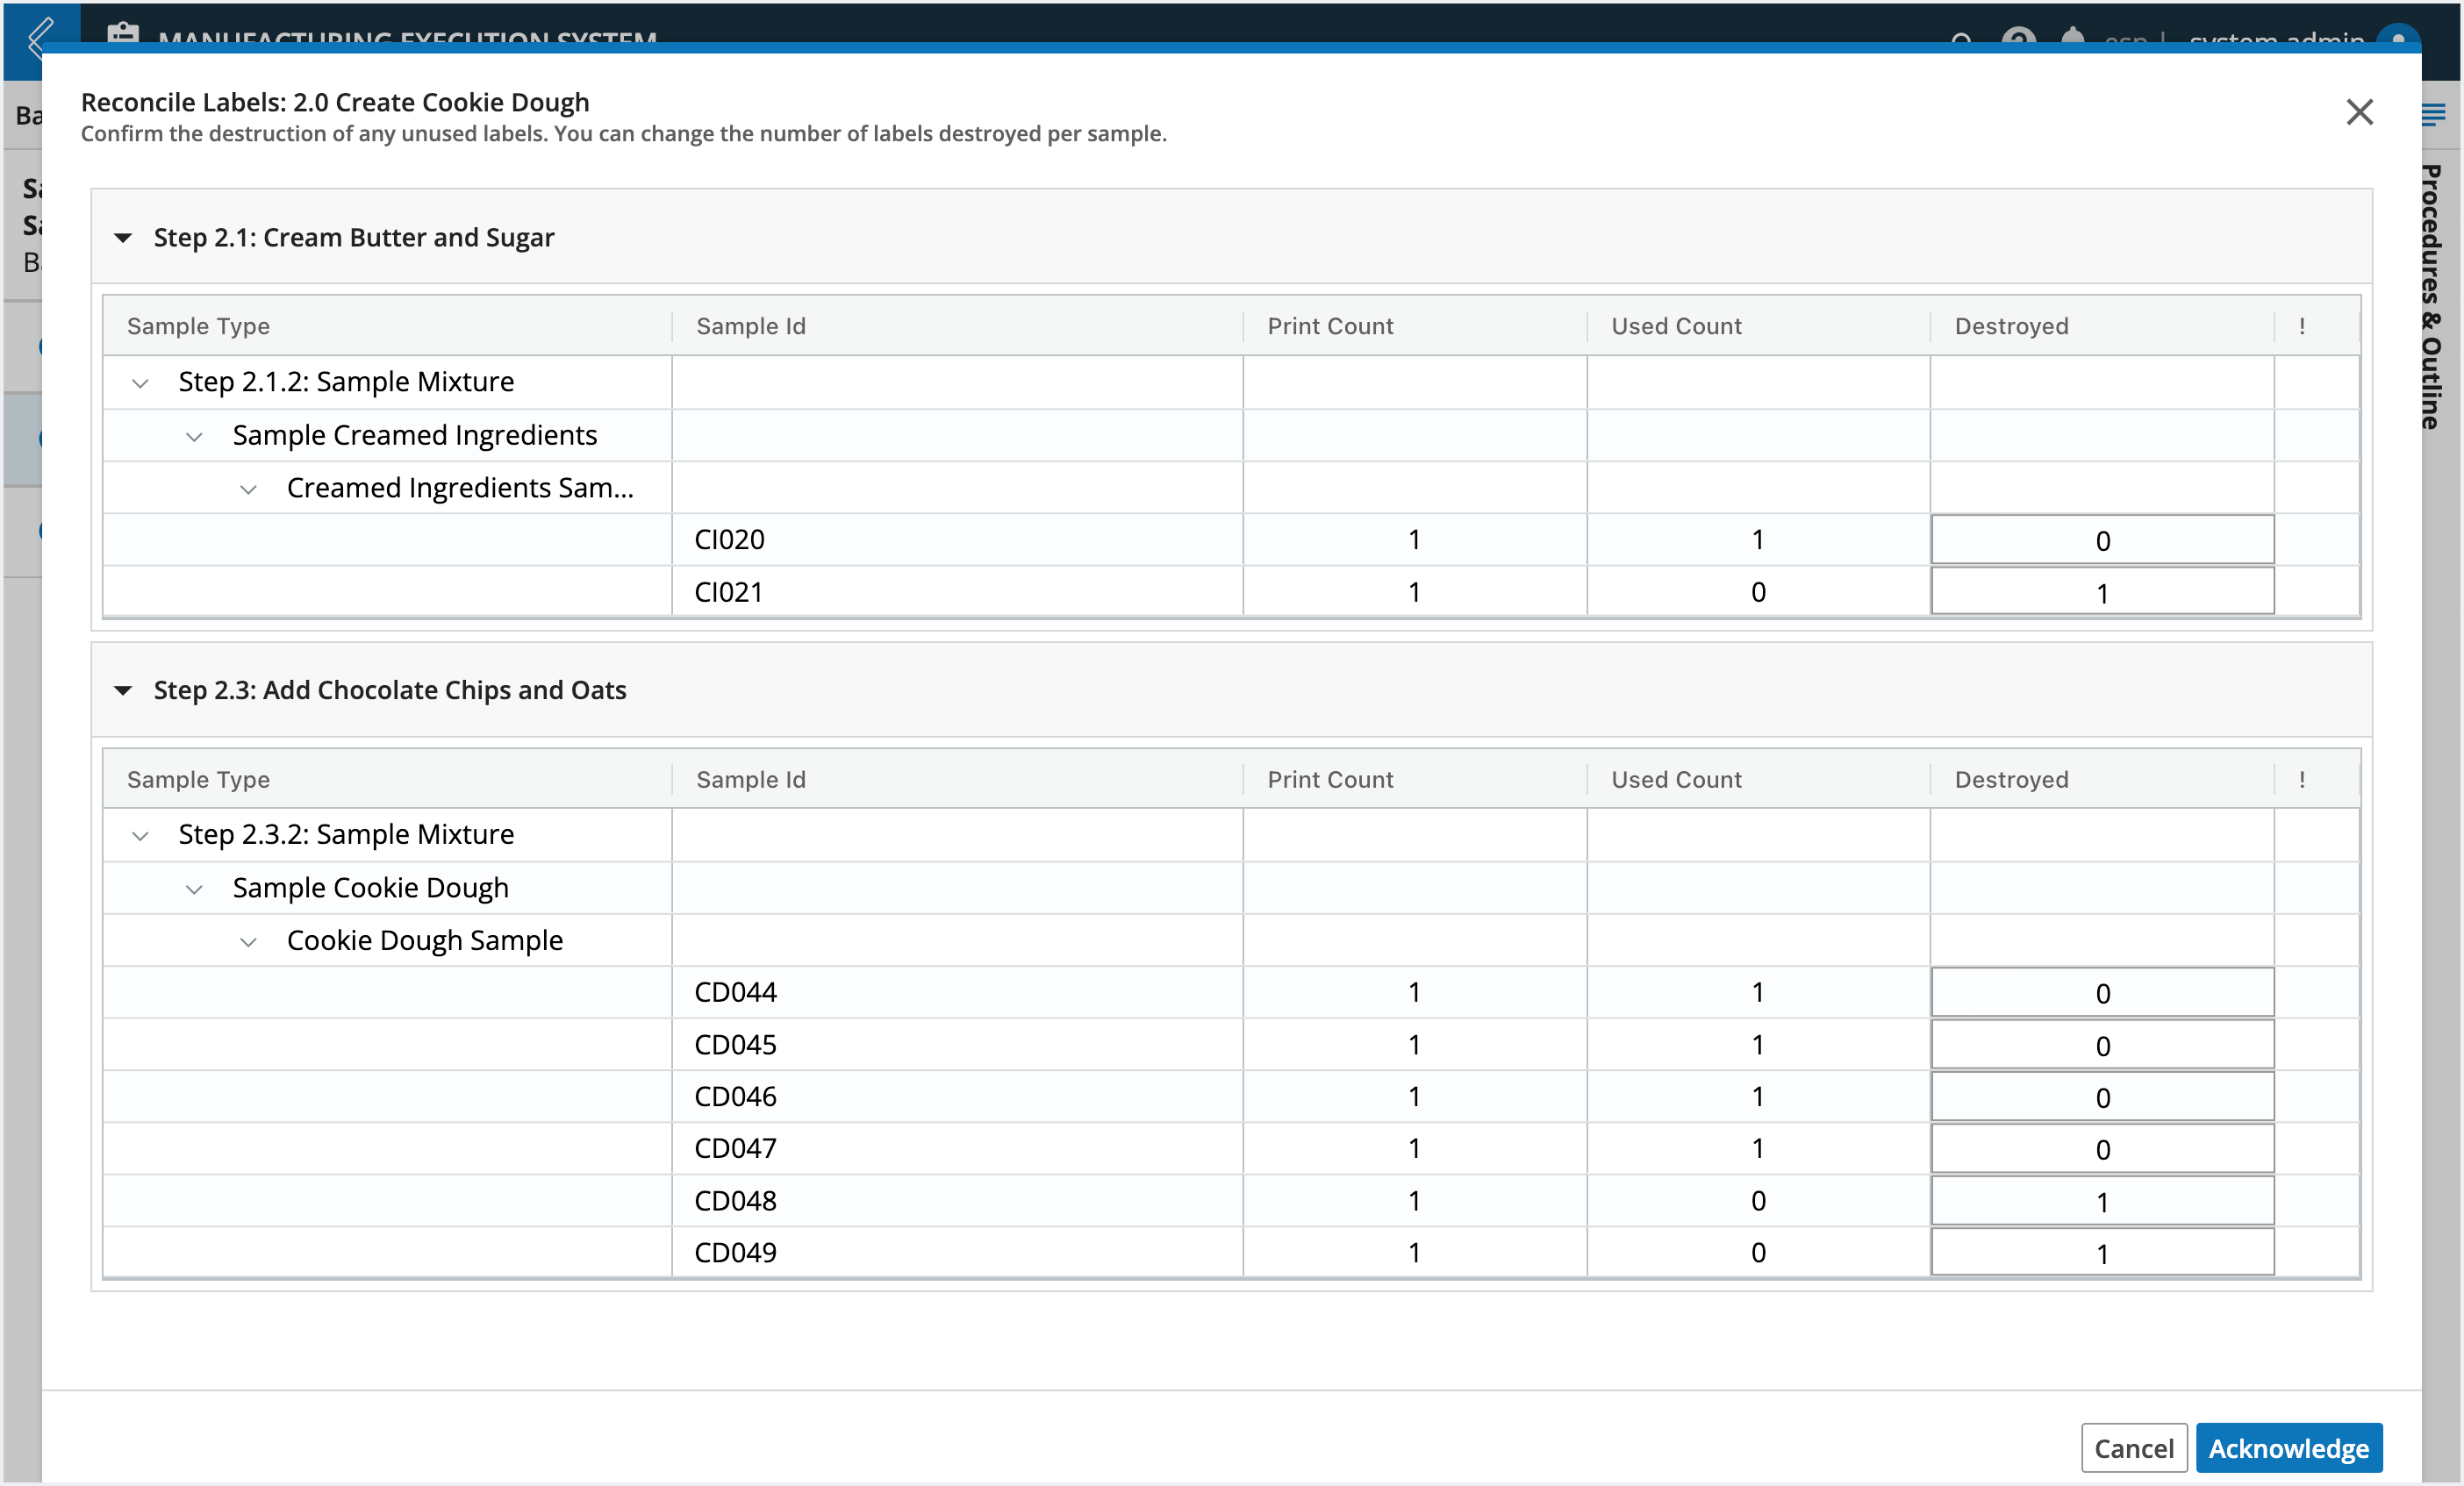
In the Reconcile Labels modal, review the values recorded in the Destroyed column.
These values are equal to the Print Count minus the Used Count, but can be updated.
Click the Acknowledge button at the bottom of the window.
Enter your Password (must be the logged-in User).
Click Confirm.
 |
