Modeling Workflow Chains
In this section
This section will help you:
Understand what Workflow Chains are and when they are used.
Understand design considerations and best practices for modeling Workflow Chains.
Know how to create and edit Workflow Chains, using:
Workflow Chain Details
Workflow Library
Nodes
Swim Lanes
Key Terms
Term | Definition |
|---|---|
Workflow Chain | Ordered collection of Workflows, representing an end-to-end business process. |
Workflow Library | List of all Workflows registered in the system. |
Node | Visual representation of a Workflow in a Workflow Chain. |
Swim Lane | Provide a way to visually organize nodes into discrete categories. |
What are Workflow Chains and when are they used in L7|ESP?
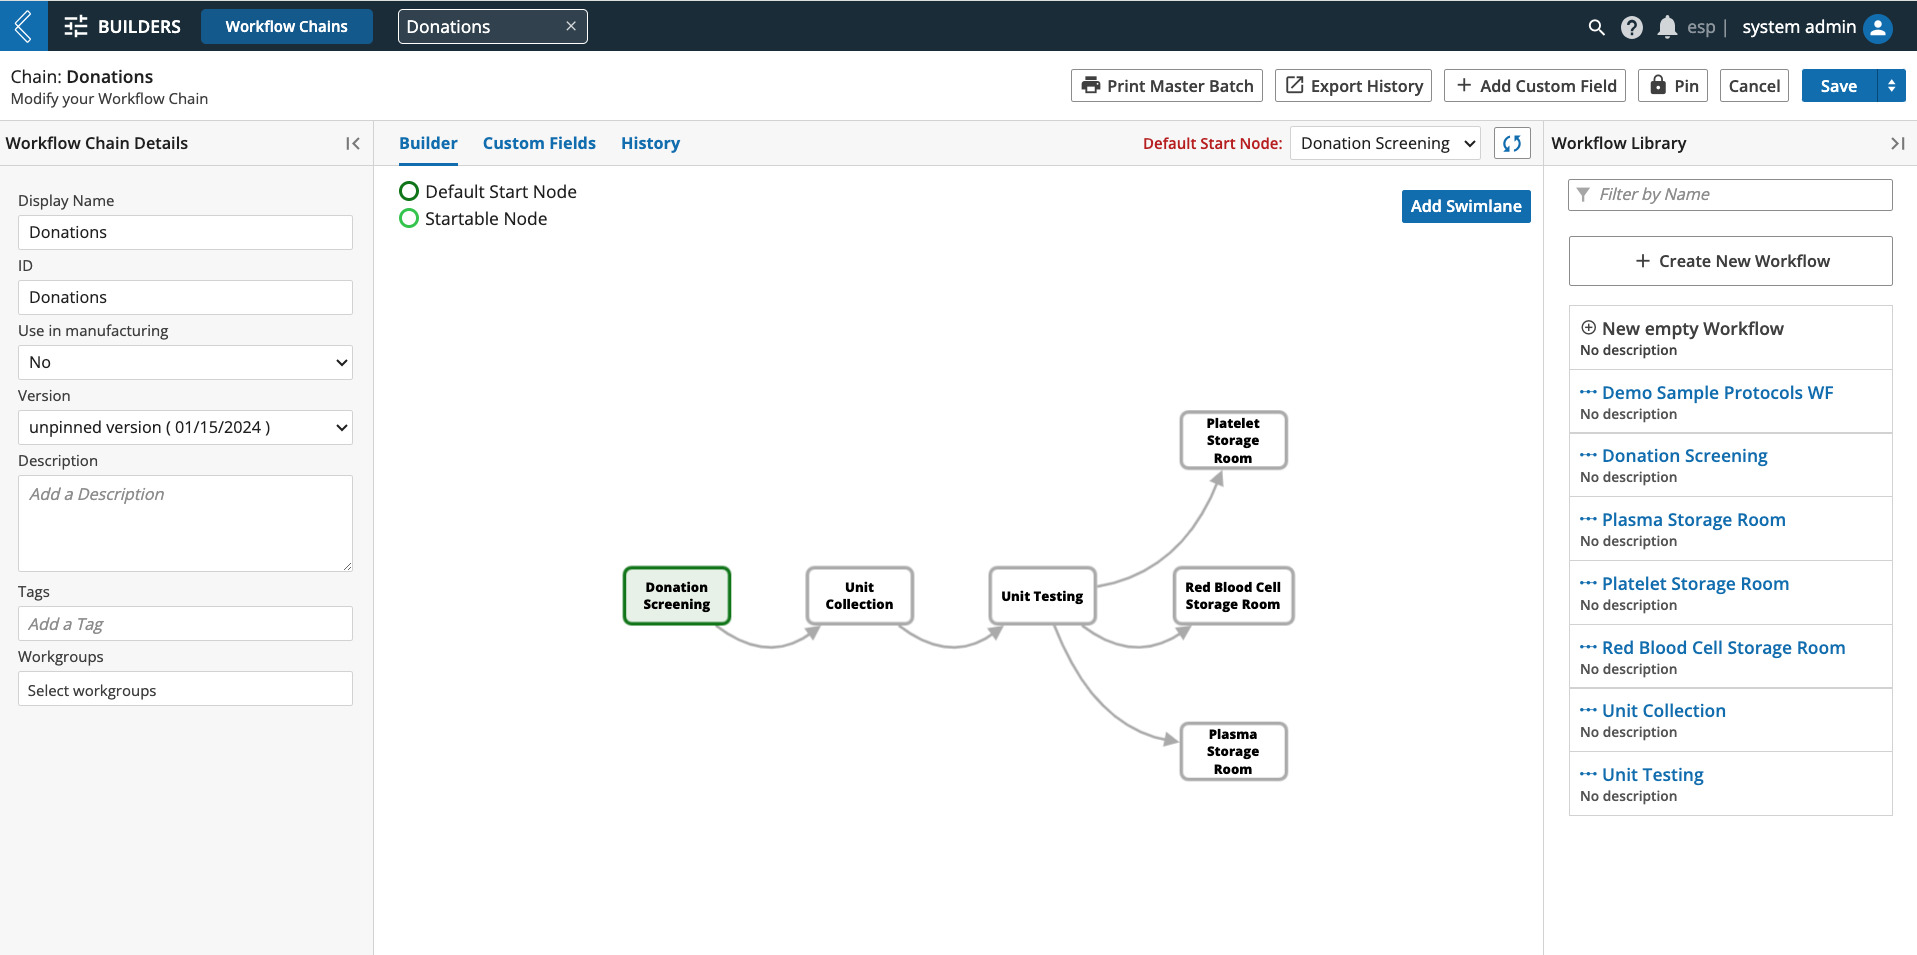
A Workflow Chain is an ordered collection of Workflows, connected to model a discrete business process. Workflow Chains are flexible and powerful tools that allow an organization to track the resources (Entities, Containers, Items, Files, etc.) associated with these complex operations.
 |
How to model Workflow Chains
Workflow Chains provide a way to connect Workflow processes (nodes) into a network to organize and track resources associated with complex operations.
When to create a new Workflow Chain
Discrete business processes.
Entity hand-offs (interdepartmental).
Provenance should capture who executed the Experiment, and the details of that Experiment.
Design considerations:
Where can Experiments start in this Workflow Chain?
Who should have access to this Workflow Chain?
Should changes to the Workflows (and their Protocols) impact the version used by End Users?
How to create a new Workflow Chain
Go to: Builders (L7|Master) → Workflow Chains → + New Workflow Chain
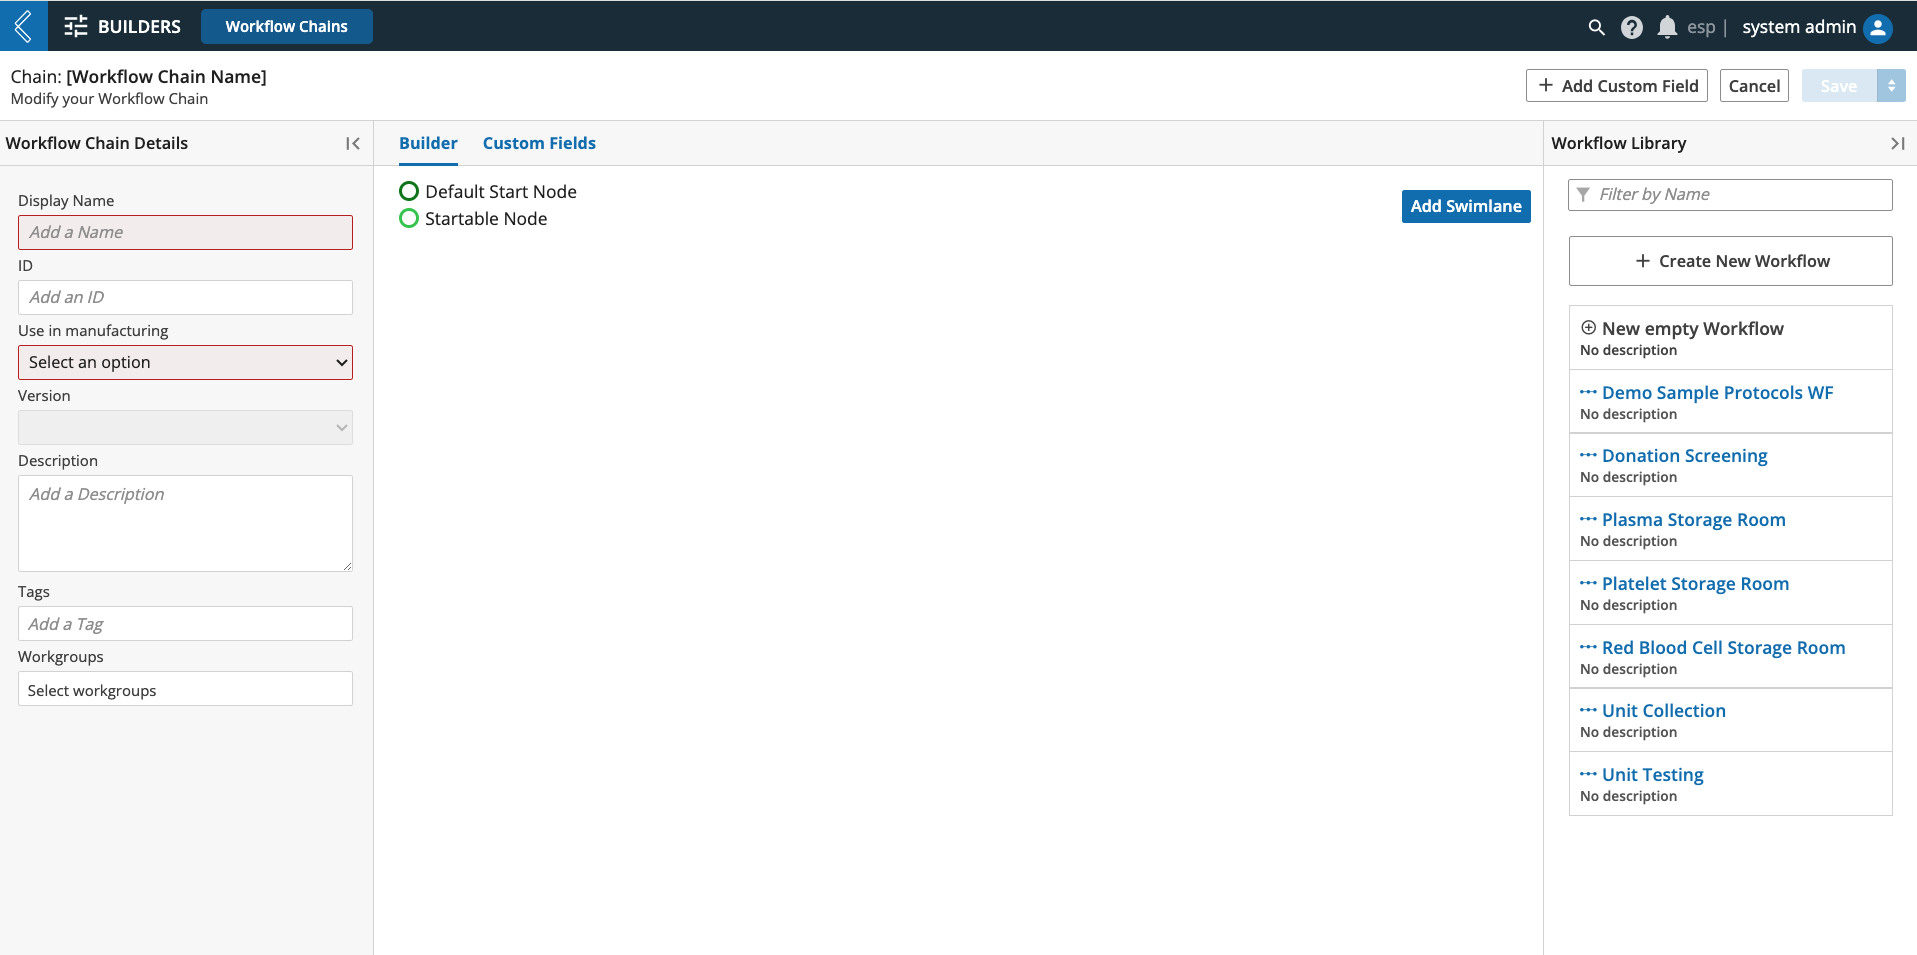 |
Workflow Chain Details
Use in manufacturing - should be set to “Yes” for Workflow Chains that will be used in MES.
Version - each time a Workflow Chain has any of its details changed and saved, a new version of the Workflow Chain is created.
Pin - locks the Workflow Chain into a previously saved collection of Workflows and Protocols.
Note
Pinning allows you to version control your content.
Workgroups - restricts who has access to the Workflow Chain in L7|Master and the Projects app when creating a new Experiment.
Warning
Custom fields are not supported in LIMS.
Workflow Library
The Workflow Library displays all Workflows registered in the system. Once a Workflow is moved into the main viewing window, it can be connected to other Workflows to form a Workflow Chain.
Note
Workflows in the Workflow Chain builder are referred to as Nodes.
Using the Workflow Library, you can:
Create new Workflows (+ Create New Workflow)
Placeholders can be added to the Workflow Chain using “New Empty Workflow”. When ready, you can edit this node to build the Workflow and its Protocols.
Construct the WorkflowChain by selecting a Workflow from the Library, then drag and drop it into the main viewing window. As additional Workflows are added, you can rearrange their position.
Drag and drop Workflows back into the Library to remove them from the Workflow Chain.
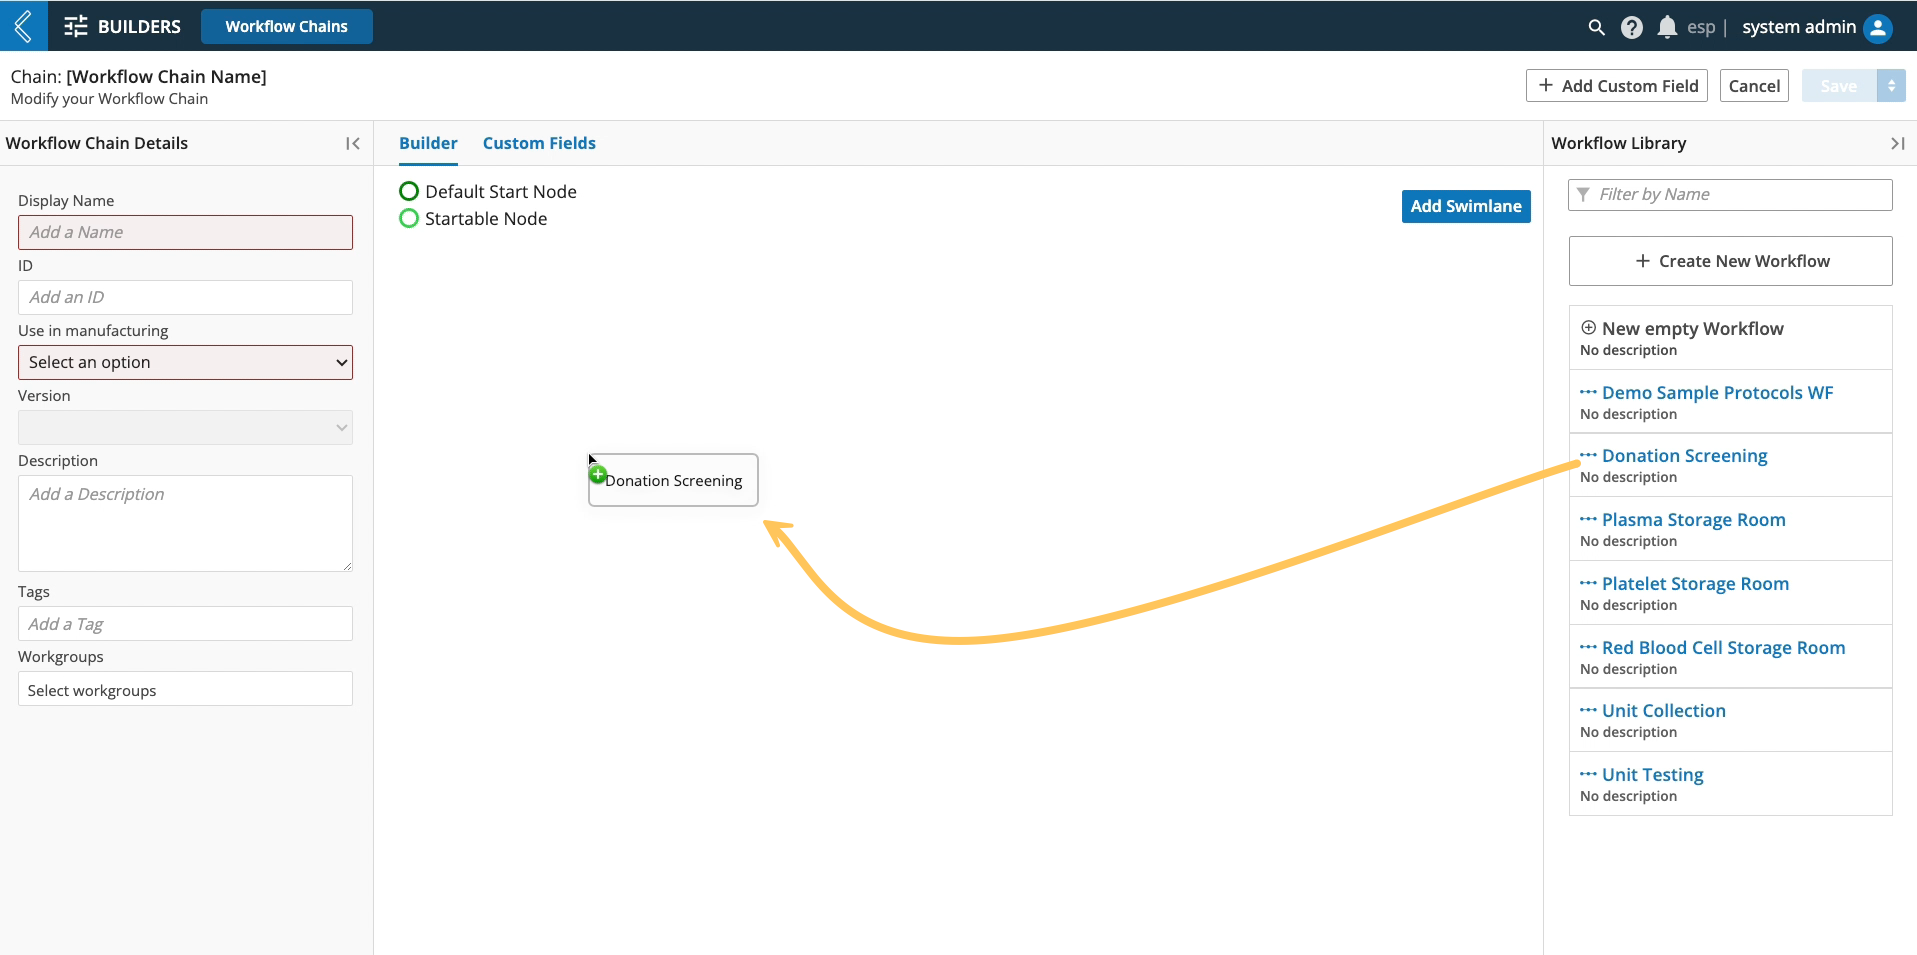 |
To create a Workflow Chain, drag and drop the first Workflow in the main viewing window. If this is a Workflow where the End User will begin processing their Workflow Chain Experiment, right-click the Workflow (node) and select “Edit Node”.
In the Workflow Node Editor, select the startable checkbox.
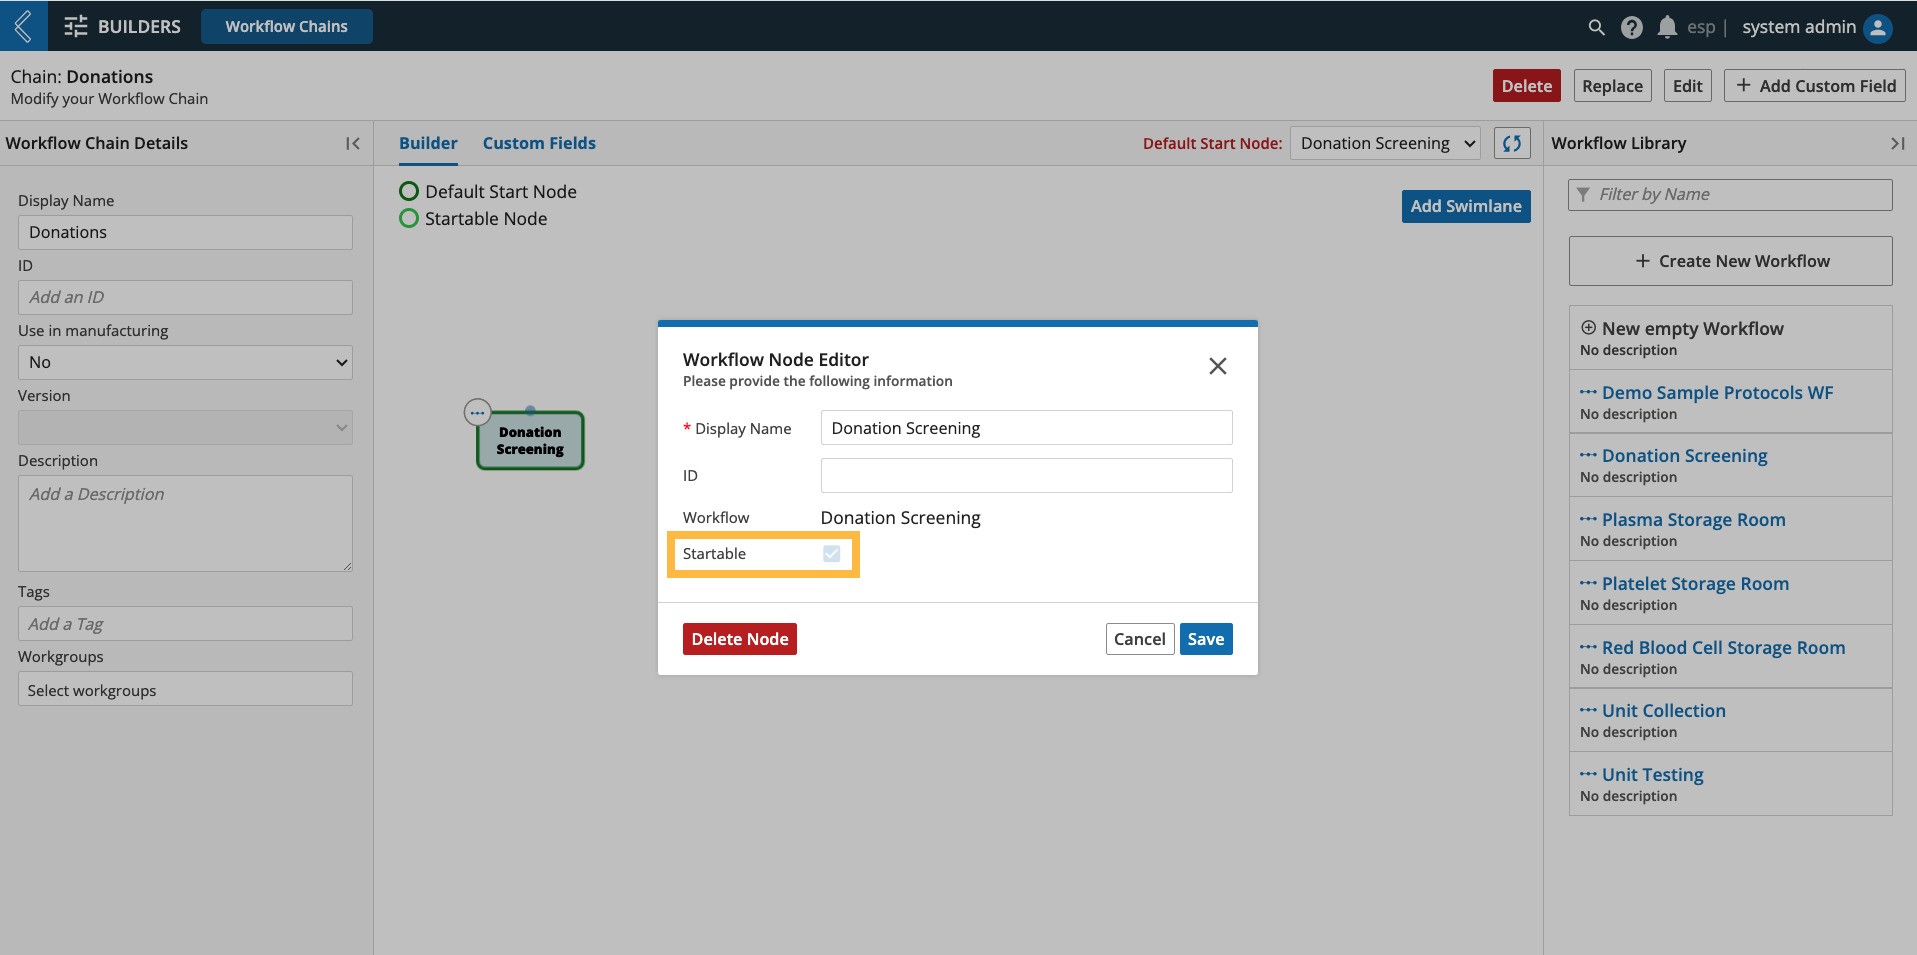 |
Once a node has been marked as startable, a dropdown menu will appear in the top-right corner of the main viewing window to select the Default Start Node.
Note
Workflow Chains can have more than one startable node, but one of them must be assigned the Default Start Node.
The Display Name and ID of each node can also be changed in the Workflow Node Editor.
By changing the Display Name, the same Workflow can be used more than once in the same Workflow Chain, or a generic Workflow can be given a process-specific name.
Note
The Workflow Node Editor can also be opened by double-clicking a Workflow in the Workflow Chain builder.
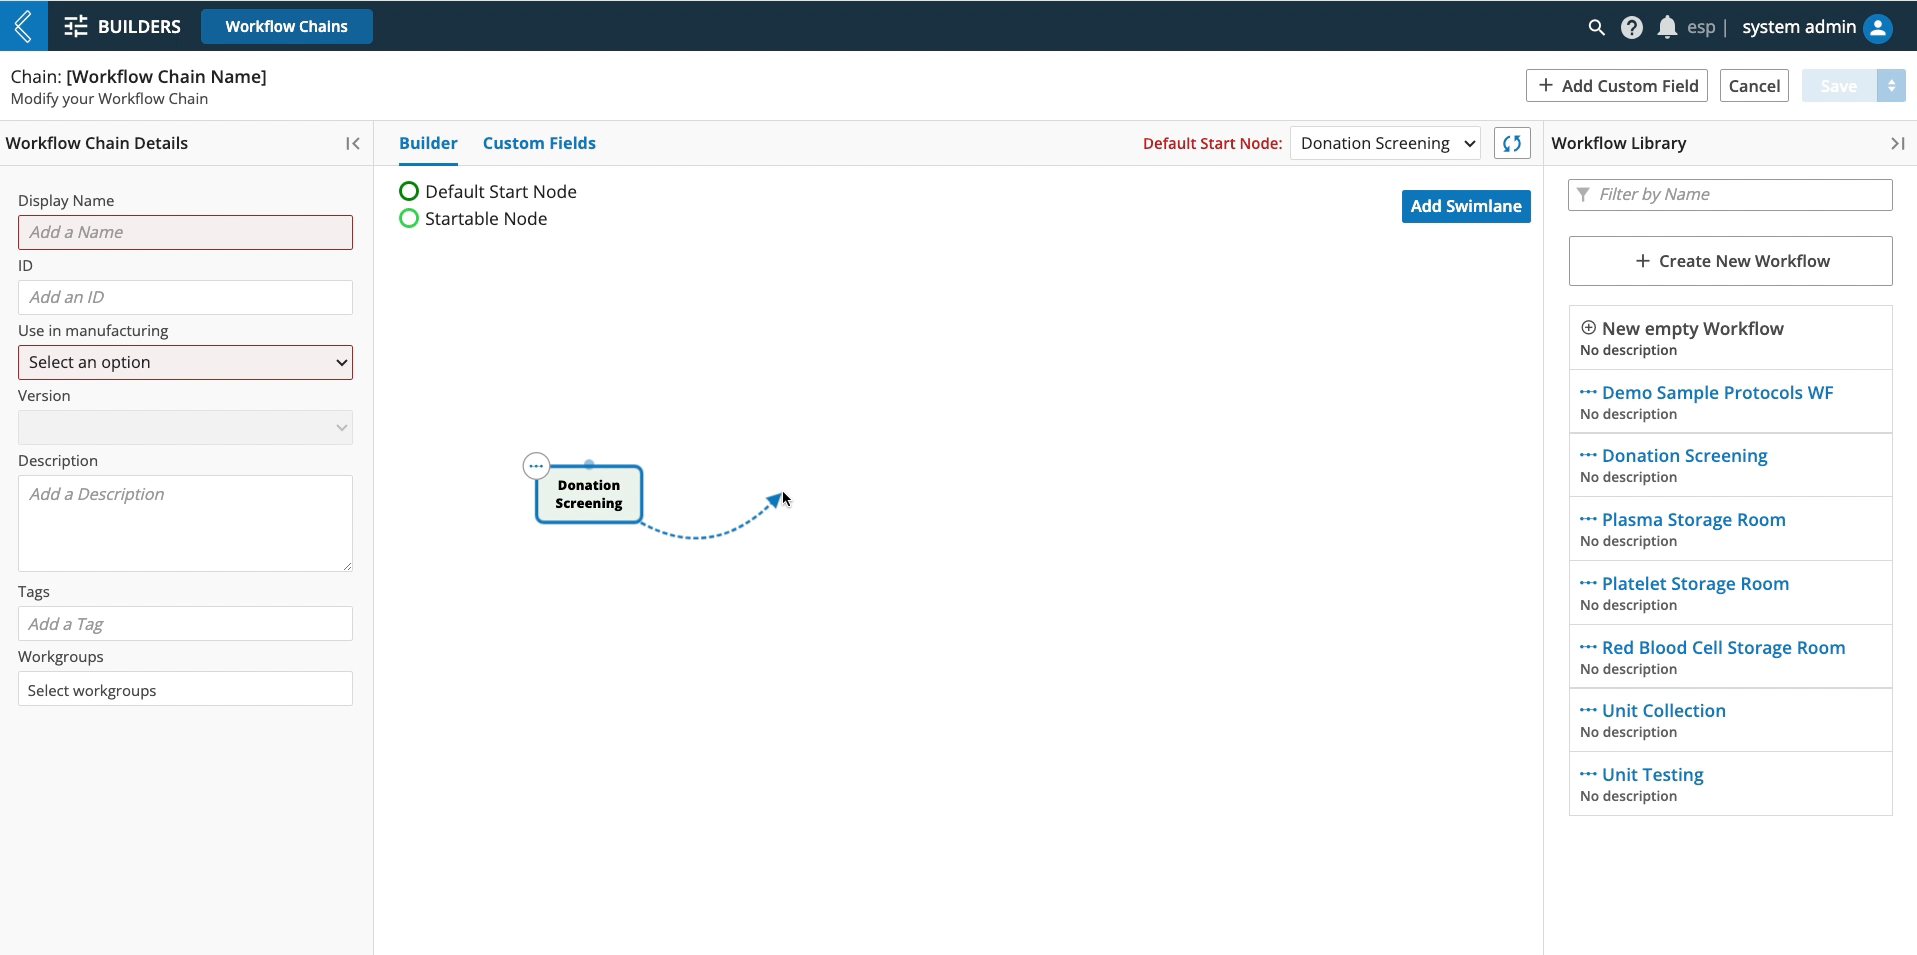
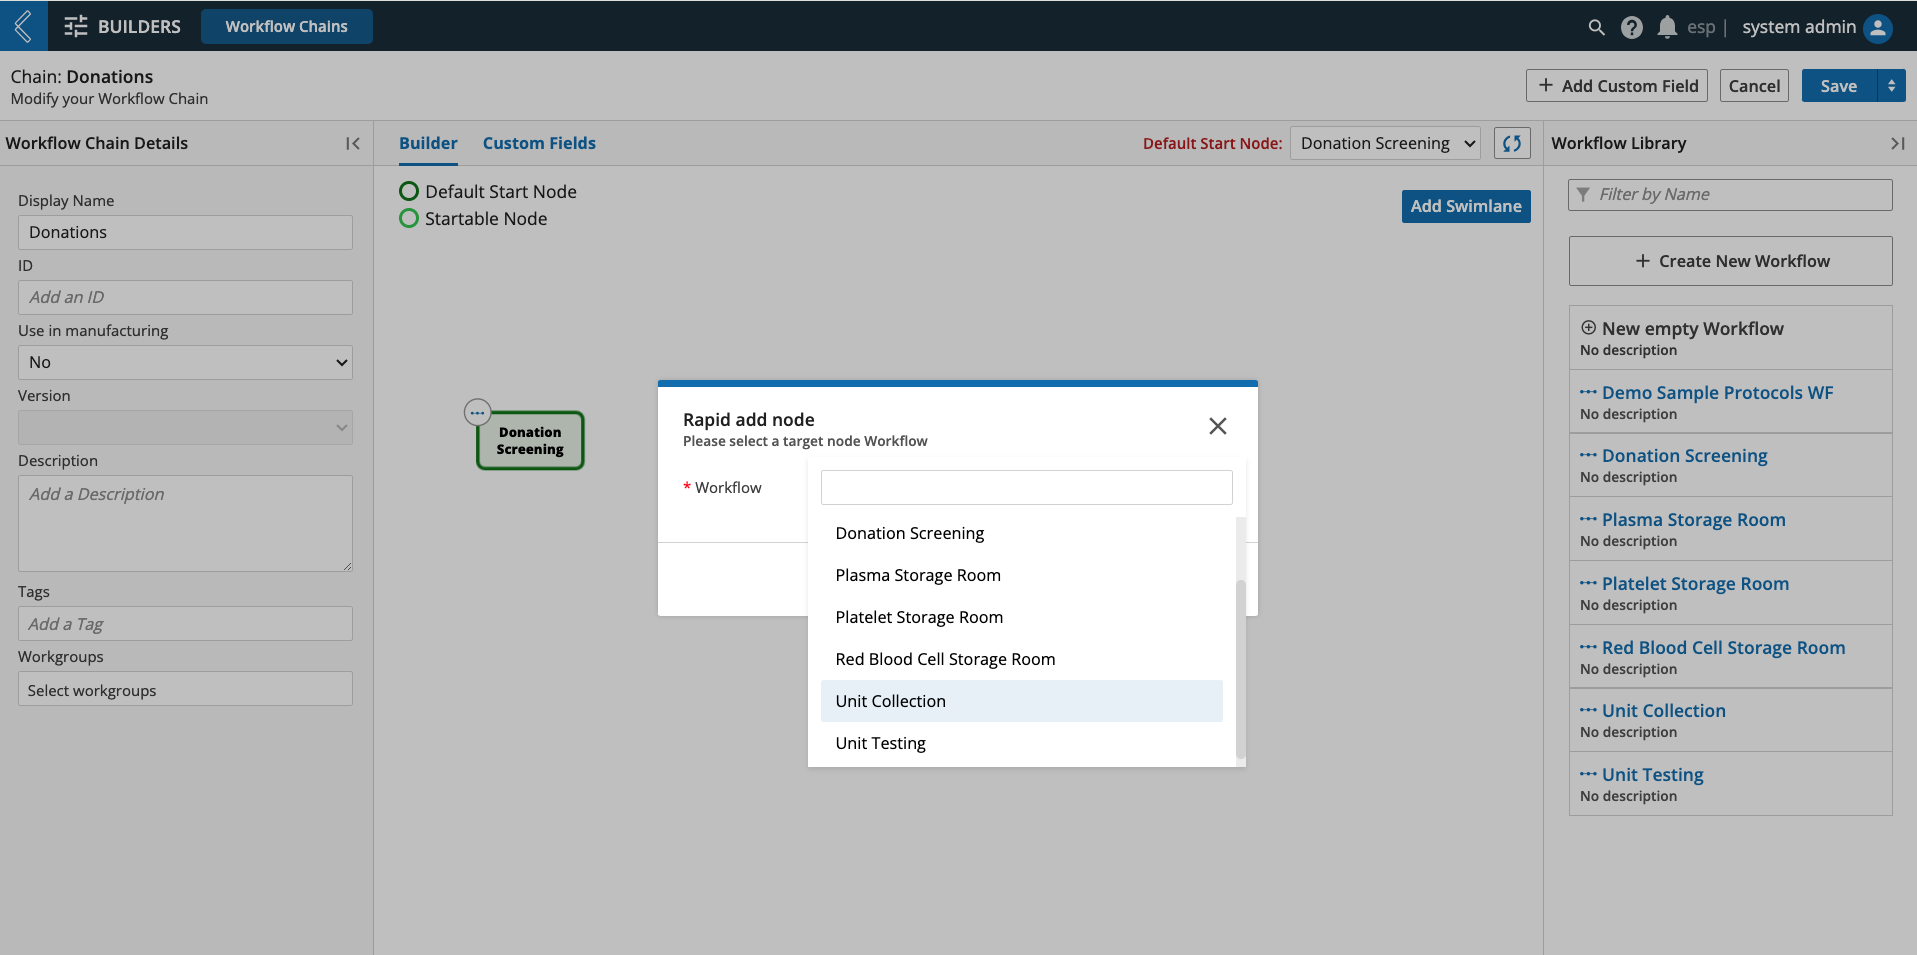
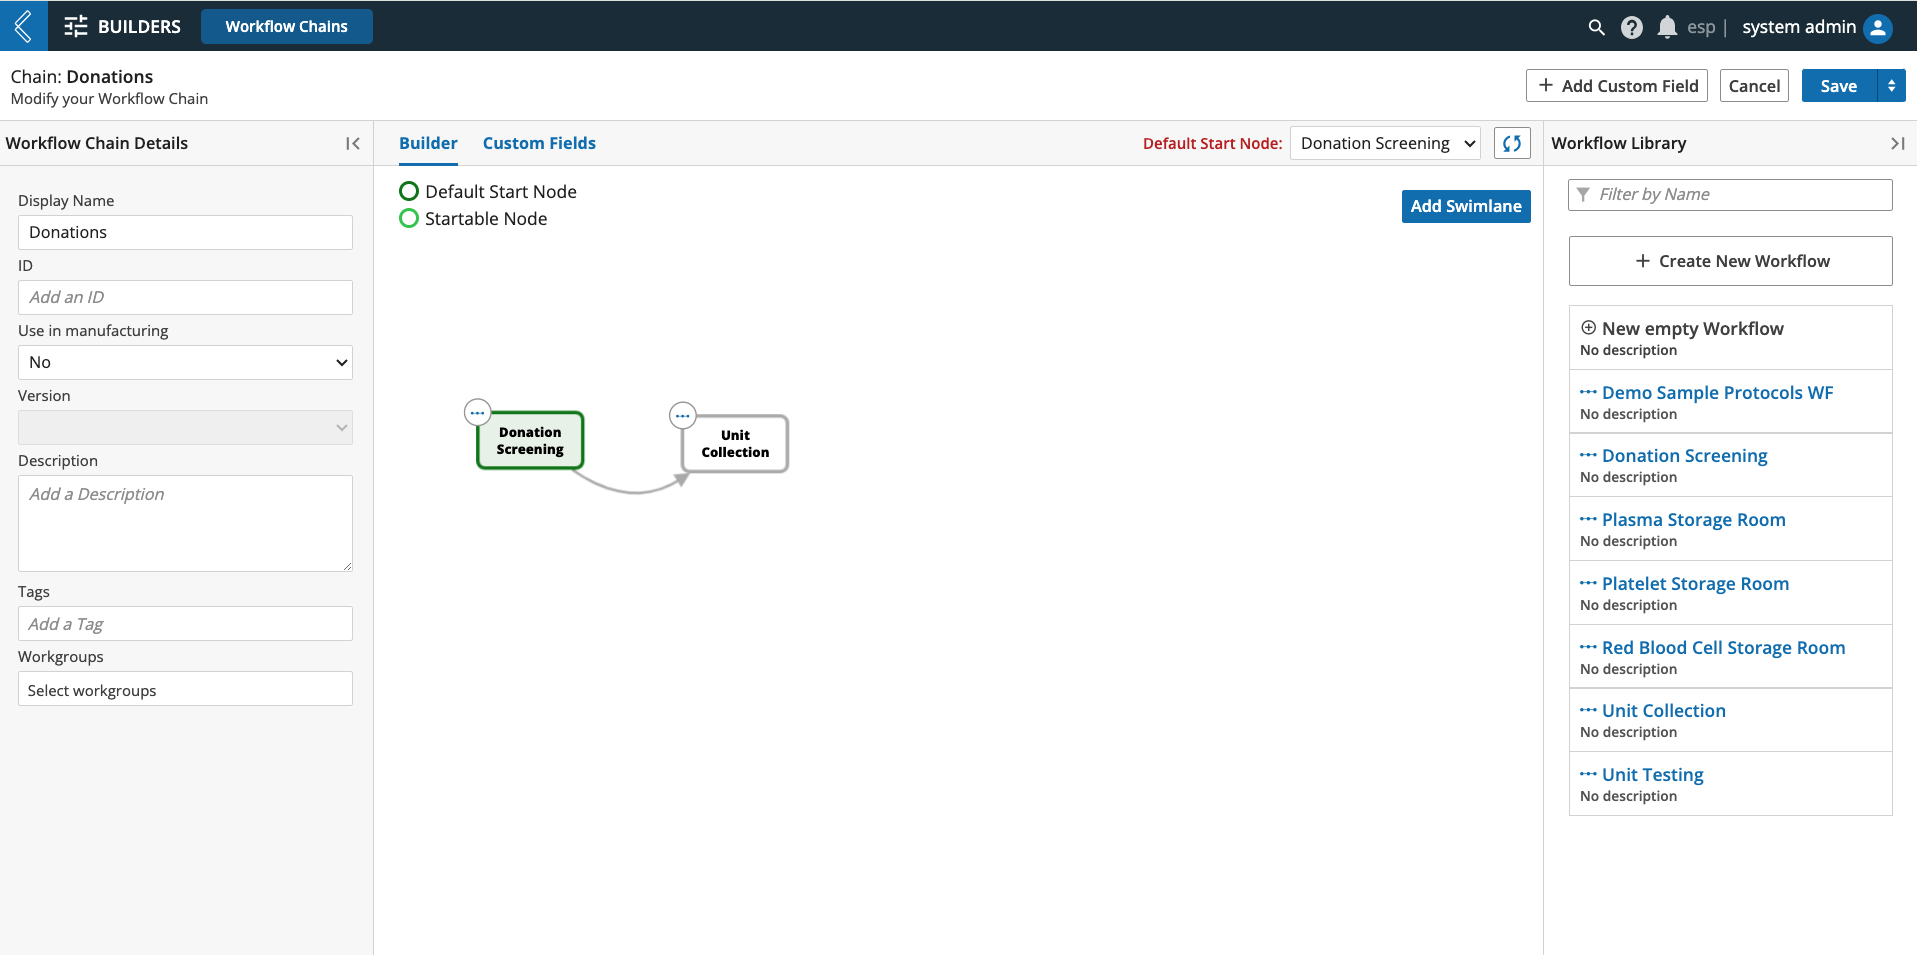
To continue building the Workflow Chain, hover over the first Workflow and …
 |
 |
 |
Alternatively, drag the next Workflow into the main viewing window and connect it to the first by selecting the blue dot at the top of the first node and connecting the arrow to the second Workflow.
Manually connecting nodes already present in the Workflow Chain builder will open the Transition Editor.
Note
Workflow Chain transitions will be covered in the next session.
How to edit a Workflow Chain
To edit a Workflow in a Workflow Chain, right-click the Workflow and select the appropriate action:
Edit - opens the Workflow builder, where both the Workflow and its Protocols can be edited.
Double-click a Protocol in the Workflow builder to edit its details in the Protocol builder.
Replace - opens the Replace Workflow modal displaying all registered Workflows.
Selecting the desired Workflow will replace the selected node.
Delete - removes the Workflow from the Workflow Chain.
Alternatively, after selecting a node, you will see the Delete, Replace, and Edit buttons appear in the top-right corner of the screen.
Swim Lanes
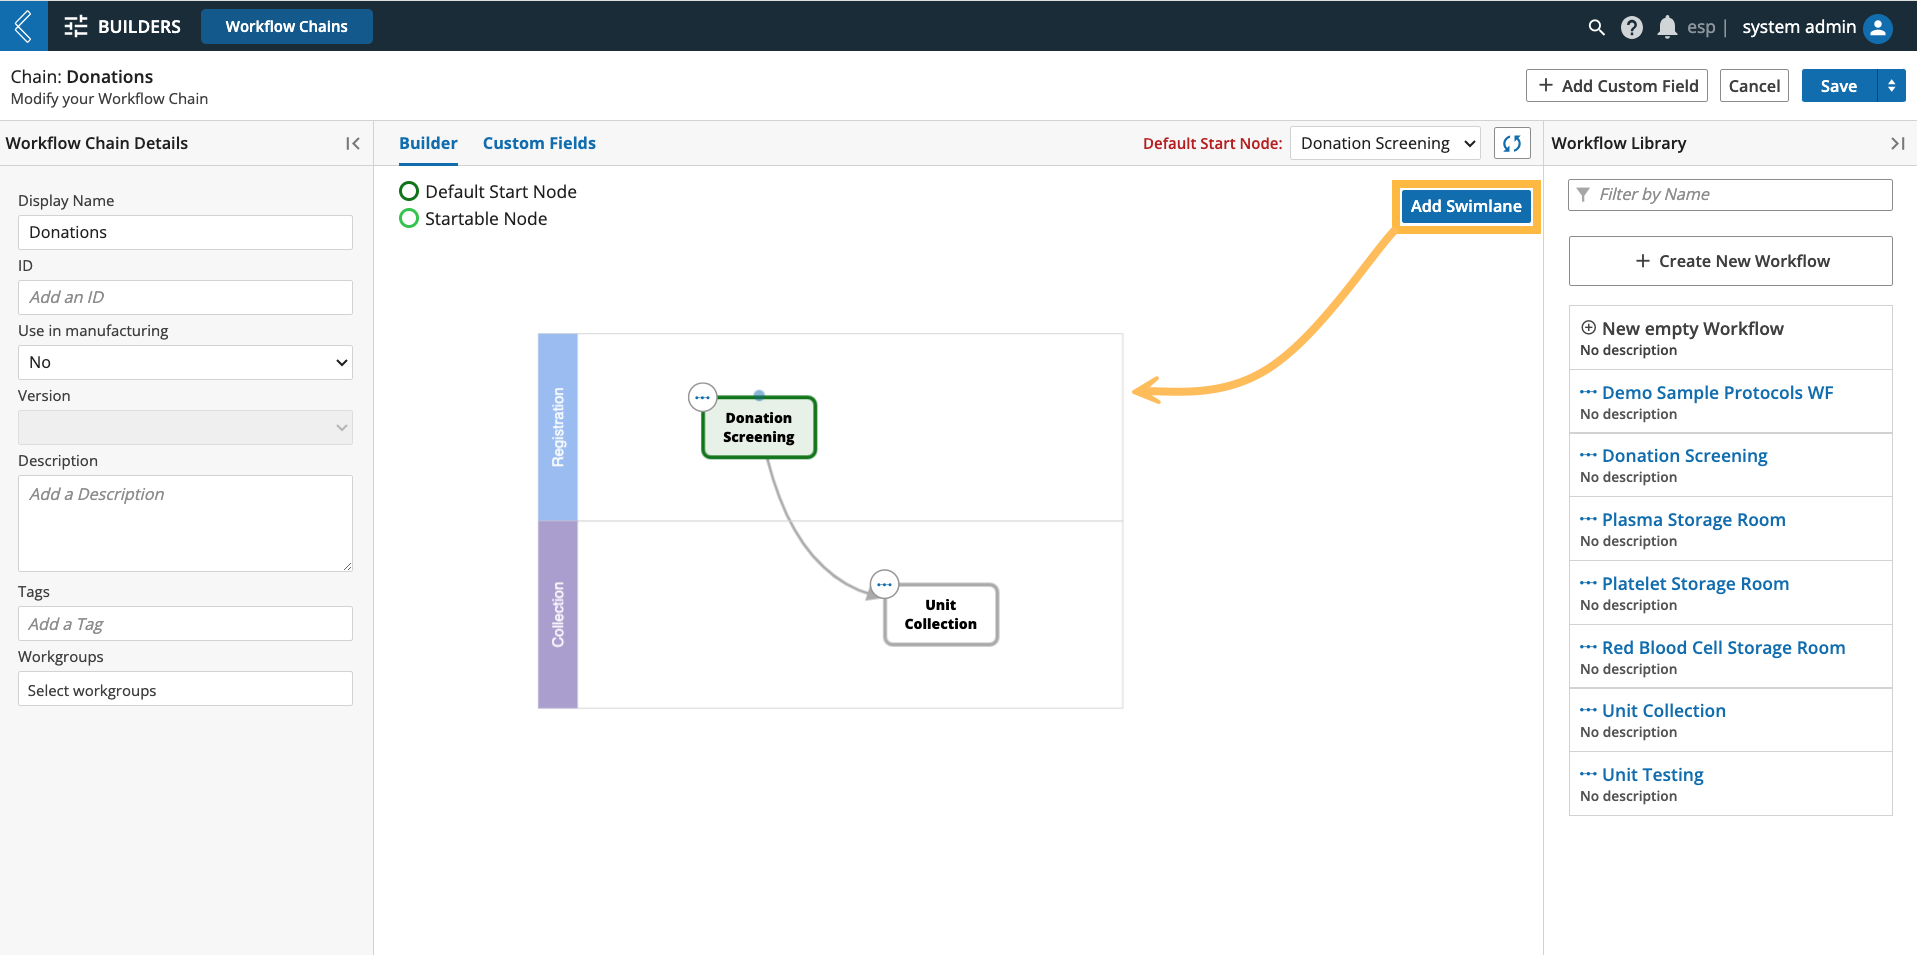
Swim lanes provide a way to visually organize nodes into discrete categories. To create a swim lane, select the Add Swimlane button in the top-right corner of the main viewing window.
In the modal, enter a display name, and select a color and position for the lane.
Each node in the Workflow Chain can then be assigned to a lane.
 |