Location Management
In this section
This section will help you:
Know how to queue Entities, Containers, and Items for storage.
Know how to add and remove these resources from a Container.
Understand the different print views available for a Container.
Case Study
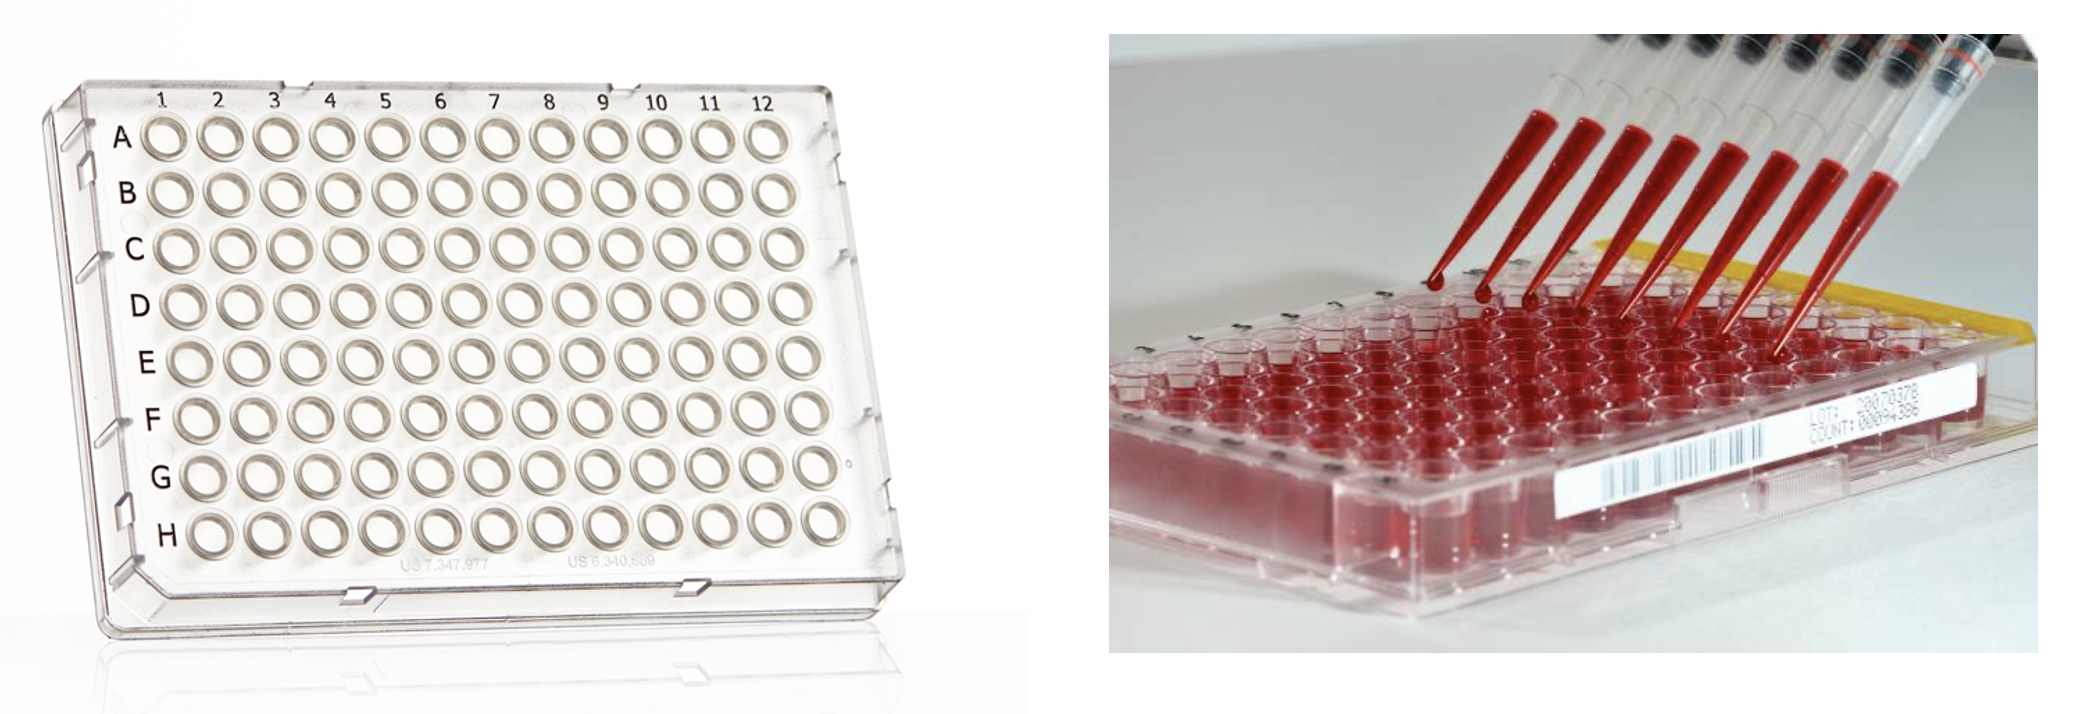
One of the most commonly modeled Container Types is the 96-well plate. In blood banking, whole blood samples are placed in 96-well plates, then processed in a blood analyzer instrument to determine their blood group and Rh factor.
How to use the Item Pool
The Item Pool is a queued list of Entities, Containers, and/or Items ready to be added to a Container.
From Container View, these resources can be added to the Item Pool in one of two ways:
Manually - selecting + Add in the top-right corner of the Item Pool will open a modal with a list of registered resources for you to chose from that the Container has been configured to store.
Barcode - scanning the barcode associated with a registered resource will automatically add the resource to the the Item Pool.
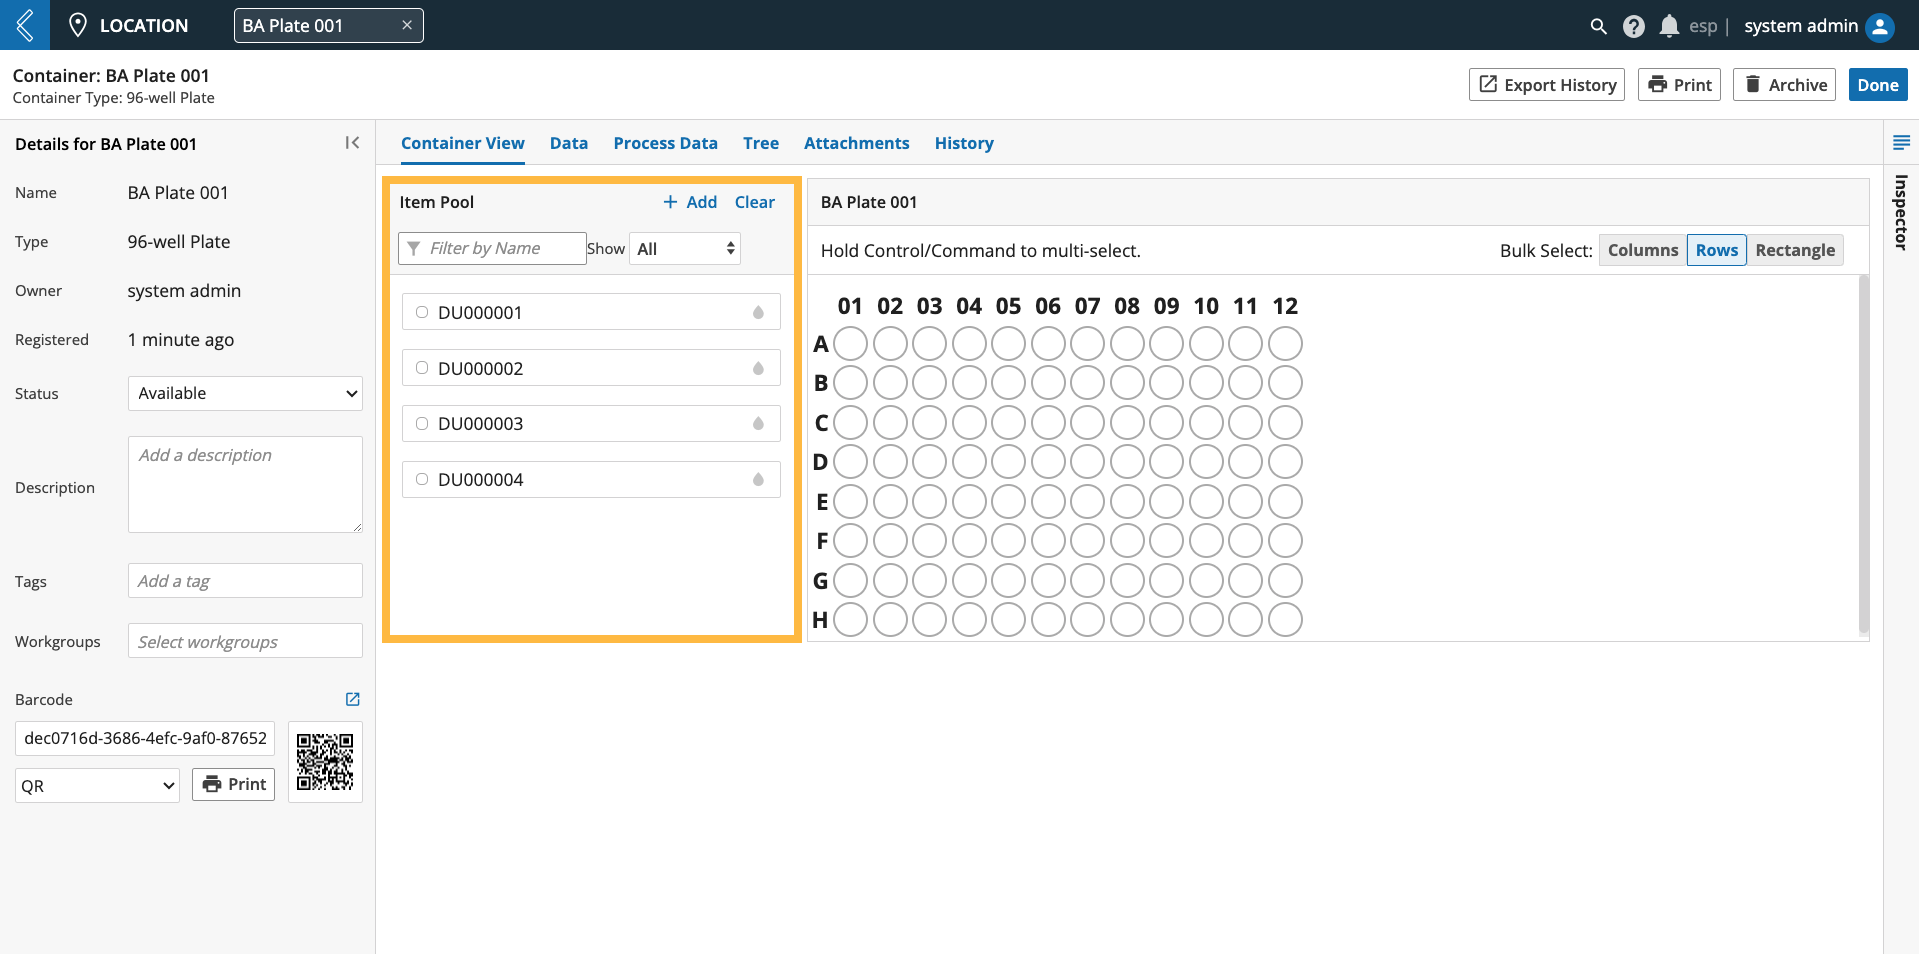 |
Resources in the Item Pool can be filtered by name and storage status (used or unused). Storage status is Container-specific. Used means that the resource is stored in the current Container.
Note
L7|ESP does not clear the Item Pool, even when navigating between Containers. Select Clear to reset the Item Pool.
How to add resources to a Container
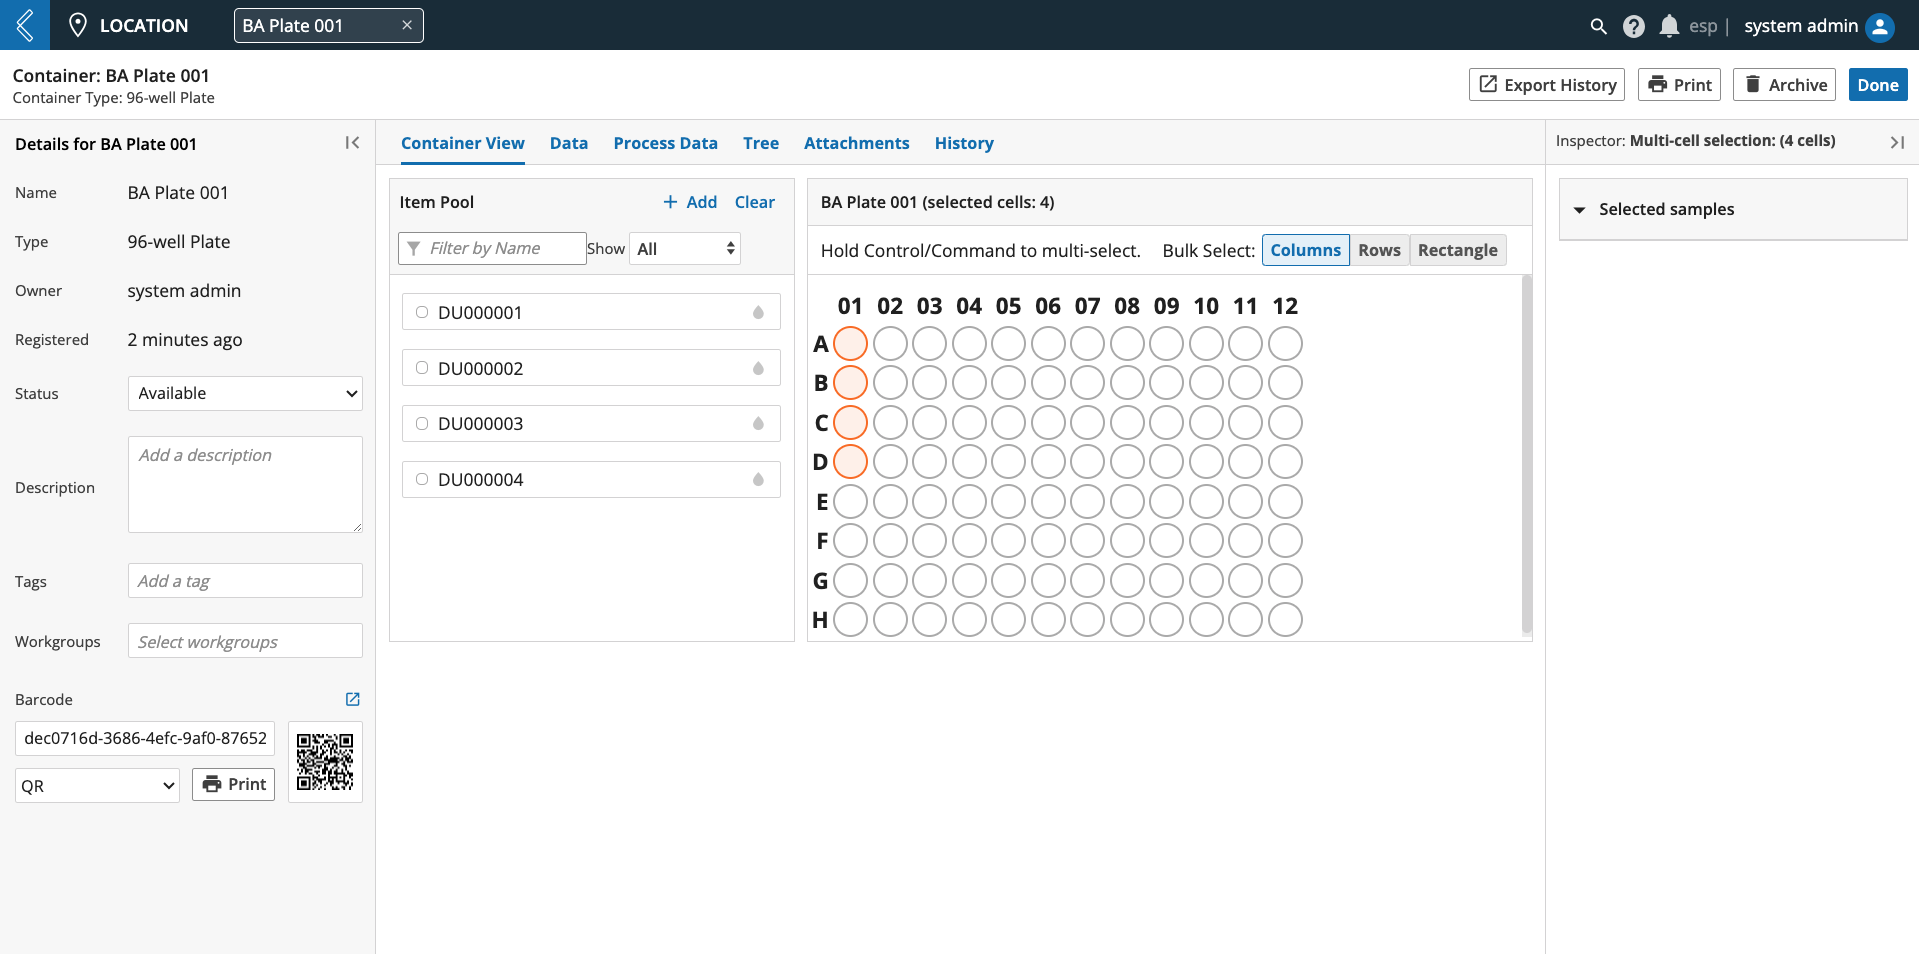
Begin by selecting the desired location(s) in the Container in one of two ways:
Manually - select one or more (command key) locations at random.
Bulk Select - select one ore more locations across columns, rows, or a user-defined grid (rectangle).
Only one location can be selected at a time for Containers configured to store more than one element per location (unlimited Container).
Note
A resource can only be stored once in an unlimited Container, unless the resource is an Item, and the Container Type is configured to “Specify Item Quantities”.
Quantities do not include units in the Location app.
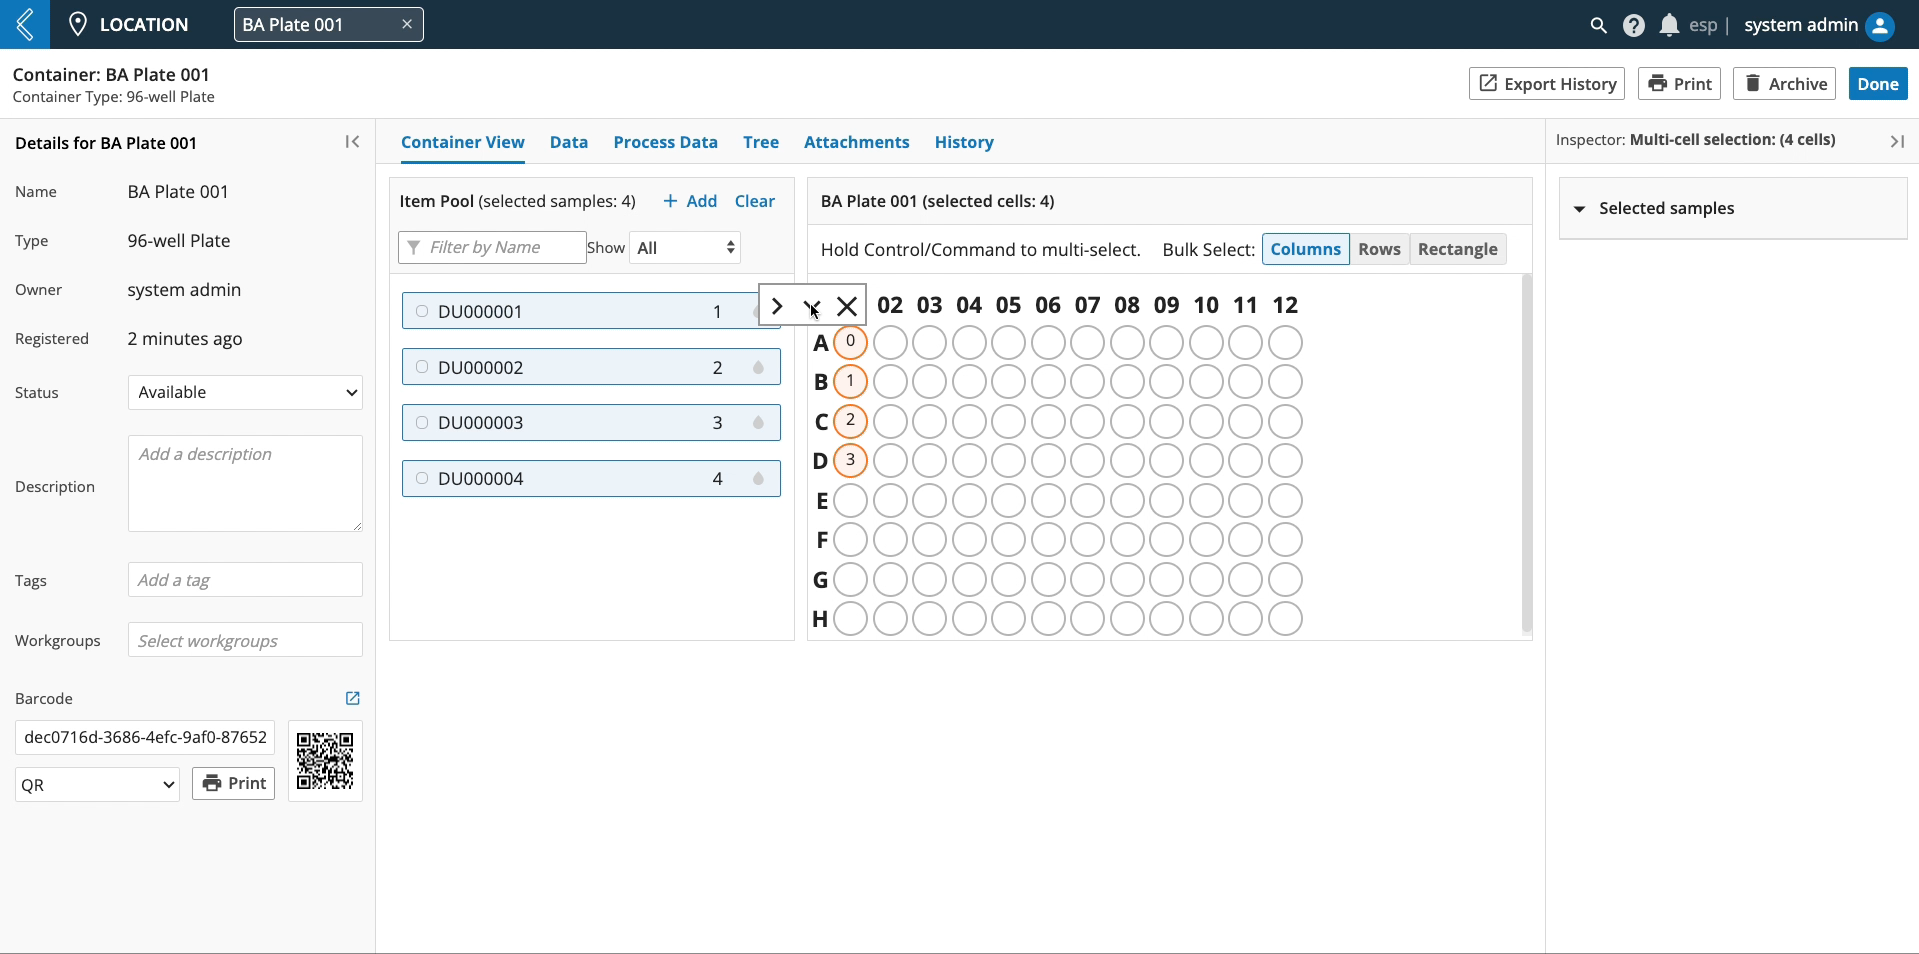
For single element Containers, selected locations are colored orange.
 |
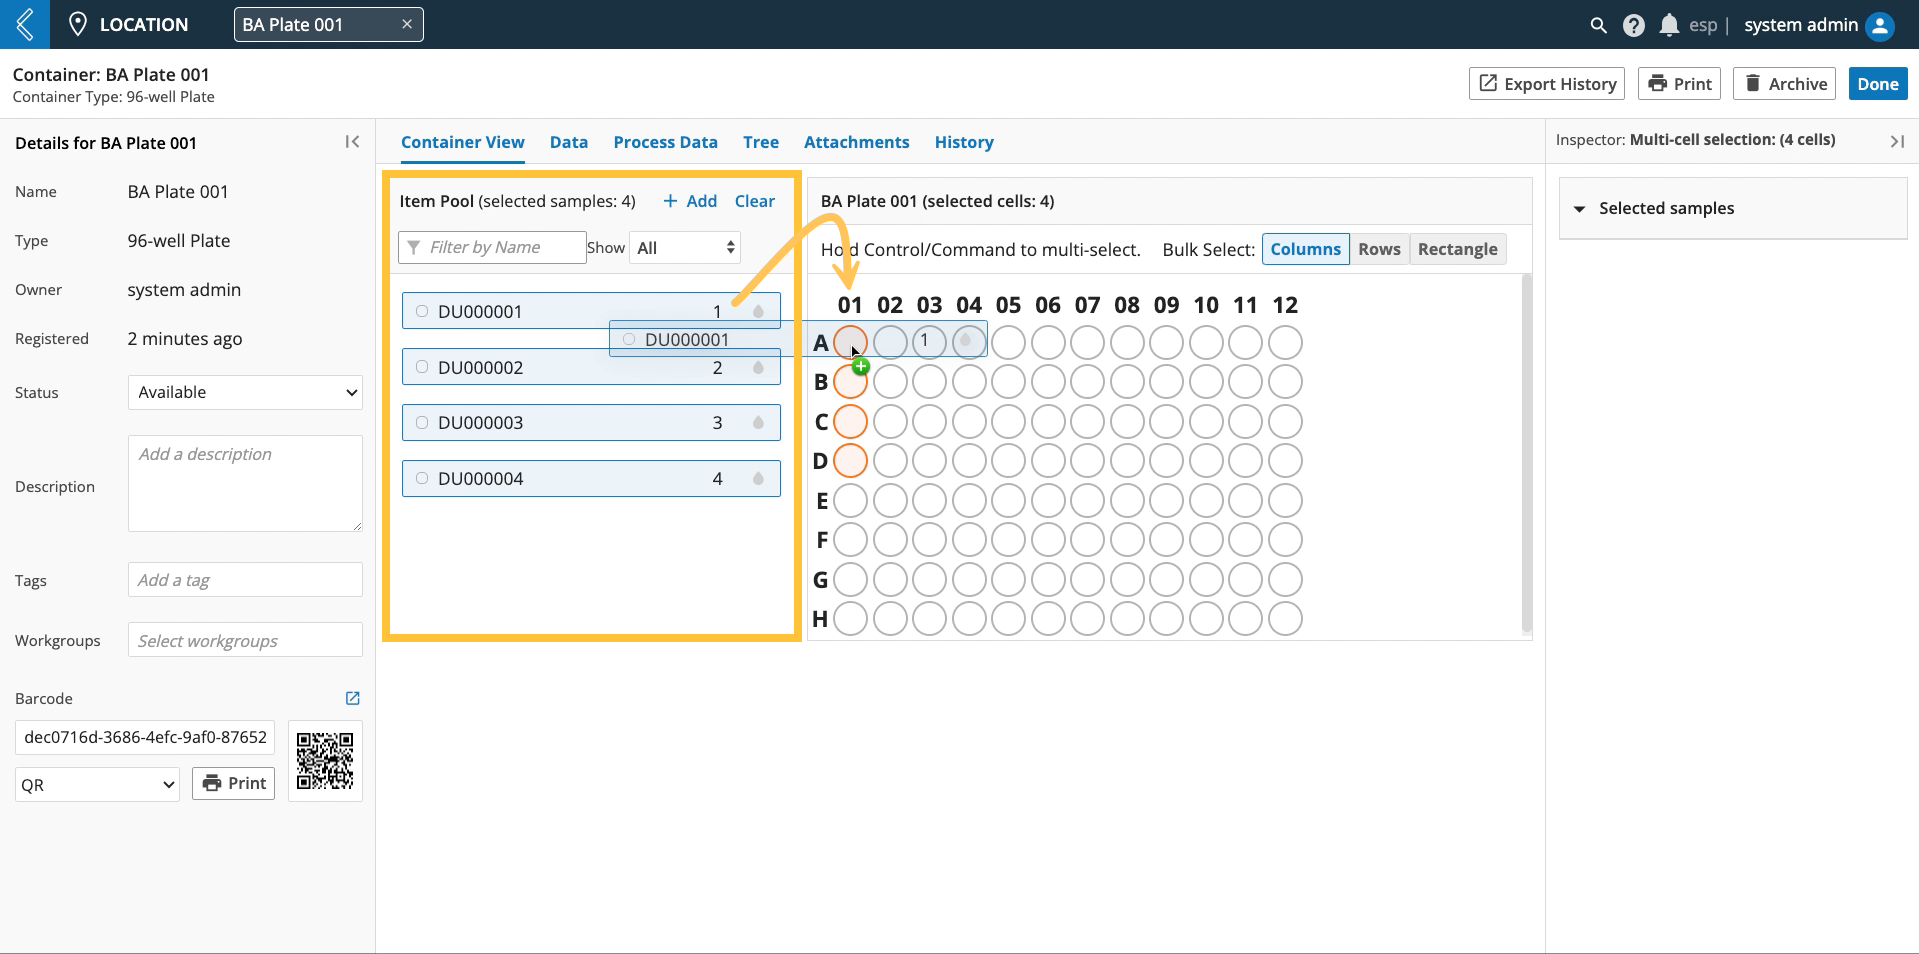
Resources can then be added to the selected location(s) in one of two ways:
Manually - select one or more (shift key) resources in the Item Pool, drag, and then drop them into the selected location(s). If more than one resource and location is selected, the resources can be added to the selected locations from left to right or top to bottom. For unlimited Containers, resources can only be added to one location at a time.
Barcode - scan the barcode associated with a registered resource to store it in the selected location. For single element Containers, L7|ESP will automatically advance to the next location after each scan. This functionality is enabled by default, but configurable for unlimited Containers using the “auto advance after scan” toggle at the top of the Item Pool.
 |
 |
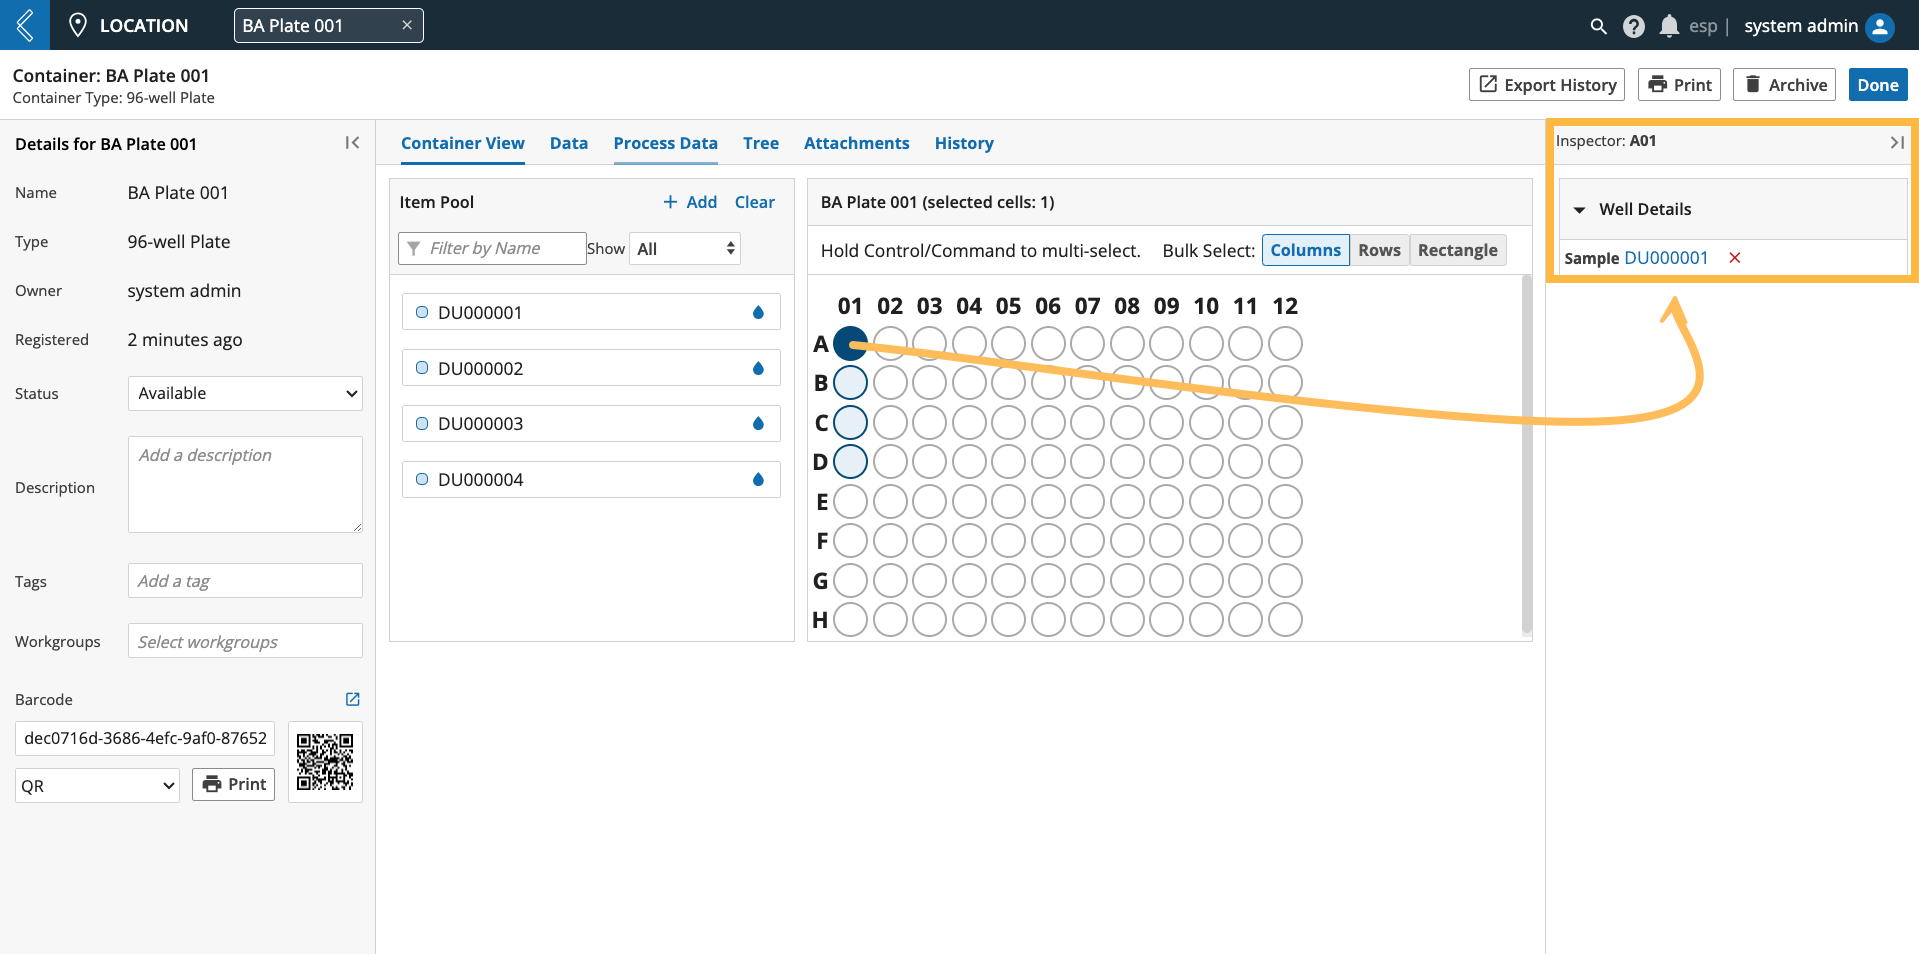
Occupied locations are colored light blue in single element Containers. Selecting an occupied location will change the color to dark blue and open the Inspector Panel to display the associated resource.
 |
How to remove resources from a Container
Note
Archived resources cannot be removed from a Container. Before archiving the resource, remove it from its storage location.
Begin by selecting the desired location(s) in the Container. For unlimited Containers, only one location can be selected at a time. In the Inspector pane, select the red X next to the resource you wish to remove. You can also right-click the resource in the Container and select Remove when asked, “Are you sure you want to remove this item?”
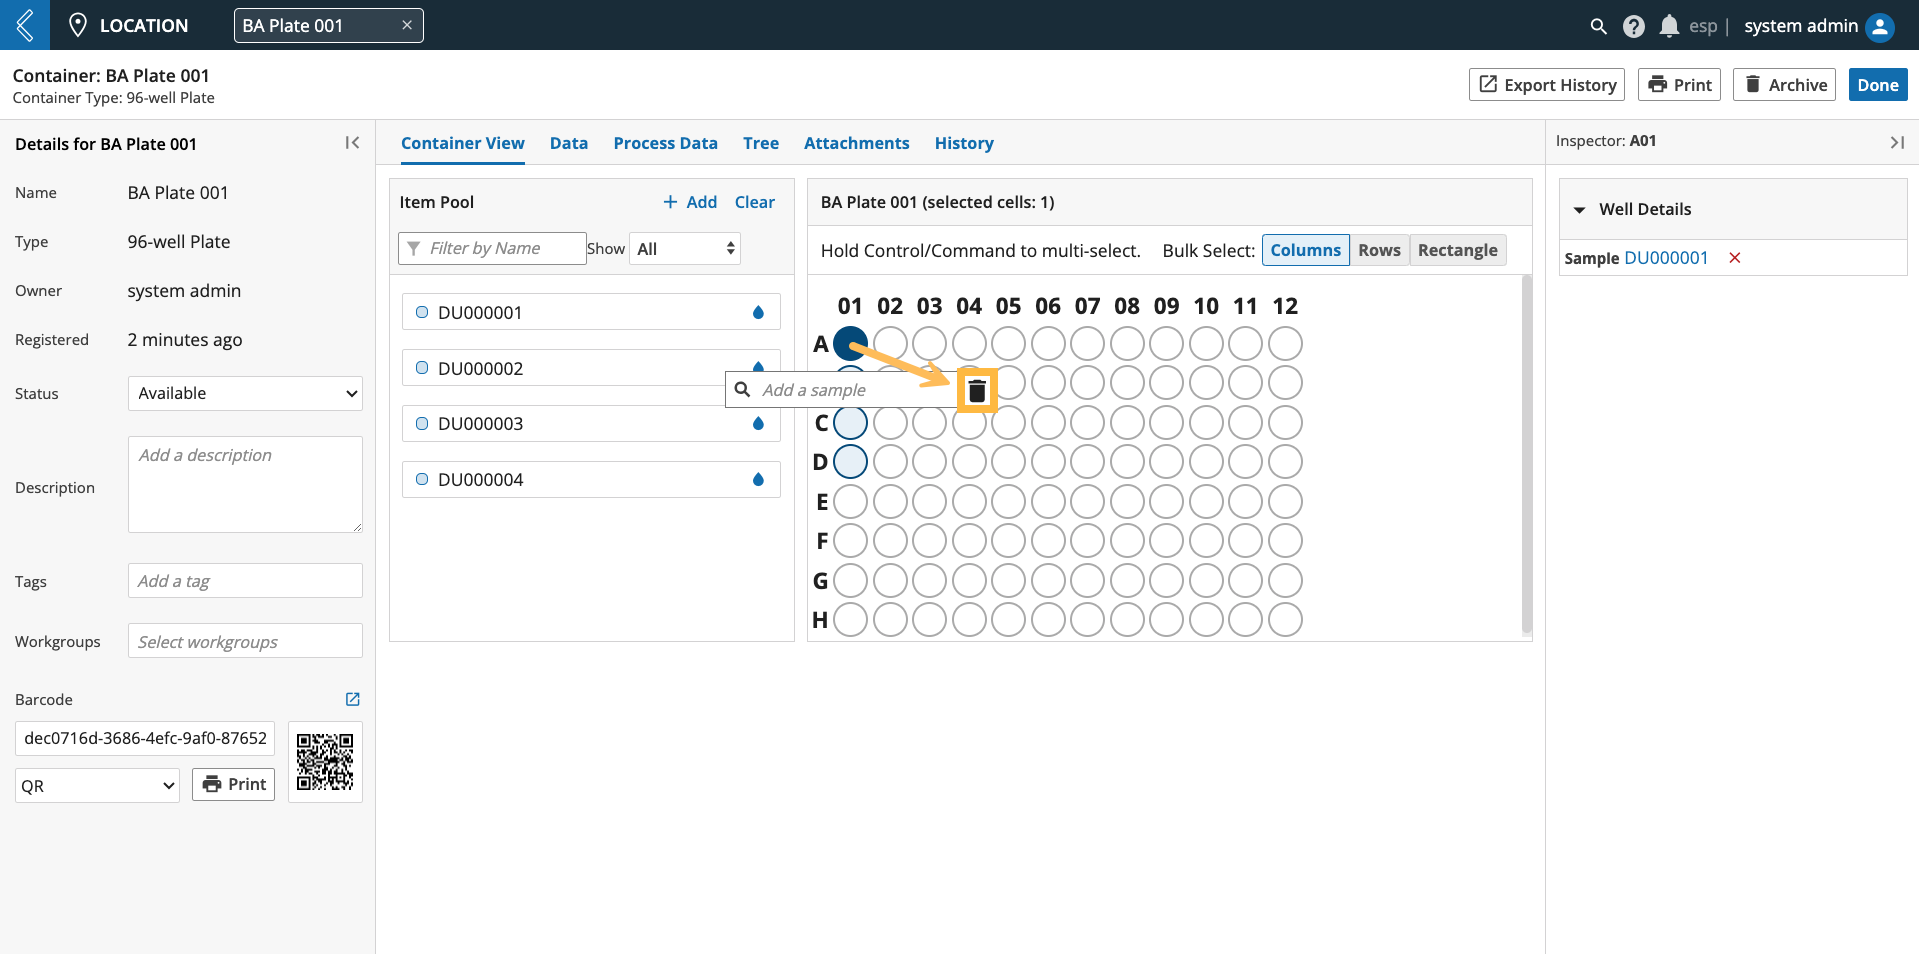
For single element Containers, individual resources can be removed using the Inspector pane, but one (1) or more resources can be removed by:
Selecting the desired location(s).
Right-clicking any one of the selected locations.
Selecting the trash can icon.
 |