Managing Entry Versions
Viewing Version History
In addition to using an Entry's History tab to view the audit history, you can use the Version History to view, compare and manage previous versions of an Entry and Entry Template.

Watch: Version History
When are versions created?
Each time an Entry is saved
Each time an Entry is autosave, which will be denoted with a clock icon next to the version name
Important
By default, the auto-save feature is disabled, but can be configured through the esp configuration file.
Once auto-save the enabled, the entry will save every specified time interval, and a message will be shown after every autosave.
Note
Versions will be grouped when several saves are performed within a given time interval (configurable).
Viewing versions
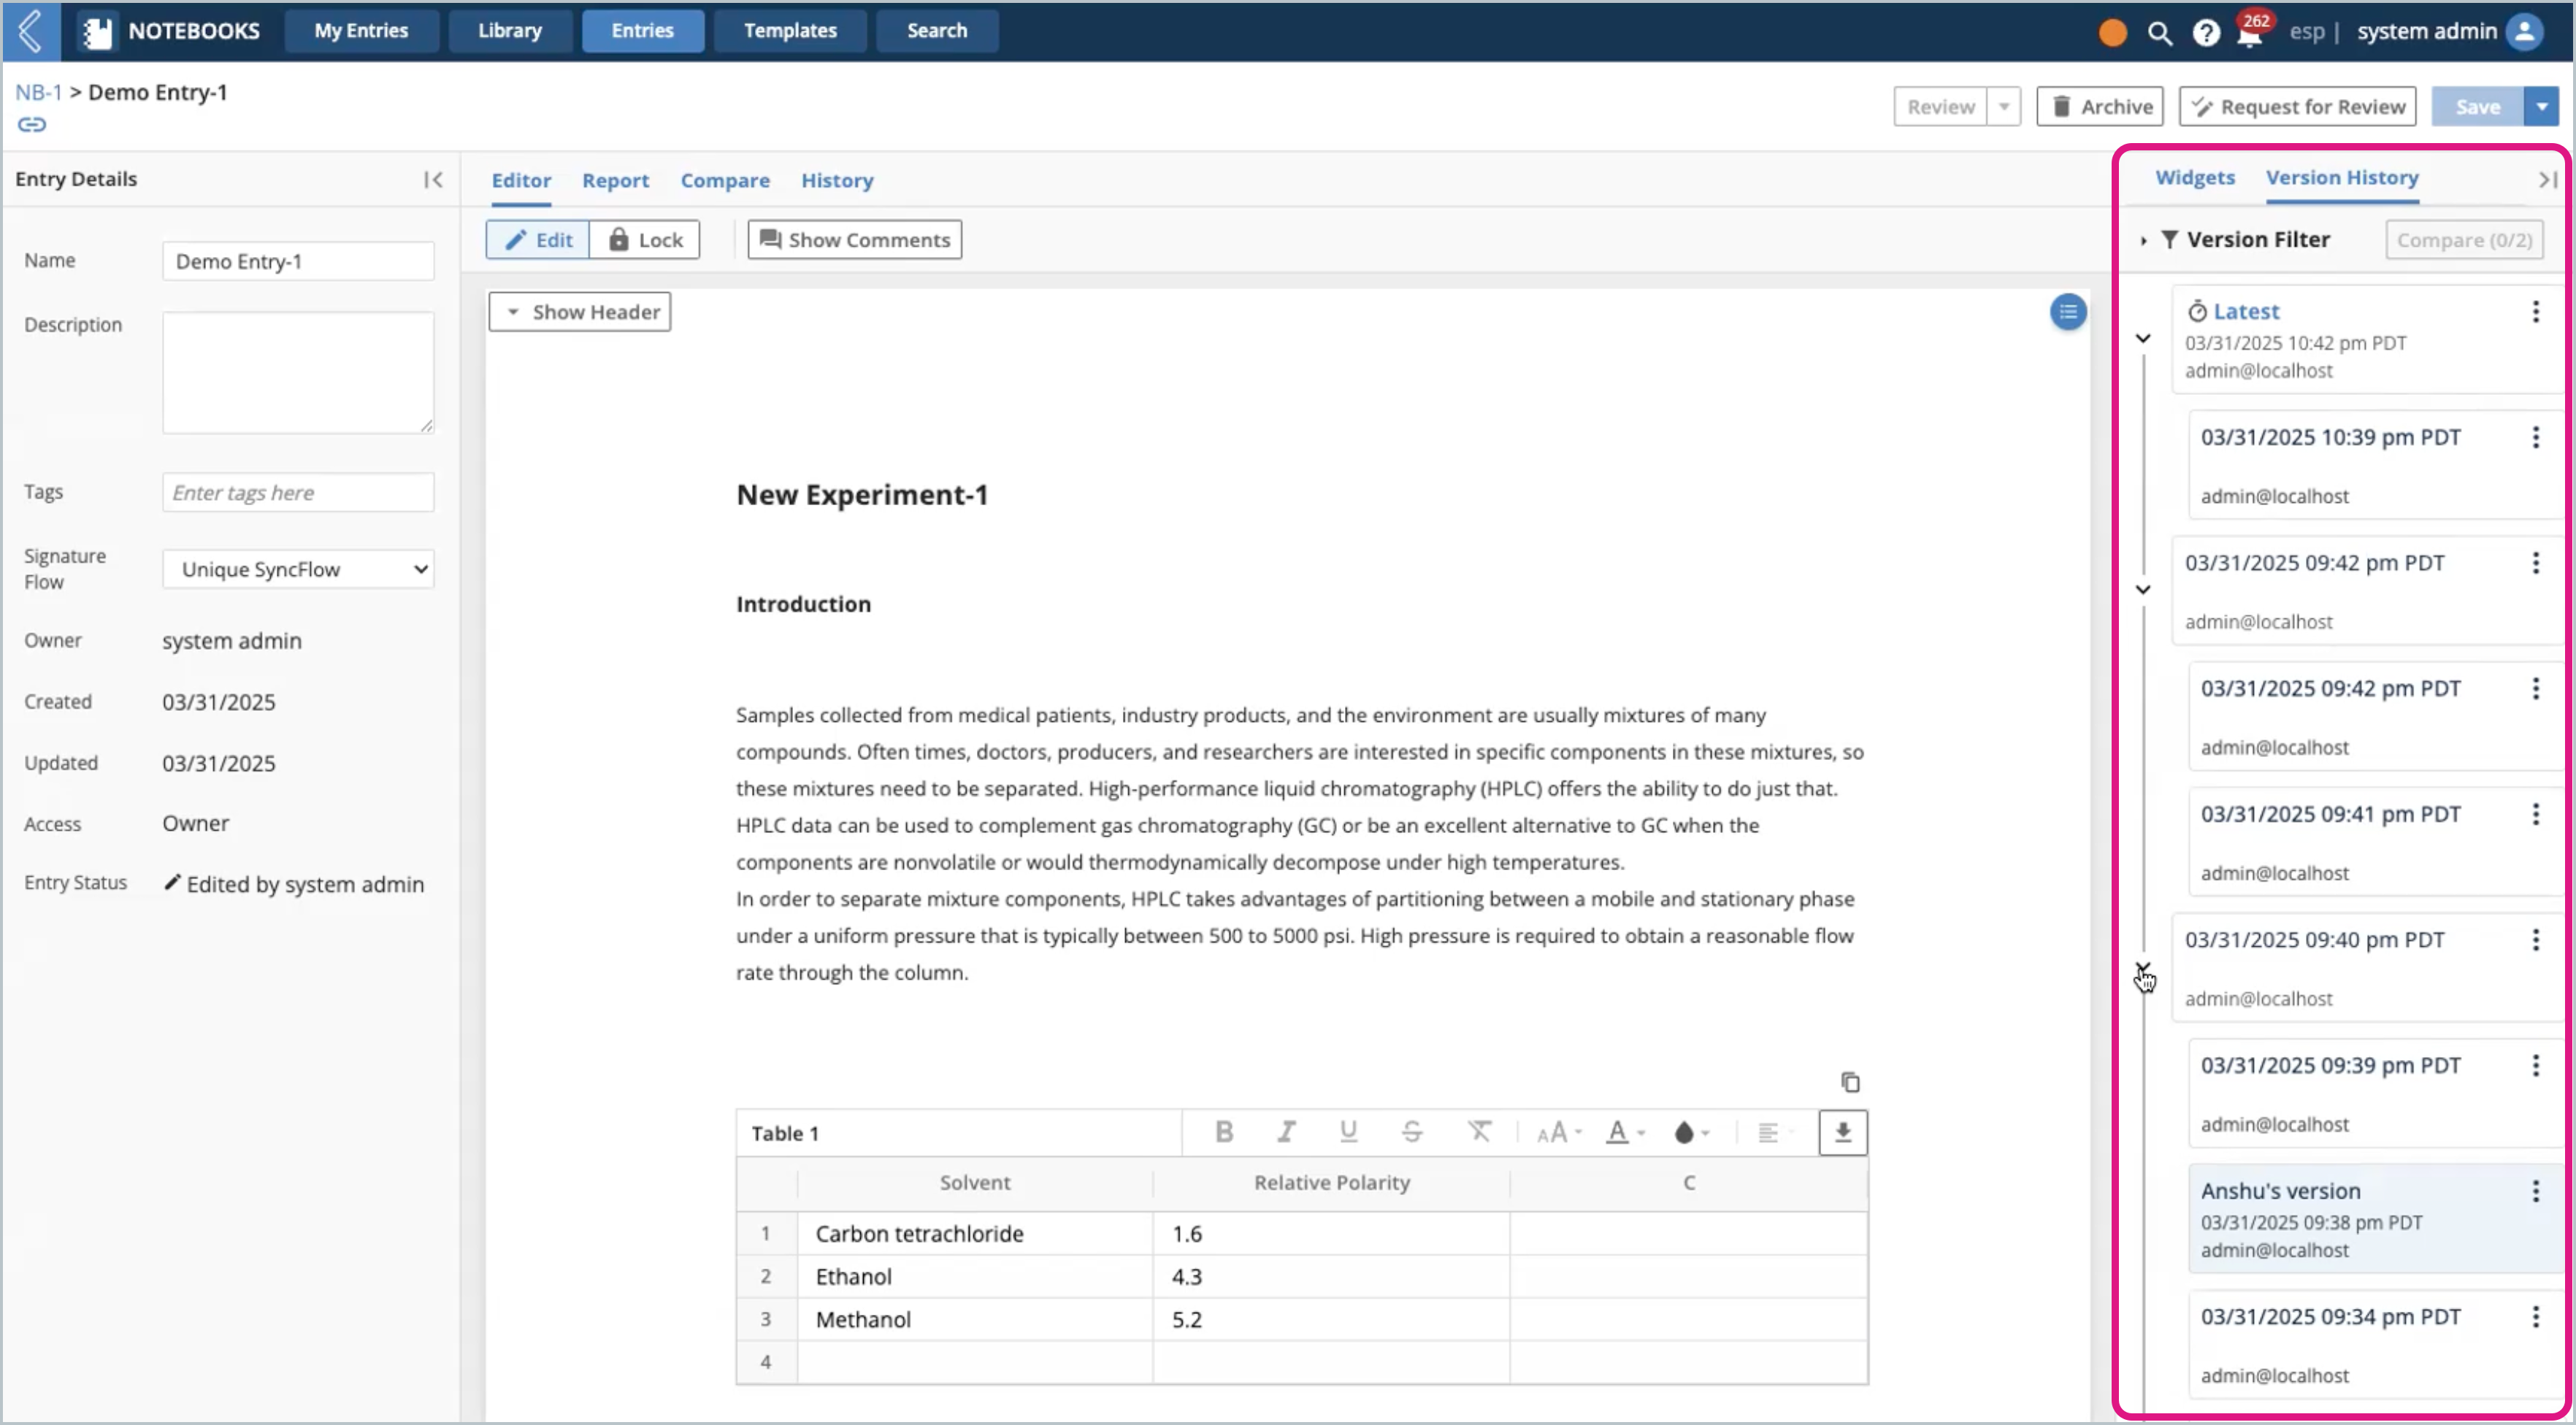
To view an old version, click on the version's card listed under the Version History panel.
Previous versions are read-only (see restoring versions)
Previous versions have a banner above the Entry, indicating which version you are viewing
Filtering versions
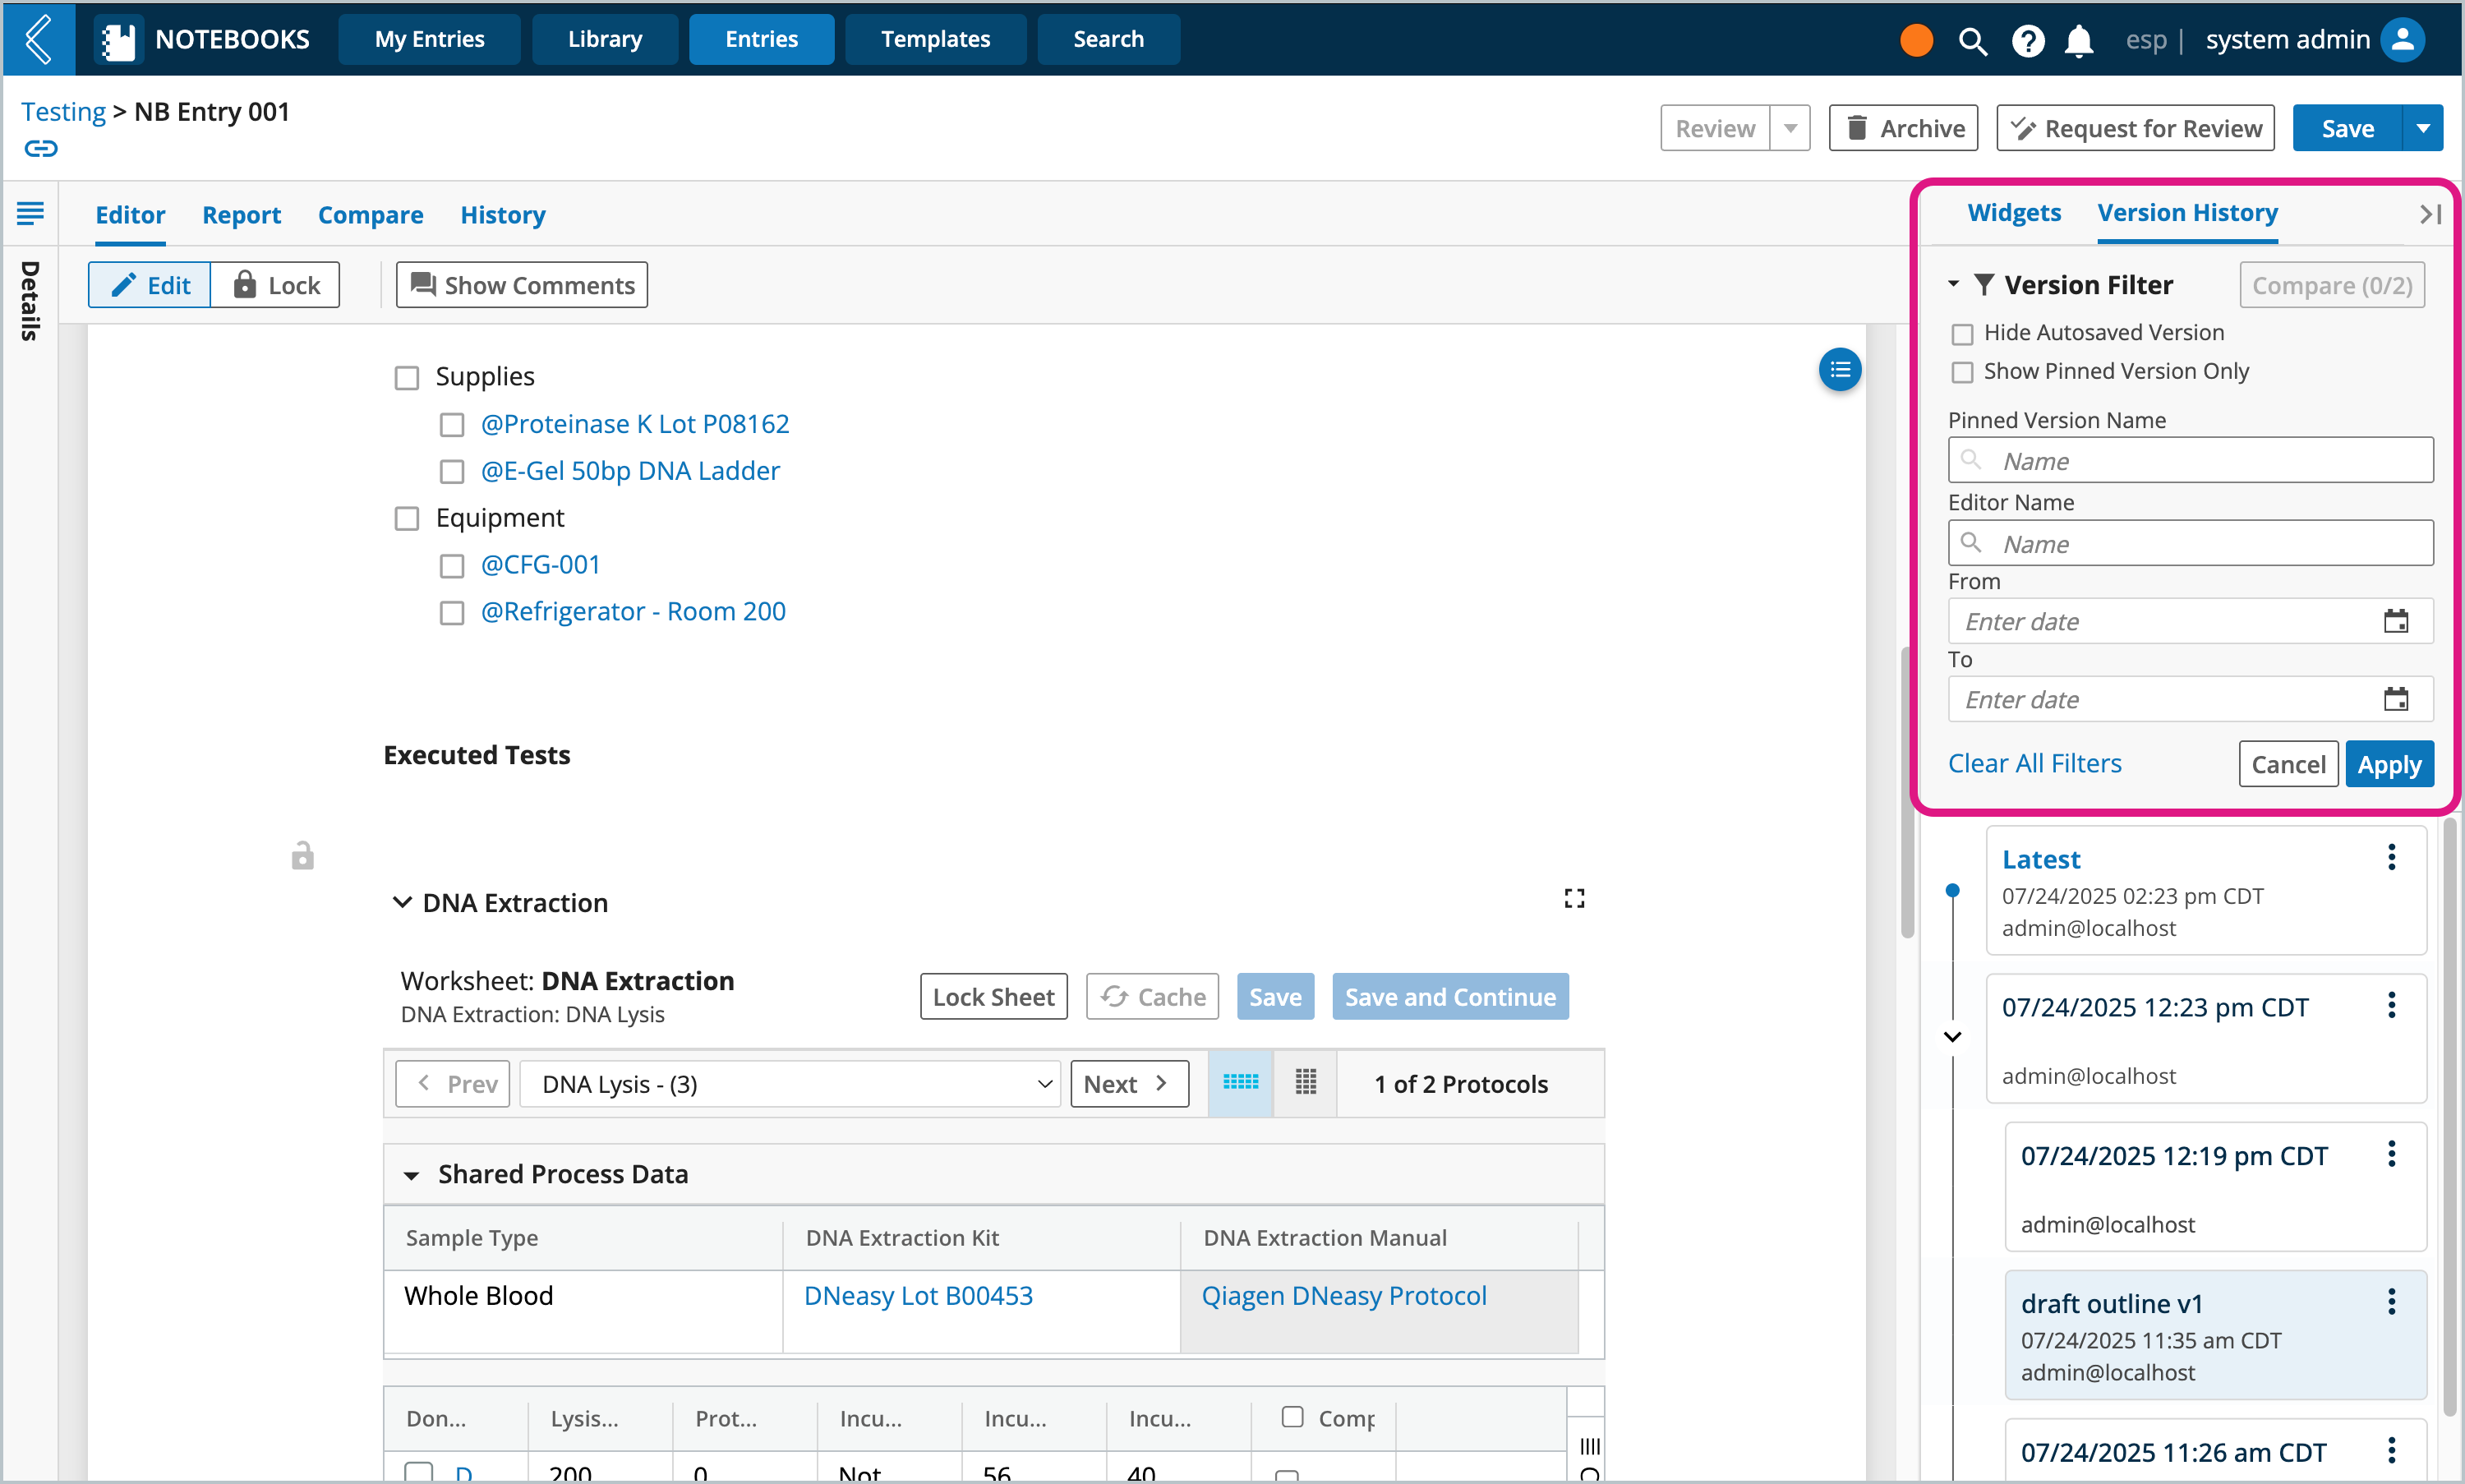
Clicking the Version Filter funnel icon will open the filters panel where you can narrow down the displayed versions.
View/hide autosaved versions
View/hide unpinned versions
Search by pinned version name and editor
View by date range

Pinning a version is a way to provide a custom name for the version, replacing the generic date/time version name.
Go to the Entry's Version History panel
Click the version's ellipsis icon
Click Pin this version
Enter a name for the pin version
Click Pin Entry Version
Tip
Versions can be unpinned by clicking Pin this version, deleting the name, then clicking Pin Entry Version.
Watch: Version comparisons
Procedure
Compare the differences between two versions of an Entry.
Go to the Entry's Version History panel
Click the first version's ellipsis icon
Click Add to compare
Click the second version's ellipsis icon
Click Add to compare
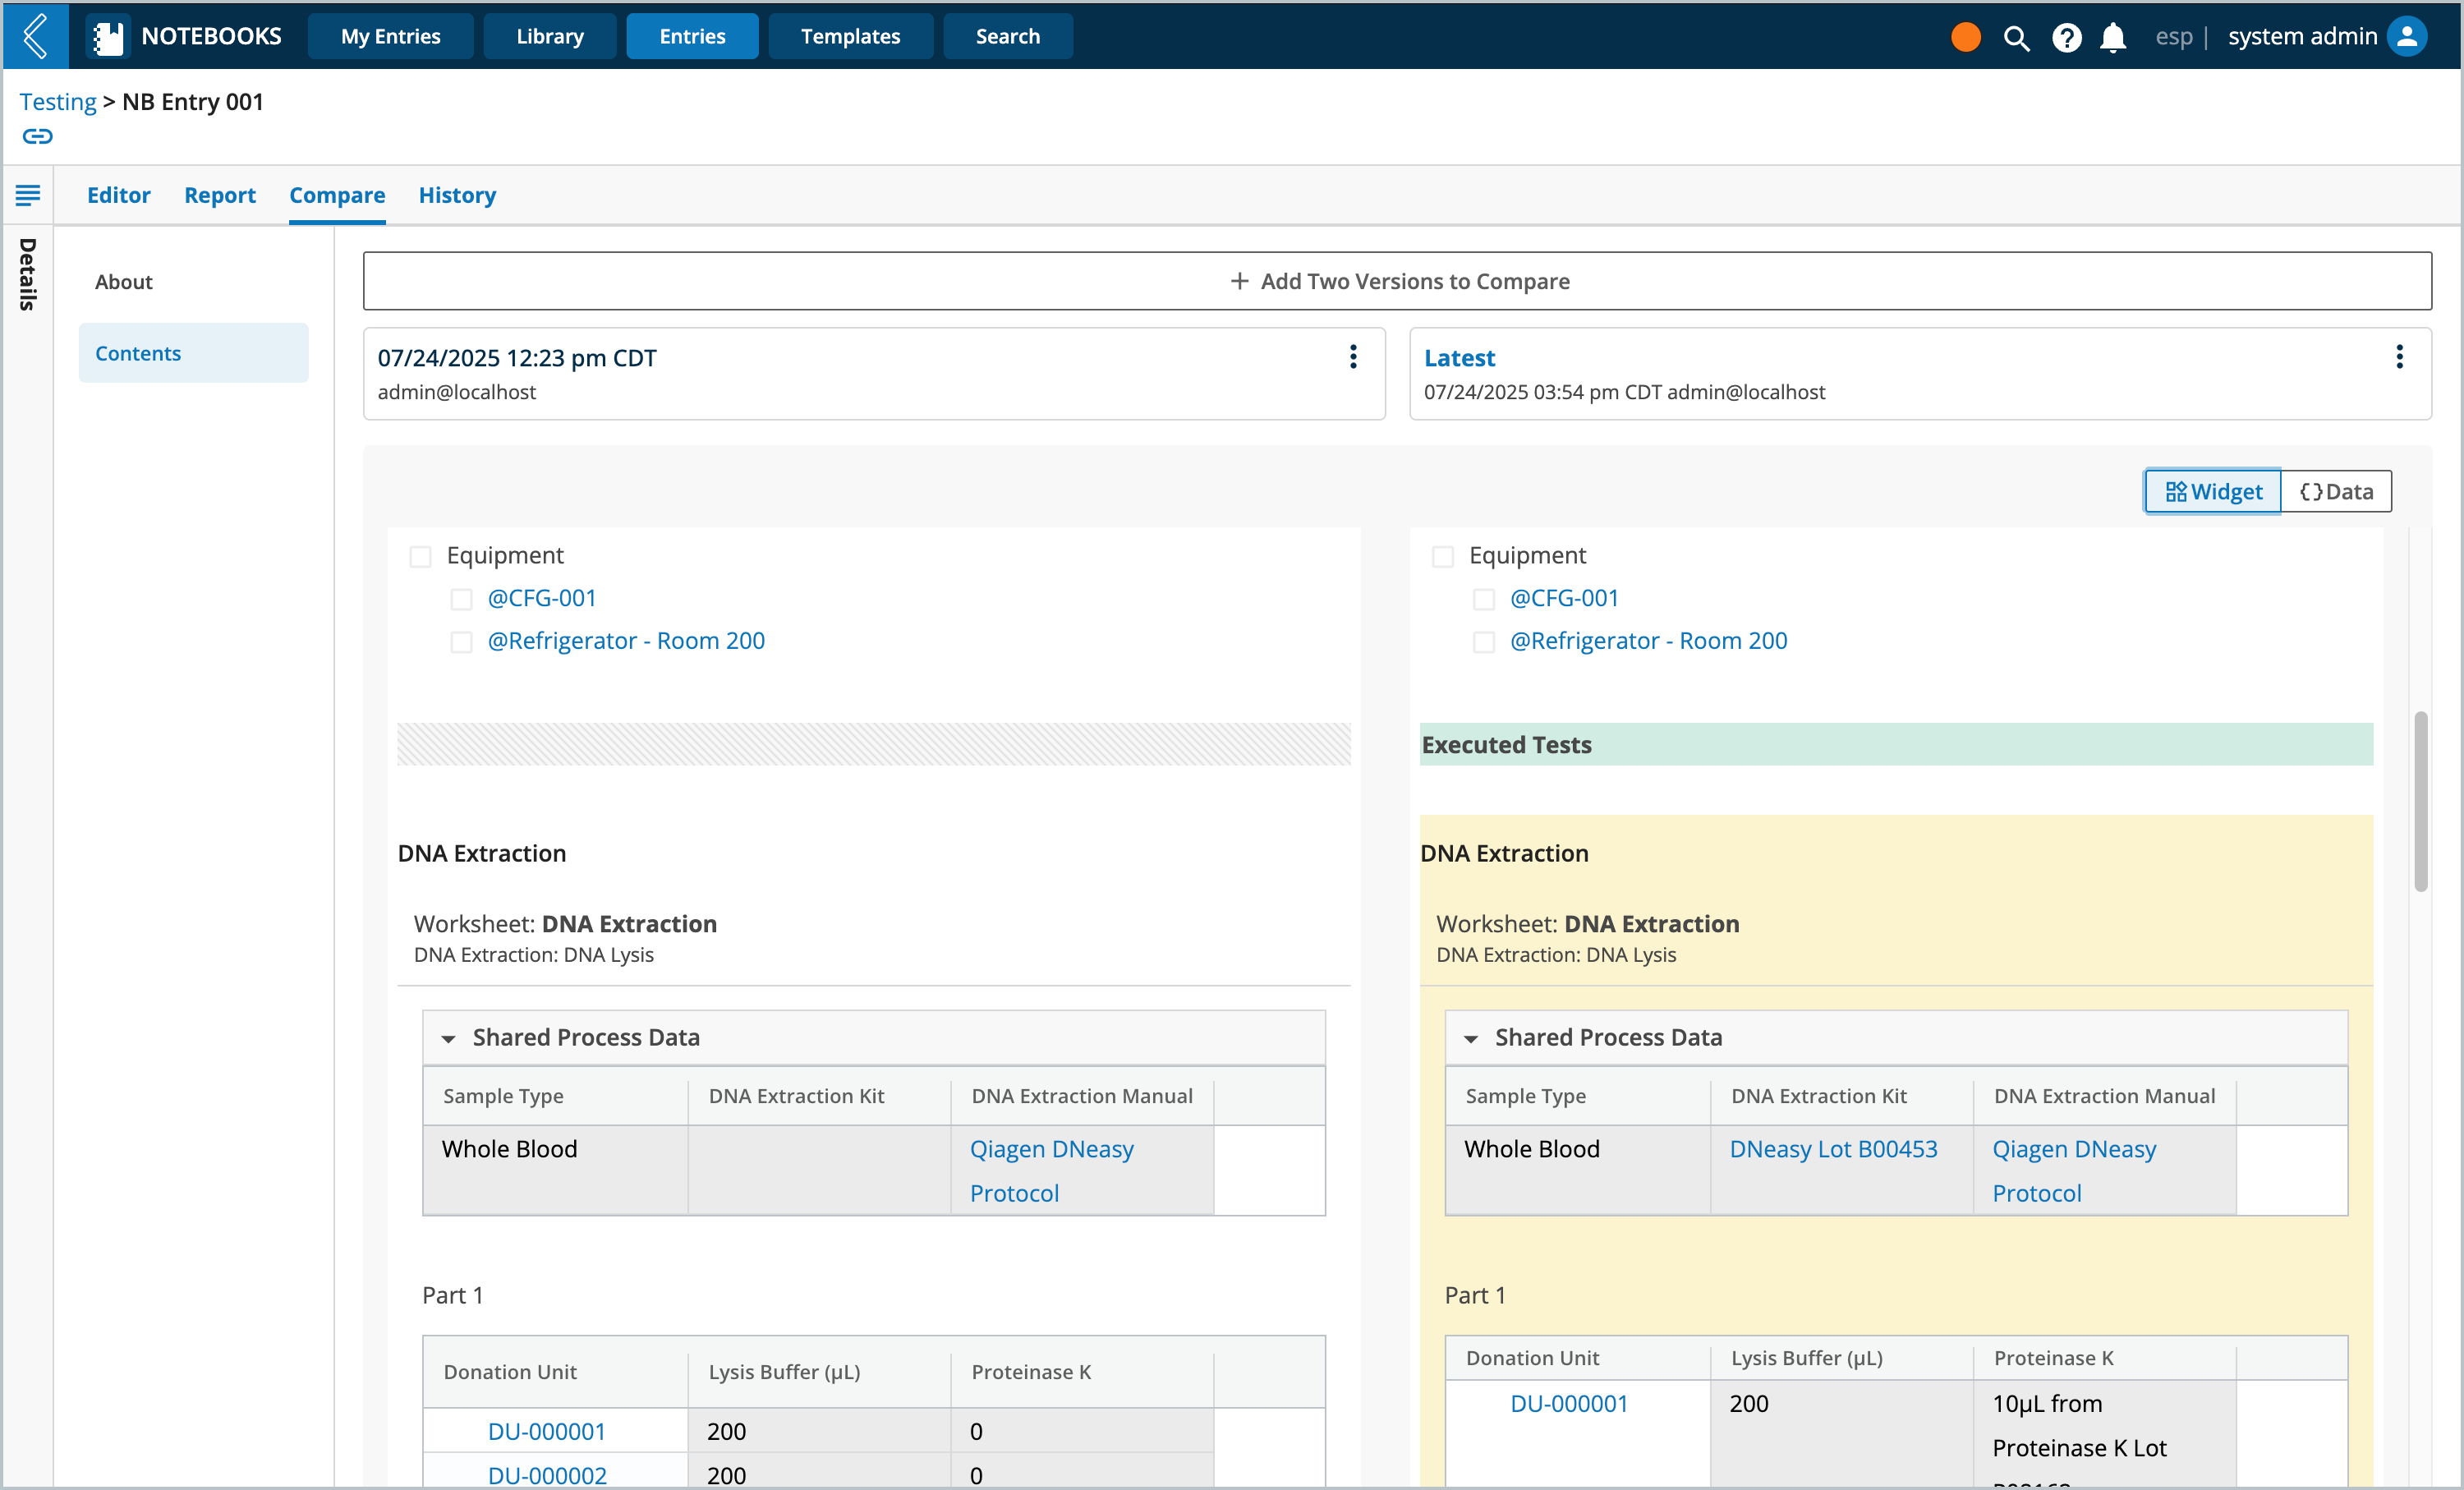
Click the Compare tab located above the Entry. You will see,
About - comparison of the versions metadata details
Contents - comparison of the content within the versions
Select Contents
Select to view the content by Widgets or {} Data
Widgets - shows differences at the widget level (i.e., if one value in a table changed, then the table widget would be highlighted)
{} Data - shows difference at the JSON code level
Note
Changes are color coded by the type of change (green = additions, yellow = modifications, and red = deletions).

Removing/changing versions being compared
From the Compare page or the Version History, click the ellipsis icon of the version you wish to remove
Click Remove from Comparison
Click the ellipsis icon of the version you wish to add
Click Add to Comparison
By default previous versions are read-only, restoring a version will make it the latest version again and enable editing.
Go to the Entry's Version History panel
Click the version's ellipsis icon
Click Restore this version
Click Restore
Important
If the Entry version has one or more worksheets with data captured and recorded, then upon restoring the worksheet will be replaced with the orignal unexecuted Protocol/Workflow definition.
Locked Entries must be unlocked before they can be restored.
Locked Entries that have had their review process completed can not be restored, but you may create a new Entry from the completed version.
Go to the Entry's Version History panel
Click the version's ellipsis icon
Click Create new Template from this version
Enter a Entry Template Name
Enter a Description, L7|ESP will automatically add one stating where the Template is being generated from
Select a Profile privacy setting: Private or Public
If the Entry has worksheet(s) containing data, then the Template will include a copy of a blank Protocol/Workflow definition, but no samples will be assigned and a worksheet will not be auto created.
Click Save, you will then be redirected to the new Template.
Go to the Entry's Version History panel
Click the version's ellipsis icon
Click Create new Entry from this version
Click Restore
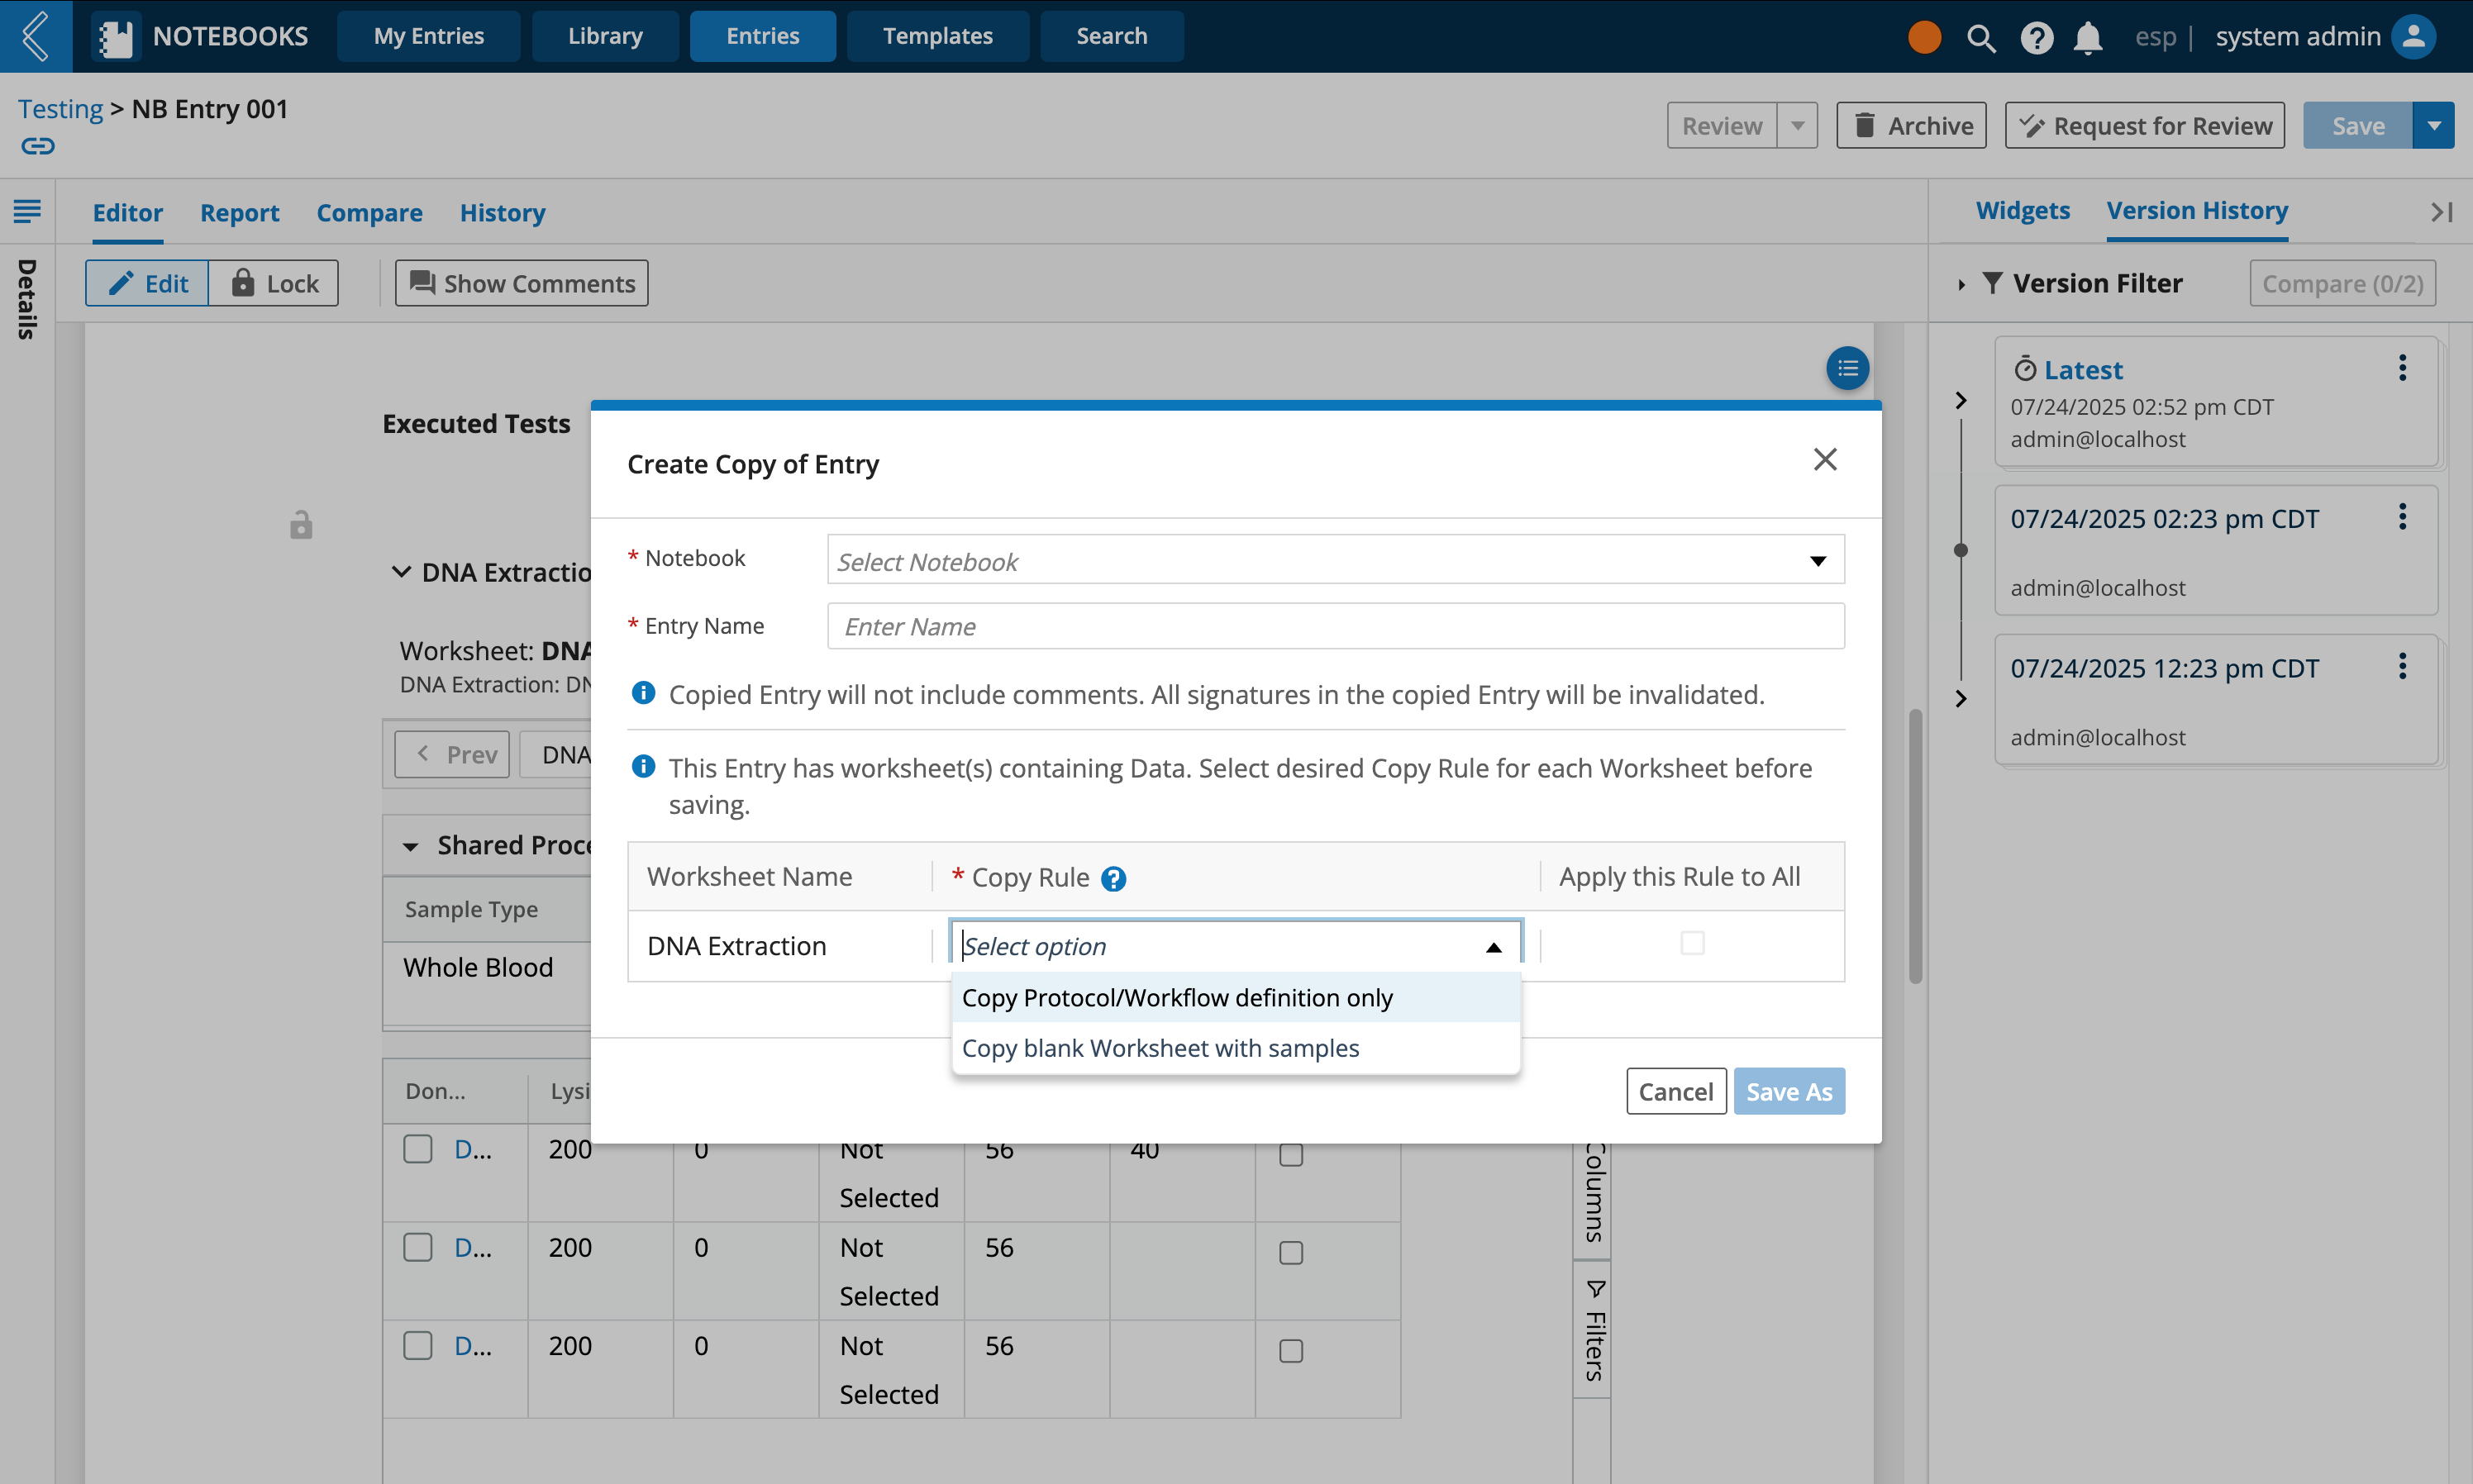
Select a Notebook to assign the new Entry to
Enter a Entry Name
If the Entry has worksheet(s) containing data, then specify the desired Copy Rule for each worksheet before saving.
Copy Protocol/Workflow definition only - will include a copy of a blank Protocol/Workflow definition, but no samples will be assigned and a worksheet will not be auto created.
Copy blank Worksheet with samples - will include a new blank copy of the worksheet loaded with the same samples, but without the previously recorded data.
Click Save As, you will then be redirected to the new Entry.
