Scheduling MES Batch Records
Overview
L7 MES batches are considered process tasks in L7 Scheduling. The batch recipe/process itself is orchestrated in advance in L7|MASTER by a super user.
Unlike administrative tasks that can be created and scheduled directly from L7 Scheduling's Calendar page, batches are created in the L7 MES app, then formally scheduled in L7 Scheduling. As personnel execute the process, L7 Scheduling will track how long each step takes to complete, and will compare the actual to expected turn around times, providing operation insights.
To learn more about how to track turn around times, check out Monitoring Task Duration Time.
Step 1: Create a schedulable batch in L7 MES
In order to formally schedule a process task in L7 Scheduling and assign resources to the task, you must first create the batch record in L7 MES app.
Note
To learn more about how a super user model processes and assign process duration times, see Assigning Process Duration Time.
Go to L7 MES app
Click + New Batch Record
Select a Product
Enter a Batch Name
Select a pinned MBR Version
Important
Only pinned Workflow Chains (MBRs) with defined duration times are Schedulable.
MBRs containing Procedures are not supported in L7 Scheduling
Select the Schedule Task checkbox
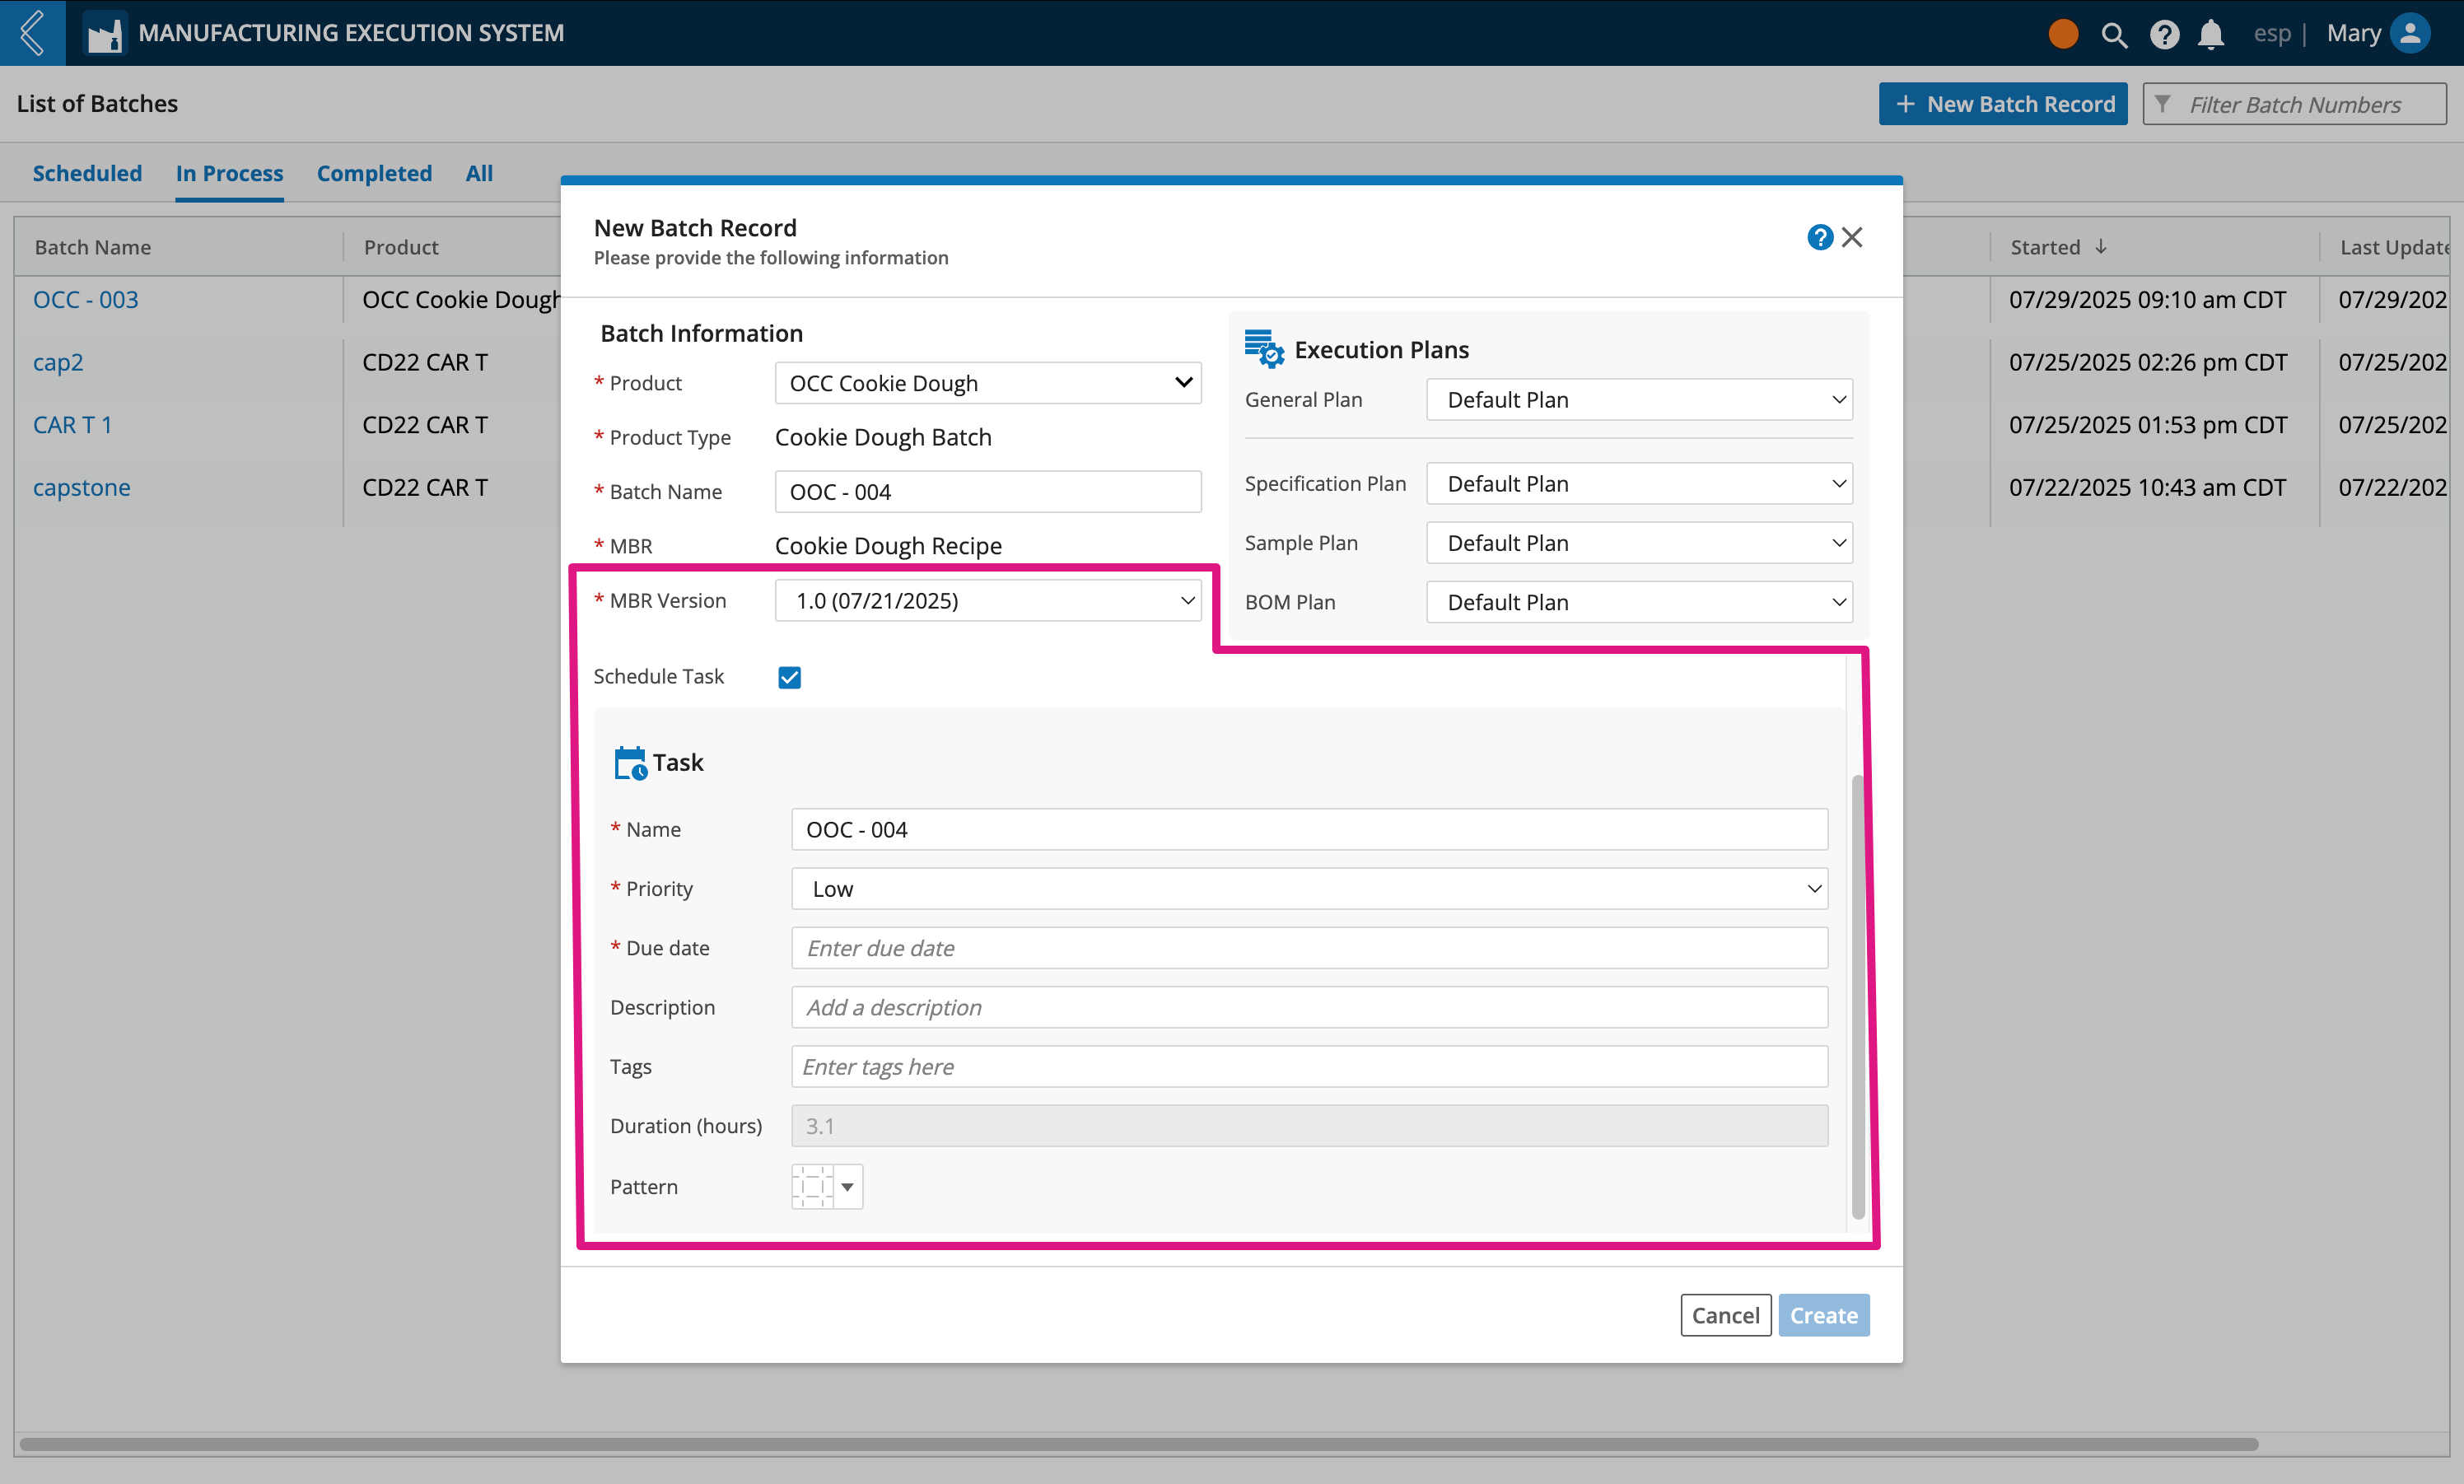
Enter a Name. By default this field will inherit the Batch Name, but is editable
Assign a Priority level to the task (low, medium, or high)
Assign a Due date
Optionally enter a Description and apply Tags to the task
Duration (hours) is a read only field that is auto computed based on how the process was modeled
Select a Pattern to be used as the background of the scheduled task displayed on L7 Scheduling's Calendar
Note
By default, patterns are selected consecutively (top left to bottom right) to help differentiate Workflow Chains from each other, this is useful when you use the same process often.
Click Create
Important
Once created, the batch will be found under the Scheduled tab in L7 MES and displayed in L7 Scheduling's Calendar page.
The EBR is read-only while a batch is in the "scheduled" state.
Sample labels can be printed while a batch is in the "scheduled" state (Sample Plan -> Print Labels).
Step 2: Schedule the batch in L7 Scheduling
After a scheduled MES batch has been created in L7 MES, you can find a record of it in the Unscheduled Tasks panel of L7 Scheduling's Calendar section. From here you can schedule the batch and assign resources to it.
Tip
MES batches (Workflow Chains) will have an arrow that can be expanded to see each Workflow in the process and their estimated duration times.
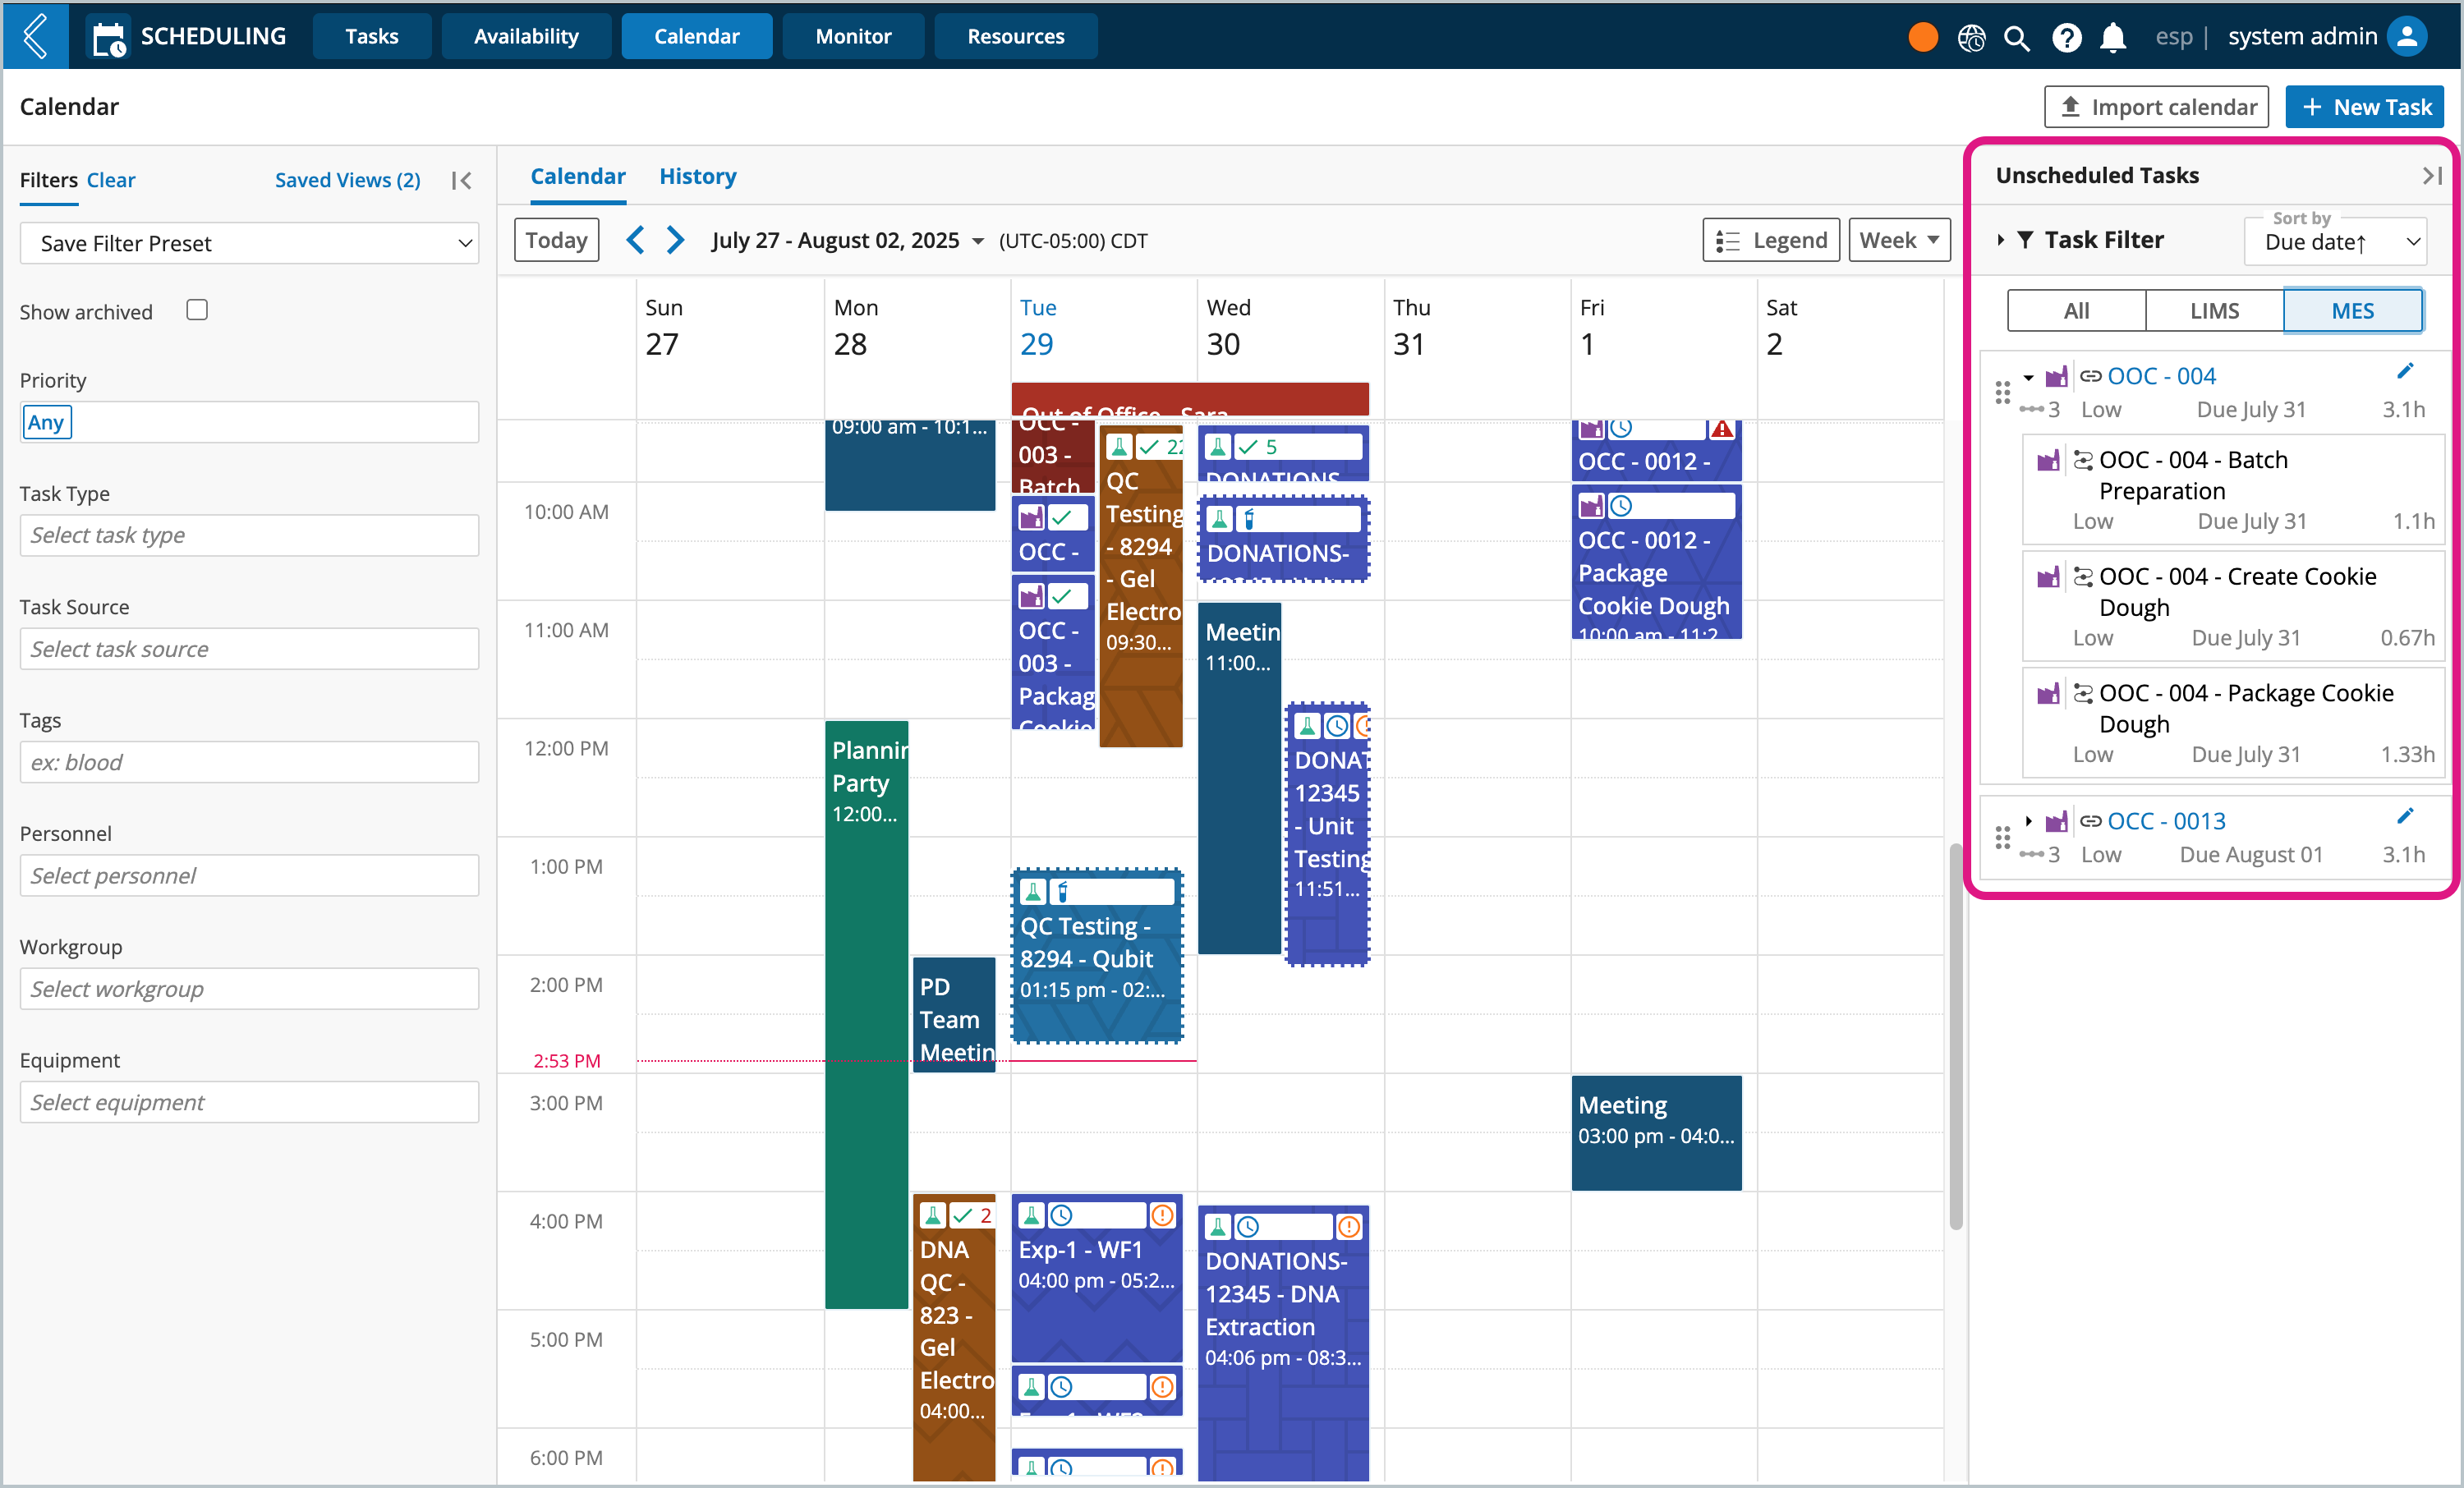
Navigate to L7 Scheduling -> Calendar
Review the calendar to determine the day and time you want to schedule the task
Drag the unscheduled task directly onto the calendar's desired day/time
Note
Alternatively, you can click the task's vertical ellipsis, then click Edit Task.
Here you can enter a start and end date/time.
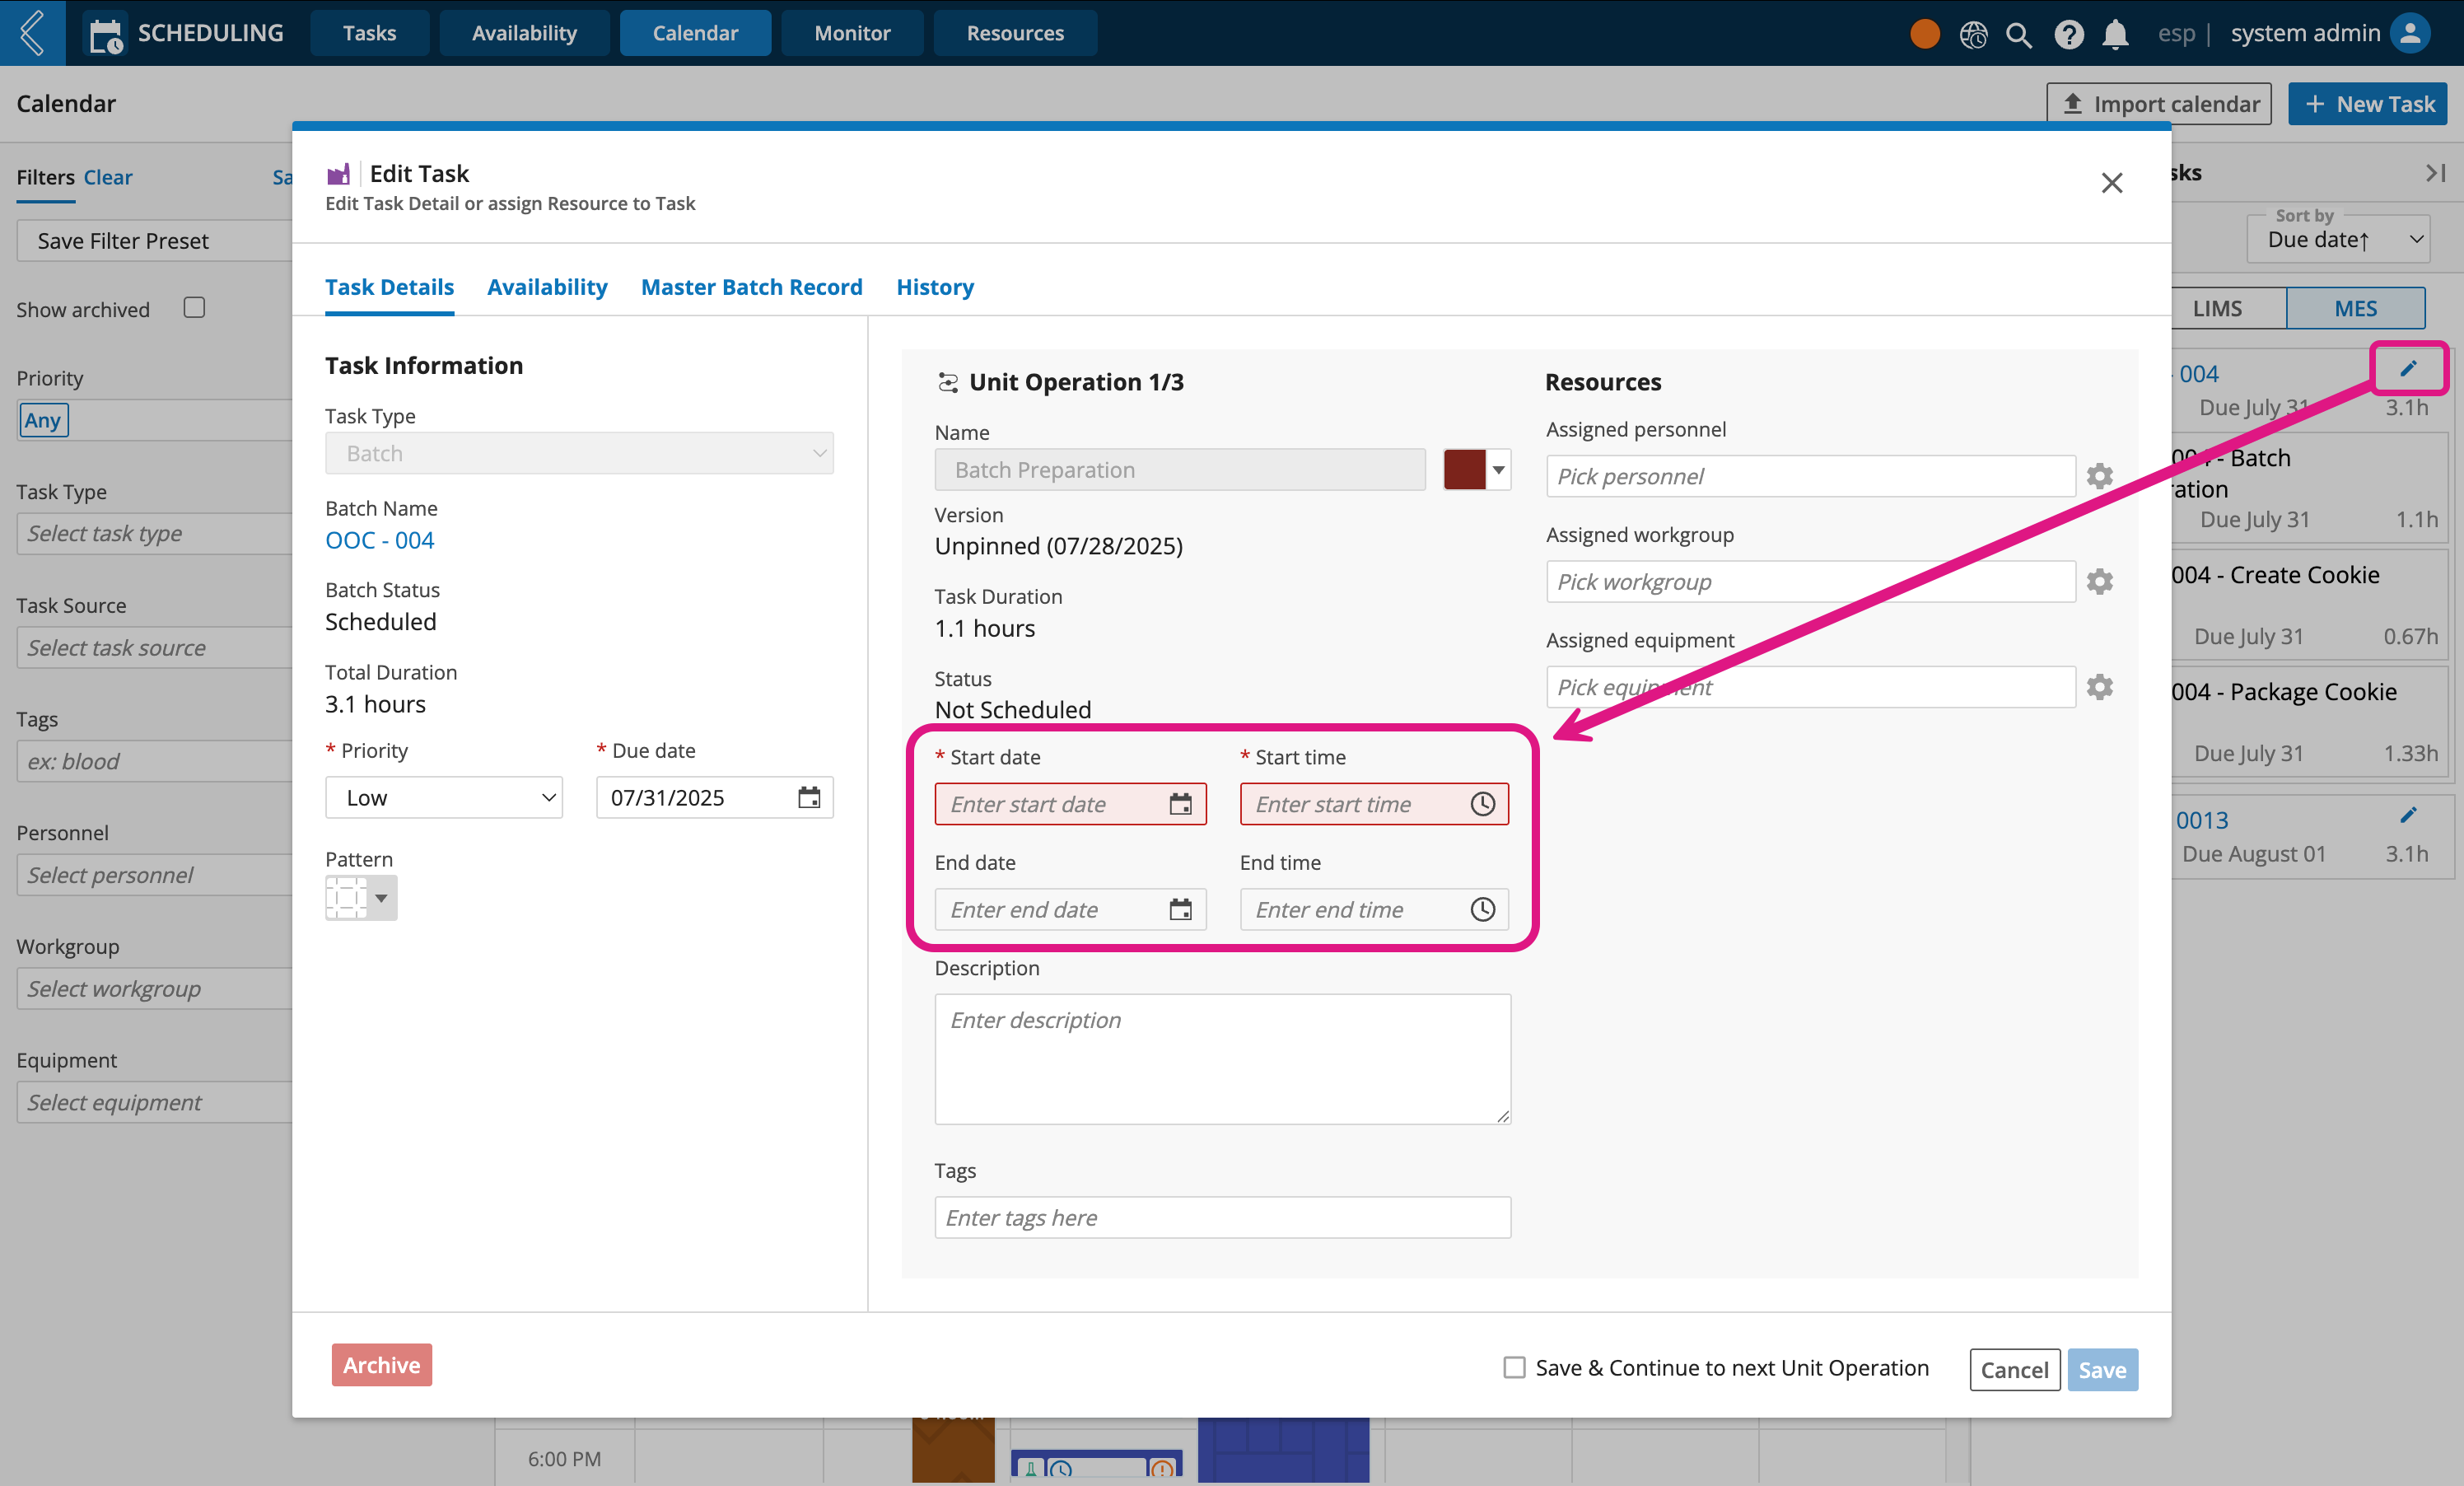
Click the scheduled task
Click Edit Task
Click Save
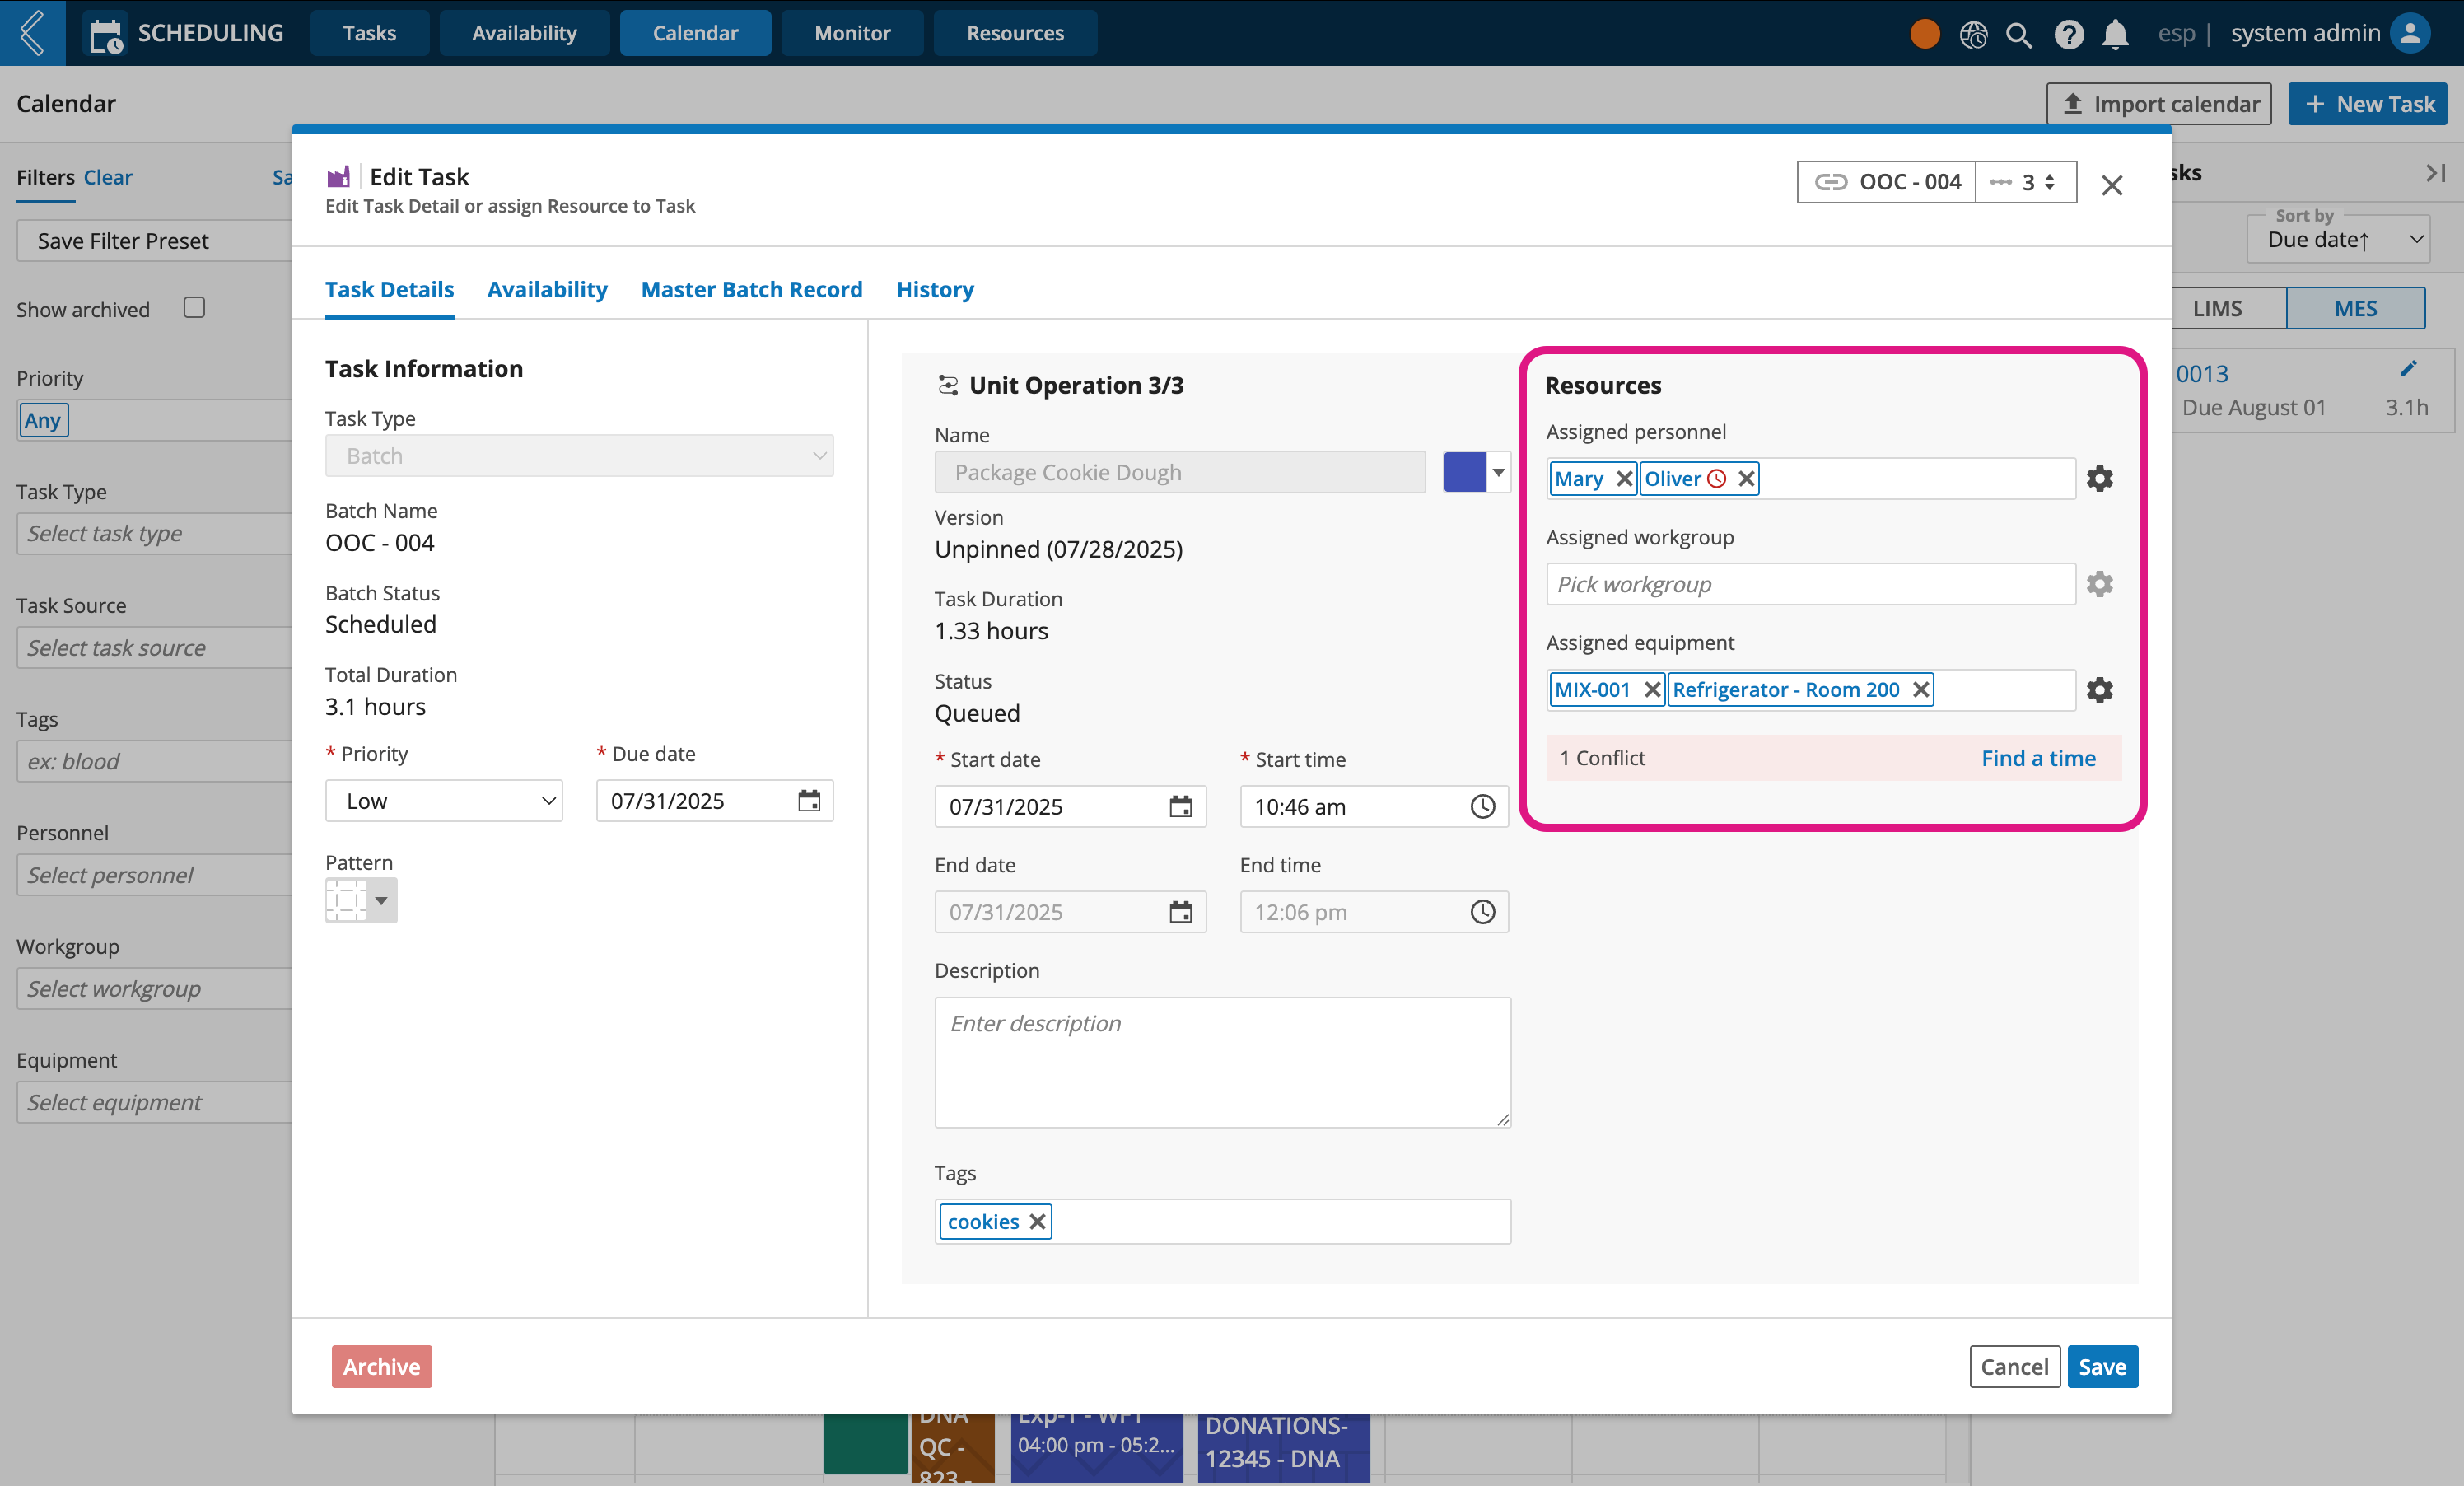
Step 3: Initiate the scheduled batch
L7 Scheduling allows you to start L7 MES batches right from the Calendar view, or from L7 MES.
Click the scheduled task
Click Start Batch Process
Click Confirm
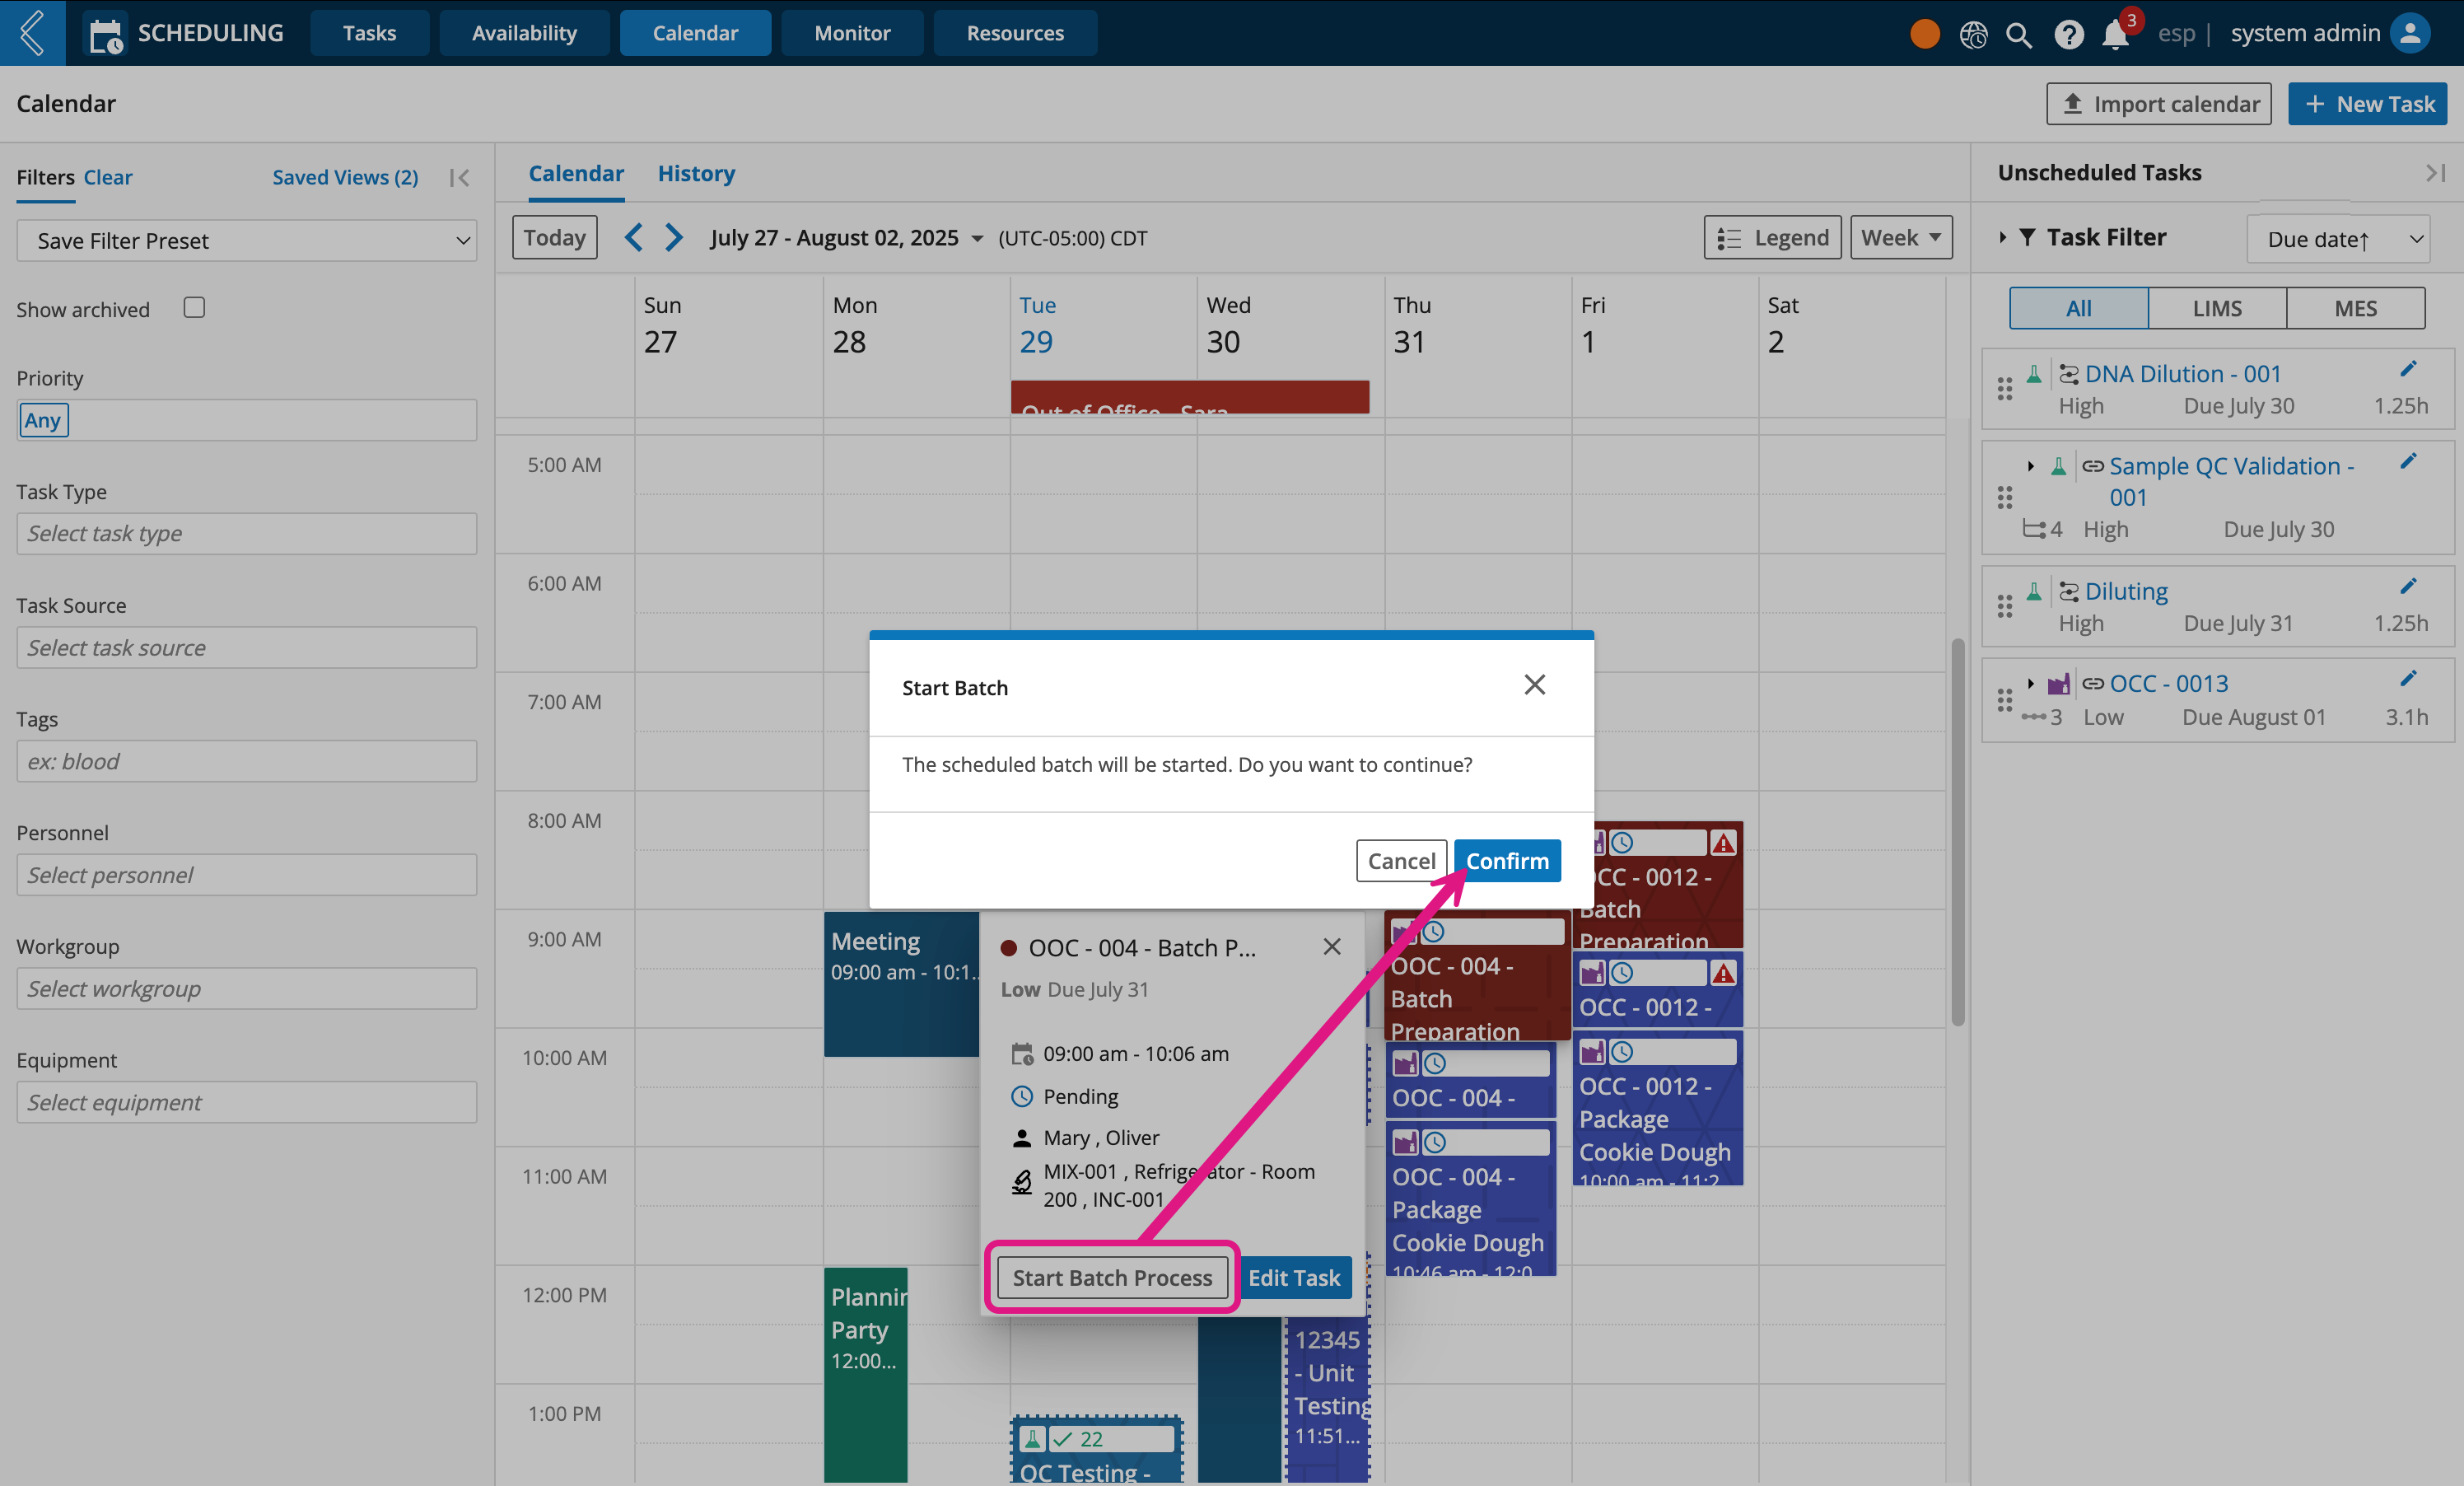
Tip
After the batch process has been started, the Start Batch Process button will change to Go to Batch. Click it to open a new browser tab with the L7 MES EBR open and ready for batch processing.
Personnel can now start processing the batch in L7 MES
Go to L7 MES app
Click the Scheduled tab
Click the Batch Name
Click Start Batch Process
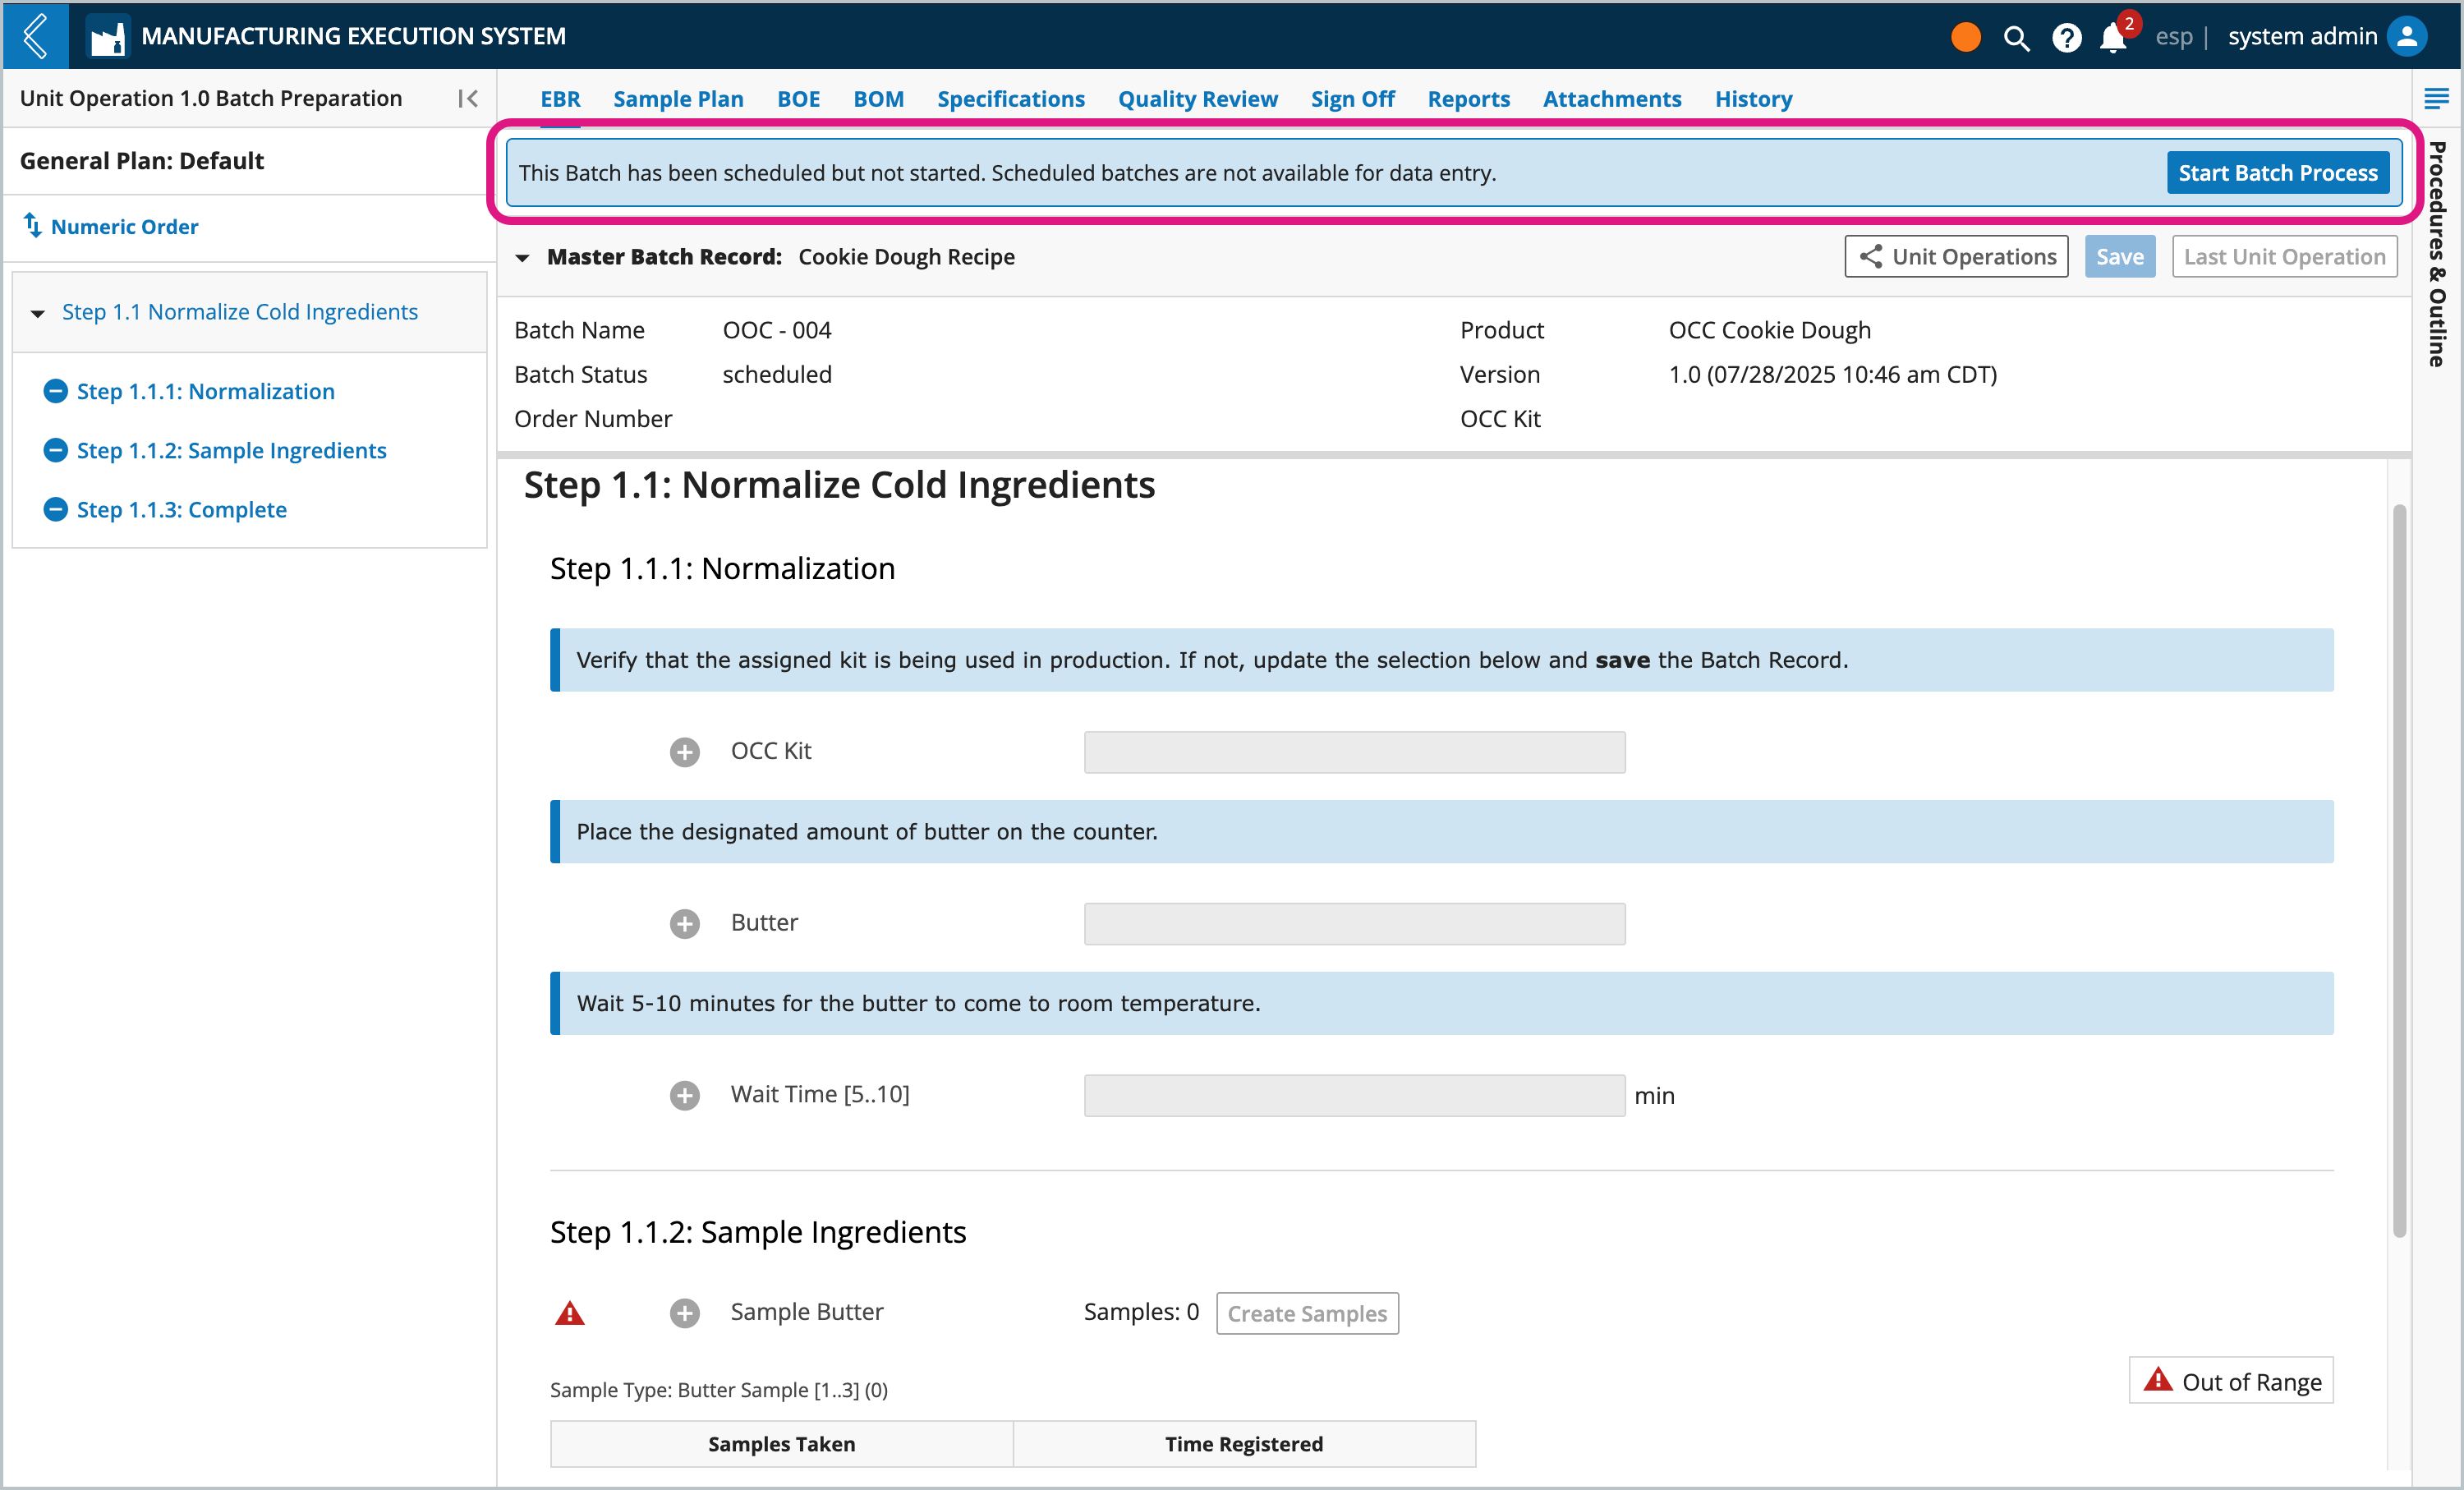
Notice
The EBR is read-only while a batch is in the "scheduled" state
Sample labels can be printed while a batch is in the "scheduled" state (Sample Plan -> Print Labels)
Click Confirm
Personnel can now start processing the batch record in L7 MES
Editing L7 MES batch tasks
At times you may find yourself needing to reschedule batch tasks, reassign resources, or view the status of the master batch record.
From the Calendar, select a process task, then click Edit Task.
The Task Details page is where you can change the priority, due date, time and day (if not already running), and assign resources.
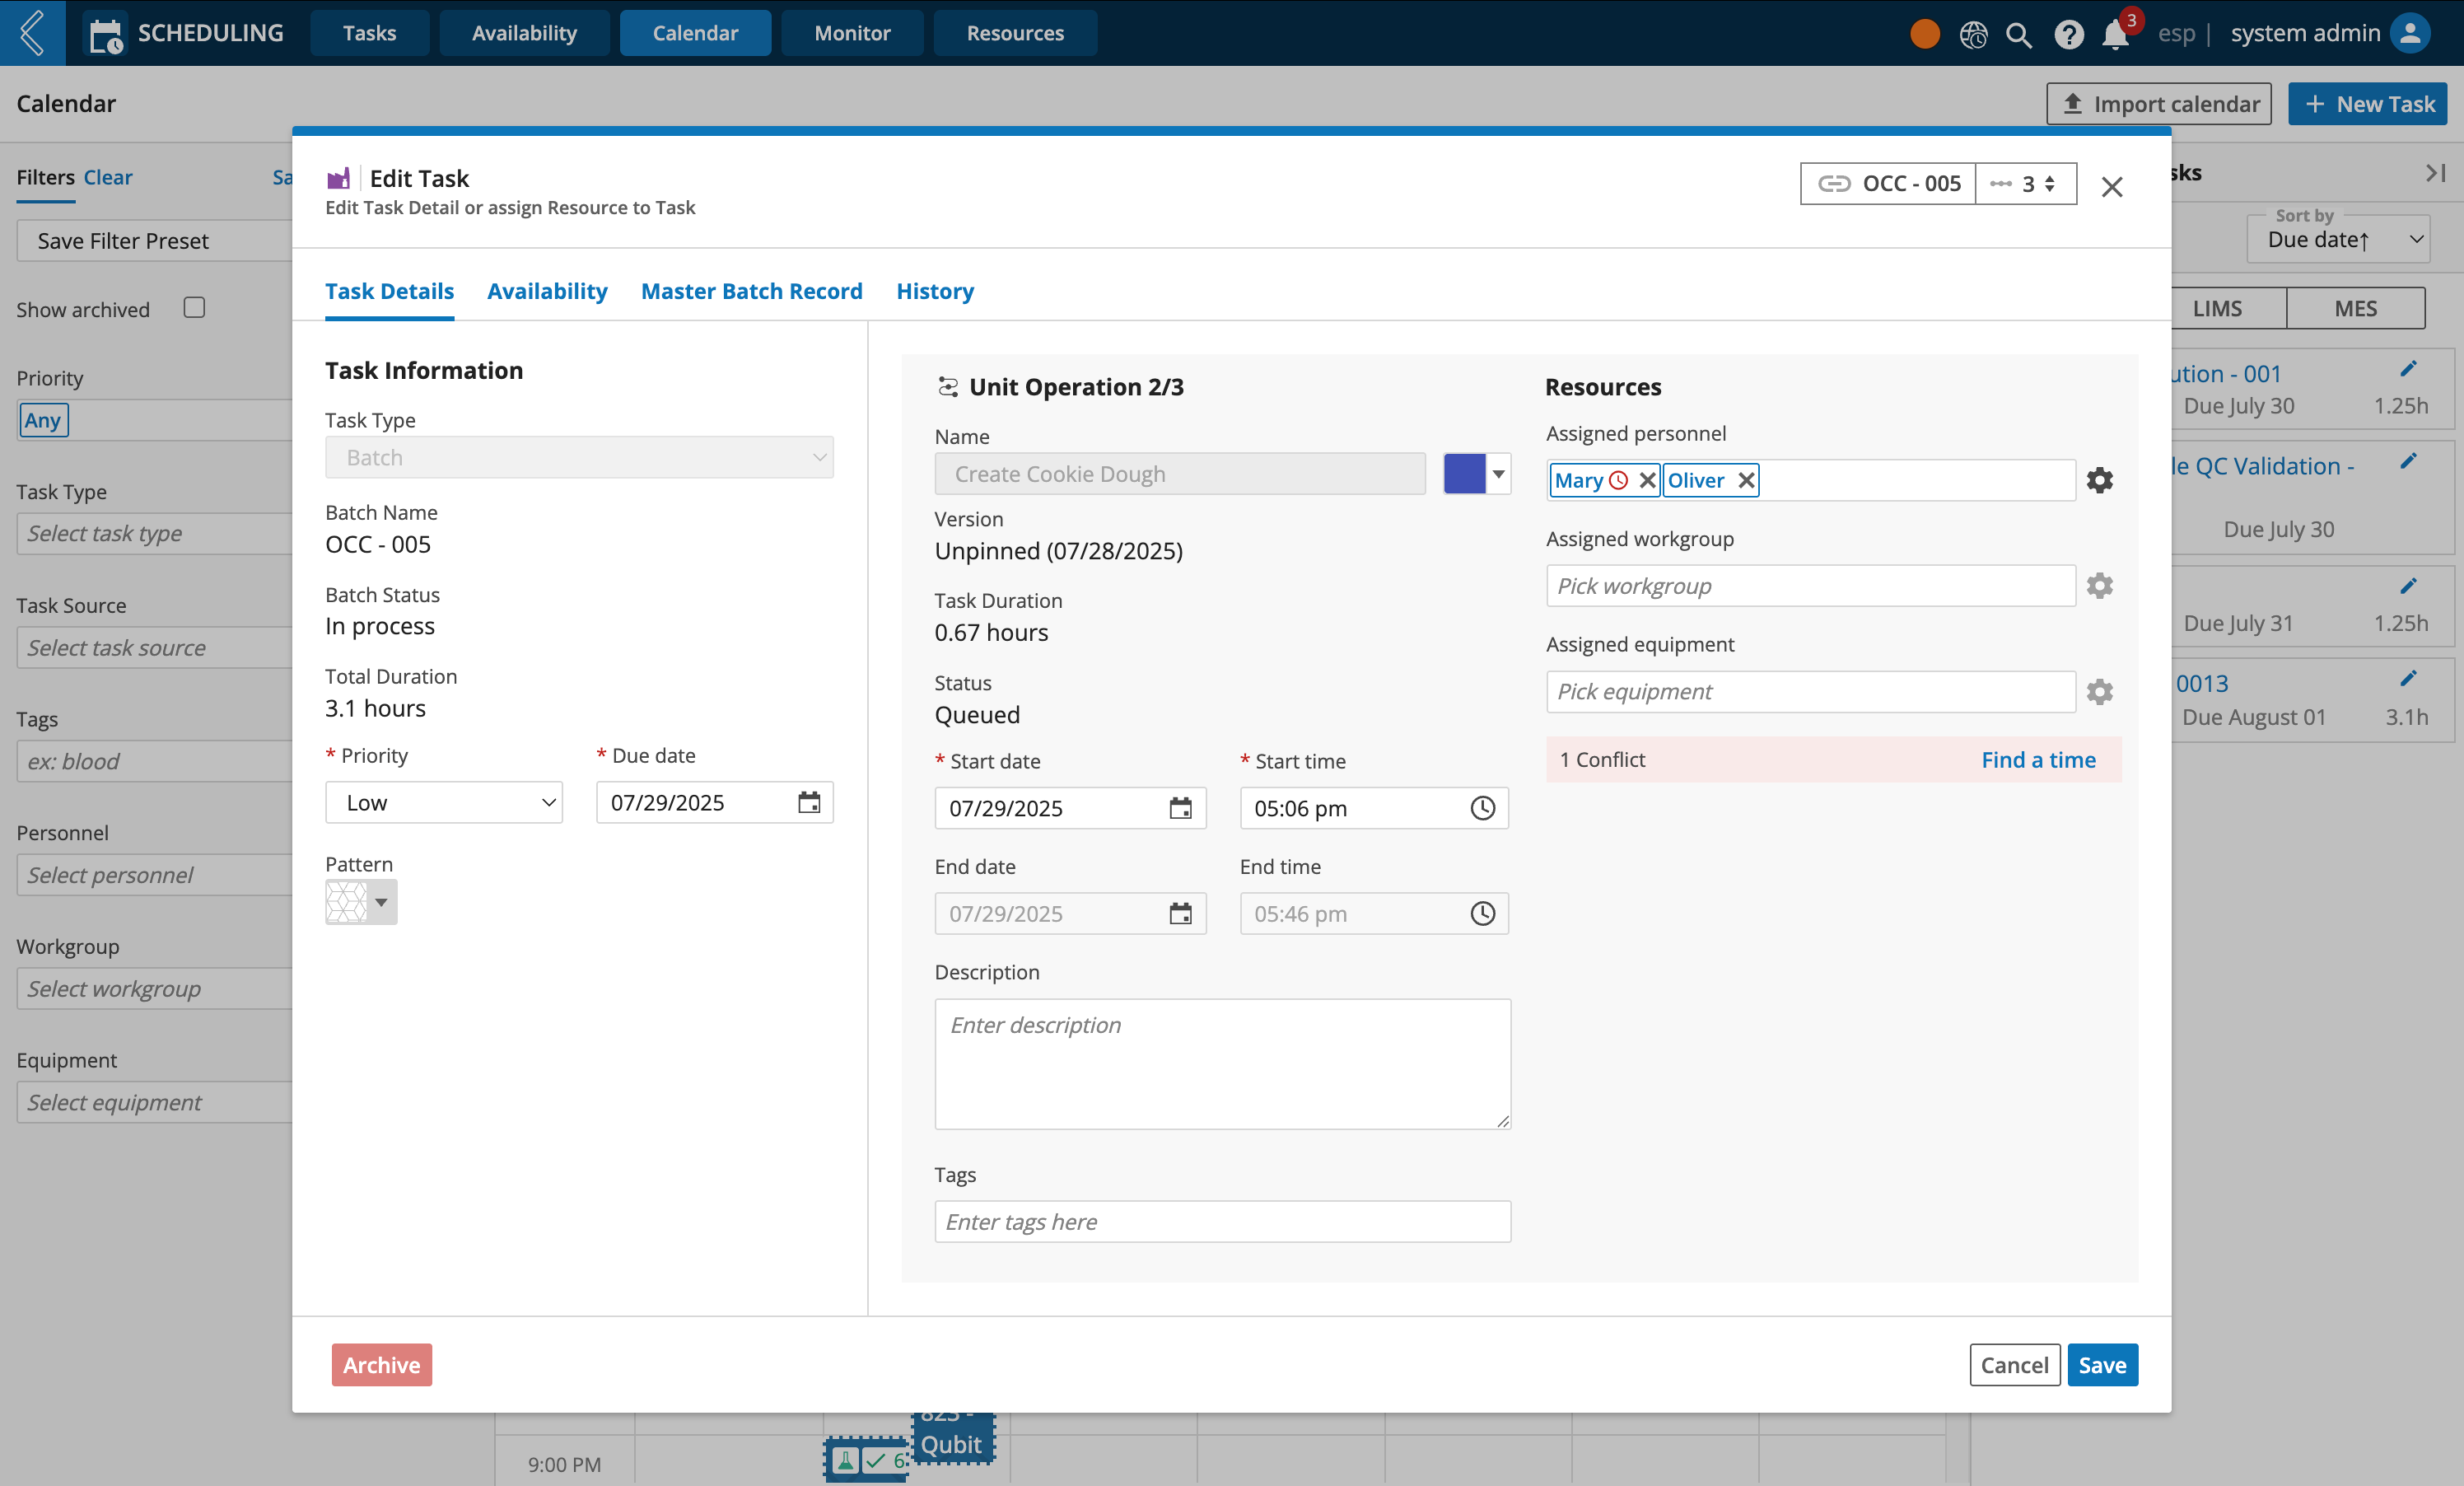
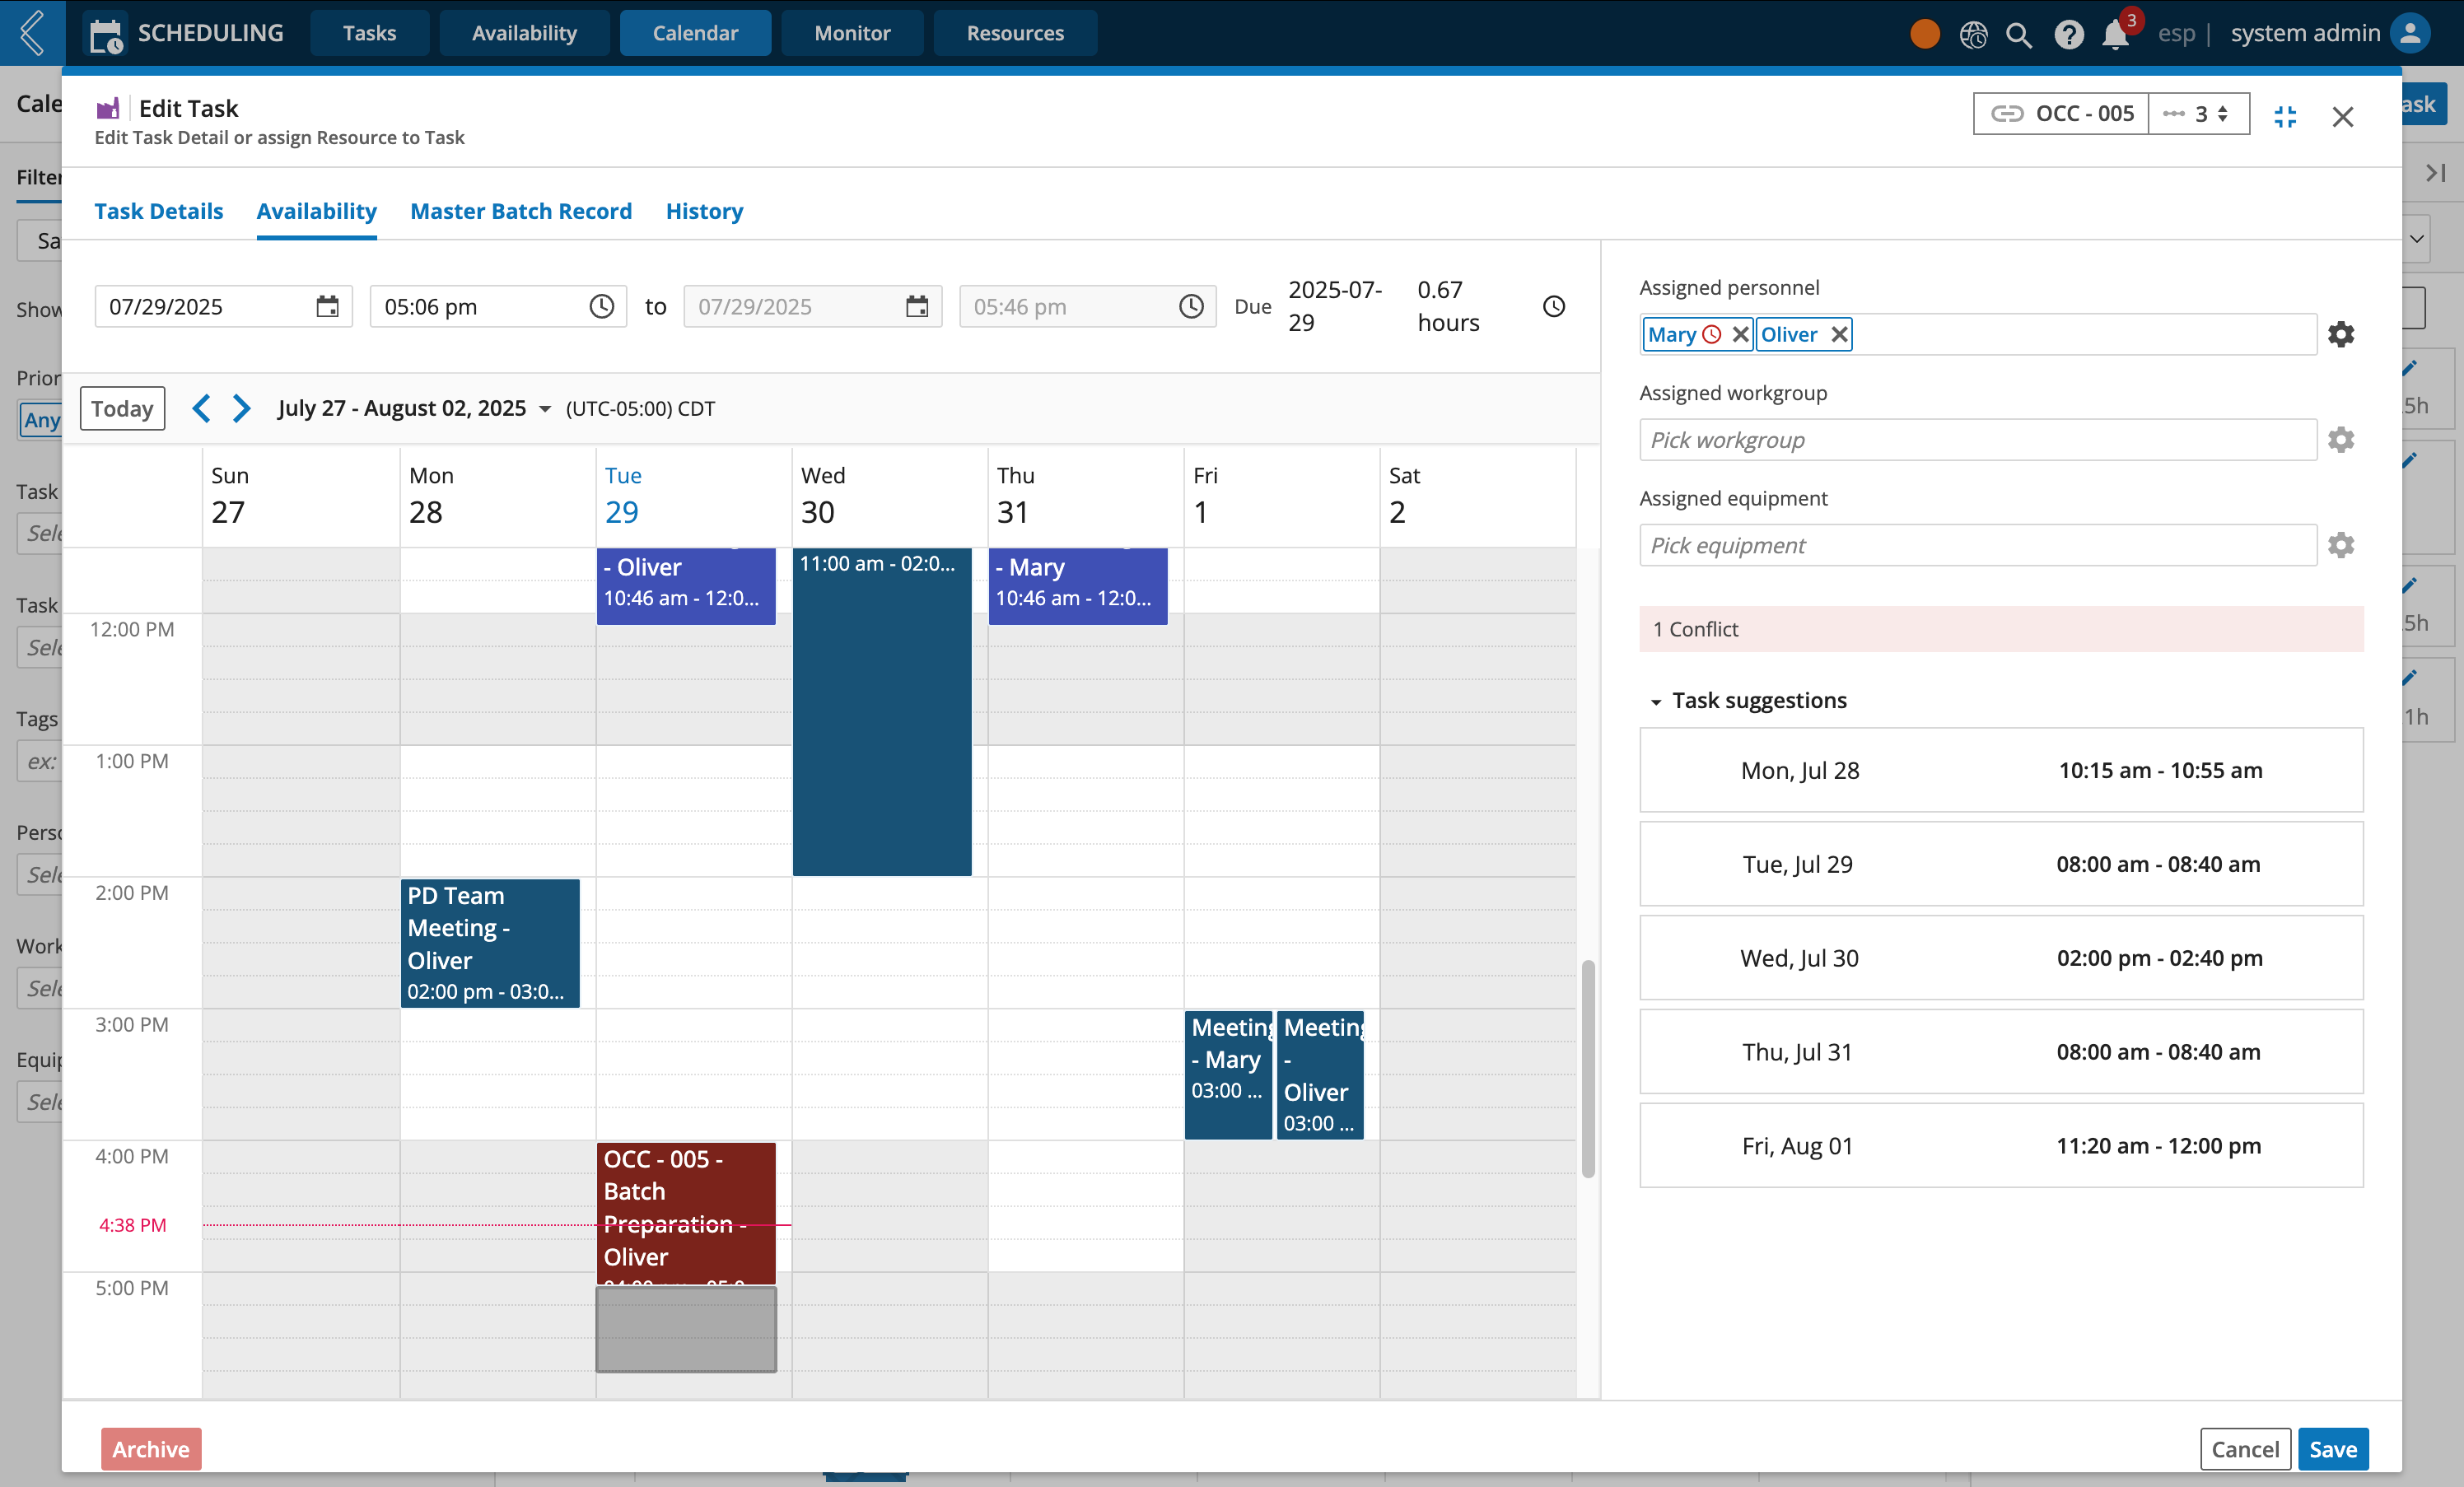
The Availability page is where you can visually see the calendar and available time slots for the selected resources. When resources have schedule conflicts, you can use this page to decide if the task should be rescheduled, or if there are other resources available that can be assigned instead.
See Resolving Schedule Conflicts to learn more.
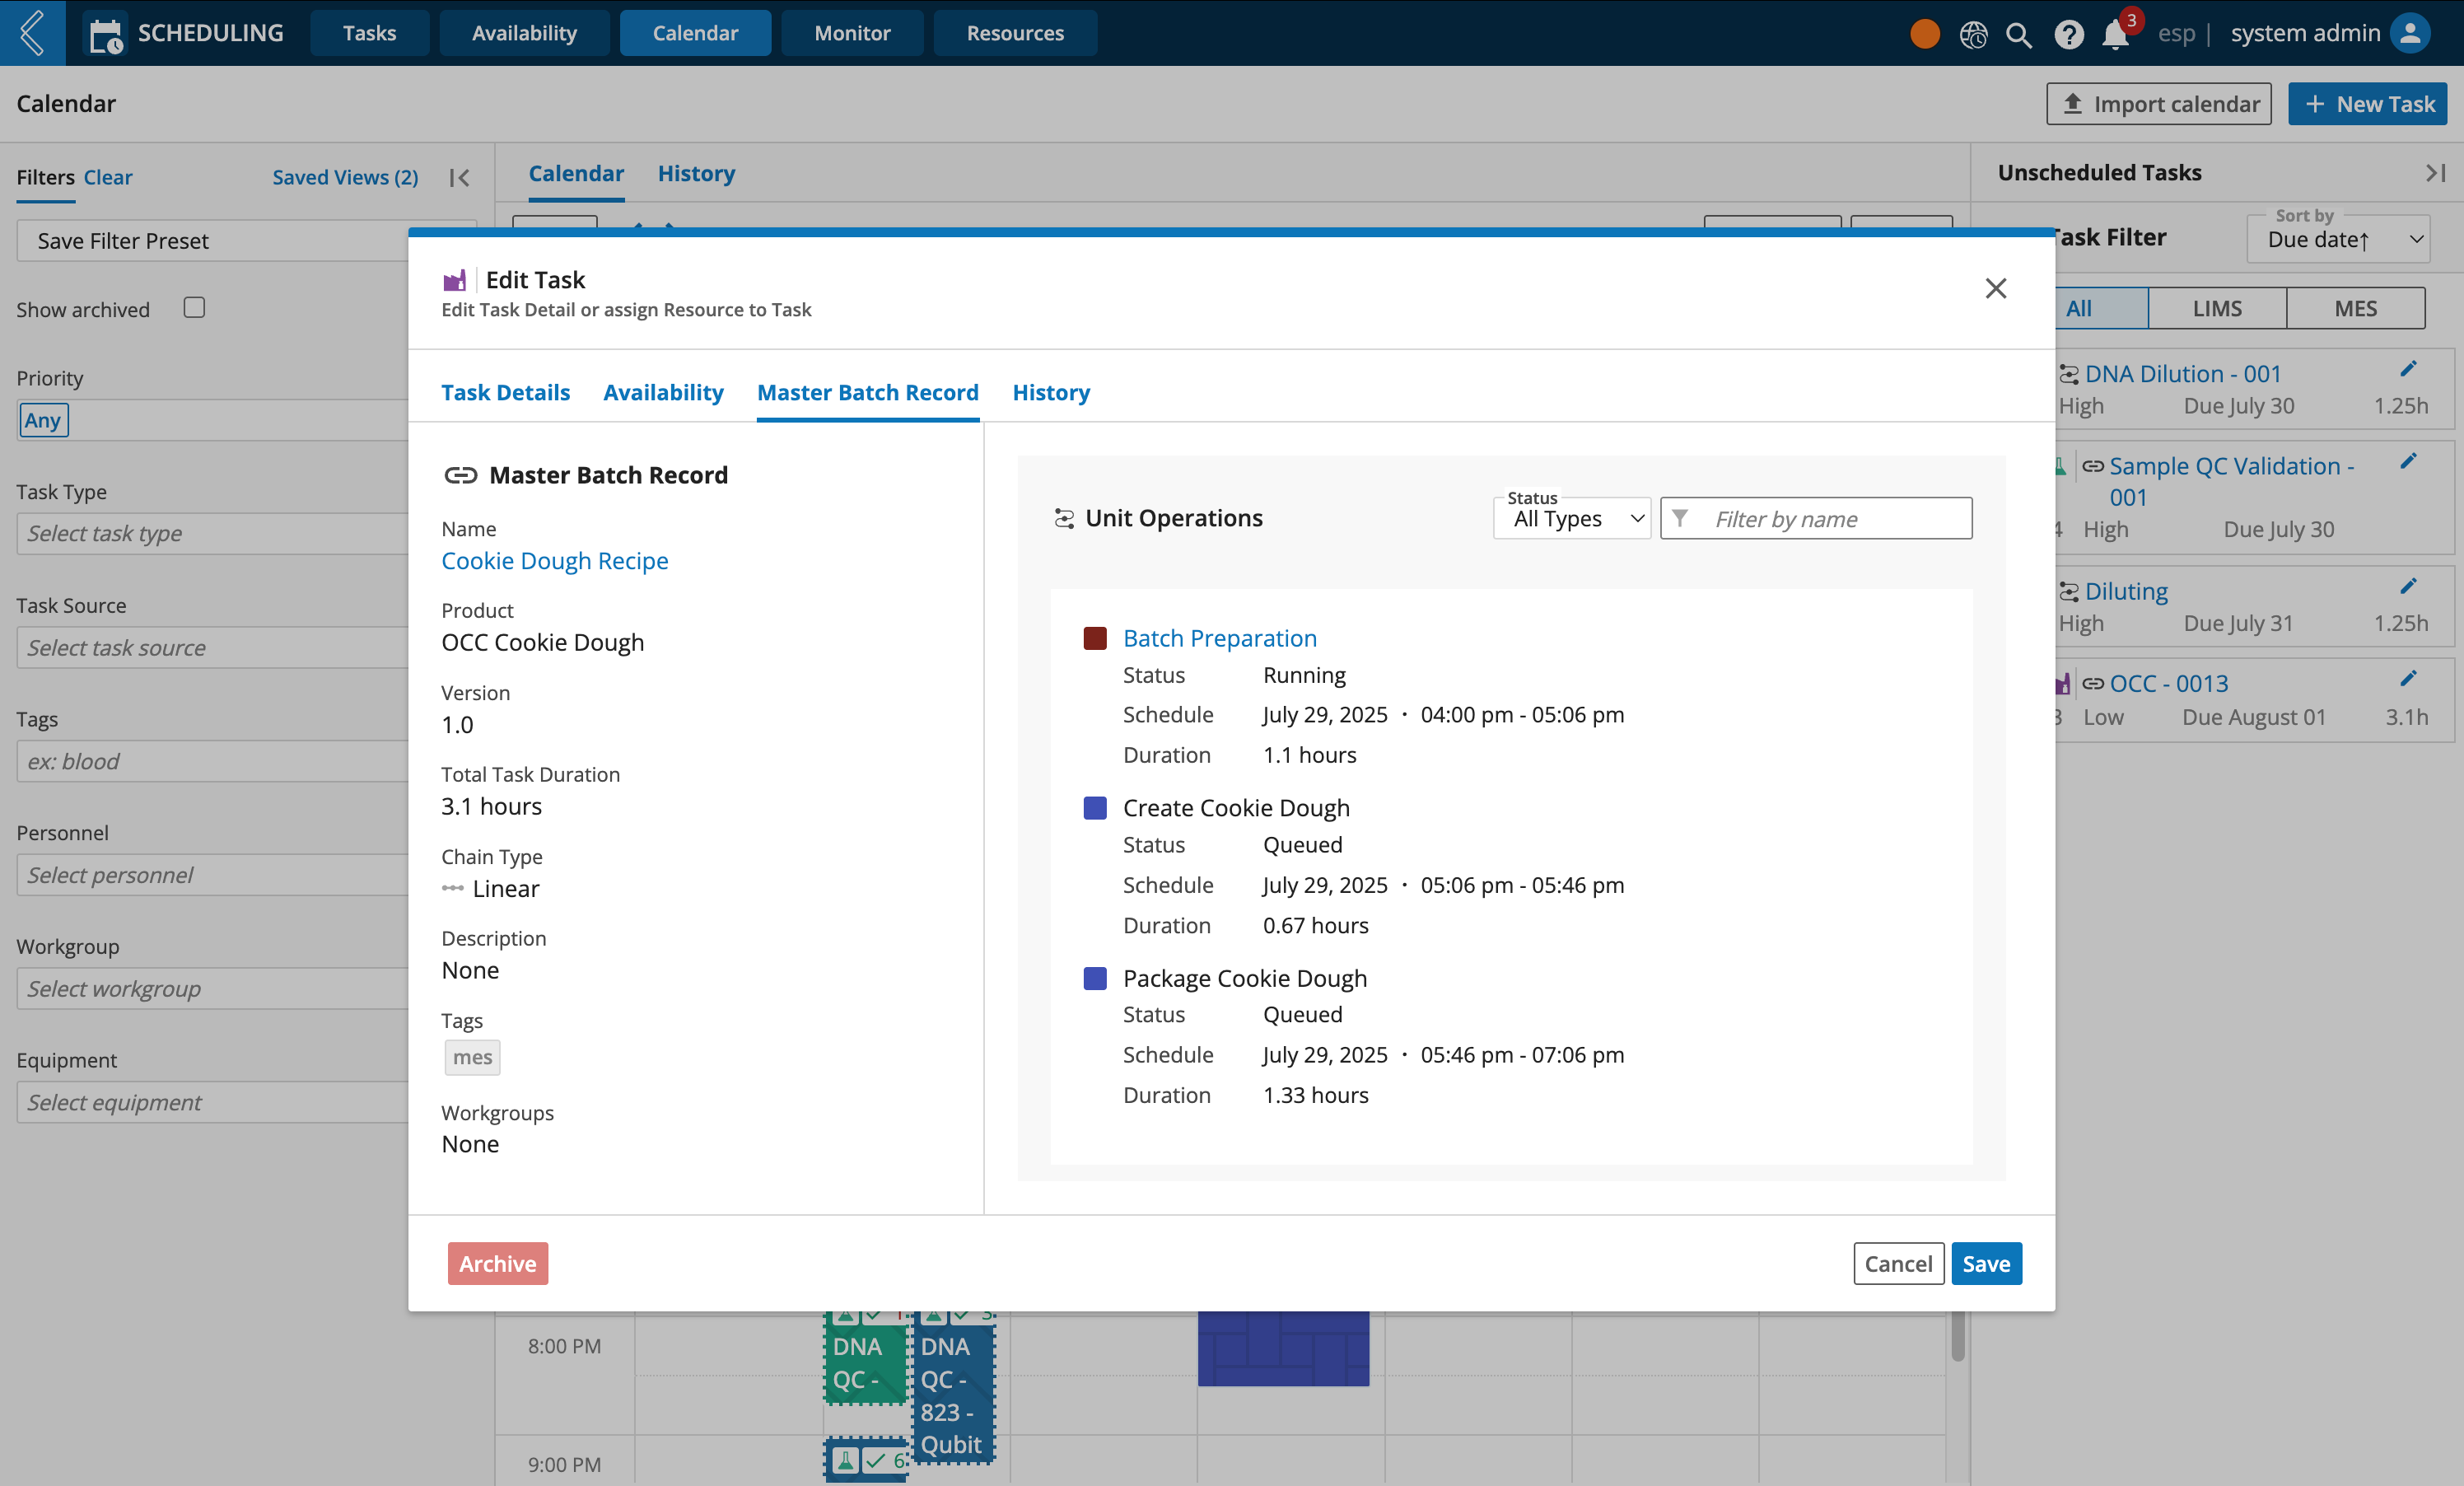
The Master Batch Record page is where you can see an overview of the Unit Operations (Workflows and/or Procedures) belonging to the MBR (Workflow Chain).
From here you can,
View each Unit Operations status in L7 MES
Navigate directly to L7 MES EBR
View the expected process duration time
Filter displayed Unit Operations by status
