Planner
Goals
Understand the role of the Planner
Know how to create Batches
Know how to schedule Batches
Know how to print Sample labels
Term | Definition |
Batch | Manufacturing run to produce a Product. |
Product | The therapeutic being manufactured. |
Recipe | Manufacturing process to produce a Product. |
Specification Plan | Numeric fields with upper and/or lower limits in the Recipe. |
Sample Plan | Number and type of Samples collected in the Recipe. |
L7 MES Tab | Activity | Permission(s) |
|---|---|---|
Landing Page | Create Batch | MES → Batch Creation LIMS → Workflow Chain Instance → Create |
Landing Page | Schedule Batch | MES → Batch Creation Scheduling →Planned Action Chain → Create |
Sample Plan | Print labels | MES → Batch Creation Analysis → Pipeline → Execute |
The Planner is responsible for creating Batches, scheduling Batches and printing Sample labels. To complete these tasks, they use the L7 MES landing page and Sample Plan tab within the Batch Record.
 |
The L7 MES landing page displays all Batches that have been created in L7 MES. To review or work with a Batch, select the relevant Batch Name.
Batches are listed by default in descending order based on their creation date, and organized into four (4) tabs:
Scheduled – Batches that have schedule, but not yet started. Until a scheduled batch is officially started, all input fields are read-only except for printing labels.
In Process – Batches that are currently active (default view).
Completed – Batches that have been completed or failed.
All – in-process and completed Batches.
All four (4) tabs display the same Batch details:
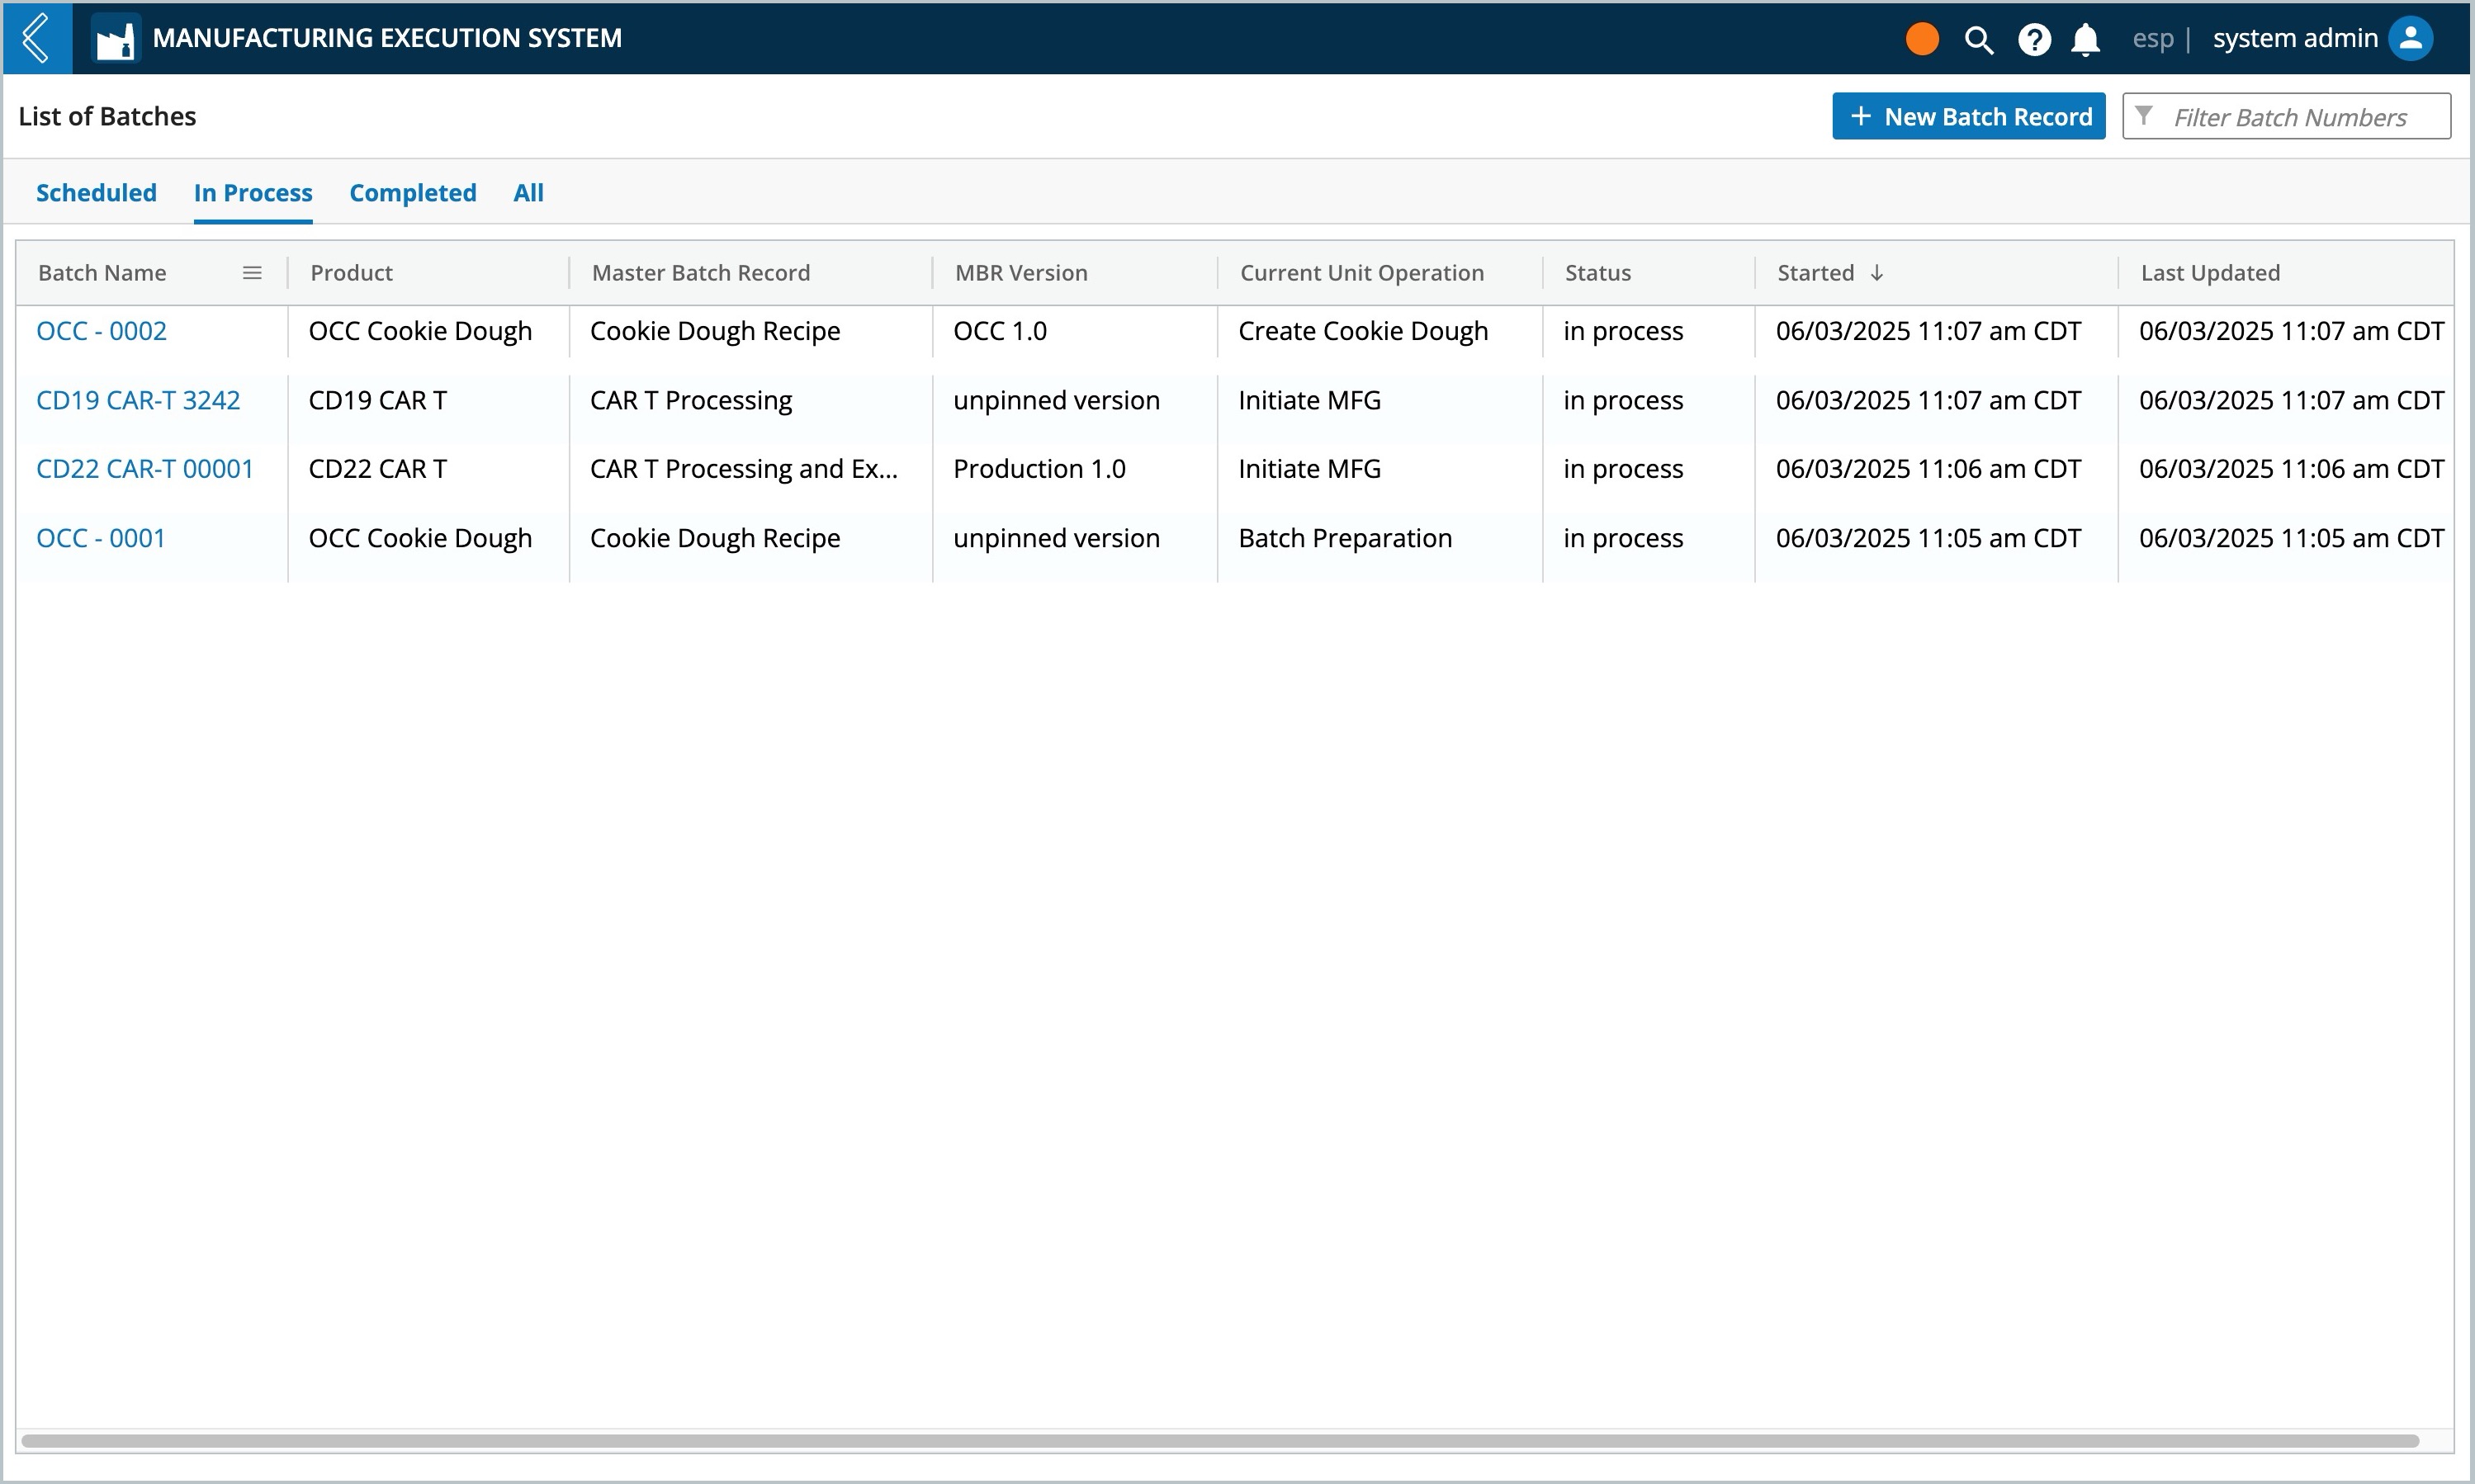
Batch Name – name of the Batch.
Product – name of the product.
Master Batch Record – Recipe used for the Batch.
MBR Version – Recipe version used for the Batch.
Current Unit Operation - current Unit Operation actively being processed
Status:
Scheduled – batch has been scheduled, but not officially started.
In process – data is actively being collected.
In review – all Unit Operations and Steps have been completed, but at least one (1) Step requires review.
Reviewed – all Unit Operations and Steps have been reviewed, and the Batch is ready for quality review.
Sign-off – quality review signatures are complete, and the Batch is ready for final sign-off.
Complete – all work for the Batch is complete.
Failed – the Batch has been failed.
Started – date time the Batch was created.
Last Update – last date time any activity was recorded for the Batch.
To create a new Batch:
Go to the L7 MES landing page and select + New Batch Record
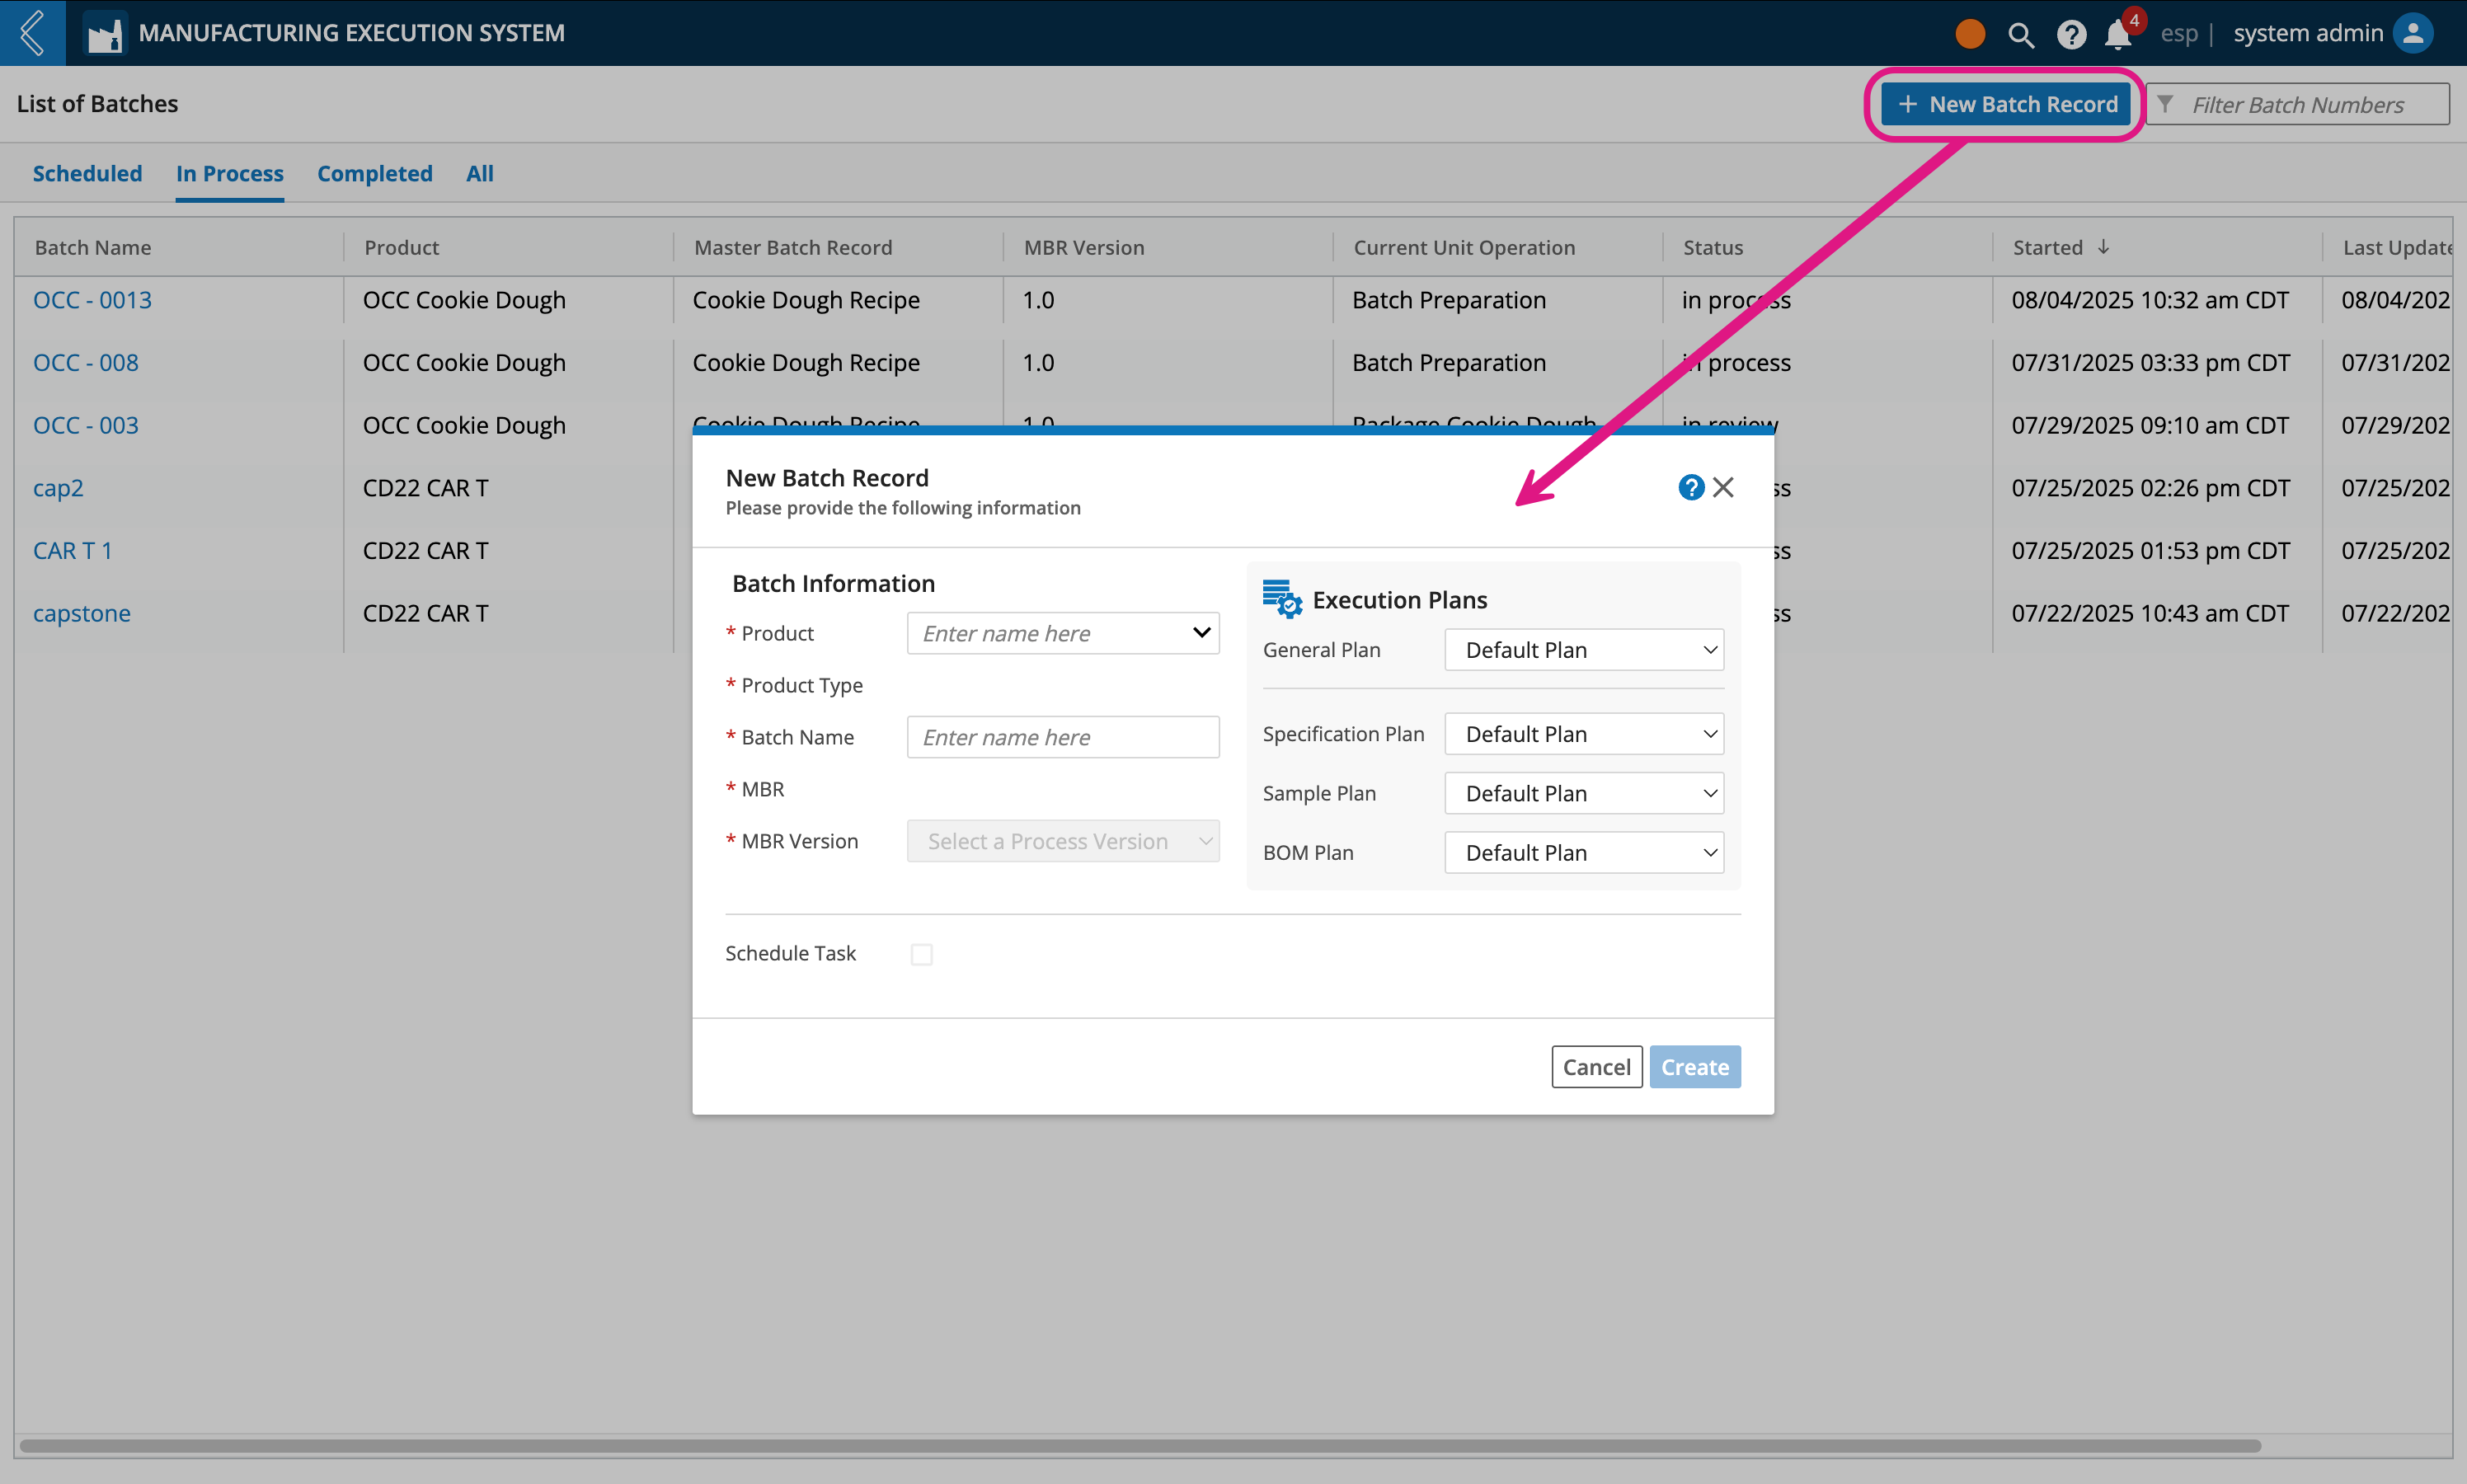
Enter a Batch Name
Select which Product is being manufactured
The Process (Recipe) is auto-populated due to its linkage with the Product
Select which Version of the Process to use
Select the appropriate Dynamic Execution Plan (General, Specification, Sample, BOM)
Enter any additional Batch-specific information that may be required
Depending on how the manufacturing process has been configured, the Planner may need to enter additional information about the Batch, including Kit assignments
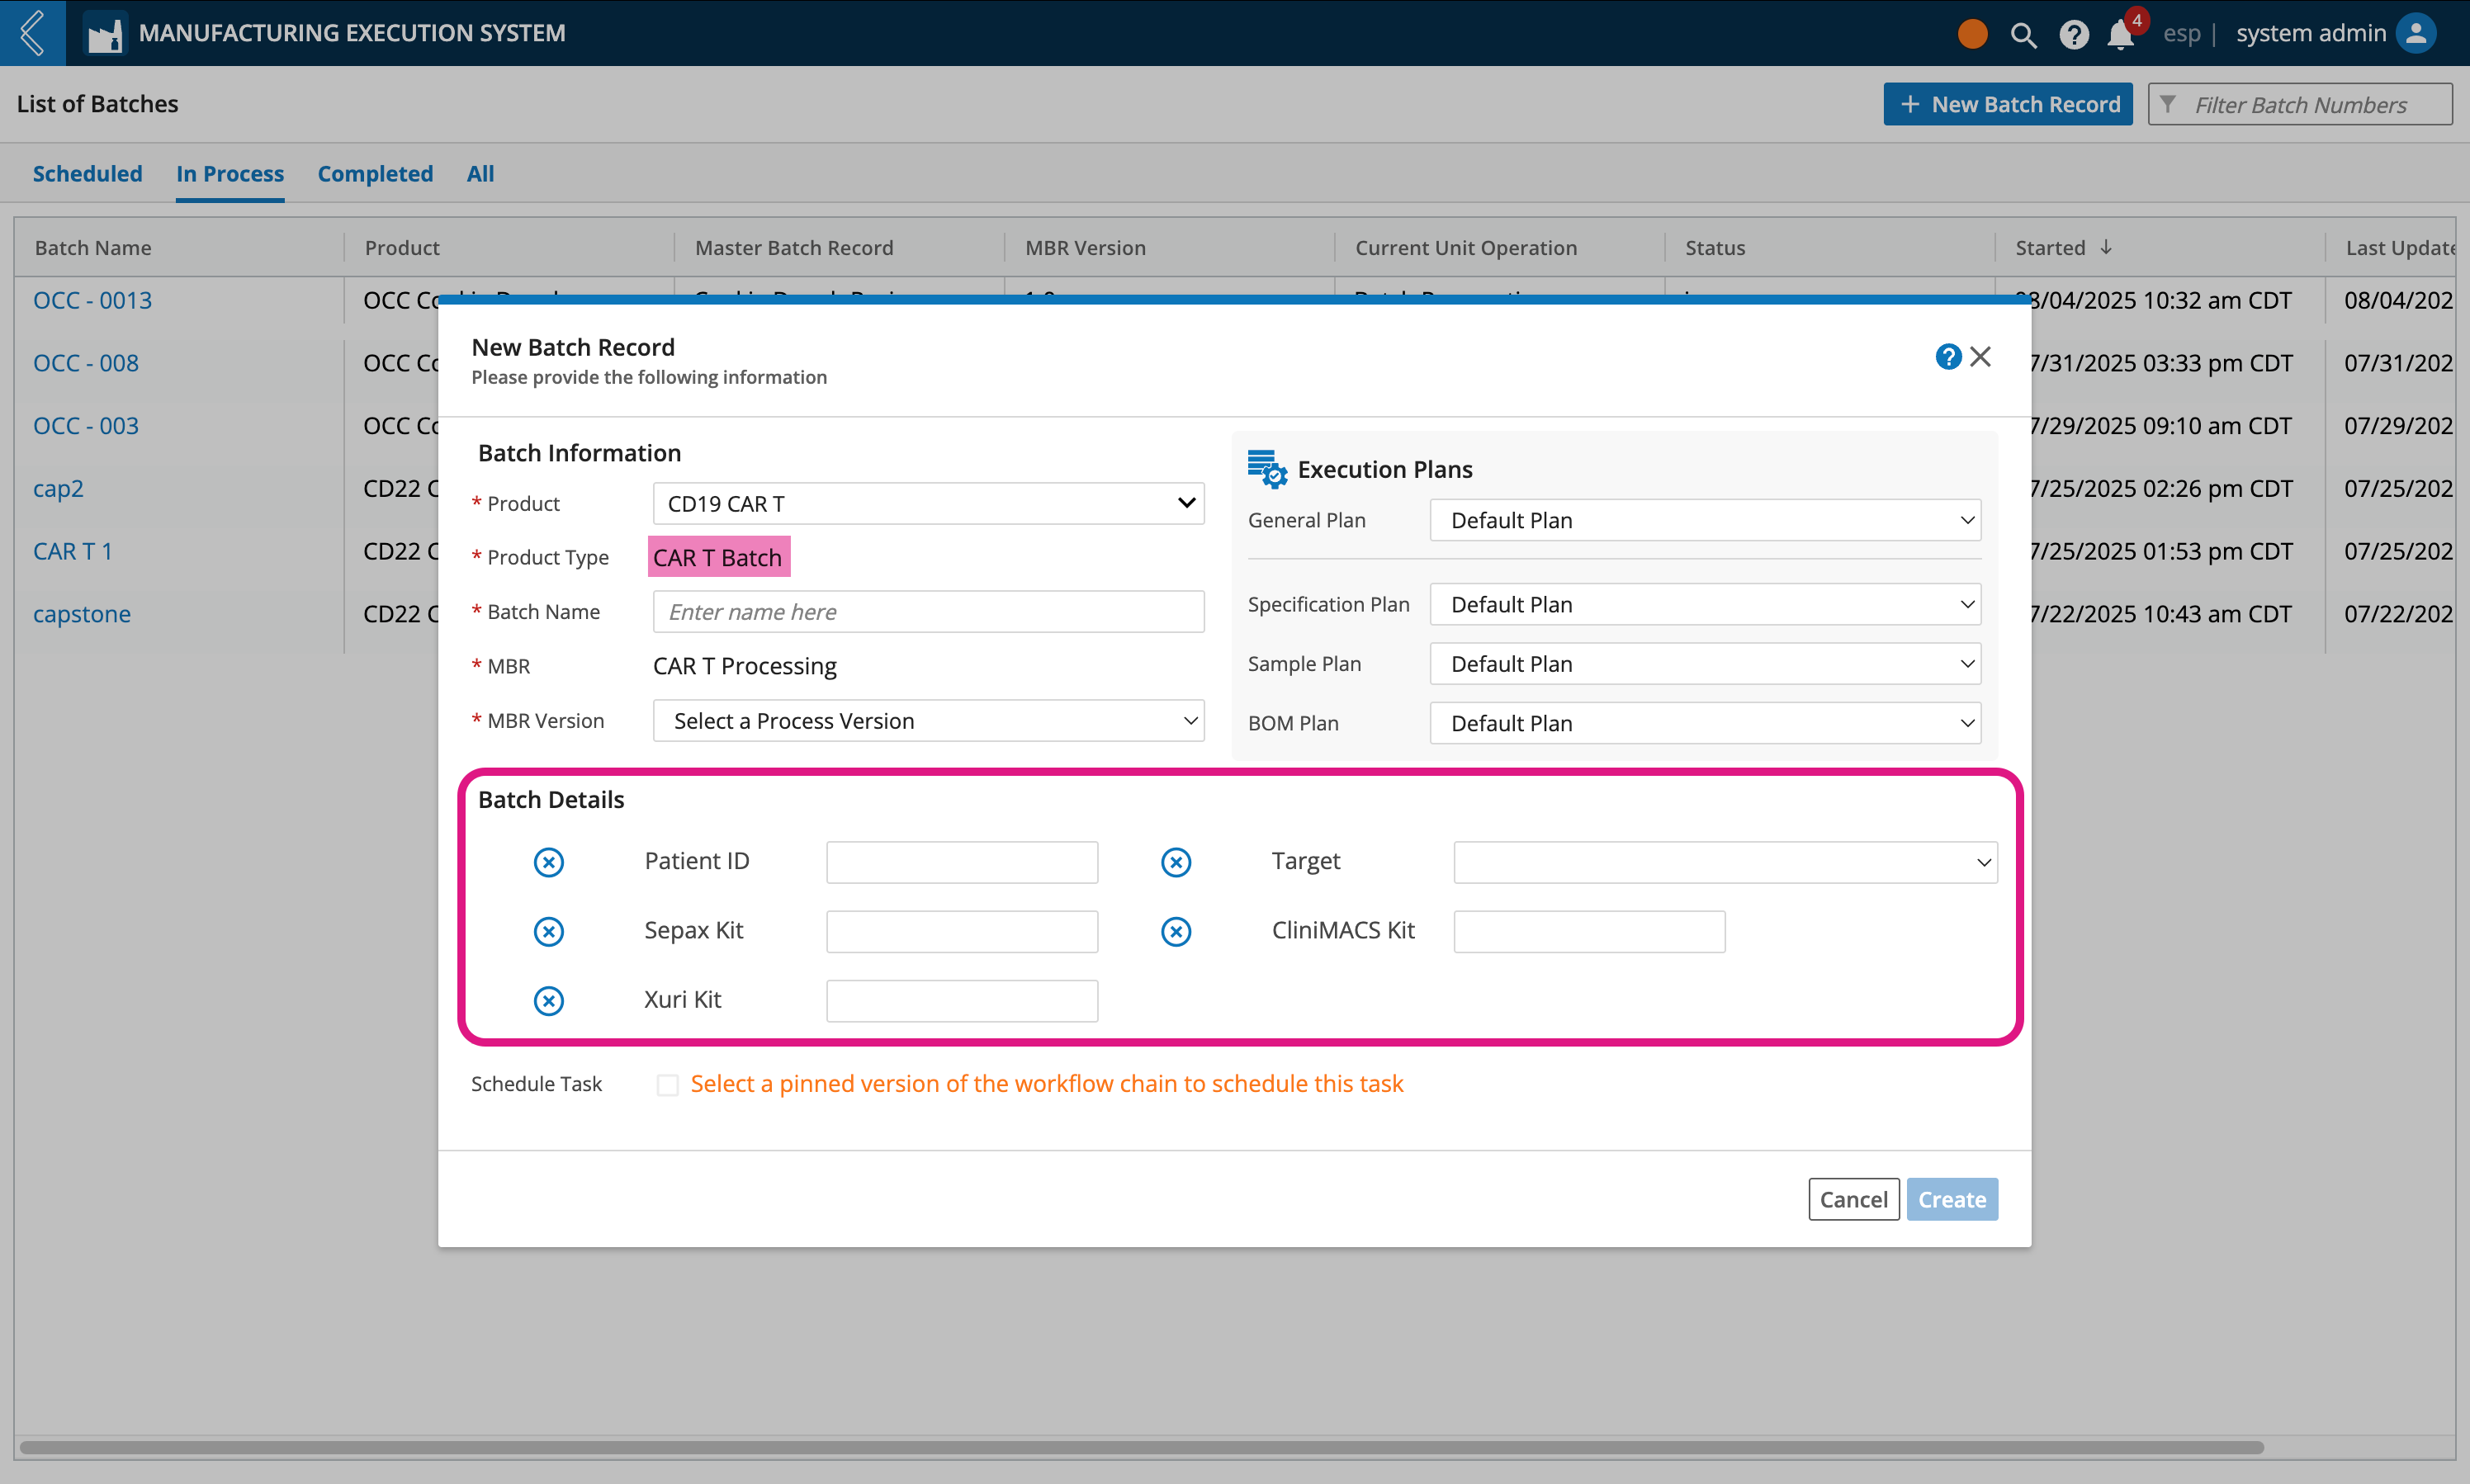
Select Create
Note
Production environments should only use pinned versions.
Important
To fully leverage batch scheduling features, you will need to use L7 Scheduling to assign a date/time, personnel, and equipment after completing the steps below.
If not using L7 Scheduling, you may still schedule a batch in L7 MES. Rather than scheduling and forecasting which resources will be assigned to it, the batch will remain in a scheduled state until you select the batch, then click Start Batch Process.
To schedule a new Batch:
Go to L7 MES app
Click + New Batch Record
Select a Product
Enter a Batch Name
Select a pinned MBR Version
Important
Only pinned Workflow Chains (MBRs) with defined duration times are Schedulable.
MBRs containing Procedures are not supported in L7 Scheduling
Select the Schedule Task checkbox
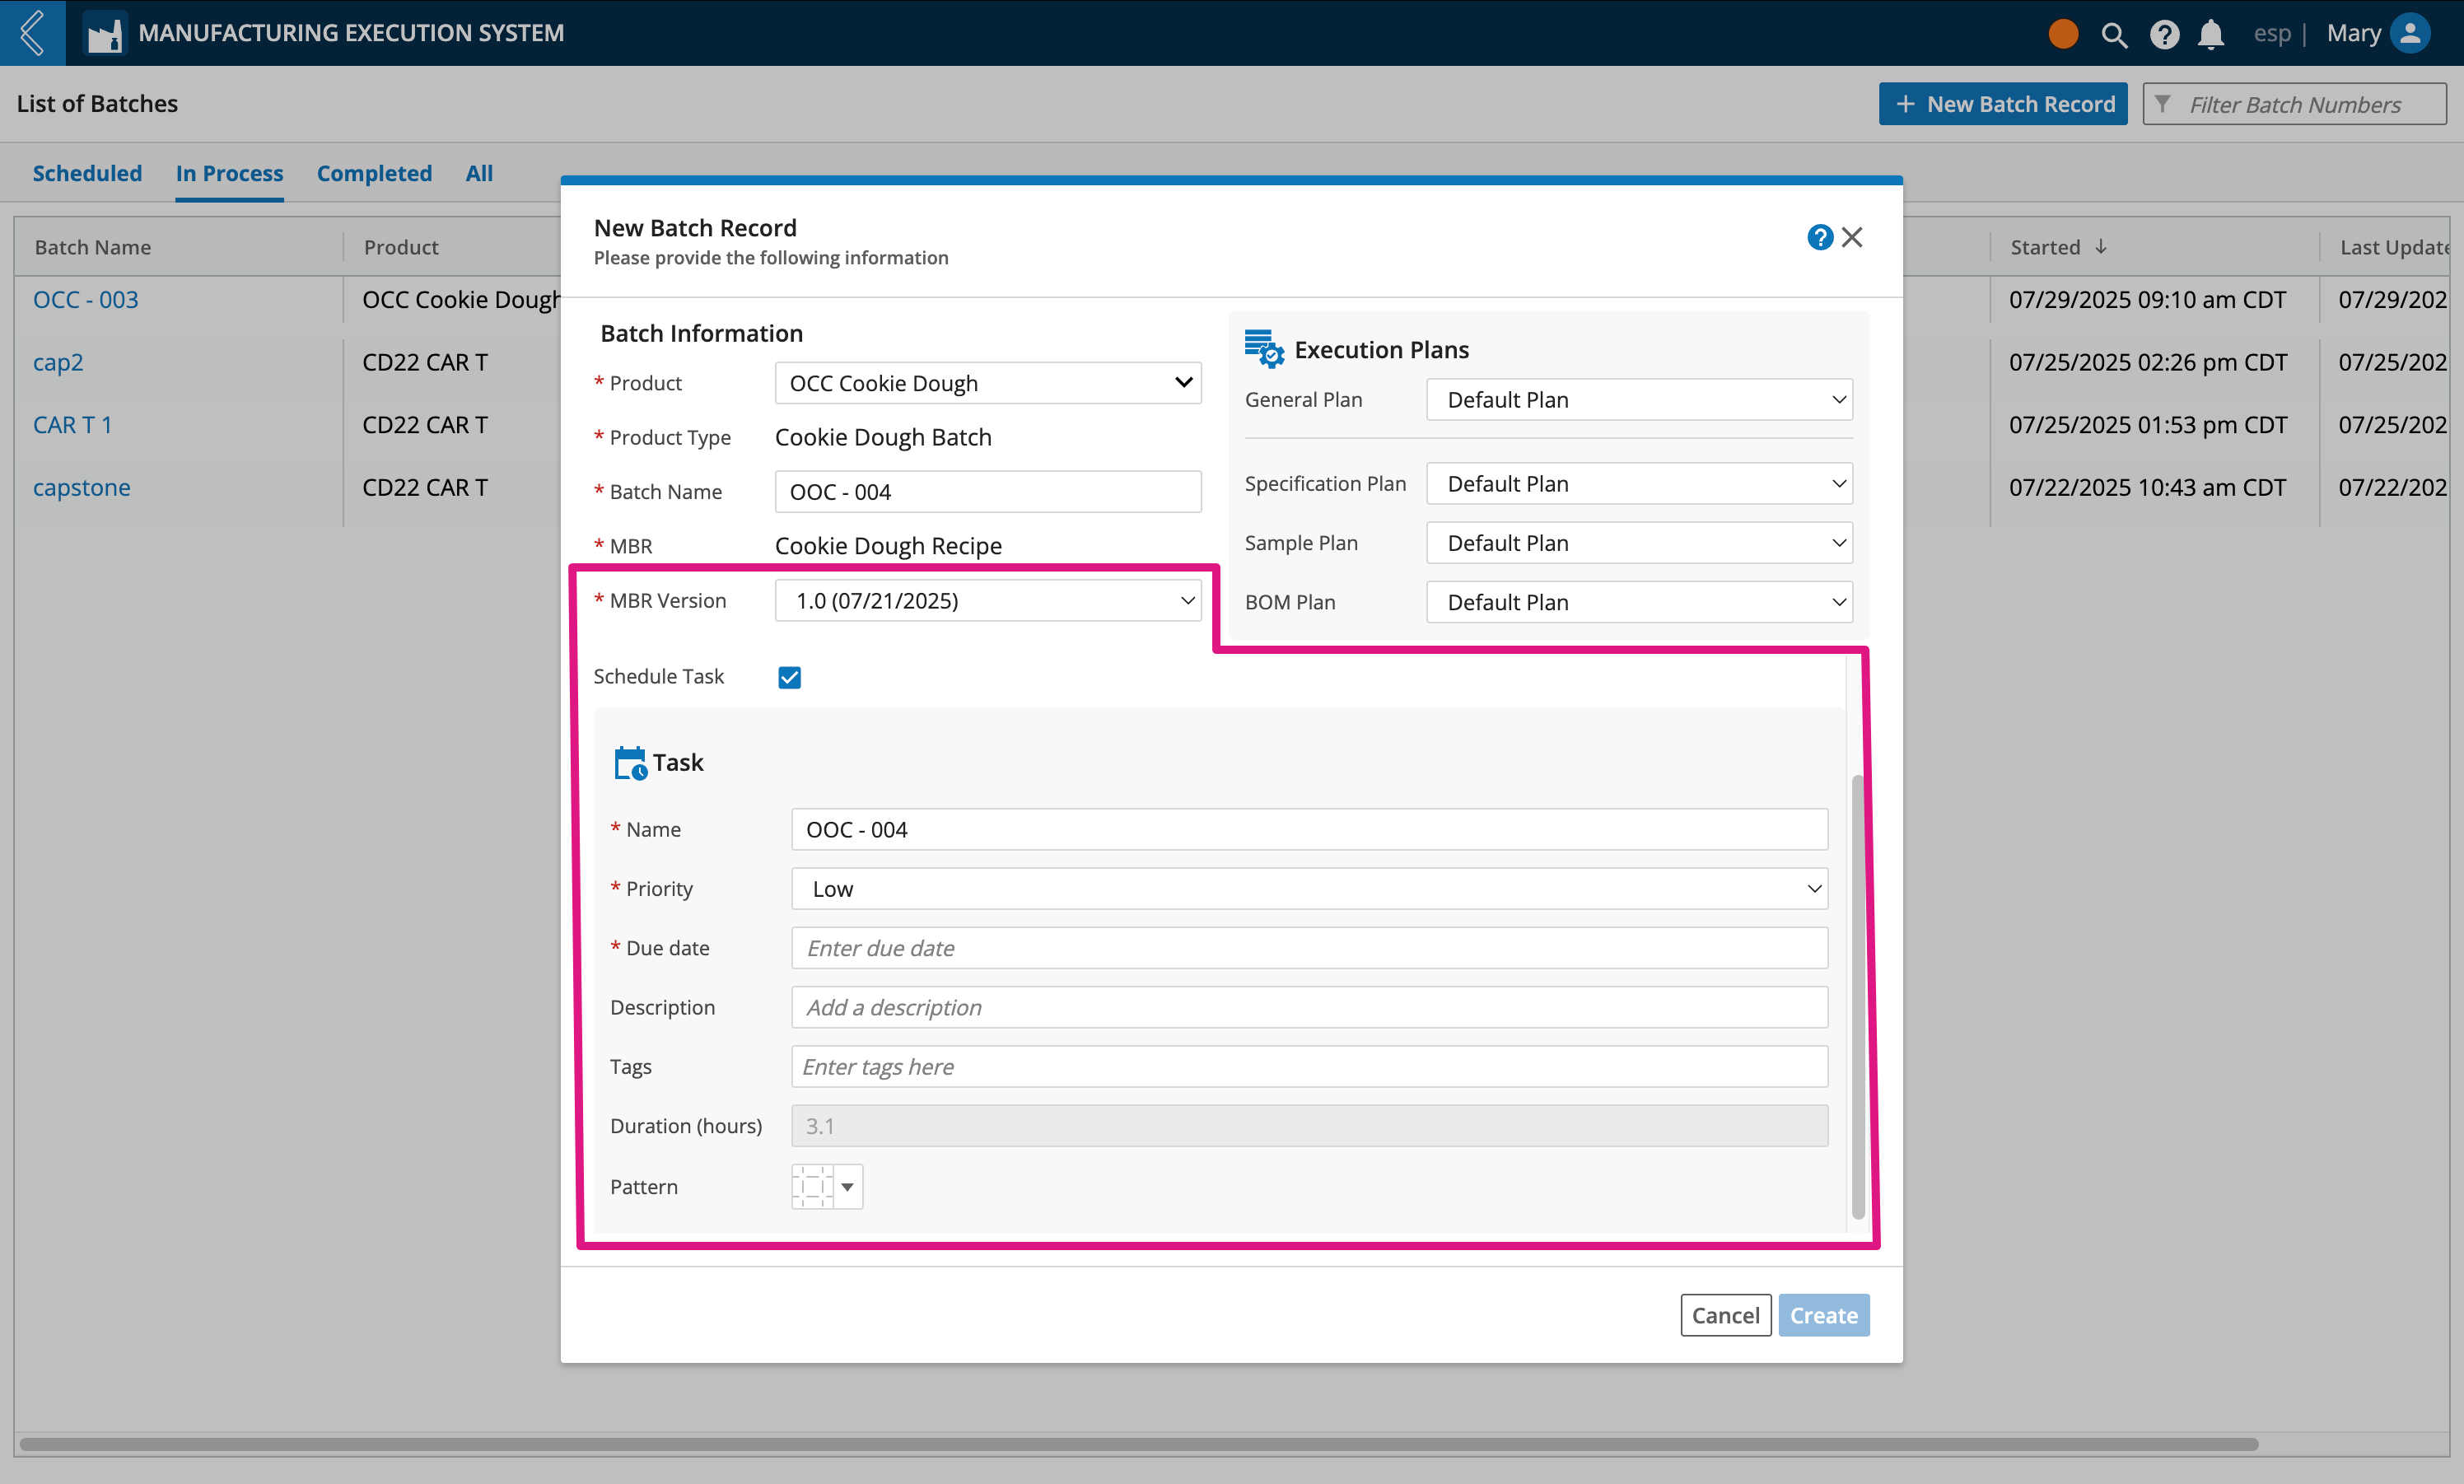
Enter a Name. By default this field will inherit the Batch Name, but is editable
Assign a Priority level to the task (low, medium, or high)
Assign a Due date
Optionally enter a Description and apply Tags to the task
Duration (hours) is a read only field that is auto computed based on how the process was modeled
Select a Pattern to be used as the background of the scheduled task displayed on L7 Scheduling's Calendar
Note
By default, patterns are selected consecutively (top left to bottom right) to help differentiate Workflow Chains from each other, this is useful when you use the same process often.
Click Create
Important
Once created, the batch will be found under the Scheduled tab in L7 MES and displayed in L7 Scheduling's Calendar page.
The EBR is read-only while a batch is in the "scheduled" state.
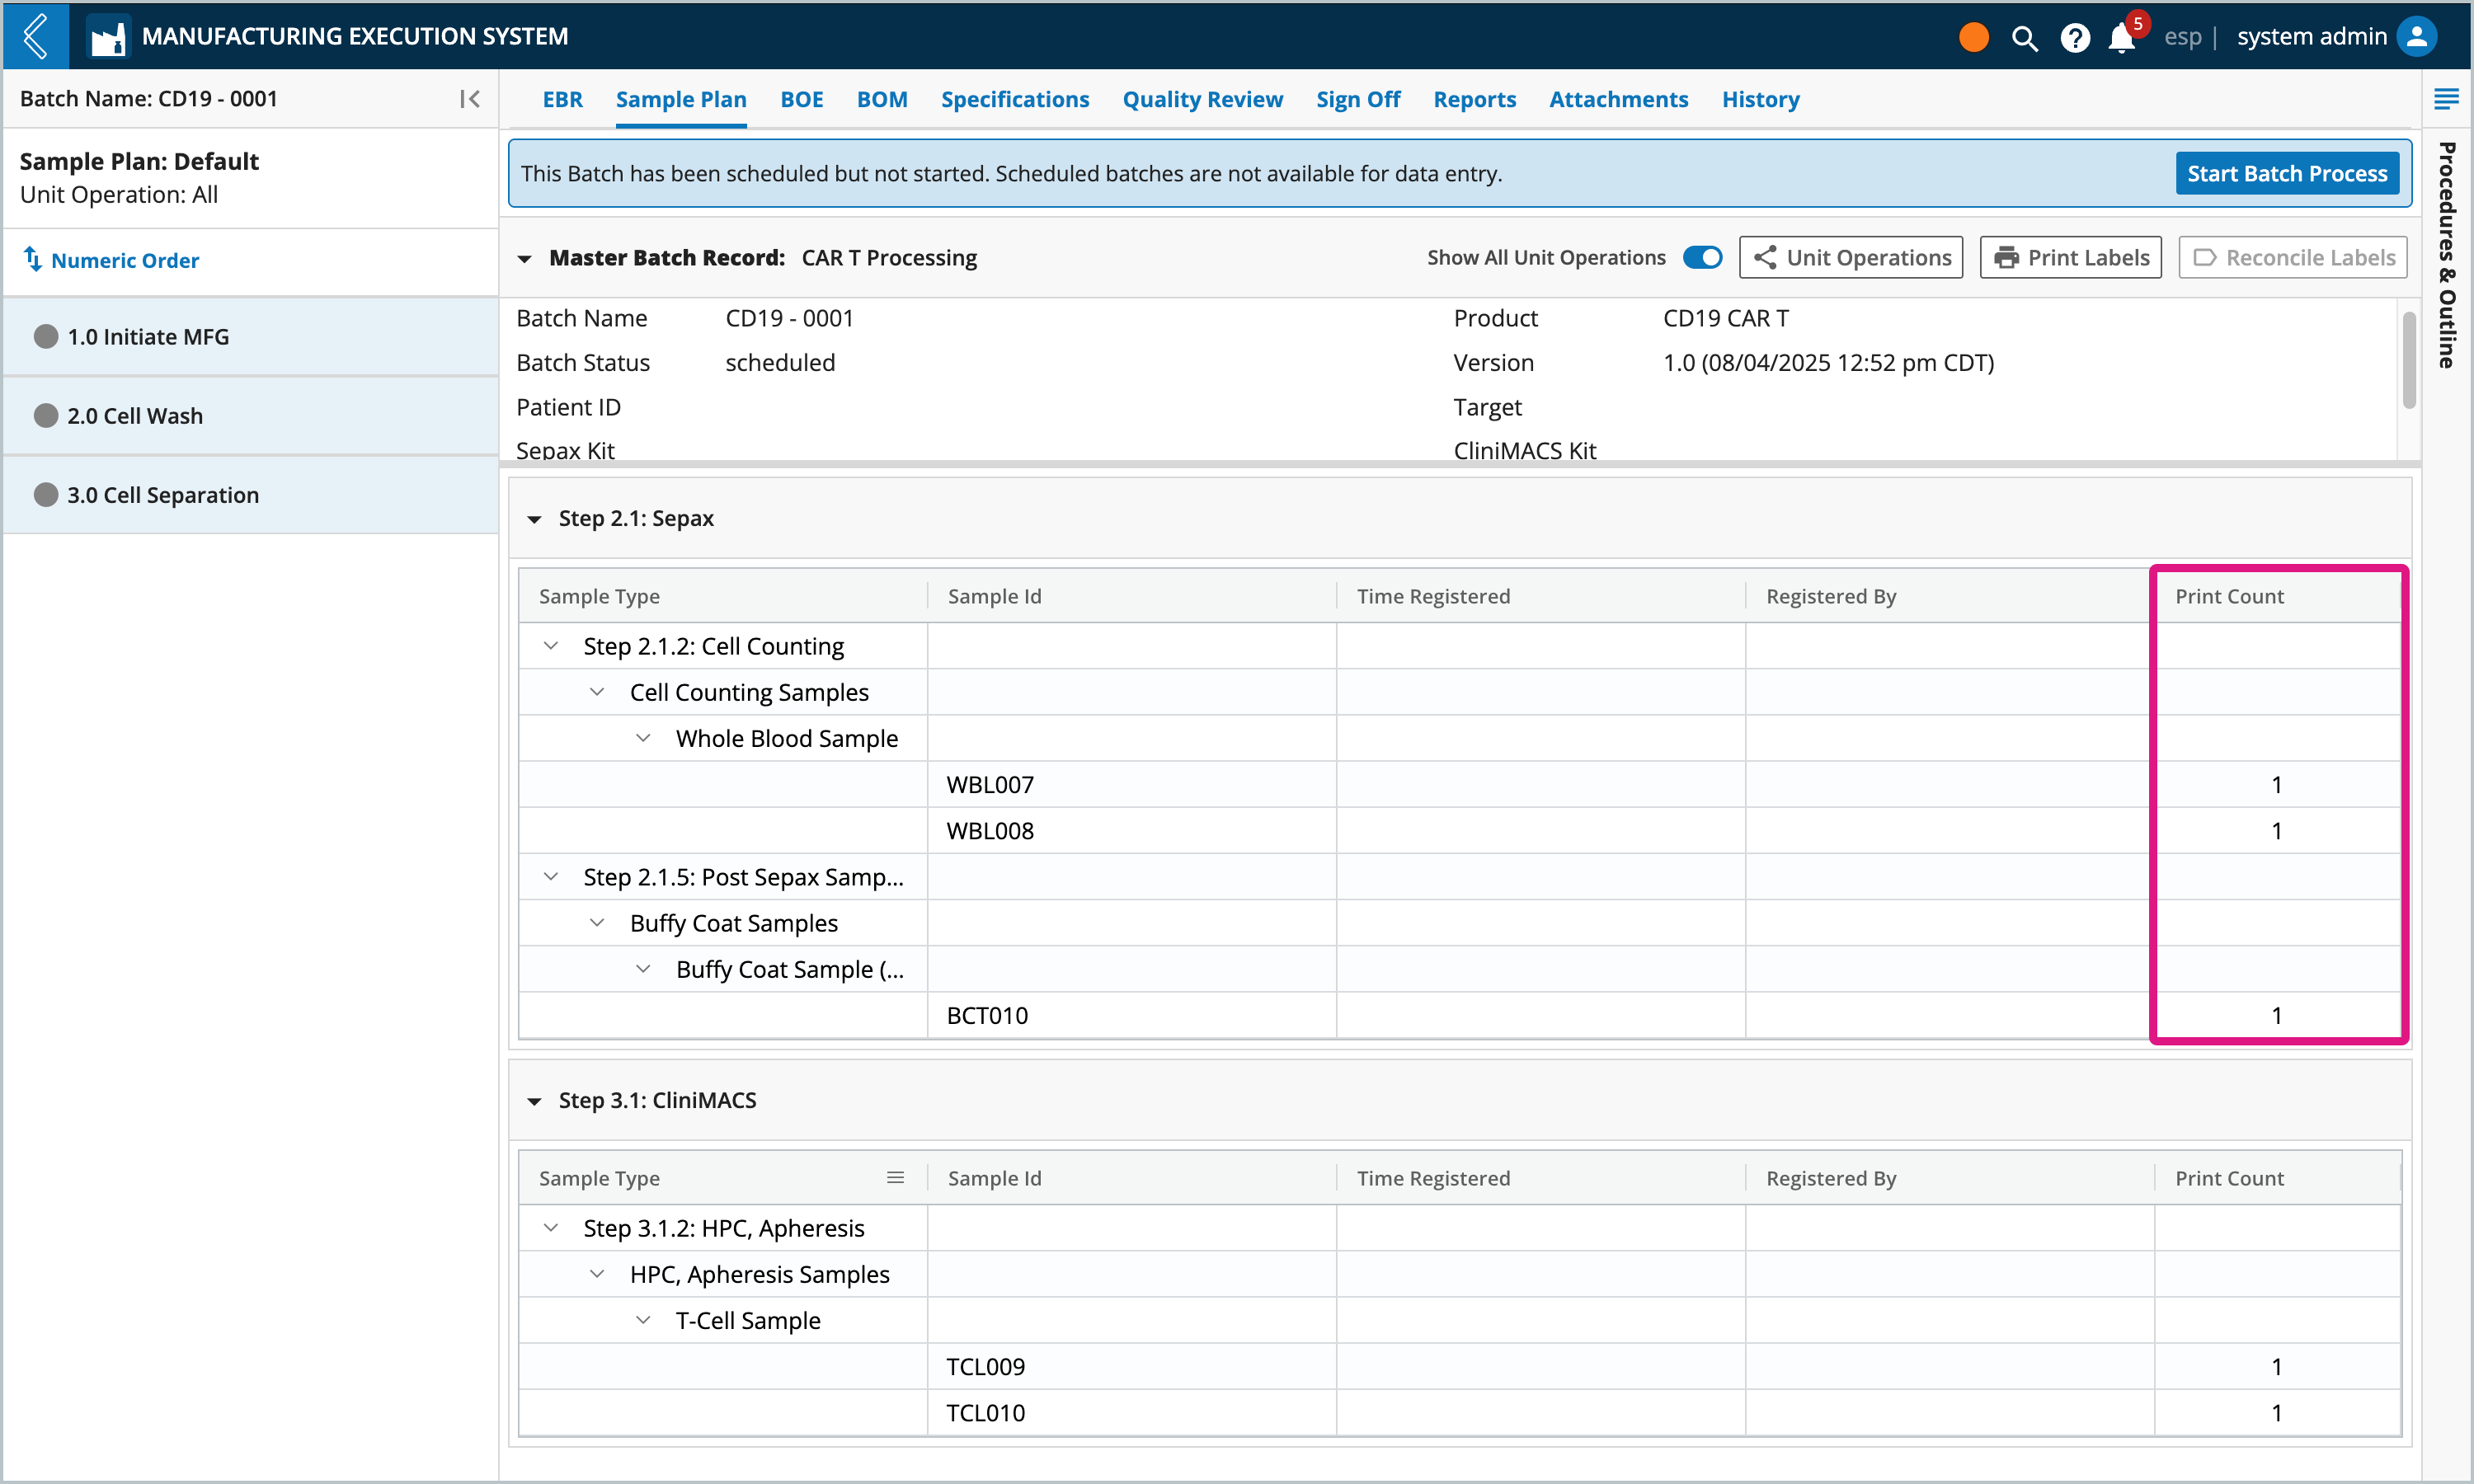
Sample labels can be printed while a batch is in the "scheduled" state (Sample Plan -> Print Labels).
During Batch creation, L7 MES reserves Sample IDs so that labels can be printed for use in the Batch. These labels are typically attached to the Sample and scanned during production to complete registration.
Labels can be printed at any time during processing, including when the batch is in a scheduled state.
To print Sample labels:
Go to the Sample Plan tab.
Select Print Labels at the top of the tab.
Select a Printer.
Select the labels to print:
All samples in the entire Batch – print one (1) label for every Sample ID reserved for the entire Batch.
All samples within a Batch Section – print one (1) label for every Sample ID reserved in the selected Batch Section.
Specific Sample Point – print one (1) label for every Sample ID reserved in the selected Sample Point.
Select Print.
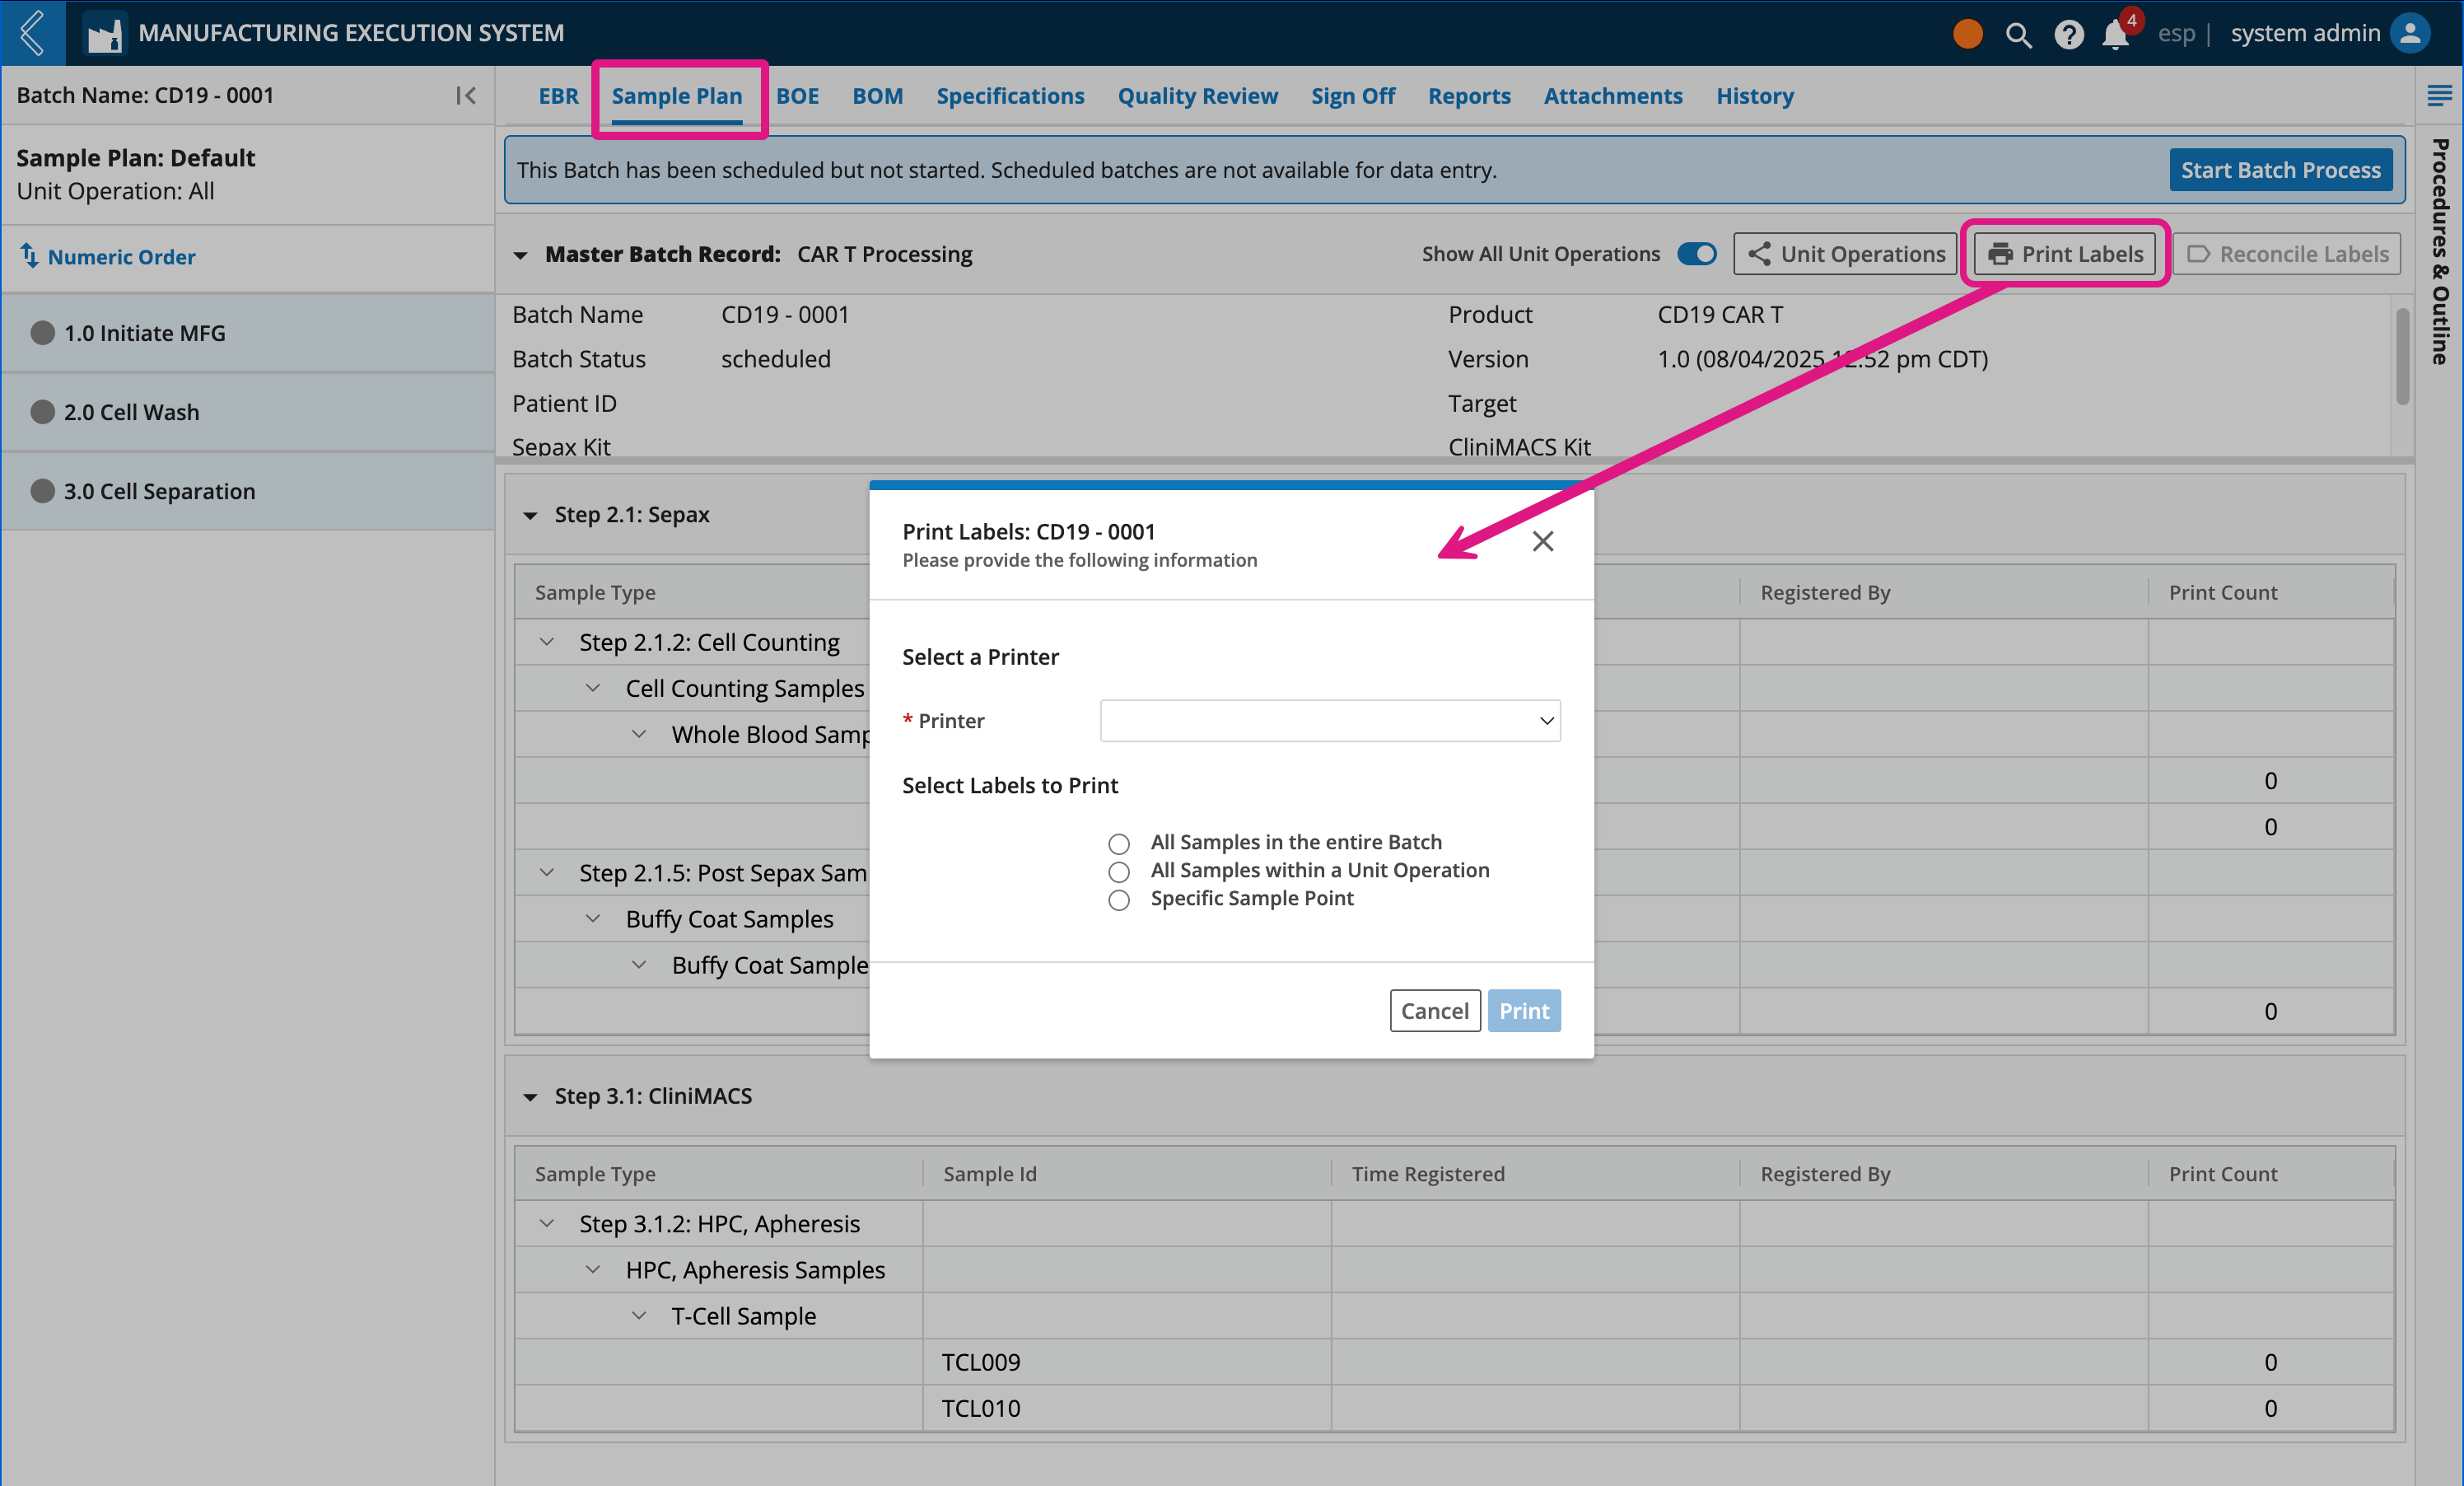
If printing is successful, then the Print Count for each label is incremented.
